British Battles

Search Results for: Bombay Army

Battle of Laswaree

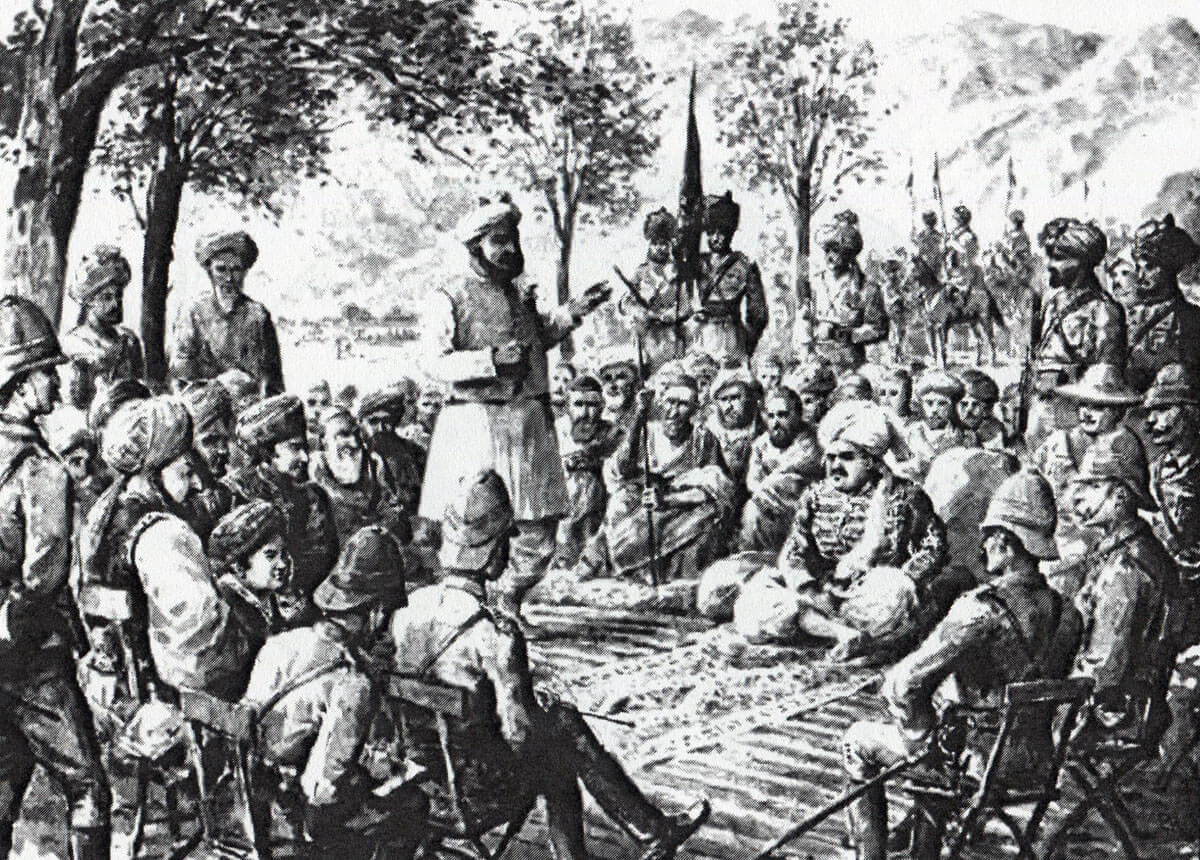
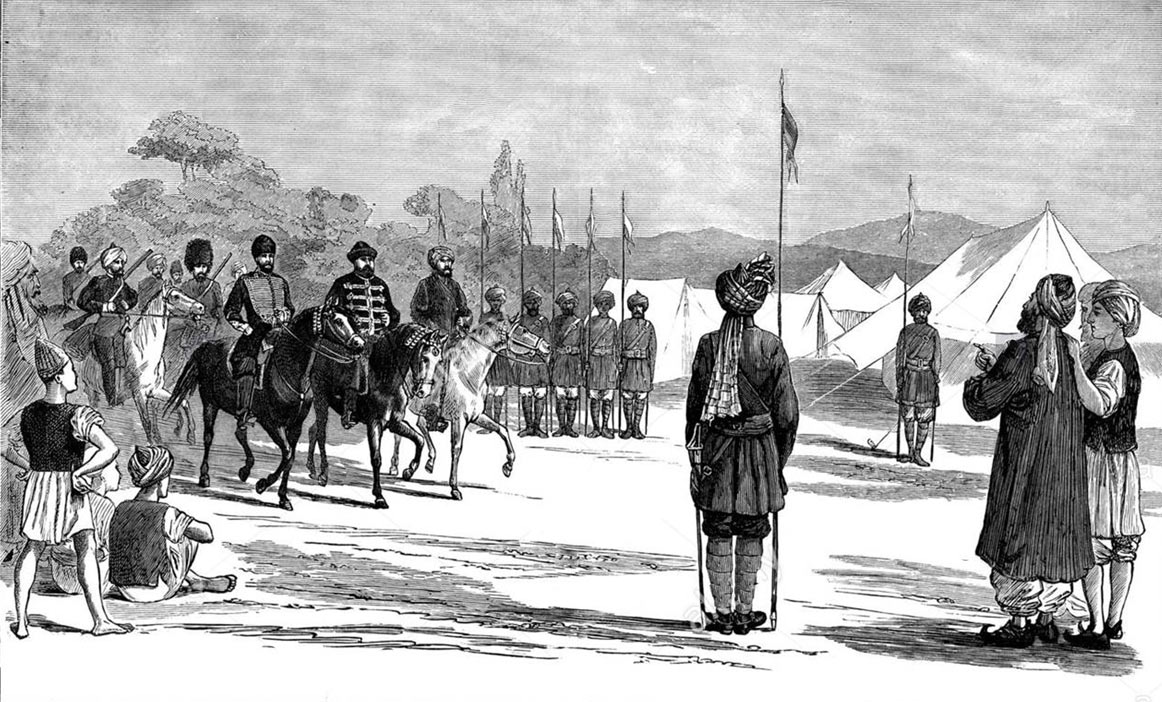
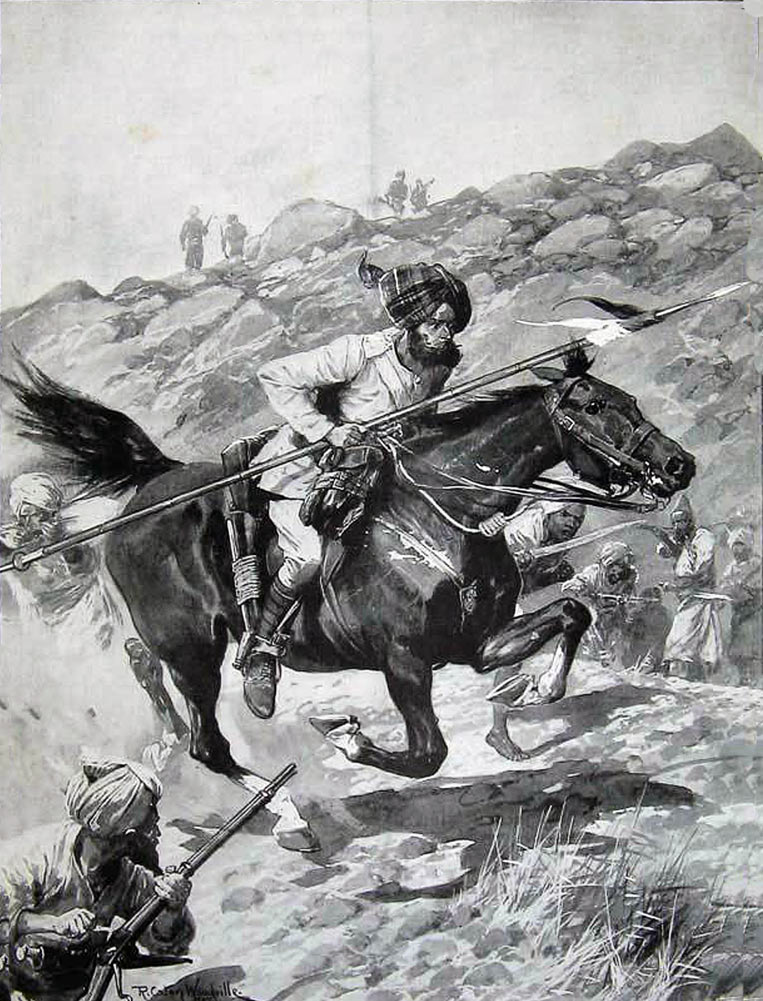
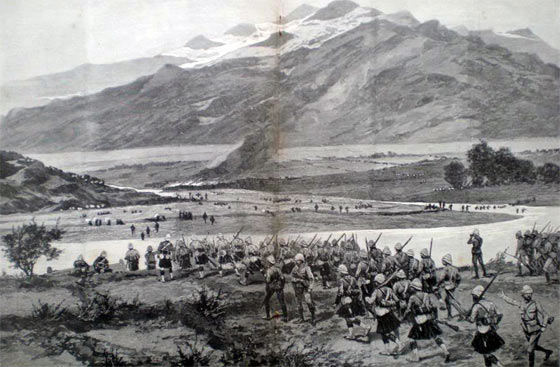
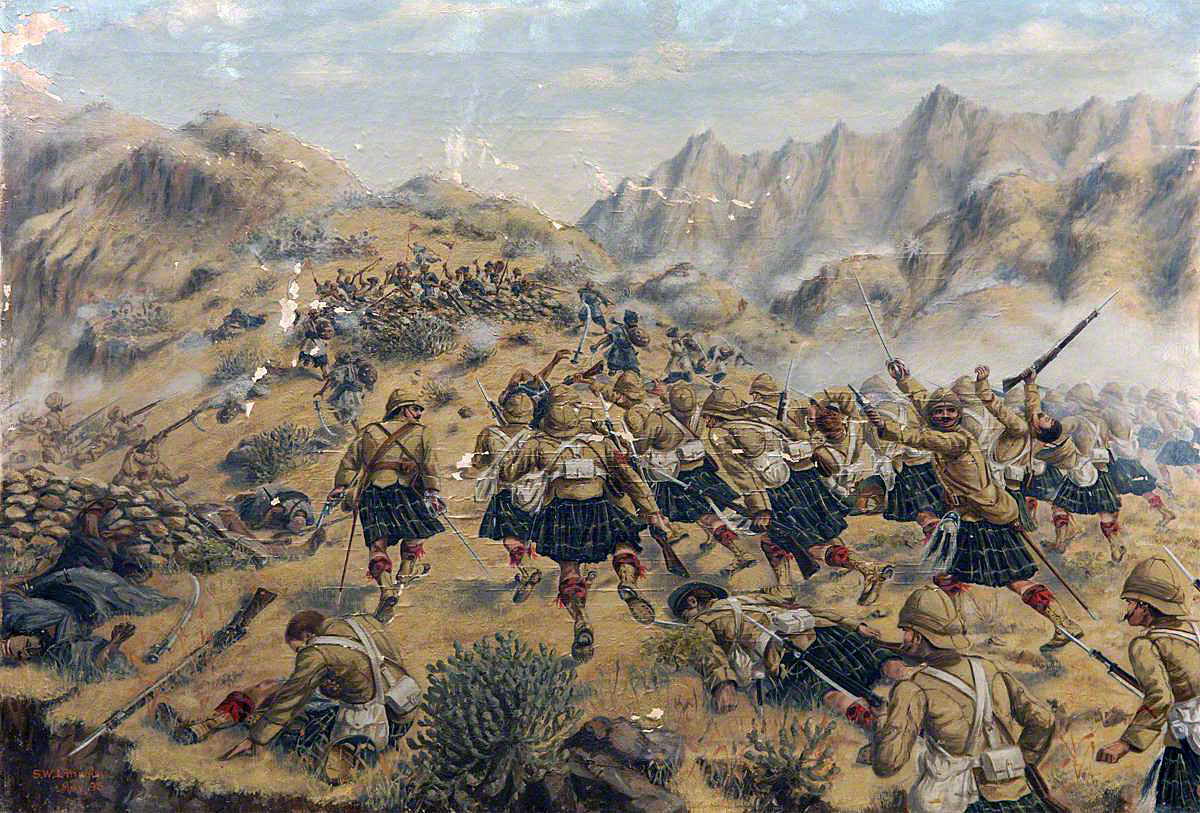
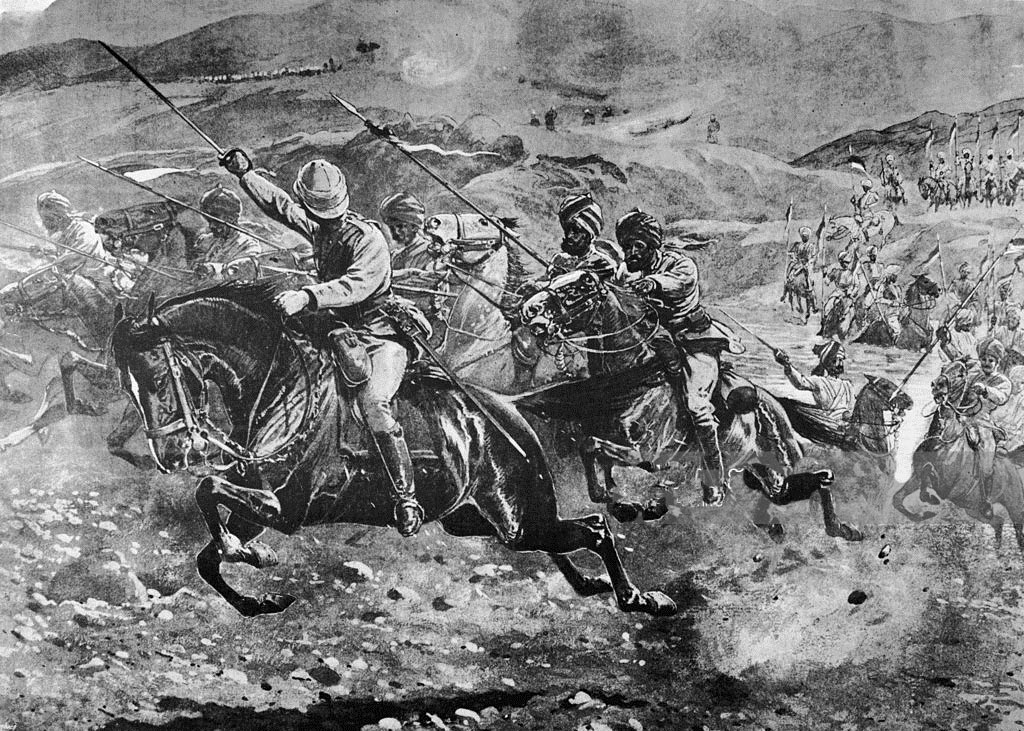
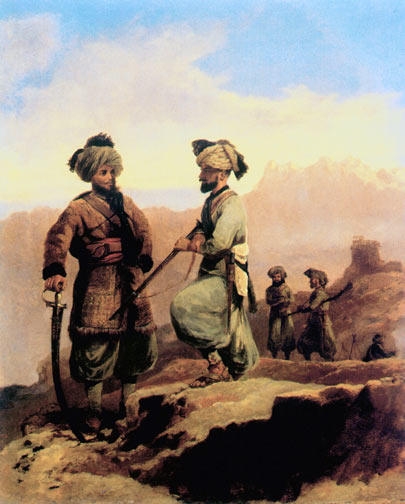
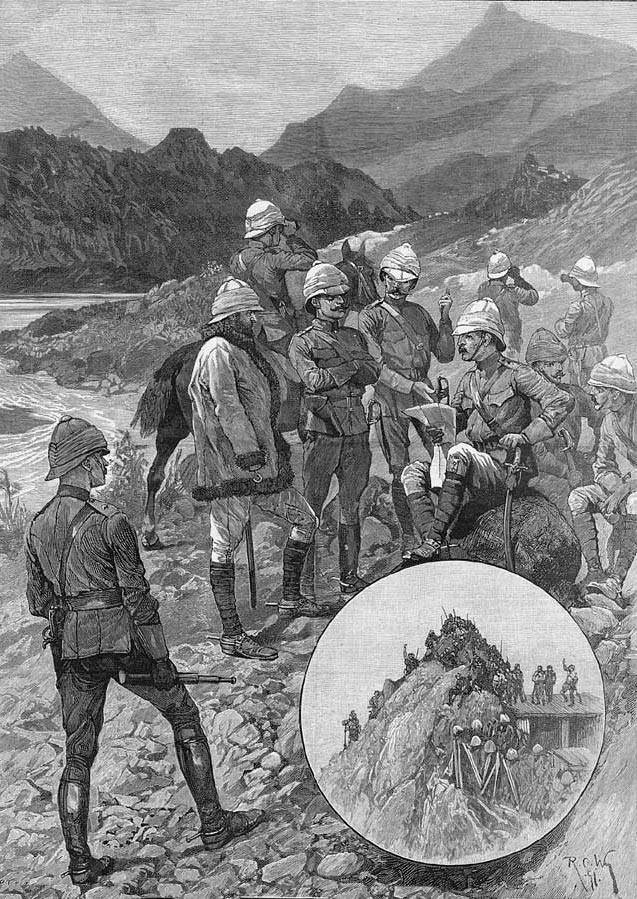
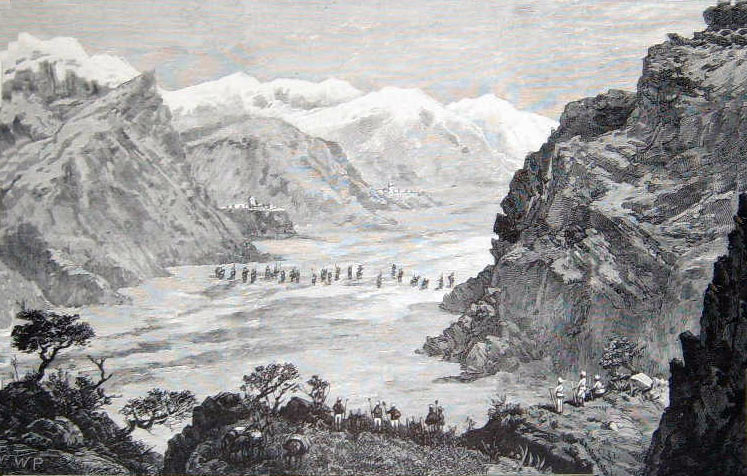
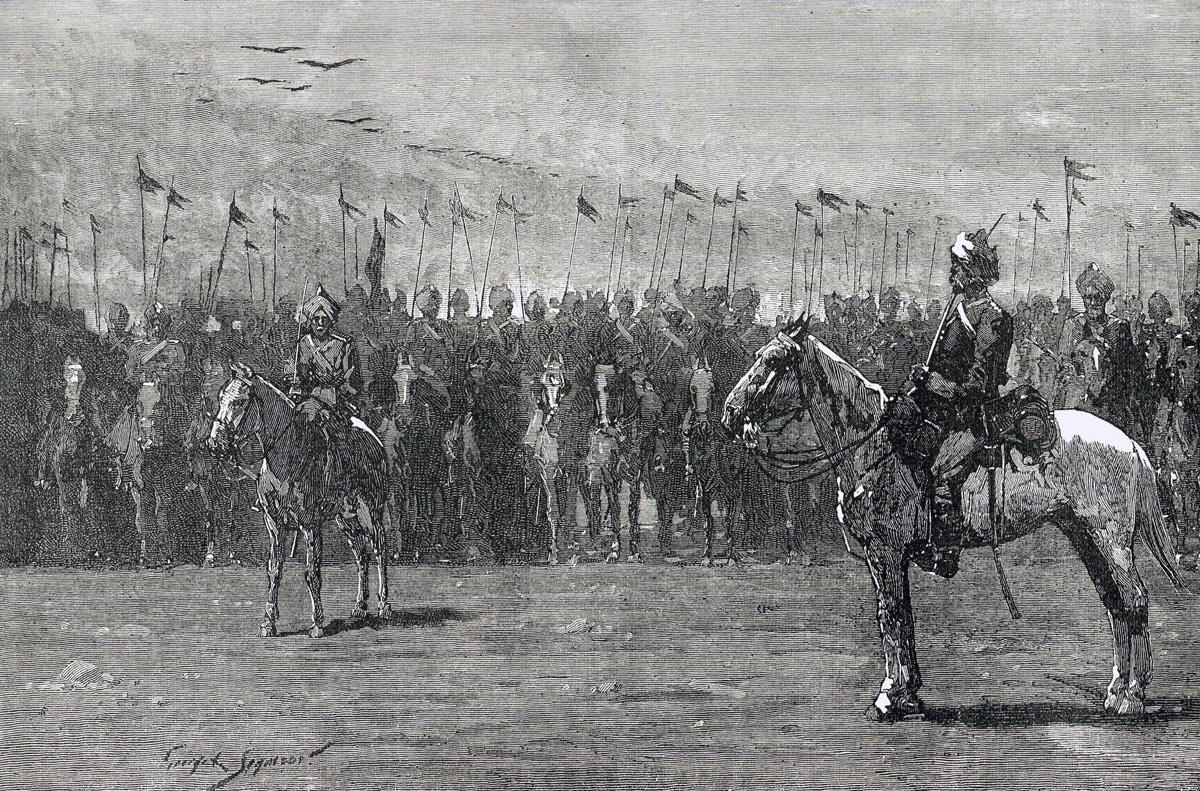
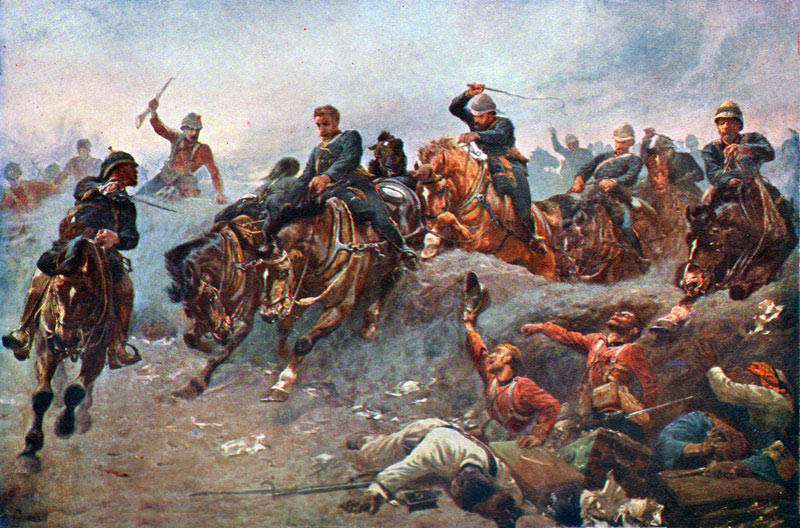
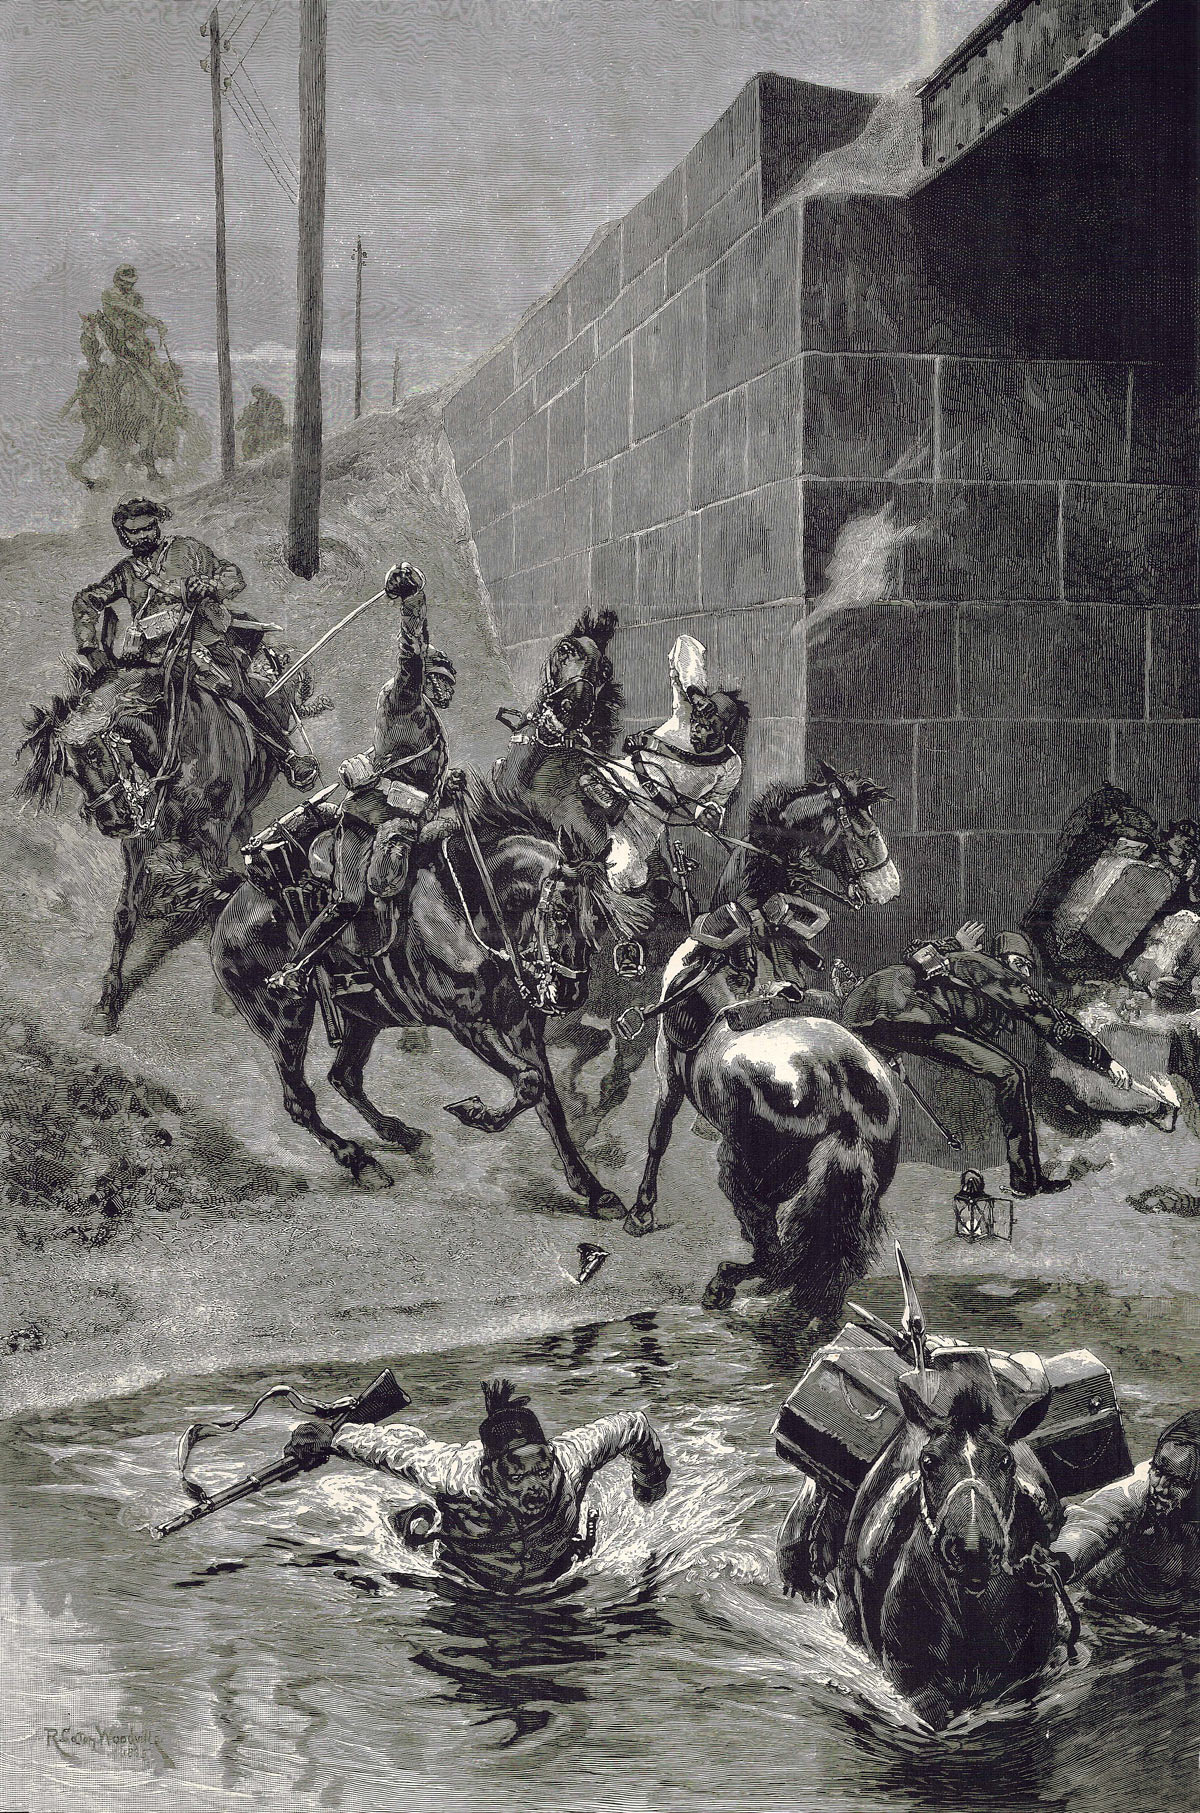
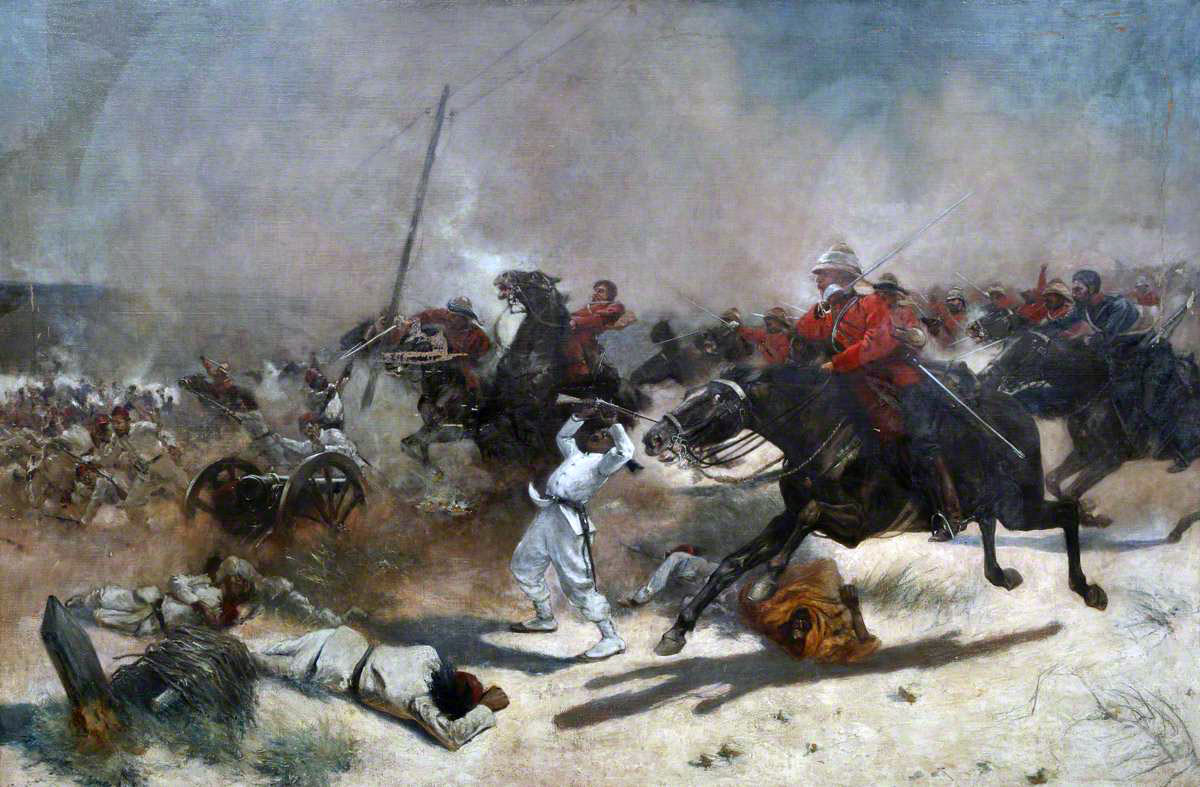
The triumph of British and Bengal light cavalry: General Lake’s defeat of the Gwalior Mahrattas on 1st November 1803, after capturing Delhi, the future capital city of British-ruled India

HM 8th Light Dragoons at the Battle of Laswaree on 1st November 1803 in the Third Mahratta War: picture by Richard Simkin
HM 8th Light Dragoons at the Battle of Laswaree on 1st November 1803 in the Second Mahratta War: picture by Richard Simkin


Podcast on the Battle of Laswaree: The triumph of British and Bengal light cavalry in General Lake’s defeat of the Gwalior Mahrattas on 1st November 1803, after capturing Delhi, the future capital city of British-ruled India: John Mackenzie’s britishbattles.com podcasts

The previous battle in the Second Mahratta War is the Battle of Assaye

The next battle in the British Battles series is the Battle of Roliça

To the Second Mahratta War index

Battle:  Laswaree

War: Second Mahratta War

Date of the Battle of Laswaree: 1st November 1803

Lieutenant General Gerard Lake: Battle of Laswaree on 1st November 1803 in the Second Mahratta War
General Sir Gerard Lake: Battle of Laswaree on 1st November 1803 in the Second Mahratta War

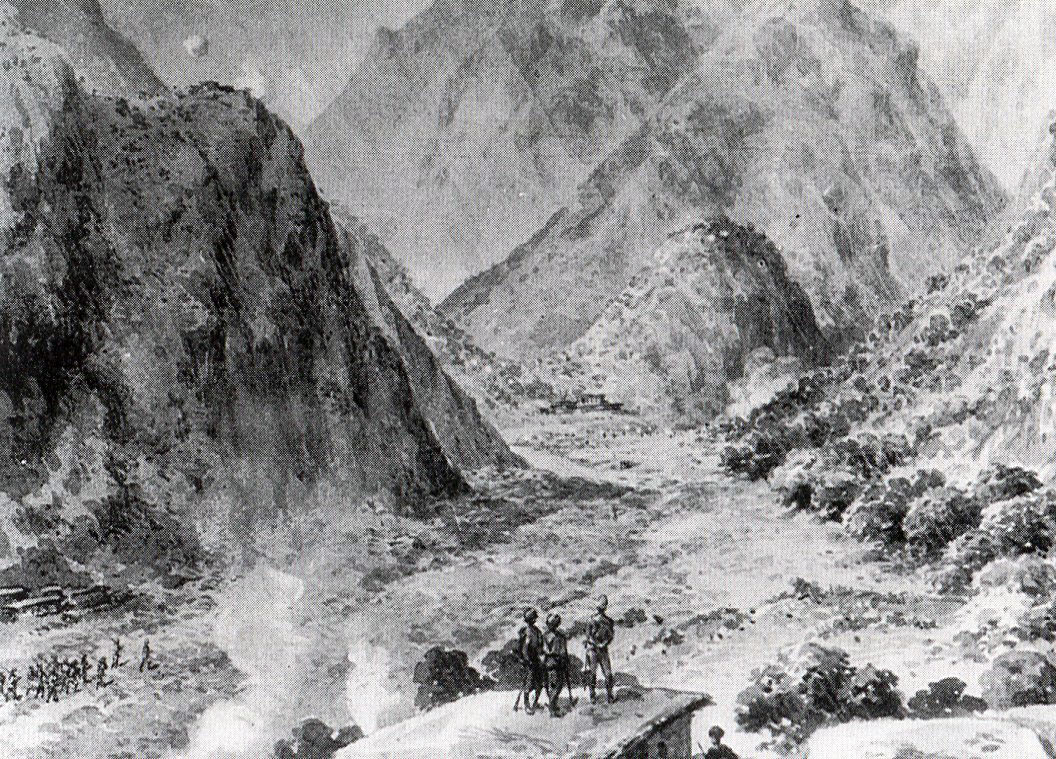
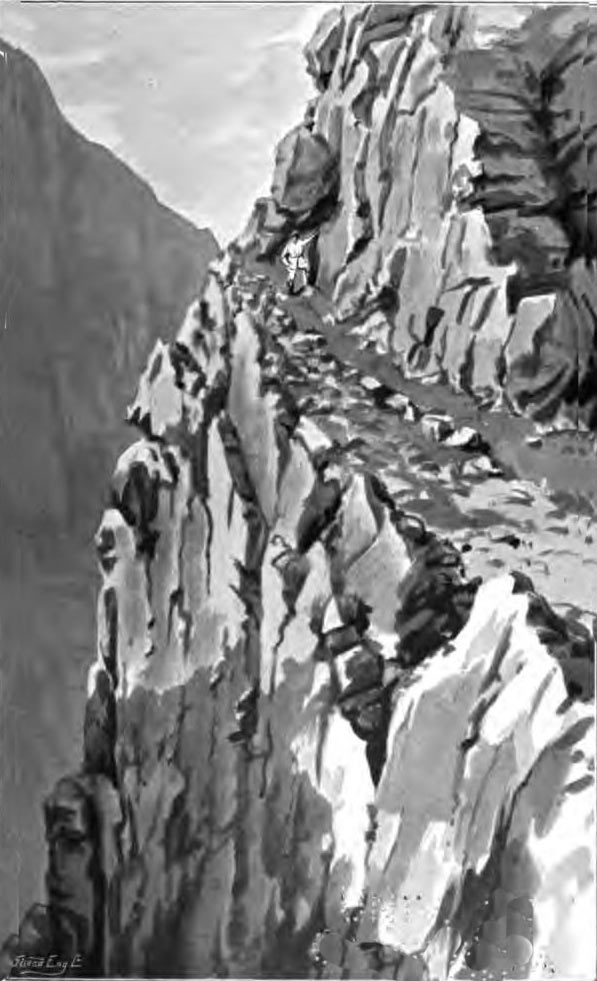
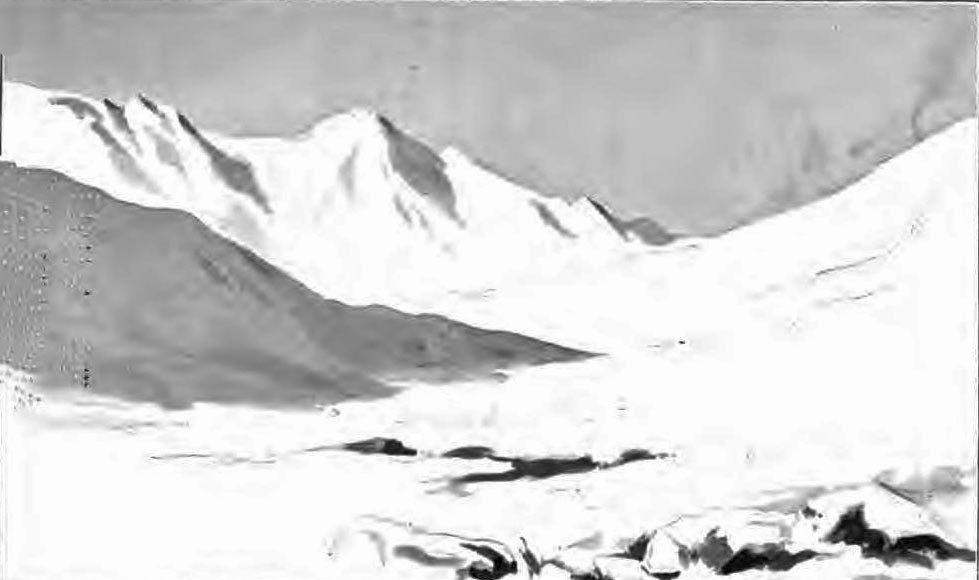
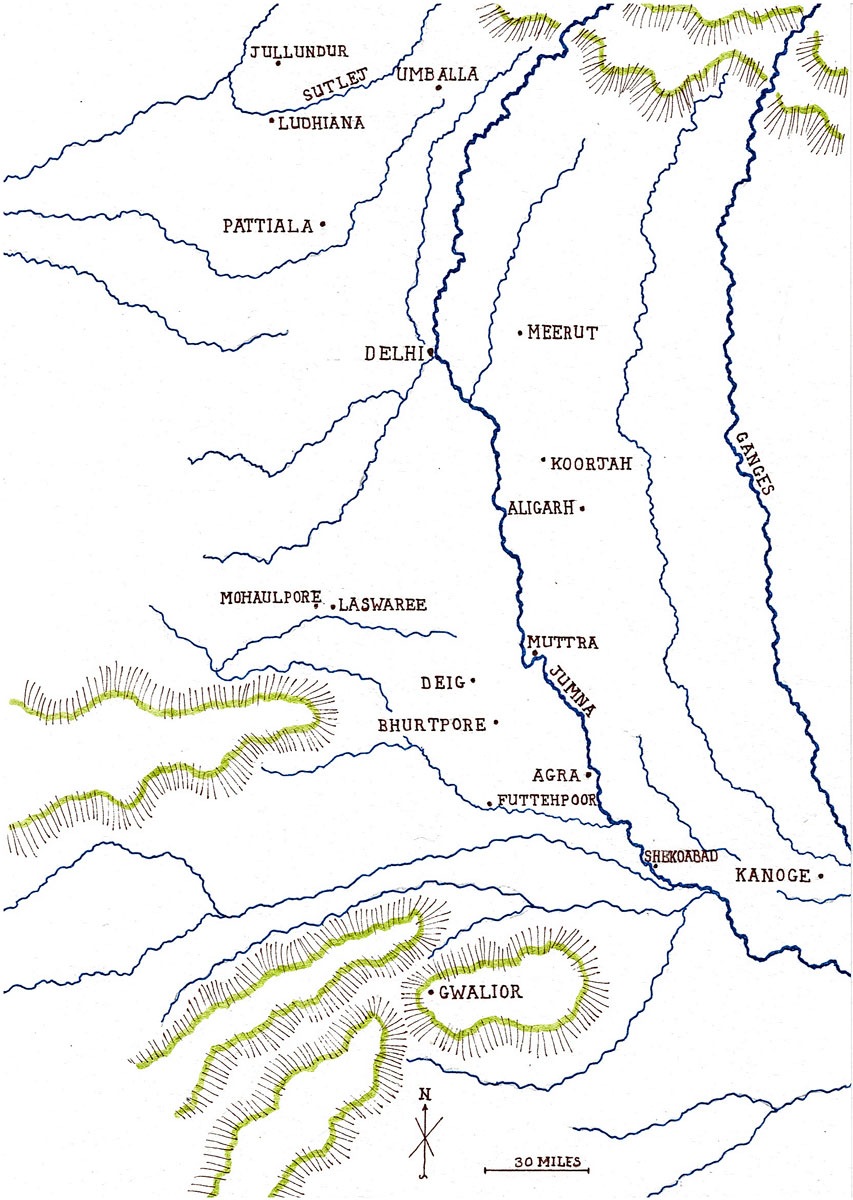
Place of the Battle of Laswaree: Northern India, 80 miles to the south-west of Delhi

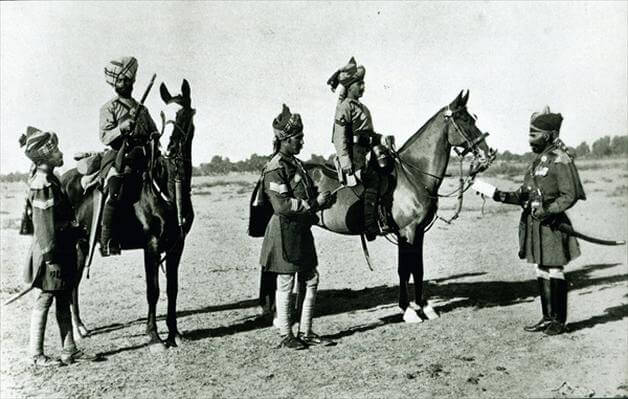
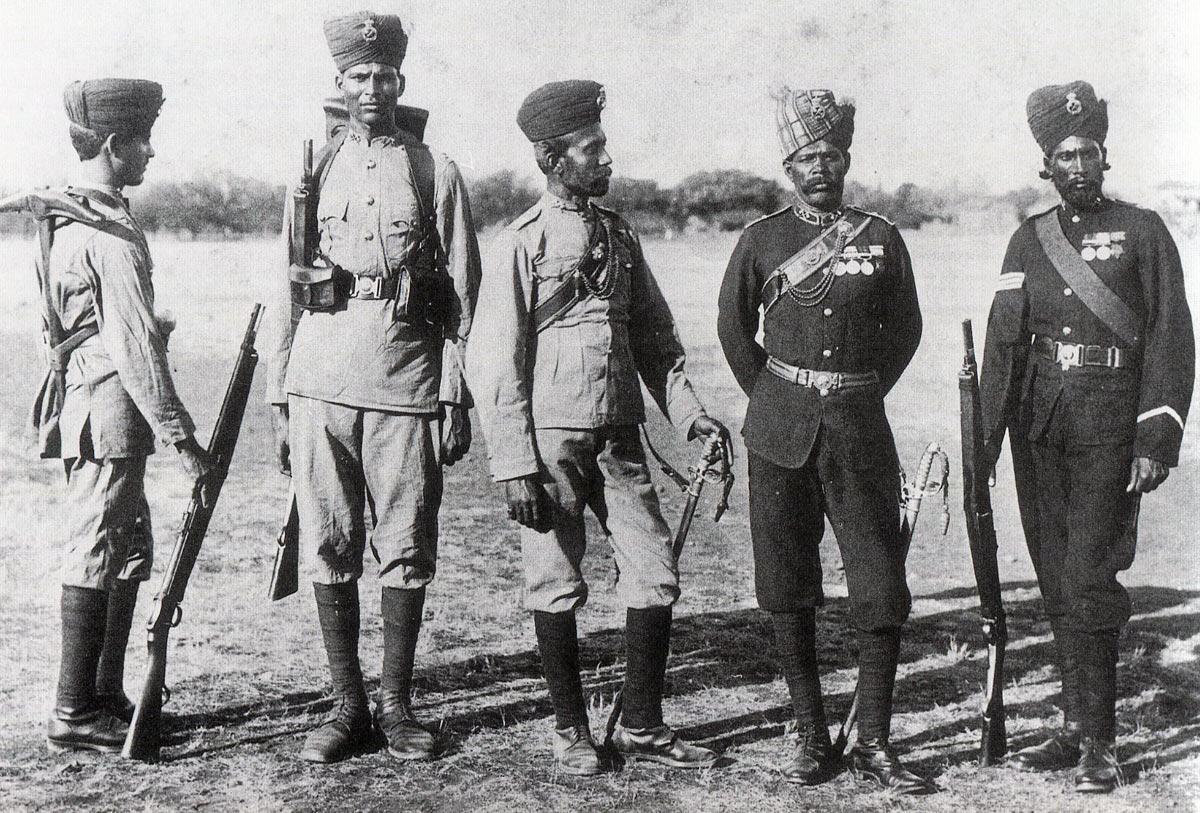
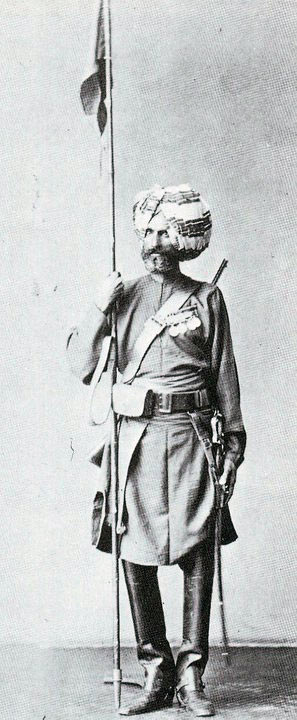
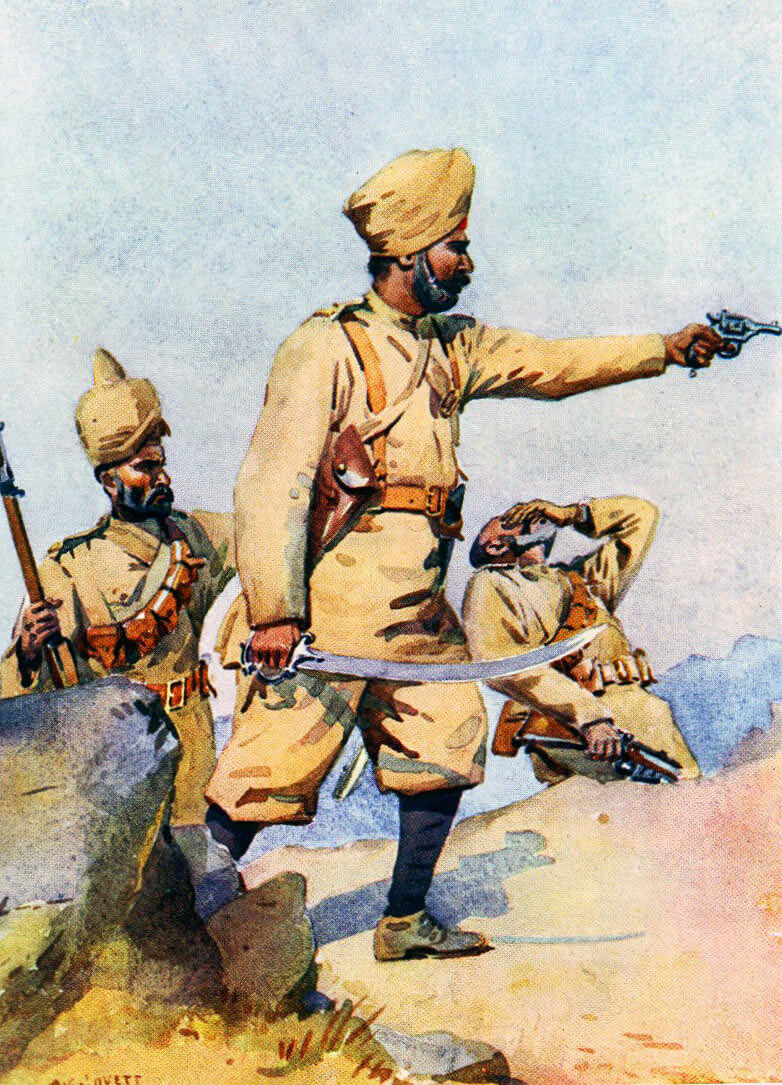
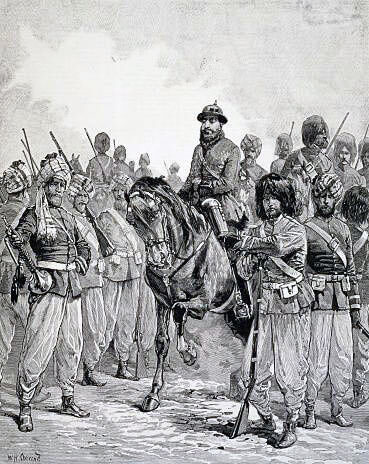
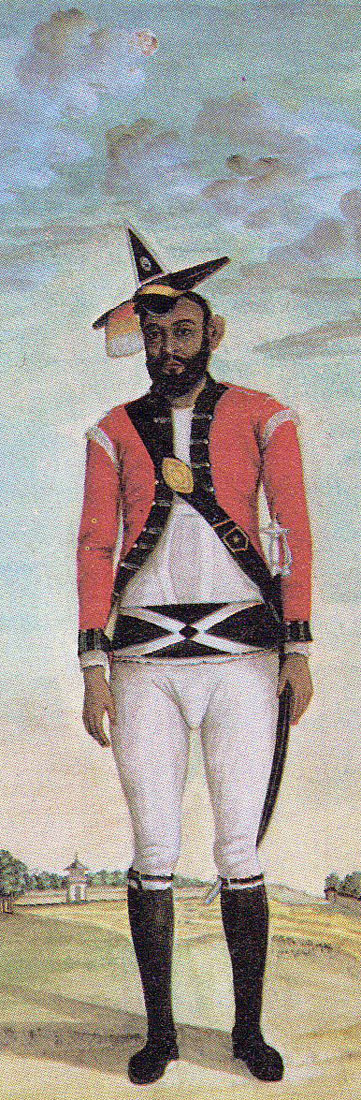
Combatants at the Battle of Laswaree: An army of British and sepoy troops from the Bengal Presidency of the East India Company against an army of the Mahratta ruler of Gwalior, Daulat Rao Scindia.

Commanders at the Battle of Laswaree: General Lake against the Mahratta general Abaji.

Size of the armies at the Battle of Laswaree: Lake’s army at the Battle of Laswaree numbered around 6,000 men.

Scindia’s Mahratta Army at the Battle of Laswaree numbered some 9,000 infantry and 5,000 cavalry with 72 guns.

Winner of the Battle of Laswaree: 
The British Bengal army of General Lake.

Background to the Battle of Laswaree: 
In 1800, the East India Company, the British governing agency in India, occupied three areas of the sub-continent; the port of Bombay on the west coast of India; an area around Madras, stretching north and south of the city along the east coast; and the substantial presidency of Bengal, based on the trading port of Calcutta in the Hoogli delta.  The three presidencies were separated by tracts of country governed by Indian potentates.

Daulat Rao Scindia, ruler of Gwalior: Battle of Laswaree on 1st November 1803 in the Second Mahratta War

In the Deccan, the southern central area of the Indian isthmus, the British controlled the principalities of Hyderabad and Mysore in the very south.

Separating the three British presidencies, stretching from coast to coast and up to the borders of Nepal in the North and the Punjab in the West, lay the sprawling Mahratta Confederacy, combining the five principalities of the Peshwa Baji Rao, Daulat Rao Scindia, Jeswant Rao Holkar, the Bhonslar Raja of Berar and the Gaikwar of Baroda.

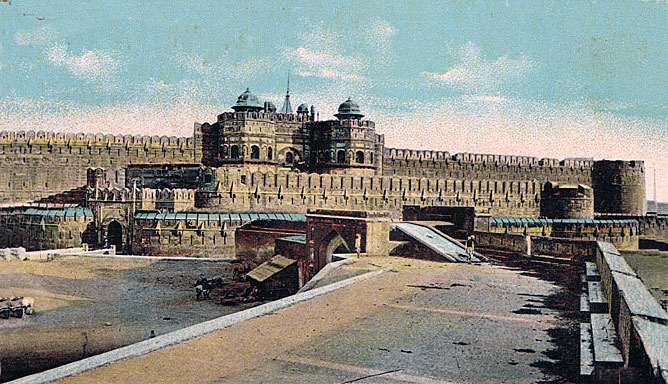
Daulat Rao Scindia was the Mahratta ruler of Gwalior. Scindia’s territory in the north included the powerful fortress of Aligarh, the city of Agra and the old Moghul capital of Delhi, each with garrisons of French trained troops. 

Scindia’s interests were represented by the French officer, Colonel Perron, based in Delhi and the effective ruler of the north of Scindia’s dominion.

In 1802, war broke out within the Confederacy, with Holkar and Berar defeating the Peshwa and Scindia and driving the Peshwa from his territory to seek refuge with the East India Company.

The British Governor-General, the aggressive and resourceful Lord Mornington, seized on the pretext of re-instating the Peshwa in his capital, Poona, close to the British city of Bombay, to invade the Confederacy from Mysore in the South and from Oudh in the North.

While General Arthur Wellesley led the attack to restore the Peshwar in Poona, the incursion from Oudh was to be led by General Lake.

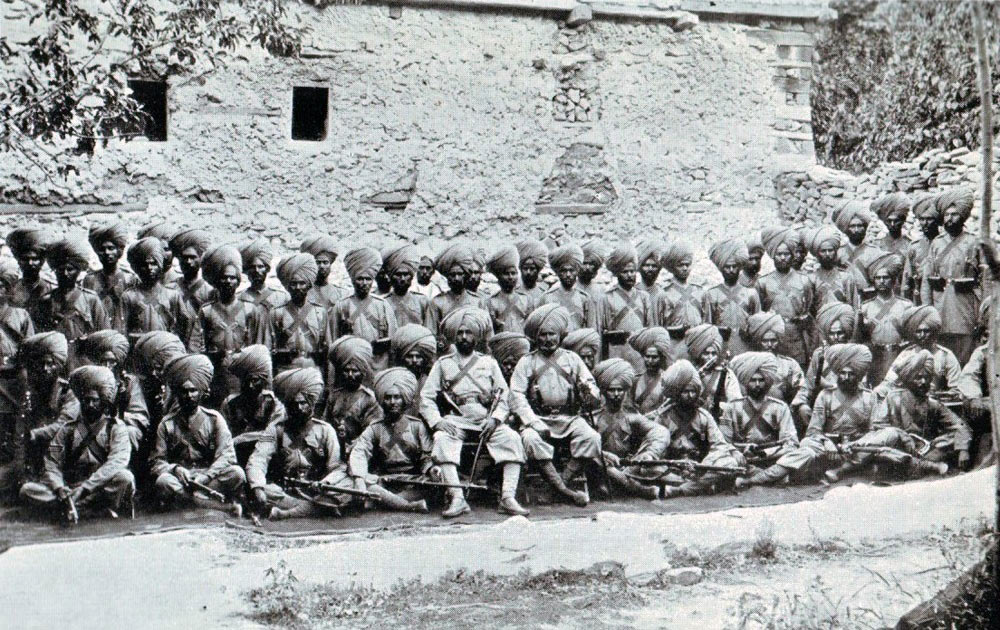
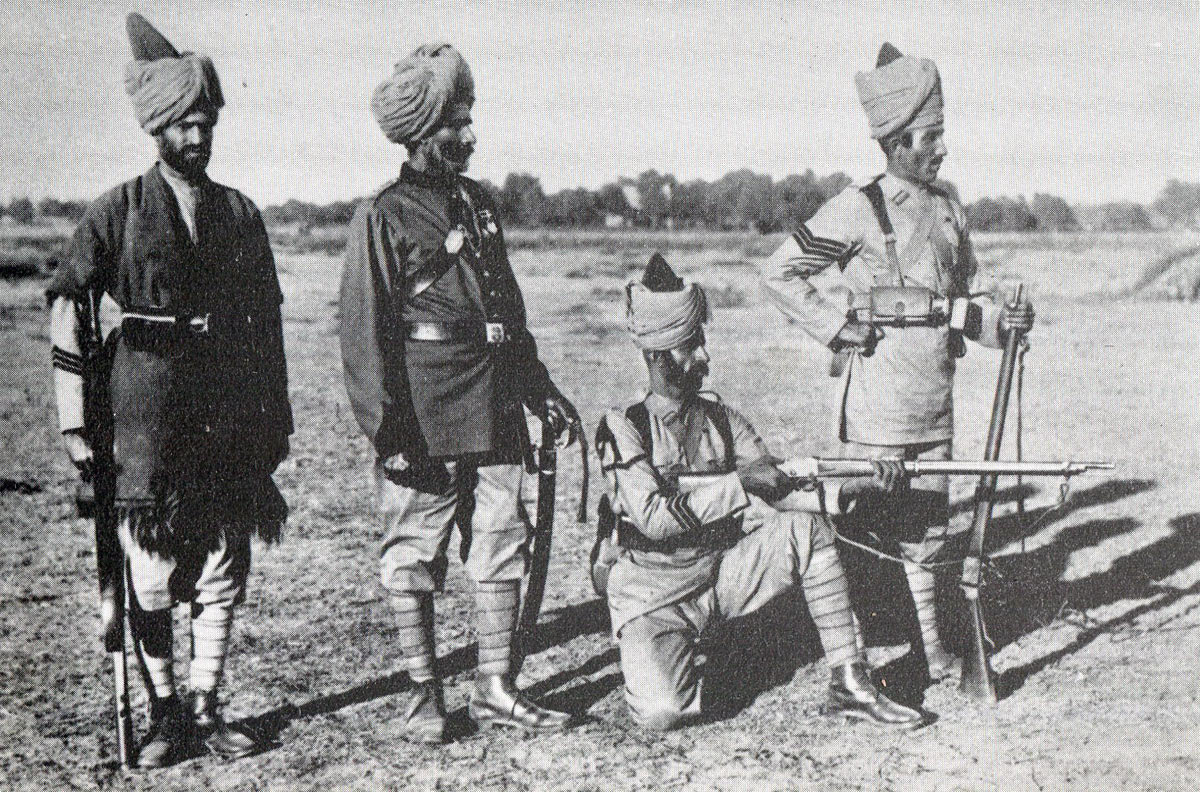
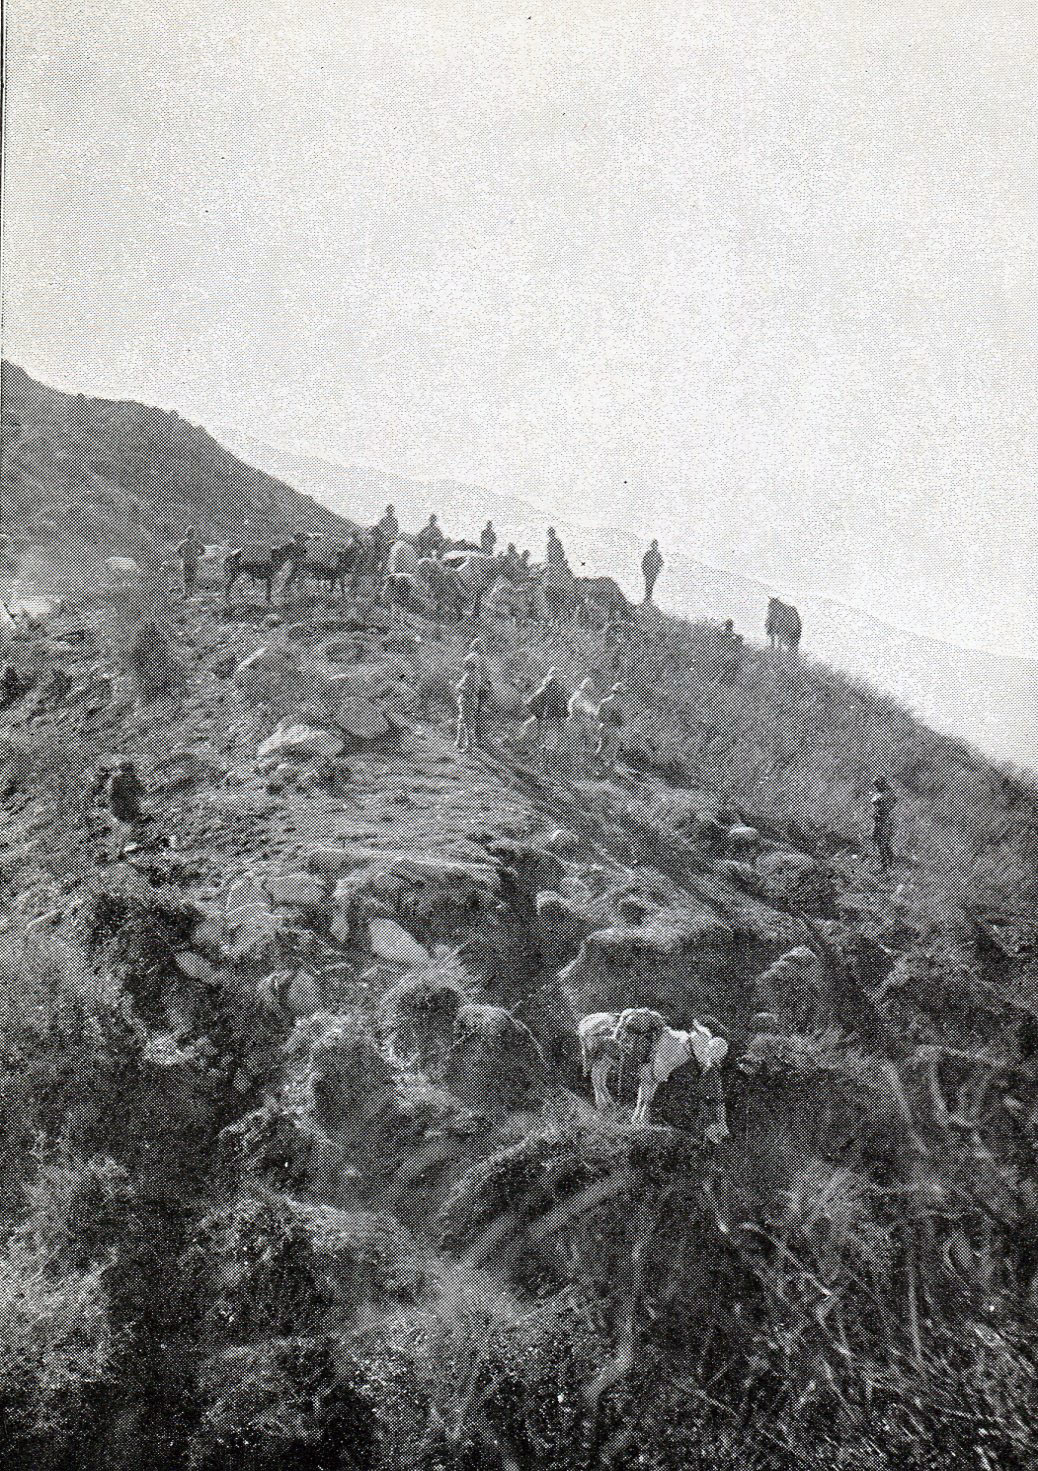
In August 1803 Lake assembled his army at Kanoge on the River Ganges, forming three cavalry brigades and four infantry brigades:


British Light Dragoon: Battle of Laswaree on 1st November 1803 in the Second Mahratta War

Cavalry:

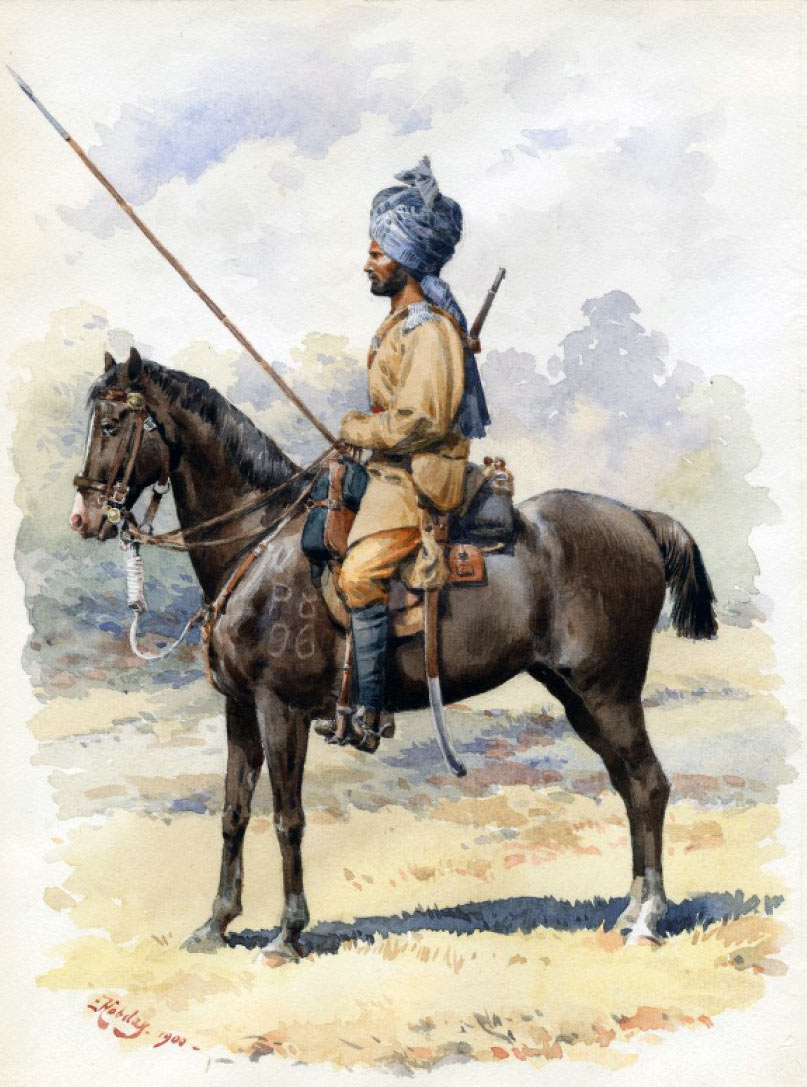
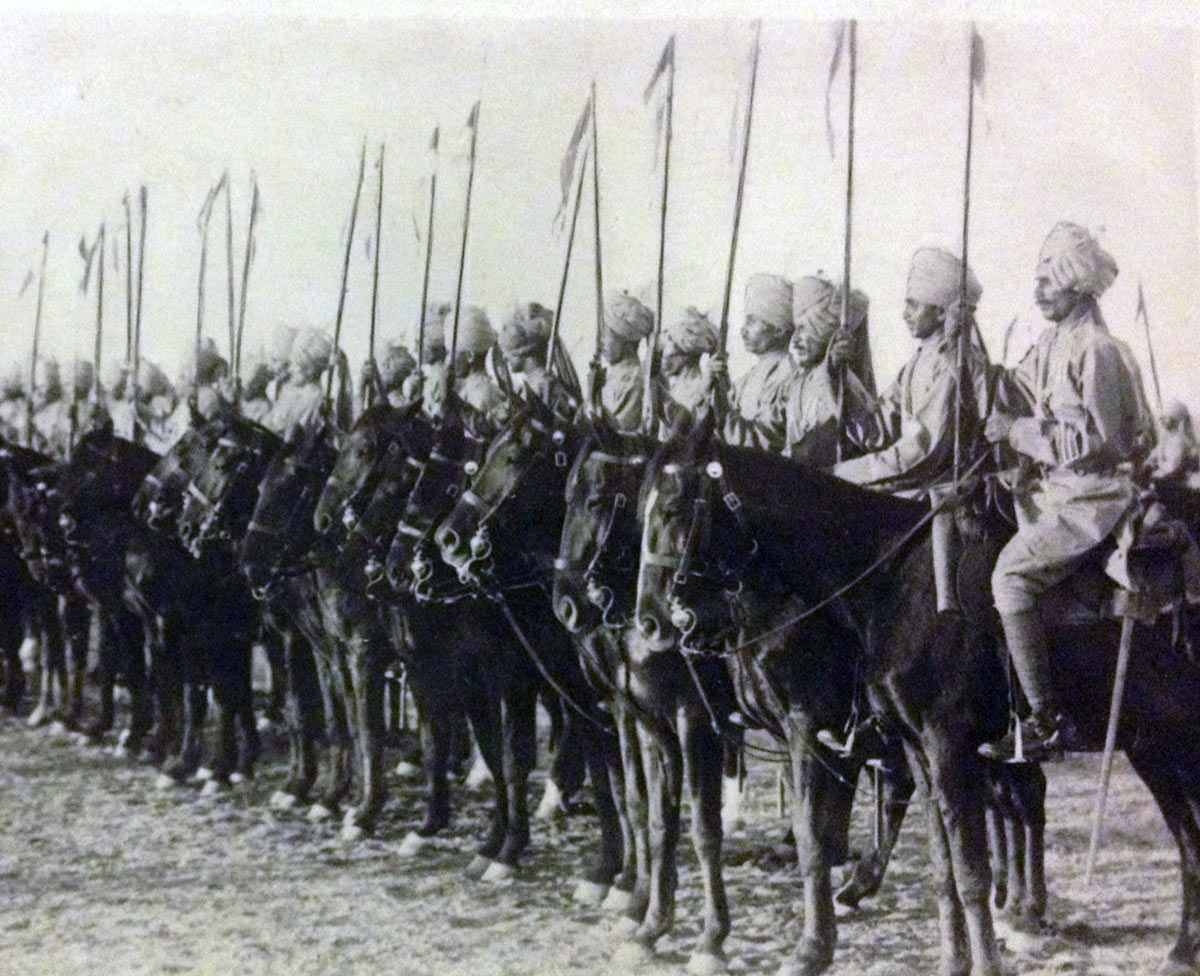
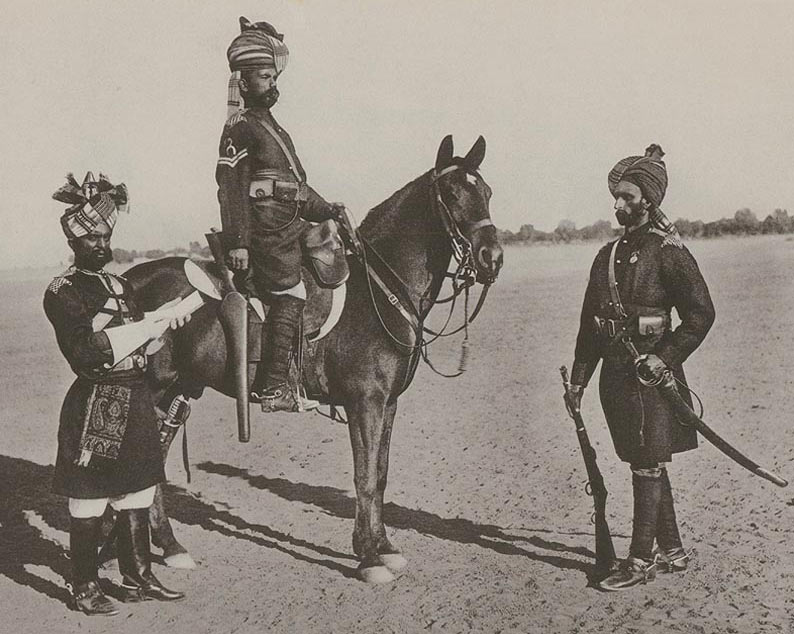
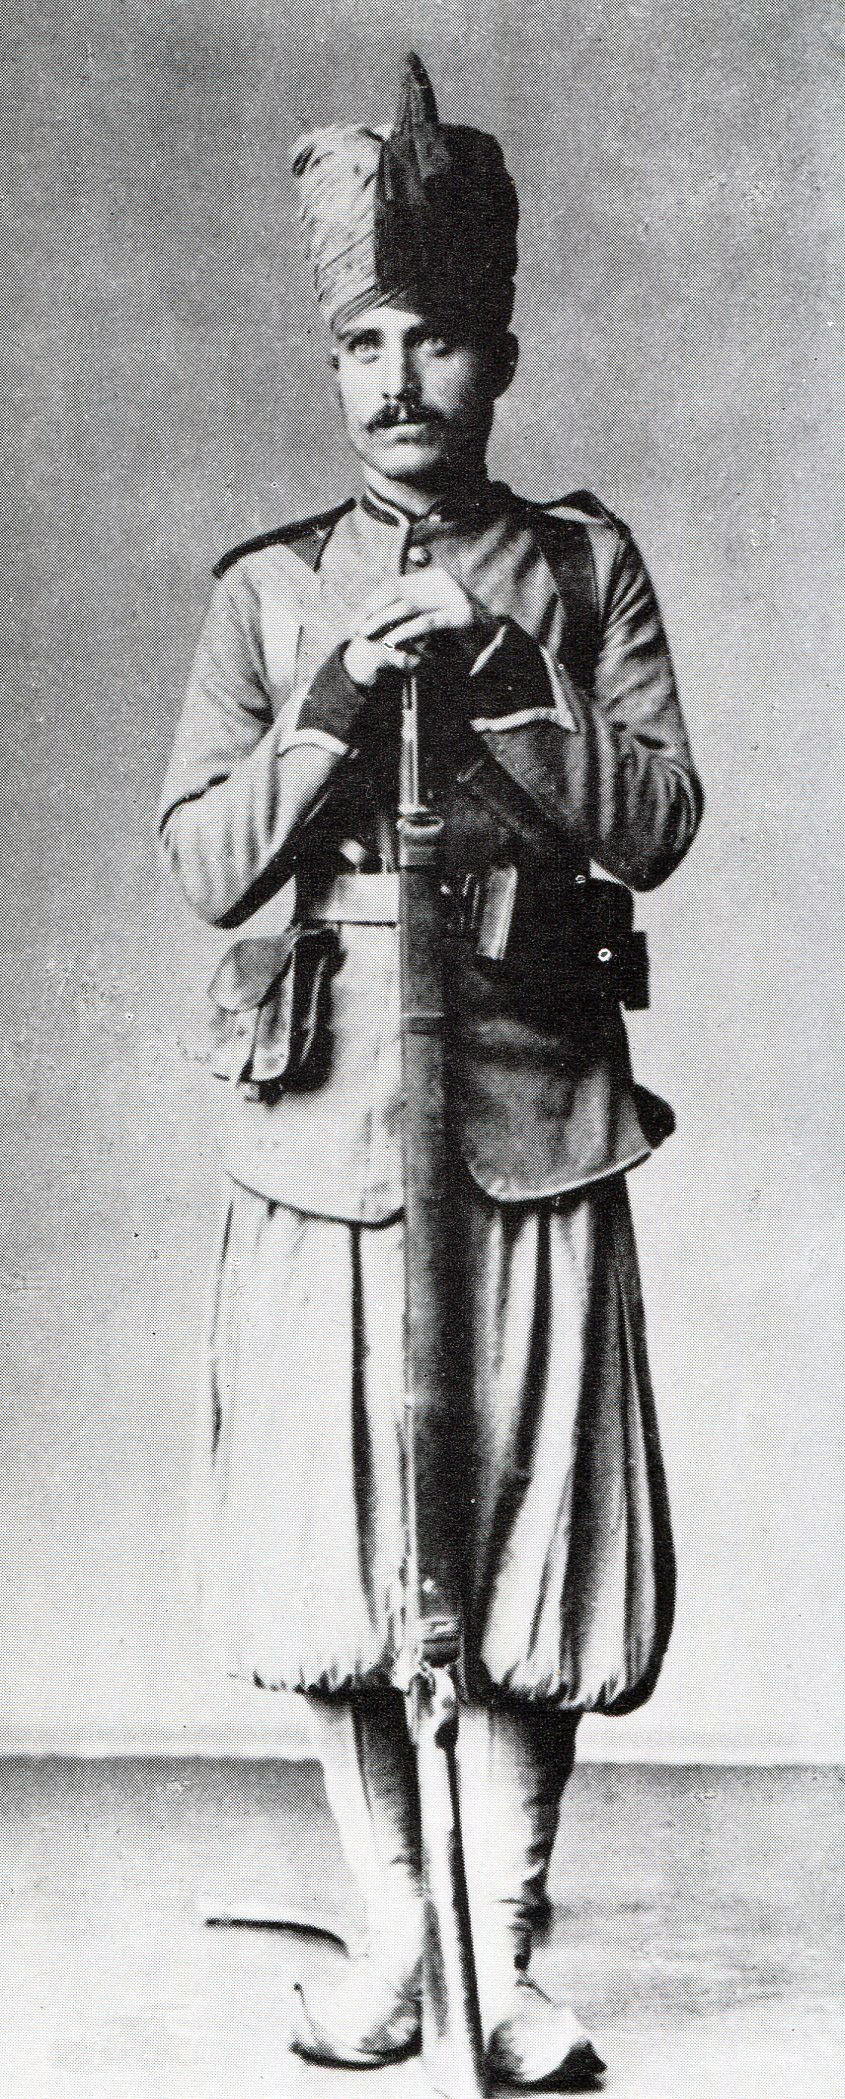
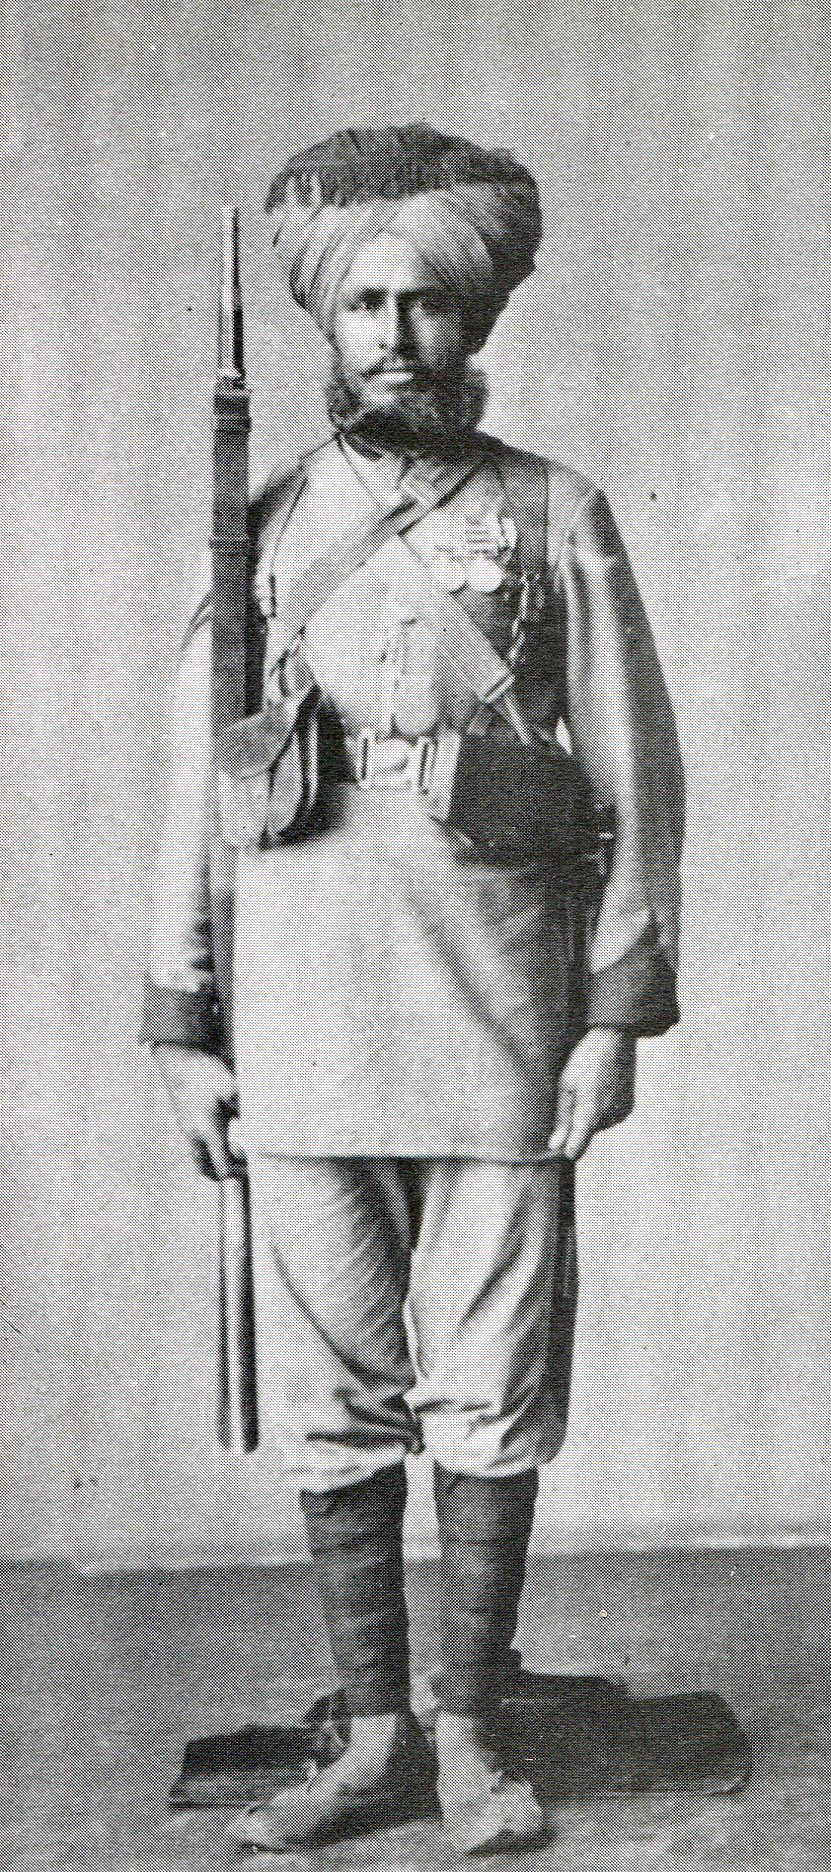
1st Brigade commanded by Lieutenant Colonel Vandeleur: HM 8th Light Dragoons, 1st and 3rd Bengal Native Cavalry

2nd Brigade commanded by Colonel St Leger: HM 27th Light Dragoons, 2nd and 6th Bengal Native Cavalry

3rd Brigade commanded by Colonel Macan: HM 29th Light Dragoons, 4th Bengal Native Cavalry

Infantry:

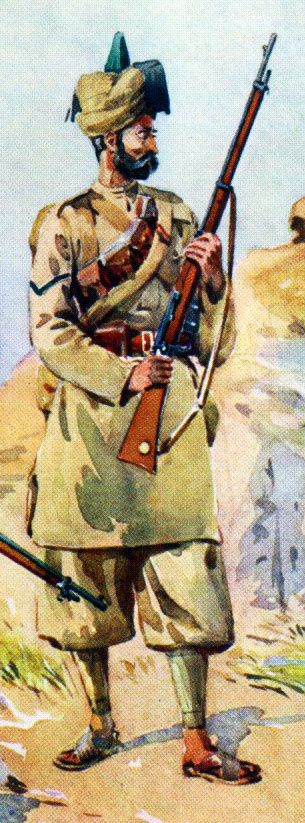
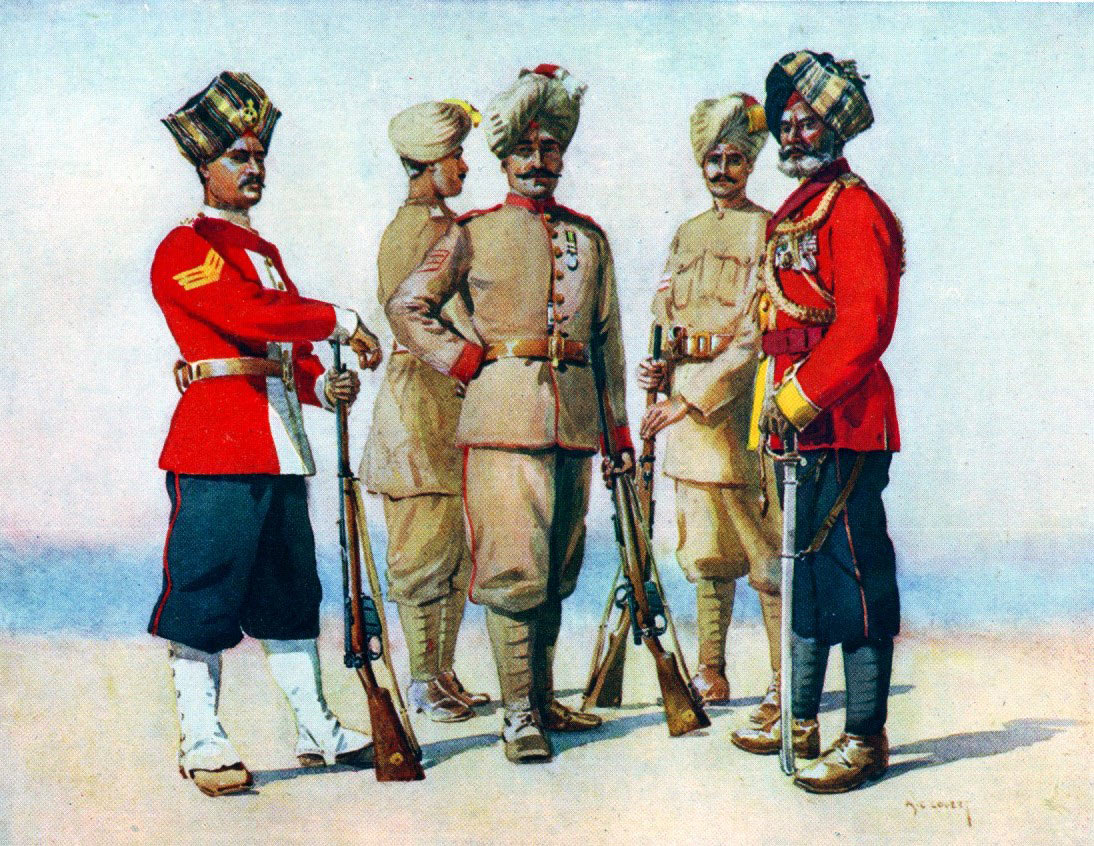
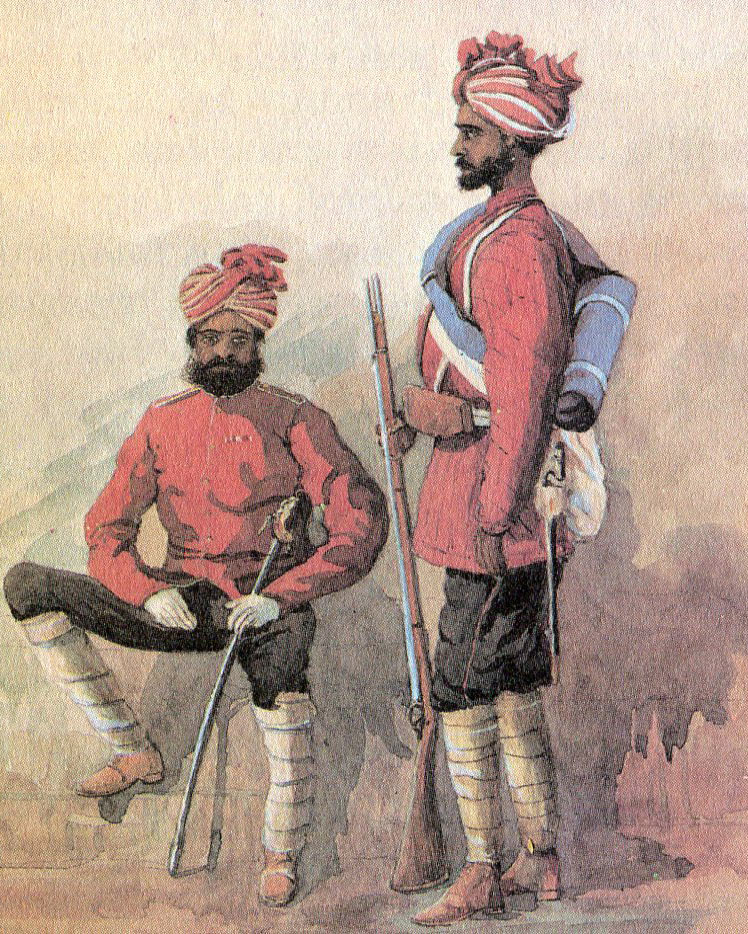
1st Brigade commanded by Lieutenant Colonel Monson: HM 76th, 1st and 2nd/4th Bengal Native Infantry, 4 Cos 17th Native Bengal Native Infantry

2nd Brigade commanded by Colonel Clarke: 2nd/8th, 2nd/9th, 1st/12th and 6 Cos 16th Bengal Native Infantry

3rd Brigade commanded by Colonel Macdonald: 2nd/12th, 1st and 2nd/15th Bengal Native Infantry

4th Brigade commanded by Lieutenant Colonel Powell: 1st and 2nd/2nd, 1st/14th Bengal Native Infantry

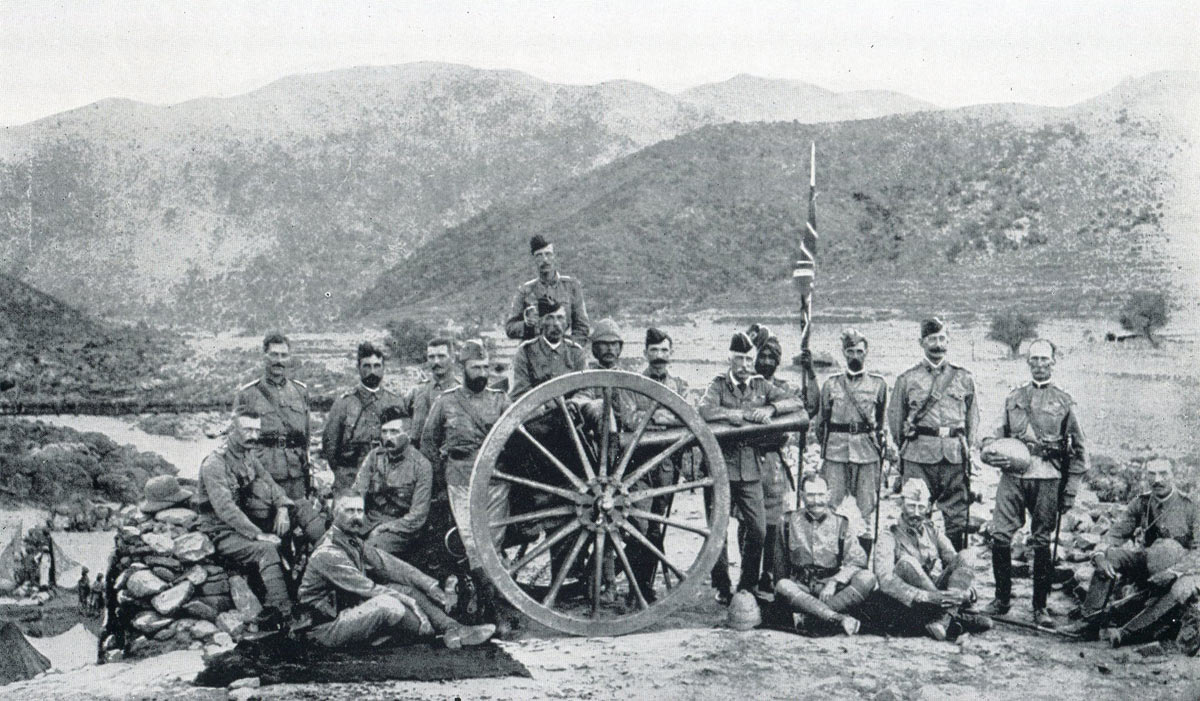
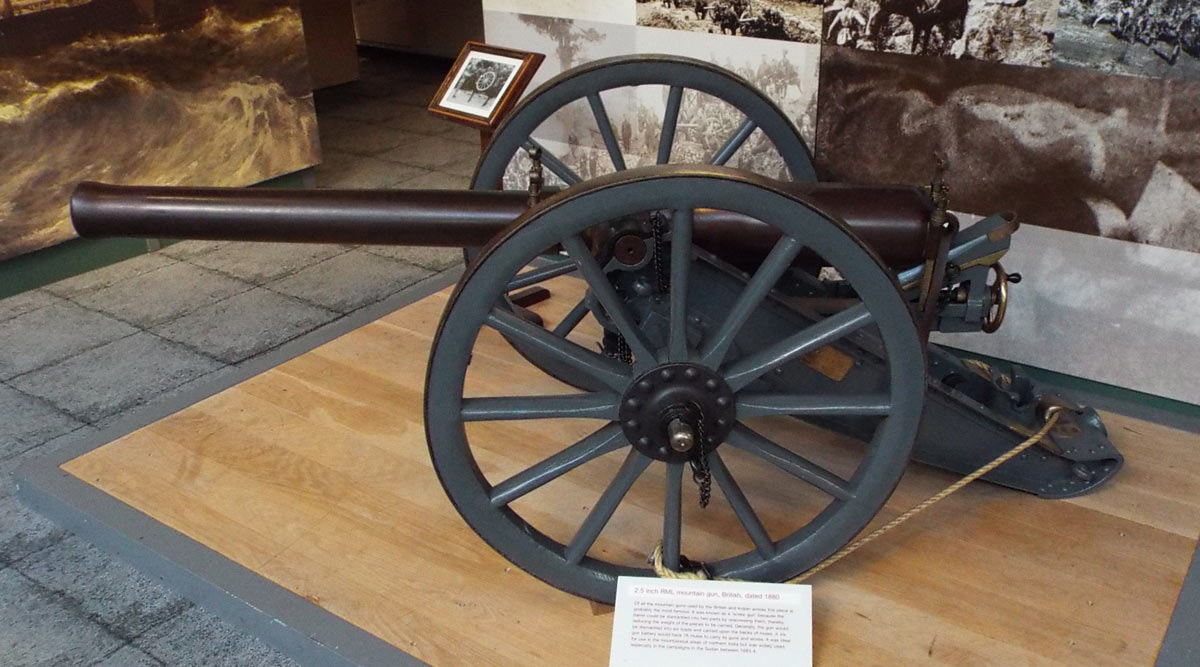
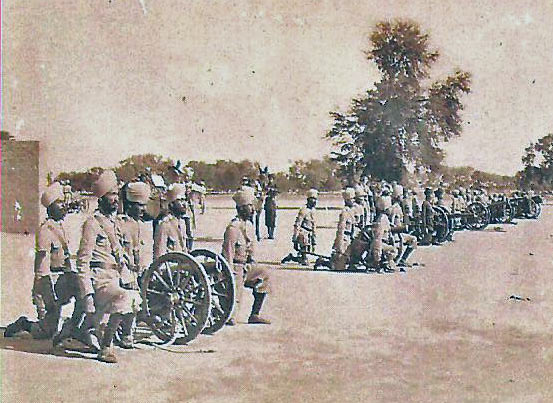
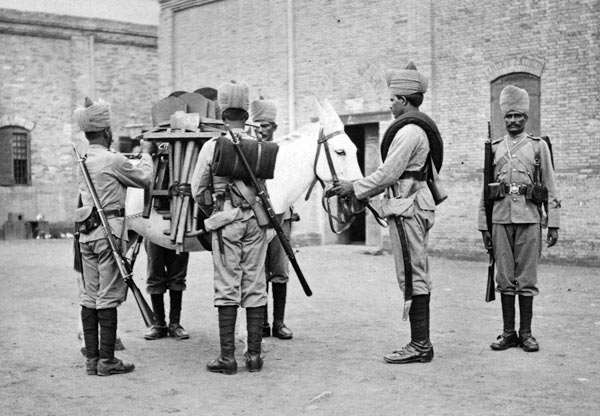
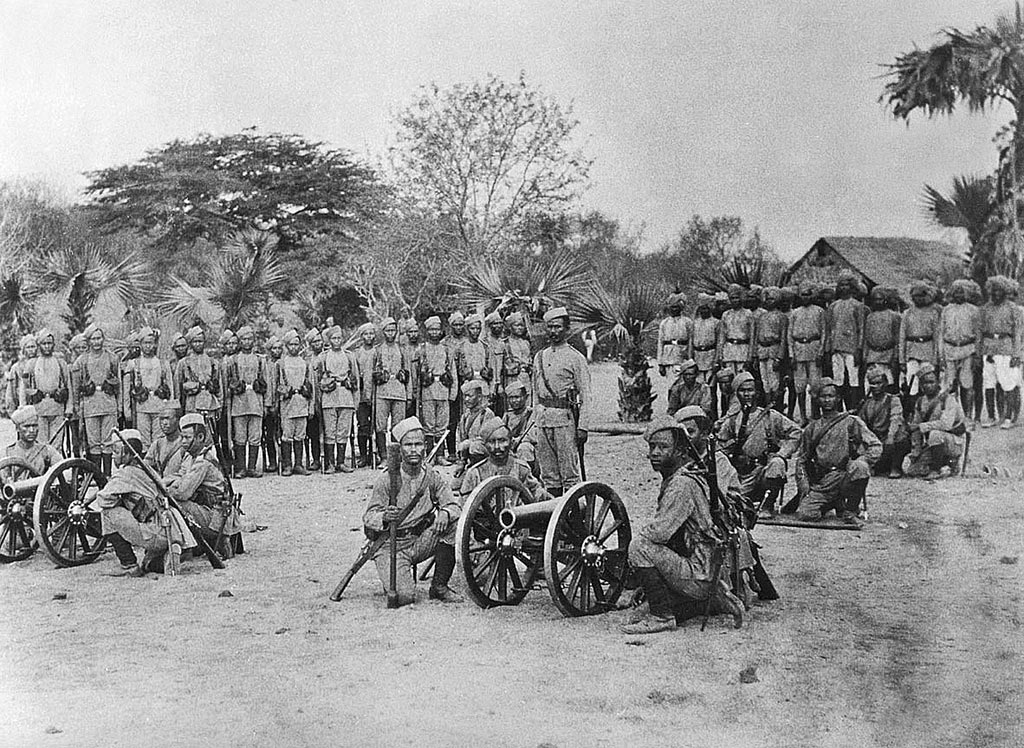
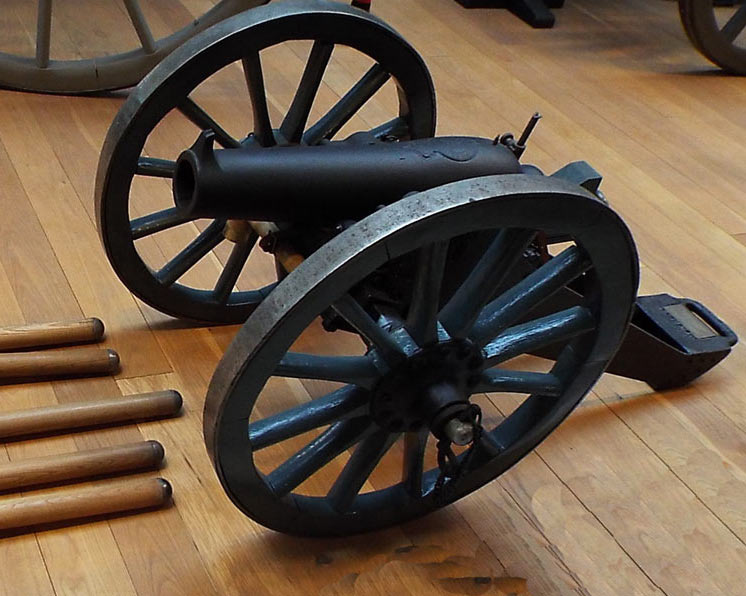
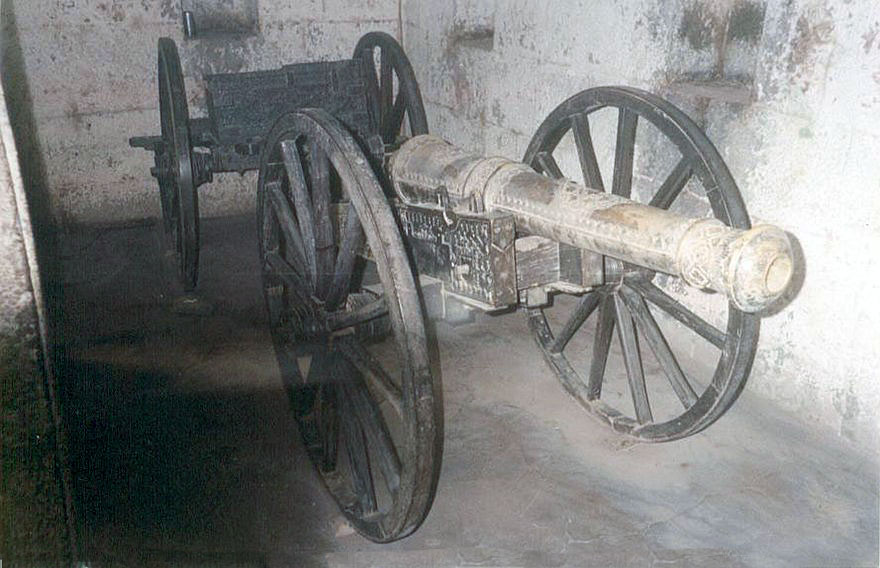
Artillery: 2 galloper guns to each cavalry regiment (16 guns), 1 battalion gun to each infantry battalion (12 guns), 1 brigade of horse artillery (6 guns), 6 six pounders, 4 twelve pounders and 3 five and a half inch howitzers. Total of 47 guns.

Map of central northern India: Battle of Laswaree on 1st November 1803 in the Second Mahratta War: battle map by John Fawkes

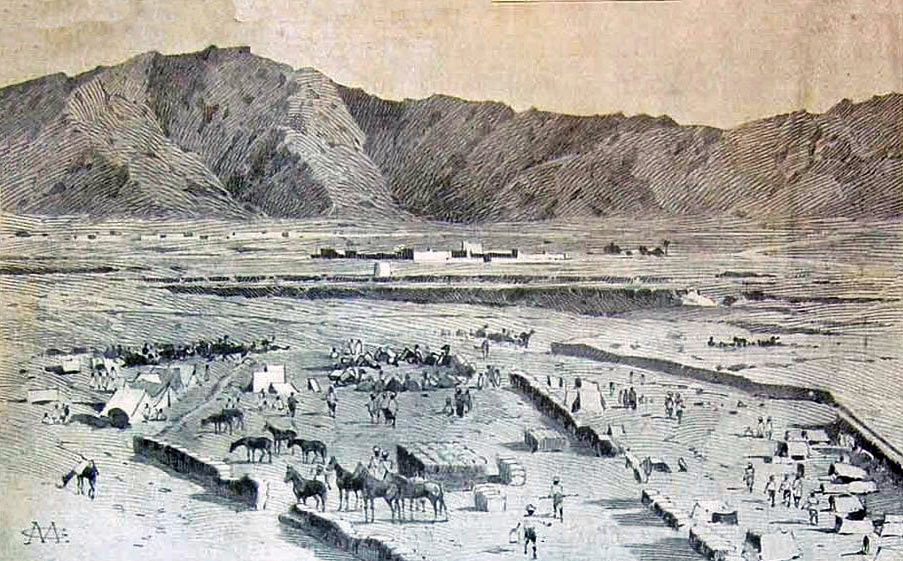
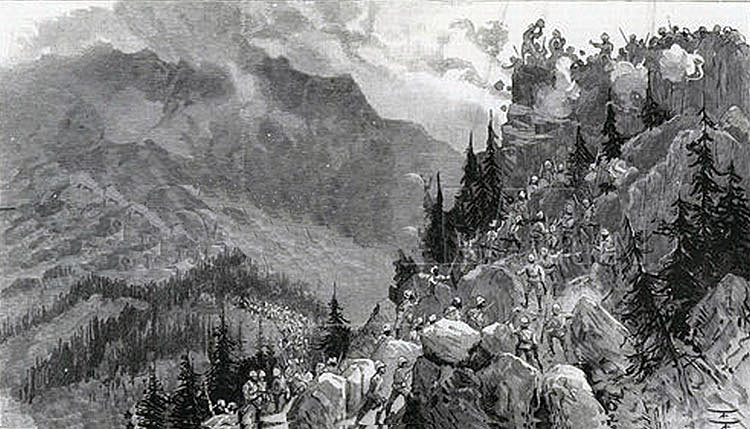
The Battle of Aligarh:

On 29th August 1803, marching in a large square and swelled by followers ten times the number of soldiers, Lake’s army entered Mahratta territory, moving towards the fortress of Aligarh, where the French general commanding Scindia’s army in his northern lands, General Perron, was encamped.

Lake’s army left its baggage and continued towards Aligarh, finding Perron’s army in the process of striking camp.

The Mahratta cavalry, numbering around 20,000 men, formed up in the plain, behind a large marshy area, with the fortress of Aligarh on their right and a village on their left.

 Lake took command of his cavalry and led the three brigades off to the right, around the marshy area.

Lake’s guns played on the Mahratta cavalry, firing directly across the area of marsh and inflicting casualties, while the Mahrattas fell back before Lake’s cavalry force and finally left the field.

Mahratta Light Horseman: Battle of Laswaree on 1st November 1803 in the Second Mahratta War

Perron with his bodyguard rode off to Agra, leaving his subordinate Colonel Pedron to defend Aligarh.

Lake called on Pedron to surrender, a summons that caused six of Pedron’s European officers to desert to the British.

Pedron answered Lake’s demand with an evasive response, seeking time to improve his defences.

On 3rd September 1803, Lake concluded that Pedron did not intend to surrender and prepared his attack.

The Fortress of Aligarh: Battle of Laswaree on 1st November 1803 in the Second Mahratta War

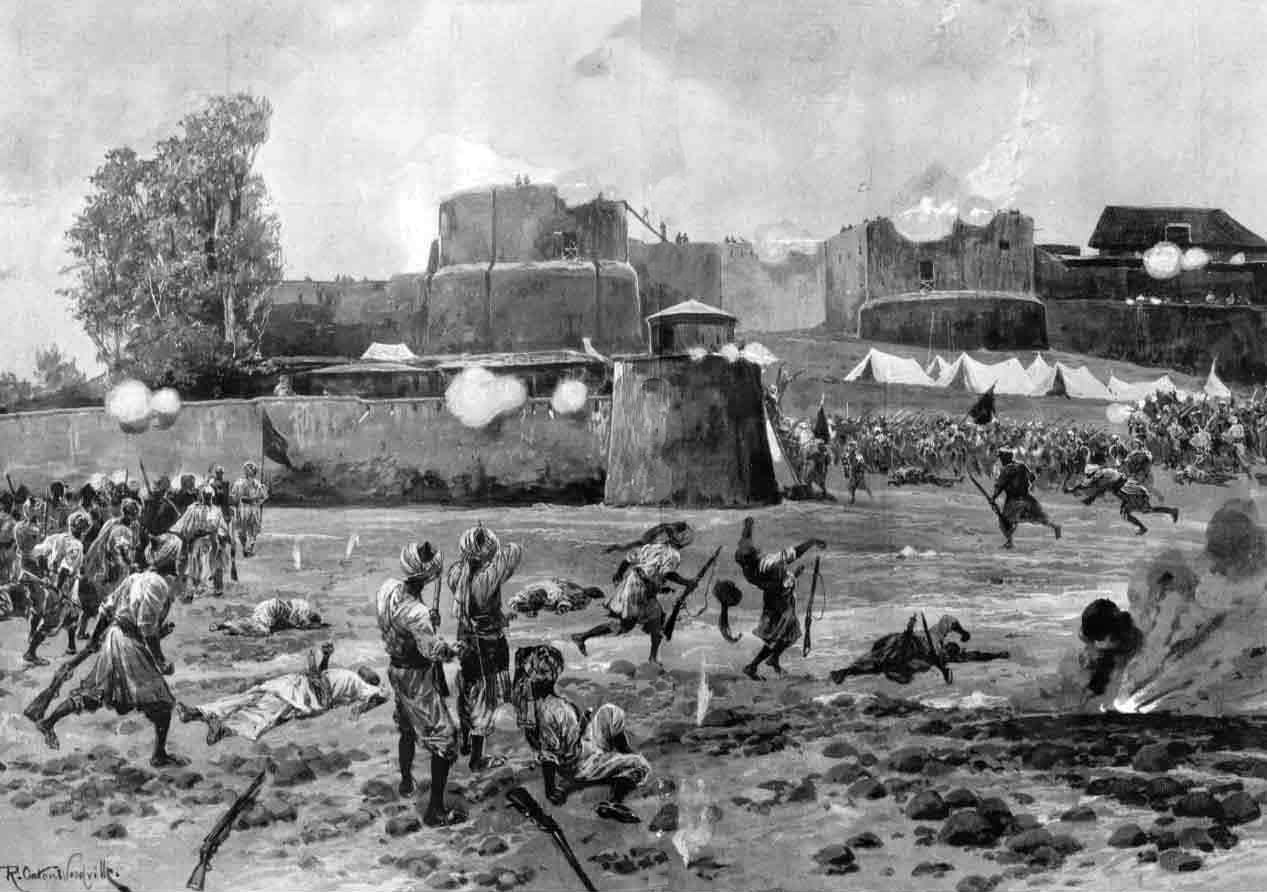
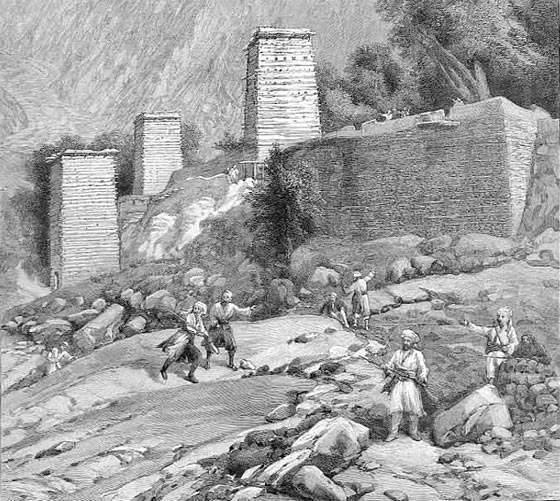
Aligarh comprised inner and outer forts, surrounded by a wide and deep flooded ditch, crossed by a single bridge leading to the main gate.

The forts mounted 73 guns of a wide range of calibres, with reserves in the arsenal.

The only point of attack was the main gate.

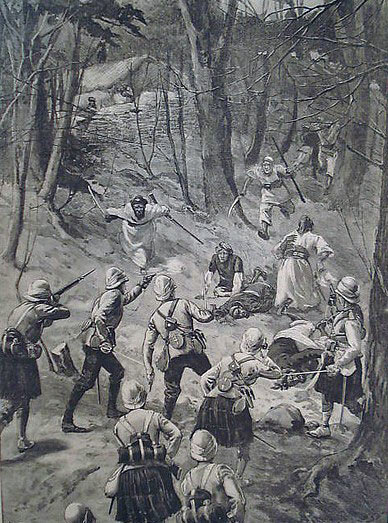
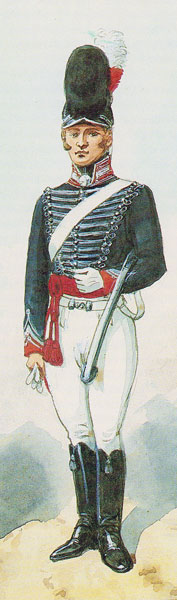
Lake constructed two batteries to fire on the gate and a storming party was formed of four companies of HM 76th Regiment and four companies of the 4th Bengal Native Infantry, with a further Bengal Native Infantry battalion in support.

The storming party, led by a forlorn hope, moved towards the main gate of the fortress at 3am on 4th September 1803.

Benoit de Boigne French trainer of the Mahratta Army: Battle of Laswaree on 1st November 1803 in the Second Mahratta War

A party of Mahratta infantry were collected around a camp fire outside the gate.

Soldiers of the 76th moved forward, with the intention of panicking the Mahratta party into running for the gate, so that the British soldiers could follow them through before the gate could be shut.

Inadvertently, all the Mahrattas were killed or severely wounded, leaving none to run to the gate and forcing the British soldiers to retire before they were spotted from the fortress walls.

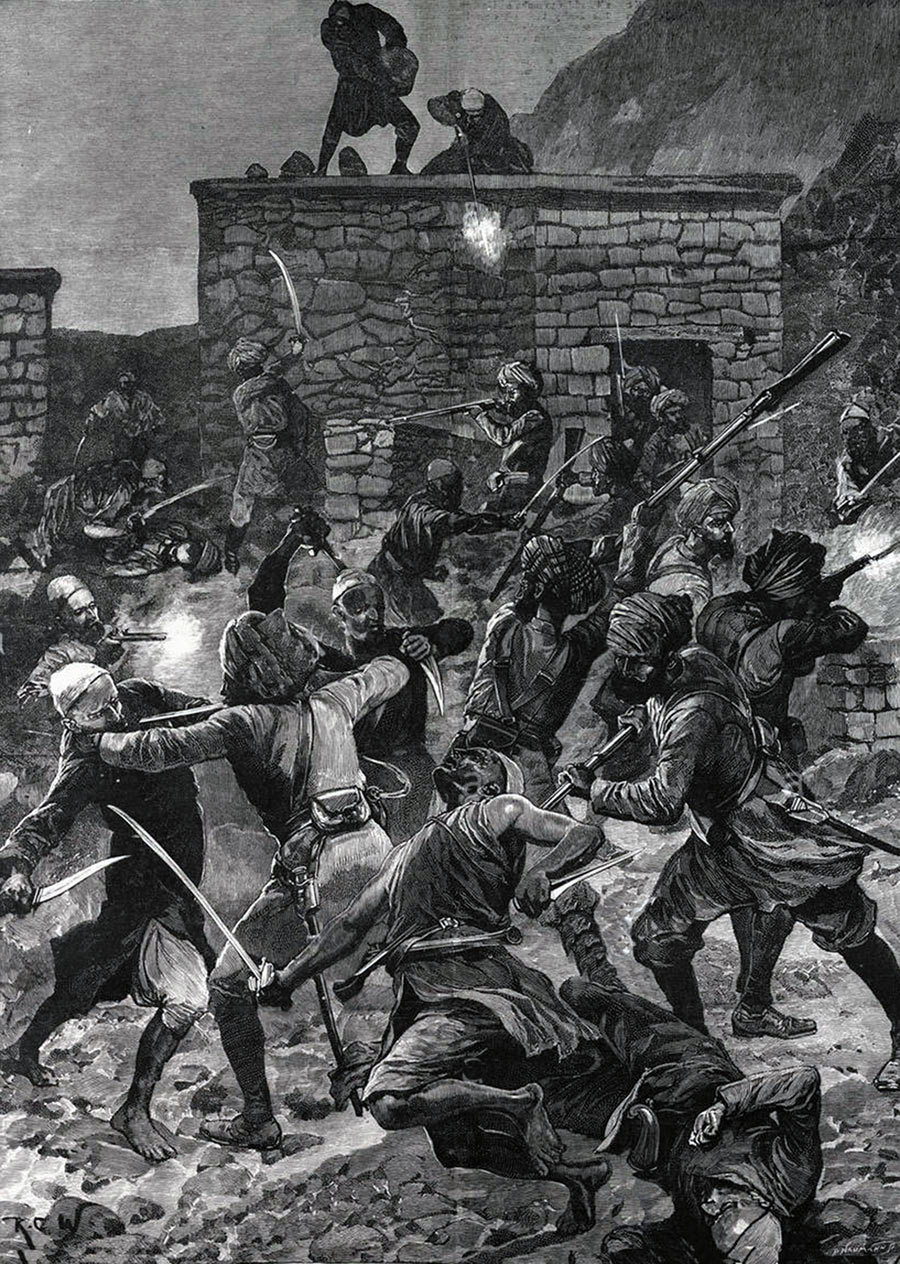
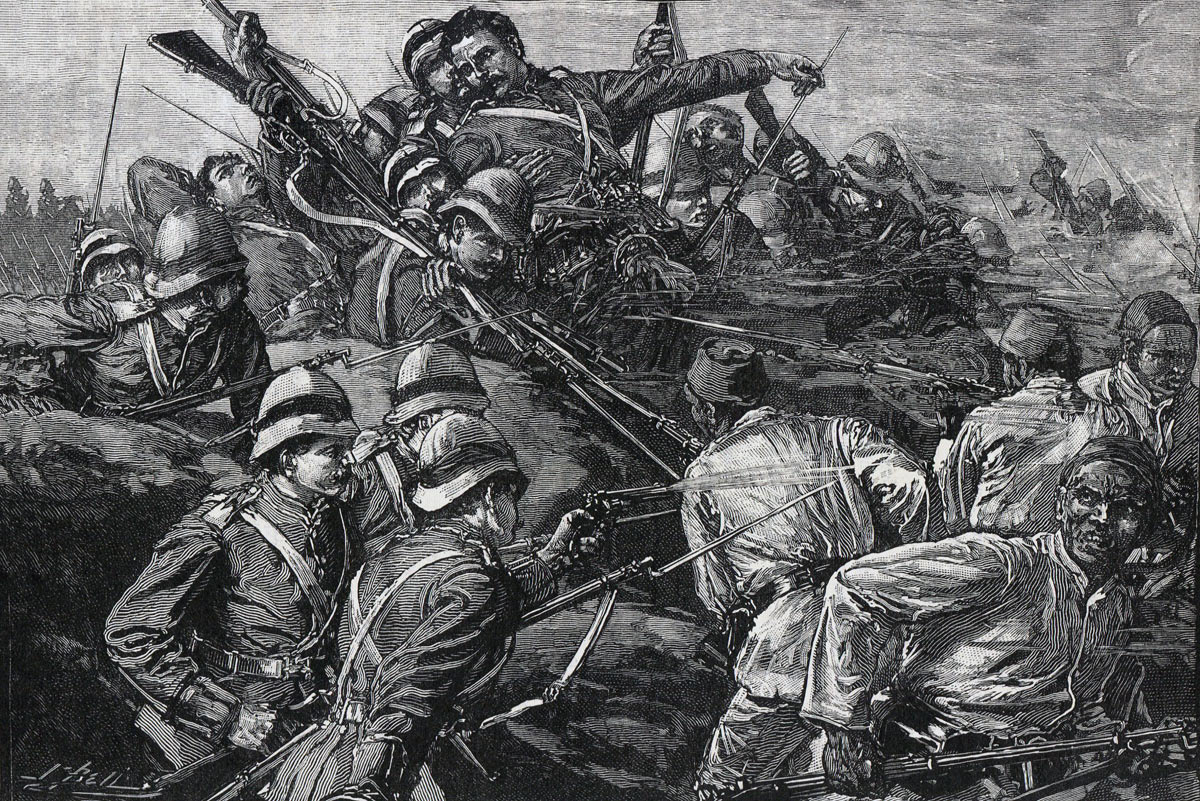
At dawn on 5th September 1803, the storming party rushed the gate, but were unable to penetrate the gatehouse against determined Mahratta resistance.

A six-pounder gun was brought forward and then a twelve-pounder and after a number of cannon balls had been discharged into the gate it gave way and the storming party took the gatehouse.

A lengthy circular road led round to a second gate.

The storming party raced along the road, under a heavy fire from the ramparts and quickly penetrated the second gate.

The storming party now faced a causeway leading to the main fortress with a third gate, which they seized before it could be closed.

The storming party was now in the passageway between the outworks and the main fortress and were subjected to a heavy fire before it could reach the fourth gate.

While the twelve-pounder was brought up and deployed in vainly battering at this gate, soldiers of the 76th entered a wicket gate and penetrated onto the ramparts.

At this point the Mahratta garrison despaired of holding the fortress and attempted to escape, many being drowned in the fortress moat, while others were cut down by HM 27th Light Dragoons waiting on the far side of the fortress.

Mahratta Light Horse at the Battle of Laswaree on 1st November 1803 in the Second Mahratta War

Lake’s troops occupied the fortress.

The casualties in the assault were 5 officers and 19 soldiers of the 76th killed and 4 officers and 62 soldiers wounded, with overall British and Bengali casualties 52 killed and 205 wounded.

Mahratta casualties in the assault on Aligarh are not recorded.

On 7th September 1803, Lake marched on to Delhi, leaving a sepoy battalion to garrison Aligarh and despatching Macan’s cavalry brigade to pursue a body of Mahratta horse that was attacking a small force of Bengal sepoys at Shekoabad.

On 8th September 1803, Lake reached the fortress of Koorjah to find the garrison had left, not wishing to be subjected to a storm, as at Aligarh.

Lake on that day received a letter from the Frenchman, Colonel Perron, saying that he had left Scindia’s service and seeking safe conduct out of Mahratta territory, which Lake gladly gave.

Command of Scindia’s troops in the north now fell to the French officer, Louis Bourquain.

Mahratta field gun: Battle of Laswaree on 1st November 1803 in the Second Mahratta War

The Battle of Delhi:

On 10th September 1803, a march of 18 miles brought Lake’s army within 6 miles of the east of Delhi.

After the long march, Lake’s army was encamping when news came in that Bourquain’s Mahratta army had crossed the River Jumna with 16 battalions of infantry, 6,000 cavalry and several guns and were forming up for an attack.

Lake rode out of camp with the three regiments of cavalry, to reconnoitre the Mahratta position.

Lake found Bourquain’s Mahratta army formed up behind previously prepared field fortifications, on raised ground with the River Jumna in its rear.

The Mahratta infantry and guns formed the first line, with swamps covering each flank and the Mahratta cavalry the second line.

High grass obscured much of the Mahratta position.

The Mahratta guns opened fire on Lake’s cavalry as he conducted his inspection.

Lake sent orders for the infantry to come up for the attack.

Lake taking his son's horse: Battle of Laswaree on 1st November 1803 in the Second Mahratta War
Lake taking his son’s horse: Battle of Laswaree on 1st November 1803 in the Second Mahratta War

While the cavalry waited, they were subjected to a damaging cannonade by the Mahratta guns, in which Lake’s horse was killed and he took his son’s horse, his son mounting the horse of a casualty.

An hour later Lake’s infantry arrived.

After the various detachments, Lake was left with eight and a half battalions of infantry and the three regiments of cavalry, some 4,500 men, with which to attack Bourquain’s 19,000 men.

As his infantry appeared in the distance, Lake ordered the cavalry to fall back, to entice the Mahratta army into an ill-judged advance.

The Mahrattas took the bait, their whole army advancing out of the entrenchments with loud shouts.

The British cavalry continued to withdraw, moving directly towards the advancing infantry, masking their appearance, until, on reaching them, the British cavalry turned to left and right and cleared the face of the infantry.

The British infantry were formed with HM 76th on the right and then: 2nd/12th BNI, 2nd/15th BNI, 2nd/2nd BNI, 1st/14th BNI and 1st/2nd BNI.

The British cavalry formed behind the right wing of the infantry line.

A force of Sikh cavalry in the Mahratta service made to move behind Lake’s left flank and rear.

This move was countered with a force of British cavalry and galloper guns and the left-hand Bengal Native Infantry battalion turning outwards and positioning its right flank on a village.

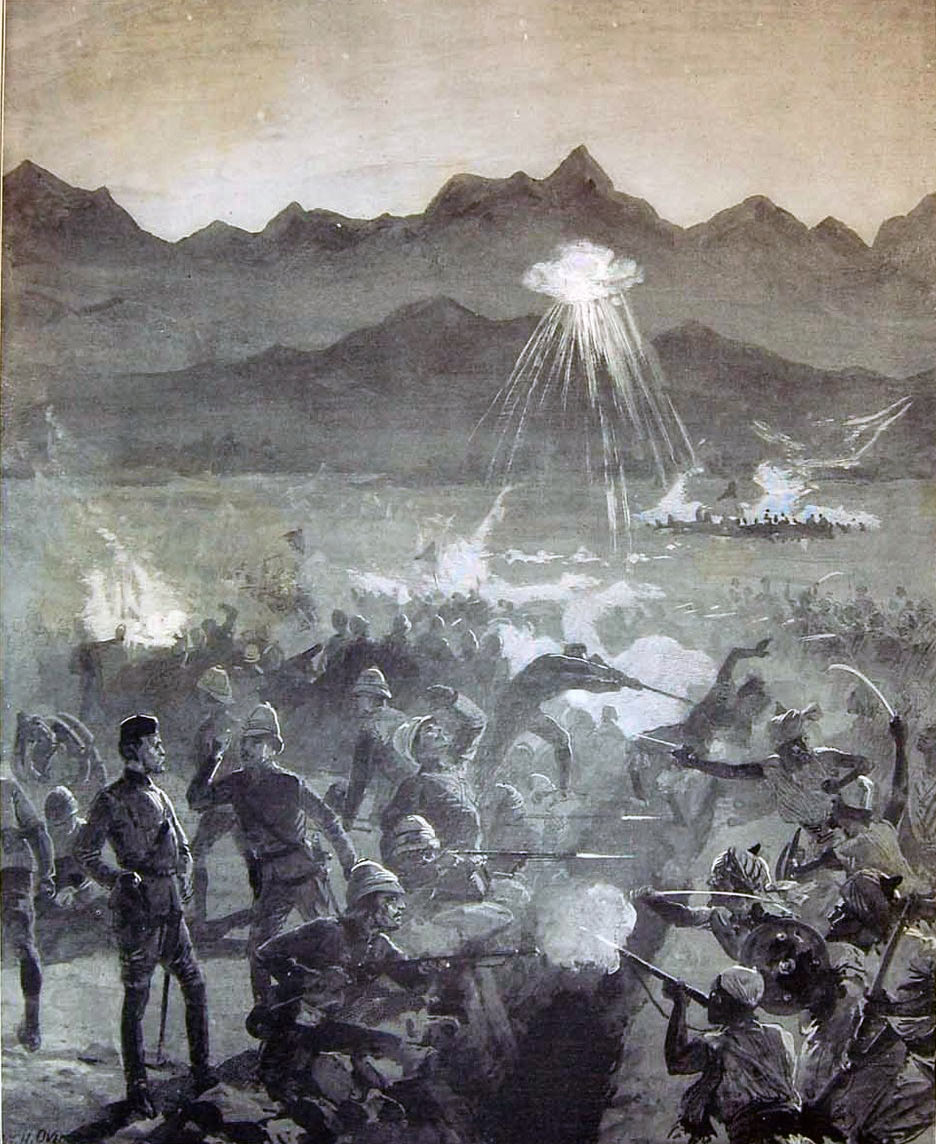
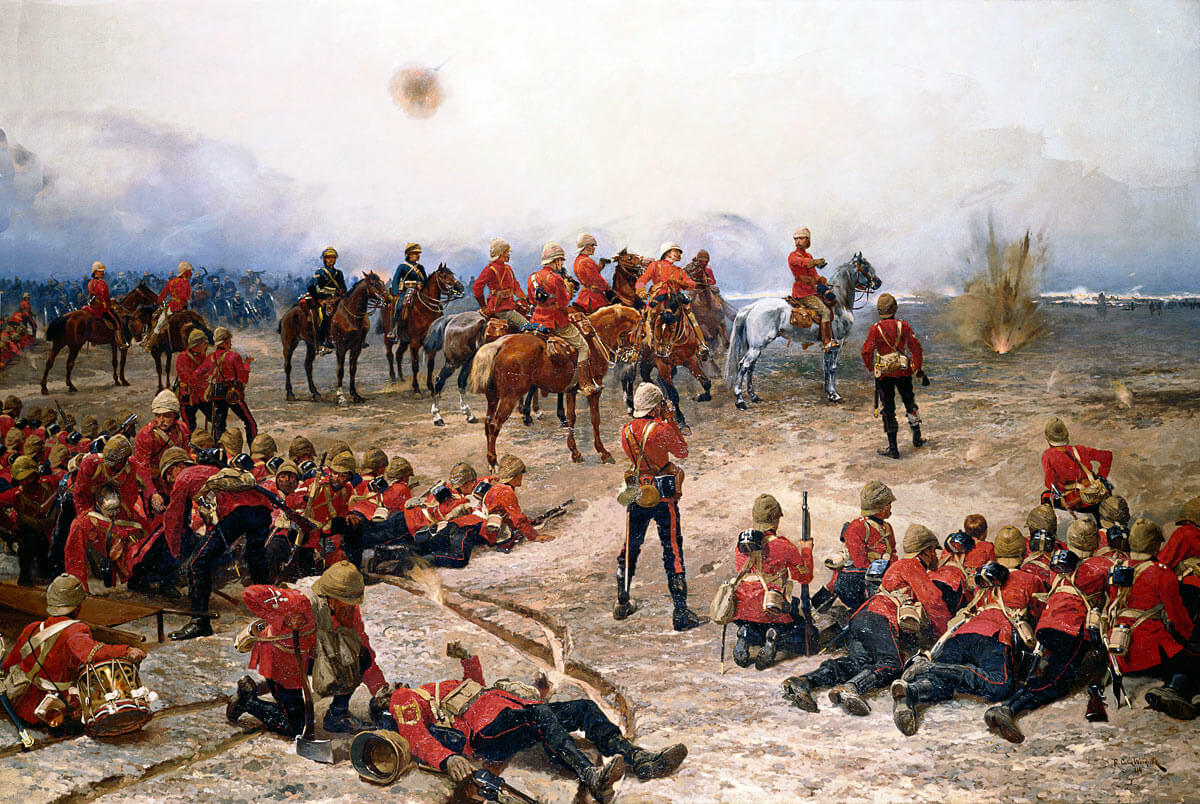
With these deployments completed under a heavy Mahratta cannonade of round, grape and chain shot, Lake began the advance of his infantry line, marching at the head of HM 76th Regiment.

Under the continuing Mahratta artillery bombardment, the British infantry advanced to within one hundred yards of the Mahratta infantry line, before halting, firing a volley and charging.

Battle of Laswaree on 1st November 1803 in the Second Mahratta War: an Indian image

The Mahratta infantry broke and fled.

Lake ordered his infantry line to halt and form ‘column of companies’. The British cavalry galloped through the gaps thereby created in the line and hunted the fleeing Mahratta troops to the banks of the River Jumna, finishing the rout by bombarding the fugitives with the galloper guns that accompanied the cavalry.

Sepoy of Bengal Infantry: Battle of Laswaree on 1st November 1803 in the Second Mahratta War
Subedar of Bengal Infantry: Battle of Laswaree on 1st November 1803 in the Second Mahratta War

A part of the Mahratta army continued along the river bank pursued by Lake’s infantry, until all the Mahratta guns and stores had been captured.

At the end of the battle, it was estimated that Lake’s troops had been on their feet for 16 hours, much of it during the hottest part of the day.

Lake’s army encamped on the bank of the River Jumna opposite Delhi.

British casualties in the battle were 478 killed, wounded or missing. Of these, 1 officer and 136 men were casualties in HM 76th Regiment. 170 British cavalry horses were lost.

The Mahratta army was estimated to have suffered 3,000 killed, wounded or missing.

The British took 68 Mahratta guns, described by Fortescue as ‘all admirably made after a French design’.

On 14th September 1803, Bourquain and four other French officers surrendered to Lake.

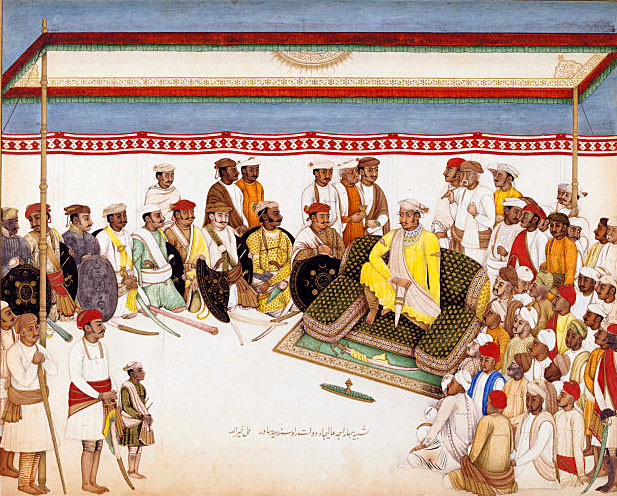
On 16th September 1803, the Moghul Emperor, Shah Alum, welcomed Lake into the City of Delhi.

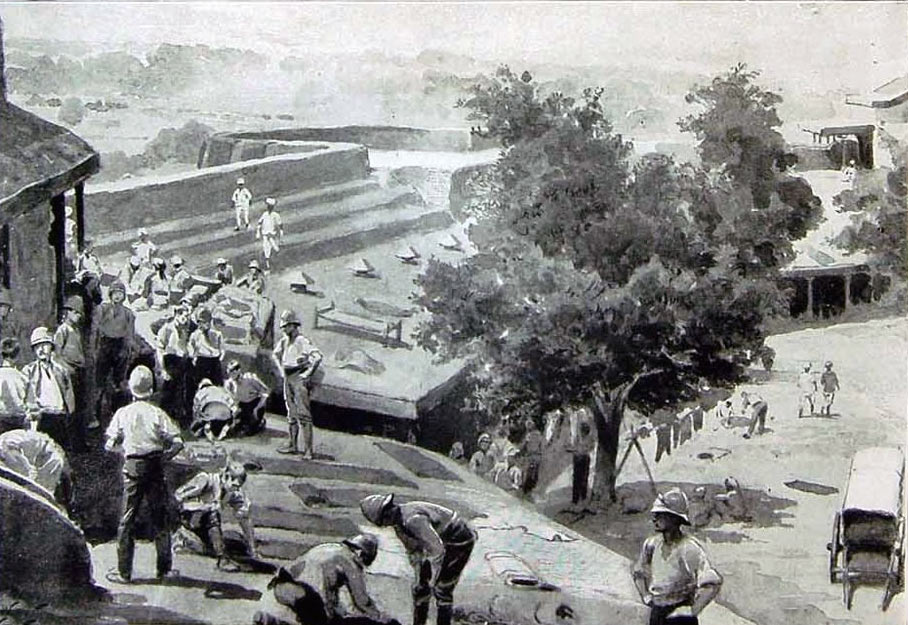
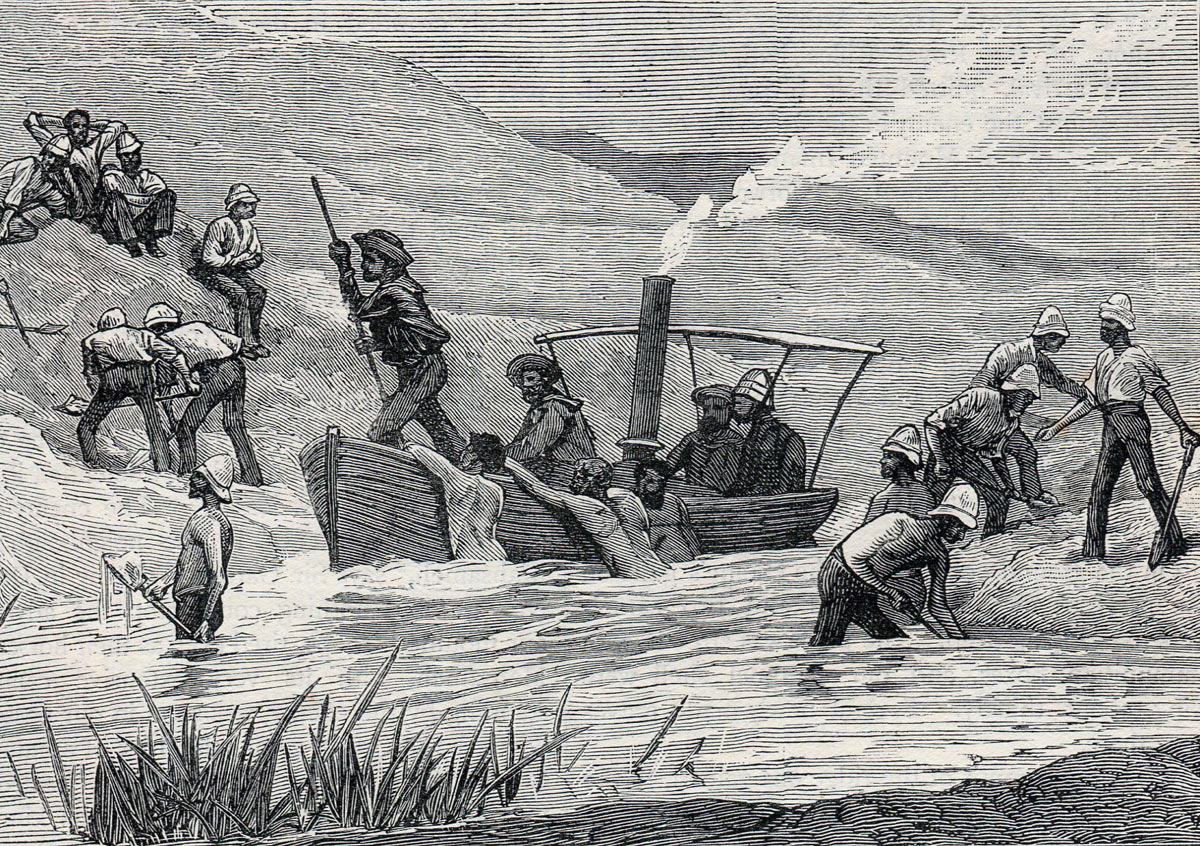
On 24th September 1803, Lake marched for Agra, down the banks of the River Jumna, while his artillery was transported in boats.

On 2nd October 1803, Lake reached the Mahratta arsenal of Muttra, where the various British and Bengal infantry and cavalry regiments that had been detached re-joined the main army. Four more French officers surrendered to Lake.

On 4th October 1803, Lake reached Agra.

On 10th October 1803, Lake launched assaults on the city which led to the surrender of the garrison on 18th October 1803.

Agra was a key fortress, its capture considerably enhancing the standing of the East India Company and providing large quantities of military stores for Lake’s army, with significant sums of cash as prize money.

Lake’s army was further reinforced by 2,500 Mahratta prisoners volunteering to join the East India Company service and the arrival of 5,000 horsemen sent by the Rajah of Bhurtpore to join the British.

Map of Lake's cavalry attack at the Battle of Laswaree on 1st November 1803 in the Second Mahratta War: battle map by John Fawkes
Map of Lake’s cavalry attack at the Battle of Laswaree on 1st November 1803 in the Second Mahratta War: battle map by John Fawkes

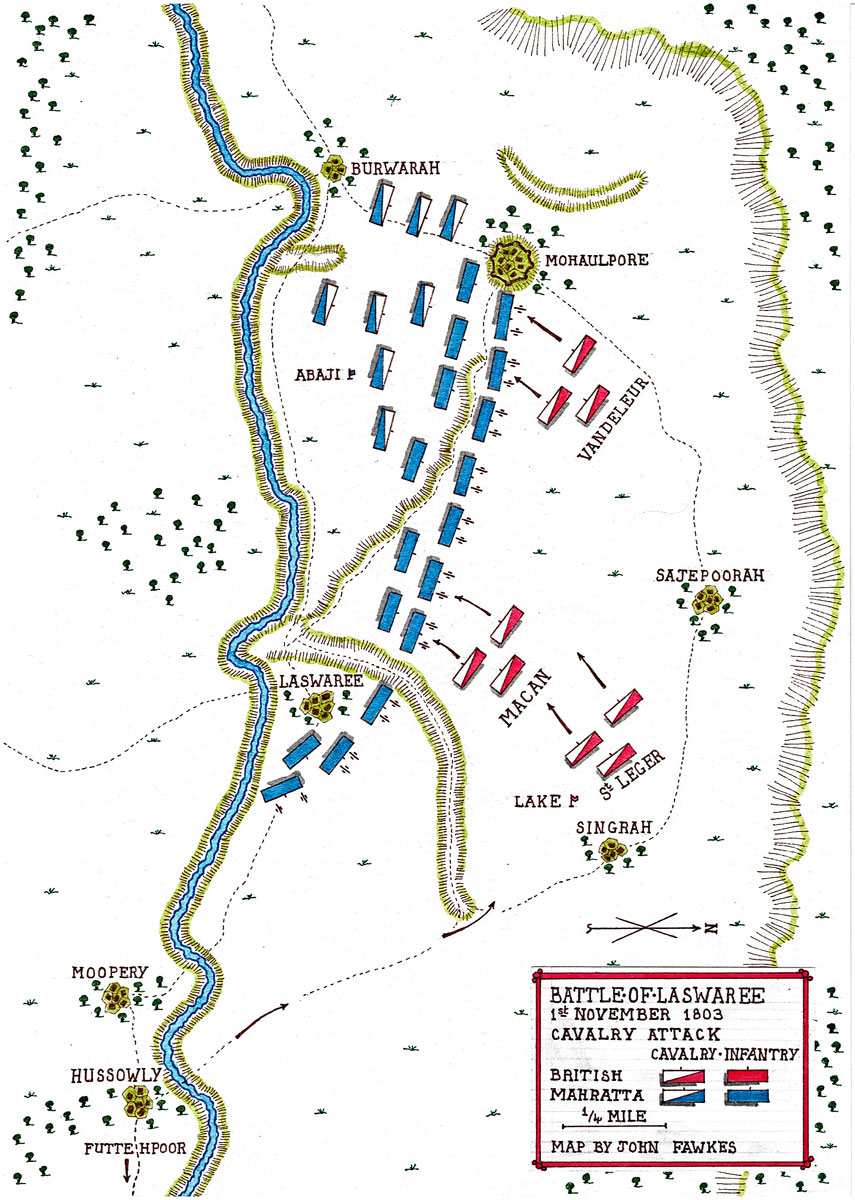
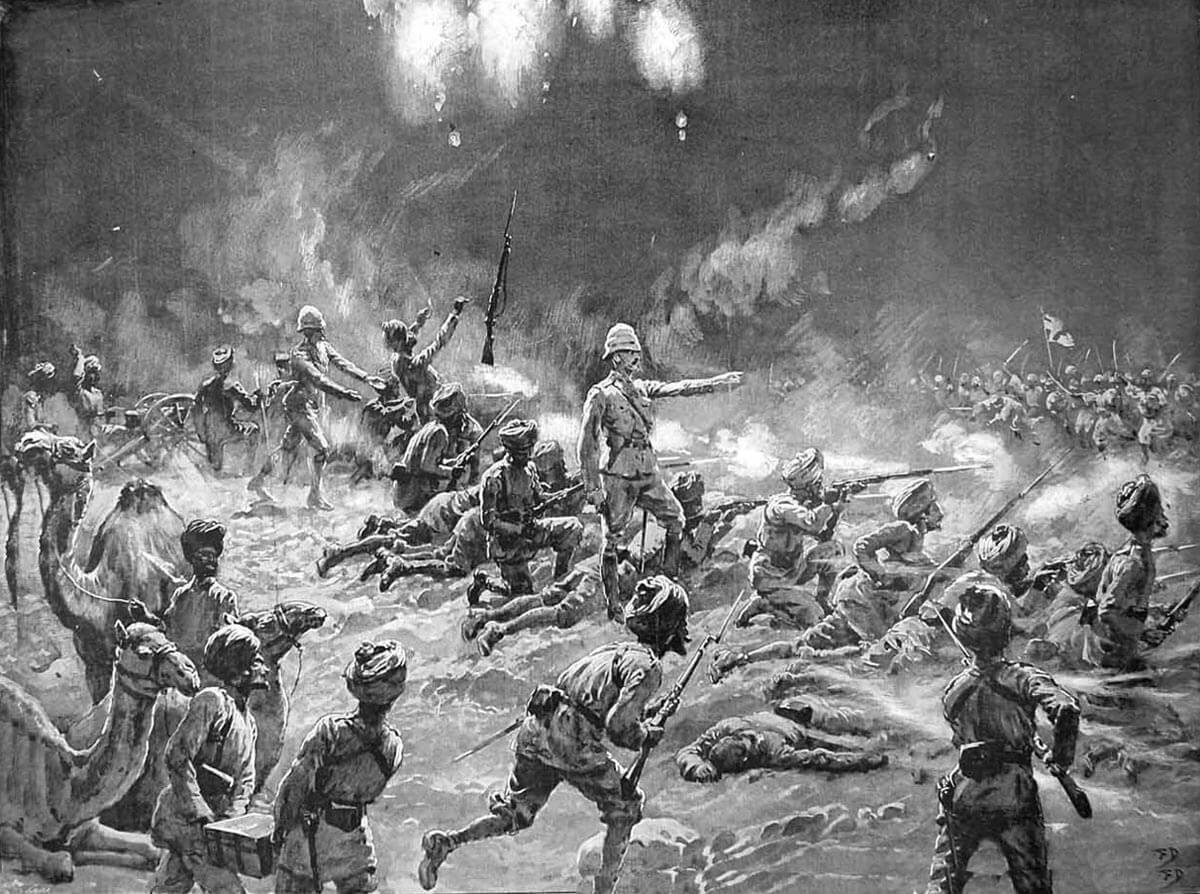
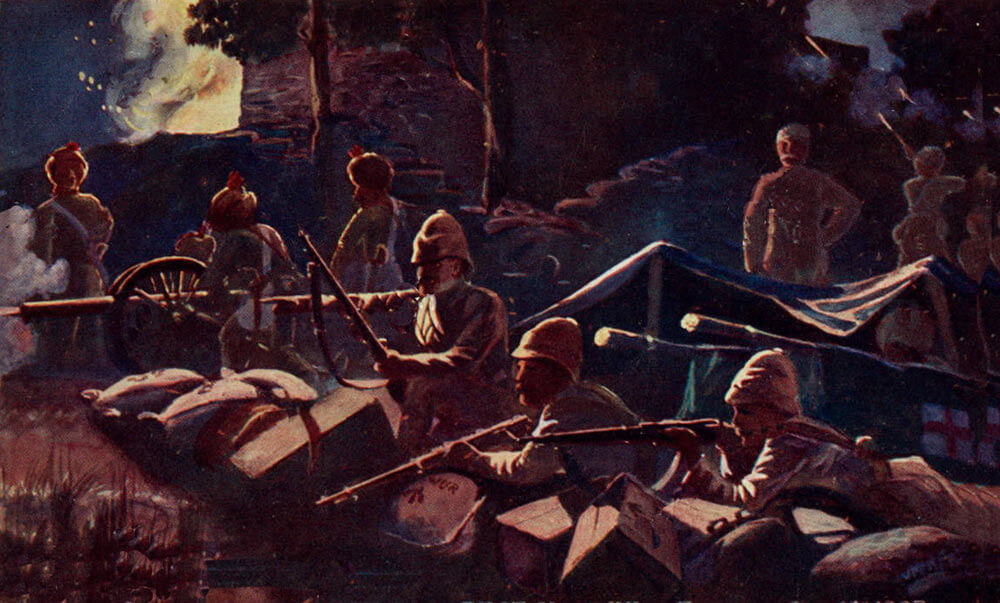
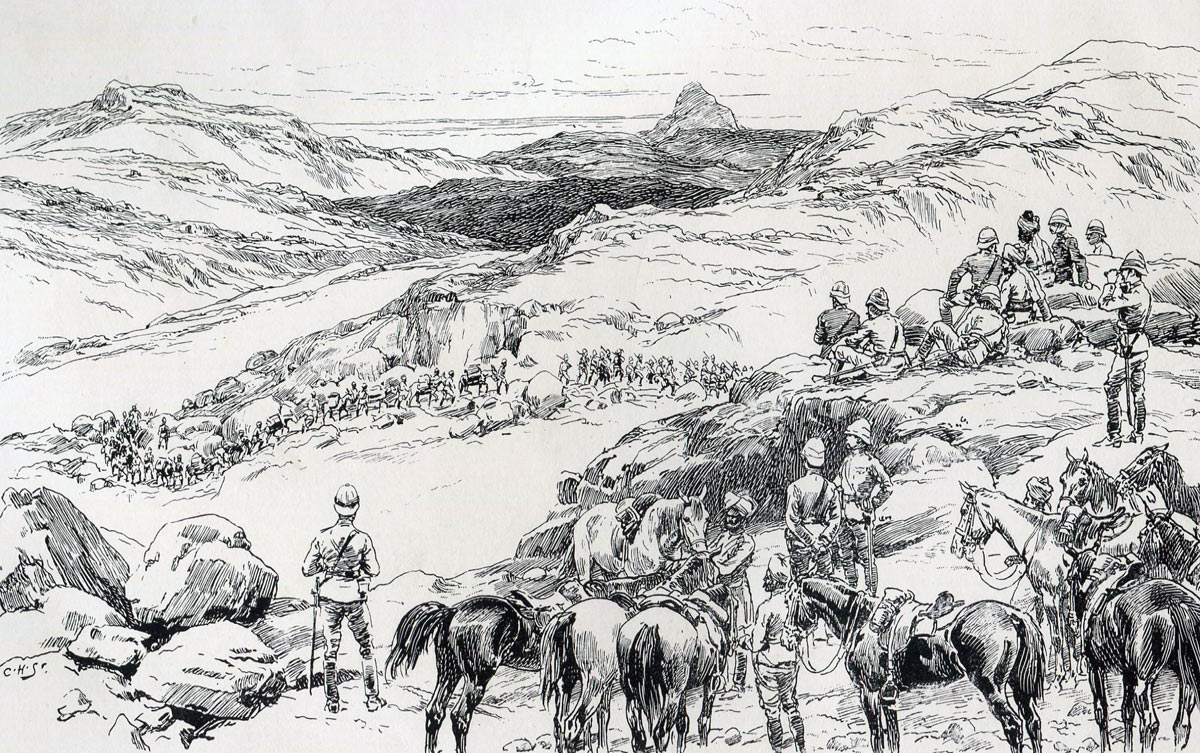
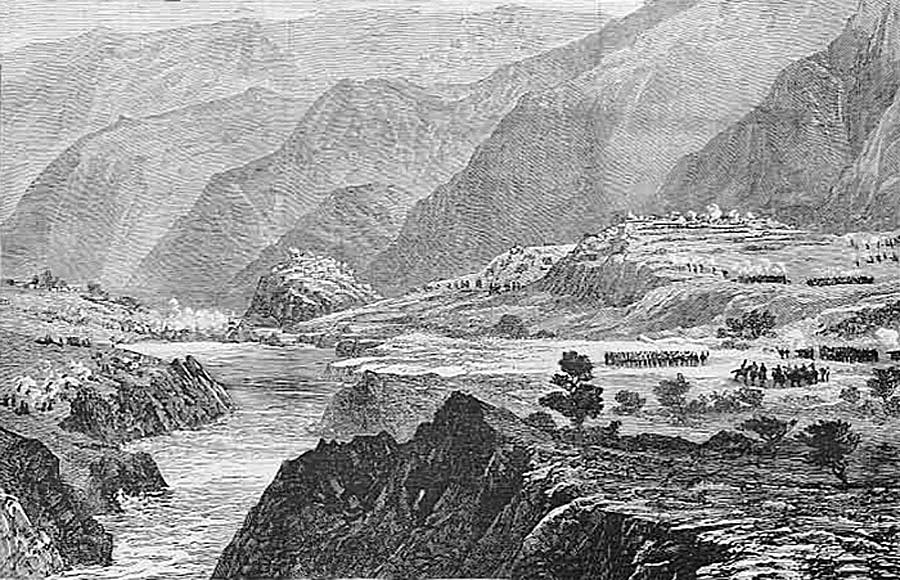
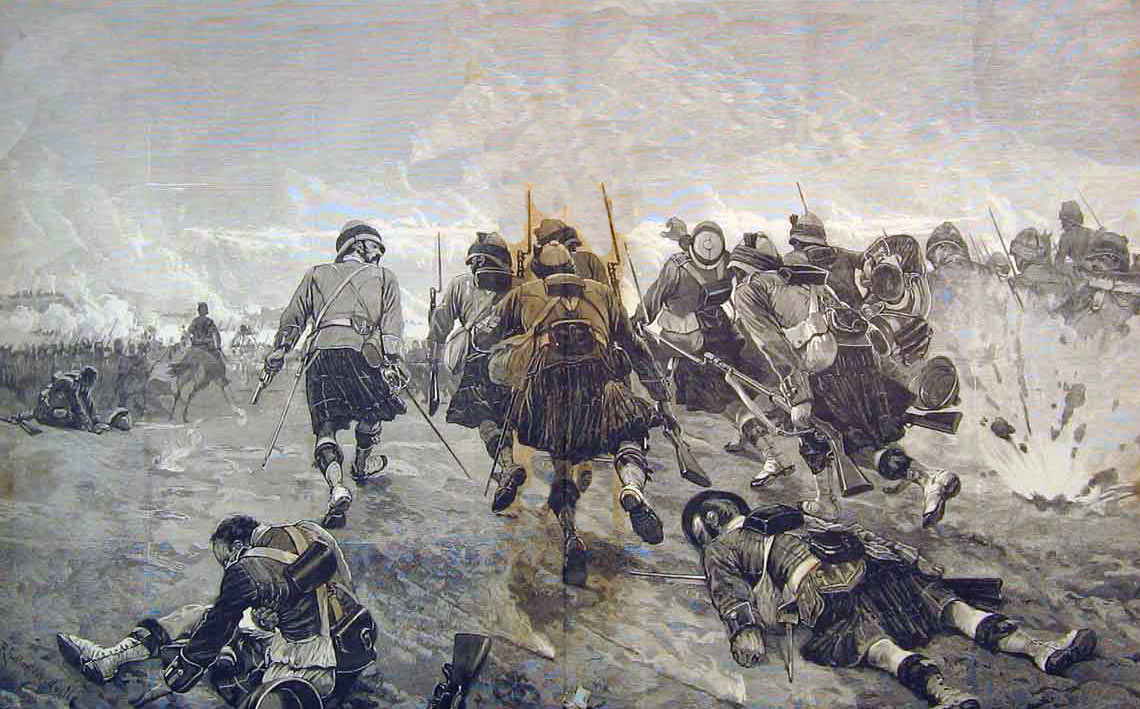
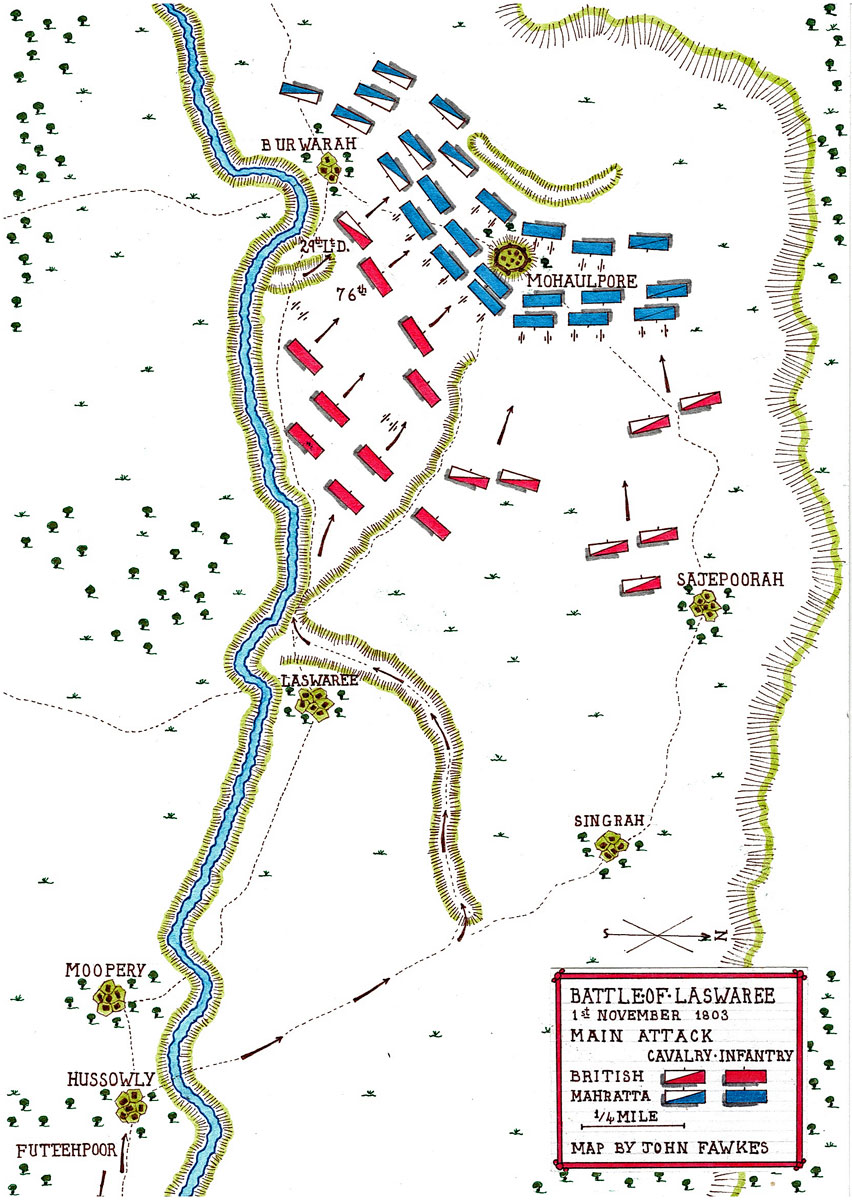
The Battle of Laswaree:

In spite of his defeats at Aligarh and Delhi and the loss of much of the Agra garrison, Scindia Rao still deployed an army of 9,000 infantry, 5,000 horsemen and a substantial artillery in Hindoostan (the North of India around Delhi).

The senior French officers having surrendered to the British, this army was commanded by a Mahratta general, Abaji.

Lake intended to bring Abaji’s army to battle and on 27th October 1803 he marched west, impeded by heavy rain.

On approaching Futtehpoor, the sound of the Mahratta guns could be heard.

Lake left his heavy guns and baggage at Futtehpoor and hurried forward to engage the Mahrattas.

On 31st October 1803, Lake reached the place where Abaji had encamped the night before.

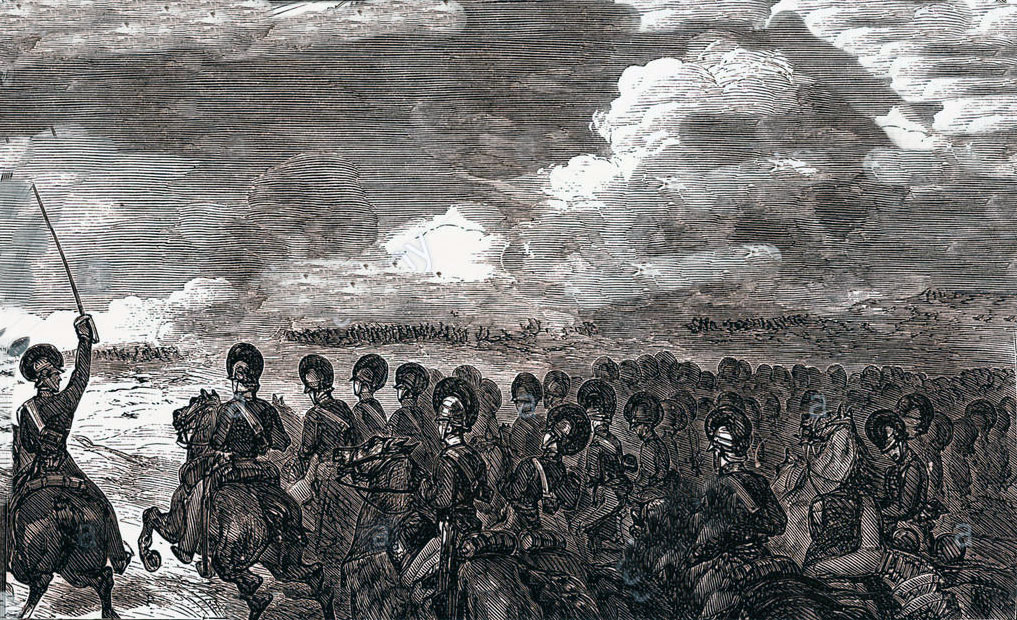
At 11pm that evening, Lake set off with his cavalry in pursuit of the Mahratta army, leaving his infantry to follow.

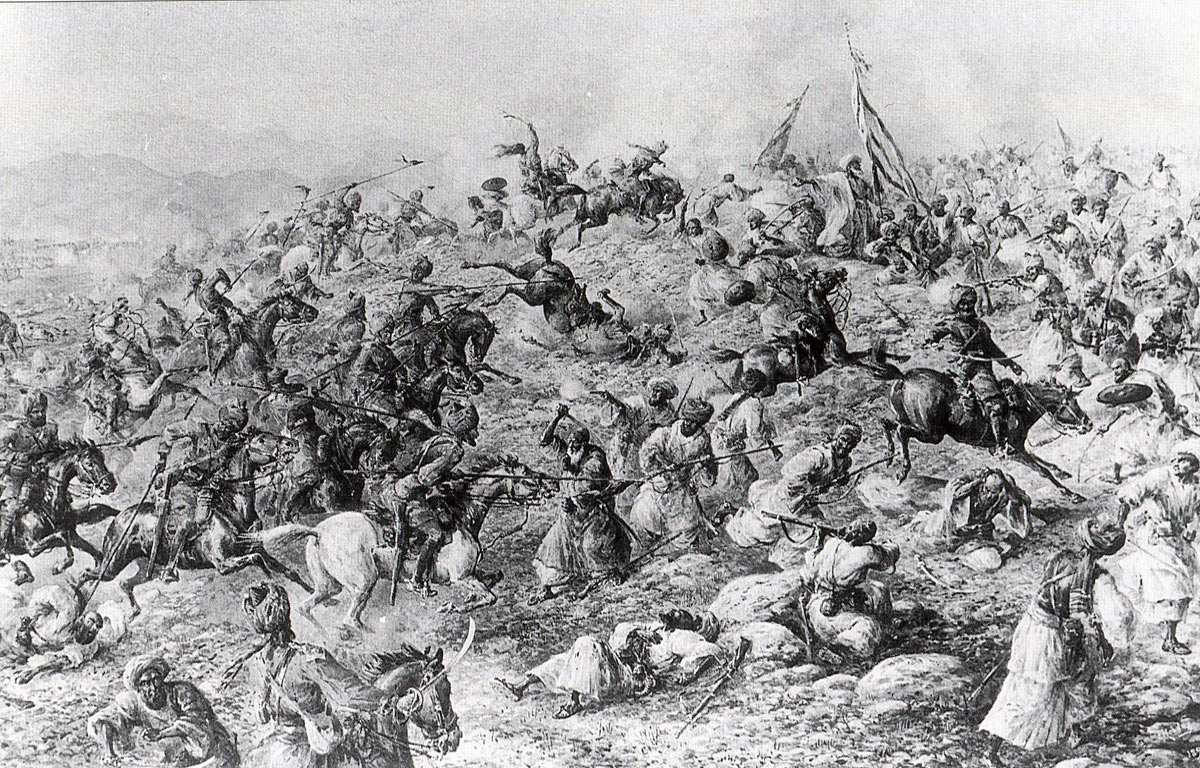
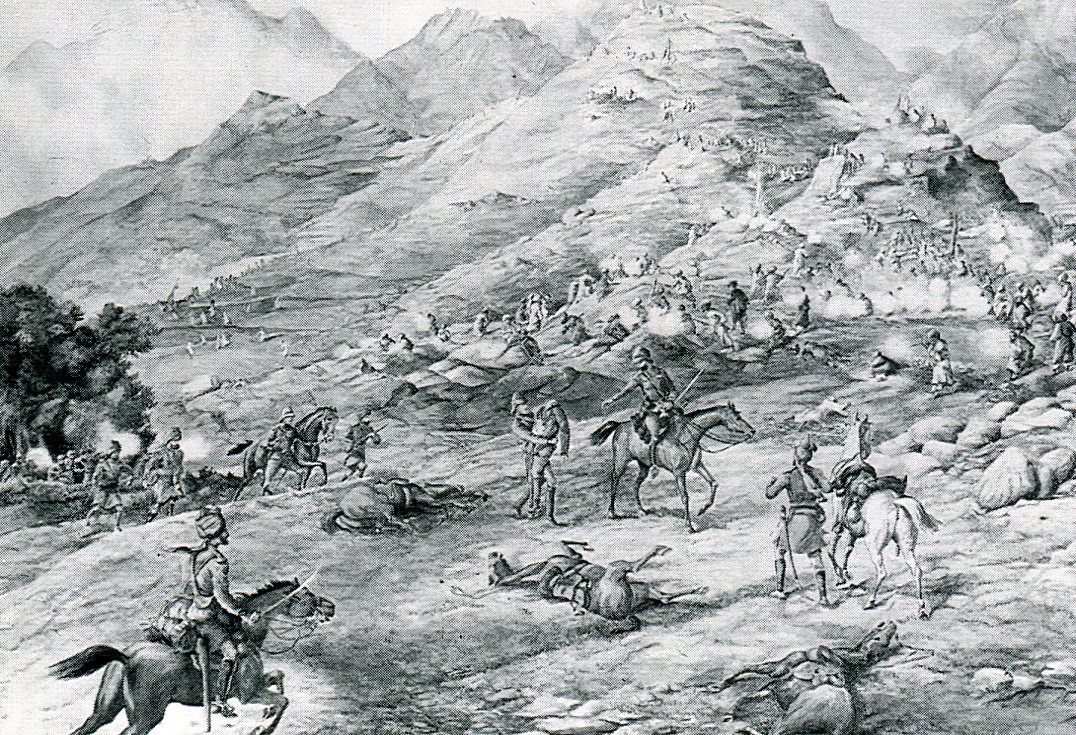
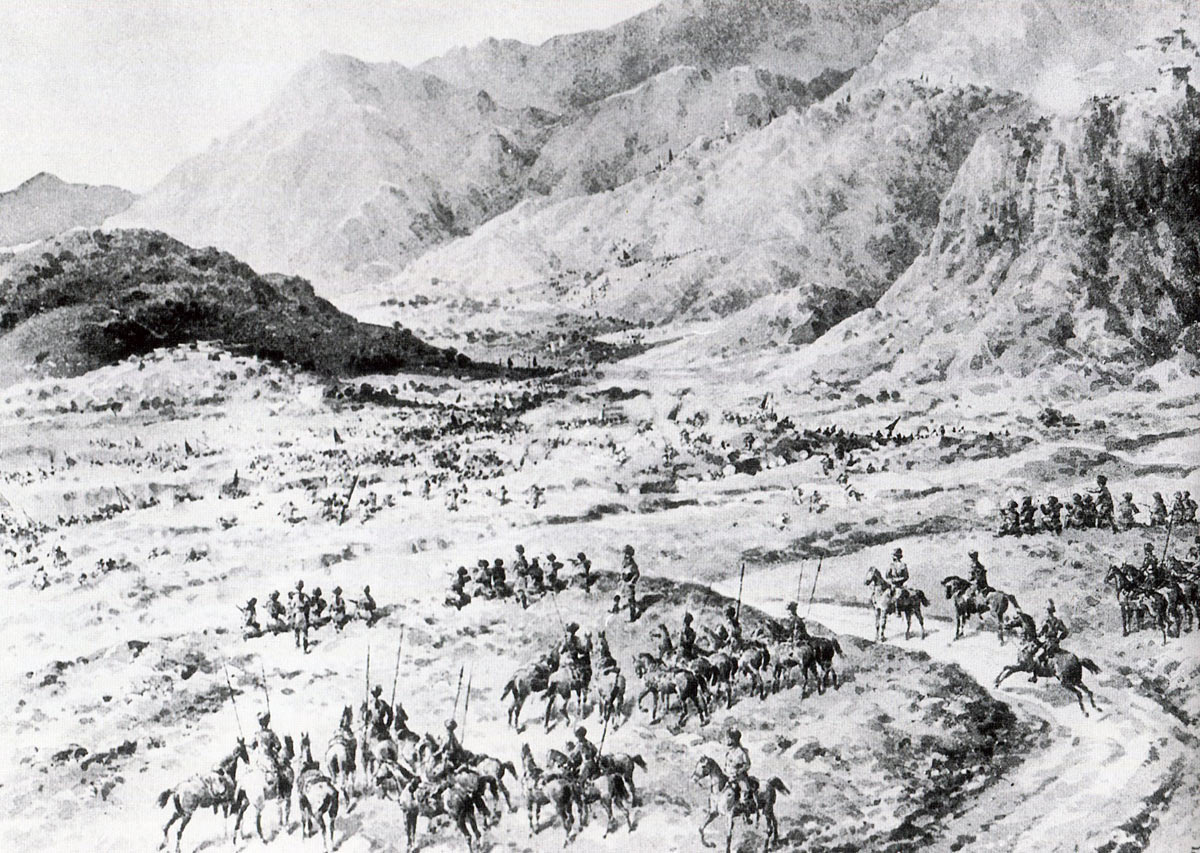
Lake marched 25 miles in six hours, coming up with Abaji’s army at dawn on 1st November 1803.

The Mahratta army was clearly in a hurried and disorganised retreat.

The British Light Dragoon attack at the Battle of Laswaree on 1st November 1803 in the Second Mahratta War

Seeing that Lake’s cavalry was about to attack them, the Mahratta troops cut into the embankment of a large reservoir, flooding the area and slowing Lake’s advance.

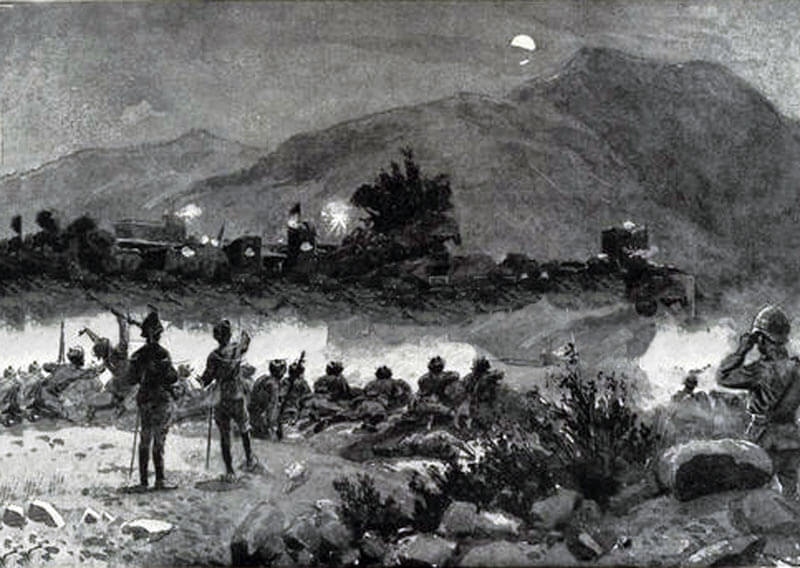
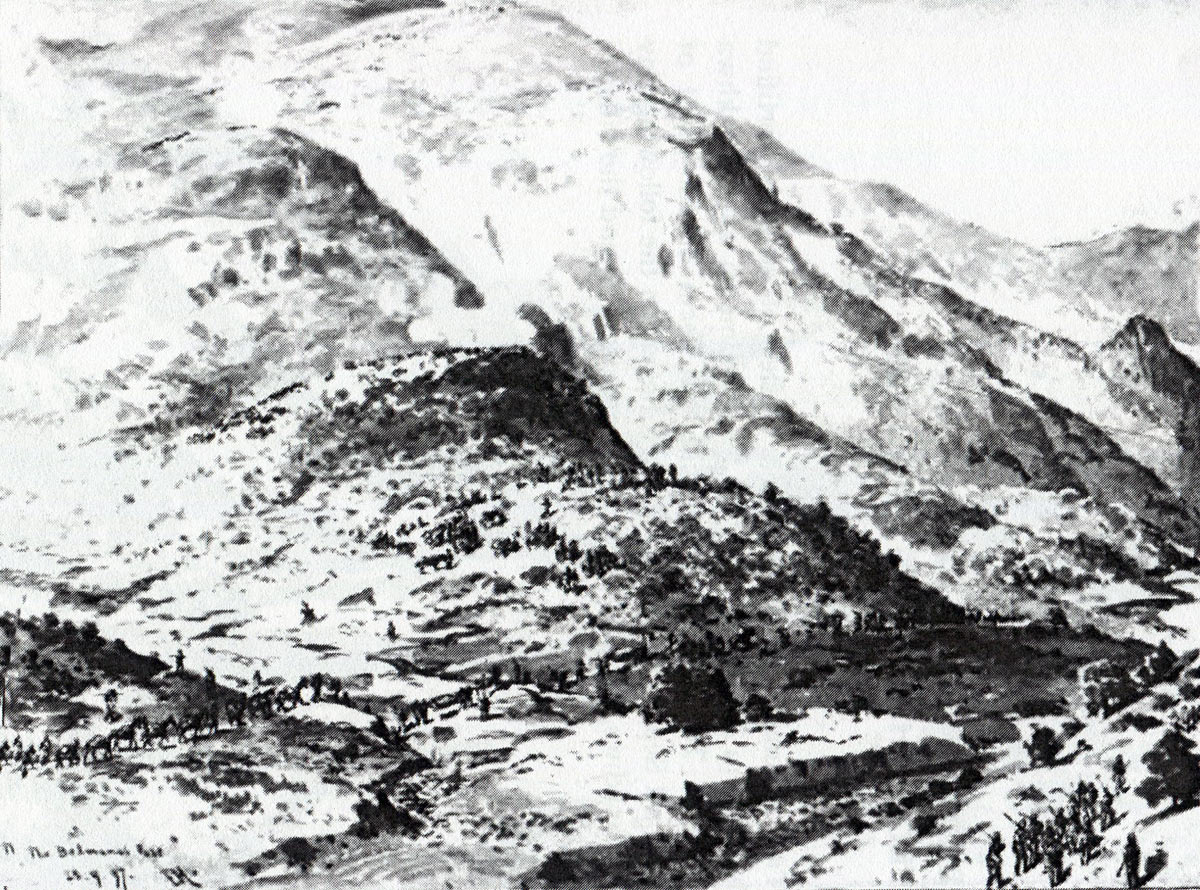
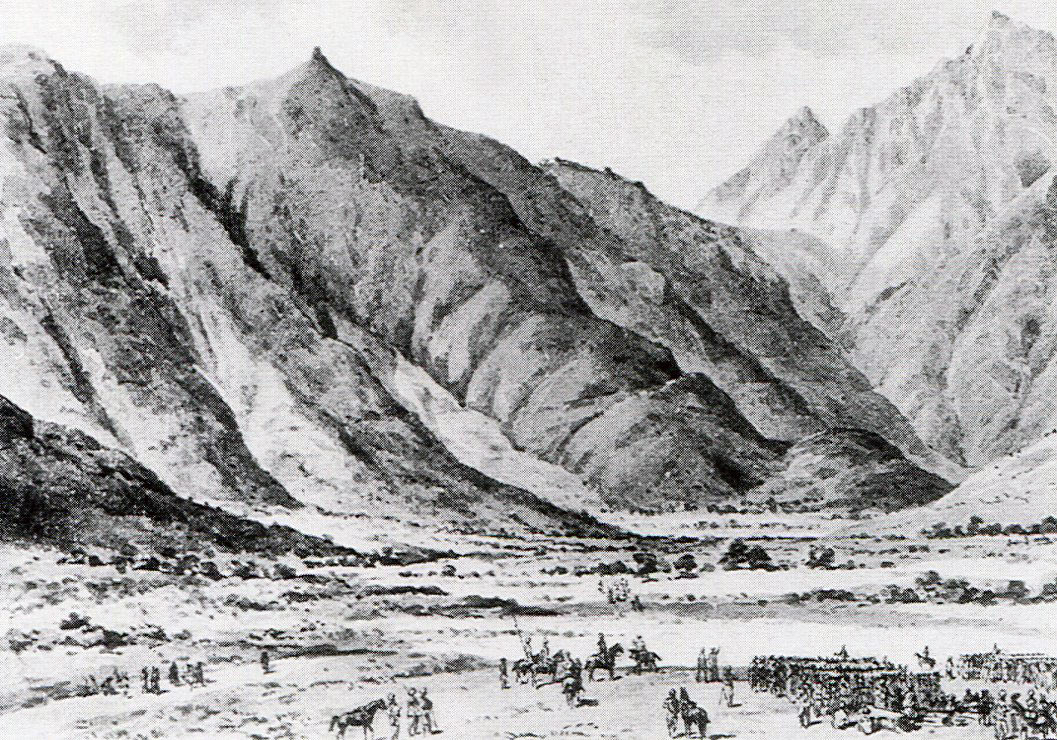
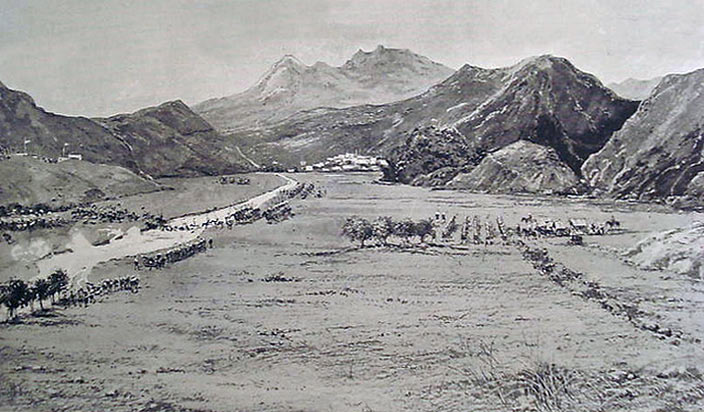
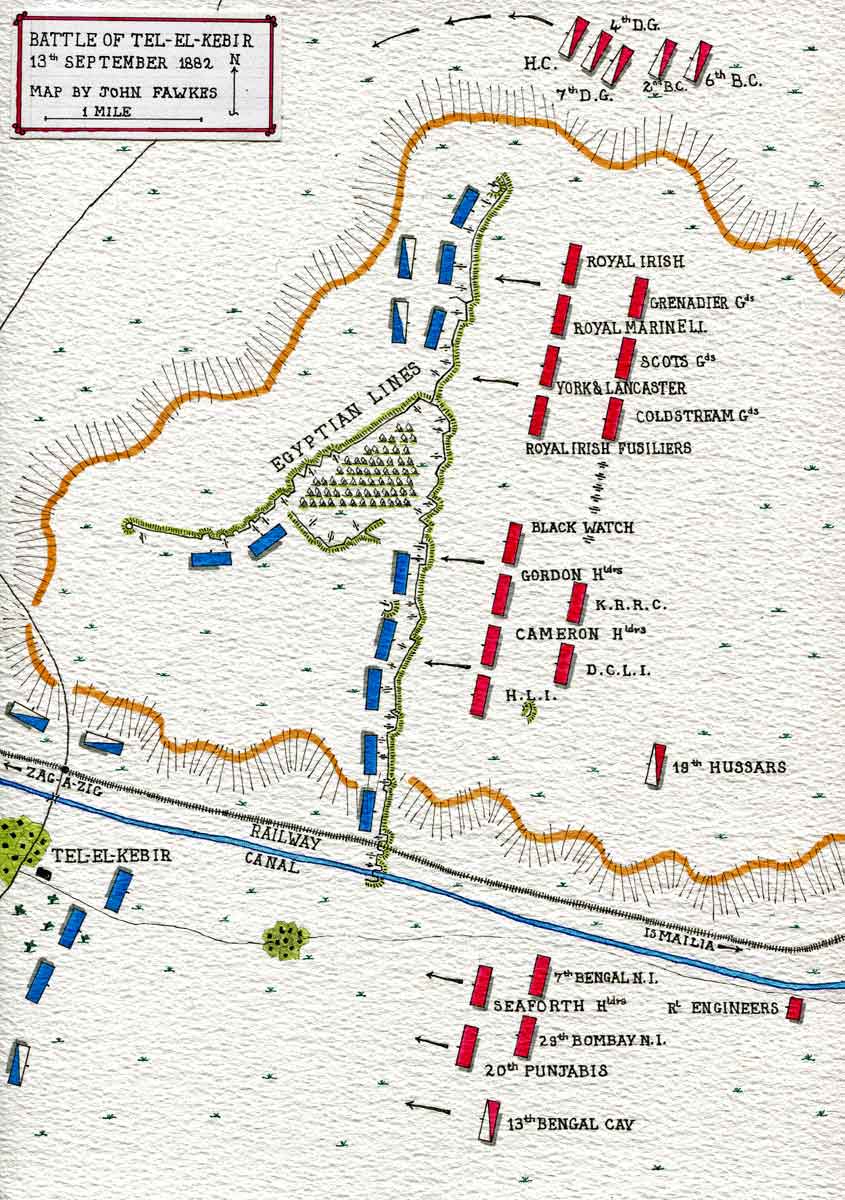
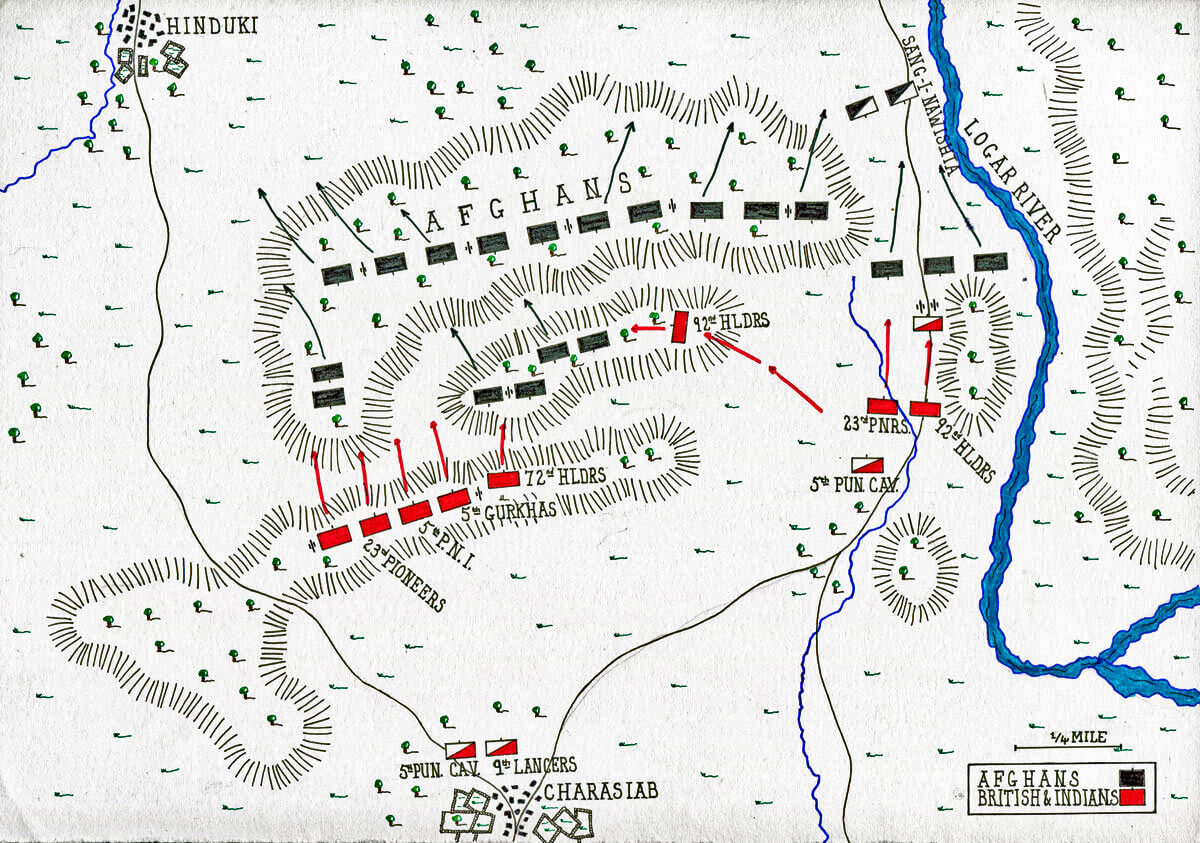
The Mahratta army continued for a short distance before taking up a position between the village of Laswaree, on its right and the fortified village of Mohaulpore, on its left.

These two villages were on the north side of a steep-banked stream.

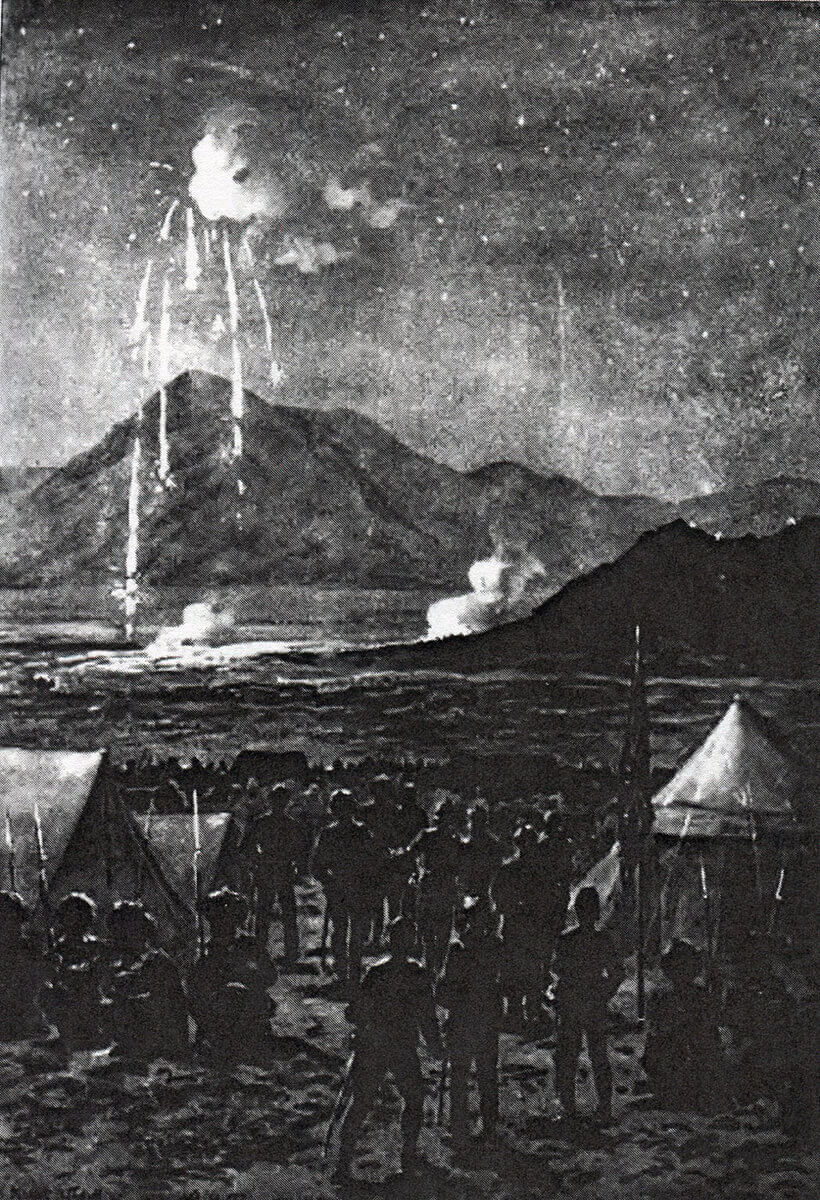
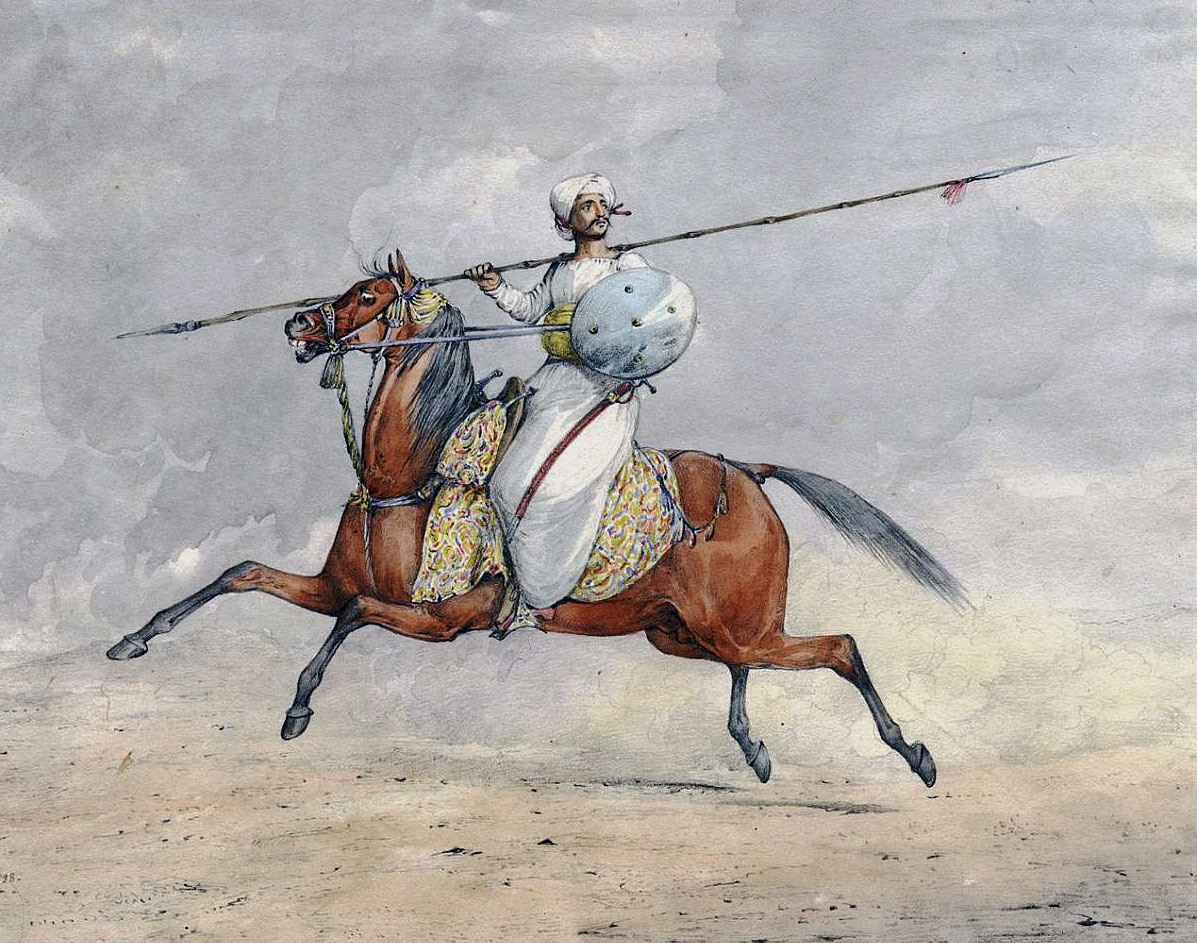
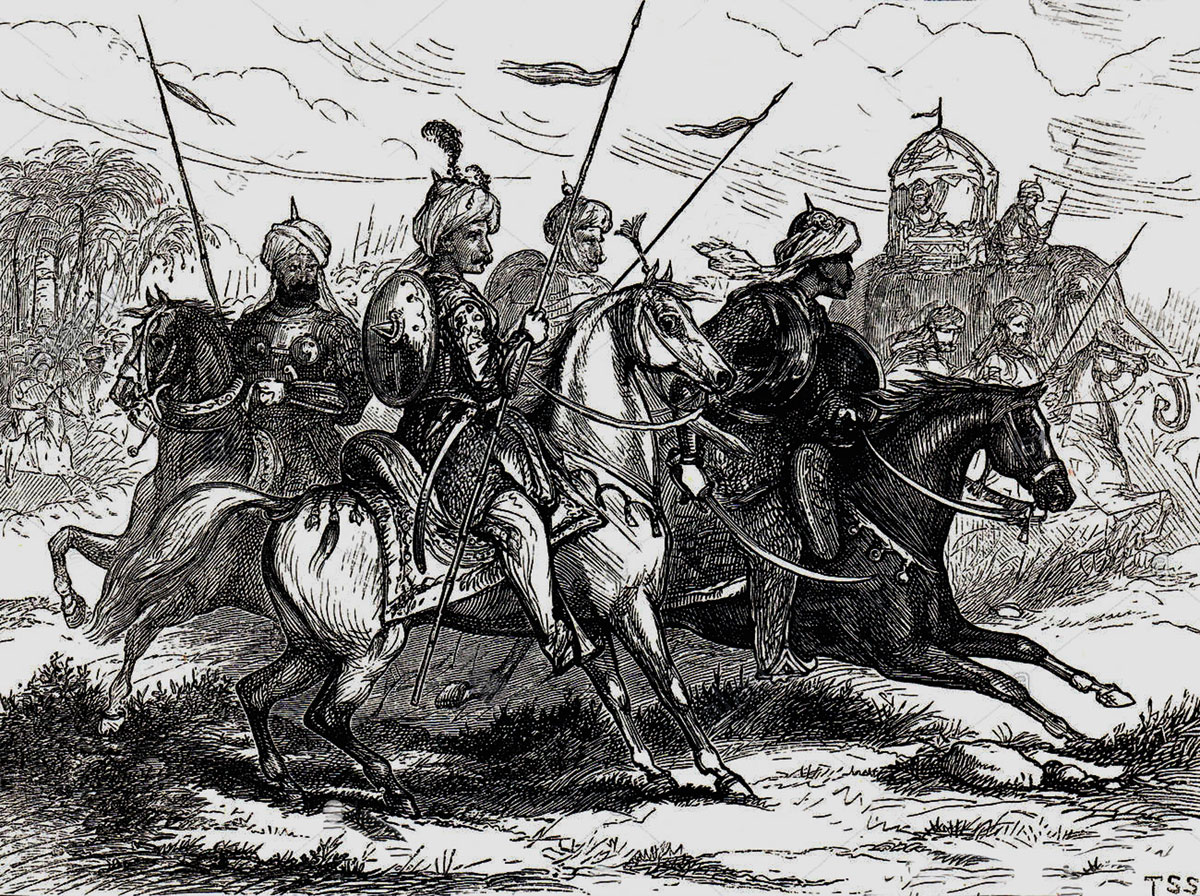
The Mahratta line was fronted by an area of tall grass that masked their positions and concealed their artillery, which comprised 72 guns.

In addition, the movement of large numbers of troops threw up dust clouds that increased Lake’s difficulty in resolving whether the Mahrattas were halting to give battle or continuing their retreat.

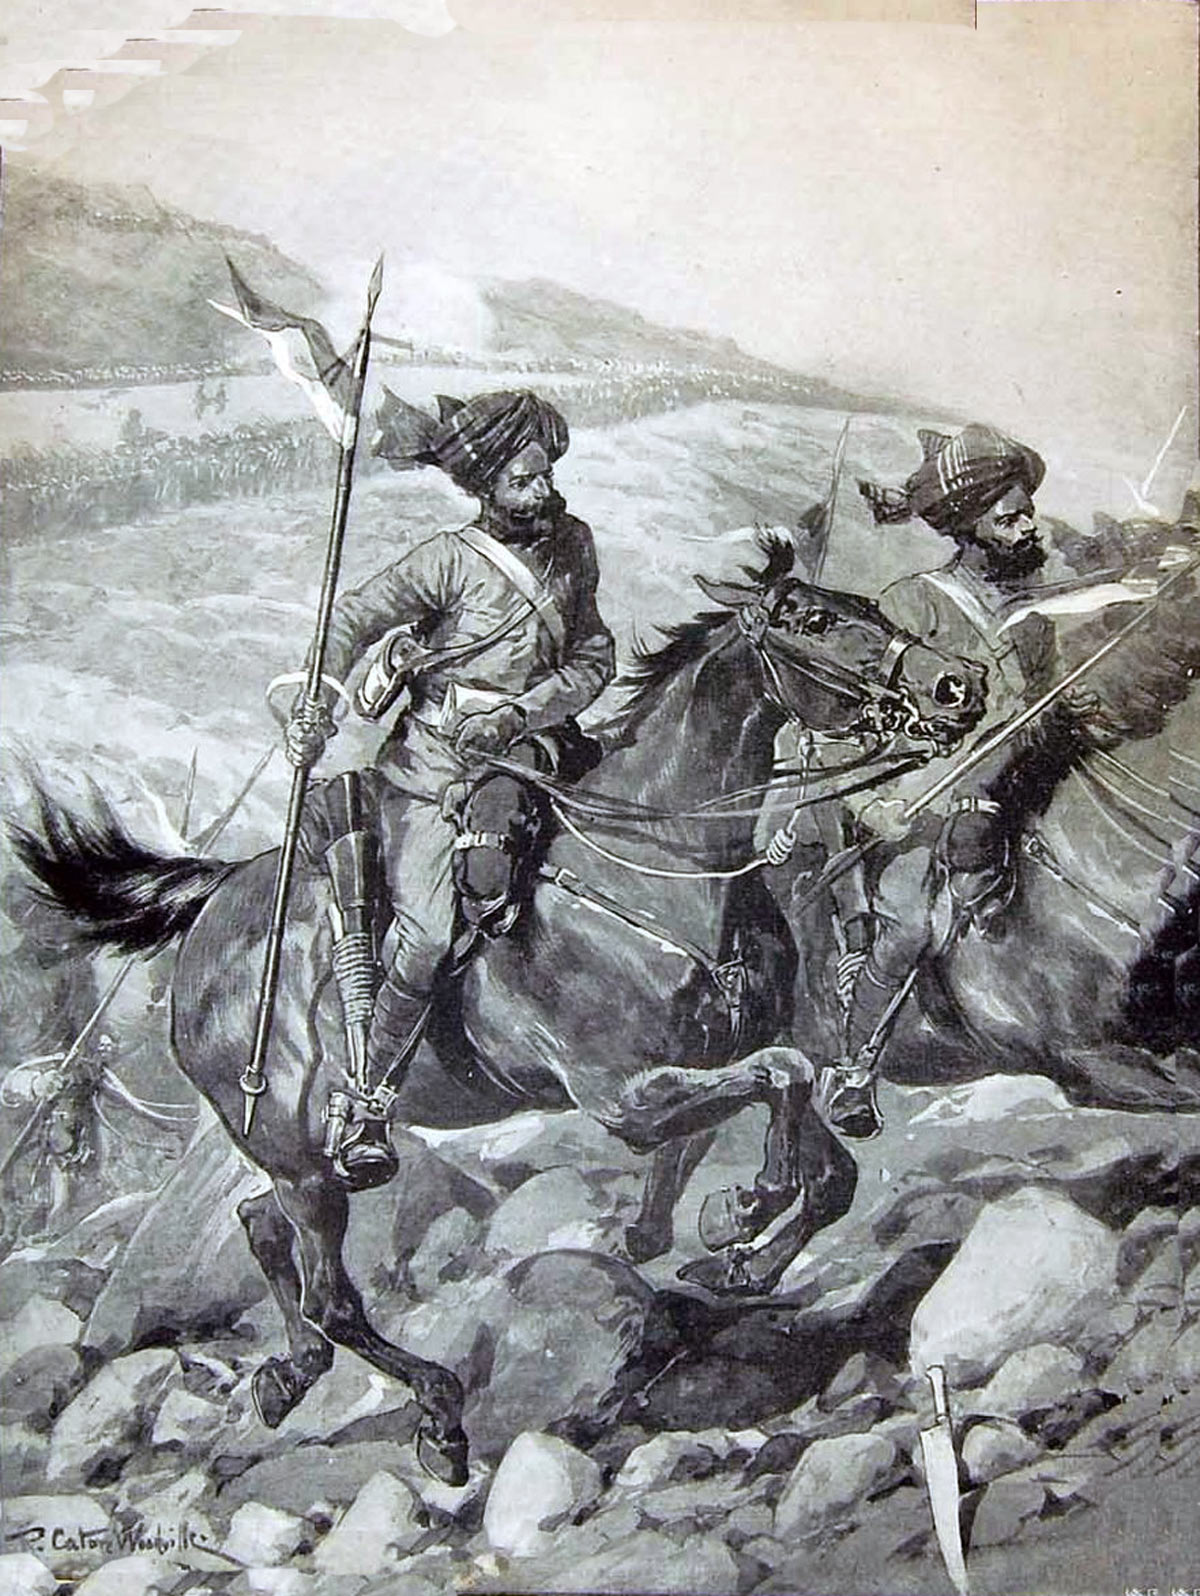
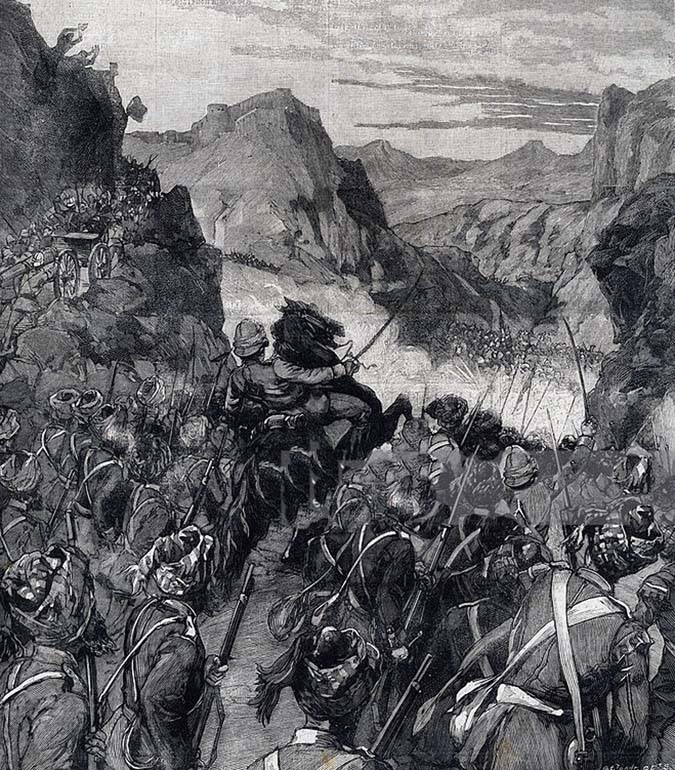
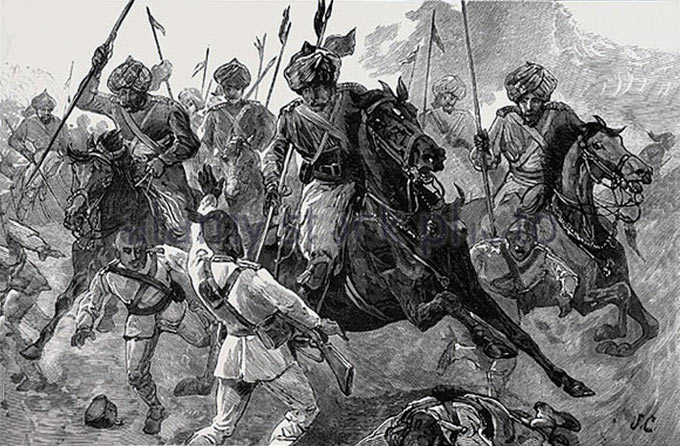
Lake’s cavalry, coming up on the south bank of the stream, crossed to the north bank and approached the Mahratta right flank.

Lake decided to launch his cavalry in attack, without awaiting the arrival of the infantry.

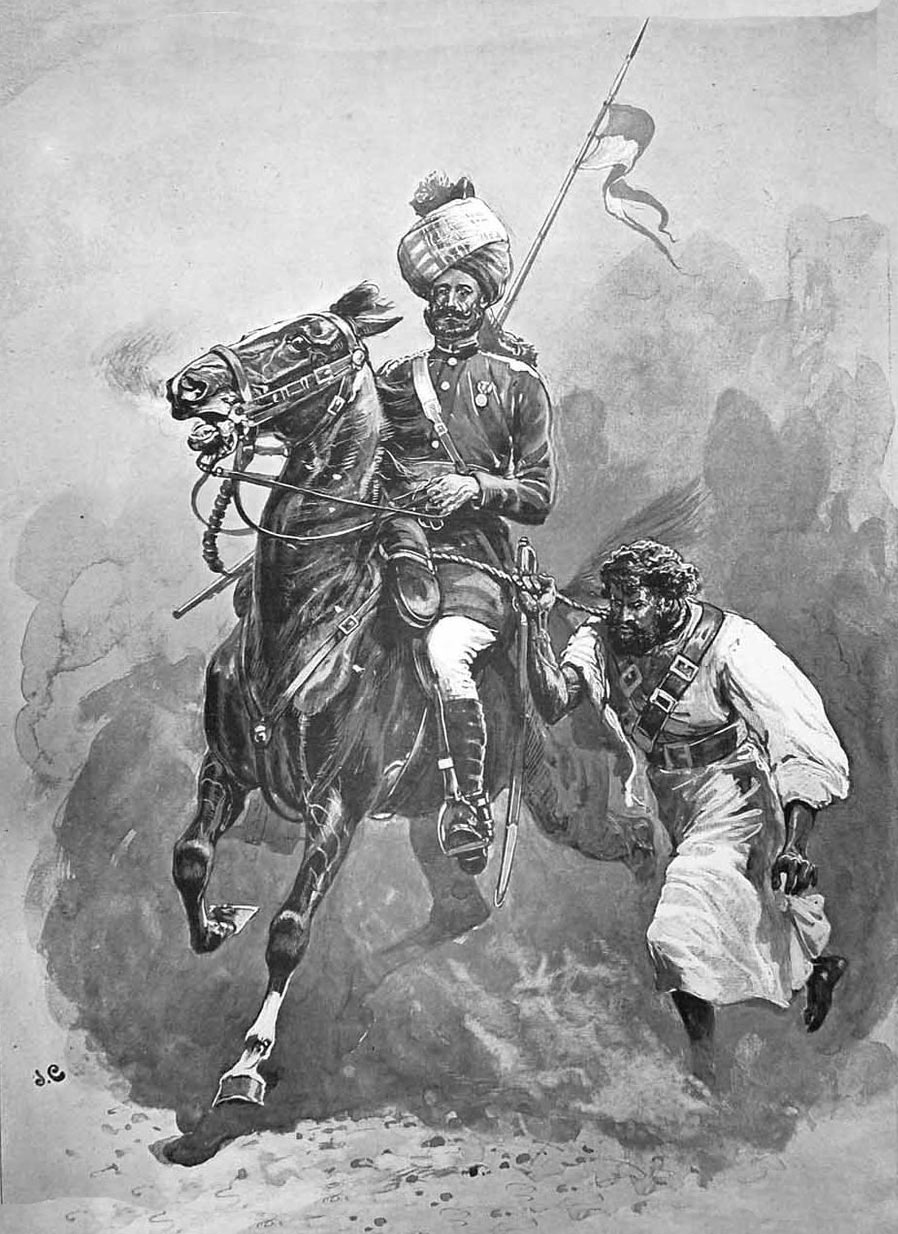
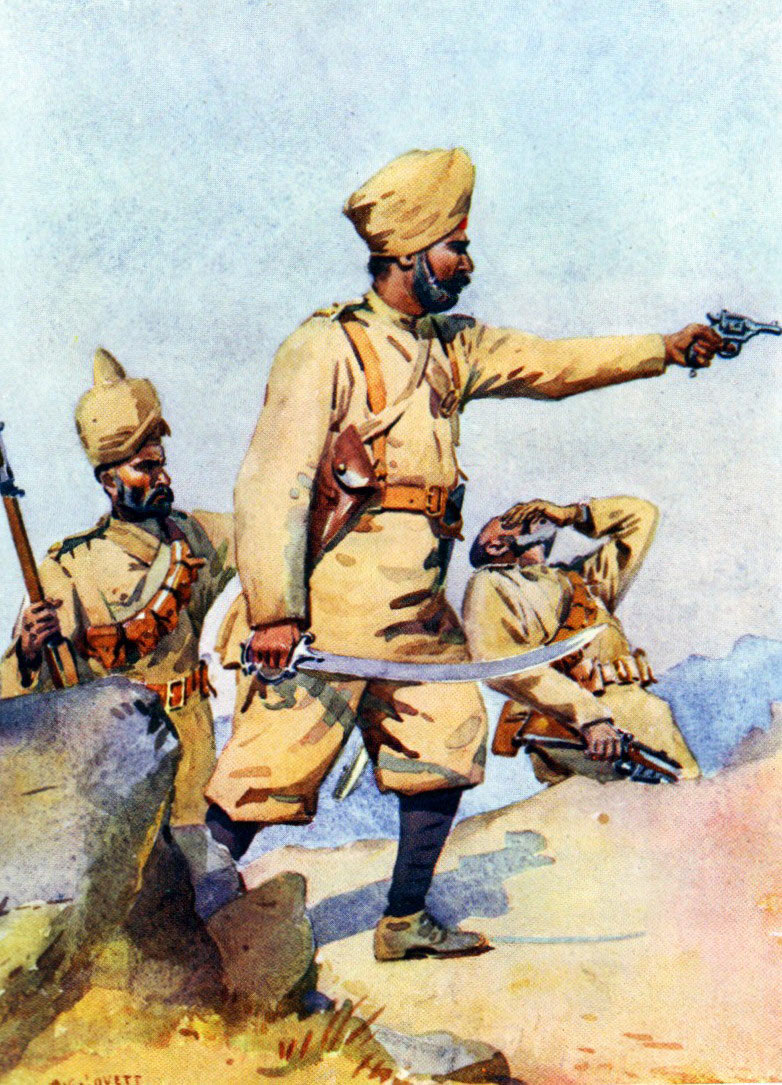
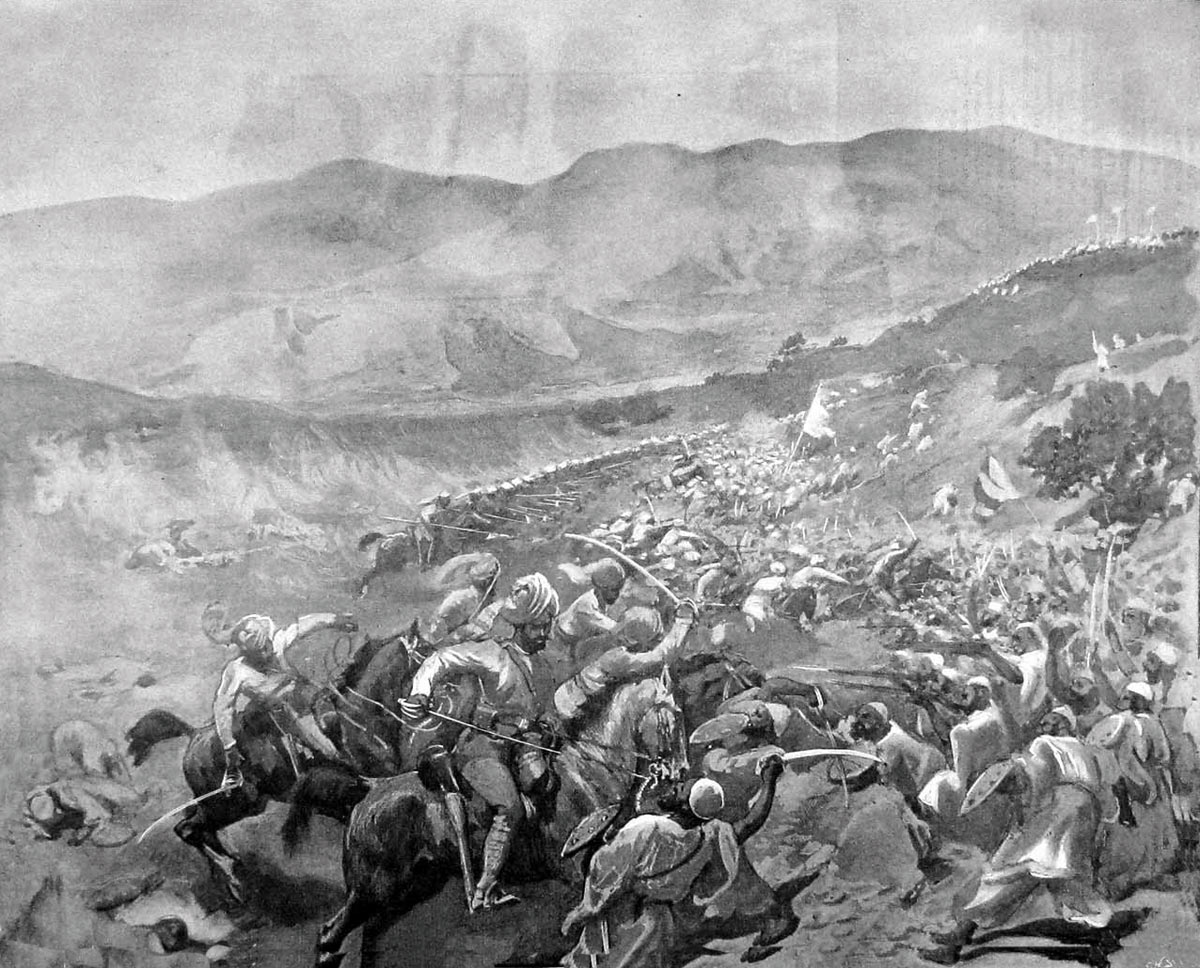
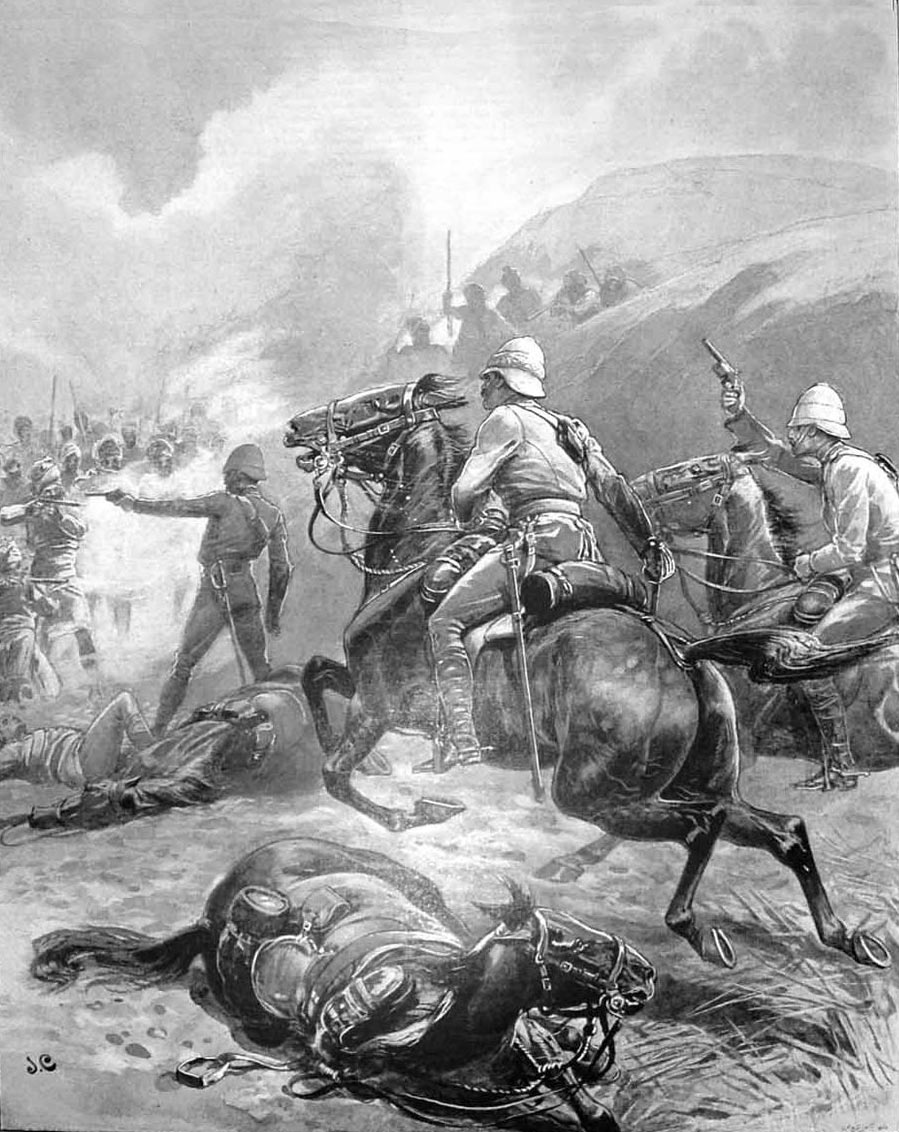
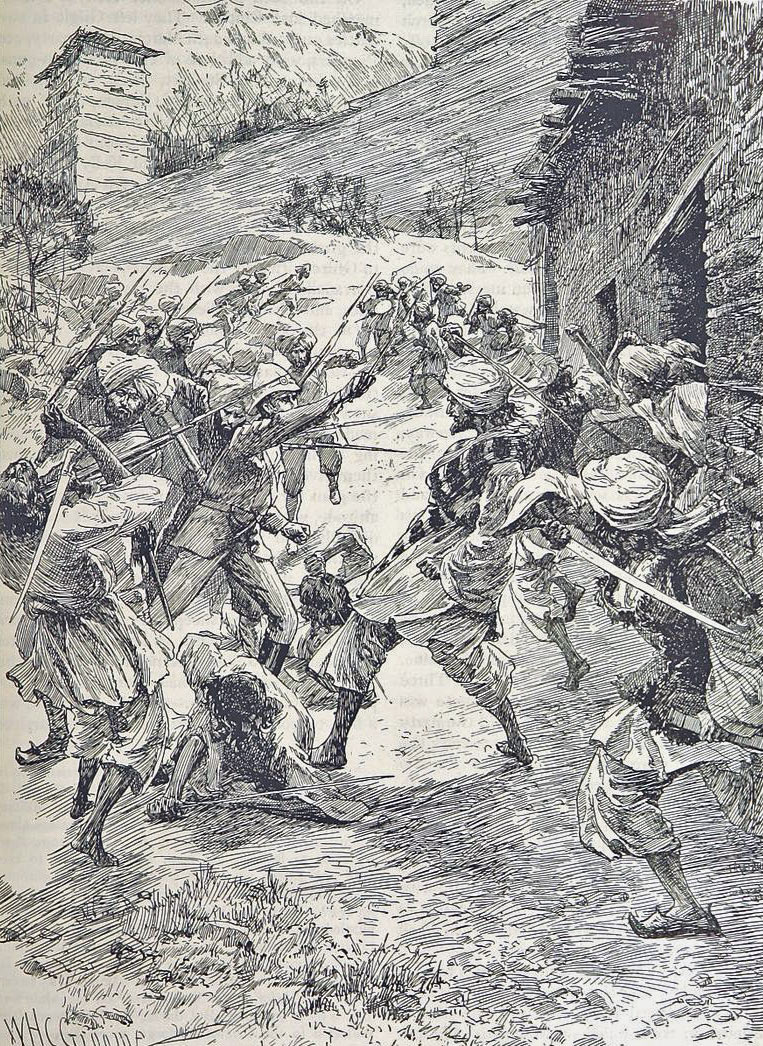
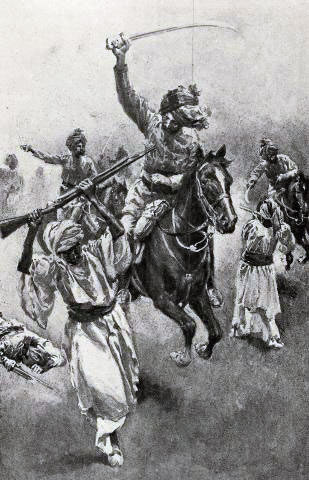
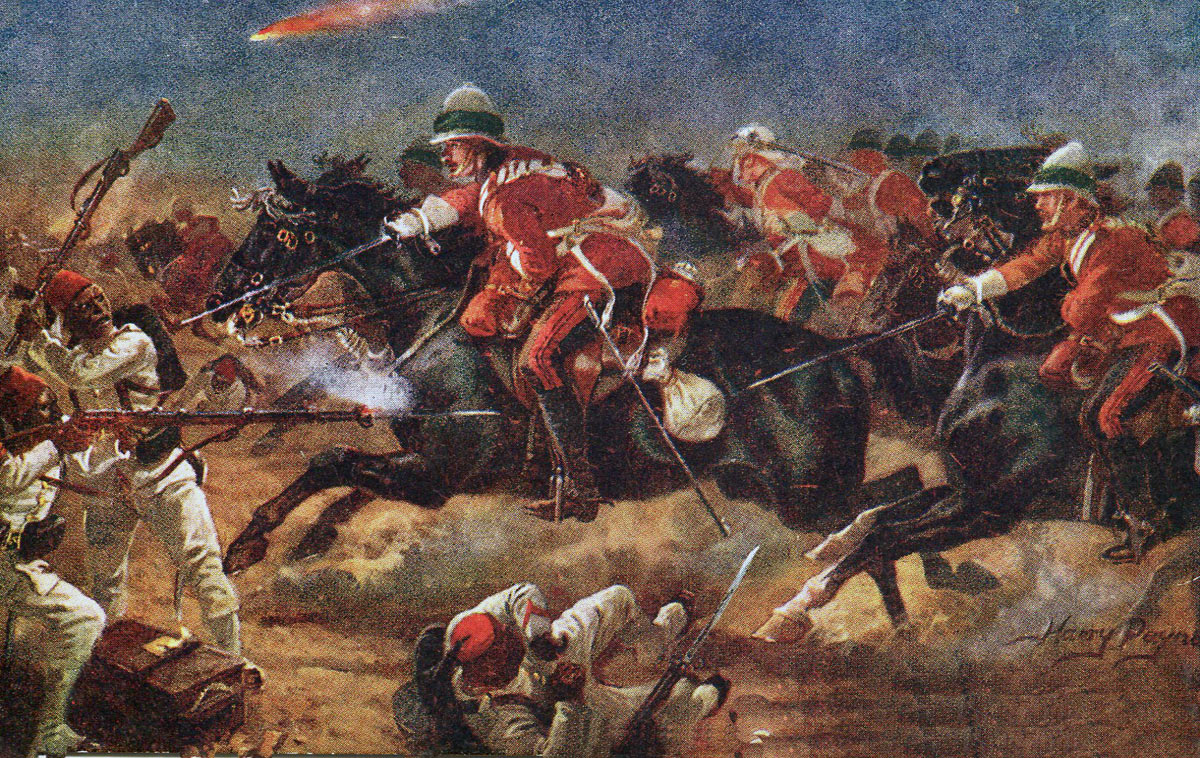
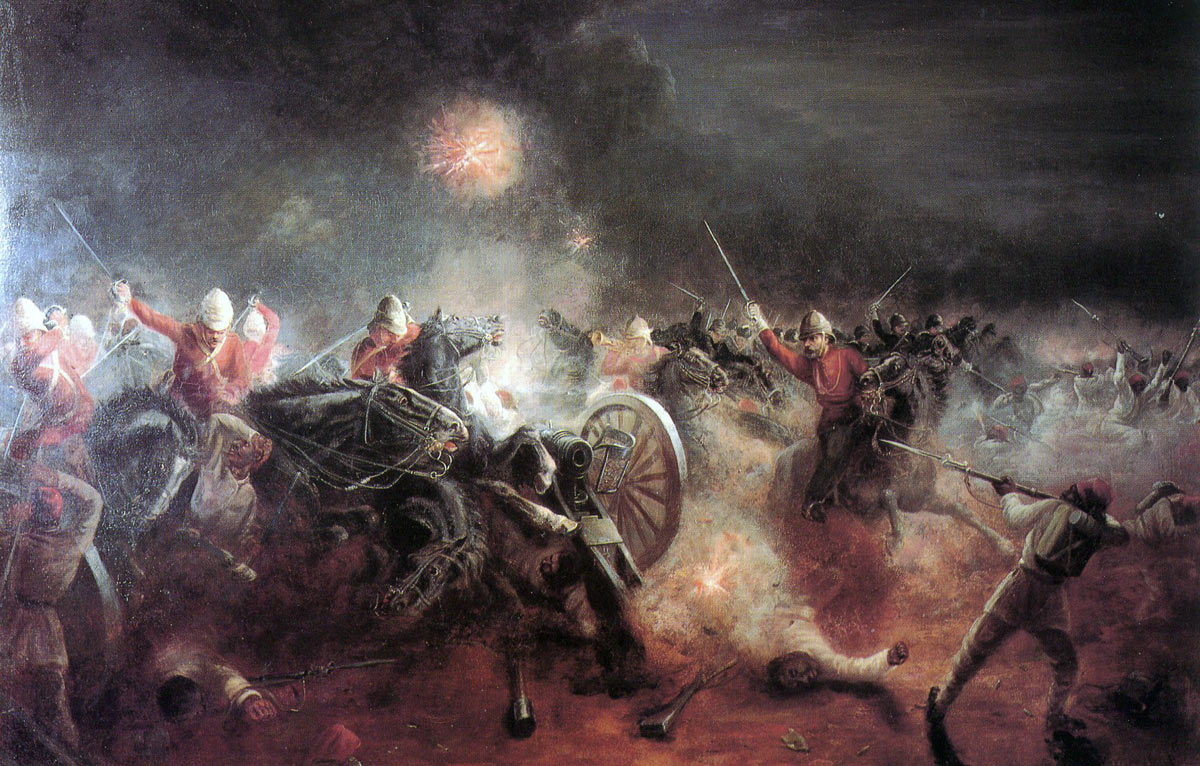
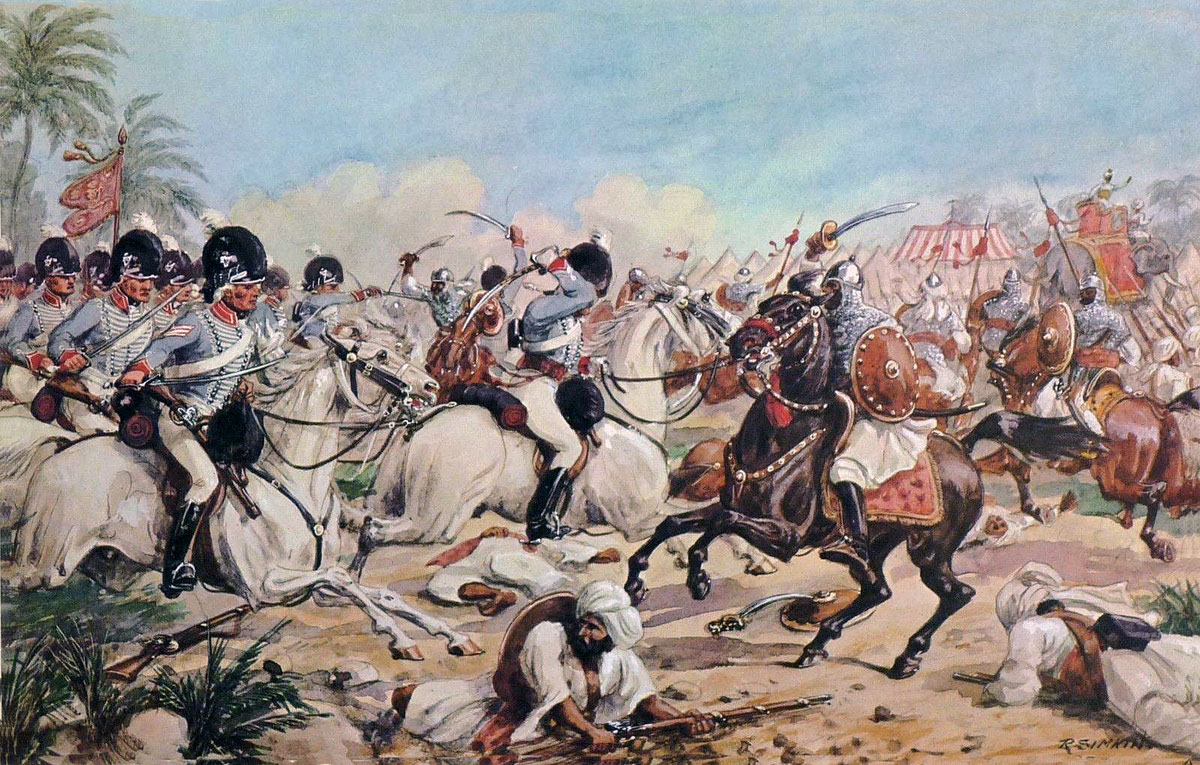
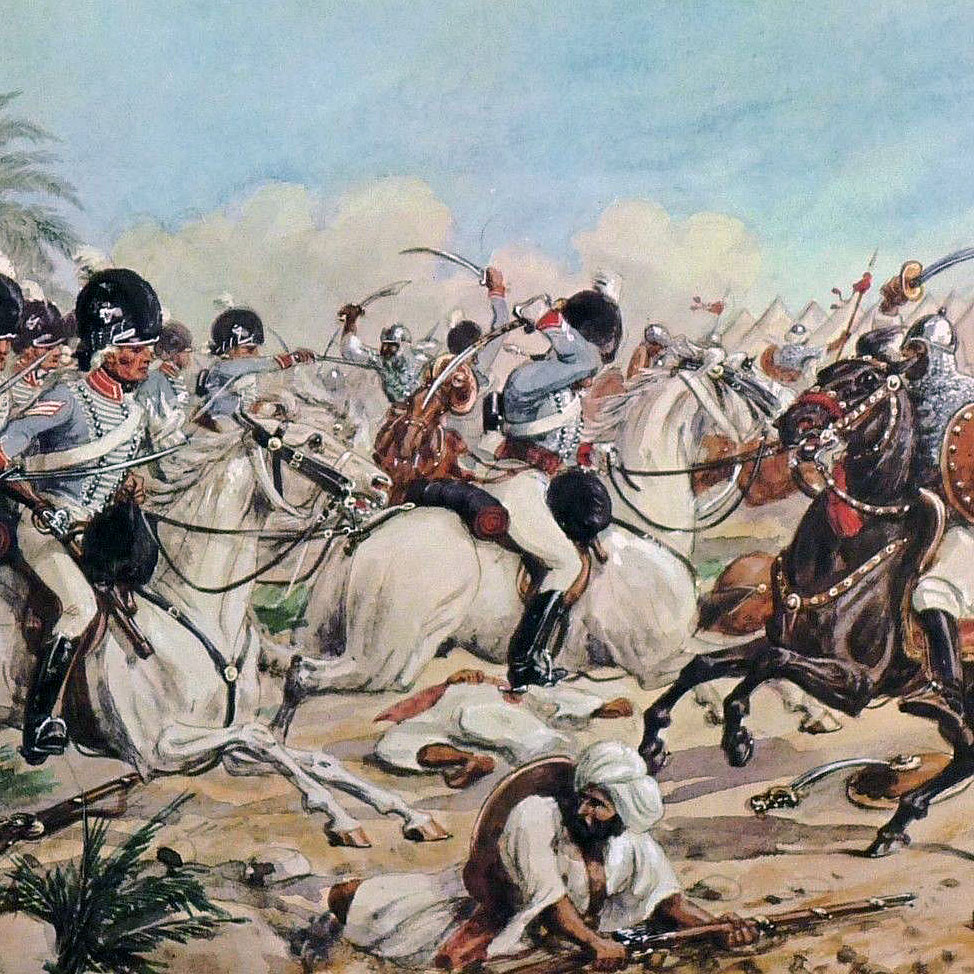
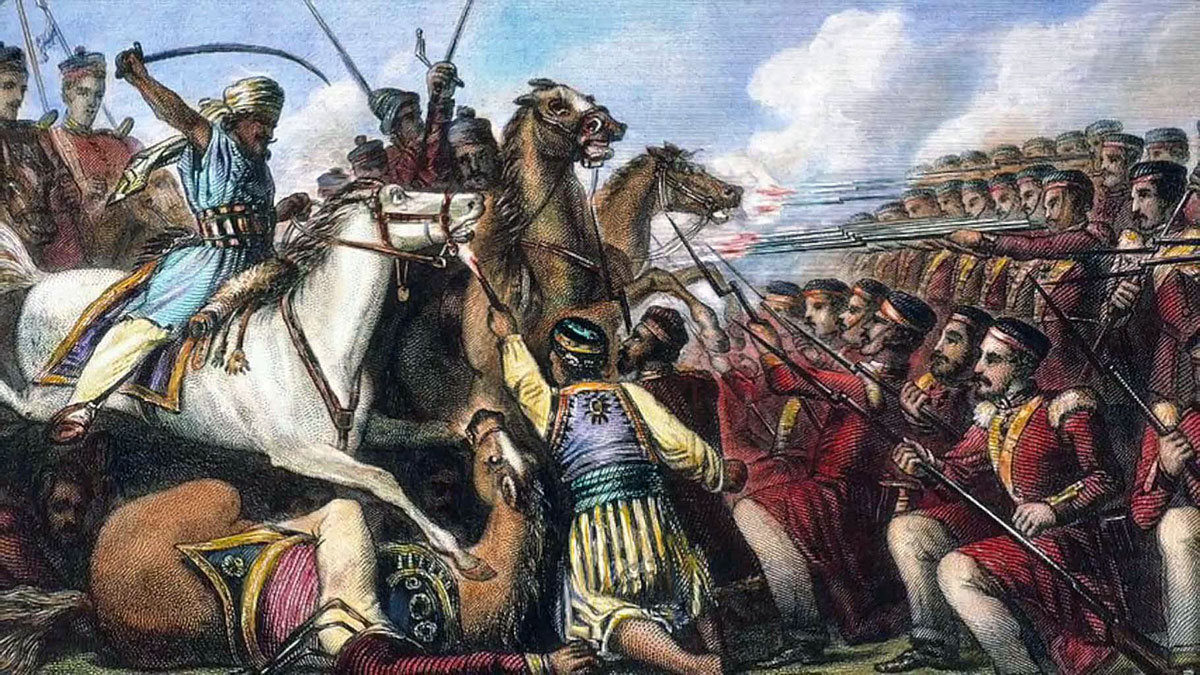
The British 1st Cavalry Brigade, under Colonel Vandeleur, rode the length of the Mahratta line and attacked its left, by the fortified village of Mohaulpore.

Vandeleur’s men drove the Mahratta gunners from their positions and captured the guns, before charging into Mohaulpore itself.

Due to the lack of infantry support, the British cavalry was unable to maintain the position or secure the captured guns and were ordered by Lake to fall back. The brigade commander, Vandeleur, was wounded.

The other two British cavalry brigades attacked the Mahratta line at other points, with much the same result.

Macan’s brigade was confronted by a ravine running from the stream and curling around the front of Laswaree village.

Under a heavy cannon fire, Macan crossed the ravine, formed up and charged the Mahratta line.

Mahratta gunners firing into the rear of the British line at the Battle of Laswaree on 1st November 1803 in the Second Mahratta War: picture by Alfred Pearse

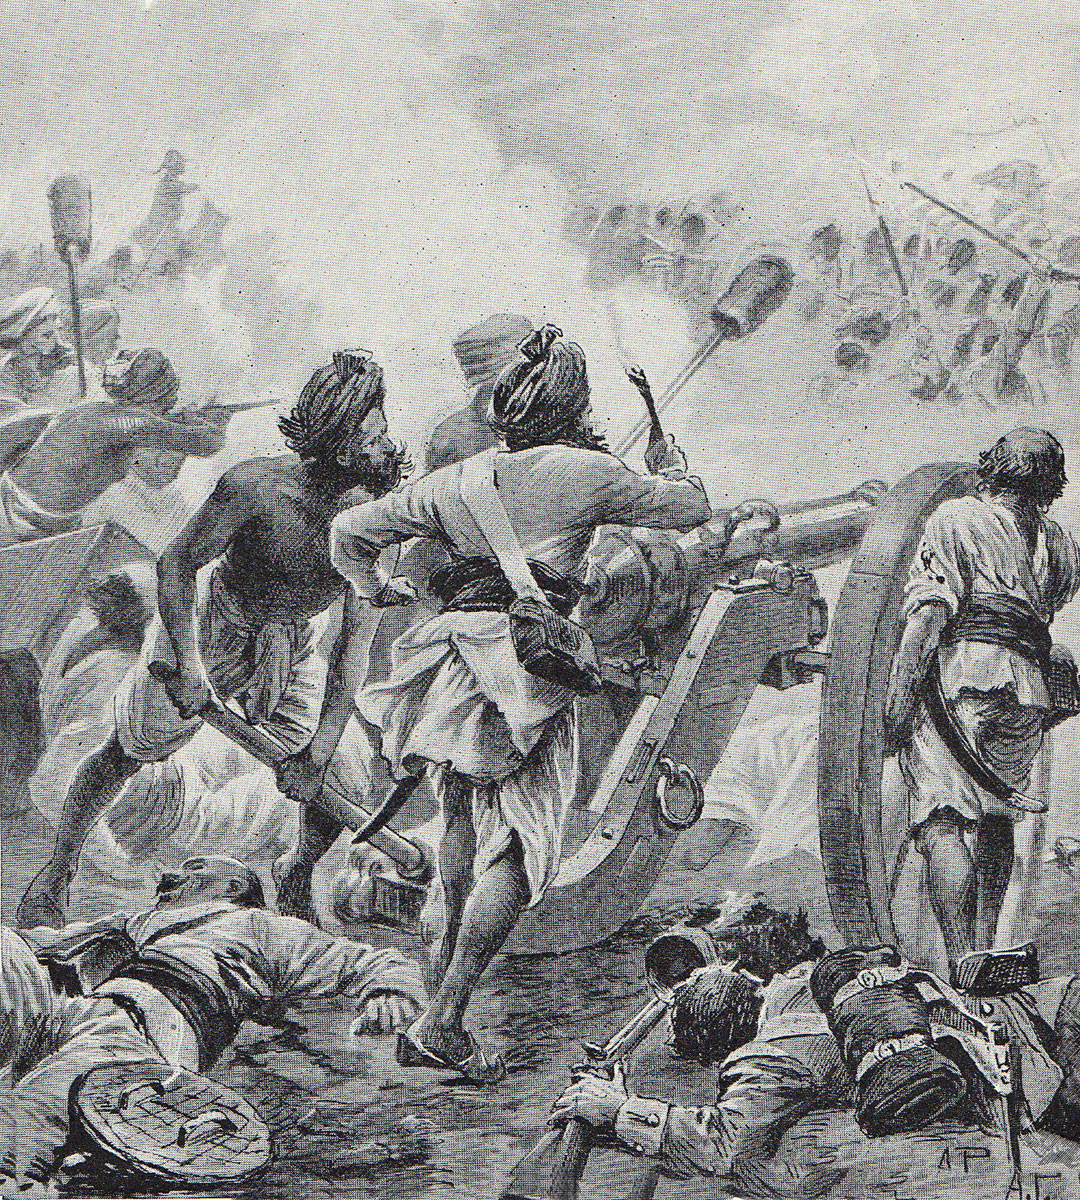
The Mahratta guns, concealed by the long grass and chained together to provide an impenetrable block, held their fire until Macan’s cavalrymen were within 20 yards before discharging a salvo of grape and chain shot.

Macan’s men charged through the gun line and the Mahratta infantry, entrenched behind their waggons and carts, before reforming and charging back through the Mahratta line.

They charged again and were about to carry out a further charge when they were recalled on Lake’s order.

Map of Lake's main attack at the Battle of Laswaree on 1st November 1803 in the Second Mahratta War: battle map by John Fawkes
Map of Lake’s main attack at the Battle of Laswaree on 1st November 1803 in the Second Mahratta War: battle map by John Fawkes

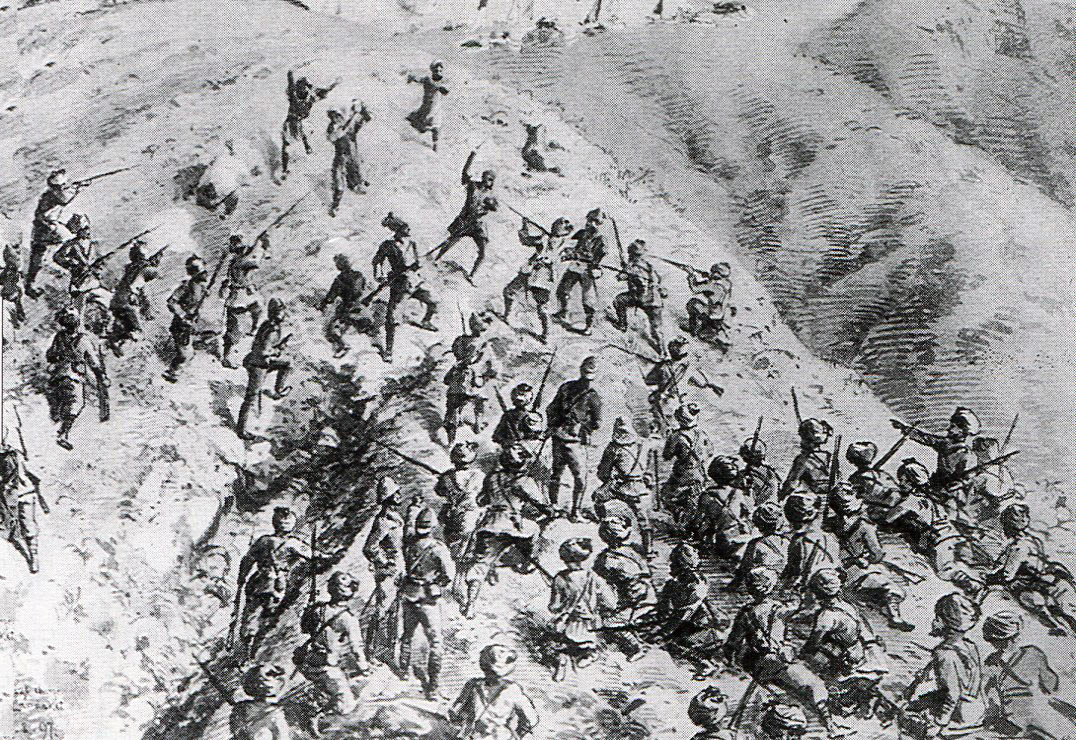
At around 11am, HM 76th Regiment and four battalions of Bengal Native Infantry arrived on the battlefield, exhausted after setting out at 3am.

Lake gave the infantry an hour to recover from the march before making their attack.

In the meantime, a message was received from Abaji stating that he was prepared, subject to certain terms, to surrender his guns.

Lake returned a message accepting Abaji’s proposal and giving him an hour to confirm the agreement.

However, Lake continued to prepare his further attack, while Abaji, far from confirming the agreement, took up a new position with his infantry in front of and behind the fortified village of Mohaulpore and his cavalry between the village and the stream, his powerful artillery positioned along the front of the village.

At the end of the stipulated hour Lake began his attack.

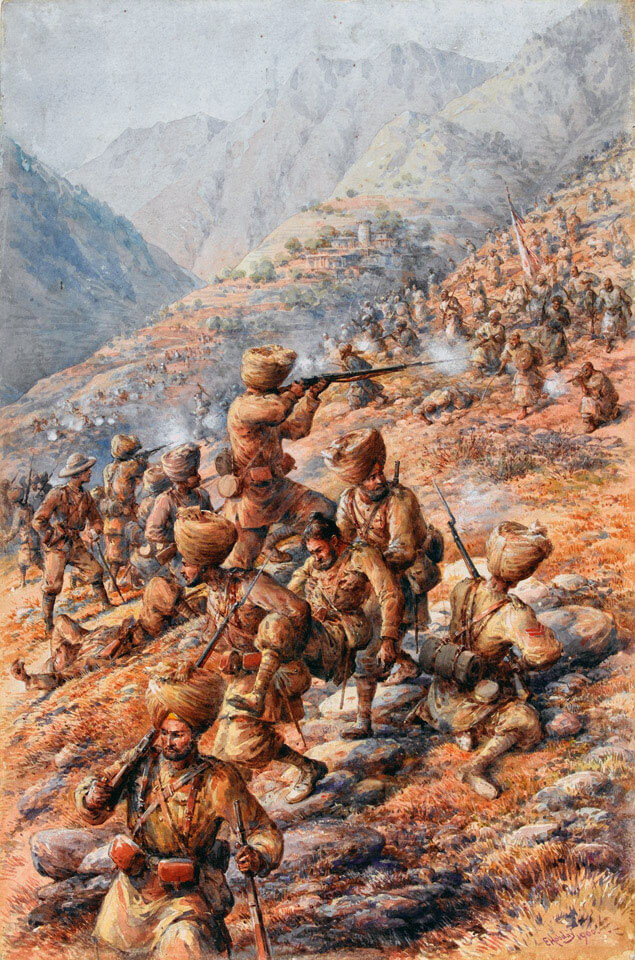
Lake’s infantry advanced along the bank of the stream in column, partially concealed by the long grass.

Macan’s cavalry brigade supported the infantry, while the other two British cavalry brigades advanced around the northern side of Mohaulpore.

Seeing the British column advancing along the stream, Abaji pulled back his right wing, putting his line in an ‘L’ shape.

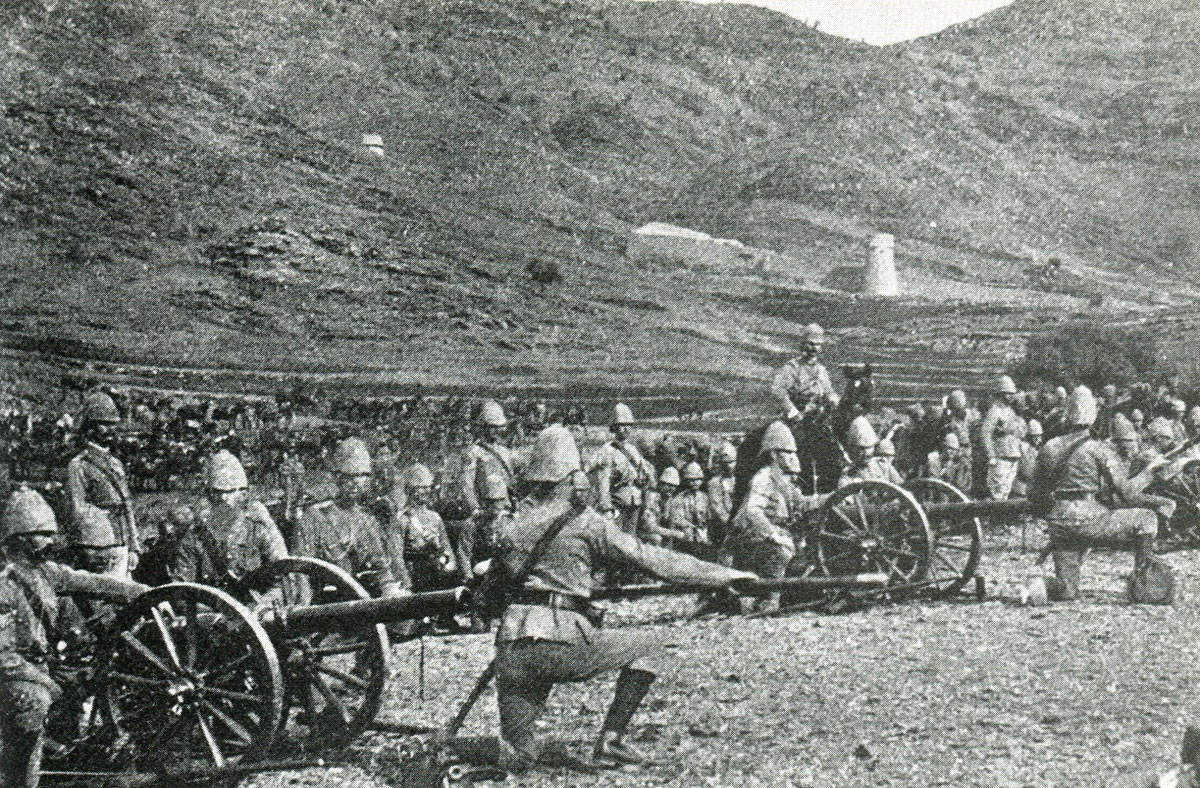
The British guns opened fire on each end of the Mahratta line, but were easily overborne by the greater number and heavier Mahratta artillery.

HM 76th and two BNI battalions headed the column advancing along the stream and began the attack under heavy cannon fire and with Mahratta cavalry threatening an attack on the left wing of the 76th.

Lake ordered HM 29th Light Dragoons to come up in support of the 76th.

Emerging from the hollow in which they had been waiting, the 29th Light Dragoons formed on the left wing of the 76th and the Mahratta cavalry abandoned their attack and withdrew.

Lake's son wounded at the Battle of Laswaree on 1st November 1803 in the Second Mahratta War: picture by Wal Paget
Lake’s son wounded at the Battle of Laswaree on 1st November 1803 in the Second Mahratta War: picture by Wal Paget

There was then a pause in the battle.

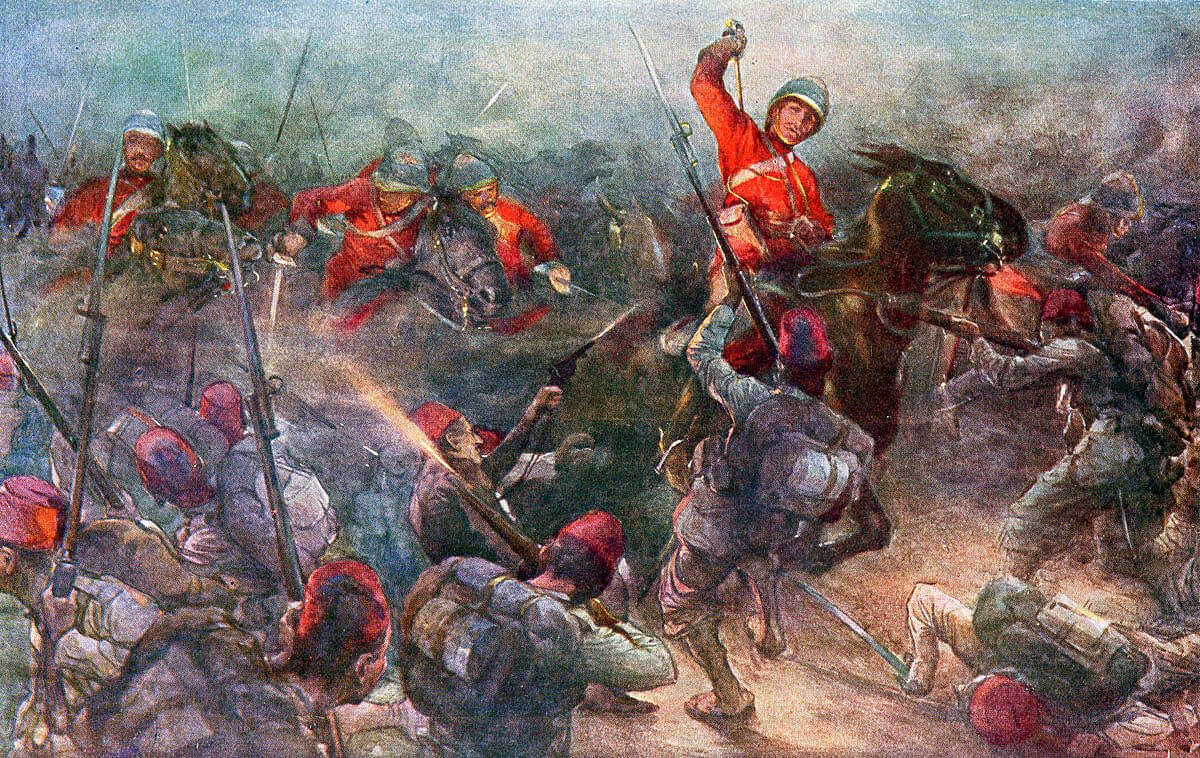
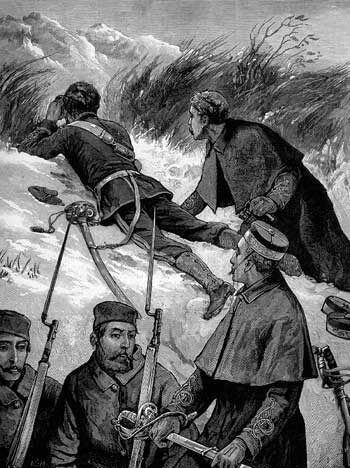
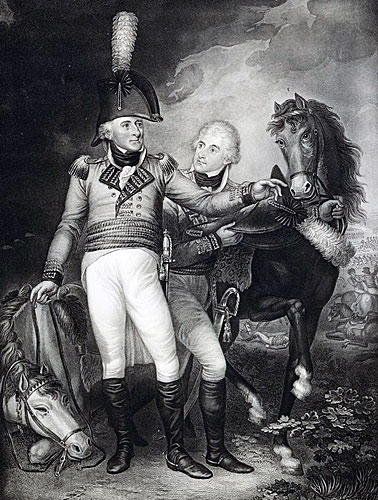
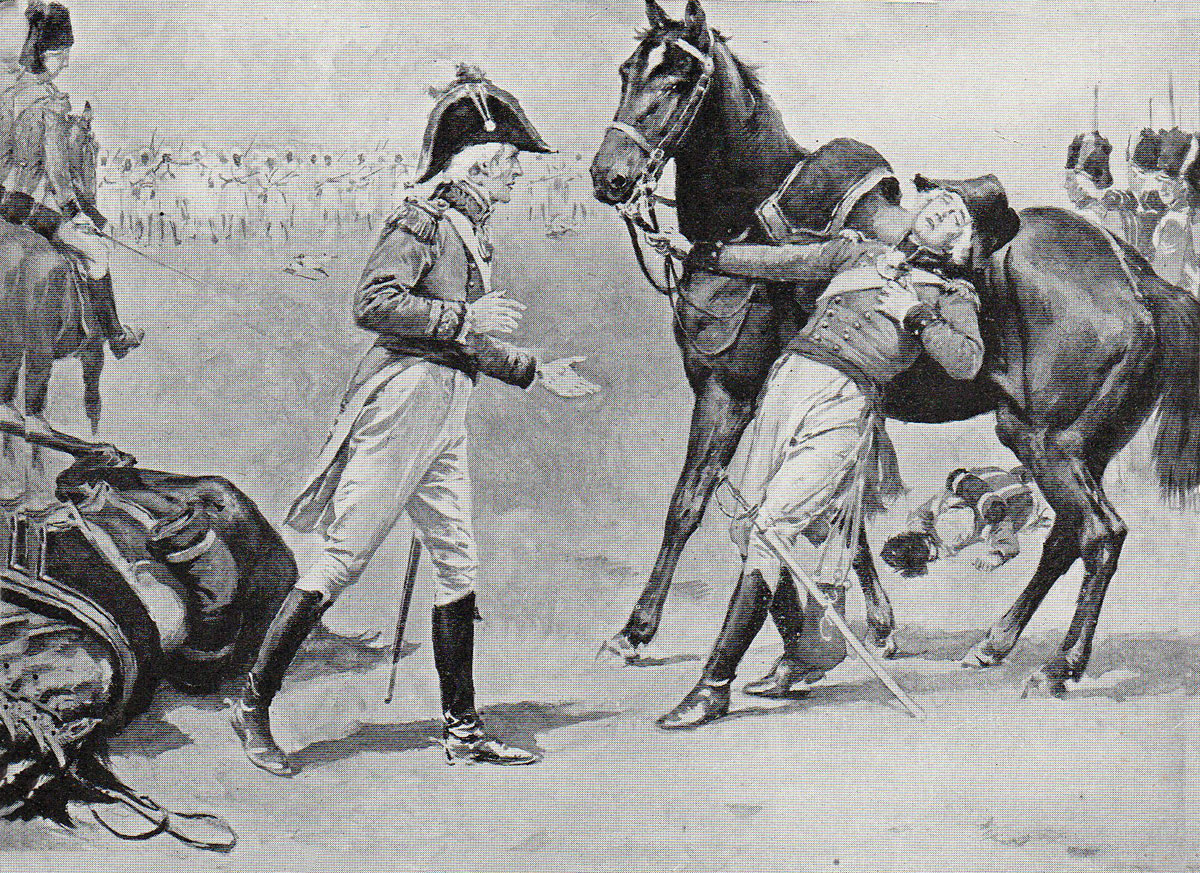
At this point the incident took place in which Lake’s horse was shot and killed under him.

Lake’s son, his ADC, dismounted to give his horse to his father and was struck by a cannon shot and severely wounded.

Lake, in spite of his anguish for his son, mounted the horse and ordered a new attack.

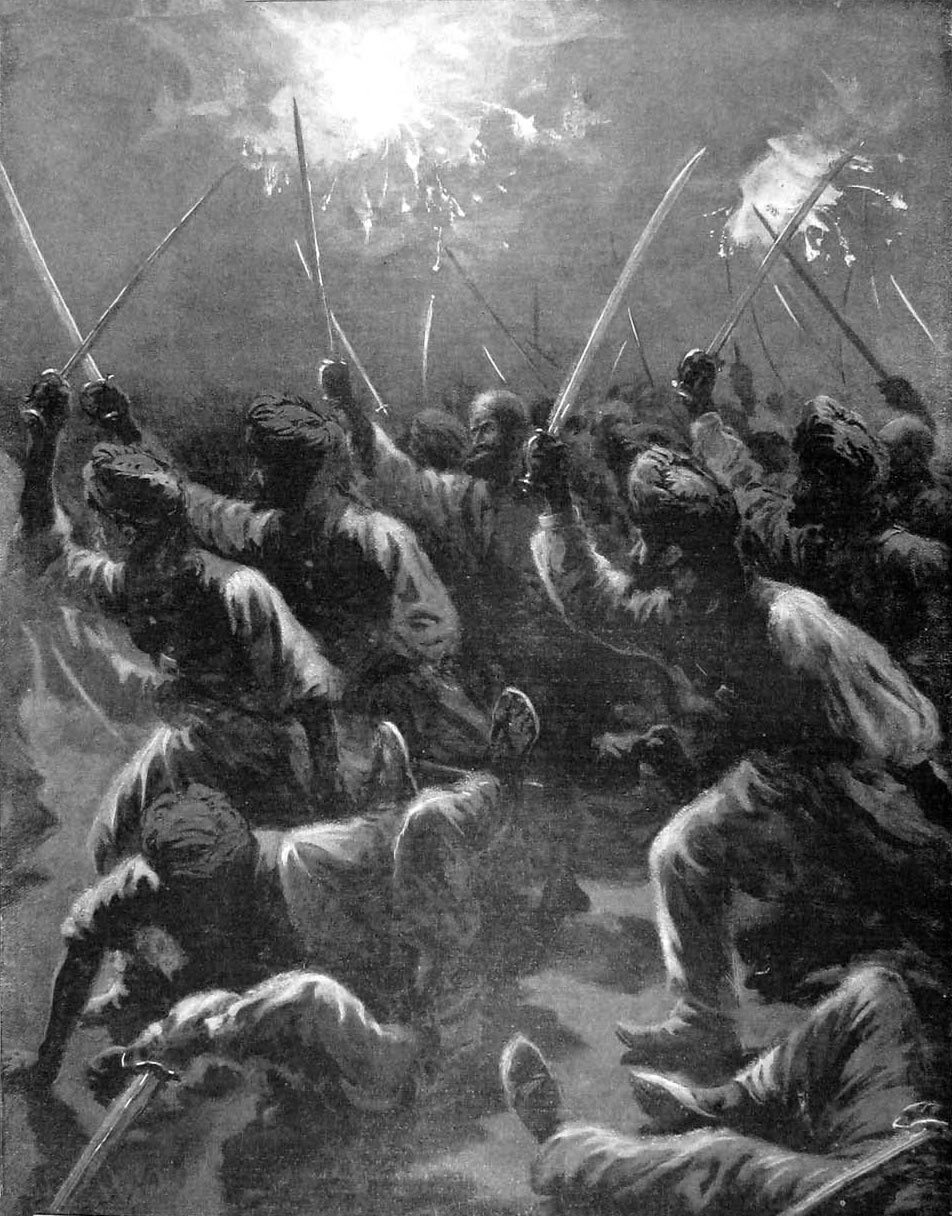
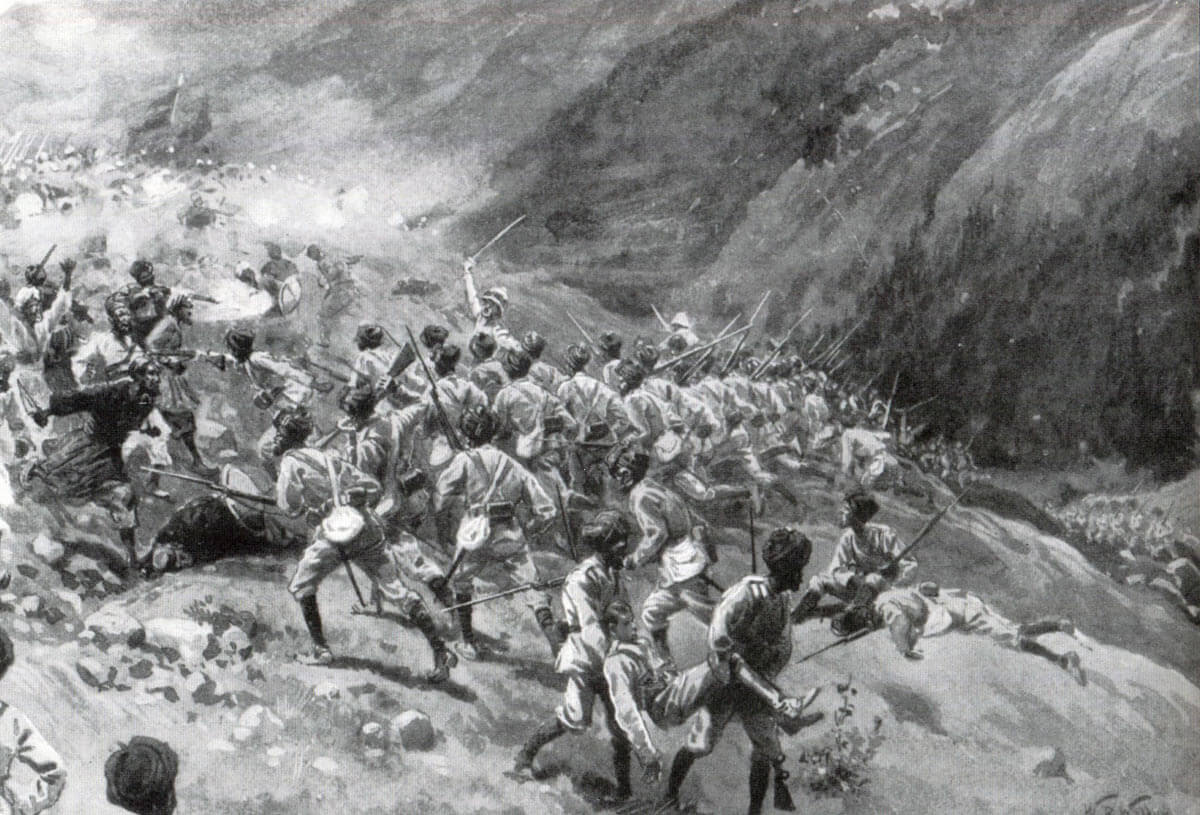
HM 29th Light Dragoons charged through the Mahratta gun line and then the infantry line, before wheeling and attacking the Mahratta cavalry.

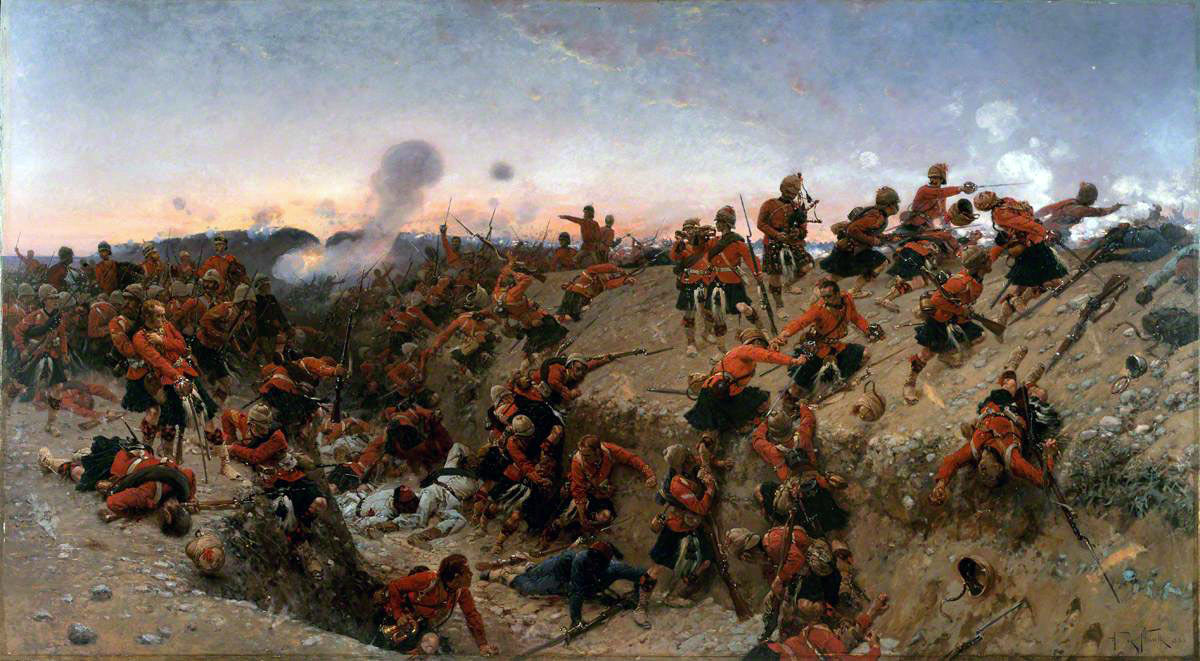
Lake brought up the infantry, now reinforced by the remaining battalions of Bengal Native Infantry that had caught up, advanced through the guns and the Mahratta infantry, taking the village of Mohaulpore.

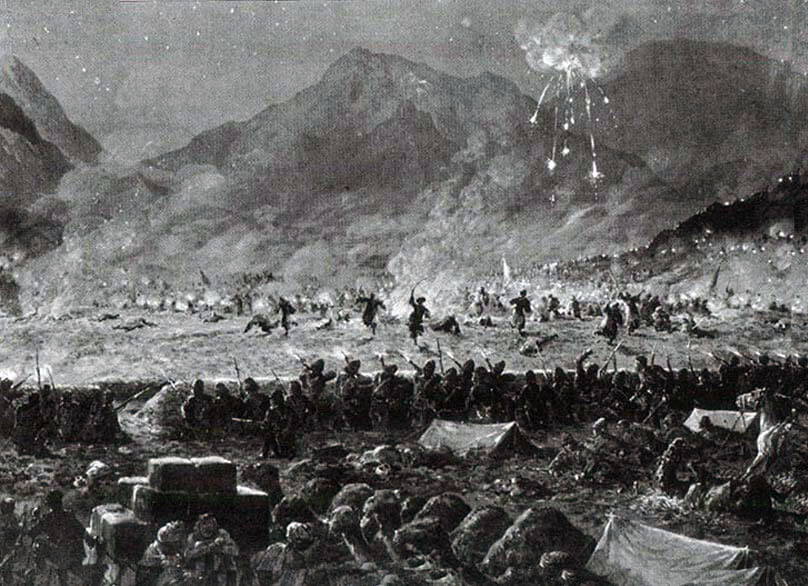
Abaji’s second infantry line was driven into the plain where they were attacked by most of Lake’s force.

Officer of HM 8th Light Dragoons: Battle of Laswaree on 1st November 1803 in the Second Mahratta War: picture by Richard Simkin

As the Mahratta column attempted to leave the battlefield, they were charged by the 27th Light Dragoons and the 6th Bengal Native Cavalry of Colonel St Leger’s Second Cavalry Brigade and cut down, only some 2,500 Mahrattas surviving the carnage, to be made prisoner.

The field was strewn with corpses and wounded soldiers, the remnants of the seventeen sepoy battalions trained by the French officer, De Boigne.

The village of Mohaulpore was a heap of smoking ashes.

Mahratta guns remained chained together in lines with the gunners lying dead and wounded around them.

The remaining guns lay across the battlefield, some overturned, the abandoned slow matches of the gunners periodically detonating the contents of the ammunition tumbrils.

Over the battlefield hung a thick pall of smoke from the detonation of gun powder.

In the evening a bank of clouds built up and a heavy thunderstorm broke.

Casualties at the Battle of Laswaree:

In the Battle of Laswaree the British lost 13 officers and 159 soldiers killed and 29 officers and 623 soldiers wounded.

HM 76th Regiment suffered casualties of 43 killed and 149 wounded.

The 76th suffered casualties in the whole campaign, with its three battles, of 18 officers and 428 soldiers killed or wounded.

Casualties in the 3 British cavalry regiments were:

The 8th Light Dragoons suffered 54 casualties and lost 116 horses.

The 27th Light Dragoons suffered 48 casualties and lost 86 horses.

The 29th Light Dragoons suffered 62 casualties and lost 112 horses.

The British Quartermaster General’s deputy and an ADC were killed and the Adjutant General, the Secretary, the Political Agent and the commander of the General’s escort wounded.

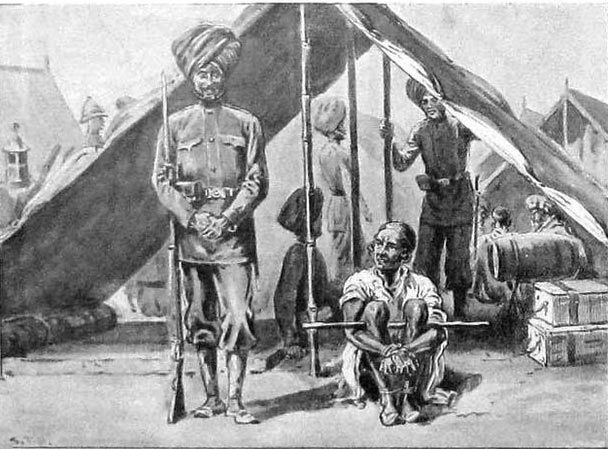
Abaji’s Mahratta army was destroyed in the battle with 2,000 soldiers captured.

All 71 of the Mahratta guns were taken by the British.

Army of India Medal awarded to S. Brown of HM 27th LD: Battle of Laswaree on 1st November 1803 in the Second Mahratta War

Follow-up to the Battle of Laswaree: 
Lake was forced to remain on the battlefield until 8th November 1803, caring for his wounded, among whom was his son.

On that date Lake marched to a camp outside Agra, sending his wounded and captured guns into the fortress.

Lake there received the rulers from the area seeking to placate the conqueror of the Mahrattas and to sign defensive alliances with him.

The Battle of Laswaree was a significant milestone in the rise of British power in India.

On 29th August 1803 a British force captured the fortress of Baroach on the west coast of India north of Bombay and the surrounding district.

On 30th December 1803 Scindia signed a treaty with the East India Company bringing the war to an end.

By the treaty Scindia ceded to the East India Company an expanse of territory between the Ganges and Jumna Rivers and other areas including the district of Baroach.

Battle Honours:

Battle Honours were awarded to the following regiments:

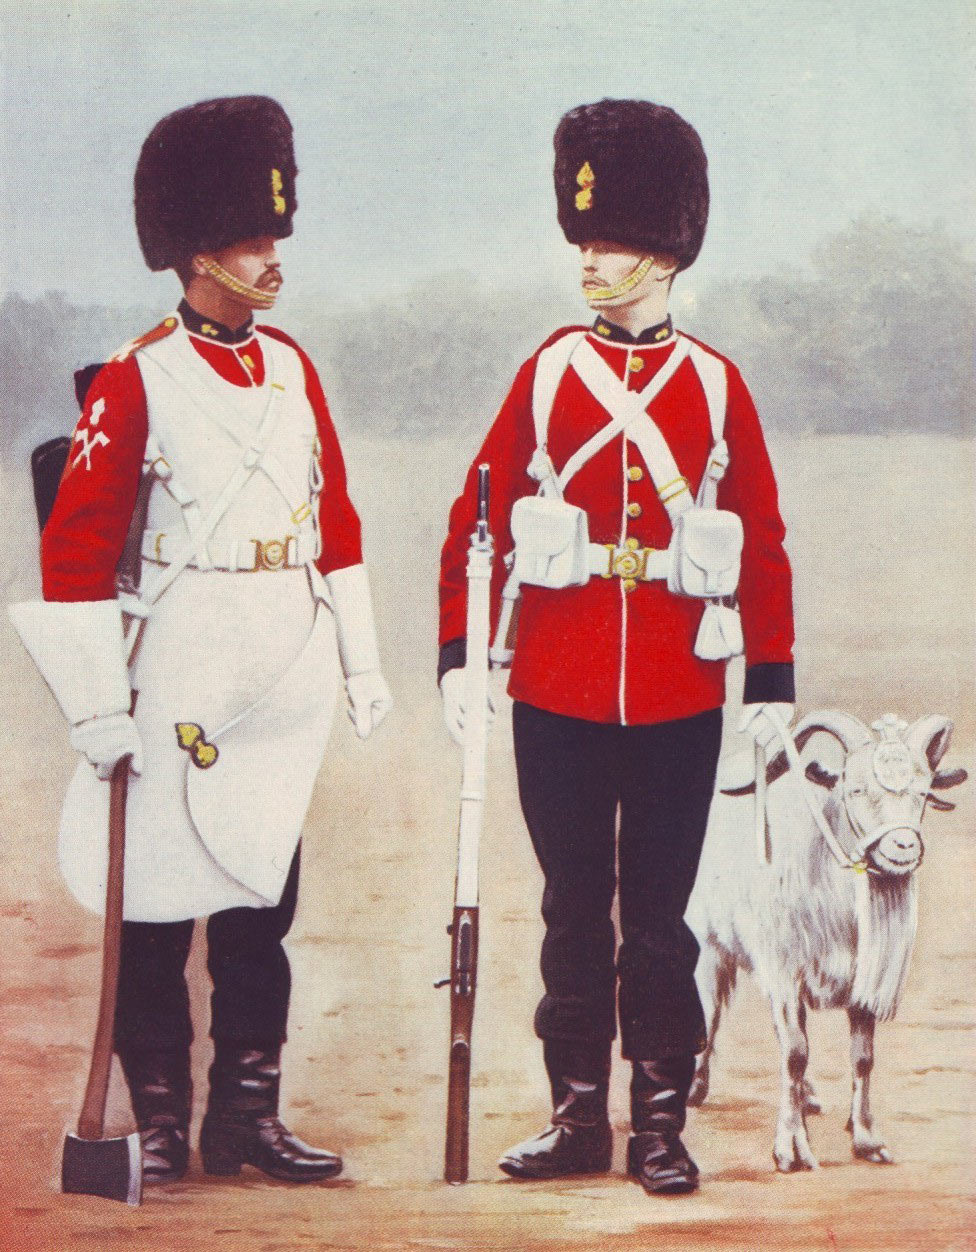
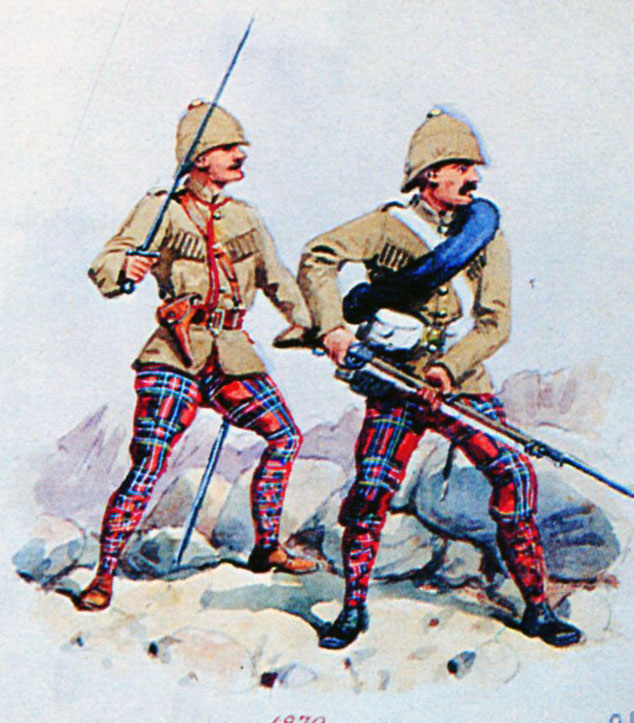
Storming of Aligarh: HM 76th Regiment

Battle of Delhi: HM 76th Regiment and 2nd/15th Bengal Native Infantry

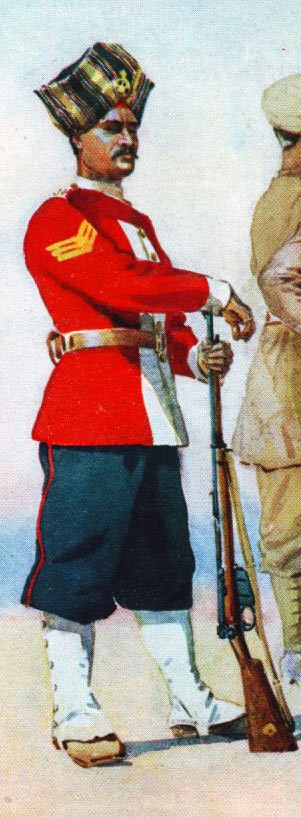
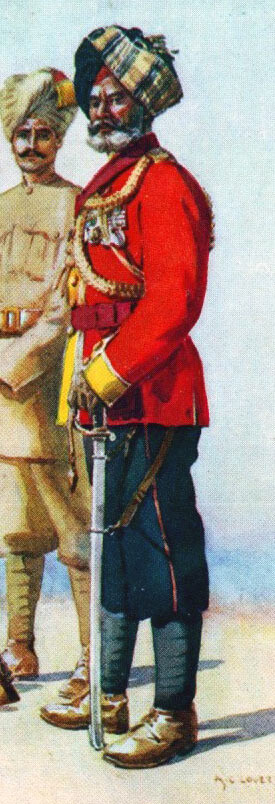
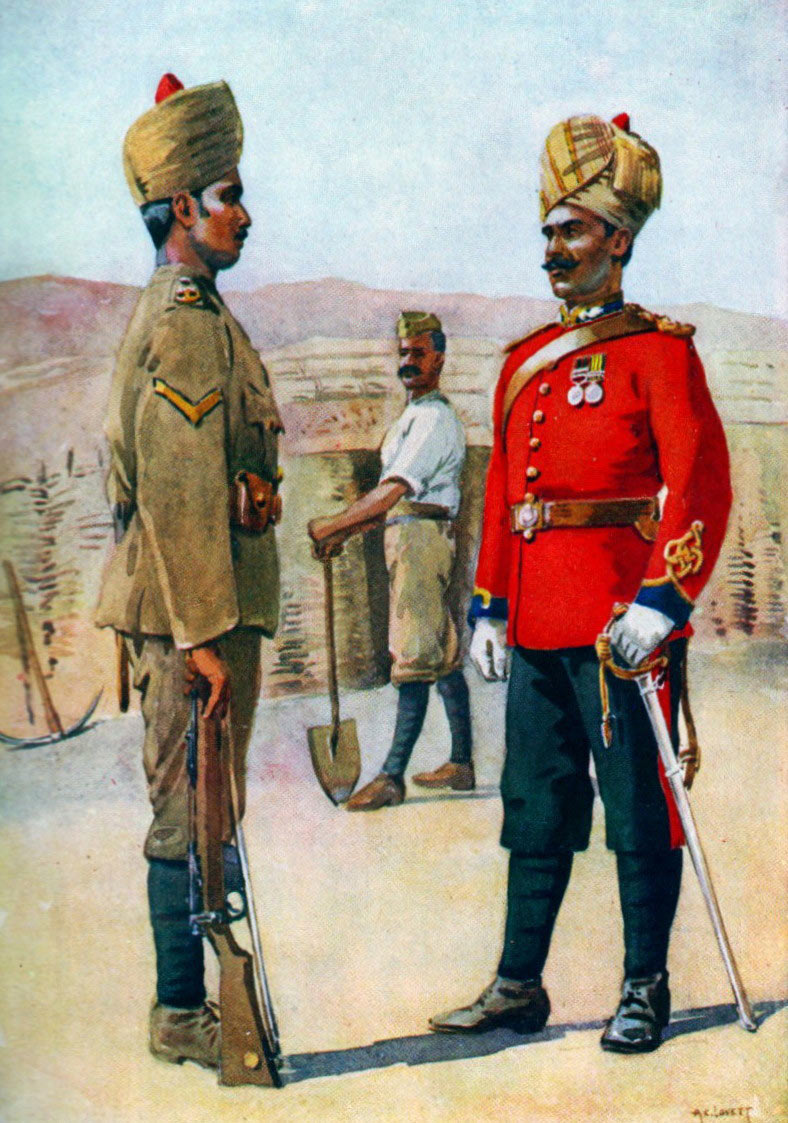
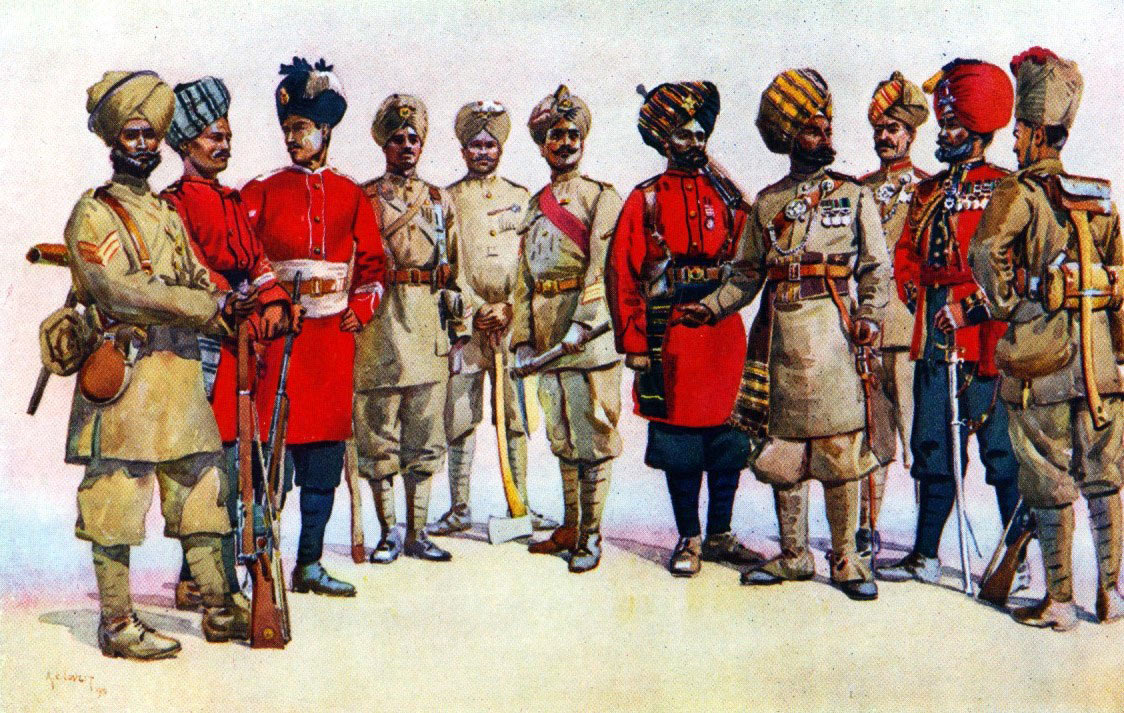
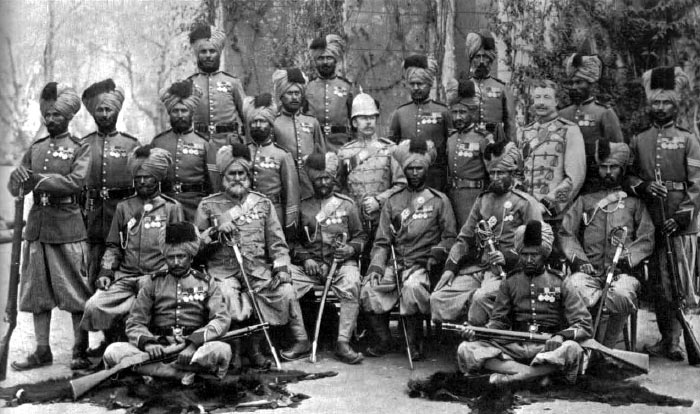
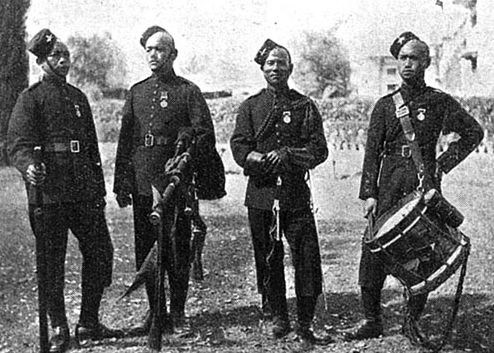
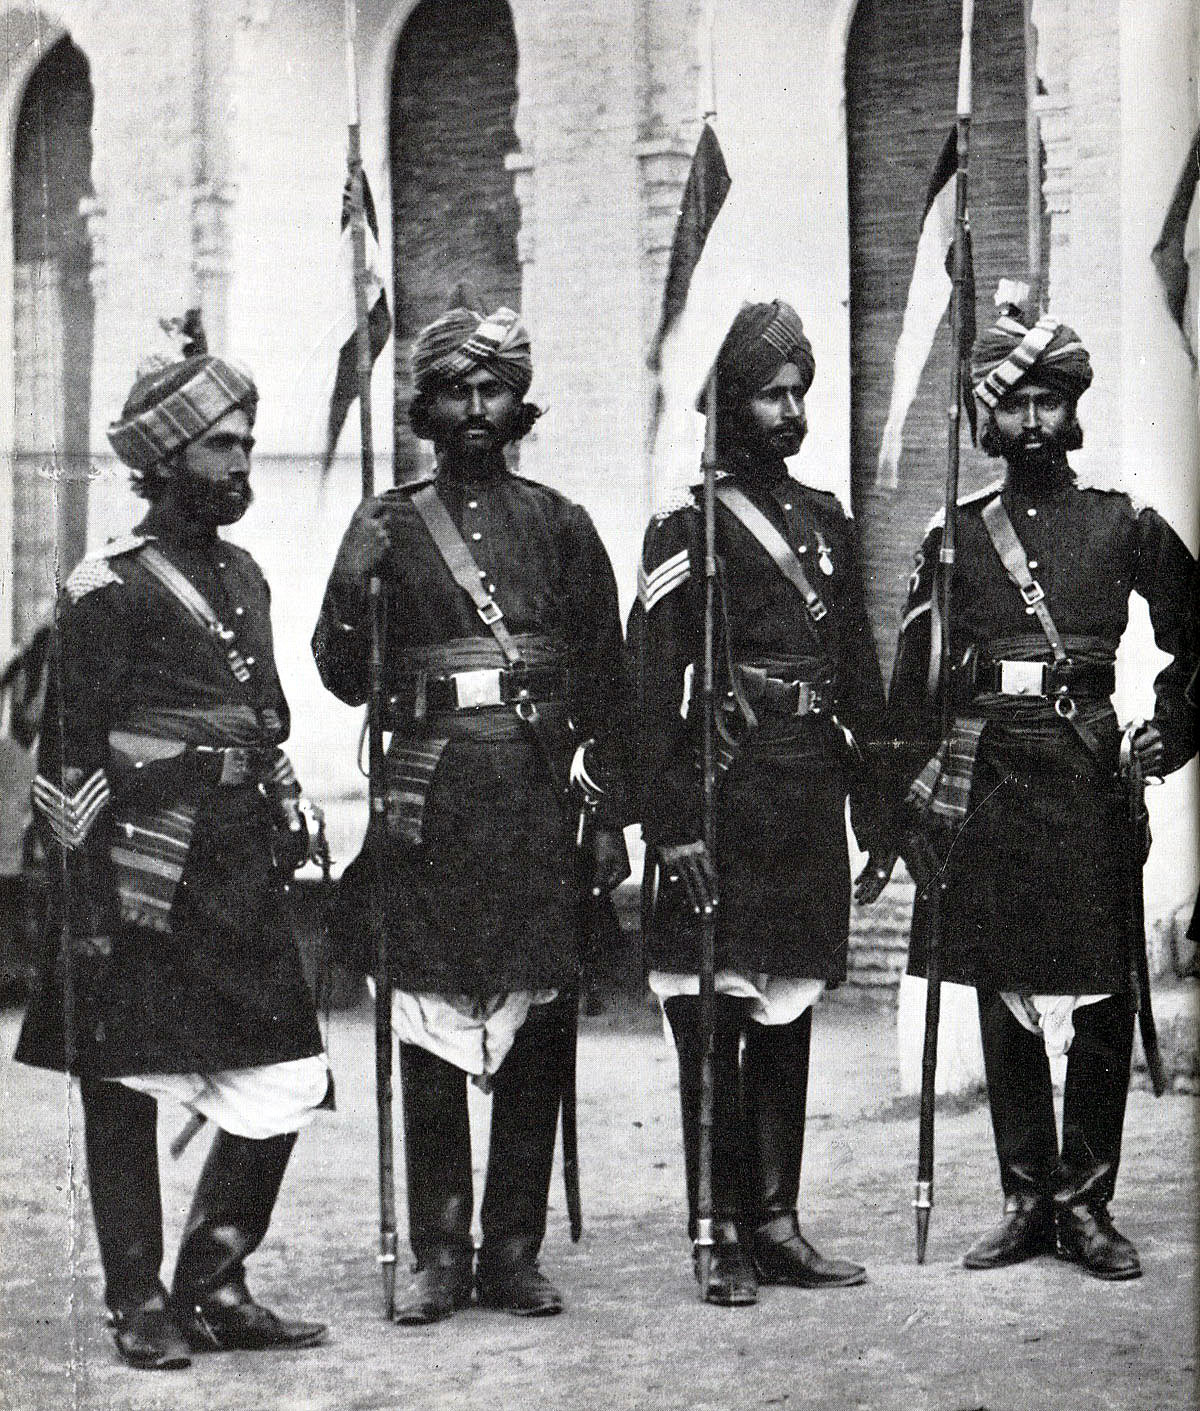
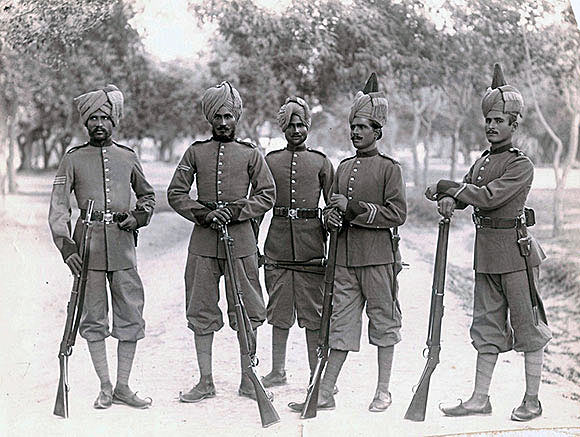
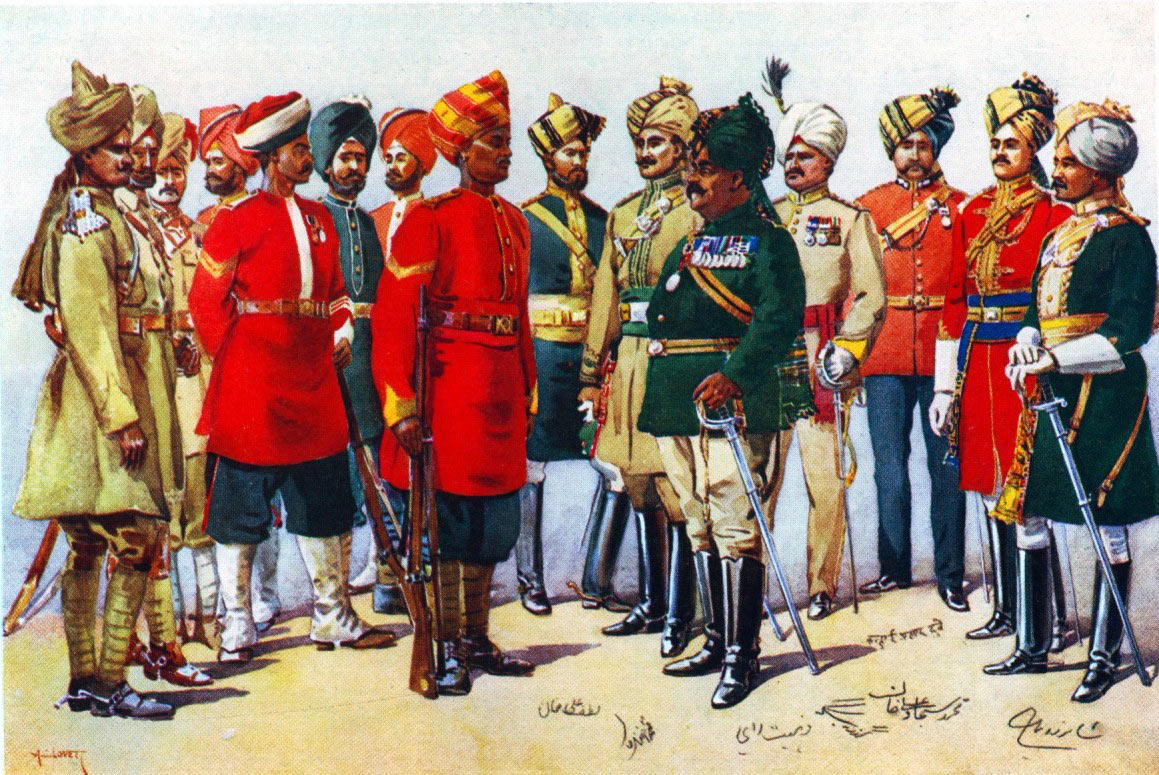
Battle of Laswaree: HM 8th Light Dragoons, HM 76th Regiment, 2nd/9th, 2nd/15th and 2nd/16th Bengal Native Infantry

The other regiments of HM Light Dragoons had been disbanded by the time the Battle Honours were awarded.

HM 76th Regiment was awarded special colours by the East India Company with the Battle Honour ‘Hindoostan’ embroidered in the centre.
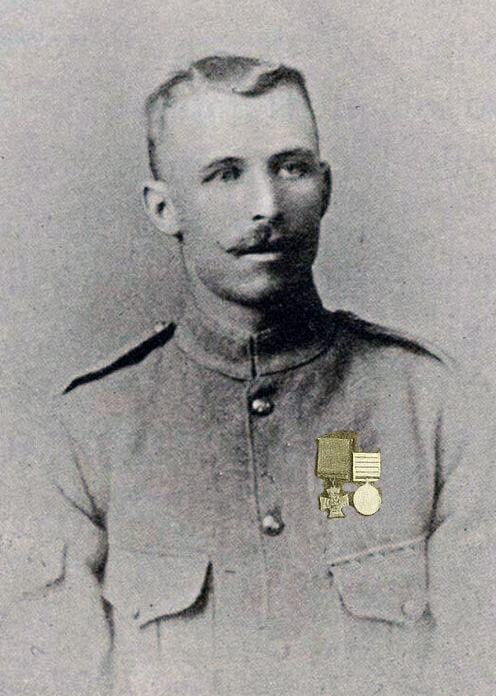
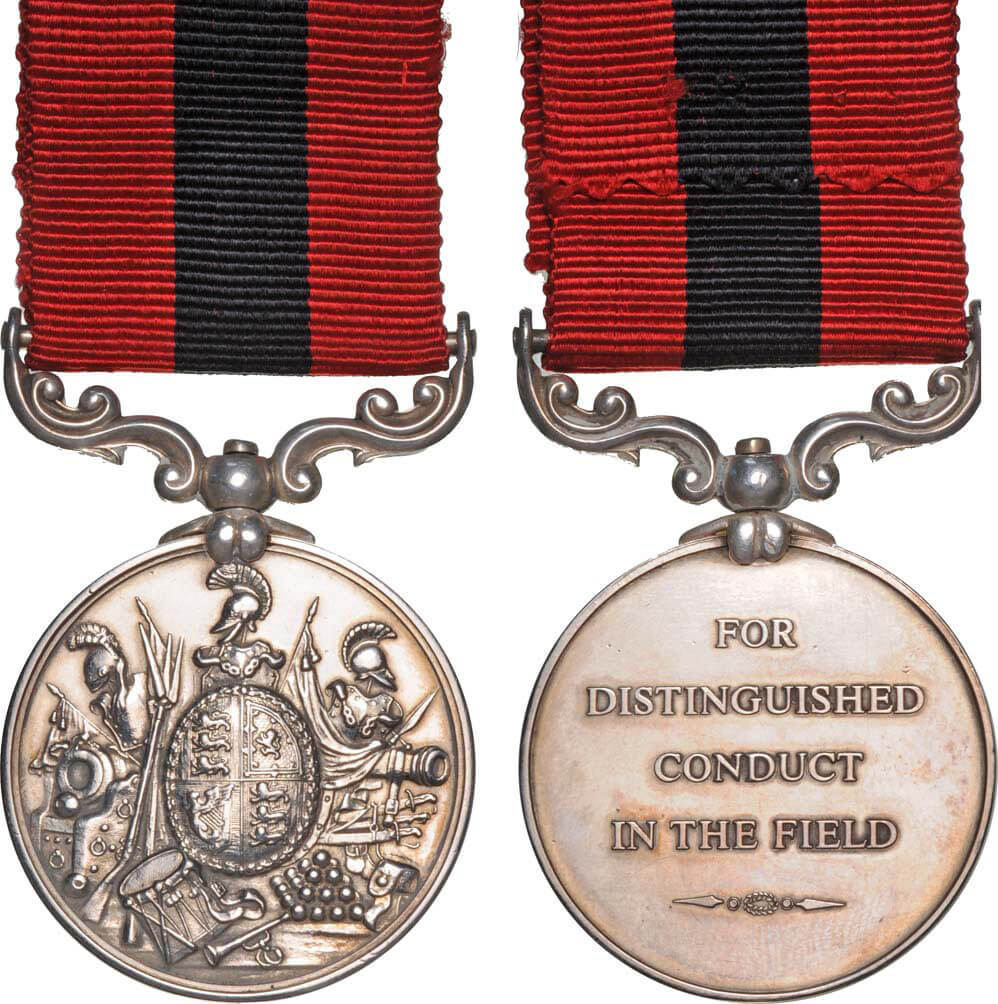
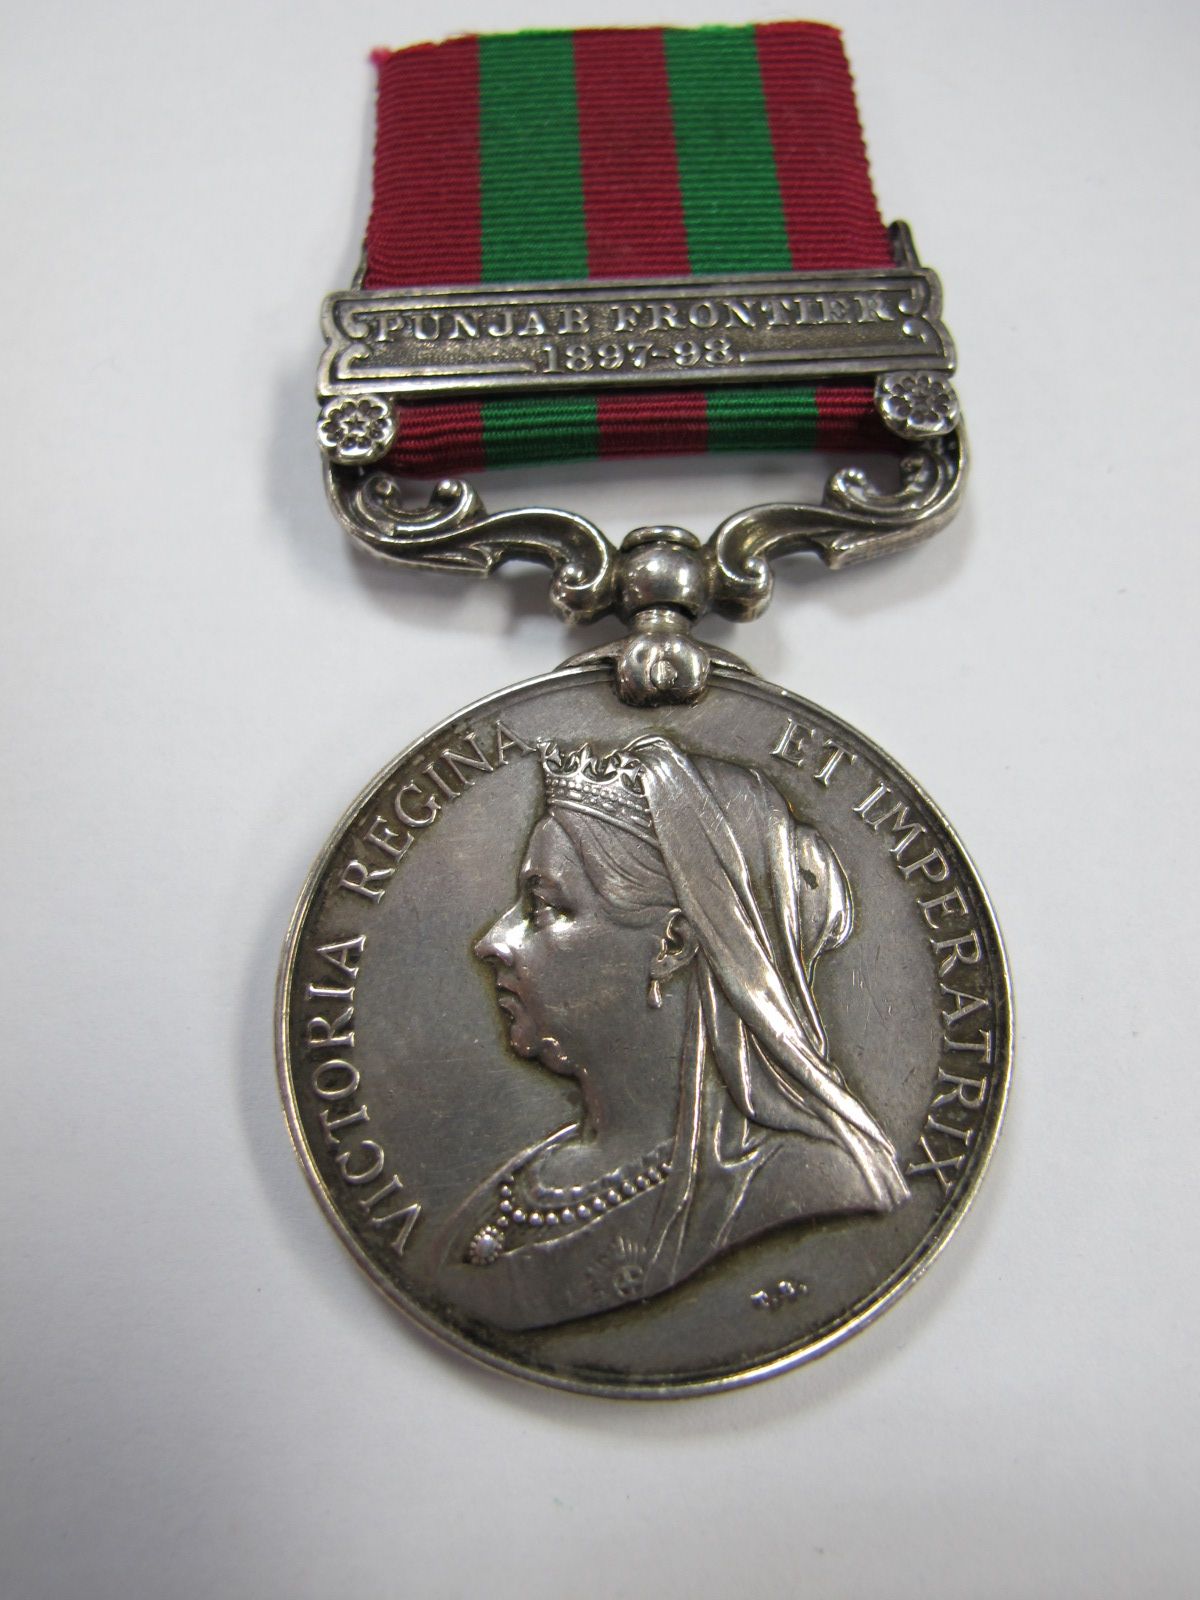
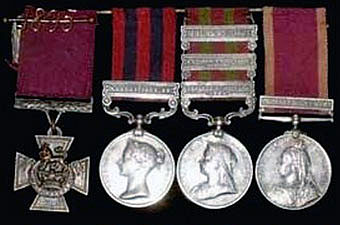
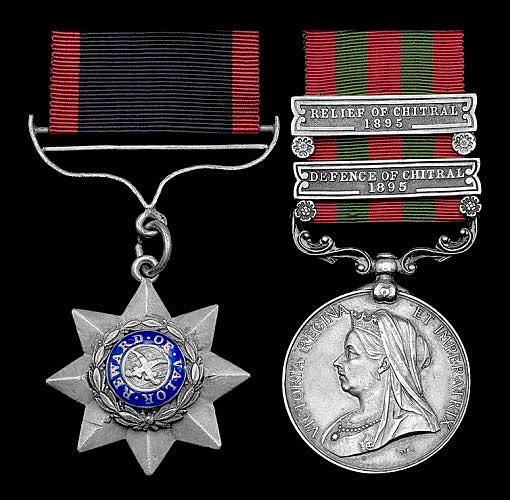
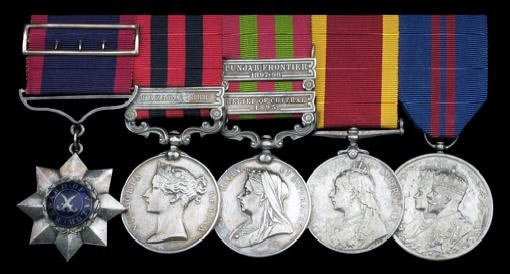
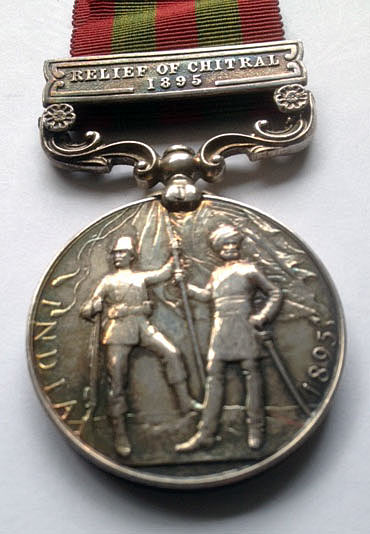
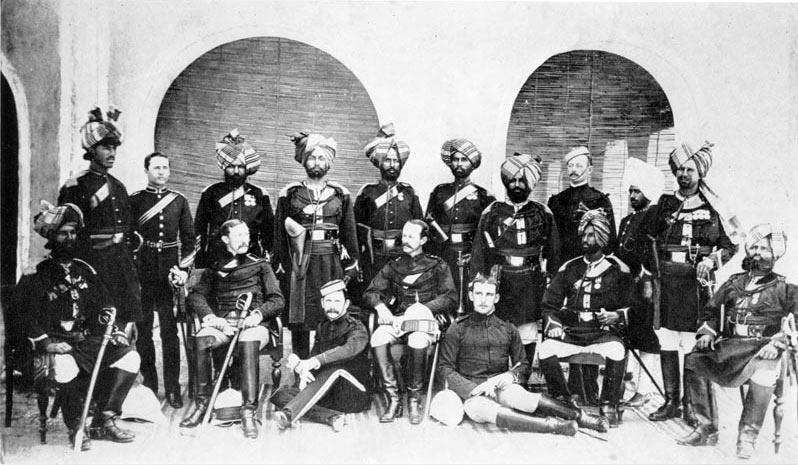
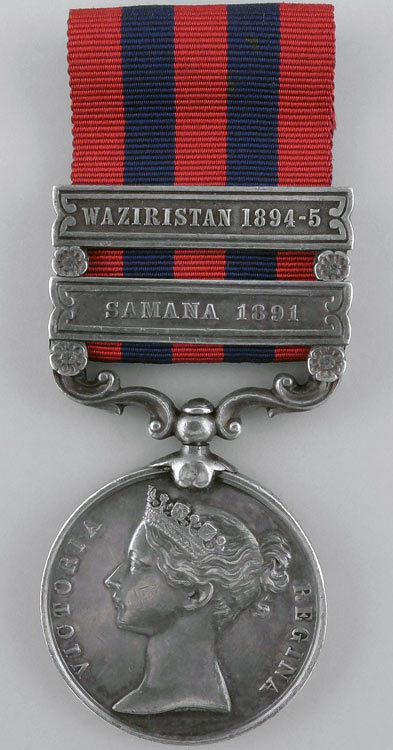
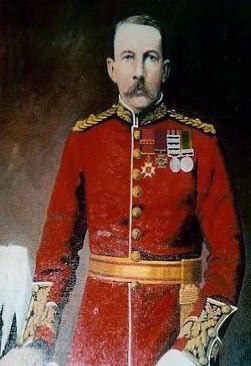
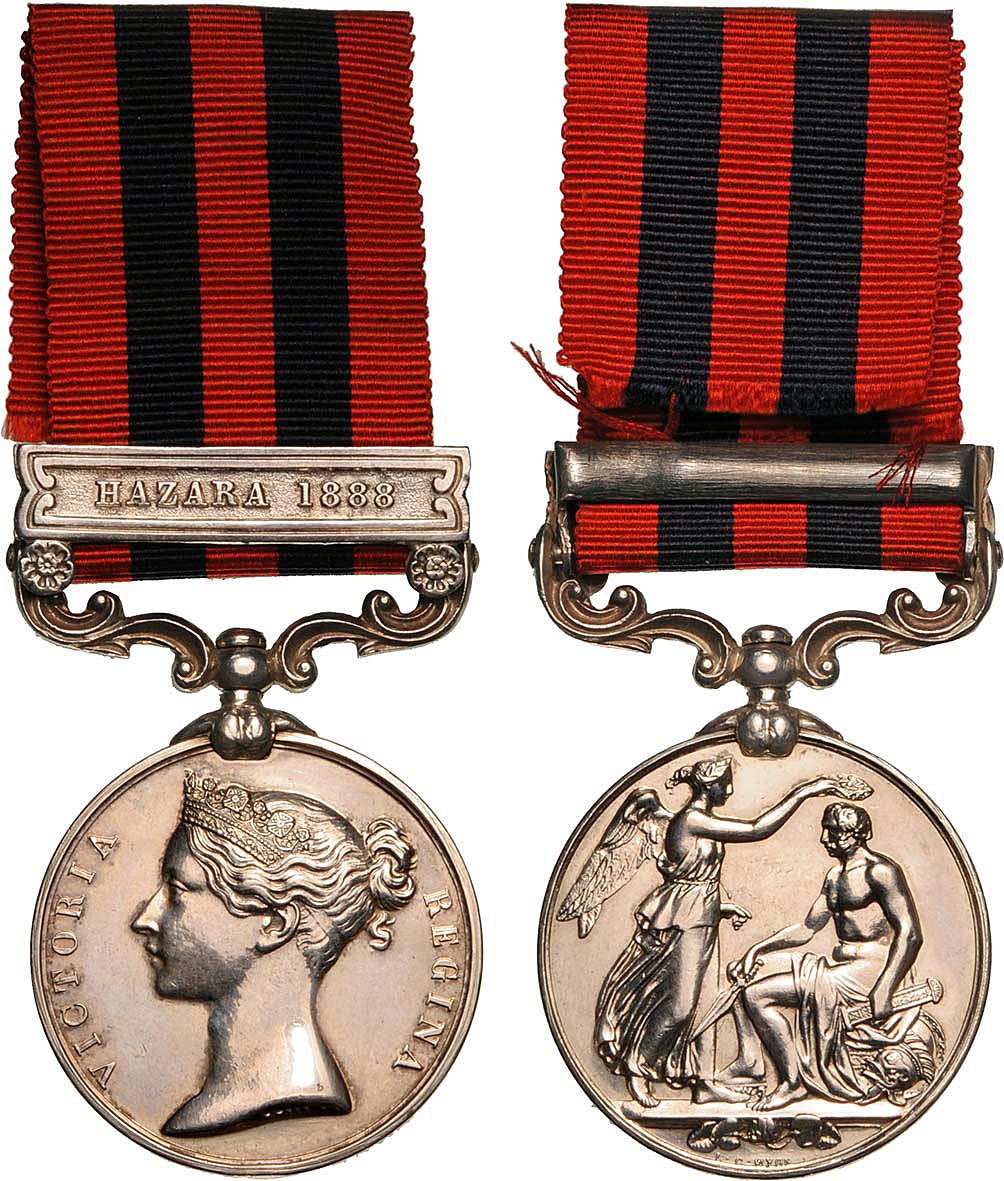
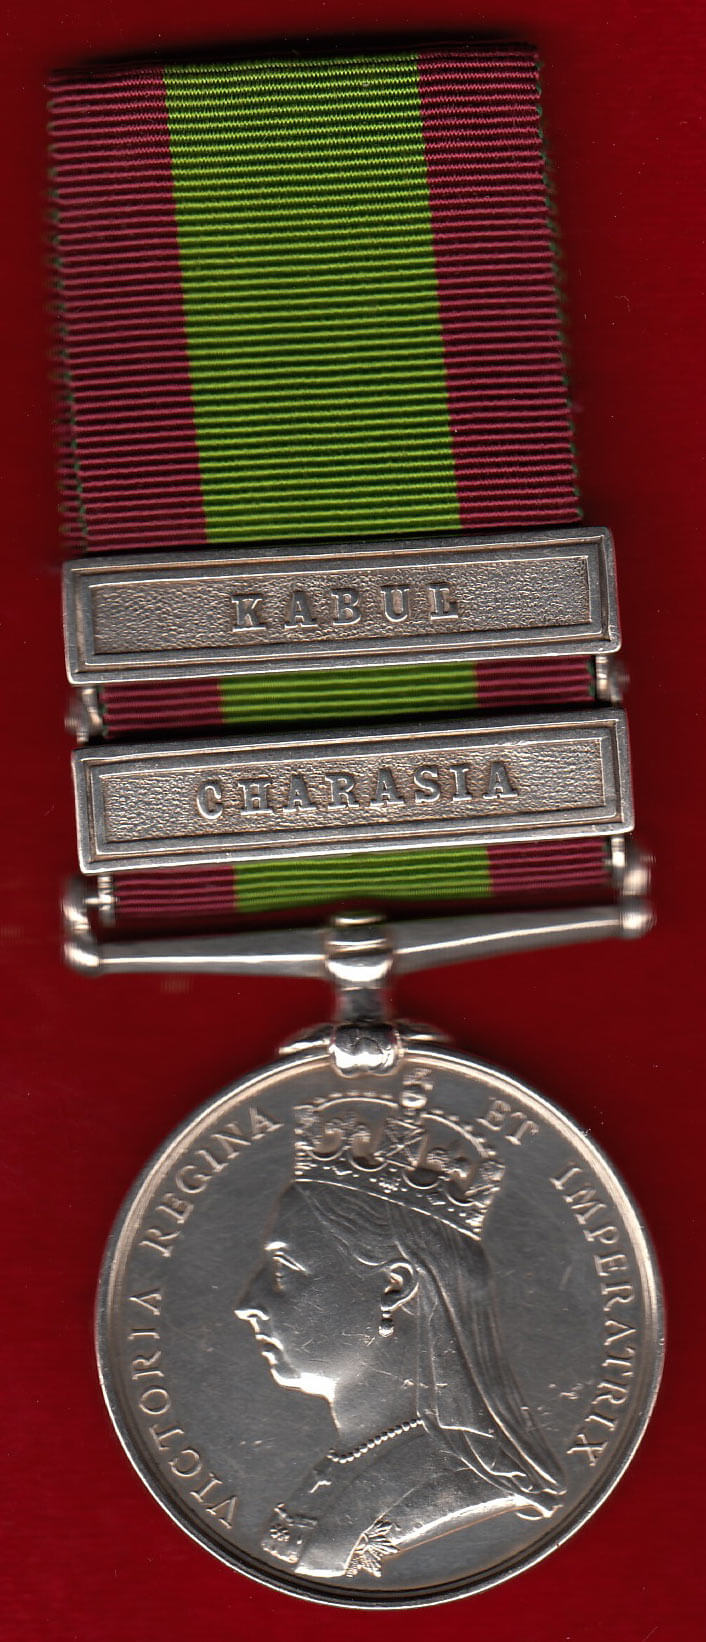
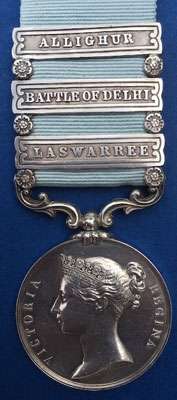
Regimental Colour awarded to HM 76th Regt showing the Battle Honour 'Hindoostan' with an Elephant.
Regimental Colour awarded to HM 76th Regt showing the Battle Honour ‘Hindoostan’ with an Elephant, now in York Minster.

Army of India Medal

The Army of India Medal was issued in 1851 to officers and soldiers of the British and East India Company armies who served at specified battles between 1803 and 1826. The medal was issued to officers and soldiers who fought at the Storming of Aligarh and the Battles of Delhi and Laswaree with the clasps ‘Allighur’, ‘Battle of Delhi’ and ‘Laswarree’.

Victorian Badge of 2nd Bn Duke of Wellington's Regiment, the 'Hindoostan' Regiment: Battle of Laswaree on 1st November 1803 in the Second Mahratta War
Victorian Badge of 2nd Bn Duke of Wellington’s Regiment, the ‘Hindoostan’ Regiment: Battle of Laswaree on 1st November 1803 in the Second Mahratta War

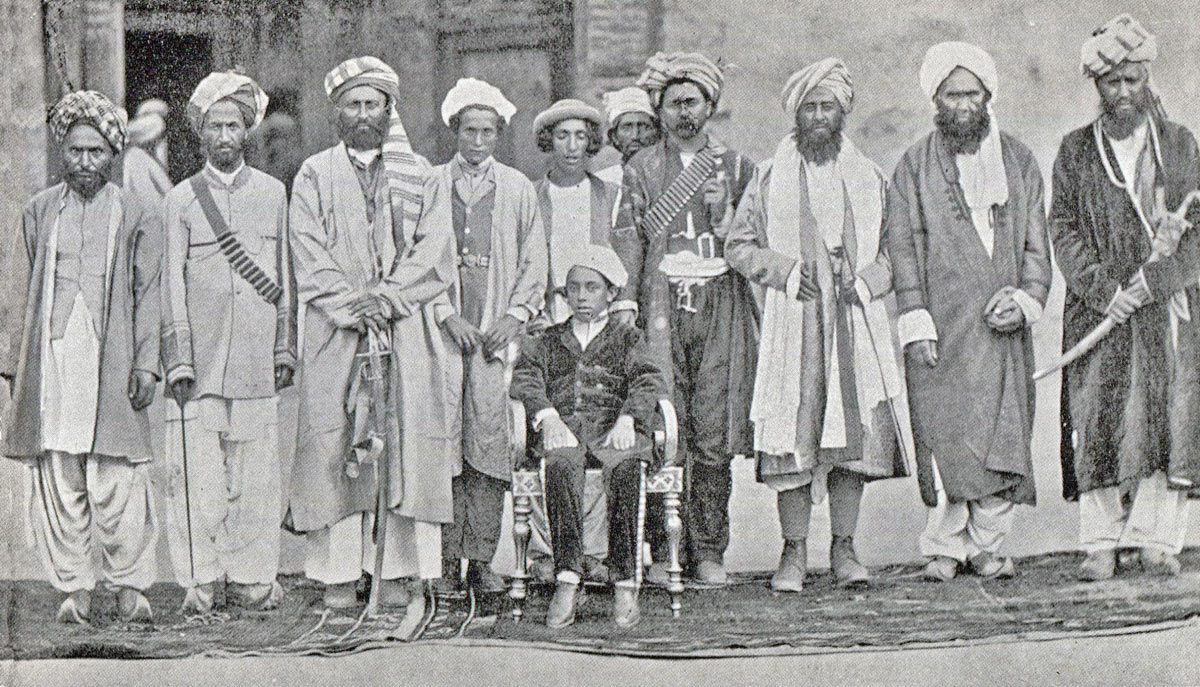
Anecdotes and traditions from the Battle of Laswaree:

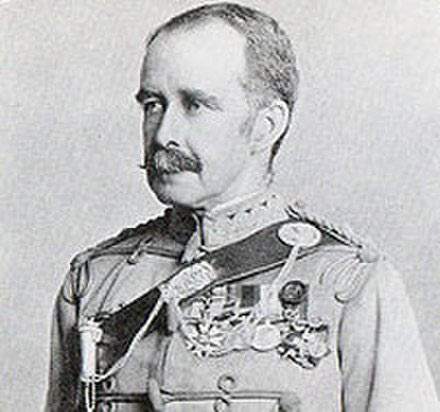
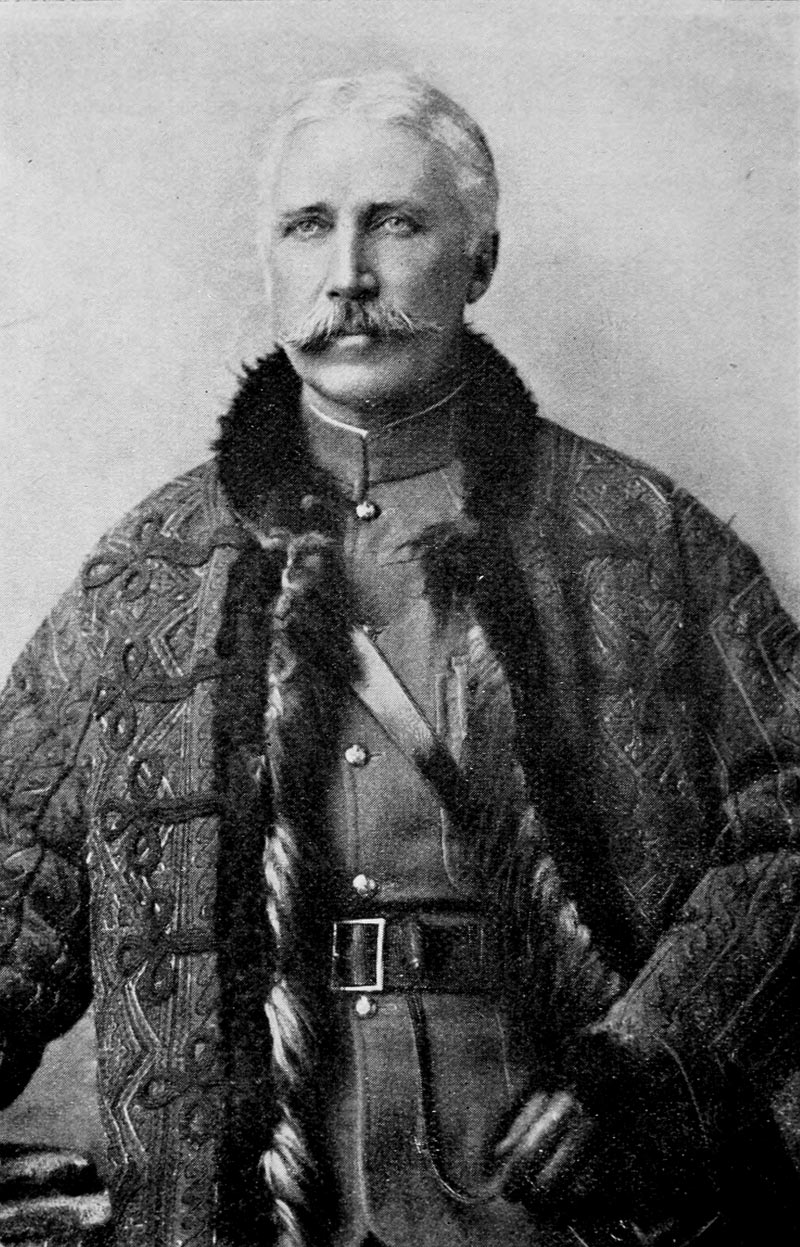
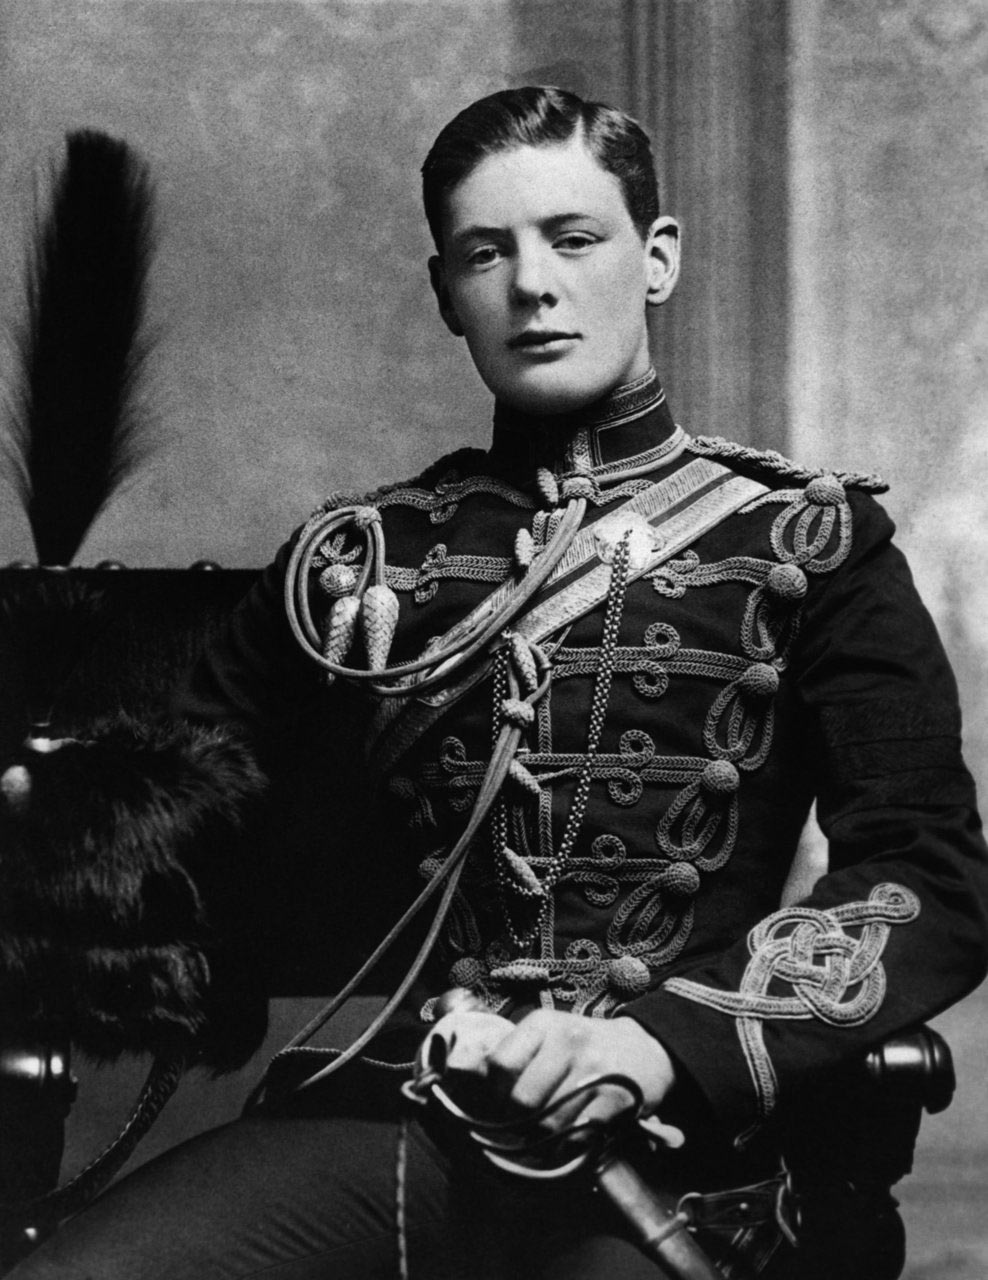
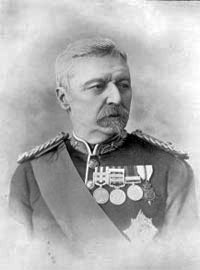
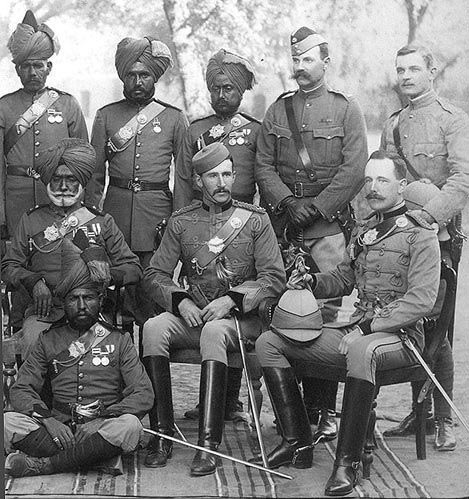
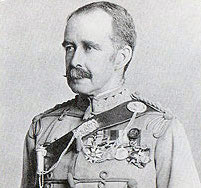
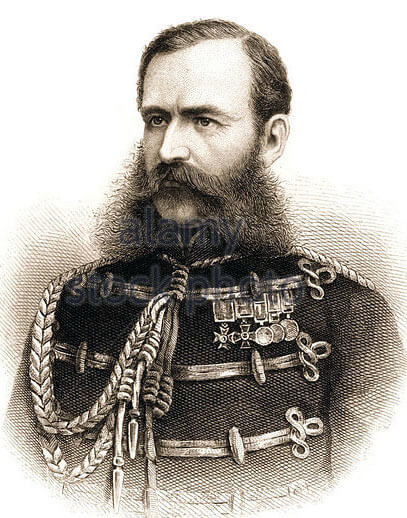
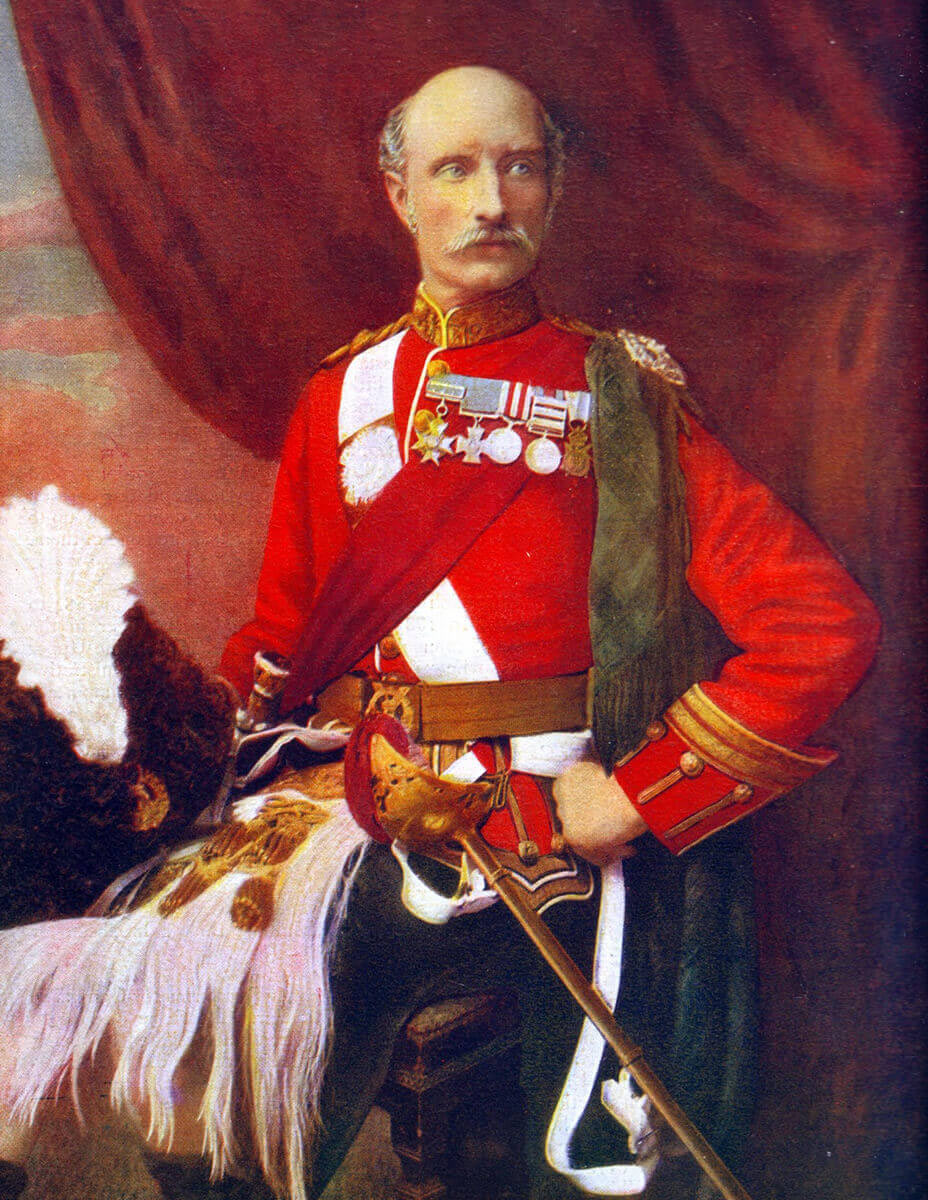
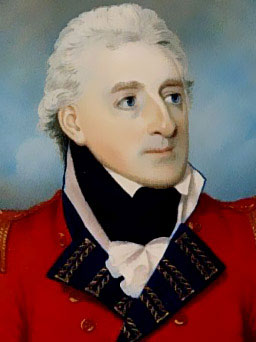
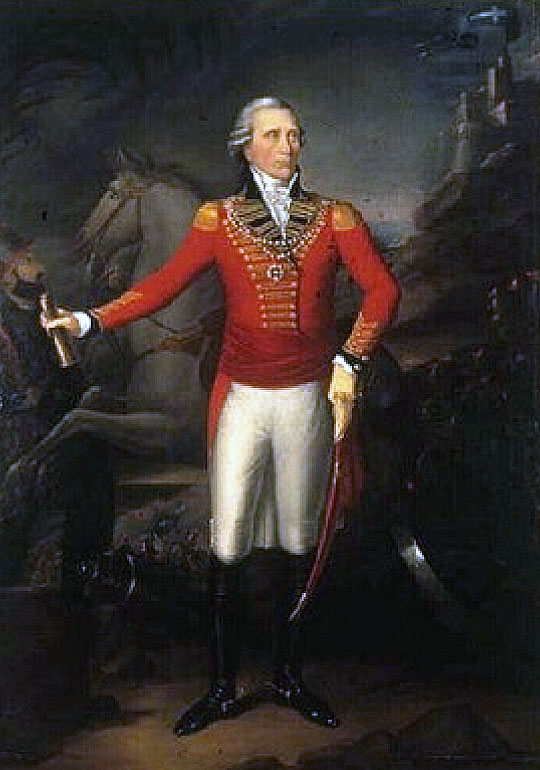
  • General Lake was British Commander-in-Chief in India from 1801 to 1807. Lake was made a viscount for his services. He is reputed to have died nearly penniless due to excessive gambling.
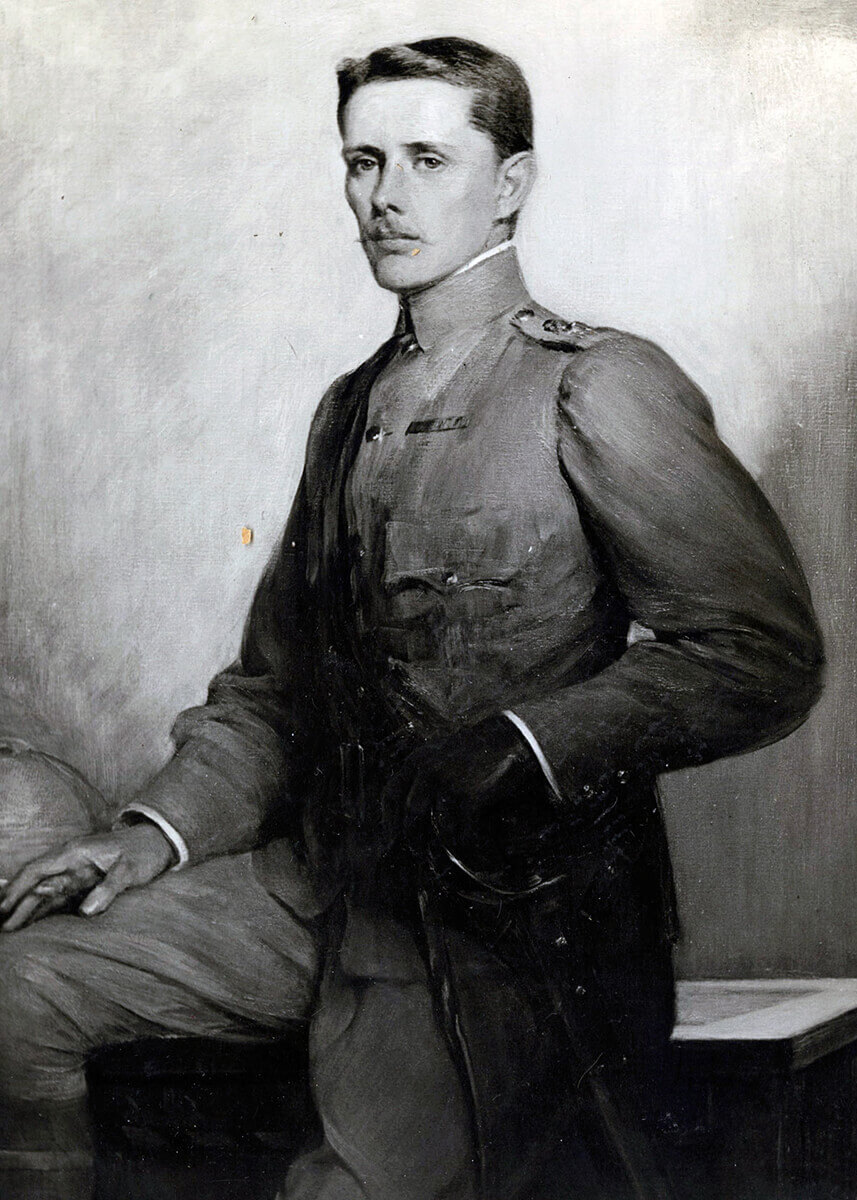
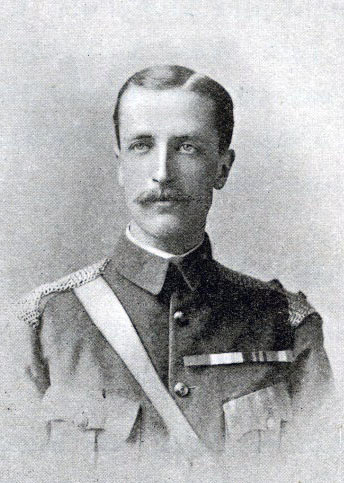
  • Lake’s son, Major George Lake, recovered from the wound he received at Laswaree, but was killed commanding the 29th Regiment of Foot at the Battle of Roliça, Portugal on 17th August 1808.
  • Lake’s horse, killed under him at the battle of Laswaree, was named ‘Old Port’. Old Port was well known in the Bengal Army and was said to be a favourite of the Viceroy.
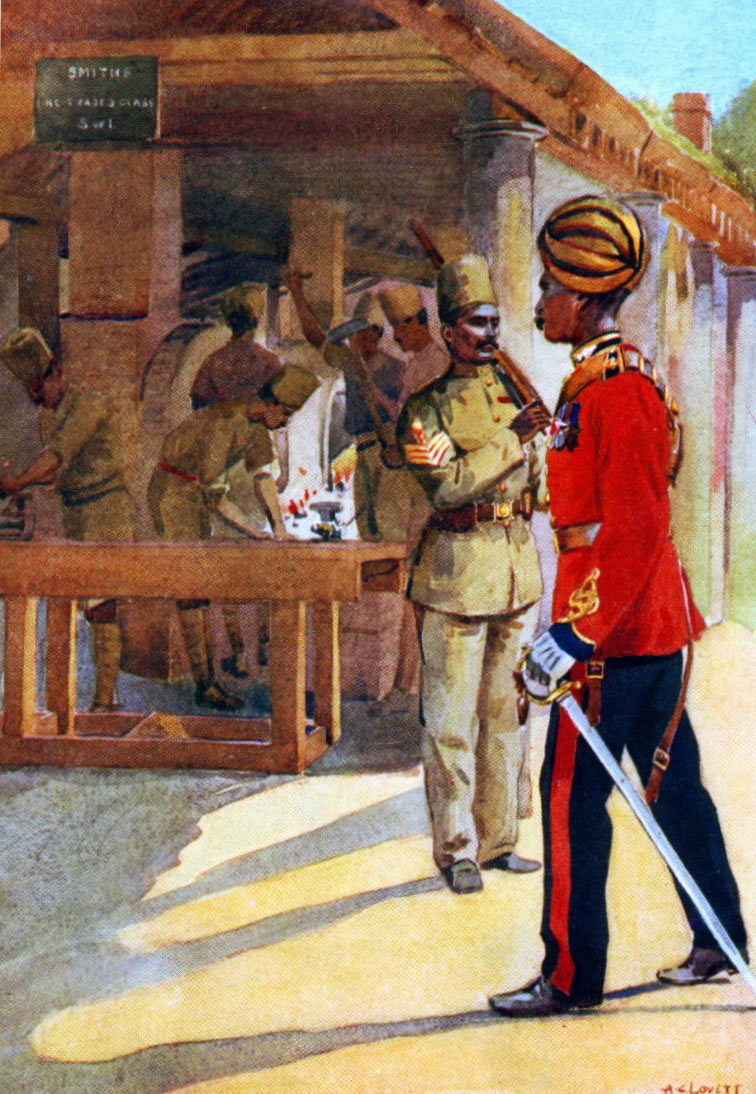
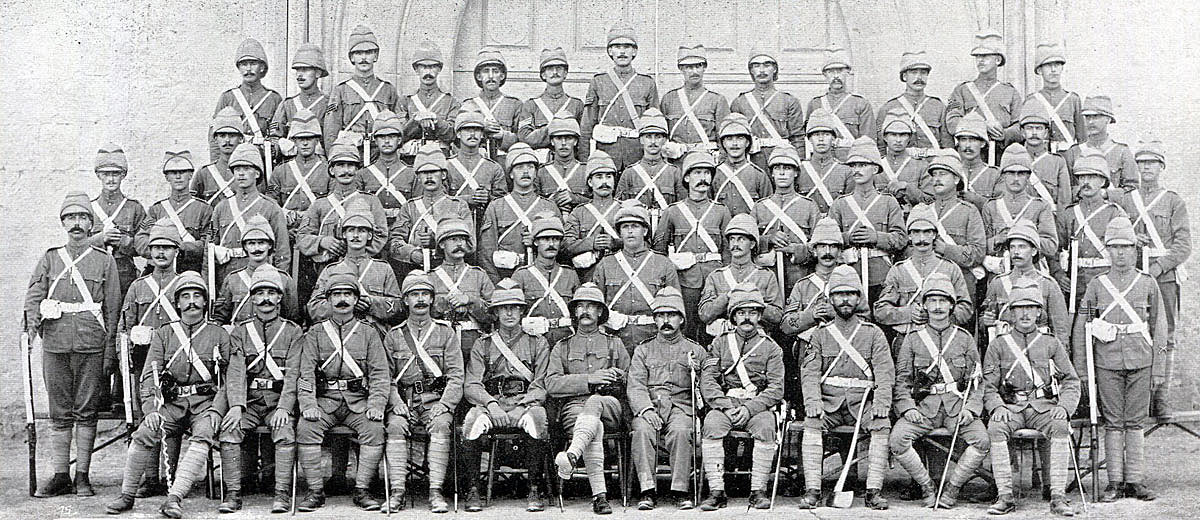
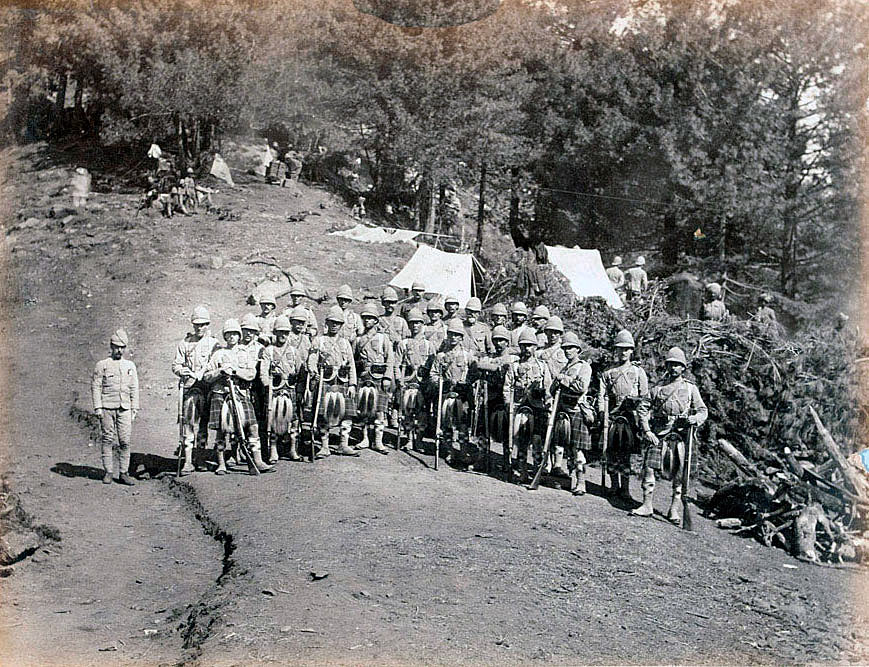
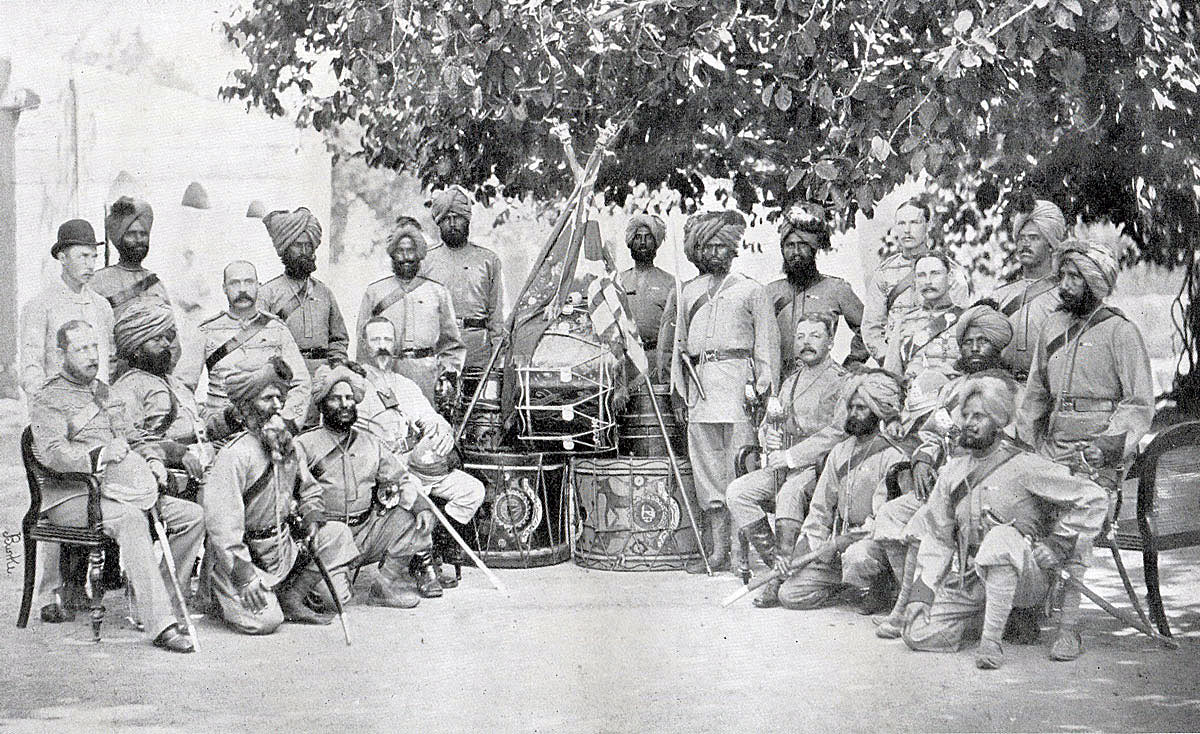
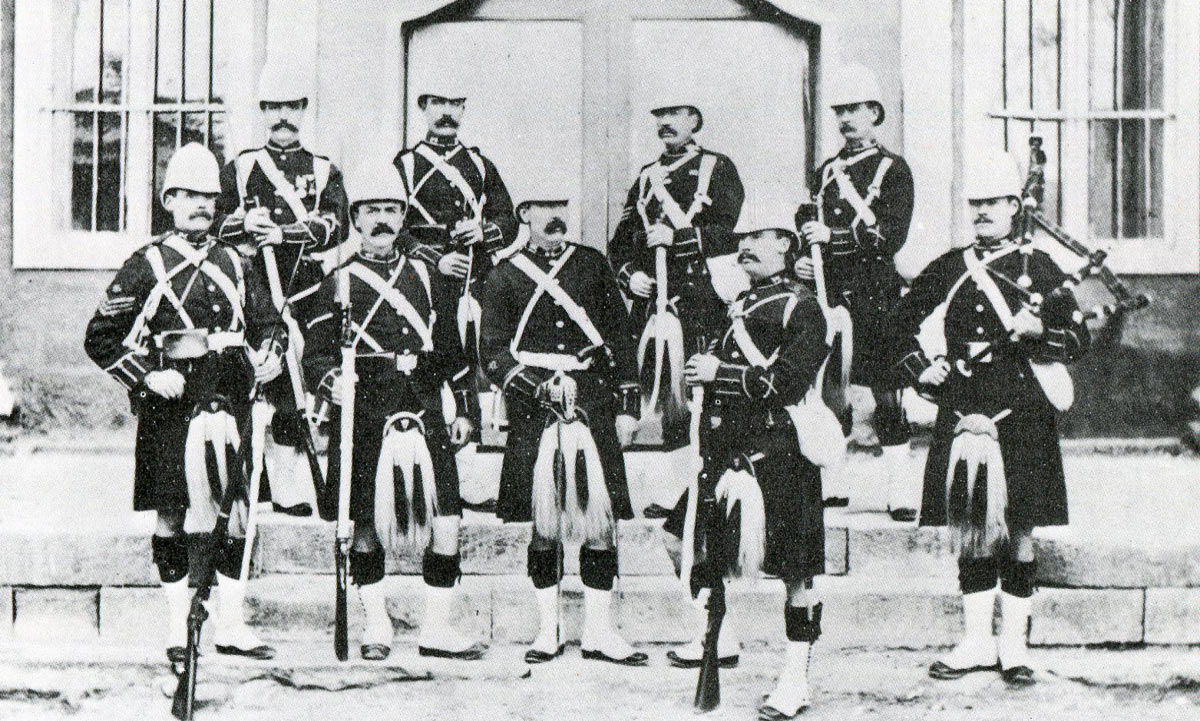
  • The 76th Regiment was for some years known as the ‘Hindoostan’ Regiment. In the Cardwell reforms of the 1880s the regiment became the 2nd Battalion of the Duke of Wellington’s (West Riding) Regiment.

References for the Battle of Laswaree:

Fortescue’s History of the British Army.

The Decisive Battles in India by Malleson

The previous battle in the Second Mahratta War is the Battle of Assaye

The next battle in the British Battles series is the Battle of Roliça

To the Second Mahratta War index


Malakand Field Force 1897

The operations of the Malakand Field Force against the Mamund tribe from 8th September 1897 to 12th October 1897, on the North-West Frontier of India, described by Winston Churchill in his book ‘The Story of the Malakand Field Force’

Night attack on the Nawagai Camp on 20th September 1897: Malakand Field Force, 8th September 1897 to 12th October 1897 on the North-West Frontier of India: picture by Frank Dadd

Night attack on the Nawagai Camp on 20th September 1897: Malakand Field Force, 8th September 1897 to 12th October 1897 on the North-West Frontier of India: picture by Frank Dadd

The previous battle of the North-West Frontier of India is the Malakand Rising 1897

The next battle of the North-West Frontier of India is the Mohmand Field Force 1897

To the North-West Frontier of India index


War: North-West Frontier of India.

Dates of the Malakand Field Force 1897: 8th September 1897 to 12th October 1897.

Place of the Malakand Field Force’s action in 1897 against the Mamunds: Bajaur and Mamund country; the area to the north of the Kabul River on the North-West Frontier of India, to the west of the Panjkora River, to the south of Jhar, to the east of the Afghan Border and to the north of Nawagai; essentially the Watelai Valley.

Combatants in the Malakand Field Force 1897: British and Indian troops against the Mamund tribe of Bajaur and their allies.

Note: the Mohmands and Mamunds are different tribes. The Mohmands occupy the area along the north bank of the Kabul River. The Mamunds are their immediate neighbours to the north. See the Mohmand Field Force 1897 for the simultaneous operation against the Mohmands by General Elles.

Commanders in the Malakand Field Force 1897:  The Malakand Field Force was commanded by Major-General Sir Bindon Blood KCB.

Lieutenant General Sir Bindon Blood (leaning on gun barrel) and his staff: Malakand Field Force, 8th September 1897 to 12th October 1897 on the North-West Frontier of India

Lieutenant General Sir Bindon Blood (leaning on gun barrel) and his staff: Malakand Field Force, 8th September 1897 to 12th October 1897 on the North-West Frontier of India

An influential cleric in the Mohmand area to the south, was the Hadda Mulla. The Hadda Mulla may have influenced the neighbouring Mamunds; otherwise there does not seem to have been a particular leader of the Mamunds. As was often the case on the North-West Frontier, the Mamunds may have responded spontaneously and without particular direction, to defend their localities against the incursions of the British and Indian troops.

Size of the forces in the Malakand Field Force 1897: Each of the two brigades of the Malakand Field Force was probably able to put into the field around 1,000 effective troops.

The number of tribesmen in the field varied enormously from day to day. What is apparent is that the British command underestimated the numbers of tribesmen and their determination and high degree of competence in this form of mountain warfare.

Winner of the Malakand Field Force 1897: The British and Indian Army.

Uniforms, arms and equipment in the Malakand Field Force 1897:
The British military forces in India fell into these categories:

  • Regiments of the British Army in garrison in India.  Following the Indian Mutiny of 1857, India became a Crown Colony.  The ratio of British to Indian troops was increased from 1:10 to 1:3 by stationing more British regiments in India.  Brigade formations were a mixture of British and Indian regiments.  The artillery was put under the control of the Royal Artillery, other than some Indian Army mountain gun batteries.
  • The Indian Army comprised the three armies of the Presidencies of Bombay, Madras and Bengal.  The Bengal Army, the largest, supplied many of the units for service on the North-West Frontier.  The senior regimental officers were British.  Soldiers were recruited from across the Indian sub-continent, with regiments recruiting nationalities, such as Sikhs, Punjabi Muslims, Pathans and Gurkhas.  The Indian Mutiny caused the British authorities to view the populations of the East and South of India as unreliable for military service.
  • The Punjab Frontier Force:  Known as ‘Piffers’, these were regiments formed specifically for service on the North-West Frontier and were controlled by the Punjab State Government.
  • Imperial Service Troops of the various Indian states, nominally independent but under the protection and de facto control of the Government of India.  The most important of these states for operations on the North-West Frontier was Kashmir.

A British infantry battalion comprised 10 companies with around 700 men and some 30 officers. A battalion had a maxim machine gun detachment of 2 guns and around 20 men.

Colour Party of 45th Rattray's Sikh Infantry: Malakand Field Force, 8th September 1897 to 12th October 1897 on the North-West Frontier of India

Colour Party of 45th Rattray’s Sikh Infantry: Malakand Field Force, 8th September 1897 to 12th October 1897 on the North-West Frontier of India

Indian infantry battalions had much the same establishment, without the Maxim gun detachment, although several of the battalions in the Malakand Field Force numbered only 400 to 500 all ranks. Senior officers were British, holding the Queen’s Commissions. Junior officers were Indian.

In 1897, Indian infantry regiments carried the single shot, drop action Martini-Henry breech loading rifle.  British regiments had received the new Lee Metford bolt action magazine rifle from 1894.

By 1897, both Indian and British Royal Artillery Mountain Batteries used the RML (Rifled Muzzle Loading) 2.5 inch gun, the successor to the small, basic and unreliable RML 7 pounder gun, which had gone out of service in the British batteries in the early 1880s and, finally, in the Indian batteries in around 1895.  The 2.5 inch had the nickname of ‘the Screw Gun’ as the barrel came in two sections that were screwed together for firing.  The gun was dismantled for transport and carried by mules (see Kipling’s poem ‘the Screw Guns’).

British and Indian troops in 1897 wore khaki field dress when campaigning, with a leather harness to carry equipment and ammunition.  British troops wore a pith helmet.  Indian troops were largely turbaned.  Gurkha troops wore a pill box hat.  Scottish Highland regiments wore the kilt.  Scottish Lowland Regiments, such as the Highland Light Infantry and the King’s Own Scottish Borderers, wore tartan trews.

The Indian cavalry regiments were armed with lance, sabre and carbine.

The standard tactic used by the British and Indian armies on the North-West Frontier of India, as with other so-called ‘semi-civilised enemies’ (tribesmen armed with swords and lances and with limited access to modern firearms), was to deliver a frontal attack, discharging controlled volleys of rifle fire and charging home with the bayonet.  When stationary under fire, cover was taken behind sangars or low, stone-built walls.

Supporting fire was provided by artillery, where available.  Cavalry conducted scouting duties and, in suitable circumstances, delivered mounted charges, which were particularly effective against loose formations of tribesmen caught in flat open country.  The Indian cavalry regiments were adept at mixing mounted action with dismounted, in which carbine fire was used against tribesmen, particularly during a withdrawal.

When a military column moved through hostile country, great care had to be taken to ensure that flanking high ground was occupied in strength, until the column was clear of the area.

Withdrawal was when troops became most vulnerable.  Experienced units made sure that withdrawal was made by alternate leaps, so that there was always a force providing covering fire for the troops moving back.  Pathan tribes were quick to follow up British withdrawals and any error was immediately exploited.  Many of the problems in battle for the British arose from inexperienced regiments failing to comply with the exacting requirements of frontier warfare.

Boy musicians, the Buffs: Malakand Field Force, 8th September 1897 to 12th October 1897 on the North-West Frontier of India

Boy musicians, the Buffs: Malakand Field Force, 8th September 1897 to 12th October 1897 on the North-West Frontier of India

The regiment that could be relied upon fully for its stamina and extensive experience of Frontier warfare was the Queen’s Own Guides, comprising a cavalry regiment and an infantry regiment. Winston Churchill describes with admiration the actions of the Guides. When other regiments were in difficulties, the Guides came to their rescue. The Guides moved about the battlefield at speed. Only the Guides seemed able to conduct a withdrawal with impunity, in the face of tribal attack. When the British column withdrew to camp under attack, it was the Guides who provided the rear-guard and ensured that the exhausted soldiers of other regiments, collapsed on the way, were carried into camp.

The tribesmen fought on foot.  It is estimated that, in the Malakand campaign, around a half were in possession of firearms: muskets, jezails, some Sniders (Enfield rifled muskets converted to breach loading) and a few Martini-Henry rifles.  The tribesmen possessed no artillery or machine guns.  Many fought with swords.  Flags representing villages, clans and tribes were carried in battle as rallying points.  Drums of many sorts were beaten; pipes and trumpets played.

A feature of warfare on the North-West Frontier of India was the ability of tribesmen to assemble in large numbers with little warning and to move at disconcerting speed across mountainous terrain, even at night.

Background to the Malakand Field Force 1897:

See Malakand Rising 1897 for the background.

Composition of the Malakand Field Force, 1897:

Havildar, 31st Punjab Infantry by AC Lovett

Havildar, 31st Punjab Infantry by AC Lovett

First Brigade (Brigadier General Meiklejohn)

1st Royal West Kent Regiment

24th Punjab Infantry

31st Punjab Infantry

45th Rattray’s Sikhs

Second Brigade (Brigadier General Jeffreys)

1st East Kent Regiment (Buffs)

35th Sikh Infantry

38th Dogras

Guides Infantry

Indian officer, 38th Dogras by AC Lovett

Indian officer, 38th Dogras; by AC Lovett

Divisional Troops:

1 squadron 10th Bengal Lancers

11th Bengal Lancers

Guides Cavalry

No.1 Mountain Battery, RA

No.7 Mountain Battery, RA

No.8 Bengal Mountain Battery

22nd Punjab Infantry

2 companies of 21st Punjab Infantry

No.4 Company Bengal Sappers and Miners

No.5 Company Madras Sappers and Miners

Third (Reserve) Brigade (Brigadier General Wodehouse)

1st Queen’s Surreys

2nd Highland Light Infantry

6 companies of 21st Punjab Infantry

39th Garwhal Rifles

No.10 Battery, RA

No.3 Company Bombay Sappers and Miners

Map of the Malakand Rising, 26th July to 22nd August 1897 on the North-West Frontier of India: map by John Fawkes

Map of the Malakand Rising, 26th July to 22nd August 1897 on the North-West Frontier of India: map by John Fawkes

Account of the Malakand Field Force 1897:

The attack by the various tribes on the Indian Army encampment in the Malakand Pass began on 26th July 1897.

The Government of India assembled a military force to relieve the Malakand garrison, under the command of Lieutenant General Sir Bindon Blood, giving it the title of ‘the Malakand Field Force’.

By 8th August 1897, the three brigades of the Malakand Field Force were assembled, the First Brigade, commanded by Brigadier General Meiklejohn, at Amandarra, the Second Brigade, commanded by Brigadier General Jeffreys, at Malakand and Khar and the Third Reserve Brigade, commanded by Brigadier General Wodehouse, at Mardan, watching the Bunerwal tribe to the east.

On that day news arrived of the Mohmand attack on Shabkadar Fort, led by the Hadda Mulla.

The attack on Shabkadar Fort was repelled, but the Hadda Mulla assembled a second force and advanced to attack the Nawab of Dir, in revenge for his support of the British.

As the Malakand Field Force moved up the Swat River to the north-east, the decision was made by the Government of India, that dealing with the Mohmands and the Mamunds, to the west, was a priority, requiring the diversion of the Malakand Field Force to act in concert with Major General Elles’s Mohmand Field Force, advancing north from Peshawar.

Map of the operations of the Malakand Field Force in Bajaur and the Mohmand Field Force in 1897: map by John Fawkes

Map of the operations of the Malakand Field Force in Bajaur and the Mohmand Field Force in 1897: map by John Fawkes

On 30th August 1897, the Second Brigade of the Malakand Field Force returned from the upper Swat Valley and the Third Reserve Brigade crossed the Swat River to Uch.

These movements caused the Hadda Mulla’s incursion into Dir to peter out, but it was still felt by the British authorities that dealing with the Hadda Mulla and the Mohmands and Mamunds was a priority, to protect the Peshawar area to the south, in turmoil due to the tribal unrest and to ensure communications with Dir, Jandol and Chitral.

The area seethed with news of a general jihad against the British, the tribal mullahs giving out that the Amir of Afghanistan would lead the jihad in person, while accounts circulated of great successes by the Afridis against the British in the Kaibur area, to the south.

The plan was that while General Elles’s two brigades of the Mohmand Field Force marched north into the Mohmand tribal area, two of General Blood’s Malakand Field Force brigades would cross the Panjkora River and advance into Bajaur and through Nawagai, to support the Khans of Dir and Nawagai and inflict punishment on the hostile Mamund clans.

Panjkora River suspension bridge and camp: Malakand Field Force, 8th September 1897 to 12th October 1897 on the North-West Frontier of India: picture by Edmund Hobday

Panjkora River suspension bridge and camp: Malakand Field Force, 8th September 1897 to 12th October 1897 on the North-West Frontier of India: picture by Edmund Hobday

On 2nd September 1897, Brigadier General Wodehouse marched from Uch to seize the bridge over the Panjkora River at Sado.  Further troops followed, giving Wodehouse a force comprising 1st Queen’s, 38th Dogras, 4 companies of 22nd Punjab Infantry, 2 squadrons of 11th Bengal Lancers, a half company of Sappers and Miners, 10th Field Battery and No.1 Mountain Battery, Royal Artillery.

It was discovered that the occupation of the Panjkora bridge, crucial for communications between the Swat Valley and Bajaur, was just in time to anticipate its seizure by hostile tribesmen. The securing of the bridge caused a number of Bajaur clans to abandon their intention to oppose the British, some chiefs even offering support.

General Blood received his orders to march into Bajaur on 3rd September 1897.

On 7th September 1897, General Blood took his divisional headquarters and the Second Brigade of the Malakand Field Force from Chakdara to Sarai. The First Brigade of the Malakand Field Force remained in the Swat Valley.

On 8th September 1897, General Blood and the Second Brigade crossed the Panjkora River and moved to Kotkai and, on the next day, to Ghosam.  Here, the advance halted while an attempt was made to impose a penalty on the Shamozai Utman Khel, unsuccessfully.

At the same time, Major Deane, the political officer, conducted negotiations with the Jandolis and a number of khans in the valley. Relations of Umra Khan, the Jandoli khan responsible for acting against the British in Chitral in 1895, were taken and sent to Malakand, until they complied with terms imposed on them by the British.

On 10th and 11th September 1897, the Third Brigade concentrated at Shakrata and a section of the First Brigade moved up to Sado, to guard the Panjkora bridge and establish a forward depot.

On 12th September 1897, the Second Brigade advanced and camped at Khar in Bajaur, while Brigadier General Wodehouse’s Third Brigade moved to Shamshak, at the southern end of the Watelai valley. Wodehouse’s cavalry reconnoitered the Watelai and Chaharmung valleys and were shot at from Zagai village.

Some Mamund and Salarzai maliks came into the Third Brigade’s camp to enquire as to the British intentions, but there was no sign of any jirgas representing the tribes as a whole, which excluded any peace negotiations.

The Second Brigade’s transport animals were mules, while the Third Brigade used largely camels. This substantially dictated how the Third Brigade could be used, as the camels found the going in mountainous areas difficult, being significantly less agile than mules, while the rocks injured their soft feet.

General Sir Bindon Blood’s plan was to act in concert with General Elles’s Mohmand Field Force, that was advancing into Mohmand territory from the south, by advancing into Mohmand territory via Nawagai, while Brigadier General Jeffreys took part of the Second Brigade across the Rambat Pass to Butkor and Danish Kol, carrying out operations against the Mamunds.

On 14th September 1897 the Second Brigade occupied the Rambat Pass and then, leaving the Buffs with the company of Sappers and Miners to hold the pass, marched to Markhanai, where the brigade built a fortified camp near the village.


The attack on the Markhanai Camp on the night of 14th/15th September 1897:

The village of Markhanai belonged to the Manda Utman Khel, who had taken part in the fighting in the Swat Valley and were still hostile to the British authorities.

The Second Brigade built the form of rectangular field encampment, usual in hostile territory on the North-West Frontier; a rectangular walled enclosure, with the eastern wall along the edge of a steep sided nala, about sixty foot deep. The rest of the perimeter was in open country, except that about seventy yards from the wall on the western side, terraced fields sloped down to a nala, running northwards to a stream about a mile distant.

The troops bivouacked along the perimeter wall, ready to man the wall at short notice, the lesson learnt from the Wana Camp attack on 3rd November 1894, with the baggage and animals in the centre of the camp.

Sikh gunners of a mountain battery: Malakand Field Force, 8th September 1897 to 12th October 1897 on the North-West Frontier of India

Sikh gunners of a mountain battery: Malakand Field Force, 8th September 1897 to 12th October 1897 on the North-West Frontier of India

At around 8pm, a signal of three shots rang out from the darkness, followed by a heavy fusillade from the east, west and north, causing heavy loss among the animals in the centre of the camp, but little or no injury to the troops, who hurriedly manned the perimeter wall, putting out cooking fires and other lights.

The tribal fire was directed mainly at the eastern face, held by the Guides Infantry. The area was lit by star shells, fired by the mountain battery and the troops responded to the tribesmen with volleys of rifle fire.

No charge was delivered, but the tribesmen used every item of cover to creep ever closer to the walls and deliver their fire, which was kept up until 10pm, when firing ceased.  Signal fires could be seen, lit in a number of the surrounding villages.

The tribesmen resumed firing with renewed vigor at about 11pm and continued for three and a half hours. This time the firing was mainly on the western wall held by the 38th Dogras.

The Dogras were ordered not to fire back, in the hope that the tribesmen might be induced to charge the camp, enabling the troops to inflict heavy casualties on them. The tribesmen did not respond to this inducement and continued their galling fire on the garrison.

Brigadier General Jeffreys then ordered the 38th Dogras to charge the tribesmen.

As the 38th Dogras assembled for the attack, two British officers were shot dead, Captain Tomkins and Lieutenant Bailey and a third officer, Lieutenant Harrington, was seriously wounded. The attack was abandoned.

Night attack on the Nawagai Camp 19th and 20th September 1897: Malakand Field Force, 8th September 1897 to 12th October 1897 on the North-West Frontier of India: picture by WH Overend

Night attack on the Nawagai Camp 19th and 20th September 1897: Malakand Field Force, 8th September 1897 to 12th October 1897 on the North-West Frontier of India: picture by WH Overend

It is hard not to conclude that Jeffreys made the same mistake he had, minutes before, been trying to induce the tribesmen to make.

Shortly afterwards the tribesmen withdrew. They had killed 2 British officers, 2 sepoys and 2 camp followers and wounded 1 British officer, 1 Indian officer and 9 soldiers. 98 horses and transport animals were killed or wounded.

The British authorities put together an accurate picture of the makeup of the attacking force of tribesmen. There were around 400 Mamund marksmen, with some Salarzai and Utman Khel, led by Muhammed Amin of Inayat Kila. Their casualties were 12 dead and an indeterminate number wounded.

The next morning, Captain Cole of the 11th Bengal Lancers set off in pursuit of the tribesmen responsible for the attack. The 11th caught up with them near the village of Badan Kot and killed 21 tribesmen, before driving the survivors into the hills around the Badan Gorge.

As the ground was becoming increasingly difficult for mounted troops, the Lancers withdrew towards camp, inevitably triggering the usual pursuit by the tribesmen. This pursuit ended and the tribesmen dispersed, when infantry support for the Lancers came up from Markhanai.

News of the attack on the Markhanai Camp was passed to General Blood at Nawagai. As soon as it was clear that the Mamunds were responsible for the attack on the camp, Brigadier General Jeffreys was ordered to abandon his intended move over the Rambat Pass and to march into Mamund country and administer punishment to the Mamunds.

On 15th September 1897, Brigadier General Jeffreys concentrated the Second Brigade at Inayat Kila, where a fortified camp was built as a base for the incursions against Mamund villages in the Watelai Valley.

Night attack on the Nawagai Camp 20th September 1897: Malakand Field Force, 8th September 1897 to 12th October 1897 on the North-West Frontier of India: picture by WH Overend

Night attack on the Nawagai Camp on 20th September 1897: Malakand Field Force, 8th September 1897 to 12th October 1897 on the North-West Frontier of India: picture by WH Overend

Attack on Nawagai Camp:

General Sir Bindon Blood’s Third Brigade of the Malakand Field Force marched to Nawagai where they built an entrenched camp, to await the arrival of General Elles’s Mohmand Field Force and to ensure the continued loyalty of the Khan of Nawagai, under severe pressure to join the rising against the British.

The Nawagai Camp followed the same design as the Markhanai Camp. The camp was on stony terraced fields sloping away to the south. The ground was open to the north. On the east and west sides, there were dry nalas, about 200 yards from the perimeter wall, with the terraces providing cover to points near to the wall. Steep rocky hills were the backdrop to the west and the east.

The cavalry of the Third Brigade carried out reconnaissances to the Kandara, Ata Khel and Ambahar valleys.

On 15th and 16th September 1897, the cavalry found the Bedmanai Pass to be strongly held by tribesmen.

On 17th September 1897, news of the fighting against the Mamunds in the Watelai Valley and the difficulties of Jeffreys’ Second Brigade reached Nawagai, putting more pressure on the khan to join the rising, which he continued to resist.

On 18th September 1897, heliograph communication was established between the Malakand Field Force Third Brigade and General Elles’s Mohmand Field Force, now in the Nahaki Pass.

On 19th September 1897, General Blood received orders from Army Headquarters to leave Nawagai and join his Second Brigade at Inayat Kila. This was not feasible in view of his lack of strength and the need to defend the Khan of Nawagai, until the threat from the tribesmen in the Bedmanai Valley could be dealt with.

On the night of the 19th September 1897, some 2,000 of the Hadda Mulla’s tribesmen came down from the Bedmanai Pass and attacked the Nawagai Camp. They were easily repelled. British casualties were 1 killed and 1 wounded.

Night attack on the Nawagai Camp on 19th September 1897: Malakand Field Force, 8th September 1897 to 12th October 1897 on the North-West Frontier of India: drawing by Edmund Hobday

Night attack on the Nawagai Camp on 19th September 1897: Malakand Field Force, 8th September 1897 to 12th October 1897 on the North-West Frontier of India: drawing by Edmund Hobday

On the 20th September 1897, a second night attack was made on Nawagai Camp. Warning of the attack was given by the khan and the troops were ready.

Again, the tribesmen were from the Hadda Mulla’s gathering in the Bedmanai Pass. They were led by the Sufi Mulla of Baticot.

The attacks began from the north of the camp at around 9pm, with a charge by swordsmen, supported by rifle fire. Some 3,000 tribesmen were involved in the attacks, with a further 2,000 in reserve

The rushes were repeatedly made and driven off, on three sides of the camp, until they ceased at around 2am. The swordsmen were determined and many were shot down within a few yards of the wall, but no tribesmen penetrated the defences.

The troops responded with disciplined volley firing, the guns firing star shells into the sky to illuminate the area.

Night attack on the Nawagai Camp on 20th September 1897: Malakand Field Force, 8th September 1897 to 12th October 1897 on the North-West Frontier of India: picture by Edmund Hobday

Night attack on the Nawagai Camp on 20th September 1897: Malakand Field Force, 8th September 1897 to 12th October 1897 on the North-West Frontier of India: picture by Edmund Hobday

The casualties among the tribesmen are believed to have been around 350 killed and a large number wounded. Several leaders among the tribesmen are known to have been killed.

British casualties were 1 killed and 31, including Brigadier General Wodehouse, wounded.

The next morning, the cavalry set off in pursuit, but did not make contact with the tribesmen, who must have dispersed into the mountains.

On 21st September 1897, General Blood met General Elles at Lakarai. The Third Brigade of the Malakand Field Force (1st Queen’s, 22nd Punjab Infantry, 39th Garwhal Rifles, 1 squadron 11th Bengal Lancers, No.1 Mountain Battery, RA and No.3 Company Bombay Sappers and Miners), now commanded by Lieutenant Colonel Graves of 39th Garwhalis, marched to Kuz Chinari and joined the Mohmand Field Force to attack the Hadda Mulla’s tribesmen in the Bedmanai Pass and in Jarobi.

Once the operation was completed, the Third Brigade marched to Peshawar and joined the Tirah Expeditionary Force.

Second Brigade, Malakand Field Force:

On 16th September 1897, Brigadier General Jeffreys’ Second Brigade marched out from the camp at Inayat Kila up the Watelai Valley in three columns. Number One Column comprised 1 squadron 11th Bengal Lancers, 4 guns No.8 Mountain Battery, 4 companies the Buffs, 6 companies 35th Sikhs and part of No.4 Company, Bengal Sappers and Miners, commanded by Lieutenant Colonel Goldney, 35th Sikhs.  Number Two Column comprised 6 companies 38th Dogras and part of No.4 Company, Bengal Sappers and Miners, commanded by Lieutenant Colonel Vivian, 38th Dogras. Number Three Column comprised 2 companies the Buffs, 5 companies the Guides Infantry and part of No.4 Company, Bengal Sappers and Miners.

Number One Column was to advance up the Kaga Pass road to Badalai.  Number Two Column was to move in parallel along the eastern foothills. Number Three Column was to march towards Agrah. All three columns would destroy villages on their march.

Colonel Vivian’s Number Two Column reached Damadolah, where it encountered strong opposition and, having insufficient strength and no guns, Vivian withdrew to the camp, reaching Inayat Kila at 4pm with insignificant casualties.

Numbers One and Three Columns moved up the valley. At 7.30am, the cavalry patrols reported that the tribesmen were holding Badan. Lieutenant Colonel Ommaney was ordered forward with 4 companies of the Buffs and 2 guns to take the village. The tribesmen fell back before the Buffs to Dabar.

In the meanwhile, Colonel Goldeney, with the rest of Number One Column, reached Badalai, where he received a report from the cavalry that the tribesmen were gathering in strength in the west.

Goldeney stopped short of Badalai and ordered Ommaney to rejoin the column with his men.

General Jeffreys then received information that the tribesmen were moving up the valley towards the Kaga Pass and ordered Goldeney to intercept them and prevent them from entering the pass, without waiting for Ommaney’s companies. A message was sent to Major Campbell, ordering him to bring his column up on the left of Goldeney’s centre column.

The tribesmen were driven out of Badalai and Captain Ryder with 1 ½ companies of 35th Sikhs moved up the hill to the east of Badalai, to protect the column’s flank, followed by the guns with an escort of a further 1 ½ companies.

The rest of the 35th Sikhs pushed on to Shahi Tangi, stopping there at 10.30am to allow the Buffs to come up.

35th Sikh Infantry at Shahi Tangi on 16th September 1897: Malakand Field Force, 8th September 1897 to 12th October 1897 on the North-West Frontier of India: picture by William Barnes Wollen

35th Sikh Infantry at Shahi Tangi on 16th September 1897: Malakand Field Force, 8th September 1897 to 12th October 1897 on the North-West Frontier of India: picture by William Barnes Wollen

With the halt of the troops, the tribesmen turned to the attack, pressing hard the Sikhs in Shahi Tangi and compelling Goldeney to order his regiment to retire. 2 of his companies were too far forward and found themselves in difficulties.

As could happen quickly in frontier warfare, a successful advance halted, in a moment turned into a position of peril.

As the 35th Sikhs withdrew towards Chingai, a body of tribesmen advanced into the open country to cut them off. Fortunately for Goldeney’s men, Captain Cole’s squadron of 11th Bengal Lancers was in the right position and charged the tribesmen, dispersing them and enabling the Sikhs to break through with the bayonet.

At about the same time, the companies of the Buffs came up and the mountain guns came into action from the ridge above Chingai.

Major Campbell’s column of Buffs and Guides Infantry occupied a position that enabled them to check the advance of a large body of tribesmen coming from the western side of the valley to join their brothers at Shahi Tangi.

In their withdrawal from Shahi Tangi, the 35th Sikhs suffered casualties of Lieutenant Hughes and a sepoy being killed and Lieutenant Cassels and 16 sepoys being wounded.

At midday, the 35th Sikhs and the Buffs returned to the attack, with support from the guns, destroying Shahi Tangi and Chingai. This was completed by 2.30pm and losses inflicted on the tribesmen, who are described as maintaining a stubborn resistance.

Brigadier General Jeffreys now began the difficult operation of withdrawing his troops, heavily engaged with the tribesmen, back to the camp at Inayat Kila, with the imperative of reaching the camp before darkness.

35th Sikh Infantry withdrawing under attack on 16th September 1897: Malakand Field Force, 8th September 1897 to 12th October 1897 on the North-West Frontier of India: picture by Edmund Hobday

35th Sikh Infantry withdrawing under attack on 16th September 1897: Malakand Field Force, 8th September 1897 to 12th October 1897 on the North-West Frontier of India: picture by Edmund Hobday

Orders to retire failed to reach Captain Ryder with his 1 ½ companies of Sikhs, on the high ground on the right flank. Not until he saw the main body withdrawing at around 3.30pm, did Captain Ryder begin his own withdrawal. As usual in frontier warfare, this withdrawal drew down on his men a prompt and violent attack by the tribesmen.

Although Ryder’s Sikhs inflicted heavy casualties on the pursuing tribesmen, they suffered significant casualties themselves, amounting to 15 killed, 3 missing and 24 wounded, including both the British officers and 2 Indian officers. As the wounded and if possible the bodies of the slain had to be carried back, more sepoys were taken out of action and the retreat greatly impeded.

Brigadier General Jeffreys halted the general withdrawal to give Ryder’s Sikhs the opportunity to catch up and, once they seemed to be in safety, the retreat continued, approaching the villages of Munar and Bilot at around 7pm. Here 4 additional companies, 2 of Guides and 2 of 45th Sikhs commanded by Major Worledge, arrived from the camp at Inayat Kila and were sent on to support the rearguard of Guides Infantry, whose volleys at the pursuing tribesmen could be heard in the distance.

The Buffs, in extended order, reached Munar, while the mountain battery, the Sappers and Miners with a company of the 35th Sikhs were approaching Bilot.

General Jeffreys with Corporal Smith and his party of 1st Buffs, No.8 Bengal Mountain Battery and No.4 Company, Bengal Sappers and Miners at Bilot on the night of 16th September 1897: Malakand Field Force, 8th September 1897 to 12th October 1897 on the North-West Frontier of India

General Jeffreys with Corporal Smith and his party of 1st Buffs, No.8 Bengal Mountain Battery and No.4 Company, Bengal Sappers and Miners at Bilot on the night of 16th September 1897: Malakand Field Force, 8th September 1897 to 12th October 1897 on the North-West Frontier of India

The action in Bilot:

Darkness was now falling and Jeffreys issued orders to occupy Munar and Bilot for the night, to enable the troops on the right flank to fall back. The difficulty in controlling the brigade was increased by a heavy thunderstorm.

The Buffs failed to receive the order and continued back to the camp at Inayat Kila, leaving the general with No.8 Bengal Mountain Battery, the Sappers and Miners and a party of 12 Buffs that had been detached to escort a dooli carrying a wounded officer, which in the event they could not find. The Sikhs escorting the guns lost touch and continued back to camp.

The action at Bilot on the night of 16th September 1897: Malakand Field Force, 8th September 1897 to 12th October 1897 on the North-West Frontier of India

The action at Bilot on the night of 16th September 1897: Malakand Field Force, 8th September 1897 to 12th October 1897 on the North-West Frontier of India

Anticipating General Jeffrey’s intentions, the tribesmen occupied Bilot, forcing the British troops to take what cover they could under a heavy fire. The guns fired at the tribesmen from close range and the night was spent with the Sappers and Miners and the 12 Buffs attempting to clear the village, led by Lieutenant Watson RE and Lieutenant Colvin RE.

Corporal James Smith VC, 1st Buffs: Malakand Field Force, 8th September 1897 to 12th October 1897 on the North-West Frontier of India

Corporal James Smith VC, 1st Buffs: Malakand Field Force, 8th September 1897 to 12th October 1897 on the North-West Frontier of India

Corporal Smith of the Buffs particularly distinguished himself in the repeated charges on the tribesmen.


At around midnight, Major Worledge arrived with his 4 companies of Guides and Sikhs, having failed to make contact with the Guides Infantry and the tribesmen were then forced out of Bilot. The force passed the rest of the night without further attack and a relieving force, of which Winston Churchill was a member, arrived in the morning.

During the fighting on 16th September 1897, Brigadier Jeffreys’ Second Brigade suffered casualties of 2 officers (Lieutenant Hughes, 35th Sikhs and Lieutenant Crawford RA of the mountain battery) and 36 soldiers killed and 11 officers, 102 soldiers and 2 camp followers wounded.

Over the following days, troops burnt a number of villages in the area of the camp at Inayat Kila.

Lieutenant Watson VC Royal Engineers: Malakand Field Force, 8th September 1897 to 12th October 1897 on the North-West Frontier of India

Lieutenant Watson VC Royal Engineers: Malakand Field Force, 8th September 1897 to 12th October 1897 on the North-West Frontier of India

On 20th September 1897, a battle took place at the village of Zagai, with ex-retainers of Umra Khan of Jandol, the leader of the attack on the British in Chitral Fort in 1895 (see the Siege of Chitral).

While retiring from Zagai over difficult ground, the Buffs were closely pressed by these tribesmen. Once the troops reached more open country, the tribesmen were driven off with heavy loss. 4 Buffs officers and 10 soldiers were wounded.

On 23rd September 1897, the village of Tangai was destroyed by the troops. This involved a large operation, to prevent the tribesmen from intervening, with the Buffs, the 35th Sikhs and the mountain guns providing a covering force for the Dogras and Sappers who went into the village.

Also on that day, the Khan of Jhar came into camp to request a truce, while terms were discussed with the Mamunds. The truce was agreed and extended to 28th September 1897.

Lieutenant Colvin VC, Royal Engineers: Malakand Field Force, 8th September 1897 to 12th October 1897 on the North-West Frontier of India

Lieutenant Colvin VC, Royal Engineers: Malakand Field Force, 8th September 1897 to 12th October 1897 on the North-West Frontier of India

During the truce, an exchange of regiments for the somewhat battered Second Brigade took place, with No.8 Bengal Mountain Battery, the Buffs and 35th Sikhs returning to the depot camp on the Panjkora, being replaced by 2 squadrons of Guides Cavalry, No.7 Mountain Battery, RA, 2nd Royal West Kents and 31st Punjab Infantry.

On 28th September 1897, reports circulated that the Mamunds were about to attack the Inayat Kila camp. This did not happen, but further reports made it clear that the request for the truce, on the basis that the Mamunds were proposing to seek terms of peace was false. The tribesmen needed the temporary cessation of hostilities to remove their belongings from vulnerable villages to higher ground and to sow their land.

Action at Agrah and Gat:

On 29th September 1897, a powerful force, comprising the Guides Cavalry, No.7 Mountain Battery, RA, 1st Royal West Kent Regiment, 31st Punjab Infantry, 38th Dogras and the Guides Infantry, led by Brigadier General Jeffreys, the brigade commander, marched up the valley to attack Agrah and Gat.

As the troops approached the villages, a large force of tribesmen could be seen on the high ground to the west, in a position of considerable strength, with more tribesmen joining them.

A rocky precipitous ridge divided the space between Agrah and Gat, while on either flank were steep boulder-strewn spurs, commanding the ground over which the troops would advance.

The Guides Cavalry began the attack, advancing along the Kakazai Nala, for some distance up the mountainside and then, dismounting and opening rifle fire on the tribesmen.

The main attack required the Guides Infantry to advance up the western spur, with the Royal West Kents on their right, advancing through the gap between the two villages to a position in the rear of Agrah. The 31st Punjab Infantry were to occupy the rocky ridge between the villages. The Dogras remained in reserve.

The mountain guns opened fire from the bank of a nala, a mile and a half south of Gat, in support of the 31st Punjab Infantry, bombarding the tribesmen holding the rocky ridge.

1st Royal West Kents at Agrah and Gat on 29th September 1897: Malakand Field Force, 8th September 1897 to 12th October 1897 on the North-West Frontier of India: picture by Walter Paget after Lionel James

1st Royal West Kents at Agrah and Gat on 29th September 1897: Malakand Field Force, 8th September 1897 to 12th October 1897 on the North-West Frontier of India: picture by Walter Paget after Lionel James

The tribesmen held their positions on the ridge with great determination and had to be driven out by the 31st Punjab Infantry, at the point of the bayonet. In the course of the attack, the commandant of the battalion, Lieutenant Colonel O’Bryen, a particularly promising officer, received a mortal wound from which he later died.

To assist the 31st Punjab Infantry in their difficult and heavily resisted attack, Brigadier General Jeffreys moved 2 companies from the reserve to a knoll on their right, to provide support and ordered the mountain guns to move half a mile forward and shell the ground east of Gat, to cut off the route for tribal reinforcements into Gat.

The Guides Infantry were heavily involved in checking the tribesmen to the front and left flank. The Royal West Kents advanced onto the ridge above Agrah and, from there, covered the Sappers and Miners as they destroyed the village.

Once the destruction of Agrah was complete, the Royal West Kents moved east to support the 31st Punjab Infantry and encountered numbers of tribesmen positioned in stone sangars, who resisted their advance fiercely.

Royal Artillery gunners at Panjkora: Malakand Field Force, 8th September 1897 to 12th October 1897 on the North-West Frontier of India

Royal Artillery gunners at Panjkora: Malakand Field Force, 8th September 1897 to 12th October 1897 on the North-West Frontier of India

As a party of Royal West Kents cleared a sangar, Lieutenant Clayton Browne was killed and several men wounded. A force of swordsmen charged the troops and drove them out of the sangar, whereupon the supporting company of the Royal West Kents advanced with the bayonet and dispersed the tribesmen.

By now, Gat was partially destroyed, but more tribesmen were advancing from Zai and the commanding officer of the Royal West Kents considered it prudent to withdraw his battalion.

Once clear of Gat, the whole force retired to the camp at Inayat Kila, arriving at 4.30pm.

British casualties on the day were 2 officers and 10 men killed with 7 officers and 42 men wounded. Tribal casualties were severe. 4 leading maliks were known to have been killed and there were many dead bodies in and around Gat.

It was now apparent that Brigadier General Jeffreys’ Second Brigade was not strong enough to compel the Mamunds to submit.

On 2nd October 1897, General Sir Bindon Blood left the Panjkora depot for the camp at Inayat Kila with a squadron of Guides Cavalry, No.8 Bengal Mountain Battery and 4 companies of 24th Punjab Infantry.

Brigadier General Meiklejohn followed, with 10th Field Battery, RA, armed with 12 pounder field guns, No.5 Company Madras Sappers and Miners and 2nd Highland Light Infantry, arriving at Inayat Kila on 4th October 1897.

1st Royal West Kents after the fight at Agrah and Gat on 29th September 1897: Malakand Field Force, 8th September 1897 to 12th October 1897 on the North-West Frontier of India

1st Royal West Kents after the fight at Agrah and Gat on 29th September 1897: Malakand Field Force, 8th September 1897 to 12th October 1897 on the North-West Frontier of India

On 2nd October 1897, Brigadier General Jeffreys marched out of Inayat Kila in the direction of Agrah and Gat with much the same force as in his previous operation on 29th September 1897, with the addition of No.8 Mountain Battery, RA.

Expecting the attack to fall again on Agrah and Gat, to complete the destruction of Gat, the tribesmen gathered in strength on the hills above the village.

But Jeffreys’ column turned off to the right and headed for the village of Badalai. Badalai was destroyed and Jeffreys’ column was on the return march to Inayat Kila, when the tribesmen came up from the direction of Chingai and attempted to envelope the British column, but were checked by the cavalry and the fire of the infantry.

Second Brigade casualties in this operation were 2 men killed and 17 men wounded.

On 4th October 1897, with the arrival of the fresh troops in Inayat Kila, the two brigades and the divisional reserve were re-organised.

The Mamunds were aware of the arrival at Inayat Kila of the significant number of fresh troops and realised that the Government of India intended to devote whatever resources were necessary to defeat them. The Khan of Nawagai was requested to act as go-between in negotiating a peace settlement.

In view of the substantial casualties the Mamunds had suffered in the fighting and the number of villages and crops that had been destroyed, the sole requirement made of the tribe was to return all the rifles captured from British and Indian troops during the fighting. This was done and the Mamunds sent all their allies, from outside the area, back to their homes.

To ensure the preservation of the new peace, the Mamunds picketed the British camps to ensure they were not attacked or sniped at.

The Afghan general, Sipah Salar, attempted to persuade the Mamunds not to return the rifles captured, but this was done.

On 11th October 1897, Sir Bindon Blood received the Mamund jirga in durbar. A declaration was read and hostilities were closed.

General Blood meets the Mamund jirgas in durbar with the Khans of Nawagai, Jhar and Khar on 11th October 1897: Malakand Field Force, 8th September 1897 to 12th October 1897 on the North-West Frontier of India: drawing by Edmund Hobday

General Blood meets the Mamund jirgas in durbar with the Khans of Nawagai, Jhar and Khar on 11th October 1897: Malakand Field Force, 8th September 1897 to 12th October 1897 on the North-West Frontier of India: drawing by Edmund Hobday

On 12th October 1897, the Malakand Field Force left the Watelai Valley and marched to Jhar.

Casualties in the Malakand Field Force 1897:  From 14th September to 11th October 1897, the Second Brigade of the Malakand Field Force suffered casualties of 6 officers killed and 24 officers wounded, 55 non-commissioned officers and men killed and 194 wounded. 135 horses and mules were killed or lost.

Indian General Service Medal 1854-1895 with the clasps 'Malakand' and 'Punjab Border 1897-1898': Malakand Field Force, 8th September 1897 to 12th October 1897 on the North-West Frontier of India

Indian General Service Medal 1854-1895 with the clasps ‘Malakand’ and ‘Punjab Border 1897-1898’

The tribesmen were estimated to have suffered casualties of 300 killed and 250 wounded.


Battle Honour and decorations for the Malakand Field Force 1897:
The Indian General Service Medal 1895, with the clasp ‘Punjab Frontier, 1897-98’ was awarded to all ranks who had taken part in the operations in Bajaur and Mamund country.

The battle honour ‘Malakand’ was awarded by the Government of India to the Indian Army regiments of the garrison of Malakand that was attacked on 26th July 1897 (see Malakand Rising 1897).

Follow-up to the Malakand Field Force 1897: 
Following the operation against the Mamunds in the Watelai Valley, the Malakand Field Force moved north to deal with the Salarzai, who sued for peace without resistance and then to Jhar, where the Shamozai Utman Khels came to terms.

The Khans of Nawagai, Khar and Jhar received substantial financial rewards for their support of the British.

The Malakand Field Force was broken up on 19th January 1898.

The Government of India record of the Malakand Field Force campaign in Bajaur in 1897 stated: ‘The stubborn defence of their country in spite of continuous losses, gained for the Mamunds a well deserved reputation for bravery and good fighting qualities.’

Winston Churchill: Malakand Field Force, 8th September 1897 to 12th October 1897 on the North-West Frontier of India

Winston Churchill: Malakand Field Force, 8th September 1897 to 12th October 1897 on the North-West Frontier of India

Winston Churchill: Churchill was serving in India as a subaltern officer in the 4th Hussars, stationed at Bangalore. With the outbreak of the risings on the North-West Frontier in 1897 and no prospect of any British cavalry regiment being involved, Churchill obtained an appointment as war correspondent for the Daily Telegraph. Churchill arrived in Swat as the Malakand Field Force was about to begin the attack on Bajaur, recounted on this page. Churchill’s book ‘the Malakand Field Force’, while recording the events surrounding the attack on Malakand, went on to become a record of his personal experiences in battle after the crossing of the Panjkora River.

Churchill was present on 16th September 1897 with Jeffrey’s Second Brigade, initially with Captain Coles’ 11th Bengal Lancers squadron and then with the 35th Sikhs, as they carried out their attack on Shahi Tangi. The next morning, Churchill was with the party that relieved Brigadier General Jeffreys in Bilot. Straight forward history became a graphic eye witness account.

Churchill’s book contains sections on the tactics of fighting on the North-West Frontier and his analysis of the problems thrown up by the area’s complex politics.

The Victorian Distinguished Conduct Medal: 4 soldiers of the Buffs were awarded the DCM for their conduct at Bilot, on the night of 16th September 1897: Malakand Field Force, 8th September 1897 to 12th October 1897 on the North-West Frontier of India

The Victorian Distinguished Conduct Medal: 4 soldiers of the Buffs were awarded the DCM for their conduct at Bilot, on the night of 16th September 1897: Malakand Field Force, 8th September 1897 to 12th October 1897 on the North-West Frontier of India

Churchill considered the loss of officers. Marked out by their swords and lack of rifles and in the Indian regiments their distinctive headgear (helmets not turbans), the officers were a prime target for the tribesmen. Churchill wrote: ‘When the Buffs were marching down to Panjkora, they passed the Royal West Kent coming up to relieve them at Inayat Kila. A private in the up-going regiment asked a friend in the Buffs what it was like at the front. ‘Oh’, replied the latter, ‘you’ll be all right so long as you don’t go near no officers, nor no white stones.’ Whether the advice was taken is not recorded, but it was certainly sound, for three days later -on 30th September- in those companies that were engaged in the village of Agrah, eight out of eleven officers were hit or grazed by bullets’.

The British army was to find just how vulnerable its officers were to enemy marksmen with the outbreak of the Boer War, two years later.

Bilot:  

Lieutenants Watson and Colvin and Corporal Smith were awarded the Victoria Cross for their conduct in Bilot.

The Distinguished Conduct Medal was awarded to Privates Lever, Poile, Finn and Nelthorpe from the party of the Buffs.

Anecdotes and traditions from the Malakand Field Force 1897:

  • One of the medical officers tending the wounded in Nawagai camp during the tribal attacks was Captain Whitchurch, who had won the Victoria Cross in the Chitral garrison in 1895.
  • The firing of three shots was the tribesmen’s signal for the attack on Markhanai Camp on 14th September 1897. Three shots fired seems to have been a standard signal among the tribesmen for a night attack. A similar signal began the attack on the Wana Camp on 3rd November 1894.

    Queen's Own Corps of Guides Cavalry 1897: Malakand Field Force, 8th September 1897 to 12th October 1897 on the North-West Frontier of India

    Queen’s Own Corps of Guides Cavalry 1897: Malakand Field Force, 8th September 1897 to 12th October 1897 on the North-West Frontier of India

  • It was widely acknowledged in Indian military circles that the Mamunds resistance was unexpectedly strong. There were times during the Second Brigade’s operation in the Watelai Valley, when the British and Indian troops came near to disaster. Captain Ryder’s 35th Sikhs were rescued in the nick of time by the indomitable Guides and, if General Jeffreys had not encountered Corporal Smith’s group of 12 Buffs and Major Worledge had not found the general in the dark, Jeffreys, a battery of mountain guns and a company of Sappers and Miners might well have been overwhelmed by the tribesmen at Bilot on the night of 16th September 1897.
  • Although nothing is said in the official history, it seems likely that General Blood was considered to have mishandled the operations against the Mohmands and Mamunds and to have run unnecessary and potentially disastrous risks, by dividing his force.
  • The British infantry battalions, armed as they were with the magazine Lee-Metford rifle, were a significant force on the battlefield.

References for the Malakand Field Force 1897:
Frontier and Overseas Expeditions from India Volume 1 published by the Government of India 
North West Frontier by Captain H.L. Nevill DSO, RFA
The Story of the Malakand Field Force by Winston Churchill
The North-West Frontier by Michael Barthorp
The Frontier Ablaze, the North-West Frontier Rising 1897-1898 by Michael Barthorp
The History of Probyn’s Horse (11th and 12th Bengal Lancers)
Sketches on service during the Indian Frontier Campaigns of 1897 by Edmund Hobday

The previous battle of the North-West Frontier of India is the Malakand Rising 1897

The next battle of the North-West Frontier of India is the Mohmand Field Force 1897

To the North-West Frontier of India index


Mohmand Field Force 1897

The Mohmand Field Force, between 7th August and 1st October 1897; the British operation against the Hadda Mulla and the Mohmand tribe, in the face of the spreading uprising along the North-West Frontier of India in 1897

Attack on Shabkadar Fort on 7th August 1897: Mohmand Field Force, 7th August to 1st October 1897, North-West Frontier of India: picture by Richard Caton Woodville

Attack on Shabkadar Fort on 7th August 1897: Mohmand Field Force, 7th August to 1st October 1897, North-West Frontier of India: picture by Richard Caton Woodville

The previous battle in the North-West Frontier of India sequence is the Malakand Field Force 1897

The next battle in the North-West Frontier of India sequence is Tirah 1897

To the North-West Frontier of India index


War: North-West Frontier of India:

Date of the Mohmand Field Force 1897: 7th August to 1st October 1897

Place of the Mohmand Field Force 1897: the Mohmand tribal region to the north of the Kabul River and to the west of the Panjkora River.

Combatants in the Mohmand Field Force 1897: troops of the British and Indian armies against the clans of the Mohmand tribe.

Major General Edmond Elles, commander of the Mohmand Field Force: Mohmand Field Force, 7th August to 1st October 1897, North-West Frontier of India

Major General Edmond Elles, commander of the Mohmand Field Force: Mohmand Field Force, 7th August to 1st October 1897, North-West Frontier of India

Note: the Mohmands and Mamunds are different tribes. The Mohmands occupy the area along the north bank of the Kabul River. The Mamunds are their immediate neighbours to the north. See the Malakand Field Force 1897 for the simultaneous operation against the Mamunds by General Sir Bindon Blood.

Commanders in the Mohmand Field Force 1897: Major-General Elles commanded the Mohmand Field Force.  The tribes were inspired and on occasions led by the Hadda Mulla, a Muslim cleric based in the western Mohmand village of Jarobi.

Size of the forces in the Mohmand Field Force 1897: the Mohmand Field Force varied around a size of 1,500 men. The numbers of tribesmen varied widely according to the stage of the operation and are given in the text.

Uniforms, arms and equipment in the Mohmand Field Force 1897:
The British military forces in India fell into these categories:

  • Regiments of the British Army in garrison in India.  Following the Indian Mutiny of 1857, India became a Crown Colony.  The ratio of British to Indian troops was increased from 1:10 to 1:3 by stationing more British regiments in India.  Brigade formations were a mixture of British and Indian regiments.  The artillery was under the control of the Royal Artillery, other than some Indian Army mountain gun batteries.
  • The Indian Army comprised the three armies of the Presidencies of Bombay, Madras and Bengal.  The Bengal Army, the largest, supplied many of the units for service on the North-West Frontier.  The senior regimental officers were British.  Soldiers were recruited from across the Indian sub-continent, with regiments recruiting particular nationalities, such as Sikhs, Punjabi Muslims, Pathans and Gurkhas.  The Indian Mutiny caused the British authorities to view the populations of the east and south of India as unreliable for military service.
  • The Punjab Frontier Force:  Known as ‘Piffers’. These were the regiments formed specifically for service on the North-West Frontier and were controlled by the Punjab State Government.
  • Imperial Service Troops of the various Indian states, nominally independent but under the protection and de facto control of the Government of India.  The most important of these states for operations on the North-West Frontier was Kashmir.

A British infantry battalion comprised ten companies, with around 700 men and some 30 officers.  A battalion possessed a maxim machine gun detachment of two guns and some 20 men.

Indian infantry battalions had much the same establishment, but without the maxim gun detachment.  Senior officers were British, holding Queen’s Commissions.  Junior officers were Indian.

By the late 1890s, British regiments were issued with the magazine Lee-Metford rifle.  The Indian Army regiments carried the single shot Martini-Henry.  Both rifles took a bayonet.

Patiala troops: Mohmand Field Force, 7th August to 1st October 1897, North-West Frontier of India

Patiala troops: Mohmand Field Force, 7th August to 1st October 1897, North-West Frontier of India

As initially the Lee-Metford was seen as having inadequate stopping power in its use against fanatical tribesmen, the ammunition was modified to cause it to spread on impact, causing horrific wounds.  These rounds were manufactured at the Government of India Arsenal at Dum-Dum.  The rounds were called ‘dum-dums’ and outlawed by the Geneva Convention.  The Lee-Metford was finally replaced by the Lee-Enfield rifle, which fired a larger .303 round and continued in service with the British army through both world wars and beyond.

2.5 inch RML Mountain Gun, 'Screw Gun': Mohmand Field Force, 7th August to 1st October 1897, North-West Frontier of India: Firepower Museum

2.5 inch RML Mountain Gun, ‘Screw Gun’: Mohmand Field Force, 7th August to 1st October 1897, North-West Frontier of India: Firepower Museum

The British and Indian Mountain Batteries used the 2.5-inch RML muzzle loading rifled gun, carried by mules. The barrel was broken into two sections for carrying, giving the gun its characteristic nickname of the ‘screw-gun’.

The cavalry regiments were armed with lances, swords and carbines.

13th Bombay Lancers: Mohmand Field Force, 7th August to 1st October 1897, North-West Frontier of India

13th Bombay Lancers: Mohmand Field Force, 7th August to 1st October 1897, North-West Frontier of India

Regiments in the Mohmand Field Force 1897:

11th Bengal Lancers

13th Bengal Lancers

1st Somerset Light Infantry

1st Queen’s Regiment (West Surreys)

2nd Oxfordshire Light Infantry

2nd/1st Gurkhas

9th Gurkha Rifles

20th Punjab Infantry: Mohmand Field Force, 7th August to 1st October 1897, North-West Frontier of India: pictcure by AC Lovett

20th Punjab Infantry: by AC Lovett

20th Punjab Infantry

22nd Punjab Infantry

28th Bombay Pioneers

39th Garwhal Rifles

No. 5 Company Bengal Sappers and Miners

No. 3 Company Bombay Sappers and Miners

No. 1 Mountain Battery, Royal Artillery

No. 3 Mountain Battery, Royal Artillery

No. 5 (Bombay) Mountain Battery

Patiala Regiment

39th Garwhal Rifles: Mohmand Field Force, 7th August to 1st October 1897, North-West Frontier of India: picture by AC Lovett

39th Garwhal Rifles: Mohmand Field Force, 7th August to 1st October 1897, North-West Frontier of India: picture by AC Lovett

Winner of the Mohmand Field Force 1897: The British and Indian force.

Background to the Mohmand Field Force 1897: In 1897 the Muslim tribes rose against the British along the North-West Frontier of India. Expressions are used such as ‘the Frontier Ablaze’ to describe a phenomenon that took the British Government of India almost completely by surprise.

The uprising began with the attack on the Malakand camp, to the north of the Kabul River, on 26th July 1897. Risings followed in Mohmand country further west and to the south of the Kabul River in the Tirah.

The British Government of India was compelled to mobilise substantial military forces to combat the tribes and the military operations became the centre of interest in Britain.

Winston Churchill wrote his first book of importance, after his involvement in the ‘the story of the Malakand Field Force’ in 1897.

The reasons for the tribal uprisings in 1897:

There is little doubt that the basic reason for the tribes’ antipathy towards the British was the clear intention of the British to incorporate much of the tribal lands into British India.

Soldiers of the 28th Bombay Pioneers: Mohmand Field Force, 7th August to 1st October 1897, North-West Frontier of India

Soldiers of the 28th Bombay Pioneers: Mohmand Field Force, 7th August to 1st October 1897, North-West Frontier of India

The close British connection with the North-West Frontier began with the annexation of the Punjab, following the two Sikh Wars. The border of the Punjab lay along the Indus. Tribal lands lay along the western and north-western banks of the Indus.

British obsession with the threat to India from Russia led to the formulation of the ‘Forward Policy’, which envisaged British influence, if not direct rule, up to the line of the Himalayan passes in the north and the Afghan border, wherever it lay, in the west.

Following the Second Afghan War, the British compelled the Amir of Afghanistan to agree to the establishment of a settled border between Afghanistan and British India. The work on demarking the border was carried out in the 1880s by the Durand Commission, which began to set up a row of white posts through the tribal lands, although the work had to be abandoned in the face of tribal opposition.

Most of the Muslim tribes along the North-West Frontier of India considered themselves to be nominal subjects of the Amir of Afghanistan. The idea of subjection to a non-Muslim state, British India, was anathema to all, other than some minor rulers who benefited financially from British rule.

Mohmand Field Force in camp at Nahaki: Mohmand Field Force, 7th August to 1st October 1897, North-West Frontier of India: picture by Melton Prior

Mohmand Field Force in camp at Nahaki: Mohmand Field Force, 7th August to 1st October 1897, North-West Frontier of India: picture by Melton Prior

The Chitral campaign in 1895 was of particular significance. The dispute over the mehtarship of Chitral and the siege of British and Indian troops in Chitral Fort gave the British Government of India the excuse to move into Chitral and install a mehtar firmly under British control. An Indian garrison was established at Chitral town and a road built from the border cantonment of Malakand to Chitral. All the intervening minor rulers, the Khans of Dir and Jandol and others, received British subsidies to maintain and protect the road. The worst fears of the border tribes as to the ambitions of the British were fulfilled.

No 3 Mountain Battery, Royal Artillery: Mohmand Field Force, 7th August to 1st October 1897, North-West Frontier of India

No 3 Mountain Battery, Royal Artillery: Mohmand Field Force, 7th August to 1st October 1897, North-West Frontier of India

In 1897, it is believed that the final trigger for the tribal uprising, orchestrated by Muslim clerics as a Jihad, was the defeat of the Christian Greeks by the Muslim Turks in the Balkans.

One of the Muslim clerics leading the attack on the Malakand was the Mahmond Hadda Mulla from Jarobi.

Once the British and Indian ‘Malakand Field Force’ relieved the Malakand garrison and Chakdara Fort and moved up the Swat River, the rising in the Lower Swat subsided and the Hadda Mulla moved back into Mahmond country, to the west of the Panjkora River, to continue the rising.

Map of the operations of the Malakand Field Force and the Mohmand Field Force in 1897: map by John Fawkes

Map of the operations of the Malakand Field Force and the Mohmand Field Force in 1897: map by John Fawkes

Account of the Mohmand Field Force 1897:

On 7th August 1897, the Hadda Mulla, now leading a force from the Mohmand clans amounting to 4,000 to 5,000 tribesmen, crossed the Afghan border into British India and advanced to attack the largely Hindu village of Shankargarh, to the north of the Kabul River.

Half the mullah’s force sacked Shankargarh, while the other half attacked the nearby Shabkadar Fort, held by a garrison of 60 Border Military Police and Peshawar District Police, led by Subadar-Major Abdur Rauf Khan.

The attack was repelled with some 40 casualties inflicted on the tribesmen.  Some of the mullah’s force withdrew into Afghanistan, while the remainder remained in the area of Shabkadar Fort.

News of the tribal advance reached Peshawar on the evening of 7th August 1897 and a British and Indian column marched out that night for Shabkadar Fort, comprising 2 squadrons of 13th Bengal Lancers, 4 field guns, 2 companies of the Somerset Light Infantry and the 20th Punjab Infantry, all commanded by Lieutenant Colonel Woon of the 20th.

Inside Shabkadar Fort: Mohmand Field Force, 7th August to 1st October 1897, North-West Frontier of India

Inside Shabkadar Fort: Mohmand Field Force, 7th August to 1st October 1897, North-West Frontier of India

The route from Peshawar to Shabkadar Fort was some fifteen miles, across the Kabul River, in spate at this time of year.  The river was crossed at the Hajizai ferry, operated by a number of boats, insufficient to convey the military force with any speed.

Troops by the road side: Mohmand Field Force, 7th August to 1st October 1897, North-West Frontier of India

Troops by the road side: Mohmand Field Force, 7th August to 1st October 1897, North-West Frontier of India

The first troops taken across the ferry were a squadron of the 11th Bengal Lancers, which hurried on to assist the Shabkadar garrison, although the attack had ended before the squadron reached the fort.

Woon arrived with part of his force on the 8th August 1897 and engaged the tribesmen, but was compelled to withdraw to the fort to await the arrival of the rest of his column.

With his full force, Woon renewed the attack on 9th August 1897, but was still in insufficient strength to make headway against the tribesmen.

13th Bengal Lancers charging the Hadda Mulla’s tribesmen at Shabkadar: Mohmand Field Force, 7th August to 1st October 1897, North-West Frontier of India: picture by Edmund Hobday

13th Bengal Lancers charging the Hadda Mulla’s tribesmen at Shabkadar: Mohmand Field Force, 7th August to 1st October 1897, North-West Frontier of India: picture by Edmund Hobday

During the course of this engagement, the squadron of 11th Bengal Lancers carried out a charge from the right wing down the line of tribesmen dispersing them.

As Woon was withdrawing, General Elles arrived, re-deployed the small force and pushed the tribesmen back into the hills, while more troops marched in from Peshawar.

There was now an assessment of the crisis facing the British authorities.  It was clear that there were some 5,000 to 6,000 tribesmen assembled in the hills.  What was less easy to assess was from which tribes and clans the tribesmen were drawn.

Working out the makeup of the tribal force was essential for devising the counter-strategy to be adopted.  This was initially to defeat the force, but then to destroy the villages and crops of the tribes and clans in insurrection.  This second feature of the campaign, essential to ensure future peace, in the view of the British authorities, could only be carried out with reliable information as to which tribes and clans were involved.  Destruction of the villages and crops of the wrong clans would be liable to drive them to join the hostile force.

Jodhpur Lancers: Mohmand Field Force, 7th August to 1st October 1897, North-West Frontier of India

Jodhpur Lancers: Mohmand Field Force, 7th August to 1st October 1897, North-West Frontier of India

With the assistance of the British political officers, General Elles worked out that the tribal force he faced comprised men from all the Mohmand tribes and clans living in the area to the west of the Panjkora River, to the north of the Kabul River, to the east of the Afghan frontier and to the south of the Koh-i-Mor Mountains.  Other men came from the Swat Valley, from across the Afghan border and from the areas further north.  The tribes included the Mohmands, the Utman Khels, the Safis, Mians, Shinwaris, Khugianis and Utkel Ghilzais.


The British and Indian force at Shabkadar was increased to 2,500 men, the Hajizai Ferry being replaced by a bridge of boats and a field telegraph line being installed from Peshawar to Shabkadar.

More troops were brought up to Peshawar to form a second column.

Prince Albert's Somerset Light Infantry on exercise in England: Mohmand Field Force, 7th August to 1st October 1897, North-West Frontier of India: picture by Orlando Norie

Prince Albert’s Somerset Light Infantry on exercise in England: Mohmand Field Force, 7th August to 1st October 1897, North-West Frontier of India: picture by Orlando Norie

In view of the failure of his surprise raid against Shabkadar, the Hadda Mulla left his army, reportedly going to Jarobi on the Afghan border and various tribal groups began to negotiate with the British political officers, the justification for their hostile actions being the influence of the Hadda Mulla over the tribesmen.

By the end of August 1897, the Hadda Mulla was again raising a force and was in communication with the Afridis in the Khaibur and the cleric in Swat labelled by the British as the ‘Mad Fakir’.

Encouraged by the Hadda Mulla, the ‘Mad Fakir’ planned to attack the Khan of Dir, an ally of the British.

This second move by the Hadda Mulla caused the British authorities to bring forward their operation against the Mohmands, despite the heavy commitment in the Tirah against the Afridis.

Two forces would operate against the Mohmands.  General Elles would march north from Shabkadar Fort and General Sir Bindon Blood, commanding the Malakand Field Force, would break off his operation up the Swat River, having reached Mingaora, cross the Panjkora River and invade Mohmand country from the east, with two of his three brigades.

This page covers the operations of Brigadier Elles with the Mohmand Field Force.

The Hadda Mulla was still in Jarobi.  Mohmand clans assembled to hold the Kharappa and Burjina passes against Elles’s troops.

However, the Tarakzai clan, occupying an important area on both sides of the Kabul River to the west, undertook to keep the Hadda Mulla’s tribesmen out of their area and prevent them from crossing the Kabul River, thereby securing Elles’s left flank, as his troops advanced to the Kharappa and Burjina passes.

Sappers and Miners clearing a road in the Nahaki Pass: Mohmand Field Force, 7th August to 1st October 1897, North-West Frontier of India: picture by CJ Stamland

Sappers and Miners clearing a road in the Nahaki Pass: Mohmand Field Force, 7th August to 1st October 1897, North-West Frontier of India: picture by CJ Stamland

On 15th September 1897, the Mohmand Field Force began its advance north.  The First Brigade, with General Elles and his headquarters, marched up the Kharappa Pass to Ghalani, eighteen miles in intense heat, while the Second Brigade followed to Dand.

Beyond Dand the route was impassable for camel convoys and a halt was called at Ghalani, to enable the path to be improved, as it was urgent to bring up supplies for Sir Bindon Blood’s brigade of the Malakand Field Force at Nawagai Camp. The route was described as like a staircase of blocks of rock, up which the animals had to be hauled.

Gurkhas in the Nahaki Pass: Mohmand Field Force, 7th August to 1st October 1897, North-West Frontier of India: picture by William Barnes Wollen

Gurkhas in the Nahaki Pass: Mohmand Field Force, 7th August to 1st October 1897, North-West Frontier of India: picture by William Barnes Wollen

On 17th September 1897, troops of Elles’s First Brigade reached Katsai, 2 ½ miles south of the Nahaki Pass.  Attempts to establish signal contact with the brigade in Nawagai Camp were unsuccessful, but a letter arrived from Sir Bindon Blood saying that the Hadda Mulla was in the Bedmanai Pass with 1,000 tribesmen, but that he could make no move from Nawagai, until his second brigade was available from its operations in the Mamund Valley.

By the 18th September 1897, the camel path and telegraph line to Ghalanai were complete.

The jirga of the Halimzai from Gandab came in to General Elles’s camp and negotiated an end to hostilities by that clan of the Mohmands.

The Mohmand Field Force advances into the Bedmanai Valley on 22nd September 1897: Mohmand Field Force, 7th August to 1st October 1897, North-West Frontier of India

The Mohmand Field Force advances into the Bedmanai Valley on 22nd September 1897: Mohmand Field Force, 7th August to 1st October 1897, North-West Frontier of India

The Mohmand Field Force moved its forward units to Nowaki Village and other units moved up to Ghalanai.

Later, on 18th September 1897, General Elles received a request from Sir Bindon Blood for assistance in driving the Hadda Mulla’s tribesmen from the Bedmanai Pass.

On 21st September 1897, General Elles marched, with his First Brigade and the cavalry and artillery from the Mohmand Field Force, to Lakarai.  A squadron of cavalry moved up to Khazina, but met no opposition.

General Blood met General Elles at Lakarai and informed him of the attacks on Nawargai Camp by the tribesmen on 19th and 20th September 1897 and that a hostile force was reported at Bedmanai of over 4,000 tribesmen.

General Blood ordered General Elles to clear the Bedmanai Valley and then the Mitai and Suran Valleys of hostile tribesmen. For this operation, Blood transferred his Third Brigade and mountain battery, then at Nawagai Camp, to Elles’s command and left to join Brigadier General Jeffrey’s Second Brigade in the Mamund Valley.

On 22nd September 1897, Elles’s force concentrated in Khazina, at the entrance to the Bedmanai Pass, where it was joined by the Third Brigade of the Malakand Field Force from Nawagai Camp.

Gurkhas under fire while descending a cliff face: Mohmand Field Force, 7th August to 1st October 1897, North-West Frontier of India: picture by Richard Caton Woodville

The path up the Bedmanai Pass followed a dry nalla.  The Third Brigade, Malakand Field Force, with one battery, advanced up this path, while the First Brigade, Mohmand Field Force, took a route along the high ground on the left, to outflank the tribesmen’s positions at the head of the valley.

The baggage, with an escort, remained in the camp near Khazina.

Sketch plan of the action in the Bedmanai Pass on 22nd September 1897: Mohmand Field Force, 7th August to 1st October 1897, North-West Frontier of India

Sketch plan of the action in the Bedmanai Pass on 22nd September 1897: Mohmand Field Force, 7th August to 1st October 1897, North-West Frontier of India

As the force entered the valley, the 39th Garwhal Rifles took Gharibai Hill, overlooking the main path from the left, from a party of some 200 tribesmen.

4 squadrons of the 11th Bengal Lancers went off to the right to observe the tribesmen in the Mitai and Suran Passes. The tribesmen were in the Suran Pass in strength and opened a long-range rifle fire on the cavalry, who occupied the villages at the base of the pass and prevented the tribesmen from joining their fellows holding the Bedmanai Pass.

The Mohmand Field Force entering the Bedmanai Pass: Mohmand Field Force, 7th August to 1st October 1897, North-West Frontier of India: drawing by Edmund Hobday

The Mohmand Field Force entering the Bedmanai Pass: Mohmand Field Force, 7th August to 1st October 1897, North-West Frontier of India: drawing by Edmund Hobday

Soon after 8am, the attack up the Bedmanai Pass began, with the 20th Punjab Infantry and the maxim gun detachment of the Somerset Light Infantry advancing past the Khalil Kor and driving back the tribesmen concealed in the rocks and trees.  The 1st Gurkhas and 28th Bombay Pioneers followed in support, with No. 3 Mountain Battery.

The Third Brigade advance up the main path past Gharibai Hill was led by the Queen’s and the 22nd Punjab Infantry, supported by the brigade’s two mountain batteries.

The two brigades drove the tribesmen up the pass, until at around 10am, the 20th Punjab Infantry, supported by the fire of No. 3 Mountain Battery, stormed the sangars on the 5,500 foot crowning peak on the southern side of the pass.

Many of the tribesmen withdrew to the Yari Sar peak of 6,750 feet, where they occupied a large stone sangar.

13th Bengal Lancer bringing in a Pathan prisoner: Mohmand Field Force, 7th August to 1st October 1897, North-West Frontier of India: picture by John Charlton

13th Bengal Lancer bringing in a Pathan prisoner: Mohmand Field Force, 7th August to 1st October 1897, North-West Frontier of India: picture by John Charlton

As these attacks went in, the two Third Brigade Mountain Batteries came into action, bombarding the tribesmen holding the Buddhist ruins on the western side of the head of the Bedmanai Pass.  These tribesmen withdrew west, up the side of the mountain while the Queen’s occupied a knoll in the middle of the pass.

1st Gurkhas and No. 3 Mountain Battery moved forward onto the 5,500 foot spur, from where they provided covering fire, as the 20th Punjab Infantry advanced to take the Yari Sar sangar. The tribesmen streamed away to the south, under fire from the Somerset Light Infantry maxims, which had managed to keep up with the Punjabis.

No 3 Mountain Battery, Royal Artillery: Mohmand Field Force, 7th August to 1st October 1897, North-West Frontier of India

No 3 Mountain Battery, Royal Artillery: Mohmand Field Force, 7th August to 1st October 1897, North-West Frontier of India

The Queen’s and the 22nd Punjab Infantry occupied the head of the Bedmanai Pass and, with the ending of tribal resistance, the Sappers and Miners began the arduous task of making the path up the pass usable for the transport animals.

British and Indian casualties amounted to 1 killed and 3 wounded.  It turned out that there had only been around 700 or 800 tribesmen holding the pass, a substantial force of tribesmen being held in the Mitai and Suran passes by the small force of 13th Bengal Lancers.  The retreating tribesmen took their dead and wounded with them, so that it was not possible to give an accurate assessment of their casualties, but they were considered to have been substantial.

Destruction of the Hadda Mulla's mosque at Jarobi: Mohmand Field Force, 7th August to 1st October 1897, North-West Frontier of India: drawing by Edmund Hobday

Destruction of the Hadda Mulla’s mosque at Jarobi: Mohmand Field Force, 7th August to 1st October 1897, North-West Frontier of India: drawing by Edmund Hobday

With the capture of the pass, the First Brigade moved down into the Bedmanai valley and occupied villages there, while the Third Brigade returned to Kuz Chinari, where the force had camped the night before and, on 24th September 1897, began destroying Musa Khel villages in the Mitai valley.

On 25th September1897, the Third Brigade destroyed villages in the Suran valley.

With the winding down of operations against the Mohmands, the Third Brigade was ordered to march south to join the Tirah Expeditionary Force and left for Peshawar, on 26th September 1897.

The attack on Jarobi: Mohmand Field Force, 7th August to 1st October 1897, North-West Frontier of India

The attack on Jarobi: Mohmand Field Force, 7th August to 1st October 1897, North-West Frontier of India

On 25th September 1897, the First Brigade began the final attack on Jarobi, the Hadda Mulla’s stronghold in wild mountainous country.

A cavalry squadron, comprising troops from the 13th Bengal Lancers and the Patiala and Jodhpur Lancers, reached the Shindarra ravine.  Checked by the ground, the cavalry was forced to wait for the Somerset Light Infantry and No. 3 Mountain Battery to come up and take over the advance.

Preparations were now made for the attack on Jarobi.  The Somersets, 28th Bombay Pioneers and the mountain battery took up positions at the mouth of the Shindarra Gorge. 4 companies of 1st Gurkhas occupied the heights to the west.  3 companies of 20th Punjab Infantry entered the Shindarra Gorge with the Sappers and Miners and the mountain battery, making their way up the gorge and turning right into the Jarobi glen.

More resistance was encountered, with rifle fire from sangars on the hillsides, as the troops entered Jarobi.  A party of Ghazis emerged from the Hadda Mulla’s mosque and charged with swords, being repelled by rifle fire.

First Brigade withdrawing after the attack on Jarobi: Mohmand Field Force, 7th August to 1st October 1897, North-West Frontier of India

First Brigade withdrawing after the attack on Jarobi: Mohmand Field Force, 7th August to 1st October 1897, North-West Frontier of India

Considerable damage was inflicted on the village and the First Brigade then retired, followed up by the tribesmen. The brigade bivouacked at Tor Khel.

On 26th September 1897, the First Brigade marched out of Tor Khel in two columns, the main column commanded by Brigadier General Westamott, with the baggage, marching south-east to Kharwina.

The second, smaller, column, commanded by Lieutenant Colonel Sage of 1st Gurkhas, took a different route to Kharwina.  Both columns destroyed several villages and fortified houses.

No. 3 Mountain Battery in bivouac: Mohmand Field Force, 7th August to 1st October 1897, North-West Frontier of India: picture by ST Dadd

No. 3 Mountain Battery in bivouac: Mohmand Field Force, 7th August to 1st October 1897, North-West Frontier of India: picture by ST Dadd

Over the next few days, jirgas from several the tribes came into the British camp, now at Kung, seeking terms of peace.  The brigade pushed on to Nahaki, suffering sniping at night, but it was clear that the hostilities were subsiding.

On 30th September 1897, the brigade marched on to Yakhdand and the peace arrangements continued to be negotiated.

Indian Medal 1895 with the clasp ‘Punjab Frontier 1897-8’: Mohmand Field Force, 7th August to 1st October 1897, North-West Frontier of India

Indian Medal 1895 with the clasp ‘Punjab Frontier 1897-8’: Mohmand Field Force, 7th August to 1st October 1897, North-West Frontier of India

The elements of the Mohmand tribe involved in the attack on Shankargarh had been punished.  The Hadda Mulla’s followers had been dispersed.  His base at Jarobi had been destroyed and he was considered by the British to have been discredited in the eyes of his followers.

British and Indian troops had crossed tribal country they had not before entered and destroyed numbers of villages and fortified houses of the offending tribes.  The fines in money and weapons imposed had almost all been paid.

On 1st October 1897, the British authorities considered the operation to have been concluded with a satisfactory outcome and drew it to a close.

Battle Honours and campaign medal for the Mohmand Field Force 1897:

Participants in the Mohmand Field Force received the Indian Medal 1895 with the clasp ‘Punjab Frontier 1897-98’.

Participants in the Mohmand Field Force received the Indian Medal 1895 with the clasp ‘Punjab Frontier 1897-8’.

These regiments of the Indian army were awarded by the Vice-Roy of India the battle honour ‘Punjab Frontier’ arising from the Mohmand Field Force operations:

Sowar of 11th Bengal Lancers: Mohmand Field Force, 7th August to 1st October 1897, North-West Frontier of India

Sowar of 11th Bengal Lancers: Mohmand Field Force, 7th August to 1st October 1897, North-West Frontier of India

These regiments of the Indian army were awarded by the Vice-Roy of India the battle honour ‘Punjab Frontier’ arising from the Mohmand Field Force operations: 11th Bengal Lancers, 13th Bengal Lancers, Queen’s Own Guides, 1st PWO Sappers and Miners, 28th Bombay Pioneers, 39th Garwhal Rifles, 20th Punjab Infantry, 22nd Punjab Infantry, 1st Gurkhas and 9th Gurkhas. The British regiments did not receive the battle honour.

Casualties in the Mohmand Field Force 1897: casualties of each side are set out in the text above.

Anecdotes and traditions from the Mohmand Field Force 1897:

  • The Hadda Mulla: Winston Churchill gives a short biography of the Hadda Mulla in ‘Malakand Field Force’. Churchill starts his account: ‘In the heart of the wild and dismal mountain region, in which these tribesmen dwell, are the temple and village of Jarobi: the one a consecrated hovel, the other a fortified slum. This obscure and undisturbed retreat was the residence of a priest of great age and of peculiar holiness, know to fame as the Hadda Mullah. His name is Najb-ud-din, but as respect has prevented it being mentioned by the tribesmen for nearly fifty years, it is only preserved in infidel memories and records.’  The title ‘Hadda Mulla’ refers to the cleric’s original home in Afghanistan, the village of Hadda, to the south of Jellalabad. In 1884 the Hadda Mulla raised the Mohmand tribe against the Amir of Afghanistan. He was summoned to appear in Kabul, but went to Jarobi, the Mohmand village outside the Amir’s jurisdiction. From Jarobi, the Hadda Mulla sent the Mohmands to resist the British incursion with the Chitral Relief Expedition in 1895. In 1896, the Hadda Mulla wrote a book, setting out his religious philosophy, in furtherance of a dispute with the pro-British ‘Manki Mullah of Nowshera’. This book, published in Delhi, was widely read by the Muslim community across the Indian sub-continent. The Hadda Mulla’s prestige was significantly enhanced. He became the friend and confidant of the Afghan commander-in-chief, Sipah Salar. In 1897, the Hadda Mulla sent the Mohmands to fight under the ‘Mad Fakir,’ in the attack on the Malakand Camp. The Hadda Mulla declared ‘Jihad’ against the British, before himself directing the attack on Shankargarh. The Hadda Mulla died in 1902, widely acclaimed, or blamed, for the 1897 Frontier Risings by the Tribes.

    The Afghan army commander Sipah Salar visiting the Durand Commission encampment before the 1897 outbreaks: Mohmand Field Force, 7th August to 1st October 1897, North-West Frontier of India

    The Afghan army commander Sipah Salar visiting the Durand Commission encampment before the 1897 outbreaks: Mohmand Field Force, 7th August to 1st October 1897, North-West Frontier of India

  • As in all the border operations of the British on the North-West Frontier in 1897, an Afghan army, commanded by Sipah Salar, watched from the Afghan side of the border. Many Afghan soldiers joined the tribesmen in their battles with the British and Indian troops.

    3rd Sappers and Miners: Mohmand Field Force, 7th August to 1st October 1897, North-West Frontier of India: pictcure by AC Lovett

    3rd Sappers and Miners: Mohmand Field Force, 7th August to 1st October 1897, North-West Frontier of India: pictcure by AC Lovett

References for the Mohmand Field Force 1897:

Frontier and Overseas Expeditions from India Volume 1 published by the Government of India in 1905
North West Frontier by Captain H.L. Nevill DSO, RFA
The North-West Frontier by Michael Barthorp
The Frontier Ablaze, the North-West Frontier Rising 1897-1898 by Michael Barthorp

The previous battle in the North-West Frontier of India sequence is the Malakand Field Force 1897

The next battle in the North-West Frontier of India sequence is Tirah 1897 

To the North-West Frontier of India index


Malakand Rising 1897

The tribal attack on the Malakand frontier station on the North-West Frontier of India between 26th July and 22nd August 1897; marking the beginning of the uprisings along the frontier and described by Winston Churchill in his book ‘The Malakand Field Force’

Royal Artillery advancing to Malakand: Malakand Rising, 26th July to 22nd August 1897 on the North-West Frontier of India

Royal Artillery advancing to Malakand: Malakand Rising, 26th July to 22nd August 1897 on the North-West Frontier of India

The previous battle of the North-West Frontier of India is the Siege and Relief of Chitral

The next battle in the British Battles sequence is the Malakand Field Force 1897:

To the North-West Frontier of India index


War: North-West Frontier of India.

Dates of the Malakand Rising: 26th July 1897 to 22nd August 1897.

Place of the Malakand Rising: The area from the Malakand Pass on the north-west border of British India to the Swat Valley, to the north of the Malakand Pass (all now in the North-West Frontier Province of Pakistan).

Combatants in the Malakand Rising: British and Indian troops against the Pathan tribes of Swat, Bajaur and Buner (Utman Khel, Khawazazai, Baizai, Nikbi Khel, Khadakzai, Dusha Khel and others).

Colonel William Meiklejohn, commanding the Malakand Camp: Malakand Rising, 26th July to 22nd August 1897 on the North-West Frontier of India

Colonel William Meiklejohn, commanding the Malakand Camp: Malakand Rising, 26th July to 22nd August 1897 on the North-West Frontier of India

Commanders in the Malakand Rising: At the time of the outbreak, the Indian Army garrison at Malakand and Chakdara was commanded by Brigadier-General William Meiklejohn.  The Malakand Field Force was commanded by Major-General Sir Bindon Blood KCB.  The uprising seems to have been inspired by the Muslim cleric given the title by the British of the ‘Mad Fakir’ and other mullahs.  One of the main non-religious leaders in the uprising was the Swati khan, Mian Gul.

Size of the forces in the Malakand Rising: Meiklejohn’s force at Malakand and Chakdara numbered around 2,750 men.  The troops sent up from Mardan under the command of Colonel Reid numbered a further 1,200.  The additional troops making up the balance of the Malakand Field Force under General Blood numbered around 5,000.  4 batteries, 3 of mountain artillery, accompanied the Force with 24 guns.
The number of tribesmen built up during the attack on Malakand to around 20,000.  Numbers then fell away as the British advanced.

Major-General Sir Bindon Blood KCB, commander of the Malakand Field Force: Malakand Rising, 26th July to 22nd August 1897 on the North-West Frontier of India

Major-General Sir Bindon Blood KCB, commander of the Malakand Field Force: Malakand Rising, 26th July to 22nd August 1897 on the North-West Frontier of India

Winner of the Malakand Rising: The British and Indian Army.

Uniforms, arms and equipment in the Malakand Rising:
The British military forces in India fell into these categories:

  • Regiments of the British Army in garrison in India.  Following the Indian Mutiny of 1857, India became a Crown Colony.  The ratio of British to Indian troops was increased from 1:10 to 1:3 by stationing more British regiments in India.  Brigade formations were a mixture of British and Indian regiments.  The artillery was put under the control of the Royal Artillery, other than some Indian Army mountain gun batteries.
  • The Indian Army comprised the three armies of the Presidencies of Bombay, Madras and Bengal.  The Bengal Army, the largest, supplied many of the units for service on the North-West Frontier.  The senior regimental officers were British.  Soldiers were recruited from across the Indian sub-continent, with regiments recruiting nationalities, such as Sikhs, Punjabi Muslims, Pathans and Gurkhas.  The Indian Mutiny caused the British authorities to view the populations of the East and South of India as unreliable for military service.
  • The Punjab Frontier Force:  Known as ‘Piffers’, these were regiments formed specifically for service on the North-West Frontier and were controlled by the Punjab State Government.
  • Imperial Service Troops of the various Indian states, nominally independent but under the protection and de facto control of the Government of India.  The most important of these states for operations on the North-West Frontier was Kashmir.

A British infantry battalion comprised 10 companies with around 700 men and some 30 officers. A battalion had a maxim machine gun detachment of 2 guns and around 20 men.

Indian infantry battalions had much the same establishment, without the Maxim gun detachment. Senior officers were British, holding the Queen’s Commissions. Junior officers were Indian.

In 1897, Indian infantry regiments carried the single shot, drop action Martini-Henry breech loading rifle.  British regiments had received the new Lee Metford bolt action magazine rifle from 1894.

By 1897, both Indian and British Royal Artillery Mountain Batteries used the RML (Rifled Muzzle Loading) 2.5 inch gun, the successor to the small, basic and unreliable RML 7 pounder gun, which had gone out of service in the British batteries in the early 1880s and, finally, in the Indian batteries in around 1895.  The 2.5 inch had the nickname of ‘the Screw Gun’ as the barrel came in two sections that were screwed together for firing.  The gun was dismantled for transport and carried by mules (see Kipling’s poem ‘the Screw Guns’).

45th Sikhs: Malakand Rising, 26th July to 22nd August 1897 on the North-West Frontier of India

45th Sikhs: Malakand Rising, 26th July to 22nd August 1897 on the North-West Frontier of India

British and Indian troops in 1897 wore khaki field dress when campaigning, with a leather harness to carry equipment and ammunition.  British troops wore a pith helmet.  Indian troops were largely turbaned.  Gurkha troops wore a pill box hat.  Scottish Highland regiments wore the kilt.  Scottish Lowland Regiments, such as the Highland Light Infantry and the King’s Own Scottish Borderers, wore tartan trews.

The Indian cavalry regiments were armed with lance, sabre and carbine.

The standard tactic used by the British and Indian armies on the North-West Frontier of India, as with other so-called ‘semi-civilised enemies’ (tribesmen armed with swords and lances and with limited access to modern firearms), was to deliver a frontal attack, discharging controlled volleys of rifle fire and charging home with the bayonet.  When stationary under fire, cover was taken behind sangars or low, stone-built walls.

Tribesmen surprised in the Swat Valley: Malakand Rising, 26th July to 22nd August 1897 on the North-West Frontier of India

Tribesmen surprised in the Swat Valley: Malakand Rising, 26th July to 22nd August 1897 on the North-West Frontier of India

Supporting fire was provided by artillery, where available.  Cavalry conducted scouting duties and, in suitable circumstances, delivered mounted charges, which were particularly effective against loose formations of tribesmen caught in flat open country.  The Indian cavalry regiments were adept at mixing mounted action with dismounted, in which carbine fire was used against tribesmen, particularly during a withdrawal.

When a military column moved through hostile country, great care had to be taken to ensure that flanking high ground was occupied in strength, until the column was clear of the area.

Withdrawal was when troops became most vulnerable.  Experienced units made sure that withdrawal was made by alternate leaps, so that there was always a force providing covering fire for the troops moving back.  Pathan tribes were quick to follow up British withdrawals and any error was immediately exploited.  Many of the problems in battle for the British arose from inexperienced regiments failing to comply with the exacting requirements of frontier warfare.

Rescue of the officers at Landakai on 17th September 1897: Malakand Rising, 26th July to 22nd August 1897 on the North-West Frontier of India

Rescue of the officers at Landakai on 17th September 1897: Malakand Rising, 26th July to 22nd August 1897 on the North-West Frontier of India

The tribesmen fought on foot.  It is estimated that, in the Malakand campaign, around a half were in possession of firearms: muskets, jezails, some Sniders (Enfield rifled muskets converted to breach loading) and a few Martini-Henry rifles.  The tribesmen possessed no artillery or machine guns.  Many fought with swords.  Flags representing villages, clans and tribes were carried in battle as rallying points.  Drums of many sorts were beaten; pipes and trumpets played.

A feature of warfare on the North-West Frontier of India was the ability of tribesmen to assemble in large numbers with little warning and to move at disconcerting speed across mountainous terrain, even at night.

Map of the Malakand Rising, 26th July to 22nd August 1897 on the North-West Frontier of India: map by John Fawkes

Map of the Malakand Rising, 26th July to 22nd August 1897 on the North-West Frontier of India: map by John Fawkes

The drums of the 45th Rattray's Sikhs: Malakand Rising, 26th July to 22nd August 1897 on the North-West Frontier of India: picture by AC Lovett

The drums of the 45th Rattray’s Sikhs: Malakand Rising, 26th July to 22nd August 1897 on the North-West Frontier of India: picture by AC Lovett

Background to the Malakand Rising:
In 1897, the North-West Frontier of India erupted in warfare, the tribes along the border attacking British garrisons and Indian villages.  The reaction to this uprising was a series of incursions by the British into tribal territory in 1897 and 1898.

The first incident in the series of uprisings was the action at Maizar in the Tochi Valley, where, on 10th June 1897, the inhabitants of a group of Madda Khel villages attacked a small British force.
Following this incident, the British were involved in campaigns during 1897-8 in the Tochi Valley, in the Tirah against the Afridis, in the Malakand and Swat Valley (this account), against the Mohmands and finally the Bunerwals.

The Government of India identified several factors leading to the uprisings.  The Amir of Afghanistan in the late 1880s penned a book urging Muslims in the border regions to wage ‘jihad’ against the British.  The Amir claimed to the British that the book was to preserve his own precarious position amongst fanatical Afghans.

Numbers of Muslim mullahs in the independent tribal regions along the border of India preached ‘jihad’ against the British and invoked the Amir’s book.

In Lower Swat, a Bunerwal Mullah called Sadullah established himself at Landakai and sought to raise the tribes against the British, other religious leaders contributing to his efforts.  This Mullah was referred to by the British as the ‘Mad Fakir’.  This form of label was a consistent British practice in the late 19th Century.  Any Muslim leader who fought against the British at this time, whether in the Indian sub-continent, the Sudan, Somalia or Eritrea, was liable to be given a nickname by British officials that suggested that he was deranged.

On the other hand, it seemed that the ‘Mad Fakir’ made claims to the tribesmen that suggested that he was near-divine.  He also seems to have informed the tribesmen that the garrisons at Malakand and Chakdara contained the only troops the British had.

The Government of India concluded that the immediate trigger for the uprisings was the victory of the Turks over the Greeks in the eastern Mediterranean, a potent symbol of Muslim success over the Christian infidel.

Malakand Camp seen from Malakand Fort, looking north towards the Swat River Valley: Malakand Rising, 26th July to 22nd August 1897 on the North-West Frontier of India

Malakand Camp seen from Malakand Fort, looking north towards the Swat River Valley: Malakand Rising, 26th July to 22nd August 1897 on the North-West Frontier of India

Of background importance was the concern of the border tribes at the threat to their independence from the increasingly intrusive British presence in the area.

The British found tribal dissatisfaction hard to reconcile with the growing prosperity of the area from the increase in trade with British India during the 1890s.

Guides Infantry and Guides Cavalry: Malakand Rising, 26th July to 22nd August 1897 on the North-West Frontier of India: picture by AC Lovett

Guides Infantry and Guides Cavalry: Malakand Rising, 26th July to 22nd August 1897 on the North-West Frontier of India: picture by AC Lovett

After the 1895 Chitral campaign, the British maintained a garrison in Chitral town.  To support this post, a road was established through Swat and Dir to the Chitral valley.  The road was guarded through tribal territory by local levies, paid for by the Government of India.  At the southern end of the road, the British built a fort and camp at the top of the Malakand Pass and a fort at the Chakdara crossing of the Swat River.  A graded road was built from Dargai to the Chakdara Bridge, via Malakand and the Amandara Defile.

At the beginning of 1897, the Malakand Camp was garrisoned by an Indian brigade.  The fort overlooked the Malakand Pass, with most of the brigade encamped in the volcanic bowl beneath the fort.  An additional camp, called Malakand North Camp, lay in the valley to the north-west of the main camp.

The British encampment at Malakand, from its establishment in 1895 during the Chitral operation, grew by default and without proper planning.  The fort, on a spur running down from the Malakand Kotal, was the only permanent structure and accommodated 200 men.  The rest of the brigade lived in tents and huts in the main camp, on the floor of the crater immediately below the fort and in the North Camp.

As with any cantonment in India, a bazaar was established by civilian traders, to supply the troops.  A Serai provided accommodation for visitors.  A commissariat camp contained the brigade’s supplies of food and clothing.  The Royal Engineers park contained the engineering stores and reserves of ammunition and weapons.

Account of the Malakand Rising:

The Attack on the Malakand Camp:
Colonel William Meiklejohn of 20th Punjab Infantry (see Waziristan 1894) commanded the Malakand Brigade, as temporary brigadier-general, with troops situated at Malakand, North Malakand, Chakdara and Dargai, comprising the 24th Punjab Infantry, the 45th Sikh Infantry, No. 5 Company Madras Sappers and Miners, the 31st Punjab Infantry, No. 8 Bengal Mountain Battery and 1 squadron of the 11th Bengal Lancers.

Map of Malakand Camp: Malakand Rising, 26th July to 22nd August 1897 on the North-West Frontier of India: map by John Fawkes

Map of Malakand Camp: Malakand Rising, 26th July to 22nd August 1897 on the North-West Frontier of India: map by John Fawkes

200 men of the 24th Punjab Infantry formed the garrison in the Malakand fort.  The remainder of the 24th Punjabis, with the 45th Sikh Infantry and the Sappers and Miners, were encamped in the Crater.  The 31st Punjab Infantry, 1 squadron of 11th Bengal Lancers and the mountain battery were in the North Camp.

Malakand Camp South seen from the fort: Malakand Rising, 26th July to 22nd August 1897 on the North-West Frontier of India

Malakand Camp South seen from the fort: Malakand Rising, 26th July to 22nd August 1897 on the North-West Frontier of India

Lieutenant Rattray commanded the garrison at Chakdara Fort, guarding the bridge over the Swat River, with 180 sepoys of the 45th Sikhs and 20 sowars of the 11th Bengal Lancers.  200 men of the 31st Punjab Infantry garrisoned Dargai, on the road from Nowshera to Malakand.

A political officer, with responsibility for the area, Major Deane, operated from Malakand Camp.

In early summer 1897, information came in to the British at Malakand, from Swat and other tribal areas that the ‘Mad Fakir’ was attracting large crowds for his addresses, urging holy war against the British.  Pathans serving with the regiments at Malakand warned their officers of an impending tribal uprising.

Malakand Pass: Malakand Rising, 26th July to 22nd August 1897 on the North-West Frontier of India

Malakand Pass: Malakand Rising, 26th July to 22nd August 1897 on the North-West Frontier of India

26th July 1897:
On 26th July 1897, British officers from Malakand and Chakdara assembled to play polo on the garrison ground at Khar, a village on the road between Malakand and Chakdara.  At the end of the game Lieutenant Rattray received a note from 2nd Lieutenant Wheatley, that Chakdara Fort was being threatened by a large force of tribesmen.  The officers returned to their posts, Rattray passing several large gatherings of armed tribesmen on his ride to Chakdara.

Brigadier-General Meiklejohn telegraphed to Mardan, for the Guides to come up to Malakand and prepared to dispatch the 45th Sikhs to seize the pass at Amandara, on the road between Malakand and Chakdara.

Lieutenant Colonel McRae of the 45th Sikhs: Malakand Rising, 26th July to 22nd August 1897 on the North-West Frontier of India

Lieutenant Colonel McRae of the 45th Sikhs: Malakand Rising, 26th July to 22nd August 1897 on the North-West Frontier of India

Before the 45th Sikhs could leave, at around 10pm, a jemadar of the local levies arrived, with the news that the Mad Fakir was approaching Malakand with a large force of tribesmen.  Buglers blew the assembly, for the garrison to take its alarm positions.

The main Malakand camp was accessed from the north by two routes.  One was the main graded road from Khar into the centre of the camp.  The other was the old Buddhist road which led up to the edge of the crater, on the east side of the camp.  Both routes were points of vulnerability for the garrison.

On hearing the assembly, Lieutenant-Colonel McRae, commanding the 45th Sikhs, rushed to his regiment’s guardroom and ordered the guard piquet to the edge of the crater, to hold the Buddhist road against any tribesmen advancing up the road.  The piquet was led off by Major Taylor.  Colonel McRae gathered such other soldiers as he could find, left orders for the whole regiment to follow, and hurried after Taylor.

McRae and Taylor arrived, with their handful of Sikh soldiers, at the top of the crater rim to find a large body of tribesmen climbing the road from the opposite direction.  The Sikhs took up a defensive position in a cutting, where the tribesmen were unable to deploy and opened fire.

45th Sikhs holding the piquet on the Budhist Road into Malakand Camp: Malakand Rising, 26th July to 22nd August 1897 on the North-West Frontier of India

45th Sikhs holding the piquet on the Budhist Road into Malakand Camp: Malakand Rising, 26th July to 22nd August 1897 on the North-West Frontier of India

The Sikh troops were able to hold back the mass of tribesmen, until more of their comrades arrived under Lieutenant Barff.

The party of 45th Sikhs fell back to a stronger position, maintaining a fire which kept the tribesmen back.  McRae’s Sikhs were about to be overwhelmed when the rest of the regiment arrived.  The position was then firmly held against the attackers.  This dramatic episode prevented the Malakand garrison from facing a flood of tribesmen pouring into the camp from the east rim.

In the centre of the camp, the tribesmen rushed up the Khar Road into the crater.  The piquet of the 24th Punjab Regiment on the road was driven back and the tribesmen flooded into the bazaar and the Serai.

Other tribesmen climbed the hills on either side of the road and began a fire into the camp, which would continue for several days until the assault on Malakand ended.

The noise was overwhelming with drums beating and pipes playing.  A bugler was heard in the ranks of the tribesmen, playing all the calls of the British Army in turn.  The bugler was part way through the ‘Officers’ Mess call’, when he abruptly ceased, presumably shot.

 Sir Skipton Climo DSO as a retired lieutenant general: Malakand Rising, 26th July to 22nd August 1897 on the North-West Frontier of India

Sir Skipton Climo DSO as a retired lieutenant general: Malakand Rising, 26th July to 22nd August 1897 on the North-West Frontier of India

Lieutenant Climo led a company of the 24th Punjabis across the camp football pitch and cleared the bazaar of tribesmen at the point of the bayonet.  The tribesmen renewed the assault on the bazaar in greater numbers and Climo’s company was driven back.

The tribesmen advanced on the defended area and entered the Commissariat Hut, where the Brigade Commissariat officer, Lieutenant Manley, was killed.  Other tribesmen captured the Quarter Guard Hut of the Sappers and Miners, with the company’s ammunition reserve.

Brigadier-General Meiklejohn organised a party to retake the Quarter Guard, comprising his orderly, Captain Holland and Lieutenant Climo, both of the 24th Punjabis and a handful of soldiers from the 24th, 45th Sikhs and the Sappers and Miners.  The first counter-attack failed.  Captain Holland was severely wounded and several of the soldiers killed or wounded.  The general was struck on the neck.

Lieutenant Climo led two further assaults with soldiers from his regiment, the 24th Punjabis, the second of which succeeded in re-taking the Quarter Guard.  The tribesmen had removed the ammunition.

The garrison now held the stockaded areas on the south side of the road, the Royal Engineers Park and the Commissariat in the centre of the crater.  The tribesmen occupied the crater rims from which they fired down into the area held by the troops.  Major Herbert the DAAG was hit, as was Lieutenant-Colonel Lamb, the Commanding Officer of the 24th Punjab Infantry.  Command of the 24th devolved on Lieutenant Climo, as the senior unwounded officer.  Climo was 29 years of age.

At around 1am, it was realised that a havildar of the 24th was lying wounded on the edge of the football pitch near the bazaar.  Lieutenant Costello, of the 26th Punjabis but attached to the 24th, took 2 soldiers of the 24th and brought the havildar back despite a heavy fire, for which he received the Victoria Cross and the 2 soldiers received the Indian Order of Merit.

After dark, Lieutenant Rawlins was sent up to the fort to bring down 100 men from the garrison, to re-enforce the camp.  Evading, with some difficulty, the tribesmen on the hillside between the camp and the fort, shooting some of them, Rawlins returned with the 100 men.

24th Punjabis: Malakand Rising, 26th July to 22nd August 1897 on the North-West Frontier of India: picture by AC Lovett

24th Punjabis: Malakand Rising, 26th July to 22nd August 1897 on the North-West Frontier of India: picture by AC Lovett

27th July 1897:
Around 4am, the tribesmen withdrew from the bazaar, carrying their casualties and the firing fell away.  At dawn 2 companies of the 24th Punjabis cleared the bazaar of stragglers and rescued the surviving traders, hiding in their booths.

With dawn, a force commanded by Major Gibbs moved out from the North Camp, which had not been attacked, comprising the 31st Punjab Infantry, 2 guns and 40 sowars of the 11th Bengal Lancers and supported by a wing of the 24th Punjab Infantry.

Gibb’s force advanced up the valley to the north, to clear it of tribesmen.  It was only then that it became clear how immense was the number of tribesmen and Major Gibbs’ force was compelled to fall back, other than the small squadron of the 11th Bengal Lancers under Captain Wright, which went on to Chakdara, to re-enforce the garrison.  The tribesmen attempted to interfere with Gibbs’ withdrawal by attacking from the high ground.

Lieutenant Climo led a counter-attack with 2 companies of the 24th, pushing the tribesmen back.

In view of the information now brought in to him on the scale of the tribal uprising, Brigadier-General Meiklejohn directed that the North Camp be abandoned and the troops withdrawn to the main camp as quickly as possible.  This was a tough order.  The regiments had been living in the North Camp for some time and had a substantial amount of kit with them.  It took time to pack this up and there was no transport available for the move.

At 8.30am, the Guides Cavalry completed their 37 mile journey from Mardan and marched into Malakand Camp.  Other regiments, mobilised by the Government of India, were moving to assist in the relief of the Malakand garrison.

The abandonment of the North Camp was taking too long, in view of the imminent threat from the hordes of tribesmen and, at 4pm, the order was given to evacuate the camp without further delay.  By this time a substantial number of tribesmen, particularly Utman Khels, were advancing on the camp.  As the garrison of the North Camp withdrew the short distance to the Crater, it was closely pursued by the tribesmen, while covering fire was provided by the 24th Punjab Infantry.

Badge of the 24th Punjabis: Malakand Rising, 26th July to 22nd August 1897 on the North-West Frontier of India

Badge of the 24th Punjabis: Malakand Rising, 26th July to 22nd August 1897 on the North-West Frontier of India

The Guides infantry (260 men), commanded by Lieutenant Elliot-Lockhart, arrived at Malakand at 7.30pm, having marched from Mardan at 2am (the march was 32 miles in blistering heat).  50 of the Guides were left at Dargai to bolster the garrison there.

On the evening of 27th July 1897, the tribesmen gathered, in even greater numbers, along the road from Chakdara and Khar, to resume the attack on the Malakand garrison.  The North Camp was in flames, after being looted.  Numerous tribesmen fired down on the camp from the hills and the crater rim.

The regiments were in much the same formation as on the night before.   Lieutenant-Colonel McRae and his 45th Sikhs, with 2 guns, held the Buddhist Road, at the top of the crater rim, on the right of the position.  The 24th Punjab Infantry, now commanded by Lieutenant Climo, following the wounding of Lieutenant-Colonel Lamb, held the area of the road to the North Camp.

In the centre of the garrison’s position, the 31st Punjab Infantry, No. 5 Company, Queen’s Own Sappers and Miners, 2 guns and the Guides defended the graded road and the various compounds.
The bazaar was abandoned.  A piquet of 24 men from the 31st Punjab Infantry, commanded by Subadar Syed Ahmed Shah, held the Serai.

At 8pm, the tribesmen attacked along the whole defensive line.  The 45th Sikhs were pressed hard, many tribesmen fighting their way into the Sikh positions, until killed or driven back at the point of the bayonet and subjected to salvos from the 2 guns.


In the crater, the tribesmen swept through the bazaar and attacked the Serai held by Subadar Shah’s piquet.  Only when 20 of his men were dead or wounded, did the subadar, himself injured, order his men to evacuate the building by way of a ladder over the back wall, taking the wounded with them.

On the left, the 24th Punjab Infantry were heavily attacked.  Lieutenant Climo took 2 companies and led them in a counter-attack beyond the breastwork.  Churchill records that Climo’s force drove the tribesmen back some two miles.  However, it seems unlikely that such a small force would have gone so far from the camp, however successful their attack.

At the end of that night, the tribesmen held the Serai, but, otherwise, the Malakand garrison stood where it was at the beginning of the attack.  The tribesmen suffered significant casualties which could not be assessed.

28th July 1897:
The tribes identified by the Malakand Garrison included Swatis, Utman Khels, Mohmands, Salarzais and others.  During the course of 28th July, large numbers of Bunerwals could be seen in the opposing ranks for the first time.  The Bunerwals were easily identified, wearing black or dark blue clothes against the white worn by most of the other tribes.

During the day, the garrison strengthened and improved the defences of the camp, while the tribesmen sniped at the troops.

At 10pm, the tribesmen renewed the assault along the whole of the defended line.  The attacks continued throughout the night, until the tribesmen withdrew to the surrounding hills, just before dawn.  British casualties were 2 soldiers killed and 3 British officers and 13 men wounded.  No pursuit was possible due to the exhaustion of the troops.

29th July 1897:
During the day, further work was carried out on the defences.  Bonfires were prepared, to be lit when the next attack was launched, thereby illuminating the battlefield.  Signalling was resumed with Chakdara Fort, which reported that it was successfully holding out.

In the afternoon, a squadron of the 11th Bengal Lancers reached Malakand, with 12,000 rounds of ammunition carried in the sowars’ saddle bags.

In the evening, the 35th Sikhs, the 38th Dogras and more Guides arrived at Dargai, but in a state of exhaustion.  The 35th Sikhs, who had marched up from Nowshera, had 21 fatal casualties from heat stroke.

Piquet of Guides Infantry on the Buddhist Road near Castle Rock: Malakand Rising, 26th July to 22nd August 1897 on the North-West Frontier of India: picture by Edmund Hobday

Piquet of Guides Infantry on the Buddhist Road near Castle Rock: Malakand Rising, 26th July to 22nd August 1897 on the North-West Frontier of India: picture by Edmund Hobday

That night, the bonfires were lit to illuminate the attackers.  As a result, the tribesmen initially directed their assault around the flank of the position held by the 24th Punjab Infantry.  This attack was driven off.

At 2am, a desperate attack was made on the main defences.  After half an hour, the attack was abandoned.  It was heard later that the ‘Mad Fakir’ led this assault himself and had been shot in the hand, retiring with his injury to Landakai.  His chief companion, designated by the ‘Mad Fakir’ to be crowned King in Delhi once the uprising succeeded, was killed.

British casualties were 2 officers severely wounded and 1 soldier killed and 17 soldiers wounded.

Badge of the 31st Punjabis: Malakand Rising, 26th July to 22nd August 1897 on the North-West Frontier of India

Badge of the 31st Punjabis: Malakand Rising, 26th July to 22nd August 1897 on the North-West Frontier of India

30th July 1897:
200 soldiers of the 31st Punjab Infantry marched up from Dargai to Malakand and began to assist in the repair of the defences.  During the day, the fire from the tribesmen on the hills and the crater rim was noticeably less than on previous days.

In the afternoon, the tribesmen appeared in greater numbers than before, confirming reports that re-enforcements from Buner were joining the attackers.  The attack on the camp was resumed that night, but not pressed with the same vigour as on previous nights.

31st July 1897:
Lieutenant-Colonel Reid arrived at Malakand Camp, with the remaining 700 men of the reinforcements, leaving 400 men at Dargai.  Firing continued during the day, but there was no attack that night.

1st August 1897:
At around 11am, a force left Malakand to relieve Chakdara, comprising the Guides Cavalry and 1 squadron of the 11th Bengal Lancers, a force of 250 men.  Lieutenant-Colonel Adams of the Guides commanded the force.  3 battalions of the infantry and the mountain battery prepared to follow.

The cavalry was ordered to make a dash for the Amandara Defile.  This move was anticipated by the tribesmen, who attacked the cavalry in great strength, while they were still in the hills.

Despite the difficult ground, the Guides delivered a charge, killing around 100 tribesmen, with losses of 1 sowar killed and 2 officers and 12 sowars wounded.  The tribesmen continued to press on, until the numbers surrounding the small cavalry force compelled the sowars to dismount and drive them back with carbine fire.

It was clear that the cavalry were too few and the day too far advanced, to achieve a breakthrough to Chakdara before nightfall and Adams returned to Malakand.  The squadrons executed a withdrawal in turn, covering each other with dismounted carbine fire.

The Siege of Chakdara Fort:
In 1895, when the Chitral Relief Force crossed the mountain line from Malakand into the valley of the Swat River, it was immediately apparent that there needed to be a permanent crossing point on the river.

Chakdara Fort and bridge over the Swat River: Malakand Rising, 26th July to 22nd August 1897 on the North-West Frontier of India

Chakdara Fort and bridge over the Swat River: Malakand Rising, 26th July to 22nd August 1897 on the North-West Frontier of India

At the end of the Chitral operation, a 500 yard suspension bridge was built over the Swat River near the village of Chakdara.  A fort was built on the small hill at the north end of the bridge, with a signalling tower on the hillside above the fort.

The description of the fort in the Official Government of India history states: “This fort, which was built of stone, was situated on a small rocky knoll on the right bank of the river, and about 150 yards from the end of a spur which descends from the high hills on the west.  On the north-west and west faces were double-storied barracks with rows of loopholes and arrangements for flanking fire.  The north-east side of the knoll was steeply scarped and protected by a wall and barbed wire fence, while on the south was a small hornwork.  About 500 yards away, on the spur to the west, was a small one-storeyed blockhouse, used as a signalling tower, from which communication was maintained with the Malakand.  On the left bank of the river the entrance to the bridge was guarded by a loopholed iron gate with a blockhouse on either side.”  One of these bridge blockhouses took 1 of the fort’s 2 Maxim guns.  The other Maxim gun and a 9 pounder field gun were mounted on a platform in the main fort.

The weakness of the fort was that it was dominated by the cliff on which the signal tower stood.  Tribesmen on the ridge could see and fire directly into every open area of the fort.

26th July 1897:
On 26th July 1897, the day of the outbreak, the garrison of Chakdara Fort comprised around 210 men, 20 sowars of the 11th Bengal Lancers, 180 men of the 45th ‘Rattray’s’ Sikhs and several others and was commanded by Lieutenant Haldane Rattray, the son of the officer who had raised the 45th Sikhs.  Rattray’s second in command was Second-Lieutenant Wheatley of the 45th Sikhs.  The medical officer was Surgeon-Captain Hugo.  The Political Agent in the Fort was Lieutenant Minchin.

The first warning of possible trouble came with a message from the brigade headquarters on 23rd July 1897.

Sowar of the 11th Bengal Lancers riding through the tribesmen: Malakand Rising, 26th July to 22nd August 1897 on the North-West Frontier of India: picture by Richard Caton Woodville

Sowar of the 11th Bengal Lancers riding through the tribesmen: Malakand Rising, 26th July to 22nd August 1897 on the North-West Frontier of India: picture by Richard Caton Woodville

On the evening of 26th July 1897, Rattray played polo at Khar, with fellow officers from Malakand.  As the game ended, 2 sowars arrived with a message from Wheatley, saying that large numbers of tribesmen were closing in on the fort.  Rattray galloped back to Chakdara, passing a large party of tribesmen, who took no notice of him.  On Rattray’s return, a message was telegraphed to Malakand that Chakdara was about to be attacked and then the line was cut, outside the fort, by the tribesmen.

A Sikh havildar, out conducting survey work in the hills, was robbed of his sketching materials by a party of tribesmen and returned to the fort with a warning of tribal unrest.

A soldier of the Khan of Dir’s levies had promised to light a bonfire to warn of any impending attack. At 10.30pm that night, the bonfire was lit on the opposite hill. The garrison went to its alarm posts and soon afterwards, the tribesmen opened fire on the fort.  The fort was to be under constant fire for a week.

The official Government of India record states in a footnote: “It may be interesting to note here that at 2am after the attacks had been made on the Malakand, the troops at Chakdara saw a fire balloon with a scintillating ball of intensely white light sent up from the top of a hill, about four miles off, adjoining the Swat valley.  This was of course a pre-arranged signal for the tribes to rise…. The balloon must have been an imported article, this strange occurrence is a proof that the idea of a rising did not originate in the Swat valley itself, but was instigated elsewhere.”

Following the opening fusillade, the tribesmen rushed the fort, but were driven back.  Further attacks during the night were made on the north-east corner of the fort and on the stable block.  All were repelled with heavy casualties, inflicted on the tribesmen by controlled volley firing from the loop-holed walls.  The assailants were identified as from the Adinzai valley and Khwazazai-Shamozai.

27th July 1897:
Captain Wright’s squadron of the 11th Bengal Lancers arrived in the fort with 40 additional sowars.  Captain Baker of the 102nd Bombay Grenadiers, the Malakand Transport Officer, accompanied Wright’s squadron.  Wright became the senior officer in Chakdara Fort, but left the day to day command to Rattray, whose regiment formed most of the garrison.  Baker concentrated on working on the defences, to improve the cover provided to the soldiers from the harassing fire from the high ground behind the fort.

Chakdara Bridge under attack, seen from the south bank of the Swat River: Malakand Rising, 26th July to 22nd August 1897 on the North-West Frontier of India: picture by CJ Staniland

Chakdara Bridge under attack, seen from the south bank of the Swat River: Malakand Rising, 26th July to 22nd August 1897 on the North-West Frontier of India: picture by CJ Staniland

At 11.30am, the tribesmen launched a new attack on the north and east sides of the fort.  They were driven off by the heavy defensive fire, many of the fanatical tribesmen shot down at the foot of the walls.

In addition to the assaults and rifle fire on the main fort, the tribesmen built stone sangars around the Signal Tower, from which they maintained an incessant fire at the tower, to prevent the occupants from gaining access to the signal platform on the roof and making contact by heliograph with the Malakand.

At midday, once the attack on the fort was repelled, a team took water and supplies up to the Signal Tower, under covering fire provided by the rest of the garrison and, in particular, by the 2 guns in the fort (1 Maxim and 1 Field).  This re-supply was maintained daily until 1st August 1897, when the tribesmen completed their positions, so that it was impossible to make the short journey up the hillside to the tower.

The tribesmen massed for a further attack after nightfall.  Second Lieutenant Wheatley noted the concentration points and, as soon as night came and the tribesmen began to move forward, the gun and the Maxim Gun opened fire, causing some 70 casualties.  This fire did not prevent the attack, which came in, the tribesmen carrying scaling ladders to mount the wall, only to be repelled by the heavy musketry from the fort.

Lieutenant General Sir Bindon Blood and his staff: Malakand Rising, 26th July to 22nd August 1897 on the North-West Frontier of India

Lieutenant General Sir Bindon Blood and his staff: Malakand Rising, 26th July to 22nd August 1897 on the North-West Frontier of India

28th July 1897:
There was continuous firing all day, until, at 5.30pm, an attack was launched, falling on the section of the perimeter manned by the sowars of the 11th Bengal Lancers.  The tribesmen came on in a semi-circle, carrying some 200 flags representing many of the tribes on this section of the border. The tribesmen rushed up to the fort and several climbed into the compound, clambering over the barbed wire.  The attack lasted until dawn, when it fell away in the face of the garrison’s fire.  The attackers were identified as including men from the Abazai, Khadakzai and Musa Khel clans.

British Mountain Battery: Malakand Rising, 26th July to 22nd August 1897 on the North-West Frontier of India: picture by Ernest Prater

British Mountain Battery: Malakand Rising, 26th July to 22nd August 1897 on the North-West Frontier of India: picture by Ernest Prater

29th July 1897:
The attack began at 3pm.  Tribesmen emerged from Chakdara village, carrying ladders and bundles of grass to throw on the barbed wire entanglement.  Again, the attack was unable to penetrate the defences.

A substantial group attacked the Signal Tower, working up to the walls and setting a large fire.  The fire burnt itself out without any effect on the masonry of the tower, while the small garrison, aided by fire from the fort, inflicted significant casualties on the attackers.  The attack ceased at around 5pm and the tribesmen withdrew, carrying as many of their casualties as they could, but still leaving some 50 dead around the Signal Tower.

30th July 1897:
The tribesmen appeared to be losing confidence in their ability to take the fort.  Although there was some desultory firing, an attack was not launched until 5pm, enabling some of the garrison to rest for the first time since the siege began.  The attack had little of the ferocity of the previous days and was over within a couple of hours.  The attackers were joined by tribesmen from Bajaur.

Sappers and Miners: Malakand Rising, 26th July to 22nd August 1897 on the North-West Frontier of India: picture by AC Lovett

Sappers and Miners: Malakand Rising, 26th July to 22nd August 1897 on the North-West Frontier of India: picture by AC Lovett

31st July and 1st August 1897:
During these two days, the attackers were heavily re-enforced by tribesmen from the Malakand and by members of the Malizai clan.  From around 1,500 tribesmen on the first day of the siege, the number of attackers reached around 12,000 to 14,000.  The attacks were less frenzied and made greater use of cover and entrenchments to approach the fort.  The exhausted sowars and sepoys constantly fell asleep, to be aroused by the British and Indian officers.  There was no sign of a relief column and no messages from the outside world.

On 1st August 1897, the tribesmen mounted an attack in which they captured the civilian hospital, a building near to the fort.  The tribesmen loop-holed the walls of the hospital and used it to fire at the fort from close range.

The tribesmen were now in sufficient numbers to occupy the ridge above the fort, cutting off the signal tower and preventing any further supplies of water reaching the small garrison of the tower.  From the ridge, fire could be maintained straight into the fort, which made any movement hazardous.  It was apparent that these tribesmen were armed with Martini-Henry and Snider rifles.

A simple message was sent by heliograph to Malakand ‘Help us’.

2nd August 1897:
No doubt in view of the approach of the relief column from Malakand, early on 2nd August 1897, the tribesmen launched a desperate attack on the fort in large numbers.  Bundles of grass were thrown on the barbed wire entanglements and scaling ladders placed against the walls, combined with a heavy fire from sangars on the ridge and all round the fort.  While the garrison sustained some casualties, substantial numbers of tribesmen were shot down.

Late morning, the cavalry of the Guides and the 11th Bengal Lancers were seen to be crossing the Amandara Ridge on the far side of the river and to be galloping towards the fort, cutting down parties of tribesmen in their path.  Promptly Lieutenant Rattray had the gates of the fort thrown open and led a party of his men in an assault on the hospital, where some 30 tribesmen were bayoneted.  Rattray then led his party to attack the tribesmen in a sangar that was inflicting casualties on the cavalry.  One of the last tribesmen to be bayoneted wounded Rattray in the neck.
The cavalry reached the gates and the blockade of the fort was broken.

The Signal Tower:
The Signal Tower was a square stone and masonry block house, built on the ridge above the fort.  The position of the Tower enabled contact by heliograph (a signalling mechanism flashing Morse messages using the sun’s rays on a mirror; only usable in sunlight, between stations in view of each other) to be made with the Signal Tower at Malakand.  Heliograph or flag contact was possible with Chakdara Fort itself, which was in full view of the Signal Tower.

Signalling Tower above Chakdara Fort: Malakand Rising, 26th July to 22nd August 1897 on the North-West Frontier of India

Signalling Tower above Chakdara Fort: Malakand Rising, 26th July to 22nd August 1897 on the North-West Frontier of India

Entrance to the Signal Tower was by way of a door, 6 feet above the ground and a ladder that was drawn up.  The Signal Tower walls were loop-holed and a gallery ran around the roof, projecting over the walls, with loop-holes in wall and floor, enabling the garrison to fire down on attackers.  The garrison of the tower comprised 10 soldiers of the 45th Sikhs under Lance-Naik Vir Singh.  This party was increased with a further 6 sepoys on news of the uprising.  The tower contained a water tank which had not been filled prior to the attacks.

The Signal Tower was 500 yards up the hillside from the fort.  A party took supplies of food and water up to the tower every day of the week-long siege, until the last day when the tribesmen built sangar positions to prevent access to the tower.  The 9 pounder gun and the Maxim gun in the fort were able to fire in support of the Signal Tower.

Signalling Tower above Chakdara Fort: Malakand Rising, 26th July to 22nd August 1897 on the North-West Frontier of India

Signalling Tower above Chakdara Fort: Malakand Rising, 26th July to 22nd August 1897 on the North-West Frontier of India

Churchill records that Sepoy Prem Singh went onto the tower roof every day, to signal to Malakand by heliograph, each time under a hail of fire.  The signalling could only be carried out in full sunlight.

Casualties at Chakdara:
It was estimated that the tribesmen lost around 2,000 men in the week of attacks on the fort.  The casualties in the fort were slight: The 11th Bengal Lancers lost 1 man killed and 1 wounded.   The 45th Sikhs lost 4 men killed and 10 wounded.  Other casualties were 2 killed and 2 wounded.

The ride to Chakdara by Captain Wright’s squadron:
On 27th July 1897, Brigadier-General Meiklejohn ordered Major Gibb to lead the garrison of the North Camp up the Chakdara Road and drive away the tribesmen who had been attacking the Malakand during the night.  The squadron of the 11th Bengal Lancers under Captain Wright, with Captain Baker, the brigade transport officer, went on in advance.

Captain Wright's squadron of 11th Bengal Lancers rides to Chakdara Fort: Malakand Rising, 26th July to 22nd August 1897 on the North-West Frontier of India: picture by Richard Caton Woodville

Captain Wright’s squadron of 11th Bengal Lancers rides to Chakdara Fort: Malakand Rising, 26th July to 22nd August 1897 on the North-West Frontier of India: picture by Richard Caton Woodville

On reaching Bedford Hill, opposite the village of Khar, the infantry force under Major Gibb saw that large numbers of tribesmen were on the surrounding hills, threatening to cut the force off from Malakand and overwhelm it.  Covered by Lieutenant Climo and his 2 companies of the 24th Punjab Infantry, who were providing support, the force managed to withdraw to the Malakand Camp, although under heavy attack.  Wright’s squadron which was far in advance and moving at speed, carried on towards Chakdara.

As Wright’s lancers headed for the Amandara Ridge, which stretched in their path between the Swat River and the mountains and was usually negotiated by way of the Amandara Pass, it was apparent that the rising was on a massive scale.  Every hill was occupied by tribesmen in arms.

As the squadron crossed the plain towards the Amandara Pass, it could be seen that the tribesmen were massed on the heights, ready to fire down on the lancers as they passed through the defile below them.  The squadron might gallop through the defile, but there would inevitably be casualties who would have to be left behind.

Chakdara Fort seen from the north: Malakand Rising, 26th July to 22nd August 1897 on the North-West Frontier of India

Chakdara Fort seen from the north: Malakand Rising, 26th July to 22nd August 1897 on the North-West Frontier of India

A sowar informed Wright of a path at the end of the ridge, between the high ground and the Swat River.  Wright resolved to take that route.  The squadron veered to the left, heading for the end of the ridge.  The watching tribesmen realised what was intended and started running along the crest of the ridge, towards the river.

The squadron reached the end of the ridge and headed along the path the sowar had described.  After a distance, the path ended with a near sheer drop down to the river.  Now committed to the route, the horsemen rode down the cliff face and found themselves on the edge of a gully.  They rode down the gully which ended at a branch of the river, fast flowing and deep.  The horses plunged in and swam across the branch.

The tribesmen reached the end of the ridge and began to fire at the squadron.  The horsemen reached the far bank, to find themselves on an island.  At the end of the island, the squadron crossed back to the bank they had left, now clear of the high ground.  Here the sowars dismounted and returned the fire of the tribesmen, while Wright plunged into the stream, on his now seriously wounded horse, to rescue the hospital orderly and his pony, who were in trouble in the fast current.

Soldiers of the 35th Sikhs: Malakand Rising, 26th July to 22nd August 1897 on the North-West Frontier of India

Soldiers of the 35th Sikhs: Malakand Rising, 26th July to 22nd August 1897 on the North-West Frontier of India

The squadron continued along the bank, until the Maxim Gun in the bridge blockhouse at Chakdara came within range and gave covering fire, enabling the squadron to cross the bridge and join the Chakdara garrison.

As Captain Wright was now the senior officer in Chakdara Fort, he took nominal command, although he left the routine running of the garrison to Lieutenant Rattray.  Captain Baker took on the role of improving the defences of the fort, in particular rigging up head cover where there was no loop-holing.

The Chakdara Relief Force:
The Government of India appointed Major-General Sir Bindon Blood KCB to command the newly constituted Malakand Field Force and put down the rising in Swat.  General Blood lost no time in travelling from Agrah to Malakand, arriving in the camp on 1st August 1897, the day after the end of the all-out tribal assault on the Malakand Camp and the day of Meiklejohn’s first attempt to relieve Chakdara Fort.

Reconnaissance by 11th Bengal Lancers and the Guides Cavalry on 1st August 1897: Malakand Rising, 26th July to 22nd August 1897 on the North-West Frontier of India: drawing by Edmund Hobday

Reconnaissance by 11th Bengal Lancers and the Guides Cavalry on 1st August 1897: Malakand Rising, 26th July to 22nd August 1897 on the North-West Frontier of India: drawing by Edmund Hobday

Blood found that Meiklejohn was ready with a new force, to march to Chakdara at dawn the next day, 2nd August 1897.  Blood approved the plan and directed Meiklejohn to command the force himself.  The tribesmen appeared to threaten a further assault on the Malakand that night, firing into the camp and Meiklejohn’s force mustered under arms at midnight to counter any attack.  The force comprised 2 squadrons of the Guides Cavalry, 2 squadrons of the 11t Bengal Lancers, 4 guns of No. 8 Bengal Mountain Battery, ½ company of No. 5 Company, Madras Sappers and Miners, 400 rifles of the 24th Punjab Infantry, 400 rifles of the 45th Sikhs and 200 rifles of the Guides Infantry.

At around 3am, the firing fell away and, at 5am, Meiklejohn’s column marched out of the Malakand Camp on the road to Chakdara.

General Blood directed the operation from a position on Castle Rock.  On his orders, Colonel Goldney, with soldiers from the 35th Sikhs and the 38th Dogras, captured a hill (then named ‘Goldney’s Hill’) half a mile north of the camp, from where they provided covering rifle fire for the initial stages of Meiklejohn’s march, with the fire of 2 mountain guns positioned on Castle Rock.

As in the previous attempt, the cavalry pushed on ahead to seize the Amandara Pass.  The Guides Cavalry crossed Bedford Hill on the east side.  Numbers of tribesmen moved hurriedly out of the way of these squadrons, to the west side of the hill, into the path of the 11th Bengal Lancers.  Hard fighting took place, including one incident in which a tribesman, impaled on an 11th sowar’s lance, attempted to climb up the lance to strike at the sowar with his sword.  This contest ended when an officer shot the tribesman with his pistol.

Troops from several regiments: Malakand Rising, 26th July to 22nd August 1897 on the North-West Frontier of India

Troops from several regiments: Malakand Rising, 26th July to 22nd August 1897 on the North-West Frontier of India

As the infantry left Malakand Camp, tribesmen occupied the high ground at the junction of the Chakdara Road with the road to the North Camp.  The Guides Infantry and the 45th Sikhs drove the tribesmen off the hill at the point of the bayonet, assisted by the supporting fire from Goldney’s Hill and Castle Rock.  The tribesmen fell back to Malakot village on Bedford Hill.  The 24th Punjab Infantry, the 45th Sikhs and the Guides Infantry attacked in line, driving the tribesmen off Bedford Hill into the Khar plain beyond, where they were pursued by the 4 squadrons of cavalry.  Significant casualties were inflicted on the tribesmen in this sequence of attacks.

Lieutenant-Colonel Adams of the Guides, commanding the cavalry, pushed on across the Khar plain and seized the Amandara Pass.  The infantry followed up, the 45th Sikhs taking, at the point of the bayonet, the village of Bat-Khela, from where fire had been directed at the passing cavalry squadrons.

Charge of the 11th Bengal Lancers and the Guides Cavalry in the relief of Chakdara Fortl: Malakand Rising, 26th July to 22nd August 1897 on the North-West Frontier of India

Charge of the 11th Bengal Lancers and the Guides Cavalry in the relief of Chakdara Fortl: Malakand Rising, 26th July to 22nd August 1897 on the North-West Frontier of India

Adams pushed on with the cavalry through the Amandara Pass.  At about 7.30am, the cavalry squadrons came in sight of Chakdara Fort.  Everything was ominously quiet.  A thin column of smoke rose from the gun tower.  A helio was flashed and immediately there was a heavy burst of firing from the fort, which was taken up by the surrounding tribesmen.  The cavalry rode across the plain and entered the fortified entrance to the bridge, the tribesmen withdrawing swiftly up the river.

With the appearance of Adam’s squadrons, Rattray led a party out of the fort to re-capture the civilian hospital, while Captain Baker cleared the sangars above the fort, from which fire was being directed at the approaching cavalry.  The siege of the fort was over.

The Malakand Relief Column at Dargai: Malakand Rising, 26th July to 22nd August 1897 on the North-West Frontier of India: drawing by Edmund Hobday

The Malakand Relief Column at Dargai: Malakand Rising, 26th July to 22nd August 1897 on the North-West Frontier of India: drawing by Edmund Hobday

The Malakand Field Force:
The troops already in Malakand, Chakdara and Dargai were incorporated in the Malakand Field Force.

The First Brigade, commanded by Brigadier-General Meiklejohn, concentrating at Amandara, comprised 1st Royal West Kents, 24th Punjab Infantry, 31st Punjab Infantry and 45th Rattray’s Sikhs.

The Second Brigade, commanded by Brigadier-General Jeffreys, concentrating at Khar and Malakand, comprised 1st Buffs (East Kent Regiment), 35th Sikhs, 38th Dogras and the Guides Infantry.

Divisional troops comprised 1 squadron 10th Bengal Lancers, 11th Bengal Lancers, Guides Cavalry, No. 1 Mountain Battery RA, No. 7 Mountain Battery RA, No. 8 Bengal Mountain Battery, 21st Punjab Infantry, 2 companies of 22nd Punjab Infantry, No. 4 Company Bengal Sappers and Miners and No. 5 Company Madras Sappers and Miners.

Tribesman held prisoner in Khar: Malakand Rising, 26th July to 22nd August 1897 on the North-West Frontier of India

Tribesman held prisoner in Khar: Malakand Rising, 26th July to 22nd August 1897 on the North-West Frontier of India

The Third, Reserve Brigade, commanded by Brigadier-General Wodehouse, comprised 1st Queen’s Surreys, 2nd Highland Light Infantry, 6 companies of 22nd Punjab Infantry, 39th Garwhal Rifles, No. 10 Field Battery, RA and No. 3 Company Bombay Sappers and Miners.

An advanced supply depot was established at Khar, between Malakand and Chakdara.  The various units making up the force were to concentrate in the Swat Valley by 8th August 1897.  In the meantime, advances were made up the Swat Valley.

Sikh troops looting and destroying a village in the Swat Valley: Malakand Rising, 26th July to 22nd August 1897 on the North-West Frontier of India

Sikh troops looting and destroying a village in the Swat Valley: Malakand Rising, 26th July to 22nd August 1897 on the North-West Frontier of India

Brigadier-General Jeffreys occupied a number of villages around the area of Khar, whose male inhabitants had taken part in the attack on Malakand.  The villages were deserted.  The troops destroyed the fortifications.  On reports that Bunerwals and Hindustani fanatics were arriving in the area, the passes of Shakot, Morah and Charat were reconnoitred.  Groups of tribesmen were found and dispersed by the cavalry.

The ‘Mad Fakir’ was reported to be in Mingaora, the ancient capital of the old Buddhist state of Udyana in Upper Swat.

One of the Mad Fakir’s urgings on his followers was that the garrison at Malakand was the full extent of Britain’s military force in India.  The trebling of the force in a matter of days, with extensive activity in bringing up supplies and establishing bases, was troubling evidence for the tribesmen of the unreliability of this claim.

On 9th August 1897, the Ranizai and Khan Khel jirgas from Lower Swat came in to the British headquarters at Chakdara to negotiate.  Terms of a fine and surrender of weapons were imposed on them and the members of these clans were permitted to return to their villages.

On 12th August 1897, the jirgas from the Khwazazai clans, based on the northern bank of the Swat River in Dir, came in to the British camp to negotiate and were given the same terms.

Swat River Valley at Landakai: Malakand Rising, 26th July to 22nd August 1897 on the North-West Frontier of India

Swat River Valley at Landakai: Malakand Rising, 26th July to 22nd August 1897 on the North-West Frontier of India

The action at Landakai:
General Blood prepared to move his force into Upper Swat, the area to the north of Landakai, known as ‘the Gate of Swat’. To cover the right flank of the force from interference by the Bunerwals, Brigadier-General Wodehouse moved parts of the reserve Third Brigade (the HLI, No. 3 Company Bombay Sappers and Miners and 1 squadron of the 10th Bengal Lancers) to Rustam, the south-west approach to Buner.

The main force assembled for the advance up the Swat River at Amandara and comprised Brigadier-General Meiklejohn’s First Brigade, with the cavalry, guns and Sappers and Miners of the divisional troops.

On 16th August 1897, the force moved from Amandara to the village of Thana on the Swat River, bringing twelve days supplies but no tents. The baggage was left at Thana, with a strong guard from the 35th and 45th Sikhs and the 11th Bengal Lancers.

On 17th August 1897, a squadron of the 11th Bengal Lancers, commanded by Major Beatson, moved out at 6.30am to reconnoitre the left bank of the river.  A skirmish took place with tribesmen at the village of Jalala.

At this point, a ridge extended from the mountains to near the river.   Jalala lay between the end of the ridge and the river.  Beyond the Jalala ridge lay a nullah running down to the river and a second spur, before a ravine and the substantial Landakai ridge.

The Landakai ridge extended from the mountain line and ended abruptly at the gorge through which ran the Swat River.  A narrow causeway, sufficient only for a single file, was built into the cliff above the river and ran for a mile, until the ridge ended, with an open area devoted to rice fields and the village of Landakai.  The tribesmen were positioned along the crest of the ridge, in a sequence of stone sangars.  The causeway had been broken down in several places.

The relief of Chakdara Fort: Malakand Rising, 26th July to 22nd August 1897 on the North-West Frontier of India: illustration from Le Petit Parisien

The relief of Chakdara Fort: Malakand Rising, 26th July to 22nd August 1897 on the North-West Frontier of India: illustration from Le Petit Parisien

The cavalry found tribesmen skirmishers occupying Buddhist ruins on the spur above Jalala.  2 companies of the Royal West Kents cleared the ruins and the battalion took up positions along the Jalala Ridge.  At 9am, the 10th Field Battery and No. 7 Mountain Battery came into action on Jalala Ridge, firing on the sangars along the Landakai Ridge.

Lieutenant Alexander Murray VC: Malakand Rising, 26th July to 22nd August 1897 on the North-West Frontier of India

Lieutenant Alexander Murray VC: Malakand Rising, 26th July to 22nd August 1897 on the North-West Frontier of India

Brigadier-General Meiklejohn took the 24th Punjab Infantry and the 45th Sikhs into the mountains and moved along, parallel with the Swat River, to take the Landakai Ridge position in flank.  If this succeeded, the tribesmen would be unable to withdraw along the ridge into the mountains and be forced to retreat by descending into the rice fields at the back of the ridge, leaving themselves vulnerable to cavalry attack, provided the cavalry regiments could negotiate the river causeway.

The Royal West Kents moved across the intervening ground from Jalala and began the climb onto the Landakai Ridge.

Most of the tribesmen, seeing the threat from Meiklejohn’s force moving along the mountain line on their left, soon to cut off their retreat into the mountains and under destructive fire from the guns on the Jalala Ridge, began to retreat down from the ridge into the fields on the far side, leaving only their more determined brothers.  A group of Bunerwals, distinguishable by their dark blue and grey clothing, could be seen moving away along the mountain tops, back towards the passes to Buner.  This group later skirmished with the Thana baggage guard of the 11th Bengal Lancers.

Attack on 24th Punjab Infantry by the Bunerwal ghazis at Landakai on 17th August 1897: Malakand Rising, 26th July to 22nd August 1897 on the North-West Frontier of India: drawing by Edmund Hobday

Attack on 24th Punjab Infantry by the Bunerwal ghazis at Landakai on 17th August 1897: Malakand Rising, 26th July to 22nd August 1897 on the North-West Frontier of India: drawing by Edmund Hobday

As the 24th Punjabis climbed up the steep hillside to reach the tribesmen, a group of Bunerwal ghazis launched a charge down the hill, to be met with a destructive rifle fire from the 24th. The surviving ghazis were driven back onto the ridge.

By the Swat River, the Madras Sappers and Miners worked to clear the obstructions on the causeway and mend the damage, to permit the cavalry to make their way round to the rear of the Landakai Ridge position.  Even when repaired, the causeway was so narrow, that the cavalrymen had to dismount and lead their horses in single file.  Captain Palmer of the Guides Cavalry gathered a small force at the far end of the causeway and headed off in pursuit of the retreating tribesmen making for the hills across the rice fields.

Lieutenant Colonel Adams, Guides Cavalry: Malakand Rising, 26th July to 22nd August 1897 on the North-West Frontier of India

Lieutenant Colonel Adams, Guides Cavalry: Malakand Rising, 26th July to 22nd August 1897 on the North-West Frontier of India

Most of the tribesmen were now in the foot hills above the village of Nawakila, 1 ¼ miles to the east of Landakai.  Lieutenant-Colonel Adams directed the sowars to head for a clump of trees from which dismounted fire could be directed at the tribesmen.

Captain Palmer was riding with Lieutenant Greaves, an officer of the Lancashire Fusiliers, with the force as correspondent for the Times.  Ignoring, or not hearing Adams’ order, these two officers continued in direct pursuit, outstripping the accompanying sowars.  As they came up with the tribesmen, a number turned on the two officers.  Both were shot.  Palmer was rescued by 2 sowars of the Guides.  Greaves’ horse carried him into the middle of the tribesmen, where he fell to the ground.  A party comprising Colonel Adams, Lieutenant Viscount Fincastle, who was also acting as a news correspondent, Lieutenant Maclean of the Guides and a number of sowars came up to rescue Greaves.  In the resulting melee Greaves was dragged onto a horse, but again shot, this time fatally and Maclean was mortally wounded.  The party managed to escape to the small wood, under covering fire from the remaining sowars.

For this incident, Adams and Fincastle received the Victoria Cross and Jemadar Bahadur Singh and 4 men of the Guides Cavalry received the Indian Order of Merit.  Lieutenant Maclean was awarded a posthumous VC.

The rescue of Palmer and Greaves by Colonel Adams and Viscount Fincastle, who both won the VC: Malakand Rising, 26th July to 22nd August 1897 on the North-West Frontier of India

The rescue of Palmer and Greaves by Colonel Adams and Viscount Fincastle, who both won the VC: Malakand Rising, 26th July to 22nd August 1897 on the North-West Frontier of India

The infantry regiments descended from the Landakai Ridge and crossed the fields into the foothills, by which time the tribesmen were well into the mountains.

Lieutenant-Colonel Adams assembled the 2 cavalry regiments and continued up the valley towards Barikot.  They came up with a force of around 150 tribesmen holding the village of Abuwa.  The cavalry drove them out and then returned to camp at Landakai.

Around 1,500 of the tribesmen who had retreated towards the Morah Pass attempted an attack on the baggage at Thana but were driven off.  These were the Bunerwals seen earlier to be moving along the mountain crest.

The camp at Thana: Malakand Rising, 26th July to 22nd August 1897 on the North-West Frontier of India

The camp at Thana: Malakand Rising, 26th July to 22nd August 1897 on the North-West Frontier of India

British casualties in the day were the 2 British officers killed and 2 officers and 7 men wounded.  The losses of the tribesmen were estimated at more than 300.

Further operations in the Malakand Rising:
On 18th August 1897, the Malakand Field Force continued its march up the east bank of the Swat River, reaching the village of Ghalegai.  All the villages on the route were abandoned.  The villagers at Ghalegai were still in place and complied with the requirements imposed upon them, surrendering all arms and British looted property and providing supplies and transport.  When a few shots were fired into the British camp, the villagers drove the offenders away.

On the next day, the column marched to Mingaora, where it remained until 24th August 1897, while the political officer, Major Deane, negotiated terms.  On 22nd August 1897, the jirgas of the Upper Swatis agreed to the terms required of them, surrender of firearms and payment of fines.

The Mian Guls withdrew to Buner, as did the Mad Fakir, beyond the present reach of the British.  A substantial number of firearms was collected from the now compliant tribesmen of the area, with grain, fodder and fuel for the use of the troops and some transport animals.  Reconnaissance parties moved about the country, as far as the Kotkai Pass in the east, on the border of Bunerwal country, conducting surveying work.

Villagers were required to demolish the fortifications in their houses and villages.  A postal service was established between Thana and Mingaora, for the temporary purposes of the British troops, which the tribes were required to protect.

On 22nd August 1897, the jirgas of the Upper Swat signed a document of unconditional surrender.  As part of the terms, the assurance was given on behalf of the British Government in India that there was no intention to interfere with the tribes or their country, but that ‘peace must be maintained on the Border’.

Major Deane questioned widely as to why the uprising had taken place.  There seemed to be no particular complaint about the conduct of the British.  The only motivation seemed to be religious fanaticism, fanned by the ‘Mad Fakir’ and other mullahs.

British gunners with a 12 pounder field gun: Malakand Rising, 26th July to 22nd August 1897 on the North-West Frontier of India

British gunners with a 12 pounder field gun: Malakand Rising, 26th July to 22nd August 1897 on the North-West Frontier of India

The move towards Buner:
On 24th August 1897, the Malakand Field Force returned to Barikot and, on 26th August 1897, to Khar and then Malakand.  The intention was to invade Bunerwal country and complete the operations against the tribes involved in the attack on Malakand.

By this time the British Indian Army was dealing with the uprisings by the Mohmands, immediately to the west of the area of operations of the Malakand Field Force and the uprising in the Tirah, to the south of the Kabul River.  The Government of India decided that the invasion of Buner should be left for the moment and that General Blood’s force should move west, to assist General Elles in dealing with the Mohmands, in the area around the Nawagai Valley.

The operations in the Swat Valley ended and the political officers were left to monitor compliance with the cease fire agreements.  A substantial force remained in the area to support the Khan of Dir, in ensuring compliance by the villages in his area.

Casualties in the Malakand Rising:  These are set out in the narrative above. 

Indian General Service Medal 1854-1895 with the clasps 'Malakand 1897' and 'Punjab Border 1897-1898'

Indian General Service Medal 1854-1895 with the clasps ‘Malakand 1897’ and ‘Punjab Border 1897-1898’

Battle Honour and decorations for the Malakand Rising:
The battle honour ‘Malakand’ was awarded to those regiments that took part in the defence of Malakand and Chakdara:  11th Bengal Lancers, the Guides, 24th Punjab Infantry, 31st Punjab Infantry, 35th Sikhs and 38t Dogras.

The battle honour ‘Punjab Frontier’ was awarded to the regiments that took part in the Malakand Field Force, along with the regiments involved in the Tochi and Mohmand operations.

All troops and civilian staff, who either took part in the defence of Malakand and Chakdara or took part in the operations beyond Jalala, received the Indian General Service Medal 1895, silver for troops and bronze for civilians, with the clasp ‘Punjab Frontier 1897-8’.  For the garrisons of Malakand and Chakdara and the troops and supporters of the relief force, the additional clasp was issued ‘Malakand, 1897’.  Where an individual already had the medal, he added the appropriate clasps to his existing medal.

Lieutenant Edmund Costello VC: Malakand Rising, 26th July to 22nd August 1897 on the North-West Frontier of India

Lieutenant Edmund Costello VC: Malakand Rising, 26th July to 22nd August 1897 on the North-West Frontier of India

Brigadier-General Meiklejohn was made Commander of the Bath (CB). Captain Wright and Lieutenants Climo and Rattray were awarded the DSO. Lieutenant-Colonel Adams, Lieutenant Viscount Fincastle and Lieutenant Maclean received the Victoria Cross for the incident at Landakai on 17th August 1897. Lieutenant Costello received the Victoria Cross for rescuing the havildar on 26th July 1897.

Several Indian sepoys and sowars received the Indian Order of Merit, including the defenders of the Serai at Malakand, the Signal Tower at Chakdara and the sowars who rode to the rescue of the 2 officers at Landakai with Adams, Maclean and Fincastle and the sepoys who assisted Lieutenant Costello in rescuing the havildar.

Follow-up to the Malakand Rising: 
See the entry for ‘Mohmands 1897’ and ‘Buner 1898’ for the subsequent operations of the Malakand Field Force.

Anecdotes and traditions from the Malakand Rising:

  • A striking feature of warfare on the North-West Frontier was the responsibility that fell on junior British officers, a consequence of the small establishment for British officers in Indian Army regiments.  Lieutenant Climo, aged 29, took command of his regiment, the 24th Punjab Infantry, on the second day of the assault on the Malakand, conducting himself with resource and determination, thereby winning a DSO.  When the order for the Guides to march for the Malakand arrived at Mardan, on 26th July 1897, the only British officer in camp was Lieutenant Elliot-Lockhart, who immediately put the regiment’s cavalry and infantry, effectively 2 regiments, in motion.  The garrison at Chakdara was commanded by Lieutenant Rattray, until the arrival of Captain Wright of 11th Bengal Lancers, who left the day to day conduct of the defence to Rattray.
  • ‘Resource and determination’ are qualities that must be attributed to many of the soldiers of the Malakand and Chakdara garrisons, particularly Colonel Meiklejohn, Lieutenant-Colonel McRae of the 45th Sikhs, Captain Wright of the 11th Bengal Lancers, Subadar Syed Ahmed Shah and his 31st Punjabis in the Serai and Lance Naik Vir Singh and his 45th Sikhs in the Signal Tower, to name but a few.

    Royal Horse Artillery firing 12 pounder field guns': Malakand Rising, 26th July to 22nd August 1897 on the North-West Frontier of India

    Royal Horse Artillery firing 12 pounder field guns’: Malakand Rising, 26th July to 22nd August 1897 on the North-West Frontier of India

  • The 12 pounder BL (breech loading) field gun was used for the first time in Indian frontier warfare by the Royal Artillery.  These guns were present in the Chitral Relief Force but were not used in action.
  • The Chakdara Signal Tower is now called ‘Churchill’s picket’.  It is not clear why this should be.  Winston Churchill joined the Malakand Field Force after the fighting in the Swat Valley, when General Blood was about to move west against the Mohmands in the Nawagai Valley.  No doubt, Churchill visited Chakdara and the Signal Tower, but he will not have seen action in that area.  Any dispatch he sent from Chakdara will have been by telegraph from the fort, rather than by heliograph from the Signal Tower.
  • Lieutenant Colonel Lamb, the commandant of the 24th Punjab Infantry, received a bullet wound in the leg, during the first attack on the Malakand, on 26th July 1897.  Amputation of the leg was delayed, while a Röntgen X-ray machine was brought up from India, to see if the bullet could be located and removed.  When the machine arrived, it was found to be damaged and unusable.  Colonel Lamb’s leg was amputated, but the delay proved fatal and Colonel Lamb died.
  • During his investigation of the reasons for the uprising, the political officer in Malakand, Major Deane, asked tribal leaders why the Malakand Camp had been attacked.  He received the answer that the British had not issued any order forbidding an attack.
  • ‘The McMunn Book’:  A leading Indian Army officer wrote short comments for each of those regiments illustrated in his copy of McMunn’s ‘The Armies of India’:  His comments for regiments involved in the Malakand campaign were (not all the regiments involved appear in the book): Guides:  ‘God’s Own Very Good’: 3rd Company Sappers and Miners:  ‘Fair’: 22nd Punjab Infantry:  ‘Very good honest reliable battalion’: 24th Punjab Infantry:  ‘A1’: 31st Punjab Infantry: ‘Very good’: 38th Dogras:  ‘Very good’: 39th Garwhalis:  ‘Excellent’: 45th Sikhs:  ‘Very good’.
  • Most of the regiments involved in the operation comprised Sikhs, Pathans, Punjabi Mussulmans and Dogras.  The 3rd and 4th Companies of Sappers and Miners were from Bombay and will have been Hindu and Muslim, as will the 5th Company from Madras.
  • The Guides were formed from a wide range of nationalities, including Pathans of several tribes, Afghans, Sikhs, Dogras, Muslim and Hindu Punjabis, Turkmens, Gurkhas, Persians and others.
  • Officers in the Sappers and Miners were from the Royal Engineers.  Officers in the Mountain Batteries were from the Royal Artillery.  These two corps made a substantial contribution to the Indian Army.  General Sir Bindon Blood was a Royal Engineer.

    Meg Meiklejohn, daughter of the Malakand Camp commandant: Malakand Rising, 26th July to 22nd August 1897 on the North-West Frontier of India

    Meg Meiklejohn, daughter of the Malakand Camp commandant: Malakand Rising, 26th July to 22nd August 1897 on the North-West Frontier of India

  • Brigadier-General Meiklejohn’s daughter Meg aged 4 was in the camp at Malakand with her nurse, when the attack took place on 26th July 1897.
  • Comment is made on the conduct of the Guides Cavalry and the 11th Bengal Lancers in the authoritative work, ‘Small Wars’, by Colonel Callwell, Third Edition 1908.  Callwell states “It is, however, only right to point out that the mounted troops which performed such signal service during the advance towards Chitral and during the operations of the Malakand field force, enjoyed the advantage of great experience in irregular warfare. Because regiments like the Guides and the 11th Bengal Lancers were able to play an important tactical rôle in theatres of war so awkward to traverse by mounted men as Swat and Bajaur, it does not follow that corps trained on more favourable ground and accustomed only to ordinary cavalry manoeuvres, would do as well under the same conditions.”
  • Several Indian Army regiments maintained in their informal titles references to the British officers who had raised them.  The Guides were ‘Lumdsen’s’.  The 11th Bengal Lancers were ‘Probyn’s Horse’.  The 45th Sikhs were ‘Rattray’s Sikhs’.

Winston Churchill as a 19 year old officer of the 4th Hussars: Malakand Rising, 26th July to 22nd August 1897 on the North-West Frontier of India

Winston Churchill as a 19 year old officer of the 4th Hussars: Malakand Rising, 26th July to 22nd August 1897 on the North-West Frontier of India

References for the Malakand Rising:
Frontier and Overseas Expeditions from India Volume 1 published by the Government of India 
North West Frontier by Captain H.L. Nevill DSO, RFA
Malakand Field Force by Winston Churchill
The North-West Frontier by Michael Barthorp
The Frontier Ablaze, the North-West Frontier Rising 1897-1898 by Michael Barthorp
The History of Probyn’s Horse (11th and 12th Bengal Lancers)
Sketches on service during the Indian Frontier Campaigns of 1897 by Edmund Hobday

The previous battle of the North-West Frontier of India is the Siege and Relief of Chitral

The next battle in the British Battles sequence is the Malakand Field Force 1897

To the North-West Frontier of India index


Siege and Relief of Chitral

The siege and relief of the fort at Chitral in the remote mountainous region beyond the North-West Frontier of India, held by Sikh and Kashmiri soldiers and their British officers from 3rd March to 20th April 1895; that caused such a stir in late Victorian Britain

Sketch of Chitral Fort from the far side of Kunar River looking south to the fort, drawn within days of the end of the siege by an officer of the Chitral Relief Force: Siege and Relief of Chitral, 3rd March to 20th April 1895 on the North-West Frontier of India: Pencil Notes: a. Gun Tower within ten feet of which Umar Khan’s men bored a mine which was however discovered and blown up under cover of a Sortie by the Garrison. b. Flag Tower on which garrison hoisted Union Jack c. Water Tower; d. Baird’s grave e. View of Chitral Fort looking from the north

Sketch of Chitral Fort from the far side of Kunar River looking south to the fort, drawn within days of the end of the siege by an officer of the Chitral Relief Force: Siege and Relief of Chitral, 3rd March to 20th April 1895 on the North-West Frontier of India:
Pencil Notes: a. Gun Tower within ten feet of which Umar Khan’s men bored a mine which was however discovered and blown up under cover of a Sortie by the Garrison.
b. Flag Tower on which garrison hoisted Union Jack
c. Water Tower; d. Baird’s grave
e. View of Chitral Fort looking from the north

The previous battle of the North-West Frontier of India is Waziristan 1894

The next battle of the North-West Frontier of India is the Malakand Rising 1897

To the North-West Frontier of India index


Surgeon Major Robertson (seated) with Lieutenants Harley, Gurdon and Captain Townsend: Siege and Relief of Chitral, 3rd March to 20th April 1895 on the North-West Frontier of India

Surgeon Major Robertson (seated) with Lieutenants Harley, Gurdon and Captain Townsend: Siege and Relief of Chitral, 3rd March to 20th April 1895 on the North-West Frontier of India

War:  North-West Frontier of India.

Date of the Siege and Relief of Chitral: 3rd March to 20th April 1895.

Place of the Siege and Relief of Chitral:  Chitral, now in Northern Pakistan.

Contestants in the Siege and Relief of Chitral:  British Army, Indian Army, Kashmir Imperial Service Troops and levies from Hunza and Nagar against Chitralis, Jandolis, Afghans and Pathan tribes from the area to the north of the Kabul River.

Commanders in the Siege and Relief of Chitral:  
Surgeon Major George Robertson, Indian Medical Service, commanded the Indian Army garrison in Chitral Fort; Lieutenant Colonel Kelly, the commandant of the 32nd Punjab Pioneers, commanded the relief column from Gilgit and Major General Sir Robert Low commanded the relief column from Peshawar against Umra Khan, the Khan of Jandoli and Dir, and Sher Afzul, putative Mehtar of Chitral.

Umra Khan of Jandol: Siege and Relief of Chitral, 3rd March to 20th April 1895 on the North-West Frontier of India

Umra Khan of Jandol: Siege and Relief of Chitral, 3rd March to 20th April 1895 on the North-West Frontier of India

Size of the forces in the Siege and Relief of Chitral:  
The garrison in Chitral from 3rd March 1895 when the siege began comprised some 500 Sikh and Kashmir troops (the exact numbers are set out in the text).

The Chitral Relief Force comprised some 15,000 British and Indian troops, some 9,000 civilian followers and 30,000 transport animals, mules and camels.

Colonel Kelly’s relief force from Gilgit comprised some 500 men of his own regiment, the 32nd Punjab Pioneers, and levies from Hunza and Nagar with a 2 gun section from 1st Kashmir Mountain Gun Battery.

Umra Khan is thought to have invaded Chitral in January 1895 with 4-5,000 men, a number which increased over the following months, until the Chitral Relief Force began operations in the Malakand Pass, when many of Umra Khan’s men left Chitral to oppose the British incursion.

Captain Charles Townsend, senior military officer: Siege and Relief oaf Chitral, 3rd March to 20th April 1895 on the North-West Frontier of India

Captain Charles Townsend, senior military officer: Siege and Relief of Chitral, 3rd March to 20th April 1895 on the North-West Frontier of India

A wide range of tribes opposed General Low’s Chitral Relief Force, so that the number of tribesmen taking part in the initial fighting, defending the Morah, Shakot and Malakand Passes, was around 20,000.  This number decreased after the Malakand Pass was forced and the British took active steps to reassure the tribes that the aim of the force was to relieve Chitral and not to invade their territory.  The return of the Khan of Dir assisted in this process.  The overthrow of Umra Khan was a not unwelcome outcome for many of the tribes, who felt threatened by Umra Khan’s expansion of his dominion during the 1880s and 1890s.

The number of besiegers of Chitral Fort is not capable of being assessed and varied widely during the course of the siege.  There were probably, at any one time, around 2,000 to 5,000 Chitralis, Jandolis, Afghans, Pathans and members of Umra Khan’s army conducting the siege.  Many of these men went up the Chitral Valley to attack Edwardes and Fowler’s party and Ross’s Sikhs and later to oppose the advance of Colonel Kelly’s Gilgit Relief Force and then returned.

Winner in the Siege and Relief of Chitral:  The British, Indian and Kashmiri forces.

Uniforms and equipment in the Siege and Relief of Chitral: 

British and Indian troops in 1895 wore khaki field dress when campaigning, with a leather harness to carry equipment and ammunition.  British troops wore a pith helmet.  Indian troops were largely turbaned.  Gurkha troops wore a pill box hat.  Highland regiments wore the kilt in the field.

Major General Sir Robert Low, commander of the Chitral Relief Force: Siege and Relief of Chitral, 3rd March to 20th April 1895 on the North-West Frontier of India

Major General Sir Robert Low, commander of the Chitral Relief Force: Siege and Relief of Chitral, 3rd March to 20th April 1895 on the North-West Frontier of India

The British authorities operated a system whereby the most modern rifles, Lee-Metford magazine weapons, were made available to the British regiments (none available to the Chitral garrison, but widely issued to the British regiments in Low’s Chitral Relief Force).  The Indian army regiments were equipped with an earlier model of rifle, the Martini-Henry (the highly effective drop-action, single shot rifle, withdrawn from service with the British regiments in the 1880s), while the Kashmir soldiers and the levies were equipped with an even earlier model, the Snider (the conversion of the Enfield rifled musket to an inefficient breach-loading rifle in the 1860s).  This was a legacy of the Indian Mutiny, as was the system whereby all the artillery, other than some mountain gun batteries, was controlled by the British Royal Artillery.

British Infantry battalions each had 2 Maxim machine guns.

The main artillery support for the British forces on the North-West Frontier of India was the mountain batteries, although there was one field battery in the Chitral Relief Force.  The mountain guns were dismantled and carried on mules while in transit.

The two Indian cavalry regiments (11th Bengal Lancers and the Guides Cavalry) were armed with lance, sabre and carbine.

Rissaldar-Major, 11th King Edward's Own Lancers, Probyns: Siege and Relief of Chitral, 3rd March to 20th April 1895 on the North-West Frontier of India: picture by AC Lovett

Rissaldar-Major, 11th King Edward’s Own Lancers, Probyns: Siege and Relief of Chitral, 3rd March to 20th April 1895 on the North-West Frontier of India: picture by AC Lovett

The standard tactics used by the British and Indian armies on the North-West Frontier of India as with other so-called ‘semi-civilised enemies’ (tribesmen armed with swords and lances and with limited access to modern firearms) was to deliver a frontal attack, discharging controlled volleys of rifle fire and attacking with the bayonet.  When under fire and not moving, cover was taken behind sangars.  Supporting fire would be provided by artillery.  Cavalry would conduct reconnaissance and in favourable circumstances deliver mounted charges.

When a military force moved through hostile country great care had to be taken to ensure that flanking high ground was occupied in strength, until the force was clear of the area.

Umra Khan possessed a semi-disciplined army.  Otherwise, the opposition to the British was by tribesmen.  Umra Khan’s men were in part equipped with Snider and Martini-Henry rifles.  The tribesmen were in possession of muskets, jezails, some Sniders and a few Martini-Henry rifles.  Many of the tribesmen, being without firearms, carried swords and knives and resorted to throwing stones or rolling rocks down the mountainside.  There were no artillery or machine guns.  The tribesmen were largely on foot, although some were mounted.

Tribal prisoners taken during the storming of the Malakand Pass: Siege and Relief of Chitral, 3rd March to 20th April 1895 on the North-West Frontier of India

Tribal prisoners taken during the storming of the Malakand Pass: Siege and Relief of Chitral, 3rd March to 20th April 1895 on the North-West Frontier of India

A feature of warfare on the North-West Frontier of India was the ability of tribesmen to assemble in large numbers, with little or no warning and to move at disconcerting speed across mountainous terrain.

Jandoli soldier: Siege and Relief of Chitral, 3rd March to 20th April 1895 on the North-West Frontier of India

Jandoli soldier: Siege and Relief of Chitral, 3rd March to 20th April 1895 on the North-West Frontier of India

Background to the Siege of Chitral:  
In the early 1890s Chitral was an independent area to the north-west of Kashmir.  Chitral’s northern border ran with Russian Tajikistan, in the area of the Pamirs known as the ‘Roof of the World’, separated from Russia by a thin tongue of Afghanistan.

The whole of Chitral comprised mountainous areas and fast-flowing rivers.  The few inhabitants, estimated at that time to be around 55,000, lived on the limited areas of soil alongside the rivers.  Communication was along the side of these rivers, in places by way of precarious footways.  In places where the rivers ran between steep cliffs, the paths were made by inserting short wooden beams into crevices in the rock and covering them with flat stones and wood.  Such paths might be only two or three feet wide and be above a drop of some distance into the torrent beneath.  These routes were easily destroyed or defended by a hostile population.

In many areas of Chitral the snow is nearly constant.  In the winter months, there are heavy snow falls and many mountain passes become inaccessible.  During the day, the sun is often hot and glaring, while the nights are freezing cold.  Due to the altitude, the effective period of summer is only a couple of months.

In the 1890s, the ruler of Chitral was entitled the ‘Mehtar’.  Chitrali society comprised the Adamzada or minor squirearchy, the middle class, called the Arabzada and the peasantry or Fakir Miskin.  The people of Chitral were Muslim.  In the higher regions, the pre-dominant sect gave allegiance to the Agar Khan.  In the lower areas, the prevailing Islamic sect was Sunni.

Chitral town and fort: Siege and Relief of Chitral, 3rd March to 20th April 1895 on the North-West Frontier of India

Chitral town and fort: Siege and Relief of Chitral, 3rd March to 20th April 1895 on the North-West Frontier of India

The centre of government was in the town, or collection of hamlets, called Chitral, on the right or west bank of the Kunar River.  The principal building and residence of the Mehtar was Chitral Fort on the river bank.  The Fort was the Mehtar’s treasury, storehouse and armoury, holding the resources necessary to maintain his rule.

To the east of Chitral lies Yasin, Hunza and Nagar and to the south-east lies Kashmir, all regions in 1892 subject to the rule of British India.

To the South of Chitral lay the independent tribal Pathan regions of Jandol and Dir.  South of these areas lay the Kabul River with the British military region based on Peshawar.

Along the western and northern borders of Chitral lies Afghanistan.

The principal routes into Chitral and to Chitral itself in 1895 were; from the east along the Yasin River from Gilgit, Kashmir and Hunza and, from the south, over the Lowari Pass, from Dir, which led into the Kunar River valley.

Following the Second Afghan War between Britain and Afghanistan between 1878 and 1880, a boundary commission worked to establish the border between British India and Afghanistan, which, for the British, came to be called the ‘Durand Line’ after the British Commissioner, Colonel Algernon Durand.

The approach to the Malakand Pass: Siege and Relief of Chitral, 3rd March to 20th April 1895 on the North-West Frontier of India

The approach to the Malakand Pass: Siege and Relief of Chitral, 3rd March to 20th April 1895 on the North-West Frontier of India

The work of the commission had an unsettling effect on the independent tribes along the border of Afghanistan and British India.  The tribes to the north of the Kabul River, including the Chitralis, felt that the establishment of the ‘Durand Line’, with their regions on the Indian side, was a significant step towards British takeover.

On 30th August 1892, a long period of relative stability in Chitral came to an end, with the death of Aman-ul-Mulk, the ‘Great’ Mehtar of Chitral.  Unusually in Chitrali politics, the Great Mehtar appears to have died from natural causes.  His death unleashed a period of extreme violence and intrigue between the most prominent of the Great Mehtar’s sons and his brother, to secure the vacant Mehtarship.

The eldest son of Aman-ul-Mulk, Nizam-ul-Mulk, was absent from Chitral at the time of his father’s death, enabling another son, Afzal-ul-Mulk, who was in Chitral, to seize the arms and treasure in Chitral Fort and proclaim himself Mehtar.

Sher Afzal and attendants: Siege and Relief of Chitral, 3rd March to 20th April 1895 on the North-West Frontier of India

Sher Afzal and attendants: Siege and Relief of Chitral, 3rd March to 20th April 1895 on the North-West Frontier of India

In November 1892, Sher Afzal, a brother of the Great Mehtar, arrived at Chitral Fort, having travelled in secret from Afghanistan, murdered Afzal-ul-Mulk and proclaimed himself Mehtar.

Sepoy of the 32nd Sikh Pioneers: Siege and Relief of Chitral, 3rd March to 20th April 1895 on the North-West Frontier of India

Sepoy of the 32nd Sikh Pioneers: Siege and Relief of Chitral, 3rd March to 20th April 1895 on the North-West Frontier of India

On hearing of his brother’s death, Nizam-ul-Mulk, who had taken refuge in British territory at Gilgit, left for Chitral, with the intention of displacing Sher Afzal and taking the Mehtarship.  The troops Sher Afzal sent to oppose Nizam-ul-Mulk changed sides and, in December 1892, Sher Afzal fled into nearby Afghan territory, leaving Chitral to Nizam-ul-Mulk.

At the request of the British, the Amir of Afghanistan summoned Sher Afzal to Kabul and agreed to prevent him from returning to Chitral.

Nizam-ul-Mulk requested the Indian Government to station a British officer at Chitral.  Initially the British Political Officer in Gilgit, Surgeon Major Robertson, visited Chitral with a force of 50 men from the 15th Sikhs, soon to be replaced by the 14th Sikhs.  In May 1893, Robertson returned to Gilgit, leaving Captain Younghusband as Political Officer in Chitral.

At this time, Nizam-ul-Mulk was having difficulty from two main sources.  One was the Adamzadas (members of the Chitrali squirearchy) who remained loyal to Sher Afzal.  The other cause of difficulty was Umra Khan, ruler of Jandol and Dir, to the south of Chitral, who planned to add Chitral to his expanding realm.

Following the death of the Great Mehtar, Umra Khan had seized the Chitrali Fort of Narsat on the Kunar River to the south of Chitral Town and made threatening moves further up the river.

Interior of Chitral Fort: Siege and Relief of Chitral, 3rd March to 20th April 1895 on the North-West Frontier of India

Interior of Chitral Fort: Siege and Relief of Chitral, 3rd March to 20th April 1895 on the North-West Frontier of India

In September 1894, Captain Younghusband moved to Mastuj, a remote fort to the north-east of Chitral town, on the Yarkhun River and on the route to Gilgit, which became the headquarters for the British Political Officer.  In October 1894, Lieutenant B.E.M. Gurdon took over the post from Younghusband.

Lieutenant BEM Gurdon: Siege and Relief of Chitral, 3rd March to 20th April 1895 on the North-West Frontier of India

Lieutenant BEM Gurdon: Siege and Relief of Chitral, 3rd March to 20th April 1895 on the North-West Frontier of India

On 1st January 1895, the Mehtar of Chitral, Nizam-ul-Mulk, was murdered, while hunting, at the instigation of his brother, Amir-ul-Mulk.  Amir-ul-Mulk seized the Chitral Fort and claimed the Mehtarship.  It may be that the murder was intended at the time to further the return of Sher Afzal as Mehtar.  Umar Khan was invited to invade Chitral in support of Sher Afzal.  Amir-ul-Mulk changed his mind, decided to retain the Mehtarship and asked Umar Khan to withdraw.  Umar Khan had in the meantime crossed the Lowari Pass into Chitral and advanced up the Kunar River to Kala Drosh, the next major fort on the road to Chitral Town.  Umar Khan refused to leave Chitrali territory.

At the time of the murder of Nizam-ul-Mulk, Lieutenant Gurdon, the British Political Officer, was in Chitral Town, with an escort of 8 soldiers from the 14th Sikhs.  A further 95 soldiers of the 14th Sikhs were at Mastuj Fort under Captain Ross.  286 soldiers of the 4th Kashmir Rifles were at Gupis, on the route between Mastuj and Gilgit.

Mr Udney, the British Representative on the Boundary Commission working with the Afghans and Surgeon Major Robertson, the British Agent in Gilgit, both wrote to Umra Khan, requiring him to withdraw from Chitrali territory, a demand which he ignored.

On 1st February 1895, Surgeon Major Robertson arrived in Chitral, with detachments from the 14th Sikhs and the 4th Kashmir Rifles.  Robertson brought in his group another candidate for the Mehtarship, Shuja-ul-Mulk, a younger son of the Great Mehtar.

Koragh Defile: Siege and Relief of Chitral, 3rd March to 20th April 1895 on the North-West Frontier of India

Koragh Defile: Siege and Relief of Chitral, 3rd March to 20th April 1895 on the North-West Frontier of India

To the south, the Chitralis were proposing to hold Umra Khan’s advance at Drosh, a fort on the Kunar River.

On 9th February 1895, the governor of Drosh, a supporter of Sher Afzal, surrendered the fort to Umra Khan.  It emerged that Sher Afzal was with Umra Khan at Drosh, despite the promise of the Amir of Afghanistan to the British to hold Sher Afzal in Kabul.

Colour Party, 14th Ludhiana Sikhs: Siege and Relief of Chitral, 3rd March to 20th April 1895 on the North-West Frontier of India: picture by AC Lovett

Colour Party, 14th Ludhiana Sikhs: Siege and Relief of Chitral, 3rd March to 20th April 1895 on the North-West Frontier of India: picture by AC Lovett

Correspondence took place between Sher Afzal and Robertson, in which Sher Afzal demanded that Robertson concede that he be confirmed as Mehtar and agree terms that he receive a subsidy from the Indian Government and that no European officer be permitted to enter Chitral.  Robertson evaded giving any definite answer, saying that his demands had to be submitted to the Government of India.

One of the difficulties for Robertson and the other British officers during the whole Chitrali affair was that it was not easy to work out who was allying himself with whom and whether the locals who claimed to be on the same side as the British were being entirely frank.

A particular conundrum was the extent to which Umra Khan and Sher Afzal were allied.  As the fighting continued and Jandol and Dir were threatened and then invaded by the British Chitral Relief Force moving up from Peshawar, Umra Khan increasingly followed his own direct interest and moved away from Sher Afzal.

During February 1895, in view of the threat from Umra Khan as he advanced north up the Kunar River, Robertson moved his force into Chitral Fort, with the members of the Mehtar’s entourage and the stores of food that Gurdon had been stockpiling since the crisis broke.  Gurdon’s foresight in this respect was to be the saving of Robertson’s garrison.

Shuja-ul-Mulk, Mehtar of Chitral: Siege and Relief of Chitral, 3rd March to 20th April 1895 on the North-West Frontier of India

Shuja-ul-Mulk, Mehtar of Chitral: Siege and Relief of Chitral, 3rd March to 20th April 1895 on the North-West Frontier of India

It was apparent that the Mehtar, Amir-ul-Mulk, was communicating with Sher Afzal.  Robertson placed him in custody and recognised his younger brother Shuja-ul-Mulk (nicknamed by the British troops ‘Sugar and Milk’) as Mehtar of Chitral.

On 15th February 1895, Captain Townsend, with a party of Kashmir Rifles, occupied a blockhouse on the left bank of the Kunar River at Gahirat, downstream or south from Chitral Town.  Lieutenant Gurdon joined the Chitralis on the right bank.

On 18th February 1895, Gurdon took a mounted party towards the Jandoli positions at Ghosh.  During this reconnaissance, Gurdon’s party was shot at and forced to retire in haste.  Robertson clearly considered that Gurdon had been incautious in advancing so far and that firing on a British officer was tantamount to a declaration of hostilities.  The British party fell back to Chitral Town and occupied the bridge towers over the river.

On 3rd March 1895, Sher Afzal occupied villages within two miles to the South of Chitral Town.  Captain Campbell, the senior British military officer, advanced to meet Sher Afzal with 200 men of the 4th Kashmir Rifles (Dogras and Gurkhas). Lieutenant Gurdon in his ‘Memories of Chitral’ described how he attempted to dissuade Campbell and his second-in-command, Captain Baird, from attacking the Chitralis.  It was clear to Gurdon that these two officers underestimated the fighting qualities of the substantial number of tribesmen who were opposing them, many of whom were armed with breach loading rifles and were skilled mountain fighters and overestimated the competence of their own soldiers from the Kashmir Rifles, who were not fully trained in the use of their firearms.

Gurdon described how members of the Kashmir Rifles dropped rounds of ammunition during the fighting on 3rd March 1895 and failed to recover them, Gurdon picking up some of them himself. Robertson commented on the Kashmir soldiers firing too high.

Bridge at Chitral: Siege and Relief oaf Chitral, 3rd March to 20th April 1895 on the North-West Frontier of India

Bridge at Chitral: Siege and Relief of Chitral, 3rd March to 20th April 1895 on the North-West Frontier of India

Gurdon urged Baird not to attack without support from the unengaged party of Kashmir Rifles, particularly as the Jandolis and Chitralis had infiltrated along the heights to their rear.  Baird insisted on his rash assault, which lead to his own fatal wounding and the death or incapacitation of most of his men.

Captain Baird: Siege and Relief of Chitral, 3rd March to 20th April 1895 on the North-West Frontier of India

Captain J. McD. Baird: Siege and Relief of Chitral, 3rd March to 20th April 1895 on the North-West Frontier of India

In the fight on 3rd March 1895 the Chitralis and Jandolis inflicted heavy casualties on the Kashmiris and Captain Baird was gravely wounded in the stomach.  Campbell received a severe wound to the knee.  Gurdon took over command and, after putting Baird in the care of Lieutenant Whitchurch of the Indian Medical Service, conducted a difficult withdrawal through Chitral Town to the river bridge.

Lieutenant Harley provided cover for the final retreat to the fort with 50 of the 14th Sikhs.  The Sikh and Kashmiri troops withdrew into Chitral Fort and the siege began on the evening of 3rd March 1895.

In the action on 3rd March 1895, the Kashmiris suffered 25 dead and 30 wounded, out of 150 men engaged.

Robertson’s view was that the heavy defeat of the Kashmir Rifles on 3rd March 1895 made them largely ineffective during the siege and ruled out aggressive action by the garrison, until Harley’s sortie against the mine on 17th April 1895, which was unavoidable and largely carried out by his Sikh soldiers.

Account of the Siege and Relief of Chitral:  

The Siege, which lasted from 3rd March to 20th April 1895:

The elements of the Siege and Relief of Chitral are these:

  1. The fighting on 3rd March 1895, immediately before the siege, in which Captains Campbell and Baird were wounded.
  2. The Siege of Chitral Fort itself, involving Robertson and his officers.
  3. The loss of Captain Ross’s party in the Goragh Defile, in its attempt to march from Mastuj to Chitral.
  4. The capture of Lieutenants Edwardes and Fowler at Reshun, on the route between Mastuj and Chitral and the loss of their party.
  5. Colonel Kelly’s march from Gilgit in the east to the relief of the Fort.
  6. General Low’s march from the south to relieve the Fort.

    The Panjkora Valley: Siege and Relief of Chitral, 3rd March to 20th April 1895 on the North-West Frontier of India

    The Panjkora Valley: Siege and Relief of Chitral, 3rd March to 20th April 1895 on the North-West Frontier of India

Chitral Fort was invested on 4th March 1895, by the Chitrali forces of Sher Afzal and the Jandoli soldiers of Umar Khan.

Captain Baird died of his wound on 4th March 1895.  Captain Campbell was too incapacitated by his knee wound to take any active part in the siege.  The British officers left to Robertson were Lieutenant Gurdon, his deputy political officer, Captain Townsend who became the senior British military officer, Lieutenant Harley of the 14th Sikhs and Surgeon Captain Whitchurch.  The troops were 99 men of the 14th Sikhs and 301 men of the 4th Kashmir Rifles.  Robertson, in his account of the siege, states that the Kashmiris were shaken by their defeat on 3rd March 1895 and their efficiency impaired by the experience (that the besiegers were able to set fire to the Gun Tower on 6th April 1895 was attributed to the slackness of the 2 Kashmir soldiers in the tower).  Whenever there was a task during the siege that required reliable troops the Sikh soldiers were used.

Umra Khan's Jandoli soldiers: Siege and Relief of Chitral, 3rd March to 20th April 1895 on the North-West Frontier of India

Umra Khan’s Jandoli soldiers: Siege and Relief of Chitral, 3rd March to 20th April 1895 on the North-West Frontier of India

The garrison could never know the exact make-up of the attacking forces, which changed from day to day.  The main components were the Chitrali adherents of Sher Afzal and a large contingent of Umra Khan’s soldiers from Jandol and Dir, with some Afghans.

Fowler and Edwardes, when they arrived in Chitral as prisoners, saw men in the uniforms of six Indian Army regiments, who appeared to be deserters serving in Umra Khan’s force.  In fact, there were probably deserters from up to eleven British Indian regiments.

An emissary from the besiegers, who came to the fort on several occasions, stated that he had left the 5th Punjab Infantry in the Indian Army, to serve as a subadar in Umra Khan’s army.  This man saluted the British officers and stood to attention when speaking to them.

As Colonel Kelly’s relief column from Gilgit made its presence felt, after crossing the Shandur Pass on 7th April 1895, besiegers were drawn off to contest the column’s advance to Chitral.  Equally, as the Chitral Relief Force moved northwards towards and then into Jandol and Dir, Umra Khan summoned many of his soldiers to face this threat.  Umra Khan himself left Chitral early in the siege and returned to Jandoli territory.

The weapons available to the besiegers ranged from old muzzle loading, long jezails and old British Army issue Brown Bess muskets, to many Enfield rifles and a significant number of Martini-Henry rifles.

The guns in Chitral Fort: Siege and Relief of Chitral, 3rd March to 20th April 1895 on the North-West Frontier of India

The guns in Chitral Fort: Siege and Relief of Chitral, 3rd March to 20th April 1895 on the North-West Frontier of India

The besiegers had no artillery.  Chitral owned three 7 pounder guns, but these were in the fort.  The garrison made two attempts to use these guns, but neither was successful and it was clear that they were more risk to the fort than to its besiegers, as there were no trained gunners in the garrison.

The Kunar River runs from the north-east to the south-west.  Chitral Fort lay on the right or west bank of the Kunar River, at a point where the river describes a half circle and runs west to east for a short distance.

The official Indian government history describes the Chitral Fort in these terms: “The fort was of the ordinary local type, about seventy yards square.  The walls, which were twenty-five feet high, and seven or eight feet thick, were constructed of rough stone, rubble, and mud, and were held together by a kind of cradle work of timbers.  At each corner a square tower rose about twenty feet above the walls, and a fifth tower, known as the water tower, guarded the path to the river, which was further protected by a recently constructed covered-way (this had been built by Campbell as a precaution in case the fort had to be used to withstand a siege).  Outside the north-west face was a range of stables and outhouses.  The fort was practically commanded on all sides, and, except on the river front, was surrounded by houses, walls, and trees, which allowed the enemy to approach under cover close to the defences.”

Chitral Fort plan: Siege and Relief oaf Chitral, 3rd March to 20th April 1895 on the North-West Frontier of India

Chitral Fort plan: Siege and Relief of Chitral, 3rd March to 20th April 1895 on the North-West Frontier of India

The towers were identified with these names: Flag Tower (at the south-west corner), North Tower (at the north-west corner), Gun Tower (at the south-east corner), East Tower (at the north-east corner) and Water Tower (by the river, nearly in line with the North Tower).  The walled area of the fort was square in shape, except on the north or river side.  Here, the wall followed the line of the river.  The main gate was in the West Wall, next to the North Tower.  The second gate, called the East Gate or Garden Gate, lay in the East Wall, next to the Gun Tower.  Between the North Wall and the Kunar River was an enclosure and Stable Block.  The Water Tower was at the western corner of this enclosure and Campbell’s Covered Way led from the Water Tower to the river bank (Campbell had caused the Covered Way to be built before the siege started, to ensure the garrison could remain under cover while taking water from the Kunar River).

The fort lay in a rectangular walled garden, extending to the south and the east of the fort.  The garden was held by the besiegers who loop-holed the wall and sniped from it.

Various buildings lay outside the perimeter of the fort, notably the Summer House to the West of the Gun Tower. Robertson considered clearing the houses away from the fort’s walls before the siege began, but decided it was likely to alienate the Chitrali population.  Many of the structures were cleared away during the siege.

The Chitralis and Jandolis built sangars or short walls of stones around the fort during the siege, some as close as 25 yards from the walls.  The besiegers were particularly adept at this form of operation.

Chitral Fort; looking out over the river, North Tower on left: Siege and Relief oaf Chitral, 3rd March to 20th April 1895 on the North-West Frontier of India

Chitral Fort; looking out over the river, North Tower on left: Siege and Relief of Chitral, 3rd March to 20th April 1895 on the North-West Frontier of India

Fascines of branches were used to conceal the area where a sangar was being built.  Demonstrations would take place elsewhere on the perimeter to divert the garrison’s attention and the sangar erected, often overnight.  The main besieger’s sangars were positioned in the garden and opposite the Main Gate and the West Wall.  Sangars across the river, on the edges of the village of Danin, enabled the besiegers to maintain a near constant sniping at the members of the garrison in Campbell’s Covered Way and the Water Tower or when collecting water.

During Harley’s sortie to destroy the Gun Tower Mine on 17th April 1895, Robertson was struck by the speed with which the Jandolis built a sangar, after being surprised and driven out of the Summer House, from which they maintained an effective fire on the Sikhs and Kashmir Rifles of Harley’s party.

A continuing task for the garrison was to improve the quality of the fort’s defences.  Conferences would be held during the evening, at which improvements would be devised and the work would, if possible, be carried out during the next day.

A corps of workmen was formed from the Chitralis, of whom there were 52 in the fort, headed by a Chitrali called Sifat Bahadur.  They performed good service.  The tasks required were to repair and improve structures, build sangars and put loopholes in the walls, particularly where there was limited vision of the areas outside the fort.  Many parts of the fort were vulnerable to sniper fire and these had to be concealed.

Chitral Fort from an up-stream Chitrali sangar: Siege and Relief oaf Chitral, 3rd March to 20th April 1895 on the North-West Frontier of India

Chitral Fort from an up-stream Chitrali sangar: Siege and Relief of Chitral, 3rd March to 20th April 1895 on the North-West Frontier of India

Robertson gave the distribution of the garrison on 29th March 1895 as: 10 soldiers at the main West Gate, 6 soldiers at the Garden Gate, 16 soldiers for each of the four fort towers, 10 soldiers for each of the four parapets, 10 soldiers watching Chitralis considered to be unreliable, 20 soldiers in the picket on Campbell’s Covered Way, 25 soldiers in the Water Tower, 25 soldiers in the stables, 10 Sikhs in the doorway leading to the stables, 6 soldiers guarding the Kashmir Rifles Snider ammunition (the Sikh Martini-Henry ammunition was held at the Main Gate).  This left 167 soldiers uncommitted at any one time.

Discipline was maintained as far as possible, with bugle calls blown as regularly as in cantonment.  The besiegers blew a bugle in reply at first, but then gave up.  It seemed to Robertson that the besiegers’ bugler was probably sent up the valley.  The bugler returned later and resumed his playing.

Lieutenant Harley's Sikhs storming the Chitrali tunnel: Siege and Relief of Chitral, 3rd March to 20th April 1895 on the North-West Frontier of India

Lieutenant Harley’s Sikhs storming the Chitrali tunnel: Siege and Relief of Chitral, 3rd March to 20th April 1895 on the North-West Frontier of India

The garrison was subject to frequent rifle fire from the surrounding forces, who built sangars near the walls, some as close as 25 yards and from sangars across the river.  While much of the rifle fire was random there was also highly accurate sniping, particularly across the river on the Water Tower and Campbell’s Covered Way, the passage that was used to bring water from the river.

On 9th April 1895, the day Colonel Kelly reached Mastuj Fort and the Chitral Relief Force moved into the Panjkora River Valley, the besiegers began a bombardment of the fort, using slings to throw stones.  This was surprisingly galling and inflicted some severe injuries on members of the garrison.

Falling stones made movement across the fort yards dangerous.  The rattling of stones on the fort’s fabric kept the garrison awake and on edge and clearing up the stones took considerable effort each morning.

The garrison was constantly prepared for a massed attack by the besiegers.  Robertson, in the light of information received after the siege, concluded that Umra Khan was so put out by the scale of casualties inflicted on his troops by Edwardes and Fowler’s party in the fighting at Reshun and by Ross’s Sikhs that he vetoed any direct attack on the fort.

Chitral Fort from across the river: Siege and Relief oaf Chitral, 3rd March to 20th April 1895 on the North-West Frontier of India

Chitral Fort from across the river: Siege and Relief of Chitral, 3rd March to 20th April 1895 on the North-West Frontier of India

It was Robertson’s conclusion that the besiegers were confident of starving the garrison into surrender and that they did not realise that the garrison had substantial supplies, albeit that they were on reduced rations, which were about to be reduced to half rations when the siege ended.  During the extensive contacts between besieged and besiegers, Robertson required that demands always be made for food, to give the impression that the garrison had less than in fact it had.

Lieutenant HK Harley: Siege and Relief of Chitral, 3rd March to 20th April 1895 on the North-West Frontier of India

Lieutenant HK Harley: Siege and Relief of Chitral, 3rd March to 20th April 1895 on the North-West Frontier of India

A problem with the stocks of grain in the fort was that the only grinding facility available to the garrison was a grinder manufactured by a Sikh soldier.  The grinder used soft stone, because it was all that was available, with the result that fragments of grit became mixed with the flour, causing intestinal illness for the soldiers.  There was some rum and tea.  The officers had some tobacco.  There appeared to be sufficient ghi to cook the soldiers’ food.  Ponies were eaten by the British officers.

Beynon in his book ‘With Kelly to Chitral’ gives this description of the Kashmir Rifles after the siege:

‘The next day the Kashmir troops of the garrison came out and camped with us, and revelled in the fresh air after the poisonous atmosphere of the fort. Poor chaps! they were walking skeletons, bloodless, and as quiet as the ghosts they resembled, most of them reduced to jerseys and garments of any description, but still plucky and of good heart. They cheered up wonderfully in a few days with good fresh air and sleep, and marched from Chitral quite briskly when they left.’

Supplies of ammunition at the beginning of the siege were 300 rounds per rifle for the Martini-Henrys of the 14th Sikhs and 280 rounds per man for the Sniders of the 4th Kashmir Rifles.  This was considered sufficient but not generous.  From 12th March 1895 Robertson asked Townsend to ensure that 30 rounds a day were fired at the house which had been Robertson’s and was now occupied by Sher Afzul.

Chitral Fort from across the Kunar River: Siege and Relief of Chitral, 3rd March to 20th April 1895 on the North-West Frontier of India

Chitral Fort from across the Kunar River: Siege and Relief of Chitral, 3rd March to 20th April 1895 on the North-West Frontier of India

Relations between the members of the garrison were complex.  While some of the Chitralis were considered by Robertson to be reliable, the majority were suspect.  They were deprived of their weapons, confined to a particular area of the fort and guarded.  It was clear that these Chitralis were in receipt of information from outside the fort.  The problem was finding out what the information was and interpreting it.  Robertson’s adviser and confidant among the Chitralis was Wafader Khan.

Chitralis held in Chitral Fort during the siege; Shuja-ul-Mulk, Mehtar of Chitral sits in front: Siege and Relief of Chitral, 3rd March to 20th April 1895 on the North-West Frontier of India

Chitralis held in Chitral Fort during the siege; Shuja-ul-Mulk, Mehtar of Chitral, sits in front: Siege and Relief of Chitral, 3rd March to 20th April 1895 on the North-West Frontier of India

The state of affairs outside the fort was frequently judged by the manner of the Chitralis, who did not readily pass information to the British officers.  A soldier who was particularly adept at picking up information was Captain Campbell’s orderly, a smart sowar of the 15th Bengal Lancers.  The orderly was severely wounded and disabled during the firing around the Gun Tower on 6th April 1895, in which he played a prominent and meritorious role. Some of Robertson intelligence came from Campbell’s sick room, originating with this orderly.

It was a curious feature of the siege that rumours would go around the garrison as to the intentions of the besiegers or the progress of the relief columns and turn out either to be right or to contain a strong hint of what was happening or was about to happen, with no indication of the origins of the information.

On occasions, the conduct of the besiegers inadvertently provided Robertson with important information about the state of the relief.  For example, the besiegers fired a loud charge of gunpowder on 5th April 1895.  Campbell’s orderly told Campbell he considered this to be a clear indication that a relief column was in action and using mountain artillery (this was two days after the Chitral Relief Force had attacked and forced the Malakand Pass, using artillery fire).  When a visiting emissary from Sher Afzul informed Robertson that there was no relief column coming, Robertson took that as a clear indication that there was indeed a relief column nearing Chitral.

Robertson regretted that the garrison did not have a flag to fly over the fort.  Harley seemed to have among his 14th Sikhs, men with every conceivable skill.  One of them, a skilled tailor, was given the task of preparing a large Union Jack, from pieces of cloth found in the fort.  The flag was completed on 28th March 1895.  The Sikh added a number of additional devices in the centre of the flag, which, to his disappointment, he was required to remove.  The Union Jack was then fastened to a long pole and secured overnight at the top of the tower at the south-west of the fort.

Robertson considered the Union Flag on the Flag Tower to be a considerable boost to the garrison’s morale and a fine gesture of defiance to the besiegers.

Soldiers of the 14th Sikhs in the Chitral garrison: Siege and Relief of Chitral, 3rd March to 20th April 1895 on the North-West Frontier of India

Soldiers of the 14th Sikhs in the Chitral garrison: Siege and Relief of Chitral, 3rd March to 20th April 1895 on the North-West Frontier of India

On 6th April 1895, as the relief columns neared Chitral, Colonel Kelly from the north-east and General Low from the south, the besiegers made a desperate attempt to set fire to the Gun Tower.  Robertson’s view was that this was only possible due to the inattention of the two soldiers of the Kashmir Rifles on duty in the tower.  The night was spent by the garrison desperately contriving ways of pouring water on the flames in the wooden framework at the base of the tower, under a heavy rifle fire from the besiegers’ sangars.  There were several casualties, including Robertson himself who was shot in the shoulder.  At around 9.30am the next morning, Townsend was able to report to Robertson that the fire was nearly extinguished.

A second attempt to set fire to the Gun Tower was made the following day, 7th April 1895.  The fire was spotted by Subadar Badri Singh of the 4th Kashmir Rifles and Sepoy Awi Singh of the 14th Sikhs, who extinguished it.  Robertson was mystified how the besiegers could approach sufficiently close to the fort to set it on fire, only a day after the first major conflagration.  The conclusion he came to was that the besiegers noted the time for changing sentries and made their move during the changeover.  From then on sentries were changed at random times.

Chitral Fort; the Gun Tower and exploded mine: Siege and Relief of Chitral, 3rd March to 20th April 1895 on the North-West Frontier of India

Chitral Fort; the Gun Tower and exploded mine: Siege and Relief of Chitral, 3rd March to 20th April 1895 on the North-West Frontier of India

The Tunnel:

In mid-April 1895, the besiegers began loudly drumming and blowing musical instruments in the Summer House, continuing hour after hour, much to the discomfort of the garrison positioned on that side of the fort.

A native cavalry officer in the garrison, Rab Nawaz Khan, reported to one of the British officers that the music was almost certainly designed to mask the sound of tunnelling.

He reported that where there was difficulty storming or otherwise capturing a fort in the region, attackers would often resort to tunnelling under the defences and exploding a charge of gunpowder to destroy them.

It seemed likely to Rab Nawaz Khan that a tunnel was being dug from the Summer House, under cover of the continuous drumming and music, with the target being the Gun Tower.

The sentries in the Gun Tower were ordered to listen carefully for the sound of picks being used under the ground between the Gun Tower and the Summer House.

Initially, while the native sentries were able to hear the faint sound of picks the British officers could not, through the loud drumming and whistling music from the Summer House, so no additional action was taken.

On 17th April 1895, the sound became so distinct that the British officers were able to hear it.

The loudness of the picks showed that the tunnel was close to the Gun Tower and there was little time to take suitable counter-measures.

Explosives in the besiegers’ tunnel might be detonated at any time, bringing down the Gun Tunnel, leaving a substantial hole in the defences.

In particular there was insufficient time for the garrison to dig a counter-mine.

A sortie to capture and destroy the mine tunnel, clearly originating in the Summer House, was organised with great speed and launched at 4pm the same day.

Lieutenant Harley led a force of 40 Sikhs and 60 Kashmir Rifles in a bayonet charge out of the Garden Gate to capture the Summer House.  The besiegers were taken by surprise and withdrew to cover, from where they built a sangar and opened an effective fire.

Harley’s party bayoneted the Chitralis emerging from the mine tunnel, killing some 35 men.  Two bags of gunpowder were taken into the tunnel and a fuse lit.

Harley’s men raced back to the Garden Gate.  In the minutes following the sortie it was feared that the explosion had been ineffective. There was then a rumble and a long trench appeared between the Summer House and a point just short of the Gun Tower.  The tunnel had collapsed, killing two more Chitralis.

The activities of the besiegers effectively ended with the destruction of the tunnel.

Attacking the mine: Siege and Relief oaf Chitral, 3rd March to 20th April 1895 on the North-West Frontier of India: picture by William Henry Groome

Attacking the mine: Siege and Relief of Chitral, 3rd March to 20th April 1895 on the North-West Frontier of India: picture by William Henry Groome

Other than these two incidents, the besiegers’ efforts comprised repeated demands for the garrison to withdraw from Chitral, rifle fire, including highly accurate sniping, the building of sangars ever nearer to the fort, slinging stones and shouting insults.

The shouting of insults became such a feature of the besiegers’ tactics that a Kashmiri soldier was given the task of shouting replies from one of the towers.  He was not a competent soldier but he was extremely good at devising and shouting insults.

The exploded mine by the Gun Tower: Siege and Relief oaf Chitral, 3rd March to 20th April 1895 on the North-West Frontier of India

The exploded mine by the Gun Tower: Siege and Relief of Chitral, 3rd March to 20th April 1895 on the North-West Frontier of India

On 18th April 1895, a man crept up to the fort wall and called out that the besiegers had gone.  This message was treated with suspicion.  On 19th April Gurdon cautiously led a party of men out of the fort and into the bazaar.  It was true.  The besiegers had left.  Robertson immediately despatched a messenger to give the news of the lifting of the siege to Kelly.  Kelly‘s column marched into Chitral on 20th April 1895.

Mastuj Fort, Reshun and the Koragh Defile:

Once Robertson marched to Chitral from Mastuj Fort, before the Siege began, Lieutenant Moberly assumed command of the Mastuj garrison of 4th Kashmir Rifles.  Additional officers and troops were on their way to Mastuj from Gilgit: Lieutenant Fowler, Royal Engineers, with 20 Bengal Sappers and Miners, Captain C.R. Ross with his company of 14th Sikhs, Gilgit district levies and Lieutenant Edwardes of 2nd Bombay Grenadiers who would command the levies.  Ross became the senior officer in Mastuj Fort.

At the end of February 1895, Moberly received a letter from Captain Baird at Chitral, directing him to send to Chitral 60 boxes of Snider ammunition with an escort.  The column, with the ammunition, comprising soldiers from the 4th Kashmir Rifles, commanded by a Gurkha Subadar, Gurm Singh, set off, but halted on the road, as the word was that the precarious cliff pathway had collapsed.

Gordon Highlanders advancing to the Swat River: Siege and Relief of Chitral, 3rd March to 20th April 1895 on the North-West Frontier of India

Gordon Highlanders advancing to the Swat River: Siege and Relief of Chitral, 3rd March to 20th April 1895 on the North-West Frontier of India

On 3rd March 1895, Edwardes and Fowler arrived at Mastuj Fort and went on to join the ammunition column, to take it to Chitral.  The column began its march down the valley on 5th March 1895, the road following the left bank.  On 6th March, Moberly received a letter from Edwardes sent from the village of Koragh, saying that he had received information that there was a gathering of hostile tribesman at Reshun, intent on preventing the column from proceeding further.  Ross decided to take his company of Sikhs and support Edwardes’ column in marching on to Chitral.

It was Moberly’s emphatic advice, which he put in writing, that Ross should recall Edwardes’ and Fowler’s ammunition column and occupy the Nisa Gol ravine, which was near to Mastuj, pending the arrival of reinforcements from Gilgit.  Ross ignored this advice and left for Chitral on 6th March 1985 with Lieutenant Jones and his company of the 14th Sikhs.

Later that day, Moberly received information from Ross, that he had heard that Edwardes was surrounded at Reshun.  Ross had left a detachment of 40 Sikhs at Buni and pressed on with the rest of his company to reach Edwardes.

Captain Ross with 14th Sikhs: Siege and Relief oaf Chitral, 3rd March to 20th April 1895 on the North-West Frontier of India

Captain Ross with 14th Sikhs: Siege and Relief of Chitral, 3rd March to 20th April 1895 on the North-West Frontier of India

On 10th March 1895, Captain Bretherton arrived at Mastuj with 100 sepoys of the 4th and 6th Kashmir Regiments from Ghizr.  This left Moberly free to follow up Edwardes and Ross and see what the position was.  Delayed by the destruction of the bridge at Sanogher, Moberly reached Buni on 17th March 1895, where he found a wounded Jones with 14 survivors of Ross’s party and the detachment left behind by Ross at Buni.

From Jones, Moberly discovered what had happened to Ross.  When the company marched out of Buni on 7th March, leaving the party of 40 sepoys, Ross was accompanied by the village headman, who warned that they would meet strong resistance.  Ross clearly did not believe the headman.

At midday on 7th March 1895, Ross’s party came to the village of Koragh and found it deserted.  The village headman again warned of resistance ahead, but Ross again chose to disbelieve him.  Beyond the village, Ross’s party entered the Koragh Defile, where the river flows between high cliffs.  At the entrance to the defile, they found that sangars had been built but were not occupied.  There were tribesmen on the hillside.

Amir-al-Mulk, deposed Mehtar of Chitral, guarded by Sikh and Kashmir soldiers of the Chitral garrison; Siege and Relief of Chitral, 3rd March to 20th April 1895 on the North-West Frontier of India

Amir-al-Mulk, deposed Mehtar of Chitral, guarded by Sikh and Kashmir soldiers of the Chitral garrison: Siege and Relief of Chitral, 3rd March to 20th April 1895 on the North-West Frontier of India

At the far end of the gorge, the path climbed up the cliff face.  At this point, Ross’s men were fired on from up the road and large numbers of men appeared above them, rolling stones down the hillside.  The opposition was said to have been villagers from Reshun and not well armed, but there was a substantial number of them.  Presumably, the main armed body was busy fighting with Edwardes’ party in the village.

Ross took his men back down the path.  Jones was sent with 10 Sikhs to secure the entry to the defile, but found that the sangars were now occupied and, in the ensuing fire fight, all but 2 of Jones’ men were hit.  Jones re-joined Ross and the party took cover in caves at the bottom of the cliff, where they were sniped at by Chitralis across the river.

That night, another attempt was made to force the road up to the top of the cliff, but failed.  After a further day of sniping, Ross’s party attempted to climb the cliff immediately above them.  A sepoy fell from the cliff and the climb was abandoned.  Later that night, Ross led his men back down the path towards Buni.  Ross was shot after clearing a sangar of Chitralis and killed.  Jones escaped out of the defile with 17 Sikhs.  Once in more open country, they were able to drive off their attackers with volley firing.  The survivors, Jones with14 of the original 60 Sikh soldiers, all but a couple now wounded, returned to Buni where Moberly found them.

Mastuj Fort: Siege and Relief of Chitral, 3rd March to 20th April 1895 on the North-West Frontier of India

Mastuj Fort: Siege and Relief of Chitral, 3rd March to 20th April 1895 on the North-West Frontier of India

Moberly’s party returned to Mastuj Fort, which they reached with some difficulty, being under attack for much of the route.

A group of the Sikhs did not follow Ross in his retreat back down the track to Buni.  These men took shelter in the caves and after a week and a half with no food surrendered to a number of Chitrali chiefs, against undertakings that their lives would be spared.  In fact, all but one of the Sikhs were hacked to death by the Chitralis the day after their surrender.  One Sikh was spared so that he could be killed by another headman who was not present.  He relented and the Sikh survived.

The British officers prepared to be besieged in Mastuj Fort.  Although they were blockaded and sangars were built around the fort, there was no real siege and the garrison suffered no casualties.

On 9t April 1895, a sentry in Mastuj reported that he could hear cannon fire.  The British officers were unable to hear any firing.  Muhammed Isa’s men were driven from the Chakalwat position by the Gilgit Relief Column past Mastuj Fort before anything could be done to intercept them.

Edwardes’ and Fowler’s column:

On 6th March 1895 Edwardes and Fowler’s ammunition column, comprising some 150 porters carrying the supplies and baggage, escorted by Dhurm Singh and his 40 riflemen and Fowler’s 20 Bengal Sappers and Miners, continued on their route to Chitral.

After leaving Koragh village, Edwardes and Fowler were informed that Robertson’s force was under siege in Chitral Fort.  They decided to press on to Reshun village and halt there.

Plan of Reshun, which lies south of the river: Siege and Relief of Chitral, 3rd March to 20th April 1895 on the North-West Frontier of India

Plan of Reshun, which lies south of the river: Siege and Relief of Chitral, 3rd March to 20th April 1895 on the North-West Frontier of India

At Reshun, Edwardes and Fowler were informed that the attack on the fort involved Chitralis as well as Umra Khan’s troops.  This put their position in the heart of Chitrali country in a different light.  Until then, they had believed that they were on the same side as the Chitralis.

The Yarkun River at Reshun runs through a deep gorge with precipitous cliffs on each side, rising to 100 feet.  Edwardes’ and Fowler chose to camp on the edge of the cliff, rather than on the polo ground offered to them by the village headmen, where they would be surrounded.

The next day, 7th March, Dhurm Singh was left with 30 Kashmir troops in the encampment to guard the ammunition and to build a sangar. Edwardes’ and Fowler took the rest of the troops in a reconnaissance along the road.  Near a village called Parpish, Fowler took a small group up the mountain side in pursuit of a lone armed man.  Men came out from Parpish and opened fire across the river at both officers’ parties.  They were forced to make a hurried retreat to the camp at Reshun, which they reached with considerable difficulty, more attackers appearing from Reshun itself.

Biddy, Lieutenant Edwardes' fox terrier injured in the fighting at Reshun: Siege and Relief of Chitral, 3rd March to 20th April 1895 on the North-West Frontier of India

Biddy, Lieutenant Edwardes’ fox terrier injured in the fighting at Reshun: Siege and Relief of Chitral, 3rd March to 20th April 1895 on the North-West Frontier of India

Edwardes and Fowler now decided that the troops must capture a group of buildings nearer the village, to have a reasonably defensible camp.  Fowler led Dhurm Singh and 20 of his men in a bayonet charge which took the main buildings.  The rest of the column, with the wounded and the stores, were moved up from the camp.  Among the wounded was Edwardes’ fox terrier, Biddy, which had been shot through the chest.

On 8th March 1895, the gathering Chitralis kept Edwardes’ and Fowler’s party under continuous fire, which achieved little.  Once night had fallen, the two officers took a party down to the river and came back with a substantial supply of water.  This hazardous expedition seems not to have been noticed by the Chitralis.

The fighting continued on 9th and 10th March 1895.  Soldiers claimed they could hear distant firing.  This is likely to have been Ross’s Sikhs being engaged in the Koragh Defile.

On the night of 10th March 1895, Fowler led a sortie against the main Chitrali sangar, with considerable success.  On 11th March, another sortie to collect water from the river was carried out and on 12th March there was a heavy rainfall.  The problem for the column was their dwindling food stocks.

On 13th March 1895, there were negotiations between the Chitralis and the two British officers, who were informed that Muhammed Isa, Sher Afzul’s foster brother, had arrived from Chitral with a large force.

On 15th March 1895, Edwardes’ and Fowler were persuaded to join Muhammed Isa in watching a polo match on the ground immediately next to the buildings held by their troops.  During the course of the match, Edwardes’ and Fowler were overpowered and the buildings immediately stormed, with most of the Kashmiri troops and the Sappers and Miners killed, other than a small group of Muslim soldiers who were taken prisoner.  Dhurm Singh and his men put up a ferocious resistance until they were overwhelmed.

Fowler and Edwardes, with Biddy after their capture: Siege and Relief oaf Chitral, 3rd March to 20th April 1895 on the North-West Frontier of India

Fowler and Edwardes, with Biddy after their capture: Siege and Relief of Chitral, 3rd March to 20th April 1895 on the North-West Frontier of India

After considerable argument as to what to do with the two British officers, they were taken to Chitral and finally handed to the Chitral Relief Force.  Edwardes’ fox terrier, Biddy, accompanied him.

It seems clear that Edwardes’ and Fowler’s troops inflicted considerable casualties on the Chitralis and Jandolis besieging them in the buildings at Reshun.  It was Robertson’s understanding that Umra Khan was so put out at the number of his soldiers killed at Reshun, that he directed that there was to be no attempt to storm Chitral Fort for fear of casualties on a similar scale.

Map of Colonel Kelly's march from Gilgit to Chitral: Siege and Relief of Chitral, 3rd March to 20th April 1895 on the North-West Frontier of India: map by John Fawkes

Map of Colonel Kelly’s march from Gilgit to Chitral: Siege and Relief of Chitral, 3rd March to 20th April 1895 on the North-West Frontier of India: map by John Fawkes

Colonel Kelly’s relief column from Gilgit:
The Indian Army regiment, the 32nd Punjab Pioneers (Sikh soldiers), was in the district of Gilgit, building a road during the winter of 1894/5.

Lieutenant Colonel Kelly, 32nd Sikh Pioneers: Siege and Relief of Chitral, 3rd March to 20th April 1895 on the North-West Frontier of India

Lieutenant Colonel Kelly, 32nd Sikh Pioneers: Siege and Relief of Chitral, 3rd March to 20th April 1895 on the North-West Frontier of India

In early March 1895, the Assistant British Agent in Gilgit, Captain W.H. Stewart, Royal Artillery, asked Lieutenant Colonel Kelly, commandant of the 32nd Pioneers, to bring half his regiment to Gilgit, in view of the news from Surgeon Major Robertson in Chitral, that his force was facing hostile action by Umra Khan.

The half battalion reached Gilgit on 22nd March 1895.  On the same day, Colonel Kelly received instructions to take command of all British and Indian troops in the Gilgit Agency and take what steps he considered necessary.  Kelly was informed that a force comprising three brigades was due to advance on Chitral from the Peshawar area via Swat. The Government in India did not consider that it was feasible to mount a relief of the Chitral garrison from Gilgit, as the route was considered impassable in winter.

Cliff path on Kelly's route to Gupis: Siege and Relief of Chitral, 3rd March to 20th April 1895 on the North-West Frontier of India

Cliff path on Kelly’s route to Gupis: Siege and Relief of Chitral, 3rd March to 20th April 1895 on the North-West Frontier of India

The information available to Kelly was that Robertson’s force was under siege in Chitral Fort by Sher Afzal and Umra Khan, that Lieutenant Moberly held the fort at Mastuj and that Fowler and Edwardes had left to provide further ammunition and supplies to Robertson in Chitral.  It was known that Captain Ross had been killed and his party repelled in the Koragh gorge.

Colonel Kelly decided to lead a column along the Yasin River from Gilgit, to relieve Mastuj and Chitral forts. Kelly’s staff officer was Lieutenant W. Beynon of the 3rd Gurkhas.  The forces available to Kelly were scattered across Gilgit and Hunza and comprised the 4 guns of Number 1 Battery Kashmir Mountain Artillery, his own regiment of some 800 men, around 200 Sappers and Miners and some 800 soldiers of two regiments of Kashmir Imperial Service troops, the 4th Kashmir Rifles, a strong detachment of which was with Robertson in Chitral, and the 6th Kashmir Light Infantry.

With these forces, Kelly had to maintain security in the areas of Hunza, Nagar and Chilasi, in addition to manning the relief column for Chitral and Mastuj.  The troops committed to the column were 400 soldiers from the 32nd Sikh Pioneers and a 2 gun section of No1 Kashmir Mountain Battery.  The chiefs of Hunza and Nagar provided some 1,000 levies, who were used as porters for supplies and as garrisons along the route to Mastuj.

Pioneers of the Indian Army: Siege and Relief of Chitral, 3rd March to 20th April 1895 on the North-West Frontier of India: picture by AC Lovett

Pioneers of the Indian Army: Siege and Relief of Chitral, 3rd March to 20th April 1895 on the North-West Frontier of India: picture by AC Lovett

Kelly’s route from Gilgit to Mastuj lay westwards, along the valley of the Yasin River and was around 140 miles.  Beyond Mastuj, the route to Chitral lay along the valley of the Yarkun River for about 60 miles, before it joined the Kunar River some five miles above Chitral Fort.  Before reaching Mastuj, Kelly’s force would have to cross the Shandur Pass.

Colonel Kelly with the officers of the 32nd Sikh Pioneers: Siege and Relief oaf Chitral, 3rd March to 20th April 1895 on the North-West Frontier of India

Colonel Kelly with the officers of the 32nd Sikh Pioneers: Siege and Relief of Chitral, 3rd March to 20th April 1895 on the North-West Frontier of India

There was a road for about fifty miles from Gilgit to Gupis, where it left the Yasin River valley and turned north to Yasin.  Thereafter, the route along the river valley was by track.  The Shandur Pass was likely to be snow bound.  The local population beyond the pass could be expected to be hostile to British forces and to put up resistance in sympathy with the Chitralis.  The weather would be snowy, with blindingly fierce sunshine during the day, coupled with freezing temperatures at night. Troops were permitted to carry only 15 pounds of baggage and no tents were taken.

The column marched in two detachments, on 23rd and 24th March 1895 and arrived in Ghizr Fort on 30th and 31st.  Some 150 men were taken on from the small garrison at that fort.

Shandur Pass: Siege and Relief of Chitral, 3rd March to 20th April 1895 on the North-West Frontier of India

Shandur Pass: Siege and Relief of Chitral, 3rd March to 20th April 1895 on the North-West Frontier of India

The whole column marched on 1st April 1895 for the next village of Langar, the final place of refuge before the long crossing of the Shandur Pass and some twelve miles from Ghizr.  There was now five days of snowfall along the route, which was so deep as to be nearly impassable.  The column was forced to halt at the village of Teru, well short of Langar.

Kelly returned to Ghizr, leaving a force under Captain Borradaile at Teru to attempt the crossing of the Shandur Pass.

On 2nd April 1895, the guns were brought up to Teru and Borradaile’s detachment began the struggle to cross the pass.  The mules carrying the guns were quickly brought to a halt by the deep snow.  An attempt was made to clear a path by taking a herd of native yaks up the track.

Sikhs carrying the mountain guns across the Shandur Pass: Siege and Relief oaf Chitral, 3rd March to 20th April 1895 on the North-West Frontier of India: picture by William Overend

Sikhs carrying the mountain guns across the Shandur Pass: Siege and Relief of Chitral, 3rd March to 20th April 1895 on the North-West Frontier of India: picture by William Overend

This produced no improvement as each animal carefully trod in the hoof prints of the preceding yak and failed to produce a flattened path as hoped.  Captain Stewart, the mountain battery section commander, took his men into the river, in an attempt to find secure footing, but the result was severe freezing for the men and animals.  The gun mules were left in a village and the guns and equipment carried and dragged on makeshift sledges, the gunners assisted by the other soldiers.  Eventually, the guns and equipment were left in the snow, in marked positions and Borradaile’s detachment marched on, reaching Langar at 11pm.  The troops returned the next day and brought the guns into Langar.  The mules went back to Ghizr.

Borradaile’s men were now 12,000 feet above sea level, in freezing conditions and deep snow.  Langar contained only one hut, in which the worst affected soldiers were lodged, the remainder bivouacking in the snow.

Colonel Kelly with his staff (from left: Lt Stewart RA, Lt Peterson, Lt Beynon, Lt Cobbe, Surg-Capt Luard, Lt Jones, Col Kelly, Lt Bethune, Surg-Capt Browning Smith, Captain Borrodaile, Lt Moberly, Sgt Reeves): Siege and Relief of Chitral, 3rd March to 20th April 1895 on the North-West Frontier of India

Colonel Kelly with his staff (from left: Lt Stewart RA, Lt Peterson, Lt Beynon, Lt Cobbe, Surg-Capt Luard, Lt Jones, Col Kelly, Lt Bethune, Surg-Capt Browning Smith, Captain Borrodaile, Lt Moberly, Sgt Reeves): Siege and Relief of Chitral, 3rd March to 20th April 1895 on the North-West Frontier of India

Borradaile marched on 3rd April 1895 to cross the Shandur Pass, leaving the gun section and an escort of the 4th Kashmir Rifles at Langar.  The distance across the pass was about ten miles and in the summer is not considered difficult.  The pass was filled with snow, up to five feet deep, causing the column to travel at less than a mile an hour, the soldiers being encumbered with weapons, ammunition and supplies.

Borradaile’s detachment reached the village of Laspur, at the far end of the pass, at around 7pm.  Resistance was anticipated, but the villagers had no expectation that the British/Indian column could get across the pass in such conditions and were taken by surprise.

Band of the 32nd Sikh Pioneers: Siege and Relief of Chitral, 3rd March to 20th April 1895 on the North-West Frontier of India

Band of the 32nd Sikh Pioneers: Siege and Relief of Chitral, 3rd March to 20th April 1895 on the North-West Frontier of India

On 4th April 1895, Borradaile fortified part of the village and sent porters back to assist in bringing Stewart’s gun detachment and the escort of Kashmiris commanded by Lieutenant Gough on from Langar.  Stewart’s detachment arrived in the evening, after an exacting journey in which the heavy guns had to be carried through the snow by the soldiers.   Many of Stewart’s soldiers were inflicted by snow blindness.  There were a few pairs of snow goggles with darkened lenses.  These goggles were given to a small group of gunners, who were ordered to keep them on at all times, so that there would be sufficient men who could see fully to fire the guns.

Chakalwat; plan by Captain Beynon: Siege and Relief of Chitral, 3rd March to 20th April 1895 on the North-West Frontier of India

Chakalwat; plan by Captain Beynon: Siege and Relief of Chitral, 3rd March to 20th April 1895 on the North-West Frontier of India

Reconnaissance along the road to Mastuj showed that the Chitralis were in position in the Chakalwat Defile, three miles beyond Gasht, in strength and building sangars.

On 7th April 1895, Colonel Kelly arrived at Laspur with some 50 Nagar levies.  More levies arrived on the same day and Kelly decided to attack the Chakalwat Defile, although many of the soldiers were suffering from snow blindness and the rest of the column was still on the track from Ghizr.

The attack went in on 9th April 1895, with support from the mountain guns and the Chitralis were driven from the position.  Kelly’s column suffered 4 wounded men while the Chitralis had some 40 to 60 men killed by rifle and gunfire.  The column marched into Mastuj Fort.

Kelly spent three days at Mastuj Fort, collecting supplies, bringing up the rest of the column and repairing the bridge over the Yarkhun River.  He marched out on 13th April 1895 towards Chitral.

Nisa Gol, plan by Captain Beynon: Siege and Relief of Chitral, 3rd March to 20th April 1895 on the North-West Frontier of India

Nisa Gol, plan by Captain Beynon: Siege and Relief of Chitral, 3rd March to 20th April 1895 on the North-West Frontier of India

The action at Nisa Gol:

The Chitralis were in position at Nisa Gol, where a ravine joins the river valley from the north.

Nisa Gol: Siege and Relief of Chitral, 3rd March to 20th April 1895 on the North-West Frontier of India

Nisa Gol: Siege and Relief of Chitral, 3rd March to 20th April 1895 on the North-West Frontier of India

The Chitralis had built sangars on the far side of the ravine, covering the road that ran along the north cliff of the river and more sangars above the south cliff.  The British attack went in at around 10am, supported by gunfire from Stewart’s section.  Ladders were used to cross the ravine and turn the Chitrali flank causing the Chitralis to withdraw.

It was estimated that the Chitrali force comprised around 1,500 men, with a small number of Umra Khan’s men, all armed with Martini-Henry or Snider breach loading rifles.  The Chitrali commander was Muhammad Isa.

British/Indian casualties were 7 killed and 13 wounded.  Chitrali casualties were reported by locals as 60 killed and 100 wounded.

On 15th April 1895, the column resumed its march to Kusht and then to Lun.  On 17th April, instead of following the river road, where Ross and Edwardes had come to grief, Kelly marched up into the mountains via Drasan and Lun.  In this way, all the defiles along the river route, including the Koragh, were bypassed.

On 18th April 1895, the column reached Koghazi, where Kelly received a letter from Robertson in Chitral, saying that the besieging force of Sher Afzul and Umra Khan had withdrawn and the siege of Chitral Fort was over.  The advance of Kelly’s column, with the more distant threat of Low’s relieving force from the south, had forced the abandonment of the siege.

On 20th April 1895, Kelly’s column marched into Chitral.

Map of the route taken by the Chitral Relief Expedition: Siege and Relief of Chitral, 3rd March to 20th April 1895 on the North-West Frontier of India: map by John Fawkes

Map of the route taken by the Chitral Relief Expedition: Siege and Relief of Chitral, 3rd March to 20th April 1895 on the North-West Frontier of India: map by John Fawkes

The Chitral Relief Expedition:
On 14th March 1895, the Government of India ordered the mobilisation of a division based on Peshawar, in view of the situation in Chitral and the incursion into Chitral by Umra Khan, the Khan of Jandol and Dir.  The division was placed under the command of Lieutenant General Sir Robert Low KCB.

On 21st March 1895, the Government of India received news of the attacks on the parties of Captain Ross and Lieutenants Edwardes and Fowler.

The base for the division to comprise the Chitral Relief Expedition was moved to Nowshera. Concentration started on 26th March 1895 and in two and a half weeks, 15,000 troops, with followers and transport animals, were assembled at Hoti Mardan and Nowshera.

1st King's Royal Rifle Corps: Siege and Relief oaf Chitral, 3rd March to 20th April 1895 on the North-West Frontier of India

1st King’s Royal Rifle Corps: Siege and Relief of Chitral, 3rd March to 20th April 1895 on the North-West Frontier of India

The Division comprised:
First Infantry Brigade:  Brigadier General Kinloch:  1st Bedfordshire Regiment, 1st King’s Royal Rifle Corps, 15th Sikhs, 37th Dogras and 2 field hospitals.

Second Infantry Brigade: Brigadier General Waterfield:  2nd King’s Own Scottish Borderers, 1st Gordon Highlanders, 4th Sikhs, the Guides Infantry and 2 field hospitals.

Third Infantry Brigade:  Brigadier General Gatacre:  1st Royal East Kent Regiment (the Buffs), 2nd Seaforth Highlanders, 25th Punjab Infantry, 2nd/4th Gurkha Rifles and 2 field hospitals.

Signallers of 1st Buffs: Siege and Relief of Chitral, 3rd March to 20th April 1895 on the North-West Frontier of India

Signallers of 1st Buffs: Siege and Relief of Chitral, 3rd March to 20th April 1895 on the North-West Frontier of India

Divisional Troops: 11th Bengal Lancers, Guides Cavalry, 13th Bengal Infantry, 23rd Punjab Pioneers, 15th Battery, Royal Artillery, No 3 Mountain Battery, Royal Artillery, No 8 Mountain Battery, Royal Artillery, No 2 (Derajat) Mountain Battery, 3 companies, Bengal Sappers and Miners, an Engineer Park, 3 field hospitals and a veterinary field hospital.

34th Punjab Pioneers joined the division at the end of March 1895.


Lines of Communications Troops:  1st East Lancashire Regiment. 29th Punjab Infantry, 30th Punjab Infantry, No 4 (Hazara) Mountain Battery, 2 field hospitals and a veterinary field hospital.

The Relief of Chitral was the first expedition to take the Indian and British armies over the Malakand Pass into Swat and Jandol.  The British had little information on the country that lay to the north of Mardan.  There were no roads, only tracks over the mountains.  The first range of border hills was 3,000 to 6,000 feet in height.  Beyond, were further ranges of high mountains and three substantial rivers without bridges; border hills, then the Swat River; Laram Range up to 6,000 feet, then the Panjkora River; Janbati Range and the Dir Valley; the Lowarai Pass into the valley of the Kunar River.

Until roads could be built, the force would have to rely on pack animals to move supplies.  Some 30,000 mules and camels were used in support of the force.  No tents were taken and the baggage allowance was 40 lbs for officers and 10 lbs for soldiers, including greatcoat.  The weather was snow, wind, rain and fierce sun shine.

Dir Fort: Siege and Relief of Chitral, 3rd March to 20th April 1895 on the North-West Frontier of India

Dir Fort: Siege and Relief of Chitral, 3rd March to 20th April 1895 on the North-West Frontier of India

In order to reach Jandol and Dir and then to enter Chitral, the Chitral Relief Force had to cross the territory of a number of other tribes and rulers.  While in general, agreements were reached to secure permission from these rulers and to ensure their neutrality or active assistance, it is doubtful whether individual tribesmen in these areas could resist the opportunity of a fight with the invading troops of the British Raj, at least at first.

On 30th March 1895, the Divisional Headquarters and the Second and Third Brigades moved from Nowshera to Hoti Mardan.  The divisional cavalry and guns were distributed among the brigades.  The First Brigade followed on the next day.

Maxim Gun detachment of 1st King's Royal Rifle Corps: Siege and Relief oaf Chitral, 3rd March to 20th April 1895 on the North-West Frontier of India

Maxim Gun detachment of 1st King’s Royal Rifle Corps: Siege and Relief of Chitral, 3rd March to 20th April 1895 on the North-West Frontier of India

The first move required the Chitral Relief Force to cross the range of mountains running west to east, before advancing into the Swat Valley.  There were three points at which these mountains might be crossed; the passes of Malakand, Shakot and Morah.  Reconnaissance showed that Shakot and Morah were held by 6,000 and 13,000 tribesmen respectively, while Malakand was held by a few hundred.  A feint was made towards the Shakot Pass and then the whole Chitral Relief Force concentrated to force the Malakand Pass on 3rd April 1895.  The attack was carried out by the Second Brigade supported by the First Brigade.  The Third Brigade remained at Dargai.

Chitral Relief Expedition encamped below the Malakand Pass: Siege and Relief of Chitral, 3rd March to 20th April 1895 on the North-West Frontier of India

Chitral Relief Expedition encamped below the Malakand Pass: Siege and Relief of Chitral, 3rd March to 20th April 1895 on the North-West Frontier of India

As soon as the British intention became clear tribesmen speedily assembled in considerable numbers to defend the Malakand Pass.

1st Gordon Highlanders storming the Malakand Pass: Siege and Relief of Chitral, 3rd March to 20th April 1895 on the North-West Frontier of India: picture by SW Lincoln

1st Gordon Highlanders storming the Malakand Pass: Siege and Relief of Chitral, 3rd March to 20th April 1895 on the North-West Frontier of India: picture by SW Lincoln

In the course of some five hours, the infantry battalions of the two brigades fought their way up the pass, with the support of fire from the mountain batteries.  The tribesmen retreated and were pursued by the Bedfords and the 37th Dogras as far as Khar.

It was assessed that there were some 12,000 tribesmen involved in the battle, of which it was believed that around a half were equipped with firearms.  Tribal casualties were estimated at around 500 killed.  British/Indian casualties were 11 killed and 51 wounded.  The Indian Government history records that 16,563 rifle rounds were fired with 446 artillery rounds.

11th Bengal Lancers crossing the Swat River: Siege and Relief of Chitral, 3rd March to 20th April 1895 on the North-West Frontier of India

11th Bengal Lancers crossing the Swat River: Siege and Relief of Chitral, 3rd March to 20th April 1895 on the North-West Frontier of India

The resistance to the Chitral Relief Force was not primarily Chitrali.  The incursion into tribal territory aroused the resentment of all the tribes in the region, particularly the Swatis, urged on by many of the Imams.  The resistance was co-ordinated, if not actually led, by Umar Khan, the Khan of Jandol and Dir, who had moved south from Chitral to take part in the fighting.

Highlanders attackingl: Siege and Relief of Chitral, 3rd March to 20th April 1895 on the North-West Frontier of India

Highlanders attacking: Siege and Relief of Chitral, 3rd March to 20th April 1895 on the North-West Frontier of India

While the pretext for the invasion of Jandol was the relief of Chitral and the release of the British and sepoy prisoners from Edwardes’ and Fowler’s party held by Umar Khan, the continued independence of Jandol, Dir, Swat and Chitral was now a major issue.

On 4th April 1895, the First Brigade moved down into the Swat Valley and the Second Brigade took over the top of the Malakand Pass, leaving the Third Brigade at Dargai.

Those tribesmen who had gathered in the other two passes were now massing in the Swat Valley and the First Brigade was forced to fight its way through to the Swat River at Khar during the 4th April 1895.  The Second Brigade came up on the 5th April.

On 5th April 1895, negotiations took place with various tribal leaders.  Mohammed Sharif Khan, the exiled Khan of Dir who had been expelled from Dir when it was conquered by Umra Khan, was permitted to cross the Swat and resume control of Dir.  This action enabled the Chitral Relief Force to move through Dir without resistance and kept a number of other tribes, over whom the Khan of Dir exerted influence, out of the fighting.

Guides Cavalry in action: Siege and Relief of Chitral, 3rd March to 20th April 1895 on the North-West Frontier of India

Guides Cavalry in action: Siege and Relief of Chitral, 3rd March to 20th April 1895 on the North-West Frontier of India

Between 6th and 8th April 1895 the First Brigade conducted operations along the Swat River upstream and to the north of the river, while supplies for a further move were brought over the difficult Malakand Pass.

On 9th April 1895, the First Brigade moved west, to open the route across the Panjkora River through Jandol, while the Second Brigade moved into the Swat Valley and the Third Brigade moved up to Khar.

On that day, a force from the First Brigade, comprising 11th Bengal Lancers, a squadron of Guides Cavalry, the 4th Sikh Regiment, the Guides Infantry and the Derajat Mountain battery patrolled up to the Panjkora River at Sado and found it to be fordable.  The pass leading to the river at Kamrani was found to be feasible.

Information was now received that Umra Khan was at Mundah, on the far side of the Panjkora River.  Umra Khan released 6 Mohammedan sepoys captured at Reshun with Fowler and Edwardes.

On 11th April 1895, the Second Brigade concentrated at Sado and Khungai, where they were fired on by tribesmen on the far side of the Panjkora River.  A bridge was built across the river and completed on 12th April.  6 companies of the Guides Infantry, Commanded by Lieutenant Colonel Battye, were sent across the river to guard the bridgehead and to carry out punishment raids on the neighbouring villages for firing on the troops.

During the night, the Panjkora River rose and debris brought downstream by the flood carried away part of the bridge, stranding the Guides on the far bank.

Guides Infantry: Siege and Relief oaf Chitral, 3rd March to 20th April 1895 on the North-West Frontier of India

Guides Infantry: Siege and Relief of Chitral, 3rd March to 20th April 1895 on the North-West Frontier of India

Companies of the Guides marched out to conduct the punishment raids, advancing up the right bank of the Jandol River.  While his companies were dispersed, Colonel Battye took up a position by the Jandol River.  Tribesmen assembled in the area of Kotkai and began to advance on the Guides.  Colonel Battye was given orders by heliograph to withdraw his battalion to the bridgehead on the Panjkora River.  Battye held his position on the Jandol River, to enable his companies to withdraw and came under sustained attack.  Supporting rifle and gunfire was provided from the brigade positions on the far side of the Panjkora, while the Guides fell back under pressure from the tribesmen.  During the withdrawal, Battye was shot dead.  The Guides fell back across the Jandol River and reached the Panjkora River bridgehead.  During that night, the Gordon Highlanders and a mountain battery provided covering fire from the left bank of the Panjkora River.

Suspension Bridge built over the Panjkora River by Major Aylmer VC: Siege and Relief of Chitral, 3rd March to 20th April 1895 on the North-West Frontier of India

Suspension Bridge built over the Panjkora River by Major Aylmer VC: Siege and Relief of Chitral, 3rd March to 20th April 1895 on the North-West Frontier of India

Chitral Relief Force in action: Siege and Relief of Chitral, 3rd March to 20th April 1895 on the North-West Frontier of India

Chitral Relief Force in action: Siege and Relief of Chitral, 3rd March to 20th April 1895 on the North-West Frontier of India

Between 14th and 16th April 1895, a suspension bridge was built over the Panjkora River to avoid the problem of damage from debris coming down the flooded river.

On 17th April 1895, the Third Brigade and part of the Second Brigade crossed the Panjkora River and the Third Brigade marched up the Jandol valley.  A large body of tribesmen advanced from Mian Kilai.  The Third Brigade moved forward to attack, driving the tribesmen from ridge to ridge. The tribesmen fell back and finally withdrew to the west.  It was estimated that there were some 3 to 4,000 of the Mamund and Salarzi Tarkanri tribes present in the action.

The Second and Third Brigades occupied Mian Kilai and Mundah on 18th April 1895.

In view of General Low’s increasing concern over the garrison at Chitral Fort, on 18th April 1895, General Gatacre pressed on to Barwa with a small force comprising 1st Buffs, 2nd/4th Gurkha Rifles, the Derajat Mountain Battery, a half company of Bengal Sappers and Miners and a field hospital section.

William Gatacre as a colonel in India in 1890: Siege and Relief oaf Chitral, 3rd March to 20th April 1895 on the North-West Frontier of India

William Gatacre as a colonel in India in 1890: Siege and Relief of Chitral, 3rd March to 20th April 1895 on the North-West Frontier of India

On 13th April 1895, Lieutenant Edwardes arrived from Umra Khan, with a message asking why his territory was being invaded by the British.  Sir Robert Low replied that, if Umra Khan released the remaining prisoners and desisted from opposing the Chitral Relief Force, he would be permitted to retain his territory.  On 15th April 1895, Sir Robert Low sent Umra Khan a message saying that, in view of his delay, the terms were no longer available to him.  On 16th April 1895, Umra Khan released Fowler, who arrived at the British camp at Sado and asked to be enabled to retain his territory.  Sir Robert Low replied that those terms were no longer available and Umra Khan fled to Afghanistan.

On 19th April 1895, Gatacre’s Third Brigade marched through the Janbatai Pass and, on 20th April, reached Bandai.  In the light of information that the garrison in Chitral Fort were hard pressed, Low ordered Gatacre to press on with a small column.  Gatacre organised two columns, the first being 2nd/4th Gurkha Rifles, with mountain guns and sappers and miners, the second being 1st Buffs with mountain guns and sappers and miners.  In each case, the guns were from 2nd Derajat Mountain Battery.  The columns advanced to Bandai, where the information was received that Sher Afzal had fled from Chitral and the siege of the fort lifted.

Devonshire Regiment Maxim Gun team: Siege and Relief of Chitral, 3rd March to 20th April 1895 on the North-West Frontier of India

Devonshire Regiment Maxim Gun team: Siege and Relief of Chitral, 3rd March to 20th April 1895 on the North-West Frontier of India

Gatacre continued his advance with 2 maxim guns from the Devonshire Regiment replacing the mountain guns.  The route to the Lowari Pass and the valley of the Kunar River was extremely difficult and sections of the road had to be rebuilt and new bridges constructed.  Much of the fatiguing work was carried out by the soldiers of the Buffs.

Sher Afzal and several of his main supporters were captured by the Khan of Dir, who handed them over to the British in their camp at Dir.  The leading persons were exiled to India with Sher Afzal.

Gurkhas crossing the Lowari Pass: Siege and Relief oaf Chitral, 3rd March to 20th April 1895 on the North-West Frontier of India

Gurkhas crossing the Lowari Pass: Siege and Relief of Chitral, 3rd March to 20th April 1895 on the North-West Frontier of India

On 15th May 1895, Brigadier General Gatacre reached Chitral Village with 1st Buffs, 2nd/4th Gurkha Rifles, Derajat Mountain Battery and No 4 Company Bengal Sappers and Miners.

Sir Robert Low arrived at Chitral the next day and reviewed the garrison, who had held the fort during the siege and the relieving troops.

All resistance to the British forces ceased in the area, other than some minor incidents.

General Gatacre on the road to Chitral: Siege and Relief of Chitral, 3rd March to 20th April 1895 on the North-West Frontier of India

General Gatacre on the road to Chitral: Siege and Relief of Chitral, 3rd March to 20th April 1895 on the North-West Frontier of India

Casualties in the Siege and Relief of Chitral:

The casualties of the Chitral Fort garrison:  42 killed and 62 wounded.
The casualties of Captain Ross’s party:  53 killed and 10 wounded.
The casualties of Lieutenant Edwardes’ party:  57 killed and 1 wounded.
The casualties of the Mastuj Fort garrison:  1 killed and 1 wounded.
The casualties of Colonel Kelly’s Gilgit column:  12 killed and 36 wounded.
The casualties of General Low’s Chitral Relief Force were not given.
The casualties suffered by the Chitralis, Jandolis and other tribes are unknown other than to the extent set out in the text above.

Gordon Highlanders Maxim Gun detachment: Siege and Relief of Chitral, 3rd March to 20th April 1895 on the North-West Frontier of India

Gordon Highlanders Maxim Gun detachment: Siege and Relief of Chitral, 3rd March to 20th April 1895 on the North-West Frontier of India

Aftermath to the Siege and Relief of Chitral:

On 19th April 1895, Sher Afzul fled from Chitral to Bashkar where he was taken by the Khan of Dir and handed to the British.  Sher Afzul and Amir-ul-Mulk were exiled to India.  Shuja-ul-Mulk was installed as Mehta of Chitral.  Chitral now became a part of British India for all practical purposes.

Mountain Battery of the Chitral Relief Force in action: Siege and Relief of Chitral, 3rd March to 20th April 1895 on the North-West Frontier of India

Mountain Battery of the Chitral Relief Force in action: Siege and Relief of Chitral, 3rd March to 20th April 1895 on the North-West Frontier of India

A Chitral Agency was created, containing the Kator area of Chitral, which was left to the Mehta and the areas of Mastuj and Laspur, which were placed under independent governors by the British.

A British garrison was installed at Chitral, comprising 2 Indian infantry regiments, a company of Sappers and Miners and a battery of mountain artillery.  Garrisons of local levies, numbering 200 in all and armed with Snider rifles, were installed in detachments across Lower Chitral.

Chitral Fort: Siege and Relief of Chitral, 3rd March to 20th April 1895 on the North-West Frontier of India

Chitral Fort: Siege and Relief of Chitral, 3rd March to 20th April 1895 on the North-West Frontier of India

Mehta Shuja-ul-Mulk received a monthly subsidy of 1,000 rupees and an annual payment of 8,000 rupees to compensate him for the loss of the two districts.

With the departure of Umra Khan and the reinstatement of the Khan of Dir, the post road from Nowshera to Chitral, via Panjkora and Dir, was assured.  The Khan of Dir was given a financial reward for his support during the fighting and an annual subsidy, from which to raise levies to keep the road clear.  His levies were armed with Snider rifles and later with Martini-Henry rifles.

Sir Robert Low and his staff on the Janbatai Pass: Siege and Relief of Chitral, 3rd March to 20th April 1895 on the North-West Frontier of India

Sir Robert Low and his staff on the Janbatai Pass: Siege and Relief of Chitral, 3rd March to 20th April 1895 on the North-West Frontier of India

Surgeon Captain Whitchurch VC: Siege and Relief of Chitral, 3rd March to 20th April 1895 on the North-West Frontier of India

Surgeon Captain Whitchurch VC: Siege and Relief of Chitral, 3rd March to 20th April 1895 on the North-West Frontier of India

Battle Honours and decorations in the Siege and Relief of Chitral:
‘Defence of Chitral 1895’ is a battle honour for the 14th Sikhs.

‘Chitral 1895’ is a battle honour for the following regiments:  Buffs, Bedfords, King’s Own Scottish Borderers, East Lancashire Regiment, King’s Royal Rifle Corps, Seaforth Highlanders, Gordon Highlanders, Queen’s Own Corps of Guides, 9th Hodson’s Horse, 11th Probyn’s Lancers, 1st Prince of Wales Own Sappers and Miners, 13th Rajputs, 15th Sikhs, 23rd Pioneers, 25th Punjabis, 29th Punjabis, 30th Punjabis, 32nd Pioneers, 34th Pioneers, 37th Dogras, 54th Sikhs and 4th Gurkhas.

Surgeon Major Robertson was made a Knight Commander of the Indian Empire and became Sir George Robertson KCSI.  Captain Townsend received the Companionship of the Bath and was promoted to major.

Captain Whitchurch's medals: Siege and Relief of Chitral, 3rd March to 20th April 1895 on the North-West Frontier of India

Captain Whitchurch’s medals: Siege and Relief of Chitral, 3rd March to 20th April 1895 on the North-West Frontier of India

Surgeon Captain Whitchurch was awarded the Victoria Cross. Whitchurch’s medals form part of the Ashcroft Collection in the Imperial War Museum.

Lieutenants Gurdon, Harley and Jones were awarded the Distinguished Service Order (DSO).

Lieutenants Edwardes and Fowler were awarded the DSO for their conduct of the ammunition column.

Lieutenant Colonel Kelly, Captain Stewart and Lieutenant Beynon were awarded the DSO.

For the action on 3rd March 1895 and their conduct in assisting Captain Whitchurch in rescuing Captain Baird, Subadar Badri Nar Singh and 12 other soldiers from the 4th Kashmir Rifles were admitted to the Indian Order of Merit, Third Class.

Subadar Badri Singh of the 4th Kashmir Rifles and Sepoy Awi Singh of the 14th Sikhs were awarded the Indian Order of Merit for their action on 7th April 1895 in suppressing the second attempt to set fire to the Gun Tower.  As a result of his two awards, Subadar Badri Singh was advanced to the 2nd Class of the Indian Order of Merit.  The order carried a pension depending upon the class of award.

Major Fenton Aylmer VC, Royal Engineers, the Chief Engineer for the Chitral Relief Force, was awarded the DSO for his work in building the bridges for the Chitral Relief Force over the Panjkora River between 12th and 17th April 1895 and his work during the campaign.

Bengal Sappers and Miners building roads in Chitral: Siege and Relief of Chitral, 3rd March to 20th April 1895 on the North-West Frontier of India

Bengal Sappers and Miners building roads in Chitral: Siege and Relief of Chitral, 3rd March to 20th April 1895 on the North-West Frontier of India

Captain William Robertson, 3rd Dragoon Guards, (later Field Marshal Sir William Robertson) was awarded the DSO for his work as Intelligence Officer with the Chitral Relief Force.  Robertson describes in his memoirs (‘From Private to Field Marshal’) how he was severely wounded, when attacked by his two Pathan interpreters with his own sword.

Lieutenant Frederick Roberts (The son of Field Marshal Lord Roberts, awarded a posthumous VC at Colenso in the Boer War for the attempts to rescue the guns) served with 1st KRRC in the Chitral Relief Force and was awarded the DSO.

Colonel Kelly was appointed Commander of the Bath.

Several other British officers in the Chitral Relief Force and Colonel Kelly’s column received DSOs and other decorations.

Indian Order of Merit and Indian General Service Medal with both clasps ‘Defence of Chitral 1895’ and ‘Relief of Chitral 1895’. Medals of Sepoy Bagh Singh, 14th Sikhs: Siege and Relief of Chitral, 3rd March to 20th April 1895 on the North-West Frontier of India

Indian Order of Merit and Indian General Service Medal with both clasps ‘Defence of Chitral 1895’ and ‘Relief of Chitral 1895’. Medals of Sepoy Bagh Singh, 14th Sikhs: Siege and Relief of Chitral, 3rd March to 20th April 1895 on the North-West Frontier of India

Campaign Medal for the Siege and Relief of Chitral:  The Indian General Service Medal was issued to the Chitral Fort Garrison, the members of the Mastuj Fort Garrison, Colonel Kelly’s Gilgit Relief Column, General Low’s Chitral Relief Force and the troops and supporters in the lines of communication for the Force and on the Mastuj to Gilgit route.

The clasp for the Chitral Garrison was ‘Defence of Chitral 1895’.  For the other personnel, the clasp was ‘Relief of Chitral 1895’.  The 14 sepoys from 14th Sikhs, who survived the Koragh Defile, seem to have been given the clasp ‘Defence of Chitral 1895’.  The illustrations of the medals of Sepoy Bagh Singh and Jemadar Sundar Singh show that they wore both clasps. Probably only the Koragh Defile survivors were awarded both clasps.

All ranks in the Chitral garrison were given six month’s pay as a bonus.

Medals of Jemadar Sundar Singh, 14th Sikhs, the senior non-commissioned soldier to survive the Koragh Defile action with Lieutenant Jones and 14 sepoys of the regiment. The Indian General Service Medal has the clasp ‘Relief of Chitral 1895’: Siege and Relief of Chitral, 3rd March to 20th April 1895 on the North-West Frontier of India

Medals of Jemadar Sundar Singh, 14th Sikhs, the senior non-commissioned soldier to survive the Koragh Defile action with Lieutenant Jones and 14 sepoys of the regiment. The Indian General Service Medal has the clasp ‘Relief of Chitral 1895’: Siege and Relief of Chitral, 3rd March to 20th April 1895 on the North-West Frontier of India

Anecdotes and traditions from the Siege and Relief of Chitral:

  • River Names: There is some confusion over the names of rivers in this part of the North-West Frontier of India (now Pakistan). In some references, the Kunar River is called the Chitral River.  This river, from above Chitral, becomes the Mastuj River or the Yarkhun (or Yarkun) River, depending on the reference.  The Indus River, in its upper reaches, becomes the Gilgit River.  In some references this name gives way to the Yasin River above Gilgit.  In others, the Gilgit River becomes the Ghizar River, above the branch to Yasin town.  This account uses the names Kunar River, Yarkun River and Yasin River.
  • During the action to take the Malakand Pass, it was observed that the Lee-Metford magazine rifle used by the British regiments inflicted slight injury and was considered to have inadequate stopping power for use against tribesmen.  The Indian infantry continued to use the single shot Martini Henry rifle.  The Lee-Metford was subsequently improved by the introduction of new ammunition using cordite propellant.  This in turn reduced the life of the weapon, due to the corrosion of the barrels by the increased power of the cordite.  A new barrel was put on the weapon by the Royal Armouries at Enfield.  Other improvements were made, particularly to the capacity of the magazine and the rifle became the .303 Lee Enfield used by the British Army in the First and Second World Wars, the Korean War and beyond.
  • There was a small monkey in residence at the Chitral Fort.  During the siege, the monkey wandered around the fort, along the parapets and up the outside of the walls.  Neither side shot at it.  The monkey caused havoc inside the fort by ransacking the soldiers’ and officers’ possessions.  It was repeatedly confined inside a box to restrict its disruptive antics and as repeatedly released by its sympathisers.  Finally, Robertson committed the monkey to military custody in the care of the ammunition guard.
  • There were numbers of dogs that wandered around the fort and its surroundings.  The garrison soldiers tied cans to their tails and drove them towards the besiegers’ sangars and into the bazaar in the middle of the night to the alarm and mystification of the Chitralis.

    Chitral Relief Force reconnaissance party: Siege and Relief of Chitral, 3rd March to 20th April 1895 on the North-West Frontier of India

    Chitral Relief Force reconnaissance party: Siege and Relief of Chitral, 3rd March to 20th April 1895 on the North-West Frontier of India

  • Lieutenant S.M. Edwardes was an officer of the 2nd Bombay Grenadiers, on secondment to the forces of the Maharajah of Kashmir as a member of the Indian Staff Corps.  The photograph of Edwardes and Fowler taken after their release from captivity shows Edwardes’ fox terrier ‘Biddy’.  Biddy was shot in the chest in the first day of fighting at Reshun and not expected to survive.  Biddy was evacuated to the buildings, when the group moved from the camp.  After his capture during the polo game, Edwardes persuaded his captors to permit him to keep Biddy with him.  Together, Edwardes and Biddy were taken to Chitral and then to Jandol, where they were handed to Indian troops.  Edwardes was awarded the DSO for his conduct during the Relief of Chitral.  Biddy received the Indian General Service Medal with the clasp ‘Relief of Chitral’.
  • Lieutenant J.S. Fowler was an officer of the Royal Engineers on secondment to the Bengal Sappers and Miners.  Fowler was in Gilgit conducting work on the Chilas to Gilgit road, when he was ordered to Mastuj with his 20 Sappers and Miners.  Fowler was awarded the DSO for his conduct during the Relief of Chitral.  When Robertson became Commandant of the Staff College he called for Fowler as an instructor; the ‘Chitral Mafia’ at work. Throughout the First World War, Fowler was Director of Signalling on the Western Front, rising to the rank of Lieutenant General.  Fowler was the first colonel of the Royal Corps of Signals.

    Indian General Service Medal (reverse) with clasp for 'Relief of Chitral' awarded to Captain Arthur Lynden-Bell, adjutant of 1st Buffs: Siege and Relief of Chitral, 3rd March to 20th April 1895 on the North-West Frontier of India

    Indian General Service Medal (reverse) with clasp for ‘Relief of Chitral’ awarded to Captain Arthur Lynden-Bell, adjutant of 1st Buffs: Siege and Relief of Chitral, 3rd March to 20th April 1895 on the North-West Frontier of India

  • The rumour that reached England during the siege was that Gurdon had been killed in the fighting on 3rd March 1895.  There had clearly been confusion between him and Baird.  One of Gurdon’s priorities after Chitral was relieved was to assure his family that he was alive.
  • Townsend, the military commander to Robertson in Chitral Fort after the wounding of Campbell, was made Commander of the Bath for his conduct of the defence of Chitral Fort and promoted major.  Now known as ‘Chitral Charlie’, Townsend fought at the Battle of Omdurman in 1897, where he received the DSO.  Townsend, in the rank of major general, commanded the 6th Indian Division in the advance up the Euphrates River in Mesopotamia in the First World War.  Townsend and his division surrendered at Kut to the Ottoman Turks.  His conduct of operations was heavily criticised.  It is said that his stand at Kut was influenced by the Chitral siege.  Interestingly the officer commanding the unsuccessful attempts to relieve Townsend in Kut was Lieutenant General Sir Fenton Aylmer VC.
  • Another officer who took part in the relief of Chitral was Captain Lynden-Bell, the Adjutant of the 1st Battalion of the Royal East Kent Regiment (the Buffs).  Before retiring from the Army as Major-General Sir Arthur Lynden-Bell KCB KCMG, General Lynden-Bell was Chief of Staff in the Middle East to General Monroe and, briefly, to General Allenby. It was General Lynden-Bell who wrote the report recommending withdrawal from Gallipoli, although the report is attributed to General Murray.  The Buffs were the only British Regiment in the Chitral Relief Force to reach Chitral.

    11th Bengal Lancers attacking across the Swat River: Siege and Relief oaf Chitral, 3rd March to 20th April 1895 on the North-West Frontier of India

    11th Bengal Lancers attacking across the Swat River: Siege and Relief of Chitral, 3rd March to 20th April 1895 on the North-West Frontier of India

  • In the fighting on the Swat River on 7th April 1895, 2 squadrons of 11th Bengal Lancers, the Sikh Squadron and the Muslim Squadron, crossed the river and engaged the tribesmen.  The Sikhs chased the tribesmen back to Uch, a distance of some miles, killing around 100.  The leading troop was led by Jemadar Khushal Singh.  Khushal Singh himself killed several tribesmen with his sword, including one who climbed onto the horse of a sowar and engaged the sowar in hand to hand combat on the back of the horse, until Khushal Singh intervened.  The Muslim Squadron pursued a party of mounted tribesmen for some twenty-five miles.  After the cavalry engagement on 7th April with the 11th and the Guides Cavalry, the appearance of either regiment was sufficient to cause the tribesmen to run.

    Major Fenton Aylmer VC, Royal Engineers: Siege and Relief of Chitral, 3rd March to 20th April 1895 on the North-West Frontier of India

    Major Fenton Aylmer VC, Royal Engineers: Siege and Relief of Chitral, 3rd March to 20th April 1895 on the North-West Frontier of India

  • Major Fenton Aylmer VC, Royal Engineers, Chief Engineer to the Chitral Relief Force, was awarded the DSO.  His Sappers and Miners were responsible for bridging several fast-flowing rivers with minimal equipment.  In one instance, the bridge over the Panjkora, the survival of the Guides Infantry was dependent upon their work.  Aylmer’s Sappers and Miners improvised a suspension bridge, using telegraph wire, in view of the dangerous stream and the debris being washed down, which precluded the usual pile bridge.  All along the route from Malakand, roads had to be built with the greatest haste to ensure that supplies of food and ammunition were maintained.  The work was done in snow, rain and baking sunshine. After the relief of Chitral, Major Aylmer personally carved the headstone for Captain Baird’s grave, Baird having been his close friend. As a general in Iraq during the First World War, Aylmer commanded the unsuccessful attempts to relieve Townsend in Kut. Aylmer was the Commandant of the Royal Engineers from 1922 until his death in 1935.

    Silver Alam taken from a sangar during the storming of the Malakand Pass: Siege and Relief of Chitral, 3rd March to 20th April 1895 on the North-West Frontier of India

    Silver Alam taken from a sangar during the storming of the Malakand Pass: Siege and Relief of Chitral

  • Colonel Kelly’s staff officer, Captain William Beynon, 3rd Gurkhas, drafted the plans included above and received the DSO for his part in the Relief of Chitral. Beynon retired from the Indian Army in 1920 with the rank of Lieutenant General. Beynon wrote ‘With Kelly to Chitral’.
  • During the storming of the Malakand Pass by the Chitral Relief Force, a political officer, Mr Davis, recovered from a sangar defended by tribesmen and bombarded by the British artillery, a silver alam. The alam was a Shia Moslem religious ikon. The thumb and fingers represent the Prophet Mohammed, Fatima, Ali, Husain and Hasan. The tribal escort for the alam were all badly wounded or killed by the artillery fire. It is thought this was the last time such religious symbols were carried into battle against the British by the tribesmen.
  • The siege and relief of Chitral caused a considerable sensation in late Victorian Britain.  Alice F. Jackson published a book in 1897 entitled ‘Heroes of the Chitral Siege’.  The publisher was the Society for the Propagation of Christian Knowledge’ (SPCK).  The copy of the book in the possession of bb.com was awarded as a prize to E. Albert for being equal third ‘For good conduct and attendance in Rock choir and Sunday school from Miss Russ Whit Sunday 1898’.

References for the Siege and Relief of Chitral:

Chitral the story of a minor siege by Sir George Robertson
Frontier and Overseas Expeditions from India Volume 1 published by the Government of India
The Relief of Chitral by Captain GJ Younghusband and Colonel Sir Francis Younghusband
With Kelly to Chitral by Lieutenant Beynon (Colonel Kelly’s staff officer in the Gilgit relief column)

The previous battle of the North-West Frontier of India is Waziristan 1894

The next battle of the North-West Frontier of India is the Malakand Rising 1897

To the North-West Frontier of India index


Waziristan 1894

The spectacular pre-dawn attack on the British/Indian Army camp at Wana in Waziristan on 3rd November 1894 by 2,000 Mahsud tribesmen, led by the radical Muslim preacher, the Mullah Powindah and the short campaign that followed

20th Punjab Infantry: Waziristan campaign, 3rd November 1894 to March 1895, on the North-West Frontier of India: picture by Walter Fane

20th Punjab Infantry: Waziristan campaign, 3rd November 1894 to March 1895, on the North-West Frontier of India: picture by Walter Fane

The previous battle in the North-West Frontier of India sequence is the Black Mountain Expedition 1891

The next battle in the North-West Frontier of India sequence is the Siege and Relief of Chitral

To the North-West Frontier of India index


The Mullah Powindah: Waziristan campaign 3rd November 1894 to March 1895 on the North-West Frontier of India

The Mullah Powindah: Waziristan campaign, 3rd November 1894 to March 1895 on the North-West Frontier of India

War: North-West Frontier of India

Date of the 1894 Waziristan Campaign: 3rd November 1894 to March 1895

Place of the 1894 Waziristan Campaign: The independent tribal region of Waziristan, to the south of the Kurram River on the border with Afghanistan.

Commanders in the 1894 Waziristan Campaign: Brigadier-General Turner commanded the Indian Army force surprised in the camp at Wana on 3rd November 1894.  Lieutenant-General Sir William Lockhart commanded the Waziristan Field Force that inflicted reprisals on the Mahsud Tribe following the Wana attack.  The Mahsud tribesmen that attacked the Wana camp were led by the Mullah Powindah.  There was no identifiable Mahsud leadership during the British incursion into Mahsud country.

Size of the forces in the 1894 Waziristan Campaign: The Indian Army force attacked in the camp at Wana numbered around 2,500 men.  The three brigades that formed the Waziristan Field Force numbered, in all, around 8,000 men.  Probably around 2,000 tribesmen attacked the camp at Wana on 3rd November 1894.

Combatants in the 1894 Waziristan Campaign: Regiments of the British and Indian Army against the Mahsud tribesmen of Waziristan.

Winner of the 1894 Waziristan Campaign:  The reputation of the Indian Army took a severe knock by being surprised at Wana.  The result of the subsequent campaign was the capitulation of the Mahsuds.

Uniforms, arms and equipment in the 1894 Waziristan Campaign:
The British military forces in India fell into these categories:

  • Punjab Frontier Force ('PIFFERS') 1st Punjab Regiment, 1st Punjab Cavalry, 3rd Sikhs and Punjab Mountain Battery: Waziristan campaign, 3rd November 1894 to March 1895 on the North-West Frontier of India: picture by Richard Simkin

    Punjab Frontier Force (‘PIFFERS’) 1st Punjab Regiment, 1st Punjab Cavalry, 3rd Sikhs and Punjab Mountain Battery: Waziristan campaign, 3rd November 1894 to March 1895 on the North-West Frontier of India: picture by Richard Simkin

    Regiments of the British Army in garrison in India.  Following the Indian Mutiny of 1857, India became a Crown Colony.  The ratio of British to Indian troops was increased from 1:10 to 1:3 by stationing more British regiments in India.  Brigade formations were a mixture of British and Indian regiments.  The artillery was put under the control of the Royal Artillery, other than some Indian Army mountain gun batteries.

  • The Indian Army comprised the three armies of the Presidencies of Bombay, Madras and Bengal.  The Bengal Army, the largest, supplied many of the units for service on the North-West Frontier.  The senior regimental officers were British.  Soldiers were recruited from across the Indian sub-continent, with regiments recruiting nationalities, such as Sikhs, Punjabi Muslims, Pathans and Gurkhas.  The Indian Mutiny caused the British authorities to view the populations of the East and South of India as unreliable for military service.
  • The Punjab Frontier Force:  Known as ‘Piffers’, these were regiments formed specifically for service on the North-West Frontier and were controlled by the Punjab State Government.
  • Imperial Service Troops of the various Indian states, nominally independent but under the protection and de facto control of the Government of India.  The most important of these states for operations on the North-West Frontier was Kashmir.

    Punjab Frontier Force infantry regiment: Waziristan campaign, 3rd November 1894 to March 1895, on the North-West Frontier of India

    Punjab Frontier Force infantry regiment: Waziristan campaign, 3rd November 1894 to March 1895, on the North-West Frontier of India

A British infantry battalion comprised 10 companies, with around 700 men and some 30 officers.  A battalion possessed a maxim machine gun detachment of 2 guns and some 20 men.

Indian infantry battalions had much the same establishment without the Maxim gun detachment.  Senior officers were British, holding Queen’s Commissions, of which a battalion would have 5 or 6. Junior officers were Indian.

In 1894 British and Indian infantry regiments were issued with the single shot drop action Martini-Henry breech loading rifle.  The 2nd Border Regiment had just received the new Lee Metford magazine rifle.

The Indian Mountain Batteries used 7 pounder rifled muzzle loading (RML) guns that were dismantled and carried on mules.  These guns were unreliable and difficult to use effectively.  The British Mountain Batteries used the more modern 2.3 inch RML guns.

3rd Sikh Infantry: Waziristan campaign, 3rd November 1894 to March 1895, on the North-West Frontier of India

3rd Sikh Infantry: Waziristan campaign, 3rd November 1894 to March 1895, on the North-West Frontier of India

British and Indian troops in 1895 wore khaki field dress when campaigning, with a leather harness to carry equipment and ammunition.  British troops wore a pith helmet.  Indian troops were largely turbaned.  Gurkha troops wore a pill box hat.

The Indian cavalry regiments were armed with lance, sabre and carbine.

The standard tactic used by the British and Indian armies on the North-West Frontier of India as with other so-called ‘semi-civilised enemies’ (tribesmen armed with swords and lances and with limited access to modern firearms) was to deliver a frontal assault, discharging controlled volleys of rifle fire and attacking with the bayonet.  When under fire and not moving, cover was taken behind sangars or low stone walls.  Supporting fire would be provided by artillery.  Cavalry conducted scouting duties and, in favourable circumstances, delivered mounted charges.

When a military column moved through hostile country, great care had to be taken to ensure that flanking high ground was occupied in strength, until the column was clear of the area.

Tribesmen: Waziristan campaign, 3rd November 1894 to March 1895, on the North-West Frontier of India

Tribesmen: Waziristan campaign, 3rd November 1894 to March 1895, on the North-West Frontier of India

The tribesmen were in possession of muskets, jezails, some Snider and a few Martini-Henry rifles.  They possessed no artillery or machine guns.  The tribesmen were on foot.

A feature of warfare on the North-West Frontier of India was the ability of tribesmen to assemble in large numbers, with little warning and to move at disconcerting speed across mountainous terrain, even at night.

The Mahsuds were notorious for preferring to fight by ambush rather than in open battle.

Tribesmen: Waziristan campaign, 3rd November 1894 to March 1895, on the North-West Frontier of India

Tribesmen: Waziristan campaign, 3rd November 1894 to March 1895, on the North-West Frontier of India

Background to the 1894 Waziristan Campaign:
Waziristan, an arid and inhospitable mountainous region, hot in summer and snow bound in winter, lies along the Afghanistan border to the south of the Kurram River.  It is inhabited by two main Pathan tribes, the Darwesh Khels in the northern part, known as ‘Wazirs’, and the Mahsuds in the south and east, both Wazir tribes.  The two other tribes in the area are the Dawaris and the Bhittanis, both less significant and neither Wazir.

The mountains of Waziristan increase in height to the west, providing the watershed between the Indus basin of western India and the Helmond River in Afghanistan.

The principal rivers of Waziristan are the Kurram, Kaitu, Tochi and Gumal Rivers, all flowing from west to east.  Many smaller rivers and streams intersect the mountains, finally flowing into one of these four large rivers.

Communications throughout Waziristan lie along the valleys, formed by rivers and nullahs.  While many might be dry for much of the year, they could prove dangerous if a storm occurred in the mountains and caused a spate to surge down the valley.

The inhabitants of Waziristan considered themselves to be without a ruler.  The Amir of Afghanistan at times claimed suzerainty over the region, but mostly the Amir acknowledged the independence of the area.

In 1893, the British persuaded the Amir to agree to a commission, comprising officers from Afghanistan and British India, to establish the border between Afghanistan and the independent tribal areas.  The Amir agreed with considerable reluctance.

the Durand Line: Waziristan campaign, 3rd November 1894 to March 1895, on the North-West Frontier of India

The Durand Line: Waziristan campaign, 3rd November 1894 to March 1895, on the North-West Frontier of India

The border, known to the British as the ‘Durand Line’, after their commissioner, Sir Mortimer Durand, was to be marked along its length with white posts.  Correctly assuming the marking of the border in this way to be a sign of a British intention in due course to annex all the tribal areas, the putting up of border posts was highly objectionable to the Pathan population of Waziristan.

The Government of India appointed a Boundary Commission and Survey party, under the leadership of Mr. R.I. Bruce CIE.   The Border Commission established a camp at Wana, in the south of Waziristan, from where it proposed to carry out the work of marking the agreed border.

On 10th October 1894, a jirga from the Ahmadzai of Wana presented a petition from its tribal members asking the British Government to take over Wana and to make the members of the Ahmadzai British subjects.

Plan of the Waziri attack on Wana Camp on 3rd November 1894: Waziristan campaign, 3rd November to March 1895, on the North-West Frontier of India: plan by John Fawkes

Plan of the Waziri attack on Wana Camp on 3rd November 1894: Waziristan campaign, 3rd November to March 1895, on the North-West Frontier of India: plan by John Fawkes

Account of the 1894 Waziristan Campaign:
The attack on the camp at Wana:
A strong military escort was allocated to the Border Commission at Wana.  This force, denominated the ‘Waziristan Delimitation Escort’, under the command of Brigadier-General Turner, comprised 1 squadron of the 1st Punjab Cavalry, 1st/1st Gurkha Rifles, 3rd Sikh Infantry, 20th Punjab Infantry, No. 3 Punjab Mountain Battery, No. 2 Company, Sappers and Miners and two Native Field Hospitals.

1st Punjab Cavalry: Waziristan campaign, 3rd November 1894 to March 1895, on the North-West Frontier of India

1st Punjab Cavalry: Waziristan campaign, 3rd November 1894 to March 1895, on the North-West Frontier of India

Further units were earmarked for a reserve brigade; 2nd Border Regiment at Mooltan and the remainder of 1st Punjab Cavalry, No. 8 Mountain Battery, 4th Punjab Infantry and 38th Dogras at Dera Ismail Khan.

In order to join the Border Commission at Wana, General Turner’s force marched from Dera Ismail Khan to Khajuri Kach, arriving on 18th October 1894.

After investigating water supplies on the various routes, General Turner decided to march to Wana via the area of Spin and Karab Kot.

Punjabi and Dogra Regiments (38th Dogras on the right): Waziristan campaign, 3rd November 1894 to March 1895, on the North-West Frontier of India: picture by AC Lovett

Punjabi and Dogra Regiments (38th Dogras on the right): Waziristan campaign, 3rd November 1894 to March 1895, on the North-West Frontier of India: picture by AC Lovett

The force marched out on 22nd October 1894, less 20th Punjab Infantry which remained to bring up supplies, moving via the Karkana Kot and the head of Spin Tangi, and arriving at Karab Kot on 23rd October 1894.

On 24th October 1894, General Turner reconnoitred the road to Wana and a post was built at Karab Kot.  Shots were fired into the camp that night.

On 25th October 1894, the force marched to Wana, leaving a company of 1st/1st Gurkhas in the new post, with some sappers and miners.  At Wana, a jirga of Ahmadzais expressed pleasure at the arrival of the British force.  However, shots were again fired into the camp during the night.

The Wana plain is around 13 miles long and 11 miles wide.  Wana itself lies at the eastern end of the plain.  The official record states that the camp was pitched at this place ‘for political reasons’, without giving those reasons and that the camp was larger than could conveniently be defended because no trouble was expected.  This view was confirmed by the arrival at the camp on 27th October 1894 of jirgas from the Nana Khel and the Machi Khel, both Mahsud clans.

1st Kohat Mountain Battery: Waziristan campaign, 3rd November 1894 to March 1895, on the North-West Frontier of India

1st Kohat Mountain Battery: Waziristan campaign, 3rd November 1894 to March 1895, on the North-West Frontier of India

Nevill, in his book, comments that the camp was not fortified in the way usual for a British camp on the North-West Frontier and as required by the British Field Service Regulations.  In addition, the camp was positioned near to several dry nullahs, that would give an attacking force a means of approaching the camp in strength without being seen.  Nevill also comments that the Mahsud preference for surprise attack over combat in open battle was known to the British military hierarchy.  The nature of the camp made the force vulnerable to just such an attack.

20th Punjab Infantry: Waziristan campaign, 3rd November 1894 to March 1895, on the North-West Frontier of India

20th Punjab Infantry: Waziristan campaign, 3rd November 1894 to March 1895, on the North-West Frontier of India

On 28th October 1894, information was received by the British command that a Mullah Powindah was leading a group of Mahsuds, attempting to stir up resistance to the British incursion into Waziristan and trying to prevent the jirgas from going in to negotiate with the British.  Mullah Powindah was a cleric of the Shabi Khel clan and had set himself in opposition to the lay maliks of the Mashuds.  The information was that Mullah Powindah was approaching Kaniguram to the north-east of Wana with some 800 Mahsuds of various clans with the intention of recruiting more members of the tribe and carrying out hostile action against the British.

On receipt of this information, General Turner withdrew the Gurkhas and Sappers and Miners from Karab Kot and telegraphed for a battalion and 2 guns from the designated reserve to move to Jandola, in the foothills on the Tank River.

On 30th October 1894, a reconnaissance was conducted up the Tiarza Nala, a mountain stream, the direction from which Mullah Powindah was said to be approaching.  On the party’s return they were fired on.

On 1st November 1894, information came in to the British, that the Mullah Powindah was at Torwam, on the upper reaches of the Tank River near to the Tiarza Nala, with around 1,000 tribesmen.  The Government of India record states that the camp’s piquets were doubled and all ranks ordered to be under arms in their tents by 4am.  This precaution, in the event, was far from sufficient.

On 2nd November 1894, a further reconnaissance was conducted in the mountains directly to the north of the camp, in the direction of the Inzar Narai peak.  Some shots were fired, but nothing else significant was encountered.  On the same day, messages came in from the Mullah Powindah and he was given the answer that all negotiations had to be through tribal jirgas and that he should disperse his Lashkar (a fighting force of tribesmen) and return home. It is recorded that the same precautions were maintained in the camp as on the previous night.

20th Punjab Infantry: Waziristan campaign, 3rd November 1894 to March 1895, on the North-West Frontier of India

20th Punjab Infantry: Waziristan campaign, 3rd November 1894 to March 1895, on the North-West Frontier of India

The camp was not suitable for defence, due to its size and position and had not been fully fortified.  Outside the perimeter was a system of support positions and, beyond them, twelve piquets.  To the north-east of the camp was a breastwork held by 40 men.  In the event of attack, the piquets were to fall back on the support positions and all the outlying troops were to retire to the main perimeter.  The one exception was Piquet Hill to the south-west of the camp, where the support position with its two piquets were ordered, in the event of attack, to hold and defend their posts.  The reason for this order was that Piquet Hill overlooked the camp.  Nevill comments that the orders for the piquets were contrary to usage on the frontier and the requirements of the regulations.  Piquets should have been strong enough to maintain their posts when under attack and not to withdraw.

A deserted fort lay 500 yards to the north-east of the camp.  This position was held by 100 Gurkhas.  Their role in the event of an attack on the camp was to take the attackers in the rear and to cut off their retreat.

3rd Sikh Infantry: Waziristan campaign, 3rd November 1894 to March 1895, on the North-West Frontier of India

3rd Sikh Infantry: Waziristan campaign, 3rd November 1894 to March 1895, on the North-West Frontier of India

At 5.30am on 3rd November 1894, in the pitch dark, the camp at Wana was attacked by around 2,000 tribesmen in one of the most dramatic episodes on the North-West Frontier.  Three rifle shots rang out (some authorities claim that these shots were a signal for the tribesmen and some a signal from a piquet.  Perhaps they were just the first shots).

These shots were immediately followed by wild yells and frenzied drum beating, as tribesmen poured out of the nullahs that had concealed their approach to the camp perimeter.  Many of the piquets and support posts raced back to the perimeter as instructed and the wave of tribesmen struck the camp just three minutes after the first warning shots.

The attack fell on the west face of the camp, the encampment of the 1st Gurkhas.  The battalion had 4 ½ companies in camp, the remainder being disposed: 1 ½ companies dispersed in the piquets and supports, ¾ company guarding the hospital and 1 ¼ companies in the old fort at the north-eastern approach.

In view of the information received about Mullah Powindah’s group, the British expectation was that any hostile approach would be from the north-east.  The suggestions in the authorities are that the British force had begun to build a breastwork at the north-eastern corner of the camp.  Even if this is so, the work was inadequate, too late and in the wrong place.

In the attack on the Wana camp, the Mahsuds demonstrated the extraordinary ability of the Pathans to move across mountainous terrain at night and at speed, without being detected.  The Lashkar, on reaching the area, circled round to the west of the camp and approached it in the pitch dark by way of two dry nullahs.  The assault appears to have been headed by a group of particularly fanatical tribesmen, around 800 in number.

Sappers and Miners: Waziristan campaign, 3rd November 1894 to March 1895, on the North-West Frontier of India

Sappers and Miners: Waziristan campaign, 3rd November 1894 to March 1895, on the North-West Frontier of India

A report in the Pioneer Magazine of 9th November 1894 claims to have identified three separate attacks.  It seems more likely that the rate of the charge was dictated by the geography of the nullahs, the enthusiasm of individual tribesmen for battle and their capabilities, rather than any intention to form separate attacks.

There seems to have been the initial attack against the western face of the camp, a secondary flow of tribesmen around to the south face of the camp and into the area of the hospital, commissariat and cavalry lines and another flow around the north face, that did not lead to a direct assault, but confined itself to shooting into the camp.


The order that the soldiers be under arms in their tents, if this was the order that was given, was inadequate.  Few soldiers of the 1st Gurkhas were able to reach the perimeter to meet the attack. Many encountered the charging tribesmen as they came out of their tents, fighting in the dark, bayonet against sword and shield.

B and E companies of 1st Gurkhas formed up in the middle of the regiment’s lines under Major Robinson and fought to hold back the rush of tribesmen, as they passed through the Gurkha camp into the hospital, commissariat and cavalry lines, slaughtering camp followers and baggage animals.  Several horses of the 1st Punjab Cavalry were injured or killed by the tribesmen.

1st Gurkhas: Wana Camp, Waziristan campaign 3rd November 1894 to March 1895 on the North-West Frontier of India

1st Gurkhas: Wana Camp, Waziristan campaign 3rd November 1894 to March 1895 on the North-West Frontier of India

F Company, 2nd/1st Gurkhas, attached to the 1st Battalion, reached the perimeter at the north-west corner.  A Company, 1st Gurkhas, extended out from the north-west corner of the camp and fired in enfilade into the attacking tribesmen.

A following wave of tribesmen encountered Gurkhas who had fallen back from the support positions on the left and the Regimental Police, some 50 soldiers. Much of this wave lapped around the south face of the camp and entered the lines of the hospital and commissariat.

Lieutenant Colonel William Meiklejohn, commandant of the 20th Punjabis: Waziristan campaign, 3rd November 1894 to March 1895, on the North-West Frontier of India

Lieutenant Colonel William Meiklejohn, commandant of the 20th Punjabis: Waziristan campaign, 3rd November 1894 to March 1895, on the North-West Frontier of India

On hearing the burst of firing, the other Indian regiments turned out and manned their sections of the perimeter.  It was quickly apparent that the attack was on the 1st Gurkhas and that many tribesmen were on the loose within the camp.

Lieutenant Colonel Meiklejohn, the commandant of the 20th Punjab Infantry and Lieutenant Thompson with 2 companies of the 20th and a company of the 3rd Sikhs under Lieutenant Finnis moved through the camp to reinforce the Gurkhas, bayoneting any tribesmen they encountered.

It would seem that the tribesmen intended a further attack at the north-east corner of the camp, where a group gathered, firing into the perimeter.  The mountain guns came into action and fired star shells, lighting up the area.  This illumination, with the arrival of dawn, brought the attack to an end and the tribesmen made off to the north-west.  The assault on the camp appears to have been over by 6am.

1st Punjab Cavalry: Waziristan campaign, 3rd November 1894 to March 1895, on the North-West Frontier of India

1st Punjab Cavalry: Waziristan campaign, 3rd November 1894 to March 1895, on the North-West Frontier of India

With full daylight, the general ordered out the squadron of 1st Punjab Cavalry.  Led by Major O’Mealy, 61 troopers of the squadron headed north towards the Inzar Kotal, in pursuit of the tribesmen.

Immediately after the cavalry, Colonel Meiklejohn marched out, at speed, with infantry from 3rd Sikhs and 20th Punjab Infantry.  The pursuit followed the tribesmen to the Inzari Pass, leading into Mahsud country.  The cavalry were able to catch and kill some 50 tribesmen, over a distance of around eleven miles.  The pursuit was abandoned once it was clear that the Mahsud lashkar had dispersed, leaving no worthwhile force to pursue.

British and Indian losses in the attack on Wana Camp were 2 British officers killed, 2 Indian officers and 19 men killed and 5 British officers and 38 soldiers wounded.  These casualties were mainly in 1st/1st Gurkhas.  Lieutenant Thompson, 26th Punjab Infantry, attached to the 20th Punjab Infantry was wounded.  43 followers were killed or wounded.  The attackers made off with a large number of rifles and a substantial sum in cash.  More than 100 baggage animals were killed or injured.

The estimate of the numbers of Mahsud attackers was around 2,000, although only half actually pressed the assault on the camp, while the rest provided covering fire or were part of the attack on the north-east of the camp, which was abandoned.  The tribesmen’s casualties were estimated at around 100 killed in the attack, with a further 50 killed by the cavalry in the pursuit.

The campaign following the Wana Camp attack:
The Indian Government was presented with a considerable problem by the Wana incident.  It was apparent that the attack was planned and executed by the Mullah Powendah, over whom the mainstream Mahsud tribal leaders had no control.  On the other hand, the attack was a spectacular success for the tribesmen and left a significant dent in British prestige.  Some form of retribution against the Mahsuds was considered essential.

The Mahsud maliks were offered terms, which involved the supply of hostages, the expulsion of the Mullah Powindah from Waziristan until the boundary marking was complete and the return of the loot taken in the attack on 3rd November 1894.  The period for compliance was given and extended to 12th December 1894.

In the meantime, a Waziristan Field Force was formed, to conduct punitive incursions against the Mahsuds, in case the terms were not complied with.

The Waziristan Field Force, under the command of Lieutenant-General Sir William Lockhart, comprised:

First Brigade; the Delimitation Escort under this new denomination, with the addition of 2nd Border Regiment;

Second Brigade at Tank, commanded by Brigadier-General W. Penn Symons comprising 1 squadron each of 1st and 2nd Punjab Cavalry, 33rd Punjab Infantry, 38th Dogras, 4th Punjab Infantry, 1st/5th Gurkhas, No. 8(B) Mountain Battery, No. 5 Company Bengal Sappers and Miners and 1 Maxim Gun;

Third Brigade at Mirian, commanded by Colonel C. C. Egerton, comprising 3rd Punjab Cavalry, 1st Sikh Infantry, 2nd Punjab Infantry, 6th Punjab Infantry and No. 1 Kohat Mountain Battery.

By 11th December 1894, it was apparent that the Mahsud maliks could not comply with the terms offered, mainly because they had no hold over the Mullah Powindah and could not recover the captured rifles and money.

On 16th December 1894, General Lockhart, after taking over command of the area, received orders for his three brigades to advance into Mahsud country.

The First Brigade was joined by 1st/4th Gurkhas, left a fortified post at Wana in a village rented from the locals and marched to Kaniguram, conducting reconnaissance and survey work, as was the practice on such marches.

General Lockhart accompanied the Second Brigade to the Mahsud town of Makin, on the way destroying the village of the Mullah Powindah, Marobi.  There was random shooting, but no significant resistance.

The Third Brigade marched from Bannu to Razmak.  All three brigades combined at Makin, on 22nd December 1894, where plans were put in place to attack the Mullah Powindah in the area of Pir Ghal, with 6 columns.

This operation was carried out on Christmas Day, 25th December 1894, with little opposition and a trawl of cattle seized and villages burnt.  Thereafter, the three brigades made their way back to Jandola by various routes, burning villages considered to belong to hostile Mahsud elements.  Reports were received that the Mullah Powindah was across the border in Afghanistan, unsuccessfully attempting to persuade the Kabul Khel to attack the British forces.

1st Punjab Cavalry: Waziristan campaign, 3rd November 1894 to March 1895, on the North-West Frontier of India

1st Punjab Cavalry: Waziristan campaign, 3rd November 1894 to March 1895, on the North-West Frontier of India

On 19th January 1895, General Lockhart issued a final demand for surrender on terms to the Mahsuds and directed the jirgas to assemble at Kundiwam.

The three brigades again marched through Mahsud country, the First Brigade returning to Wana, the Second Brigade, with the general, marching to Kaniguram and the Third Brigade returning to Mirian.  Each force conducted reconnaissance, survey work and established telegraph lines and some armed posts, all regular practices in British incursions into independent tribal country in the 1890s and marking the new ‘Forward Policy’ of the Indian Government.

The jirgas arrived as directed and a settlement was negotiated.  The Border Commission resumed the work interrupted by the attack on the Wana Camp, with the assistance of tribal representatives.  A permanent post was established at Wana.  General Sir William Lockhart carried out a reconnaissance in the Tochi Valley, which he assessed as being of greater significance than the Wana area.  The operation was deemed complete by the end of March 1895 and the Waziristan Field Force dispersed, leaving a significant British presence in the area.

Incidents of violence against British officials, officers and Indian troops continued until the outbreak of the general tribal war in 1897.

Indian Order of Merit: Waziristan campaign 3rd November 1894 to March 1895 on the North-West Frontier of India

Indian Order of Merit: Waziristan campaign 3rd November 1894 to March 1895 on the North-West Frontier of India

Casualties in the 1894 Waziristan Campaign:
The casualties in the attack on Wana Camp are given in the text above.  The casualties in the remaining operations were not significant.

Battle Honour and decorations for the 1894 Waziristan Campaign:
There was no battle honour for this campaign.

All ranks received the Indian General Service Medal, with the clasp ‘Waziristan 1894-5’.  As was the practice, the civilians in the Force received the same medal and clasp, in bronze rather than silver.

Lieutenant Colonel Meiklejohn was appointed Commander of the Bath.

Eight soldiers of 1st/1st Gurkha Rifles were awarded the Indian Order of Merit Third Class for the action at Wana.

Follow-up to the 1894 Waziristan Campaign:
The surprise attack on the camp at Wana was a substantial embarrassment to the Indian Army.
It is far from clear to what extent the Wana Camp was fortified in time for the assault on 3rd November 1894.  The Historical Records of the 20th Punjab Infantry describe the regiment’s soldiers as manning the ‘breastwork’.  The Government of India record refers to a ‘breastwork’.  Nevill’s commentary on the battle makes it clear that there was inadequate compliance with the Field Service Regulations, in terms of fortifying the camp.  Nevill also criticizes the positioning of the camp near to the nullahs.  There appears to have been a concern on the part of contemporary recorders of events to limit criticism of the authorities.

Indian General Service Medal 1854 with the clasp 'Waziristan 1894-5': Waziristan campaign 3rd November 1894 to March 1895 on the North-West Frontier of India

Indian General Service Medal 1854 with the clasp ‘Waziristan 1894-5’: Waziristan campaign 3rd November 1894 to March 1895 on the North-West Frontier of India

It would seem that the following criticisms are appropriate:

  • The military camp was situated near to the Boundary Commission camp, which was itself located for convenience rather than the need for defence.
  • The situation of the military camp was inappropriate, due to the presence nearby of several dry nullahs or ravines, which enabled the hostile force to approach close to the camp in cover and unseen. On the other hand, the Wana Plain appears to have been covered in dry nullahs and it was probably not possible to locate the camp away from them all, in which case, strong piquets should have been posted, specifically to supervise each nullah that was dangerously close.
  • The area of the camp was too large.  The perimeter could not be fortified adequately by the number of troops and there were insufficient troops to man the perimeter effectively in the event of an attack.  The distances from many of the tents to the perimeter were too great to enable the occupants to reach their alarm posts quickly.
  • The camp did not have adequate fortification, which would have required a stone ‘sangar’ wall and, ideally, an external ditch erected around the perimeter of the camp.  This clearly was not done, although there may have been a ‘breastwork’ in parts of the perimeter, particularly at the north-east corner.
  • A sensible precaution would have been to post piquets at the head of each of the nullahs.  There were some 12 piquets around the camp, although none appeared to be located to watch the nullahs effectively.
  • While there are references to precautions being increased in the period 1st to 2nd November 1894 in various accounts, the precautions are either not specified, contradictory, or to no apparent purpose. William Robertson in his memoirs, ‘From Private to Field-Marshal’, records the troops as being caught asleep in their tents.  Robertson was, at the time of the attack, on the staff of the intelligence unit responsible for the North-West Frontier and will have read or heard many of the accounts of what happened in the attack, including official reports.  Robertson’s memoirs were published in 1921, when he was a field-marshal and in retirement.  Robertson will have felt little need to conceal the true events, in what was by then an incident of little significance.
  • All the sources agree that the surprise attack was repelled due to the steadiness of the Indian Army regiments in the camp: 1st Gurkhas, 20th Punjab Infantry, 1st Punjab Cavalry, No. 3 Punjab Mountain Battery, No. 2 Company, Sappers and Miners and 3rd Sikh Infantry.

1st Punjab Cavalry: Waziristan campaign, 3rd November 1894 to March 1895, on the North-West Frontier of India

1st Punjab Cavalry: Waziristan campaign, 3rd November 1894 to March 1895, on the North-West Frontier of India

Anecdotes and traditions from the 1894 Waziristan Campaign:

  • The Mullah Powindah continued to preach ‘jihad’ against the British in Waziristan throughout the 1890s, operating in the Tochi Valley.  He appears to have died in 1913.
  • The 1st Gurkhas became the 1st King George V’s Own Gurkha Rifles (the Malaun Regiment) in 1910.  With independence in 1947, the Regiment was allocated to India and became the 1st Goorkha Rifles (the Malaun Regiment).
  • The 20th Punjab Infantry was a Bengal Army Regiment.  In 1903, it became the 20th (Duke of Cambridge’s Own Infantry) (Brownlow’s Punjabis) in the combined Indian Army list.  In 1922 the Regiment became 2nd Battalion (Duke of Cambridge’s Own) (Brownlow’s) 14th Punjab Regiment.  In 1947 the Regiment became part of the Pakistan Army as 6th Battalion, the Punjab Regiment.  The Regiment fought in many of the campaigns on the North-West Frontier of India and was highly experienced.
  • Lieutenant Colonel Meiklejohn, the commandant of the 20th Punjab Infantry at Wana, ended his military career as Major-General Sir William Meiklejohn.  As a brigadier-general, Meiklejohn was in command at Malakand, when the garrison was attacked by tribesmen in 1897.
  • The 3rd Sikh Infantry was a Punjab Frontier Force regiment (‘Piffer’) made up of Sikhs, Dogras, Pathans and Punjabi Muslims.  In 1903 the Regiment became 53rd Sikhs (Frontier Force) in the combined Indian Army list.  In 1922 the Regiment became 3rd Battalion (Sikhs) 12th Frontier Force Regiment.  In 1947 the Regiment was allocated to the Pakistan Army, becoming 5th Battalion Frontier Force Regiment and losing its association with the Sikhs.
  • The 1st (Prince Albert Victor’s Own) Punjab Cavalry was a Punjab Frontier Force regiment (‘Piffer’).  In 1903 the Regiment became 21st Prince Albert Victor’s Own Cavalry, Frontier Force and in 1922, on amalgamation, 11th Prince Albert Victor’s Own Cavalry (Frontier Force).  In 1947 the Regiment was allocated to the Pakistan Army becoming 11th Cavalry (Frontier Force).  Prince Albert Victor was the son of the Prince of Wales and a grandson of Queen Victoria. He died of influenza on 14th January 1892.  The Prince made a state visit to India from 1889 to 1890, when he accepted the honorary colonelcy of 1st Punjab Cavalry.

Memorial in St. Cuthbert's Church, Aldingham, Cumbria, to Lieutenant Percy Macaulay, Royal Engineers, killed at Wana Camp, 3rd November 1894, Waziristan, on the North-West Frontier of India

Memorial in St. Cuthbert’s Church, Aldingham, Cumbria, to Lieutenant Percy Macaulay, Royal Engineers, killed at Wana Camp, 3rd November 1894, Waziristan, on the North-West Frontier of India

References for the 1894 Waziristan Campaign:
The authority for campaigns on the North-West Frontier of India and other campaigns involving the Indian Army in the 19th Century is the Indian Government publication ‘Frontier and Overseas Expeditions from India’.  Six volumes were published around 1905 and distributed internally, primarily to Indian Army Officers and Officials.  Volume II covers the Wana/Waziristan Campaign 1894, being the volume on operations south of the Kabul River.

North West Frontier by Captain H.L. Nevill DSO, RFA

Historical Records of the 20th (Duke of Cambridge’s Own) Infantry, Brownlow’s Punjabis.

The previous battle in the North-West Frontier of India sequence is the Black Mountain Expedition 1891

The next battle in the North-West Frontier of India sequence is the Siege and Relief of Chitral

To the North-West Frontier of India index


Black Mountain Expedition 1888

The Black Mountain Expedition of October to November 1888, also known as the ‘Hazara Field Force 1888’; one of the first major campaigns on the North-West Frontier of India in the last two decades of the 19th Century

Hazara Valley and the Indus River with the Black Mountain in the distance: Black Mountain Expedition from 1st October 1888 to 13th November 1888 on the North-West Frontier of India

Hazara Valley and the Indus River with the Black Mountain in the distance: Black Mountain Expedition from 1st October 1888 to 13th November 1888 on the North-West Frontier of India

The previous battle in the British Battles sequence is the Siege of Ladysmith

The next battle in the North-West Frontier of India sequence is the Black Mountain Expedition 1891

To the North-West Frontier of India index


War: Operations on the North-West Frontier of India.

Date of the Black Mountain Expedition 1888: 1st October 1888 to 13th November 1888.

Place of the Black Mountain Expedition 1888:  The area of the Black Mountain on the east or left bank of the Indus River to the north of the Kabul River/ Vale of Peshawar.

Combatants in the Black Mountain Expedition 1888:
British and Indian Army troops with local levies against the Pathan tribes of Hassanzais and Akazais.

Tribesmen: Black Mountain Expedition from 1st October 1888 to 13th November 1888 on the North-West Frontier of India

Tribesmen: Black Mountain Expedition from 1st October 1888 to 13th November 1888 on the North-West Frontier of India

The Pathans:

In 1888, the north-western border of British India was the boundary of the old Sikh state of the Punjab.  This followed the Indus River to a point short of the Black Mountain.

The tribes involved in this campaign lived in the area of the Black Mountain on the east or left bank of the northern section of the Indus River beyond the border.

The Pathan tribes of Hassanzais and the Akazais (both sub-clans of the Yusufzai, being descended from sons of Yusuf, said to be the ancestor of the tribal group).  The Hassanzais lived on both sides of the Indus River and comprised ten sub clans with a fighting strength of around 2,000 men.

The Akazais occupied the section of the Black Mountain to the north of the Hassanzais.  The Akazais had four sub-clans and could put around 1,500 fighting men into the field.

Tribesman with Enfield Rifled Musket: Black Mountain Expedition from 1st October 1888 to 13th November 1888 on the North-West Frontier of India

Tribesman with Enfield Rifled Musket: Black Mountain Expedition from 1st October 1888 to 13th November 1888 on the North-West Frontier of India

The Pariari Sayids, Tikaris, Nandihars and Allais:  These tribes lived further to the north-east.  Their country was bounded by the Indus River where it bent to the east.  They were Swati rather than Pathan and had been displaced eastwards by the incursion of Pathans from Afghanistan.  The British officials of the time considered these tribes to have many of the characteristics of the Pathans, but without their bravery.  They seem to have fought in much the same way as the Pathans, but with less determination.  Their villages in the main were unfortified.

A group described as Hindustanis based on the west bank of the Indus opposite Kanar:  The Hindustanis were Muslim descendants of refugees from Central India, displaced by the Indian Mutiny of 1857, virulently anti-British and described by officials as fanatics.  The Hazara expedition was not directed against the Hindustanis, but they took part in resisting the advance of the British Fourth Column up the Indus River.

The main weapons of the tribesmen were long jezails or muskets, swords, shields and knives.  A force of tribal fighting men would receive directions from maliks or headmen or religious leaders, but no Pathan felt compelled to do what he was told.  Movement around the battlefield was guided by common enterprise and fighting experience, rather than command.

Brigadier General J.W. McQueen, Force Commander in the Black Mountain Expedition from 1st October 1888 to 13th November 1888 on the North-West Frontier of India

Brigadier General J.W. McQueen, Force Commander in the Black Mountain Expedition from 1st October 1888 to 13th November 1888 on the North-West Frontier of India

Pathans were agile, swift and experienced mountain fighters.  The Pathan code readily gave rise to blood feuds between individuals, villages or tribes.  In the face of an external enemy, the Pathans would put their feuds to one side while the invader was resisted.  Many of the tribes raided across the border into British territory.  There were close links between the inhabitants of the Agror Valley, who lived under British rule and their kin living across the border, which increased the tribal resentment at the existence of the border, an alien and incomprehensible concept.

The pattern of North-West Frontier incursions by the British led to the improvement of communications, through the building of tracks or roads and bridges and to the establishing of garrisons in key places.

Commanders in the Black Mountain Expedition 1888:  Brigadier-General J.W. McQueen CB, ADC, acting Major-General, commanded the Hazara Field Force.  There does not appear to have been any central tribal leadership.

Size of the armies in the Black Mountain Expedition 1888:  9,416 British and Indian troops against probably around 10,000 tribesmen.

Uniforms, arms and equipment in the Black Mountain Expedition 1888:
The British military forces in India fell into these categories:

  • Regiments of the British Army in garrison in India.  Following the Indian Mutiny of 1857, India became a Crown Colony.  The ratio of British to Indian troops was increased from 1:10 to 1:3 by stationing more British regiments in India.  Brigade formations were a mixture of British and Indian regiments.  The artillery was put under the control of the Royal Artillery, other than some Indian Army mountain gun batteries.

    Soldiers of the 1st Suffolk Regiment: Black Mountain Expedition from 1st October 1888 to 13th November 1888 on the North-West Frontier of India

    Soldiers of the 1st Suffolk Regiment: Black Mountain Expedition from 1st October 1888 to 13th November 1888 on the North-West Frontier of India

  • The Indian Army comprised the three armies of the Presidencies of Bombay, Madras and Bengal.  The Bengal Army, the largest, supplied many of the units for service on the North-West Frontier.  The senior regimental officers were British.  Soldiers were recruited from across the Indian sub-continent, with regiments recruiting nationalities, such as Sikhs, Punjabi Muslims, Pathans and Gurkhas.  The Indian Mutiny caused the British authorities to view the populations of the East and South of India as unreliable for military service.
  • The Punjab Frontier Force:  Known as ‘Piffers’, these were regiments formed specifically for service on the North-West Frontier and were controlled by the Punjab State Government.
  • Imperial Service Troops of the various Indian states, nominally independent but under the protection and de facto control of the Government of India.  The most important of these states for operations on the North-West Frontier was Kashmir.

    Punjab Frontier Force regiment: Black Mountain Expedition from 1st October 1888 to 13th November 1888 on the North-West Frontier of India

    Punjab Frontier Force regiment: Black Mountain Expedition from 1st October 1888 to 13th November 1888 on the North-West Frontier of India

A British infantry battalion comprised ten companies, with around 700 men and some 30 officers.  A battalion had a maxim machine gun detachment of two guns and some 20 men.

Indian infantry battalions had much the same establishment, but without the maxim gun detachment.  Senior officers were British, holding the Queen’s Commissions.  Junior officers were Indian.

In this Black Mountain expedition, the regiments were directed to mobilise with 600 all ranks.

Officers of the 2nd Northumberland Fusiliers: Black Mountain Expedition from 1st October 1888 to 13th November 1888 on the North-West Frontier of India

Officers of the 2nd Northumberland Fusiliers: Black Mountain Expedition from 1st October 1888 to 13th November 1888 on the North-West Frontier of India

British regiments were issued with the single shot, drop-action Martini-Henry breech loading rifle.  This rifle was issued to the Indian regiments in 1888, so that a number of the regiments in the Hazara Field Force had the Martini-Henry.  The remaining Indian regiments were still using the Snyder rifle, a clumsy adaptation to a breech loader of the muzzle loading Enfield rifle.  Both rifles took a bayonet.

The Indian Mountain Batteries used the 7 pounder RML (rifled muzzle loader) gun that was dismantled and carried on mules.  The Royal Artillery mountain batteries used the more modern 2.5-inch RML muzzle loading rifled gun.

Officers and soldiers of 2nd Seaforth Highlanders: Black Mountain Expedition from 1st October 1888 to 13th November 1888 on the North-West Frontier of India

Officers and soldiers of 2nd Seaforth Highlanders: Black Mountain Expedition from 1st October 1888 to 13th November 1888 on the North-West Frontier of India

Winner of the Black Mountain Expedition 1888:  The British and Indian troops of the Hazara Field Force.

Background to the Black Mountain Expedition 1888:
The conquest of the Punjab by the British, following the Sikh Wars from 1845 to 1849, extended the frontiers of British India to the western boundary of the old Sikh State, along the Indus River.  The Indus rises in the Hindu Kush and runs through Kashmir, fed by several important tributaries, until it flows down the western side of the central Indian landmass, achieving considerable size, in places a mile wide.

The border of British India, at its northern end, followed the Indus into the lower mountain areas and turned north-east away from the river towards Kashmir.

On the northern side of the border, beyond British authority on the east bank of the Indus River, lay the Black Mountain, home to the Hassanzai and Akazai tribes of Pathans.  To the east of these Pathan tribes lived the Swati tribes of Pariari Sayids, Allais and, directly along the border, the Tikaris and Nandihars.

A British garrison was maintained at Oghi Fort, some ten miles east of the Upper Indus and some five miles south of the border line.

15th Lancers Cureton's Multanis: Black Mountain Expedition from 1st October 1888 to 13th November 1888 on the North-West Frontier of India

15th Lancers Cureton’s Multanis: Black Mountain Expedition from 1st October 1888 to 13th November 1888 on the North-West Frontier of India

Persistent and troublesome cross border fighting and raiding followed the establishment of the British border.  The final incident, which caused the Indian Government to act, took place on 18th June 1888, when a patrol of 60 soldiers from 5th Gurkhas and 19 police, commanded by Major Battye of the 5th Gurkhas and Captain Urmston of the Punjab Infantry, left Oghi Fort and patrolled up to the border at Chitabat.  The patrol was fired on by tribesmen from across the border and began a withdrawal to Oghi Fort.  Extracting troops from action with tribesmen on the North-West Frontier was always tricky, as it was the tactic of the tribesmen to press a retreating force very closely.  During this withdrawal both British officers were killed and their bodies stripped.

The Government of India ordered a punitive expedition against the tribes considered to be responsible for the murders of the two officers; the Hassanzais, Akazais, Pariari Sayids, Tikaris, Nandihars and Allais.

The force mobilised to attack the Black Mountain tribes was denominated ‘The Hazara Field Force’ and put under the command of Brigadier-General McQueen, with the acting rank of Major-General.  The force comprised 10,000 troops in thirteen infantry battalions with three batteries of mountain guns and a company of Sappers and Miners (Engineers).  The force was formed into four columns and a headquarters.  Three columns and the HQ assembled at Oghi Fort in the Agror valley, with the Fourth column assembled at Darband on the Indus River, all by 1st October 1888.

Gurkhas with 7 pounder mountain gun teams: Black Mountain Expedition from 1st October 1888 to 13th November 1888 on the North-West Frontier of India

Gurkhas with 7 pounder mountain gun teams: Black Mountain Expedition from 1st October 1888 to 13th November 1888 on the North-West Frontier of India

The Maharajah of Kashmir volunteered his army for the force and two battalions of Kashmiri troops with two guns joined the expedition, as did some 600 members of the Khyber Rifles.

The instructions to the force commander were to coerce the tribes into a suitable form of submission, in consultation with the Chief Political Officer for the area, if the tribes had not submitted by 2nd October 1888.

Regiments in the Black Mountain Expedition 1888:

Royal Artillery

2nd Northumberland Fusiliers

1st Suffolk Regiment

2nd Royal Irish Regiment

Officers and NCOs of 2nd Royal Irish Regiment: Black Mountain Expedition from 1st October 1888 to 13th November 1888 on the North-West Frontier of India

Officers and NCOs of 2nd Royal Irish Regiment: Black Mountain Expedition from 1st October 1888 to 13th November 1888 on the North-West Frontier of India

2nd Royal Sussex Regiment

2nd Seaforth Highlanders

15th Bengal Lancers

34th Pioneers

40th Bengal Infantry

2nd Sikhs

Soldiers of the 2nd Sikhs: Black Mountain Expedition from 1st October 1888 to 13th November 1888 on the North-West Frontier of India

Soldiers of the 2nd Sikhs: Black Mountain Expedition from 1st October 1888 to 13th November 1888 on the North-West Frontier of India

3rd Sikhs

14th Sikhs

4th Punjab Infantry

29th Punjab Infantry

1st/5th Gurkhas

No 4 Hazara Mountain Battery

3rd Company, Sappers and Miners

Kashmir Contingent

Khyber Rifles

Khyber Rifles: Black Mountain Expedition from 1st October 1888 to 13th November 1888 on the North-West Frontier of India: picture by AC Lovett

Khyber Rifles: Black Mountain Expedition from 1st October 1888 to 13th November 1888 on the North-West Frontier of India: picture by AC Lovett

The makeup of the columns (First Brigade: First and Second Columns: Second Brigade: Third and Fourth Columns):
First Column: commanded by Colonel J.M. Sym 5th Gurkhas: 2nd Northumberland Fusiliers, 3rd Sikhs, 1st/5th Gurkhas, four guns of No 4 Hazara Mountain Battery, ½ 3rd Company, Sappers and Miners.

Second Column:  commanded by Colonel R.H. O’Grady Haly:  1st Suffolk Regiment, a wing (half a battalion) of 34th Pioneers, 40th Bengal Infantry, two guns of Mountain Battery, Royal Artillery and two Gatling guns.  This column was accompanied by the brigade commander, Brigadier-General Channer VC and headquarters First Brigade.

Third Column:  commanded by Lieutenant-Colonel M.S.J. Sunderland:  two guns, Royal Artillery, two guns of No 2 Derajat Mountain Battery, 2nd Royal Sussex Regiment, 14th Sikhs and ½ 3rd Company, Sappers and Miners.

Fourth Column:  commanded by Colonel Crookshanks CB:  2nd Royal Irish Regiment, 4th Punjab Infantry, 29th Punjab Infantry, one battery RA; all comprising 2,450 men.  This column was accompanied by Brigadier-General Galbraith and headquarters Second Brigade.

The Reserve Column, which was not brigaded, comprised 2nd Seaforth Highlanders, 15th Bengal Lancers, 2nd Sikhs and the Kashmir Contingent.

Kashmir Contingent: Black Mountain Expedition from 1st October 1888 to 13th November 1888 on the North-West Frontier of India

Kashmir Contingent: Black Mountain Expedition from 1st October 1888 to 13th November 1888 on the North-West Frontier of India

The force faced considerable difficulties.  The British were familiar with the lay of the land up to the border, but not beyond.   There were no reliable maps of the difficult mountainous country beyond the border and the tracks or paths were known to be insufficient for a substantial military force.  This was a recurring problem when operations were conducted on the North-West Frontier in areas unknown to the British.

Map of the Black Mountain Expedition from 1st October 1888 to 13th November 1888 on the North-West Frontier of India: map by John Fawkes

Map of the Black Mountain Expedition from 1st October 1888 to 13th November 1888 on the North-West Frontier of India: map by John Fawkes

Account of the Black Mountain Expedition 1888:
The tribes were given until 2nd October 1888 to submit to British requirements; fines for previous misconduct and the provision of hostages for future good behaviour.  None did submit and operations began.

The First, Second and Third Columns were to operate in the mountainous country from the area of Oghi Fort up to and beyond the border of India.  The Fourth Column was to march from Darband up the east bank of the Indus River to the village of Kotkai.

The border followed the line of the Indus River from Darband for seven miles to the north and then turned north-east, away from the river, following a high crest for some distance.

Officers of the Khyber Rifles: Black Mountain Expedition from 1st October 1888 to 13th November 1888 on the North-West Frontier of India

Officers of the Khyber Rifles: Black Mountain Expedition from 1st October 1888 to 13th November 1888 on the North-West Frontier of India

A track followed the east bank of the Indus River to the village of Bela, three-quarters of a mile beyond the point where the border turned north-east and then continued roughly along the river line to Kotkai and beyond.  The distance from Darband to Kotkai was about thirteen miles.  On 2nd October 1888, this track was improved to carry baggage animals, while the 4th Punjabis cleared a strong force of tribesmen from the ridge above Bela.


The action at Shingri:
On 4th October 1888, the Fourth Column moved up the improved road to Bela, arriving at 8am and on further up the riverbank to the village of Shingri, while the 4th Punjabis held the heights on the right of the column to protect it from attack.

Shingri was on a hill to the right of the track and was occupied by hostile tribesmen.  The Royal Irish deployed to the left and the 34th Pioneers occupied a knoll on the right of the village.  The column then advanced into Shingri, the tribesmen putting up little resistance and falling back.  There was, however, fighting in the hills to the east of the village, where the 34th Pioneers were compelled to storm the Pathan positions.  Subadar-Major Chattar Singh Bahadur of the 34th was fatally wounded while leading his company.

Kotkai occupied by 29th Punjab Infantry: Black Mountain Expedition from 1st October 1888 to 13th November 1888 on the North-West Frontier of India

Kotkai occupied by 29th Punjab Infantry: Black Mountain Expedition from 1st October 1888 to 13th November 1888 on the North-West Frontier of India

The actions at Towara and Kotkai:
At 10am on 4th October 1888, the Fourth Column continued its advance in column of route along the track.  A mile further on, the tribesmen were found to be in strength in positions around the village of Towara, occupying every point of vantage and protected by numerous stone sangars (improvised stone walls providing cover for musket and rifle fire: a standard North-West Frontier fieldwork).  The tribesmen’s positions extended up into the hills, enveloping the column on the track and were also on the other bank of the river.  The British and Indian troops could see several aged guns on the far side of the Indus.

The area comprised woods, jungle and stone walled areas of cultivation. Hills mounted up to the heights and mountains to the east.  Jungle led down to the Indus river bank to the west of the track.  As the column came in range, the tribesmen opened fire from the numerous positions they occupied.

Brigadier-General Galbraith directed the battle.  The first step was to clear away the tribesmen threatening the flanks of the column on the track.  The Royal Irish were to lead the advance astride the track, in the final approach to Kotkai.  The 34th Pioneers moved into the jungle between the track and the Indus River, driving out the tribesmen.  The 4th Punjab Infantry were given the difficult task of taking the hills on the right of the column, storming each hill top in turn and clearing the sangars.  Captain O.C. Radford of the 4th Punjab Infantry was severely wounded, but continued in action until ordered to seek medical assistance.

Royal Artillery Mountain Battery in action: Black Mountain Expedition from 1st October 1888 to 13th November 1888 on the North-West Frontier of India

Royal Artillery Mountain Battery in action: Black Mountain Expedition from 1st October 1888 to 13th November 1888 on the North-West Frontier of India

At 1pm, the guns came into action against a wooded hill, which seemed to be the centre of the Pathan positions.  After half an hour, the Royal Irish advanced and took the hill, Lieutenant W. Gloster capturing a Pathan standard.

As the Royal Irish advanced, they were subjected to a classic Pathan ploy; a surprise charge from a concealed position of around 100 ‘Ghazis’ or religious fanatics, armed with swords and shields.  The Ghazis had been hiding in a nullah or gully on the left front of the Royal Irish.  88 Ghazis were shot by the Royal Irish and the supporting Gatling Guns.  A small group of 10 to 15 Ghazis escaped into the jungle heading for the Indus River, but were hunted down by the 29th Punjab Infantry and the 34th Pioneers. Of the 88 Ghazi bodies, 48 were identified as Hindustanis (Indian Muslims who had escaped after the Indian Mutiny and taken refuge in the area).

As the Royal Irish advanced towards the hill, the 34th Sikh Pioneers were directed to move around the side of the hill, on the orders of the Brigadier-General, relayed to them by his DAQMG, Captain Beley DSO.  In giving the orders, Captain Beley rode in advance of the 34th into the immediate path of the Ghazi charge.  He was overwhelmed and suffered mortal injuries.

British Army Gatling Guns: Black Mountain Expedition from 1st October 1888 to 13th November 1888 on the North-West Frontier of India

British Army Gatling Guns: Black Mountain Expedition from 1st October 1888 to 13th November 1888 on the North-West Frontier of India

With the hill taken, the guns were able to move forward and lay down a barrage on the positions in front of Kotkai, while the Gatlings fired on the tribesmen resisting the advance of the 4th Punjabis in the hills on the right.  These tribesmen began to rush down the hillside into Kotkai and were followed by the fire of the Gatlings.  The only fire now coming from the tribesman in any concentration was from the positions on the far side of the Indus River, although this had little effect.

At around 3.30pm, the tribesmen abandoned Kotkai and hurried back towards the village of Kanar further up the river bank.   Kotkai was occupied by companies from the Royal Irish and 29th Punjab Infantry, with two guns and the brigade HQ.  The Fourth Column had completed the first part of its mission with 5 dead and 10 wounded.  The losses of the tribesmen were estimated at around 200.

British troops: Black Mountain Expedition from 1st October 1888 to 13th November 1888 on the North-West Frontier of India

British troops: Black Mountain Expedition from 1st October 1888 to 13th November 1888 on the North-West Frontier of India

Between 5th and 10th October 1888, the Fourth Column stayed in Kotkai while the track from Towara was improved to permit the passage of baggage animals. Reconnaissance parties were sent out into the surrounding country.  On 5th October 1888, the column commander, Colonel Crookshanks, advanced up the left bank of the Indus River towards Kanar with the 29th Punjab Infantry.  This advance was brought to a halt by the tribesmen’s fire from across the river, which fatally wounded the column commander.  Colonel Beddy of the 29th Punjab Infantry now assumed command.

Reconnaissances were conducted to villages on both sides of the Indus.  During the withdrawal from the village of Garhi, on the west bank of the river, a determined attack was made on the rear guard of the 4th Punjab Infantry, commanded by Captain Gray, which led to casualties on both sides.

The column advanced to Kanar on 11th and to Ghazikot on 12th October 1888.  The Fourth column was now able to communicate by heliograph with the other columns.

The Destruction of Maidan: Black Mountain Expedition from 1st October 1888 to 13th November 1888 on the North-West Frontier of India

Destruction of Maidan: Black Mountain Expedition from 1st October 1888 to 13th November 1888 on the North-West Frontier of India

The destruction of Maidan:
On 13th October 1888, Brigadier-General Galbraith crossed to the west bank of the Indus with 1,450 riflemen and three guns and burned the Hindustani village of Maidan.  The Hindustanis seem to have been cowed by the earlier fighting and no opposition was offered to the incursion.  On the same day, Brigadier-General Channer arrived at Kanar from the Second Column with an escort.

Several villages on both sides of the river, including Kotkai, were burnt before the Hassanzai capitulated and sent a jirga (deputation of tribal elders) to Oghi on 2nd November 1888, to negotiate peace.

NCOs of 2nd Northumberland Fusiliers: Black Mountain Expedition from 1st October 1888 to 13th November 1888 on the North-West Frontier of India

NCOs of 2nd Northumberland Fusiliers: Black Mountain Expedition from 1st October 1888 to 13th November 1888 on the North-West Frontier of India

Actions of the First, Second and Third Columns:
The First Column left Dilbori, the concentration point near Oghi Fort, at 6am on 4th October 1888 and marched to its first bivouac, a distance of around three miles over mountainous country with only the simplest of paths.  Tribesmen attacked the bivouac, wounding some camp followers and took 17 mules before being beaten off.  The next day, the column moved on to the border and occupied the Chitabat ridge.  All along the route, members of the column worked to improve the path to permit the passage baggage animals, under a continuous harassing fire from tribesmen in the surrounding woods and mountains.

Colonel J.M. Sym, commanding First Column, Hazara Field Force, with his staff: Black Mountain Expedition from 1st October 1888 to 13th November 1888 on the North-West Frontier of India

Colonel J.M. Sym, commanding First Column, Hazara Field Force, with his staff: Black Mountain Expedition from 1st October 1888 to 13th November 1888 on the North-West Frontier of India

On 6th October 1888, the First Column found the lack of water and forage for the animals on the Chitabat Ridge to be a difficulty.  The baggage mules were escorted back to Dilbori by the 5th Gurkhas and the Hazara Mountain Battery was sent back to Mana-ka-Dana.  Five companies of the Northumberland Fusiliers and the 3rd Sikhs advanced across the border to search out a water supply. A spring was found in the valley.

The 3rd Sikh companies were in position on the ridge when they came under attack.  The Sikhs advanced vigorously and the Northumberland Fusiliers took the tribesmen in flank, killing several.  The troops burned a neighbouring village and took the crops, before returning to the main body on the Chitabat Ridge.  The troops suffered no casualties while some 30 tribesmen were killed.  The bivouac was not attacked that night.  The column remained at Chitabat on 7th October 1888.

Burning a village: Black Mountain Expedition from 1st October 1888 to 13th November 1888 on the North-West Frontier of India

Burning a village: Black Mountain Expedition from 1st October 1888 to 13th November 1888 on the North-West Frontier of India

The Second Column, accompanied by Brigadier-General Channer, commander of the Second Brigade, left Kulakka on 4th October 1888 and marched along the Barchar spur, reaching the border near Bampur Gali on 5th October 1888.  Little opposition was encountered.

The Second Column moved south-west along the crest, which the border followed, to Nimal on 6th October 1888, taking over the bivouac occupied by the Third Column.  During the march, the Sappers improved the track to permit the passage of the column and its baggage, an arduous and time-consuming process.  The column remained in Nimal from 7th October 1888 until the end of the first phase of the campaign on 11th October 1888.

General McQueen and his staff: Black Mountain Expedition from 1st October 1888 to 13th November 1888 on the North-West Frontier of India

General McQueen and his staff: Black Mountain Expedition from 1st October 1888 to 13th November 1888 on the North-West Frontier of India

The Third Column, accompanied by the Force Commander, Major-General McQueen, and his headquarters staff, moved to the border at Nimal on 4th October 1888.

On 6th October 1888, the Third Column marched west from Nimal, along the top of the ridge, before turning sharp right, crossing the border and moving down into the valley in the direction of Seri.  The 14th Sikhs led the advance with the Sappers and Miners making up the road.  The path lay through thick woods and the troops were sniped at by tribesmen throughout the march.  The column lost 1 dead and 8 wounded.  At midday, the Third Column was forced to halt and bivouac at the village of Kaima, as the baggage could get no further until the road had been made up.

The columns carried maps of the country beyond the border, compiled from verbal reports.  It was found that these maps were wholly inaccurate.  In addition, the terrain was mountainous and wooded and much more difficult than had been expected.  Smoke could be seen rising from the distant village of Seri and its surrounding villages.  It appeared that the Khan Khels, a sub-tribe of the Hassanzais whose villages they were, had fired the buildings in an attempt to avoid having them destroyed by the invading force.

Burning villages: Black Mountain Expedition from 1st October 1888 to 13th November 1888 on the North-West Frontier of India

Burning villages: Black Mountain Expedition from 1st October 1888 to 13th November 1888 on the North-West Frontier of India

In view of the lack of water and the difficulty of making progress through the close wooded country, the Third Column returned to the border crest.  As was always the way on the North-West Frontier, the withdrawal of the troops attracted close pursuit by the tribesmen and the rear guard was hard pressed, losing 3 men killed and 1 wounded.  The Third Column bivouacked near Akund Baba, while the force commander, with his headquarters staff, bivouacked at a site partway between the Second and Third Columns.

From 11th October 1888, the First, Second and Third Columns remained in their positions on the border crest, while the Fourth Column continued operations along the Indus River bank.  Numerous parties were sent into Hassanzai and Akazai country, to destroy villages and crops.  On 19th October 1888, the tribes under attack accepted the terms offered unconditionally and operations against the Hassanzai and Akazai ceased.

2nd Northumberland Fusiliers in camp: Black Mountain Expedition from 1st October 1888 to 13th November 1888 on the North-West Frontier of India

2nd Northumberland Fusiliers in camp: Black Mountain Expedition from 1st October 1888 to 13th November 1888 on the North-West Frontier of India

Operations against the Pariari Sayids and the Tikariwals began on 21st October 1888.  These Swati tribes (not Pathans) lived in the mountainous country to the north of the Akazais.

A Fifth Column was formed from the Reserve Brigade, commanded by Colonel A. Murray of the Seaforth Highlanders and comprising a wing of 2nd Seaforth Highlanders (the old 78th), the 40th Bengal Infantry, the force from the Khyber Rifles, two guns from the Royal Artillery and two Gatling Guns.  Brigadier-General Channer accompanied the Fifth Column.

The Fifth Column moved to Dilbori and, on 21st October 1888, to Trand on the border.  The Fifth Column crossed the border and camped some three miles on the route north towards Thakot, which lies on the Indus and was the immediate target for this phase of the operations against the Pariari Sayids.

2nd Seaforth Highlanders on the march: Black Mountain Expedition from 1st October 1888 to 13th November 1888 on the North-West Frontier of India

2nd Seaforth Highlanders on the march: Black Mountain Expedition from 1st October 1888 to 13th November 1888 on the North-West Frontier of India

The Fifth Column sent parties forward to the village of Chirmang and found it abandoned.  That evening the local headmen capitulated and paid the fine imposed on them.

On 22nd October 1888, Major-General McQueen reconnoitred the area, while planning his operations in the Pariari Sayid country.  A Pariari Sayid jirga came into the camp to seek terms, but was considered to be lacking the necessary tribal headmen and was rejected.

On 23rd October 1888, the Maliks of Thakot were invited to send a jirga to the force headquarters to discuss terms.

General McQueen and his staff at breakfast: Black Mountain Expedition from 1st October 1888 to 13th November 1888 on the North-West Frontier of India

General McQueen and his staff at breakfast: Black Mountain Expedition from 1st October 1888 to 13th November 1888 on the North-West Frontier of India

On 24th October 1888, the Fifth Column moved against the village of Garhi, while a wing of the 3rd Sikhs from the First Column moved against the village of Kopra, covered by two RA guns in position at Bilandkot.  Both these villages were destroyed.  A force from Chitabat of 200 men and 2 guns covered the western flank of this operation.

Between 25th and 27th October 1888, the First and Fifth Columns advanced on Thakot, Major-General McQueen accompanying the First Column.  Part of the road was up an extremely steep mountainside and the Sappers were employed in track improvements throughout the march.

On 27th October 1888, the Chief Political Officer received a letter from the Thakotis asking for twenty days to assemble their jirga.  This was seen as a ploy to delay the incursion into their country until the snows arrived and made further progress impossible.

2nd Seaforth Highlanders: Black Mountain Expedition from 1st October 1888 to 13th November 1888 on the North-West Frontier of India

2nd Seaforth Highlanders: Black Mountain Expedition from 1st October 1888 to 13th November 1888 on the North-West Frontier of India

On 28th October 1888, a force left camp for the march to Thakot, with as little baggage as possible.  This force was commanded by Brigadier-General Channer and comprised troops from the 2nd Seaforth Highlanders, the 3rd Sikhs, the 34th Pioneers, the Khyber Rifles, two RA guns and two Gatling Guns.  The soldiers carried their weapons and ammunition, a blanket and one day’s rations.  Much of the route was down a steep mountainside.

Seaforth Highlanders Pipe Major: Black Mountain Expedition from 1st October 1888 to 13th November 1888 on the North-West Frontier of India

Seaforth Highlanders Pipe Major: Black Mountain Expedition from 1st October 1888 to 13th November 1888 on the North-West Frontier of India

The action at Thakot:
On reaching Thakot, the brigadier marched his force through the village, the pipers of the Seaforth Highlanders playing the pipe tune ‘Oh but ye’ve been a lang time acoming’.  It was understood that the inhabitants of the area considered themselves invulnerable, because the British force had not penetrated this part of the country during the operations in 1868.

During the afternoon of 27th October 1888, the force came under fire from the village of Daut, across the Indus River and from the heights above Thakot.  The Gatlings were used to suppress the fire from the heights, which were then scaled by the Khyber Rifles and the 34th Pioneers.  The next day, before leaving the area of Thakot, the guns shelled the village of Daut which was set on fire.  Thakot was not damaged as the inhabitants had not resisted.  The force then withdrew to Serai and on 30th October 1888 to Maidan.

The final hostile area was that of the Allai tribe further to the north-east.  The malik, Arsala Khan, failed to comply with the period for submission, which expired on 30th October 1888.

On 31st October 1888, detachments from the First and Fifth Columns, commanded by Brigadier Channer, moved towards the Gorapher Pass (First Column; the 2nd Northumberland Fusiliers, the 34th Pioneers and the 5th Gurkhas, with 50 marksmen from the 1st Suffolks, the 2nd Royal Sussex and the 24th Punjab Infantry, the Hazara Mountain Battery and a half Company of Sappers: Second Column; wing of the 2nd Seaforths, the 3rd Sikh Infantry, the Khyber Rifles and four RA guns).  The force bivouacked at Mazrai.

Sharpshooters from 2nd Northumberland Fusiliers: Black Mountain Expedition from 1st October 1888 to 13th November 1888 on the North-West Frontier of India

Sharpshooters from 2nd Northumberland Fusiliers: Black Mountain Expedition from 1st October 1888 to 13th November 1888 on the North-West Frontier of India

The action on Chaila Mountain:
On 1st November 1888, the First Column Detachment led the march, supported by the Fifth Column Detachment.  The route was along a rising spur for three and a half miles, at the end of which was a precipitous climb to the top of Chaila Mountain.  The tribesmen were present on the summit and in the woods at the base of the mountain.  The Northumberland Fusiliers and the Khyber Rifles began the climb under fire, which was at times heavy.  The guns put down a supporting barrage. The tribesmen beat drums, played pipes and screamed abuse.  The crest was taken at around noon and the tribesmen were found to have melted away.  Brigadier-General Channer marched on some two and a half miles to the village of Kage Oba, with the First Column Detachment.  The detachment spent the night at this village at 9,000 feet, in a hard frost without food or blankets.  The baggage and the guns were at the bottom of the Chaila climb, with the Seaforths and 3rd Sikhs holding the crest.  The route to the bottom of the climb was so difficult as to be impassable for the mules without considerable work by the Sappers.

2nd Northumberland Fusiliers and Khyber Rifles storming the Chaila Crag: Black Mountain Expedition from 1st October 1888 to 13th November 1888 on the North-West Frontier of India

2nd Northumberland Fusiliers and Khyber Rifles storming the Chaila Crag: Black Mountain Expedition from 1st October 1888 to 13th November 1888 on the North-West Frontier of India

A letter was received on the 2nd November 1888 from Arsala Khan, asking the British to wait for a while.  During this day, the baggage was moved up the Chaila climb.  This took all day and fourteen mules were lost in falls down the precipitous mountainside.

Brigadier General George Channer VC: Black Mountain Expedition from 1st October 1888 to 13th November 1888 on the North-West Frontier of India

Brigadier General George Channer VC: Black Mountain Expedition from 1st October 1888 to 13th November 1888 on the North-West Frontier of India

Brigadier-General Channer spent the day reconnoitring in the direction of Pokal, Arsal Khan’s chief village.  A report was received that Arsal Khan had crossed the Indus River, leaving his son Ghazi Khan in command.  Snow began falling during the day, impressing the need to complete the operation before the mountains became impassable for the troops.

The action at Pokal:
On 3rd November 1888, a force comprising companies from the Northumberland Fusiliers, the Seaforth Highlanders, the 5th Gurkhas and the Khyber Rifles and the marksmen from the Suffolk and Sussex Regiments and the 24th Punjab Infantry with two guns, moved forward to destroy Pokal.  The path was a gentle downward gradient to a point two miles from Pokal, where the descent became steep and open.  The tribesmen offered some resistance, but fell back through the village.  The marksmen from the Suffolk and Sussex regiments inflicted significant casualties, with volley fire on the retreating tribesmen.

The village of Pokal, other than the mosque, was burnt and the force began to retire, the Seaforth Highlanders and the Khyber Rifles providing the rear guard.  As in every campaign on the North-West Frontier, this was the point at which the tribesmen saw their opportunity for revenge and some 300 tribesmen followed the troops closely to within a mile of the camp, being held back by the volleys of the rear guard.  One company of Northumberland Fusiliers occupied a knoll and, waiting for the tribesmen to collect in a group, directed a volley at them.  This effectively ended the pursuit.

Officer and soldiers of 2nd Northumberland Fusiliers: Black Mountain Expedition from 1st October 1888 to 13th November 1888 on the North-West Frontier of India

Officer and soldiers of 2nd Northumberland Fusiliers: Black Mountain Expedition from 1st October 1888 to 13th November 1888 on the North-West Frontier of India

In the evening of 3rd November 1888, an Allai jirga came into the camp.  Arsala Khan was not represented, but the Chief Political Officer was satisfied that this constituted sufficient compliance and the next day the force withdrew from Allai country to Mazrai.  In reality, it was now too late in the year to take more effective action against the Allai.

On 5th November 1888, the force fell back to Maidan.  The Allai jirga was dismissed as insufficient, as Arsala Khan was not represented.

While the First and Fifth Columns operated against the Allai, the Second Column moved to Chirmang, to bring pressure to bear on the Pariari Sayids by consuming their crops.  As a consequence, the Pariari Sayid jirga came into the camp at Maidan and made the necessary reparations: a fine of 1,500 rupees to be paid by 7th November and the surrender of five headmen as hostages.

British Officers: Black Mountain Expedition from 1st October 1888 to 13th November 1888 on the North-West Frontier of India

British Officers: Black Mountain Expedition from 1st October 1888 to 13th November 1888 on the North-West Frontier of India

On 10th November 1888, the whole force, other than the Fourth Column, which was on the banks of the Indus River, withdrew to the Agror Valley in British territory.

On 13th November 1888, the Fourth Column withdrew to Darband.  The whole force was then dispersed to its home cantonments in India.  The campaign was complete.

Casualties from the Black Mountain Expedition 1888:  2 British officers were killed in the campaign: Colonel Crookshanks, the commander of the Fourth Column and his DAQMG Captain Beley.  23 soldiers were killed and 54 wounded.  The casualties among the tribes were estimated at around 400 killed and wounded.  Remarkably, only a handful of soldiers were lost through disease.

Follow-up to the Black Mountain Expedition 1888:  Fines were imposed and paid by the Pariari Sayids. The Hassanzais and Akazais paid fines and provided hostages for their future good behaviour and undertook not to molest troops moving on the British side of the border.   All the tribes that submitted agreed not to interfere with roads that had been made in their territories.  Nothing further could be done with Arsala Khan of the Allai as he had fled across the Indus.  However, his village of Pokal had been destroyed.

Indian General Service Medal with clasp 'Hazara 1888': Black Mountain Expedition from 1st October 1888 to 13th November 1888 on the North-West Frontier of India

Indian General Service Medal with clasp ‘Hazara 1888’: Black Mountain Expedition from 1st October 1888 to 13th November 1888 on the North-West Frontier of India

Major-General McQueen noted in his report these further important achievements:  The Thakot and Allai countries had been opened up by the building of good mule roads.  A good camel road had been built along the bank of the Indus River from Darband to Kanar and a detailed survey had been made of 177 square miles of unknown country on the far side of the border.  All these measures were of significance, in case a further incursion into this country by British forces was necessary.  The next incursion was 3 years later in 1891.

As a final measure, the Khan of Agror was removed from his post for his intrigues against the government of which he was a nominal servant, Agror being within the British Indian border.

Battle Honours and Campaign Medals for the Black Mountain Expedition 1888:  The Indian General Service Medal was issued to all ranks taking part in the campaign, with the clasp ‘Hazara 1888’.  The campaign is not a battle honour.

Anecdotes and traditions from the Black Mountain Expedition 1888:

  • It was noted that a large number of ‘British subjects’ from Hazara and even from Rawalpindi and Jhelum fought with the tribes against the British and Indian troops.
  • The 4th Punjab Infantry was one of the original Punjab Frontier Force regiments (known as the ‘Piffers’) and adopted the title of ‘Wilde’s Rifles’ in 1903 on becoming the 57th. The regiment is now the 9th Battalion of the Frontier Force Regiment in the Pakistan Army.  Captain O.C. Radford went on to command the Regiment in China in 1901 during the Boxer rebellion.  Major-General McQueen became the regimental colonel of the regiment.
  • The Khyber Rifles were considered to have performed so well that they were permitted to retain the Snyder rifles that had been issued to them for the campaign.  The GOC reported that he had received no complaints about their conduct and many plaudits.
  • Lieutenant Gloster served in the South African War and was killed in France during the First World War.

    British and Indian Officers of the 2nd Sikhs: Black Mountain Expedition from 1st October 1888 to 13th November 1888 on the North-West Frontier of India

    British and Indian Officers of the 2nd Sikhs: Black Mountain Expedition from 1st October 1888 to 13th November 1888 on the North-West Frontier of India

    Officer of 15th Lancers Cureton's Multanis: Black Mountain Expedition from 1st October 1888 to 13th November 1888 on the North-West Frontier of India

    Officer of 15th Lancers Cureton’s Multanis: Black Mountain Expedition from 1st October 1888 to 13th November 1888 on the North-West Frontier of India

  • The 2nd Sikhs, Punjab Frontier Force:  The following British officers served with the regiment in the campaign; Colonel HM Pratt, Colonel FE Hastings, Major HFV Gaitskell, Captain CGM Fasken (Brigade Major), Lieutenants T Jermyn, AH Eustace, HC Vesey and PBB Forster.  Colonel Pratt was made a Commander of the Bath following the campaign and he, Colonel Hastings and Captain Fasken were mentioned in dispatches.  The 2nd Sikhs enlisted Dogras, Punjabi Mussulmans, Sikhs and Pathans.  Fasken and Eustace subsequently became major-generals commanding divisions in the Great War/World War 1.

References for the Black Mountain Expedition 1888:

The authority for campaigns on the North-West Frontier of India and other campaigns involving the Indian Army in the 19th Century is the Indian Government publication ‘Frontier and Overseas Expeditions from India’.  Six volumes were published around 1905 and distributed internally, primarily to Indian Army Officers and Officials.  Volume 1 covers the Black Mountain Expedition of 1888, being the volume on operations north of the Kabul River.

North-West Frontier by Captain H.L. Nevill DSO, RFA

The previous battle in the British Battles sequence is the Siege of Ladysmith

The next battle in the North-West Frontier of India sequence is the Black Mountain Expedition 1891

To the North-West Frontier of India index


Black Mountain Expedition 1891

Black Mountain Expedition 1891, from 1st March 1891 to 29th May 1891; the follow-up to the operation in 1888

The Ghazi attack on 4th Sikhs in Ghazicot on 19th March 1891: Black Mountain Expedition, 1st March 1891 to 29th May 1891 on the North-West Frontier in India: picture by Richard Caton Woodville: buy this picture

The Ghazi attack on the 4th Sikhs in Ghazicot on 19th March 1891: Black Mountain Expedition, 1st March 1891 to 29th May 1891 on the North-West Frontier in India: picture by Richard Caton Woodville

The previous battle in the North-West Frontier of India sequence is the Black Mountain Expedition 1888

The next battle in the North-West Frontier of India sequence is Waziristan 1894

To the North-West Frontier of India index


War: Operations on the North-West Frontier of India.

Date of the Black Mountain Expedition of 1891: 1st March 1891 to 29th May 1891.

Place of the Black Mountain Expedition of 1891: Hazara, on the banks of the Indus River in the Hindu Kush Mountains.

Combatants in the Black Mountain Expedition of 1891: British and Indian troops against the Hassanzai and Akazai tribes of Pathans.

Commanders in the Black Mountain Expedition of 1891: Major-General W.K. Elles, CB, commanded the Black Mountain Expeditionary Force. There does not appear to have been any central tribal leadership. Hashim Ali appeared as a leader of the Akazai, but left the region during the fighting.

Size of the forces in the Black Mountain Expedition of 1891: 7,300 British and Indian troops with 15 guns against probably around 8,000 tribesmen.

Uniforms, arms and equipment in the Black Mountain Expedition 1891:
The British military forces in India fell into these categories:

Bengal Infantry: Black Mountain Expedition, 1st March 1891 to 29th May 1891 on the North-West Frontier in India

Bengal Infantry: Black Mountain Expedition, 1st March 1891 to 29th May 1891 on the North-West Frontier in India

  • Regiments of the British Army in garrison in India.  Following the Indian Mutiny of 1857, India became a Crown Colony.  The ratio of British to Indian troops was increased from 1:10 to 1:3 by stationing more British regiments in India.  Brigade formations were a mixture of British and Indian regiments.  The artillery was put under the control of the Royal Artillery, other than some Indian Army mountain gun batteries.
  • The Indian Army comprised the three armies of the Presidencies of Bombay, Madras and Bengal.  The Bengal Army, the largest, supplied many of the units for service on the North-West Frontier.  The senior regimental officers were British.  Soldiers were recruited from across the Indian sub-continent, with regiments recruiting nationalities, such as Sikhs, Punjabi Muslims, Pathans and Gurkhas.  The Indian Mutiny caused the British authorities to view the populations of the East and South of India as unreliable for military service.
  • The Punjab Frontier Force:  Known as ‘Piffers’, these were regiments formed specifically for service on the North-West Frontier and were controlled by the Punjab State Government.
  • Imperial Service Troops of the various Indian states, nominally independent but under the protection and de facto control of the Government of India.  The most important of these states for operations on the North-West Frontier was Kashmir.

    Imperial Service Troops: Black Mountain Expedition, 1st March 1891 to 29th May 1891 on the North-West Frontier in India: picture by AC Lovett

    Imperial Service Troops: Black Mountain Expedition, 1st March 1891 to 29th May 1891 on the North-West Frontier in India: picture by AC Lovett

A British infantry battalion comprised 10 companies with around 700 men and some 30 officers. A battalion had a maxim machine gun detachment of 2 guns and some 20 men.

Royal Welch Fusiliers in home service dress: Black Mountain Expedition, 1st March 1891 to 29th May 1891 on the North-West Frontier in India

Royal Welch Fusiliers in home service dress: Black Mountain Expedition, 1st March 1891 to 29th May 1891 on the North-West Frontier in India

Indian infantry battalions had much the same establishment, without the Maxim gun detachment. Senior officers were British holding the Queen’s Commissions. Junior officers were Indian.

In 1891, British and Indian infantry regiments were issued with the single shot drop action Martini-Henry breech loading rifle. Imperial Service troops and the Khyber Rifles were issued with the Snyder rifle, a clumsy adaptation of the muzzle loading Enfield rifle to a breech loader.

The Indian Mountain Batteries used 7 pounder rifled muzzle loading guns that were dismantled and carried on mules. These guns were unreliable and difficult to use effectively. The British batteries used the more modern 2.3 inch rifled muzzle loaders.

Winner of the Black Mountain Expedition of 1891: The British and Indian troops of the Black Mountain Expeditionary Force.

Background to the Black Mountain Expedition of 1891:
In 1891 the north-western border of British India was the boundary of the old Sikh state of the Punjab. The border followed the Indus River north to a point short of the Black Mountain, where the border diverged and followed a mountain crest to the north east, while the Indus River continued roughly north.

The tribes involved in this campaign lived in the area of the Black Mountain and were the Pathan tribes of Hassanzais and Akazais (both sub-clans of the Yusufzai, being descended from sons of Yusuf, said to be the ancestor of the tribal group). The Hassanzais lived on both sides of the Indus River and comprised ten sub clans with a fighting strength of around 2,000 men.

5th Gurkhas: Black Mountain Expedition, 1st March 1891 to 29th May 1891 on the North-West Frontier in India

5th Gurkhas: Black Mountain Expedition, 1st March 1891 to 29th May 1891 on the North-West Frontier in India

The Akazais occupied the section of the Black Mountain to the north of the Hassanzais, on the east side of the Indus River. The Akazais comprised four sub-clans and could put around 1,500 fighting men into the field.

Once fighting began, many Pathans from other tribes and non-Pathans from the north were drawn into the conflict from a variety of motives, including fear of British encroachment on their own area.

The main traditional weapons of the tribesmen were long jezails or muskets, swords and shields and knives. Increasingly in the 1880s and 1890s, as the North-West Frontier become more violent due to the threat from the British, modern rifles came into the area and were widely used by the tribes.

Sikh soldiers: Black Mountain Expedition, 1st March 1891 to 29th May 1891 on the North-West Frontier in India

Sikh soldiers: Black Mountain Expedition, 1st March 1891 to 29th May 1891 on the North-West Frontier in India

A force of tribal fighting men would receive direction from headmen or religious leaders, but no Pathan felt compelled to do what he was told. Movement around the battlefield was guided by common enterprise and fighting experience rather than command.

Pathans were agile, swift and experienced mountain fighters. The Pathan code readily gave rise to blood feuds between individuals, villages and tribes. In the face of an external enemy, the Pathans would put their feuds to one side while the invader was resisted. Many of the tribes raided across the border into British territory. There were close links between the inhabitants of the Agror Valley, who lived under British rule and their kin across the border, which increased the tribal resentment at the existence of the border, an alien and incomprehensible concept.

The British authorities found the lawlessness of many of the tribes unacceptable and felt bound to protect their Indian subjects, who were required to give up their weapons and consequently fell easy prey to raiding Pathans from outside British jurisdiction. In the 1880s, the British adopted a policy of extending British India up to the Afghan border, with the inevitable annexation of independent tribal country.

An important purpose of a British North-West Frontier operation was to improve communications in the tribal area invaded, by building tracks, roads and bridges and establishing garrisons in key places, thereby facilitating any subsequent incursion.

Group of 3rd Sikhs at Chittabat: Black Mountain Expedition, 1st March 1891 to 29th May 1891 on the North-West Frontier in India

Group of 3rd Sikhs at Chittabat: Black Mountain Expedition, 1st March 1891 to 29th May 1891 on the North-West Frontier in India

The Black Mountain Expedition of 1891 followed as a direct result of the previous operation in 1888 (see Black Mountain 1888). An important obligation imposed on the Hassanzais and Akazais as border tribes, in 1888, was to permit British forces to move freely along the border, running north east of the Indus through the mountains. The border followed a mountain crest.

As part of the development of the region and to improve accessibility for their forces, the British built roads up to the border, from the Agror Valley on the Indian side and it was proposed to build a road along the border. It was clear that this was not acceptable to the Pathans living on the far side of the border who, perhaps unsurprisingly, felt that their continued independence was under threat.

The Hassanzais, Akazais and Pariari Sayids were ordered to send in jirgas to agree to the construction of the border road and to accompany a military force along the route. The Hassanzais and Akazais refused and expressed their objection to the road. They were threatened with punishment. The Pariari Sayids did send in their jirga.

A military force was sent to the area to march along the border and test the tribes’ reaction. The force was commanded by Brigadier-General Sir John McQueen, commander of the Hazara Field Force in 1888, now commanding the Punjab Field Force and comprised the 4th Sikh Infantry, 1st and 2nd Battalions of the 5th Gurkhas and No 2 ‘Derajat’ Mountain Battery, an ‘All Piffer’ contingent.

The force marched from Abbottabad to Oghi Fort, arriving on 19th October 1890. McQueen’s instructions were to ‘test the water’, but not to be involved in heavy fighting and to withdraw if it was clear that his march was to be seriously opposed.

Kain Gali: Black Mountain Expedition, 1st March 1891 to 29th May 1891 on the North-West Frontier in India

Kain Gali: Black Mountain Expedition, 1st March 1891 to 29th May 1891 on the North-West Frontier in India

There were reports that the tribesmen were gathering at Nimal, Kain Gali and elsewhere, under the leadership of Hashim Ali, the Khan of the Isazais, the superior tribe of which both the Hassanzais and the Akazais were part.

Rain and snow delayed the departure of McQueen’s force until 23rd October 1890, when he marched with a force of 1,000 men and 4 guns up the Barchar Spur and bivouacked above Barchar village, near the border. There was heavy firing towards the bivouac from the tribesmen during the night, but little damage was done due to the camp being on the reverse slope of the mountain. Reports came in that Hashim Ali was leading both Hassanzai and Akazai in a mass of tribesmen that was assembling on the border crest. McQueen obeyed his instructions and withdrew his force.

Map of the Black Mountain Expedition, 1st March 1891 to 29th May 1891 on the North-West Frontier in India: map by John Fawkes

Map of the Black Mountain Expedition, 1st March 1891 to 29th May 1891 on the North-West Frontier in India: map by John Fawkes

Account of the Black Mountain Expedition of 1891:

In view of the opposition presented to Brigadier-General McQueen’s force, the Governor General of India determined to send a force into the Hassanzai and Akazai country to enforce the British right to march its forces along the border and to inflict punishment on the two tribes for their hostile actions against McQueen’s force.

The Government of the Punjab was instructed to inform the two tribes that the incursion would take place whether they submitted or not, but that if they did submit, all previous penalties would be remitted and discussions could take place on how to implement the British requirements with the minimum of difficulty.

Derajat Mountain Battery: Black Mountain Expedition, 1st March 1891 to 29th May 1891 on the North-West Frontier in India

Derajat Mountain Battery: Black Mountain Expedition, 1st March 1891 to 29th May 1891 on the North-West Frontier in India

The experience of the incursion into the Black Mountain country in 1888 now became of great importance. The same survey officer, Captain Wahab, Royal Engineers, accompanied both expeditions. It was decided that the 1891 incursion should follow the Indus River (the route taken in 1888 by the Fourth Column), with one subsidiary incursion into the hills running parallel to the river route, to occupy Pabal Gali and Tilli.

It was acknowledged that the 1888 incursion into the hinterland of the Black Mountain country (the routes taken in 1888 by the First, Second, Third and Fifth Columns) had been too difficult and time consuming and that most of the villages it was intended to destroy lay along or near the Indus River. A small force was to be stationed at Oghi Fort for defensive purposes only.

The Political Officers' camp at Seri: Black Mountain Expedition, 1st March 1891 to 29th May 1891 on the North-West Frontier in India

The Political Officers’ camp at Seri: Black Mountain Expedition, 1st March 1891 to 29th May 1891 on the North-West Frontier in India

The force was designated the ‘Black Mountain Expedition 1891’ and placed under the command of Major-General W.K. Elles, CB (an officer from the British Army). Mr Cunningham CIE CS was appointed Chief Political Officer under the general officer commanding the expedition.

Officer, sergeant and private of 5th Gurkhas: Black Mountain Expedition, 1st March 1891 to 29th May 1891 on the North-West Frontier in India: buy this print

Sergeant, Gurkha officer and private of 5th Gurkhas: Black Mountain Expedition, 1st March 1891 to 29th May 1891 on the North-West Frontier in India

Regiments in the Black Mountain Expedition of 1891:

No 1 Mountain Battery Royal Artillery

No 9 Mountain Battery Royal Artillery

1st Royal Welch Fusiliers

1st King’s Royal Rifle Corps

2nd Seaforth Highlanders

11th Bengal Lancers

No 4 Company Bengal Sappers and Miners.

11th Bengal Infantry

19th Bengal Infantry

27th Bengal Infantry.

28th Bengal Infantry

32nd Pioneers

37th Bengal Infantry (Dogras)

3rd Sikh Infantry

4th Sikh Infantry

No 2 (Derajat) Mountain Battery

2nd/5th Gurkhas

Guides Infantry

Khyber Rifles

Cooly Corps (200 men).

Number 2 (Derajat) Mountain Battery: Black Mountain Expedition, 1st March 1891 to 29th May 1891 on the North-West Frontier in India

Number 2 (Derajat) Mountain Battery: Black Mountain Expedition, 1st March 1891 to 29th May 1891 on the North-West Frontier in India

The composition of the columns:

The Indus River Column, commanded by Brigadier-General RF Williamson of the Royal Welch Fusiliers, comprised 2nd Seaforth Highlanders, a wing of 32nd Pioneers, 37th Bengal Infantry (Dogras), the Guides Infantry, 4th Sikh Infantry, No 1 Mountain Battery, Royal Artillery (3 guns) and No 2 (Derajat) Mountain Battery (3 guns).

The Tilli Column, commanded by Brigadier AG Hammond VC ADC of the 3rd Sikh Infantry, comprised 1st Royal Welch Fusiliers, 11th Bengal Infantry, a wing of 32nd Pioneers, 2nd/5th Gurkhas, Khyber Rifles and No 9 Mountain Battery, Royal Artillery (6 guns).

Divisional Troops at Darband comprised 1 squadron of 11th Bengal Lancers and No 4 Company Bengal Sappers and Miners.

The Oghi Column, commanded by Colonel GS Hills of 28th Bengal Infantry, comprised 1 squadron of 11th Bengal Lancers, 28th Bengal Infantry and No 2 (Derajat) Mountain Battery (3 guns).

The Reserve Brigade at Rawalpindi comprised 1 squadron of 11th Bengal Lancers, 1st King’s Royal Rifle Corps, 19th Bengal Infantry and 27th Bengal Infantry.

Lieutenant HCI Birdwood RE commanded the Cooly Corps (200 men).

Khyber Rifles: Black Mountain Expedition, 1st March 1891 to 29th May 1891 on the North-West Frontier in India

Khyber Rifles: Black Mountain Expedition, 1st March 1891 to 29th May 1891 on the North-West Frontier in India

The force was ordered to concentrate at its two bases, the River Column and the Tilli Column at Darband and the Oghi Column at Oghi, by 1st March 1891 and begin operations as soon as practicable.

General Elles sights the tribesmen at Shingri: Black Mountain Expedition, 1st March 1891 to 29th May 1891 on the North-West Frontier in India: picture by Richard Caton Woodville: buy this picture

General Elles sights the tribesmen at Shingri: Black Mountain Expedition, 1st March 1891 to 29th May 1891 on the North-West Frontier in India: picture by Richard Caton Woodville

Delays were caused by bad weather, but the force was ready by 11th March 1891, when the two active columns advanced, to Bela on the Indus and to Phaldar in the mountains. During the delay, work had been completed on the roads, on the Indus River route to Bela and on the upland route to a point short of the border. Telegraph lines had been laid to Bela and to Phalder.

On the 11th March 1891, boats were brought up to Bela to form a bridge across the Indus River and four days supplies were conveyed to Bela and to Phalder.

Shots were fired across the Indus River at the River Column. Otherwise there was little sign of resistance. Reports indicated that both the Hassanzais and the Akazai were pressing Hashim Ali not to resist the British advance and to send in a jirga to the British. Taking advantage of this information, the tribes were notified that if they remained in their villages and did not resist the troops no injury would come to them or their villages.

On 11th March 1891, a jirga arrived in Amb, a village across the Indus from Darband, from the Bunerwal tribe, expressing concern at the British operations. A second jirga arrived from the Mada Khel. The Mada Khel country lay along the west bank of the Indus River and the Bunerwal country lay further to the west. General Elles informed both tribes that he did not intend to interfere with them provided they took no part in resisting his troops.

Major-General Elles’s plan was for the River Column to advance up the Indus River by the east bank to Kanar. At that place, the Mada Khel country on the west bank gave way to the Hassanzai country. A detached force would cross by a bridge of boats and occupy the Hassanzai country on the west bank.

The Shal Nala: Black Mountain Expedition, 1st March 1891 to 29th May 1891 on the North-West Frontier in India

The Shal Nala: Black Mountain Expedition, 1st March 1891 to 29th May 1891 on the North-West Frontier in India

The River Column would then move into the Diliarai peninsula, that lay directly to the north of the Hassanzais on the east bank and occupy the Akazai country. The River Column would then work its way up the Shal Nala, a mountain stream which flowed through the Akazai country and joined the Indus River at the southern point of the Diliarai peninsula, to meet the Tilli Column.

As it was now clear that little resistance would be expected from the Hassanzais, a quarter of their crops would be taken unless there was active fighting, in which case further punishment would be inflicted.

The Tilli Column would advance across the mountainous route to Tilli and then to Ril and Kungar, where it would occupy the eastern areas of the Akazai country. The Tilli Column would then work its way down the Shal Nala stream and meet the River Column.

Major-General Elles and his headquarters would accompany the River Column.


Operations begin:

The River Column marched from Darband at 8.30am on 12th March 1891. The tribesmen began firing from across the Indus River at the point where Mada Khel country gave way to Hassanzai country. Their targets were the troops on the road and the boats being brought up the Indus for the bridge.

A company of the Guides crossed the Indus River and worked its way up the west bank in conjunction with the boats. All the villages on the west bank the Guides passed through were found to be abandoned.

The River Column bivouacked at Towara, the scene of the major action in 1888. At Towara a second company of Guides crossed the Indus to the west bank.

On 13th March 1891, the two companies of the Guides on the west bank moved up into the hills to the village of Nadrai. The troops came under fire, but rushed the village without casualty. The tribesmen suffered 3 dead and 3 wounded. The Guides burnt Nadrai as a reprisal for the resistance shown before moving on.

British and Indian troops crossing the Indus by the Marer Ferry: Black Mountain Expedition, 1st March 1891 to 29th May 1891 on the North-West Frontier in India

British and Indian troops crossing the Indus by the Marer Ferry: Black Mountain Expedition, 1st March 1891 to 29th May 1891 on the North-West Frontier in India

On the morning of 13th March 1891, a further detachment from the River Column, comprising a half battalion of the 2nd Seaforth Highlanders and a half battalion of the Guides, crossed to the west bank by the Marer ferry. This detachment moved up the hill behind Nadrai to the village of Doshkand, which was deserted and back to the river bank, where the villages of Garhi, Nawekili and Palosi were visited and found to be deserted. None of these villages was damaged. The Hindustani settlement at Maidan was found to be still in ruins after its destruction in 1888. The two companies of Guides that had stormed Nadrai joined the detachment at Garhi.

Palosi village: Black Mountain Expedition, 1st March 1891 to 29th May 1891 on the North-West Frontier in India

Palosi village: Black Mountain Expedition, 1st March 1891 to 29th May 1891 on the North-West Frontier in India

The main part of the River Column stayed a further night at Towara, as the east bank track from Kotkai to Kanar was found to need work to enable the passage of baggage animals.

On 15th March 1891, the River Column conducted a reconnaissance across the Indus River in the area of Palosi, to find a suitable site for an encampment and to investigate a reported gathering of tribesmen further to the west. The reconnaissance party came under fire from both sides of the river and it became clear that, although the Hassanzai were no longer resisting the British advance, other tribes were being drawn into the fighting. The reconnaissance party advanced beyond Maidan, the old Hindustani settlement, and saw large gatherings of armed tribesmen on the hills on both sides of the Indus River. The party withdrew to the main encampment at Towara on the east bank.

Village of Ghazikot: Black Mountain Expedition, 1st March 1891 to 29th May 1891 on the North-West Frontier in India

Village of Ghazikot: Black Mountain Expedition, 1st March 1891 to 29th May 1891 on the North-West Frontier in India

A detachment from the 4th Sikhs advanced from Kanar through Ghazikot and surprised a party of armed tribesmen, inflicting casualties.

On 14th and 15th March 1891, the Chief Political Officer received reports that parties of armed tribesmen carrying flags had been seen crossing the Baio Range of Mountains from the west and approaching the villages of Karnar and Kamach on the west bank of the Indus River. The leader of the ‘Hindustani Fanatics’, Maulvi Abdulla, was reported to be with them. The presence of hostile tribesmen from other areas showed that the scale of the fighting was escalating, despite the submission of the Hassanzai. As the main lever against tribesmen available to the British was the threat to destroy their villages and crops, the gathering of hostile outsiders presented considerable problems for the British.

Black Mountain Expedition, 1st March 1891 to 29th May 1891 on the North-West Frontier in India: picture by WH Overend: buy this picture

Black Mountain Expedition, 1st March 1891 to 29th May 1891 on the North-West Frontier in India: picture by WH Overend

The Tilli Column:

Meanwhile, the activities of the Tilli Column were showing that the assessment of the difficulties of operating in the mountainous areas at that time of the year was entirely justified.

The Tilli Column marched out from Darband on 12th March 1891 to Pailam. No opposition was encountered. The Column crossed the border on 13th March 1891 and moved on to Tilli, where the Column halted.

On 15th March 1891, Brigadier-General Hammond reported to the GOC that the Tilli Column was having trouble in finding enough forage in that area. The location was high and the crops were insufficiently far advanced. The village of Seri was reported to be still under snow.

Major-General Elles issued orders for a change of plan. The track from Tilli to Kanar was to be opened up and the Tilli Column brought down to join the River Column at Palosi on the west side of the Indus. Outposts would be established at three villages in the mountains above the east bank track; Tilli, Ril and Makranai. Before moving his column to the Indus River, Brigadier Hammond was ordered to take a flying column to raid Seri and destroy that village’s defences.

On 16th March 1891, a wing of the 4th Sikhs moved to Kanar to assist in building the road to Tilli and the bridge of boats was completed at Kotkai, spanning 110 yards of the Indus River, with a camel road on the west side leading to the camp at Palosi.

At this time, reports were coming in to the Chief Political Officer that the Hassanzai and the Akazai were anxious to submit to the British. Directions were sent out that they should return to their villages and that only a quarter of their crops would be sequestered. A further requirement was that the leader, Hashim Ali, and his family be surrendered. However, it was clear that hostilities were far from finished.

British troops in the Indus Valley: Black Mountain Expedition, 1st March 1891 to 29th May 1891 on the North-West Frontier in India

British troops in the Indus Valley: Black Mountain Expedition, 1st March 1891 to 29th May 1891 on the North-West Frontier in India

On 16th March 1891, reports came in that the Hindustanis, under Maulvi Abdulla, were collecting at Didal and numbers of Chagarzai tribesmen at Kamach, both villages on the west bank of the Indus River to the north of the Diliarai peninsula. In addition, Hashim Ali, after attempting to rouse his own followers in the area of Seri, in the mountains to the east of the Indus River, was in Swat, attempting to persuade its ruler, Mian Gul, to lead a jihad against the British.

The action at Ghazikot:

The Dogra Company of the 4th Sikhs, 2 Indian officers and 67 soldiers commanded by Subadar Dheru, held the village of Ghazikot, the most northerly village on the east bank of the Indus River reached by the River Column. The village comprised a narrow street with a mosque at the south-east corner.

Nullas, or dry watercourses, ran across the track to the north and south of the village. A piquet of Dogras was in position behind a wall to the north of the village, while the rest of the company was bivouacked behind the mosque. The piquet came under fire during the evening of 18th March 1891 and at 3am on 19th, the havildar of the piquet reported to Subadar Dheru that tribesmen were collecting in force in the nulla in front of his position. The tribesmen emerged from the nulla and rushed forward, yelling and banging drums. The piquet fired four volleys at the tribesmen, who charged around them and into the village, where they occupied buildings, including the mosque, that overlooked the bivouac and opened fire. The piquet re-joined the rest of the company and a heavy fire fight developed, during which tribesmen armed with swords and shields repeatedly attempted to charge the Dogras, many emerging from the mosque.

Soldiers of the 4th Sikhs: Black Mountain Expedition, 1st March 1891 to 29th May 1891 on the North-West Frontier in India

Soldiers of the 4th Sikhs: Black Mountain Expedition, 1st March 1891 to 29th May 1891 on the North-West Frontier in India

Within half an hour of the commencement of the attack, two further companies of the 4th Sikhs, commanded by Lieutenants Maconchy and Manning, arrived from Kanar in support of the Dogra company, followed by two companies of the 32nd Pioneers, commanded by Colonel Sir R Bromhead CB.

By this time, the tribesmen were well established in the mosque and on the roofs of the houses throughout the village and there was heavy firing. Lieutenant Maconchy and a half company of 4th Sikhs rushed up the village street, while Colonel Bromhead took his pioneer companies around the right side of the village and Lieutenant Manning took his company around the left side.

The flying bridge across the Indus at Bakrai: Black Mountain Expedition, 1st March 1891 to 29th May 1891 on the North-West Frontier in India: picture by Melton Prior

The flying bridge across the Indus at Bakrai: Black Mountain Expedition, 1st March 1891 to 29th May 1891 on the North-West Frontier in India: picture by Melton Prior

At dawn, Colonel Bromhead took his troops through the village, clearing it of hostile tribesmen. Most of the tribesmen had already left through the jungle on either side of the village during the night, leaving only some fanatical ‘ghazis’.

Captain DeBrath led a further company of 4th Sikhs for a mile up the east bank track, following the tribesmen’s line of retreat. 4 tribesmen were seen crossing the Indus River on a raft and a party of about 80 were seen crossing the Shal Nala and into the village of Bakrai. The area around Ghazikot was searched for any tribesmen hiding, but none were found.

The tribesmen were reported to have been almost entirely ‘Hindustani Fanatics’. 25 bodies were found in the village, of which 22 were identified as Hindustanis and 2 as Pathans. 1 was a Hindu hostage. British and Indian casualties were 4 dead and 21 wounded, including Lieutenant Maconchy.

That night, 19th March 1891, tribesmen fired at the troops in Kanar. The next morning reinforcements of two companies of Guides Infantry moved up from Towara to Kanar and two companies of Seaforth Highlanders moved up to the bridgehead at Kotkai, to reinforce the wing of the 37th Dogras, the regiment given the task of defending the bridge of boats. During the day’s fighting, the tribesmen suffered 3 dead and 3 soldiers of the 32nd Pioneers were wounded. A mule driver was found dead in the nulla to the south of Ghazikot.

On 20th March 1891, the River Column, with the divisional headquarters, moved out from Towara, crossed the bridge of boats at Kotkai to the west bank and moved up the Indus River to the village of Pirzada Bela. Tribesmen were seen in considerable numbers in the hills on the east side of the Indus River and the guns shelled the villages of Bakrai and Makranai.

The next day the River Column marched to its intended base in the village of Palosi, which it fortified.

The Tilli Column:
On 21st March 1891, the Tilli Column moved from Tilli to Ril. On 22nd March 1891, the column marched to Seri, destroyed the village and returned to Tilli.

The action at Diliarai:
On 23rd March 1891, the River Column built a flying bridge across the Indus River to the east bank at Bakrai, at the mouth of the Shal Nala. A covering force for the building of the bridge of three companies from 4th Sikhs crossed to the east bank and occupied Bakrai. In response, a large assembly of tribesmen gathered around Diliarai, a village on a high spur overlooking Bakrai and began to advance down the spur towards Bakrai. The 4th Sikh piquet was ordered to advance from Bakrai up the spur to meet the tribesmen. A wing of the Guides Infantry crossed the Indus River to support the Sikhs. The Sikhs drove the tribesmen back and occupied the crest of the hill where Diliarai stood at 5.30pm. They were joined by the Guides in Diliarai.

British and Indian troops crossing the Indus at Bakrai: Black Mountain Expedition, 1st March 1891 to 29th May 1891 on the North-West Frontier in India

British and Indian troops crossing the Indus at Bakrai: Black Mountain Expedition, 1st March 1891 to 29th May 1891 on the North-West Frontier in India

The detachment of Sikhs and Guides was then ordered to withdraw from Diliarai to a breastwork which stood half-way down the slope between Diliarai and Bakrai. As this was where the detachment would have to spend the night, the order went contrary to the well-established principle of Frontier Warfare, that troops should always occupy the highest ground when in a static position. The detachment withdrew down the spur, covered by a rear-guard of 4th Sikhs. As soon as it was apparent that the troops were withdrawing, the tribesmen returned and attacked the rear-guard, their numbers increasing by the minute. By mid-evening, it became clear that the 4th Sikhs rear-guard could not easily extricate itself from the running battle that had developed on the slope back to Bakrai, even though there were terraces that provided defensive positions. The position of the 4th Sikhs and the Guides in Bakrai itself was under threat and the detachment was in danger of being overwhelmed.

British guns shelling Diliarai: Black Mountain Expedition, 1st March 1891 to 29th May 1891 on the North-West Frontier in India

British guns shelling Diliarai: Black Mountain Expedition, 1st March 1891 to 29th May 1891 on the North-West Frontier in India

The commanding officer of the 4th Sikhs, Lieutenant-Colonel Gaselee, decided to re-occupy the crest at Diliarai. One company of 4th Sikhs moved out to the right flank, to provide covering fire directed at the tribesmen coming down from the crest, while Gaselee led the other two companies in an attack back up the spur. The tribesmen’s resistance collapsed and they were driven over the crest. Diliarai was occupied for the night by one company of 4th Sikhs and the wing of the Guides. The other two companies of 4th Sikhs returned to Palosi, as their ammunition was exhausted. No further fighting took place overnight, as the tribesmen appeared to have withdrawn from the area.

British No 1 Mountain Battery ceasing fire at Diliarai: Black Mountain Expedition, 1st March 1891 to 29th May 1891 on the North-West Frontier in India

British No 1 Mountain Battery ceasing fire at Diliarai: Black Mountain Expedition, 1st March 1891 to 29th May 1891 on the North-West Frontier in India

Once the action was over, it was established that the tribesmen had been Chagarzais and Hindustanis. The tribesmen owned to suffering 12 dead and 16 wounded, although their true casualties were probably much greater. The British had 1 officer, Lieutenant Harman of 4th Sikhs and 4 soldiers wounded mainly in the hand to hand fighting.

British and Sikh troops in Diliarai: Black Mountain Expedition, 1st March 1891 to 29th May 1891 on the North-West Frontier in India

British and Sikh troops in Diliarai: Black Mountain Expedition, 1st March 1891 to 29th May 1891 on the North-West Frontier in India

On 24th March 1891, Major-General Elles reported that the Hassanzai, other than the Khan Khel, one of the Hassanzai sub-clans, had submitted; that the Akazai would submit, but that they were intimidated by mullahs and Chagarzai tribesmen. The GOC reported that the Chagarzai country was overrun by mullahs, talibs and other Muslim figures from other areas. Some Bunerwal tribesmen were in Baio, to the west of the Indus River, led by Mulla Faizi of Bajkatta and Akhund Khel of Kuria, but appeared only to be maintaining a watch on the situation. There did not seem to be a general gathering of the Bunerwal tribe.

The action at Darbanai:

On 25th March 1891, the whole of the 4th Sikhs were in position on the Diliarai crest, with 3 guns of No 2 Derajat Mountain Battery. This force provided cover for Brigadier-General Hammond to advance up the Shal Nala, with a force comprising 1st Royal Welch Fusiliers, 2 companies of 11th Bengal Infantry, a wing of 2nd/5th Gurkhas, the Khyber Rifles and 4 guns of No 9 Mountain Battery, Royal Artillery. Hammond’s target was Darbanai, a village on a 1,500 foot spur with a commanding view overlooking the Indus River. The track along the Shal Nala was extremely difficult. By 1pm Hammond had occupied a peak near to Darbanai, where he awaited the guns which were making slow progress up a track along the bed of the Shal Nala. Once the guns joined the infantry, the approach on Darbanai began. The Khyber Rifles advanced on the right of Darbanai, the Gurkhas on the left, while the Royal Welch Fusiliers and the 11th Bengal Infantry attacked in the centre. The tribesmen did not await the assault, but made off down the hillside towards the village of Surmal. The Royal Welch Fusiliers followed them up, while the Khyber Rifles cleared the hills on the right of for a considerable distance.

The Shal Nala: Black Mountain Expedition, 1st March 1891 to 29th May 1891 on the North-West Frontier in India

The Shal Nala: Black Mountain Expedition, 1st March 1891 to 29th May 1891 on the North-West Frontier in India

British losses in the day were Second Lieutenant Doughty of the Royal Welch Fusiliers killed and one soldier wounded. The tribesmen were estimated to have suffered around 40 casualties.

Water was supplied to Darbanai by an 800 foot channel from a source further up the mountain. The tribesmen cut this supply and continued to fire into the British camp in the village. Brigadier-General Hammond sent word to Surmal, where a number of armed tribesmen were gathered, that if the firing was not discontinued and the water supply not reconnected, Surmal would be destroyed.

On 27th March 1891, the water to Darbanai remained cut and the firing continued. Hammond decided to attack Surmal.

British and Sikh soldiers on Diliarai Heights: Black Mountain Expedition, 1st March 1891 to 29th May 1891 on the North-West Frontier in India

British and Sikh soldiers on Diliarai Heights: Black Mountain Expedition, 1st March 1891 to 29th May 1891 on the North-West Frontier in India

No 9 Mountain Battery took up a position covering Surmal. From Darbanai, the ground fell away to a nulla, with Surmal on a hill on the other side of the valley. The Khyber Rifles advanced on the right with 2nd/5th Gurkhas, while the Royal Welch Fusiliers, supported by 11th Bengal Infantry, mounted a direct attack on Surmal, descending the hillside, crossing the nulla and climbing the far hill to the village. The Mountain Battery opened fire on the tribesmen. The 500 armed tribesmen occupying the area of the village took cover from the gunfire behind the crest of the hill.

The Royal Welch Fusiliers and the Gurkhas reached Surmal at much the same time. The tribesmen did not wait to contest the village. The Khyber Rifles, with one company of the Gurkhas, encountered a second group of tribesmen of the same size, on the hill to the right of the village, which they dispersed with rifle fire.

Brigadier-General Hammond’s orders were not to go further into Chagarzai country. Two houses in Surmal were burnt. British losses were 3 wounded. It was estimated that the tribesmen, mostly Chagarzais, suffered around 120 casualties.

Tribal activity at Baio:

On 29th March 1891, the focus of concern moved back to Baio, to the west of the Indus River, where there continued to be a buildup of tribesmen from the Buner, Chamla, Amazai and Gadun areas. The presence of the British force in tribal territory to the west of the Indus River was the cause of the increase in tension. The British authorities moved 9th Bengal Lancers and 22nd Bengal Infantry from the Nowshera garrison to join the 1st Northumberland Fusiliers and the Guides Cavalry at Mardan, to the south-west of Buner country, in case fighting broke out with the Bunerwals. From the force at Oghi, 3 guns of No 2 Derajat Mountain Battery moved to Darband and a wing of 28th Bengal Infantry marched to Parbal Gali, on the border in the direction of Tilli. Orders were given for a road to be built, in place of the track from Parbal Gali to Tilli, as a matter of urgency. The axis of the Black Mountain Expedition was being shifted from the Indus River to the Oghi/Tilli route, to reduce the threat perceived by the Bunerwals.

On 31st March 1891, the reserve brigade concentrated at Darband, under Brigadier-General Sir William Lockhart. The designation of the three forces was changed from River Column, Right Column and Reserve Column, to First, Second and Third Brigades. The Chief Political Officer reported that the tribesmen concentrated at Baio were from all the clans, from the Peshawar border in the south-west up to Thakot in the north. The GOC requested permission from the Indian Government to attack the lashkar at Baio, if it failed to disperse. In that event, the war could be significantly extended to cover the whole region.

On 1st April 1891, Brigadiers-General Hammond and Lockhart met the GOC at Palosi. No steps were to be taken, until instructions were received from the Indian Government.

Seaforth Highlanders on Diliarai Heights: Black Mountain Expedition, 1st March 1891 to 29th May 1891 on the North-West Frontier in India

2nd Seaforth Highlanders on Diliarai Heights: Black Mountain Expedition, 1st March 1891 to 29th May 1891 on the North-West Frontier in India

Mian Gul, the rule of Swat, was reported to have arrived at Baio. But there appeared to be no display of tribal standards, the usual indication of impending hostile action. The Commissioner for Peshawar wrote to Mian Gul and the Bunerwal jirga, stating that there was no intention of entering Chagarzai country or fighting with the Bunerwals, but that if the lascar at Baio did not disperse it would be attacked.

On 4th April 1891, an elderly Bunerwal sepoy in the 5th Punjab Infantry informed his officers that the lashkar at Baio was dispersing. Some standards were seen on a hill between Hassanzai and Chagarzai country. These were shelled by the mountain artillery and withdrew on the approach of troops.

On 4th April 1891, the Akazai village of Bimbal was burnt to encourage the tribe to hurry its submission.

On 7th April 1891, the Third Brigade was withdrawn from the force and marched from Darband towards Kohat, to deal with an outbreak by the Miranzai. As Baio was now reported completely deserted, the British force began its withdrawal to the east bank of the Indus River. It was also reported that Mian Gul was advising Hashim Ali to surrender to the British, but that he had refused and left for Teri, a Makki Khel village on the Buner border.

Seaforth Highlanders and Indian troops moving up into the mountains: Black Mountain Expedition, 1st March 1891 to 29th May 1891 on the North-West Frontier in India

2nd Seaforth Highlanders and Indian troops moving up into the mountains: Black Mountain Expedition, 1st March 1891 to 29th May 1891 on the North-West Frontier in India

Early on 8th April 1891, the divisional headquarters, escorted by the Guides Infantry left Palosi, crossed the Indus River by the flying bridge at Bakrai and took the road through Makranai to Ril. The road was steep and difficult, particularly for the baggage animals. The rear-guard arrived at around 7.30pm. The Seaforth Highlanders with the 3 guns of No 1 Mountain Gun Battery and the HQ of First Brigade marched via the bridge of boats at Kotkai to Tilli and then to Seri. The inhabitants of Palosi were enabled to return to their village. The only British troops west of the Indus River were the 37th Dogras, guarding the Kotkai bridgehead.

The base for the Expeditionary Force was moved from Darband to Oghi, the move being completed by 24th April 1891. All posts on the Indus River in the area were abandoned, except for the one at Bakrai. The bridges were dismantled and the boats moved south. The First Brigade was now based at Seri and the Second Brigade at Darbanai. Each brigade maintained a number of outposts. A road linking the two brigade HQs was quickly built.

Seaforth Highlanders standing on a crag: Black Mountain Expedition, 1st March 1891 to 29th May 1891 on the North-West Frontier in India

2nd Seaforth Highlanders standing on a crag: Black Mountain Expedition, 1st March 1891 to 29th May 1891 on the North-West Frontier in India

During the latter part of April and May 1891, several incursions were made into Akazai country, with villages being burnt.

On 26th May 1891, the jirgas of the Hassanzai and the Akazai came into the camp at Seri and by 29th May terms of capitulation were agreed. The most important term was that in view of the inability of the tribes to surrender Hashim Ali, as he had left the area, they undertook to exclude him from their territory. The Hassanzais, Akazais and Pariariwals undertook to escort any military force moving on the border, to ensure it was not attacked.

Indian General Service Medal with the clasp ‘Hazara 1891’: Black Mountain Expedition, 1st March 1891 to 29th May 1891 on the North-West Frontier in India

Indian General Service Medal with the clasp ‘Hazara 1891’: Black Mountain Expedition, 1st March 1891 to 29th May 1891 on the North-West Frontier in India

On 9th June 1891, the units of the force were ordered to return to their garrisons, other than a small contingent that was to remain at Seri and Oghi, commanded by Brigadier-General Hammond and comprising the Royal Welch Fusiliers, 1st/1st Gurkhas, 4th Sikh Infantry, 28th Bengal Infantry and No 9 Mountain Battery, Royal Artillery. By the end of November 1891, with further arrangements complete, including the establishment of a 200 strong Border Police Force recruited from the tribes, the remaining troops withdrew from the Black Mountain.

Casualties in the Black Mountain Expedition of 1891:

British casualties in the campaign were 9 killed and 39 wounded, including 3 officers, Second-Lieutenant Doughty of the Royal Welch Fusiliers and Lieutenants Maconchy and Harman of 4th Sikhs.

To the extent that they were known tribal casualties are set out in the text.

Battle Honour and Campaign Medal for the Black Mountain Expedition of 1891:

No battle honour was awarded for this campaign.

Soldiers who served in the campaign received the Indian General Service Medal with the clasp ‘Hazara 1891’.

For the action at Ghazikot Lieutenant Maconchy of 4th Sikhs received the Distinguished Service Order (DSO). The Indian Order of Merit Third Class was awarded to Subadar Dheru, Havildar Waziru, Naik Ganesha Singh, and Lance-Naik Alam Khan, all of 4th Sikhs or 32nd Pioneers, and Hospital Assistant Ahmadulla Khan.

Anecdotes and traditions from the Black Mountain Expedition of 1891:

British 7 pounder RML Mountain Gun: Black Mountain Expedition, 1st March 1891 to 29th May 1891 on the North-West Frontier in India: Firepower Museum

British 7 pounder RML Mountain Gun: Black Mountain Expedition, 1st March 1891 to 29th May 1891 on the North-West Frontier in India: Firepower Museum

  • The 7 pounder Rifled and Muzzle Loading (‘RML’) steel mountain gun came into service with the British Army in 1873. It was superceded by the 2.3 inch gun for the Royal Artillery in 1879, but remained in service with the Indian mountain batteries. The standard charge for the gun was insufficient for use in the mountains, so a double sized shell was introduced. This shell was liable not to ignite the fuse on discharge and the long shell was liable to tumble in flight. The gun was carried on several pack mules and assembled for action. It was widely used in wars on the North-West Frontier by the Indian Army mountain batteries.

References for the Black Mountain Expedition of 1891:

The authority for campaigns on the North-West Frontier of India and other campaigns involving the Indian Army in the 19th Century is the Indian Government publication ‘Frontier and Overseas Expeditions from India’.  Six volumes were published around 1905 and distributed internally, primarily to Indian Army Officers and Officials.  Volume 1 covers the Black Mountain Expedition of 1891, being the volume on operations north of the Kabul River.

North West Frontier by Captain H.L. Nevill DSO, RFA

The previous battle in the North-West Frontier of India sequence is the Black Mountain Expedition 1888

The next battle in the North-West Frontier of India sequence is Waziristan 1894

To the North-West Frontier of India index


Battle of Tel-el-Kebir

General Wolseley’s defeat of the Egyptian Army on 13th September 1882, leading to the occupation of Egypt by Britain and France

British Foot Guards at the Battle of Tel-el-Kebir on 13th September 1882 in the Egyptian War: picture by Alphonse de Neuville

British Foot Guards at the Battle of Tel-el-Kebir on 13th September 1882 in the Egyptian War: picture by Alphonse de Neuville

The previous battle in the British Battles sequence is the Battle of Ulundi

The next battle of the Egypt and Sudan War of 1882 is the Battle of El Teb

To the Egypt and Sudan War 1882 index


Lieutenant General Sir Garnet Wolseley (in hat) and his staff: Battle of Tel-el-Kebir on 13th September 1882 in the Egyptian War

Lieutenant General Sir Garnet Wolseley (in hat) and his staff: Battle of Tel-el-Kebir on 13th September 1882 in the Egyptian War

Battle: Tel-el-Kebir

War: Egypt and Sudan 1882

Date of the Battle of Tel-el-Kebir: 13th September 1882

Place of the Battle of Tel-el-Kebir: North-Eastern Egypt

Combatants at the Battle of Tel-el-Kebir: An Anglo-Indian Army against the Egyptian Army.

Commanders at the Battle of Tel-el-Kebir: Lieutenant General Sir Garnet Wolseley against Ahmed Arabi Bey.

Size of the armies at the Battle of Tel-el-Kebir: The Egyptian army was probably around 20,000 troops with 60 guns. The British and Indian force comprised 11,000 infantry, 2,000 cavalry and 45 guns.

Ahmed Arabi Bey, Egyptian commander at the Battle of Tel-el-Kebir on 13th September 1882 in the Egyptian War

Ahmed Arabi Bey, Egyptian commander at the Battle of Tel-el-Kebir on 13th September 1882 in the Egyptian War

Uniforms, arms and equipment at the Battle of Tel-el-Kebir: The British infantry was armed with the single shot breech-loading Martini-Henry rifle and bayonet. The war marked a distinct change in the British Army’s approach to campaign dress. The main body of the infantry started the war in scarlet tunics and blue woollen trousers, with white equipment and tropical helmets. The importance of being less visible was soon brought home to the regiments and tunics were dyed drab and the pipe clay washed off equipment. Several regiments fought in blue tunics, the Royal Marine Light Infantry, Royal Artillery and the Royal Horse Guards. The King’s Royal Rifle Corps fought in rifle green tunics and trousers. The Highland regiments fought in kilts, other than the Highland Light Infantry and the 72nd Highlanders (1st Battalion, the Seaforth Highlanders – see below). The Indian Army regiments all wore drab or grey uniforms.

1st Life Guards in the Charge at Kassassin: Battle of Tel-el-Kebir on 13th September 1882 in the Egyptian War: picture by Harry Payne

1st Life Guards in the Charge at Kassassin: Battle of Tel-el-Kebir on 13th September 1882 in the Egyptian War: picture by Harry Payne

The Egyptian troops wore Turkish uniforms of white tunic and trousers, spats and fezzes and were armed with single shot Remington rifles.

7th Dragoon Guards in Home Service uniform: Battle of Tel-el-Kebir on 13th September 1882 in the Egyptian War: picture by Orlando Norie

7th Dragoon Guards in Home Service uniform: Battle of Tel-el-Kebir on 13th September 1882 in the Egyptian War: picture by Orlando Norie

Winner of the Battle of Tel-el-Kebir: The British and Indian Army.

British Regiments at the Battle of Tel-el-Kebir:
N/A Battery, Royal Horse Artillery
1st Life Guards
2nd Life Guards
Royal Horse Guards
4th Dragoon Guards
7th Dragoon Guards
19th Hussars
3 batteries of the Royal Artillery: N/2, A/1 and D/1.

5th and 6th Batteries of the Royal Artillery, siege artillery
Royal Engineers: pontoon and telegraph troops, 8th and 17th Companies.
2nd Battalion, Grenadier Guards
2nd Battalion, Coldstream Guards

1st Battalion, Scots Guards
2nd Battalion, Royal Irish Regiment

Arabi with Egyptian troops: Battle of Tel-el-Kebir on 13th September 1882 in the Egyptian War

Arabi with Egyptian troops: Battle of Tel-el-Kebir on 13th September 1882 in the Egyptian War

2nd Battalion, Duke of Cornwall’s Light Infantry
1st Battalion, Black Watch
3rd Battalion, King’s Royal Rifle Corps
2nd Battalion, York and Lancaster Regiment
2nd Battalion, Highland Light Infantry
1st Battalion, Royal Irish Fusiliers
1st Battalion, Seaforth Highlanders
1st Battalion, Gordon Highlanders
1st Battalion, Cameron Highlanders

Indian Regiments at the Battle of Tel-el-Kebir:
2nd Bengal Cavalry (Gardner’s Horse)
6th (King Edward’s Own) Bengal Cavalry
13th Bengal Cavalry (Watson’s Horse)
2nd Queen’s Own Sappers and Miners
7th Bengal Infantry (Rajputs)
20th (Brownlow’s) Punjab Infantry
29th Bombay Infantry (Baluchis)

13th Bengal Cavalry at the Battle of Tel-el-Kebir on 13th September 1882 in the Egyptian War

13th Bengal Cavalry at the Battle of Tel-el-Kebir on 13th September 1882 in the Egyptian War

Account of the Battle of Tel-el-Kebir: Egypt in the late 19th Century, ruled by the Khedive, remained a nominal part of the Turkish Ottoman Empire. Britain and France maintained a substantial interest in the country due to the Suez Canal, in which both countries invested heavily and which provided the most direct route to their Asian colonies; India and Australia for Britain and Indochina for France. In the 1870s, Egypt, through mismanagement and corruption, lurched towards financial collapse and political instability. Britain and France installed a commission to supervise Egypt’s government. In 1881, Colonel Ahmed Arabi Bey, a native Egyptian officer of the Egyptian Army, with other Egyptian officers launched a revolt against the Khedive and the British and French. A British naval squadron under Admiral Seymour bombarded the defences of Alexandria, Egypt’s main port on the northern coast, on 11th July 1882. A British military force assembled under Lieutenant General Sir Garnet Wolseley to invade Egypt, with the purpose of capturing Cairo and restoring the Khedive as nominal ruler with Anglo-French control of the country.

1st Scots Guards landing at Alexandria before the Battle of Tel-el-Kebir on 13th September 1882 in the Egyptian War

1st Scots Guards landing at Alexandria before the Battle of Tel-el-Kebir on 13th September 1882 in the Egyptian War

The leading elements of the British force landed at Alexandria in the second week of August 1882. The aims of the force were to secure the Suez Canal that ran north-south in the East of Egypt and then to march on Cairo, the capital of the country, which the rebels were threatening to destroy in the event of an invasion.

Map of the Kafre El Dawwar reconnaissance on 5th August 1882: map by John Fawkes

Map of the Kafre El Dawwar reconnaissance on 5th August 1882: map by John Fawkes

2nd Coldstream Guards leaving London for Egypt: Battle of Tel-el-Kebir on 13th September 1882 in the Egyptian War

2nd Coldstream Guards leaving London for Egypt: Battle of Tel-el-Kebir on 13th September 1882 in the Egyptian War

An Anglo-Indian force (comprising both British and Indian regiments) was sent from India to join the British contingent on the Suez Canal.

On 5th August 1882 Major General Alison conducted a reconnaissance up the Alexandria to Cairo railway line to probe the fortified line built by General Arabi at Kafre El Dawwar.

The landing at Alexandria was a feint. General Wolseley concealed his true plan from everyone except his immediate staff, which was to land at Ismailia, midway down the Suez Canal and to march west to Cairo, attacking Arabi’s army in its positions at Tel-El-Kebir on the railway and main irrigation canal.

The British contingent landed at Ismailia around 20th August 1882, securing the local barracks and canal facilities, while the Anglo-Indian contingent came up the canal from the Persian Gulf in the South.

At 4am on 24th August 1882, General Wolseley’s army marched out of Ismailia, along the line of the railway, moving west towards Cairo, to attack Arabi’s army at the town of Tel-El-Kebir.

Arabi’s army had in the meanwhile dammed the irrigation canal that ran alongside the railway, with the aim of cutting off the water supply to Wolseley’s army and the town of Ismailia.

General Graham’s brigade was pushed forward to Kassassin, where there was a lock on the irrigation canal. Graham’s brigade adopted a position across the railway line and the canal.

Royal Navy steam pinnace and soldiers clearing the dammed stream: Battle of Tel-el-Kebir on 13th September 1882 in the Egyptian War

Royal Navy steam pinnace and soldiers clearing the dammed stream: Battle of Tel-el-Kebir on 13th September 1882 in the Egyptian War

Late on 24th August 1882, an Egyptian force, comprising guns and infantry, appeared to the north of Graham’s position. Graham engaged them. Seeing that the Egyptians’ flank was exposed, Graham directed Major General Drury-Lowe to attack the Egyptians with the cavalry brigade.


Map of the Tel-el-Kebir campaign, showing Wolseley's advance from Ismailia to Tel-el-Kebir: Battle of Tel-el-Kebir on 13th September 1882 in the Egyptian War: map by John Fawkes

Map of the Tel-el-Kebir campaign, showing Wolseley’s advance from Ismailia to Tel-el-Kebir: Battle of Tel-el-Kebir on 13th September 1882 in the Egyptian War: map by John Fawkes

Drury-Lowe lead forward his mounted force, comprising a composite regiment of Household Cavalry (a squadron from each of the 1st Life Guards, 2nd Life Guards and the Royal Horse Guards, the ‘Blues’) and 7th Dragoon Guards with four guns of N/A Battery, Royal Horse Artillery.

Highland Brigade assaulting the Egyptian entrenchments at the Battle of Tel-el-Kebir on 13th September 1882 in the Egyptian War

Highland Brigade assaulting the Egyptian entrenchments at the Battle of Tel-el-Kebir on 13th September 1882 in the Egyptian War

Drury-Lowe was aided in reaching the battle line by the gun flashes in the gathering darkness. The first fire was opened by the Egyptians. Drury-Lowe engaged them with his guns and then launched the Household Cavalry in a charge. The Egyptian infantry were swept away and their guns abandoned and captured in the ‘Moonlight Charge’ of the Battle of Kassassin.

Charge of the Household Cavalry at Kassassin: Battle of Tel-el-Kebir on 13th September 1882 in the Egyptian War: picture by J. Richards

Charge of the Household Cavalry at Kassassin: Battle of Tel-el-Kebir on 13th September 1882 in the Egyptian War: picture by J. Richards

Informed of this success, Graham returned to his positions at Kassassin. General Sir Garnet Wolseley completed the build-up of his army around the Kassassin position by 12th September 1882. Arabi’s Egyptian army lay at Tel-El-Kebir some ten miles distant. Tel-El-Kebir comprised a small town to the south of the line of the canal and the Cairo-Ismailia railway, that ran parallel and to the north of the canal.

Map of the Battle of Tel-el-Kebir on 13th September 1882 in the Egyptian War: map by John Fawkes

Map of the Battle of Tel-el-Kebir on 13th September 1882 in the Egyptian War: map by John Fawkes

Over the preceding weeks, the Egyptian army of some 20,000 soldiers with 59 guns, some of them modern German Krupp-made weapons, had built a length of entrenchment, starting with redoubts at the canal and railway and stretching north some three miles to the end of a raised section of ground. A second section of entrenchment covered the Egyptian camp to the rear.

Highlanders advancing at the Battle of Tel-el-Kebir on 13th September 1882 in the Egyptian War: picture by Richard Caton Woodville

Highlanders advancing at the Battle of Tel-el-Kebir on 13th September 1882 in the Egyptian War: picture by Richard Caton Woodville

General Wolseley resolved to attack the Egyptian line at dawn on 13th September 1882, following a night approach march. His army formed up with the Second Division, commanded by Lieutenant General Sir Edward Hamley, on the left; the Highland Brigade leading with the second brigade of the Division in reserve immediately to its rear. The First Division took the right, with Major General Graham’s brigade to the front and the Guards Brigade, commanded by the Duke of Connaught, in reserve. The guns, commanded by Colonel Goodenough, advanced in the area between the two reserve brigades. The cavalry brigade commanded by Major General Drury-Lowe, augmented to a division by the addition of the Indian mounted regiments, took the right of the army, conforming to the Guards Brigade, its role being to sweep around the Egyptian flank, once the infantry had stormed the entrenchments and make for Cairo, to prevent the destruction of the Egyptian capital by Arabi’s rebels.

Drury-Lowe's cavalry at Kassassin: Battle of Tel-el-Kebir on 13th September 1882 in the Egyptian War: picture by Christopher Clark

Drury-Lowe’s cavalry at Kassassin: Battle of Tel-el-Kebir on 13th September 1882 in the Egyptian War: picture by Christopher Clark

The Indian brigade was to advance along the canal/railway line on the south side, to clear the Egyptian redoubts in that area and take the town of Tel-El-Kebir, before moving on to the next station up the line, Zag-a-Zig.

13th Bengal Cavalry at the Battle of Tel-el-Kebir on 13th September 1882 in the Egyptian War

13th Bengal Cavalry at the Battle of Tel-el-Kebir on 13th September 1882 in the Egyptian War

The direction of the night-time advance was to be supervised by Lieutenant Rawson, Royal Navy, navigating by the stars from the left flank.

The night march to the entrenchments went surprisingly smoothly, except that the advancing army drifted to its right. Dawn broke with the Highland Brigade (Black Watch, HLI, Camerons and Gordons), leading the British left, within 150 yards of the Egyptian line. A heavy fire immediately broke out. The four regiments of the Highland Brigade, led by its commander, Major General Allison and General Hamley, the Divisional Commander, stormed into the entrenchments, the two centre regiments, the Gordons and Camerons leading.

Black Watch at the Battle of Tel-el-Kebir on 13th September 1882 in the Egyptian War: picture by Alphonse de Neuville

Black Watch at the Battle of Tel-el-Kebir on 13th September 1882 in the Egyptian War: picture by Alphonse de Neuville

The Black Watch on the right of the brigade found the resistance hard to overcome, until supported by 3rd Battalion the King’s Royal Rifle Corps from the divisional reserve. On the left the Highland Light Infantry were unable to break into the entrenchments, until re-inforced by the Duke of Cornwall’s Light Infantry from the reserve brigade.

On the right, General Graham’s brigade met heavy resistance but drove the Egyptians from their trenches with the support of guns from the centre.

'Bringing up the guns' at the Battle of Tel-el-Kebir on 13th September 1882 in the Egyptian War

‘Bringing up the guns’ at the Battle of Tel-el-Kebir on 13th September 1882 in the Egyptian War: picture by John Charlton

Following the success of the infantry attack, General Drury-Lowe took his cavalry division in a sweep around the Egyptian left flank and rode down the Egyptian rear towards the bridge crossing the canal into Tel-El-Kebir, accelerating the rout of the retreating Egyptian troops.

Black Watch storming the Eqyptian lines at the Battle of Tel-el-Kebir on 13th September 1882 in the Egyptian War: picture by Henri Dupray

Black Watch storming the Eqyptian lines at the Battle of Tel-el-Kebir on 13th September 1882 in the Egyptian War: picture by Henri Dupray

To the south of the canal, the Seaforth Highlanders (part of the Indian brigade) attacked the Egyptian redoubt, while the 20th Punjabis (Brownlow’s) moved around the Egyptian right flank and stormed a village from which fire was being directed, both battalions supported by 7th Bengal Native Infantry and 29th Bombay Native Infantry.

Highland Light Infantry assaulting the Egyptian entrenchments at the Battle of Tel-el-Kebir on 13th September 1882 in the Egyptian War: picture by Harry Payne

Highland Light Infantry assaulting the Egyptian entrenchments at the Battle of Tel-el-Kebir on 13th September 1882 in the Egyptian War: picture by Harry Payne

The Indian brigade then moved into the town of Tel-El-Kebir. The action was finished with the Egyptian army in rout.

Following the battle, the cavalry division secured Cairo on 14th September 1882 and accepted the surrender of Arabi. On 25th September 1882, the Khedive re-entered his capital escorted by British and Indian troops.

4th Dragoon Guards at the Battle of Tel-el-Kebir on 13th September 1882 in the Egyptian War: picture by Thomas Seccombe

4th Dragoon Guards at the Battle of Tel-el-Kebir on 13th September 1882 in the Egyptian War: picture by Thomas Seccombe

Casualties at the Battle of Tel-el-Kebir:
The Egyptians are said to have suffered 2,000 dead and an unquantified number of wounded. 66 guns were captured.

Medical treatment camp after the Battle of Tel-el-Kebir on 13th September 1882 in the Egyptian War

Medical treatment camp after the Battle of Tel-el-Kebir on 13th September 1882 in the Egyptian War

The British and Indian casualties were: 9 officers and 48 non-commissioned ranks killed and 27 officers and 353 non-commissioned ranks wounded. 22 men were reported missing.

Egyptian prisoners after the Battle of Tel-el-Kebir on 13th September 1882 in the Egyptian War

Egyptian prisoners after the Battle of Tel-el-Kebir on 13th September 1882 in the Egyptian War

Follow-up to the Battle of Tel-el-Kebir:
The Egyptian War began Britain’s involvement in Egypt and the Sudan, leading to the campaign in the Sudan to attempt the rescue of General Gordon in 1885. British troops finally left Egypt and the Sudan after the Second World War.

Lieutenant General Sir Garnet Wolseley after the Battle of Tel-el-Kebir on 13th September 1882 in the Egyptian War: picture by Lady Butler

Lieutenant General Sir Garnet Wolseley after the Battle of Tel-el-Kebir on 13th September 1882 in the Egyptian War: picture by Lady Butler

Anecdotes and traditions from the Battle of Tel-el-Kebir: 

Egypt and Sudan Campaign Medal 1882 with clasp for the Battle of Tel-el-Kebir on 13th September 1882 in the Egyptian War and the Khedive's Star

Egypt and Sudan Campaign Medal 1882 with clasp for the Battle of Tel-el-Kebir on 13th September 1882 in the Egyptian War and the Khedive’s Star

Khedive Star and Tel el Kebir clasp awarded to 361 Trumpeter Sundar Singh of 2nd Bengal Cavalry

Khedive Star and Tel el Kebir clasp awarded to 361 Trumpeter Sundar Singh of 2nd Bengal Cavalry

  • Campaign medals for the Battle of Tel-el-Kebir:
    The troops involved in the Egyptian campaign received the British medal for Egypt, 1882, with the clasp, where appropriate, ‘Tel-El-Kebir’. They also received the Khedive’s bronze star from the Khedive of Egypt.
  • While planning the campaign in London, General Wolseley said he would win the war in a battle fought in the area of Tel-El-Kebir around the middle of September 1882, which is exactly what happened.
  • Lieutenant General Sir Edward Hamley, commanding the Second Division, was a veteran of the Crimean War, having had horses shot under him at the Battle of the Alma and the Battle of Inkerman. A Royal Artillery officer, General Hamley wrote a popular history of the Crimean War.
  • The reconnaissance to Kafre El Dawwar from Alexandria on 5th August 1882 used the ‘armoured train’, equipped with a naval gun, designed and constructed by Captain Jackie Fisher RN of HMS Inflexible, later First Sea Lord in the opening years of the First World War.
  • Several foreign correspondents accompanied the British army. The correspondent of the Kolnische Zeitung wrote of the army: ‘… The private soldiers vary much more than ours. There are among them old and young, weak and strong. In general, the strong predominate. Many of them are splendid men, with muscles like those of the ‘dying gladiator’. The uniform is the red tunic and Indian mud-coloured helmet. The Household Cavalry, Rifles, Marines and Artillery do not wear red tunics. All, however, wear the sun helmet, which is of a beautiful shape, but an ugly colour.

    Indian Cavalry entering Cairo after the Battle of Tel-el-Kebir on 13th September 1882 in the Egyptian War

    Indian Cavalry entering Cairo after the Battle of Tel-el-Kebir on 13th September 1882 in the Egyptian War

    Surprising the sabotage of a bridge by Egyptian troops: Battle of Tel-el-Kebir on 13th September 1882 in the Egyptian War: picture by Richard Caton Woodville

    Surprising the sabotage of a bridge by Egyptian troops: Battle of Tel-el-Kebir on 13th September 1882 in the Egyptian War: picture by Richard Caton Woodville

    They also wear a flannel shirt and needlessly warm woollen trousers. The little wooden water-bottle that each soldier carries at his belt appears very practical, as the water keeps cooler than in flasks of tin…..The Hussars and Dragoons are to be distinguished only by their leggings, as they also wear red tunics and helmets. The Indian Cavalry look well in their uniform which resembles that of the Cossacks. They carry lances; their pointed shoes are in the style of the fifteenth century. All these men have gipsy faces with beautiful fiery eyes. They move with a cat-like softness, peculiar to all southern Asiatics. These Indians know better than anyone else how to forage and steal. Among the British officers, especially the Guards, are crowds of lords with £10,000 a year and more, but without knowing it beforehand, no one would find out…. They have almost unlimited liberty as regards uniform when not on duty. If it is difficult for the Continental European to distinguish between German regiments, it is more so when British officers not on duty wear the half military, half civilian costume. They appear in yellow leather lace-boots and gaiters, fancy coats, broad belts, gigantic revolver-pockets, scarfs, etc….As far as I was able to judge, they did not trouble themselves much about their men….’

    Royal Marine Light Infantry return to Chatham after the Battle of Tel-el-Kebir on 13th September 1882 in the Egyptian War

    Royal Marine Light Infantry return to Chatham after the Battle of Tel-el-Kebir on 13th September 1882 in the Egyptian War

    13th Duke of Connaught's Own Bengal Cavalry: Battle of Tel-el-Kebir on 13th September 1882 in the Egyptian War: picture by Harry Payne

    13th Duke of Connaught’s Own Bengal Cavalry: Battle of Tel-el-Kebir on 13th September 1882 in the Egyptian War: picture by Harry Payne

  • The Egyptian campaign formed a clear marker in the change of campaign dress to the more utilitarian. The Royal Marine Light Infantry and some of the other regiments abandoned pipe clay and stained their white equipment and helmets with tea and tobacco juice. Several of the Indian regiments already wore grey or drab which was adopted by British regiments. New drab jackets arrived for the army, but too late for the fighting.
  • The 72nd Highlanders arrived from India, where they had taken a prominent and successful part in the Second Afghan War. While the 1882 reforms saw the 72nd become the 1st Battalion, the Seaforth Highlanders, a kilted regiment wearing the Mackenzie tartan, the 72nd were still clothed in their Stuart tartan trews, having had no opportunity to re-clothe.
  • During the attack on the Egyptian entrenchments one of the guns of N/2 Battery of the Royal Artillery broke a wheel. The battery and its successor took the nickname ‘The Broken Wheel Battery’.
  • Queen Victoria directed that she be provided with photographs of selected soldiers from each of the regiments that fought at the Battle of Tel-el-Kebir. Some of these photographs are set out below:

    British Army Medical Staff after the Battle of Tel-el-Kebir on 13th September 1882 in the Egyptian War

    British Army Medical Staff after the Battle of Tel-el-Kebir on 13th September 1882 in the Egyptian War

2nd Duke of Cornwall's Light Infantry: Battle of Tel-el-Kebir on 13th September 1882 in the Egyptian War

2nd Duke of Cornwall’s Light Infantry: Battle of Tel-el-Kebir on 13th September 1882 in the Egyptian War

1st Gordon Highlanders: Battle of Tel-el-Kebir on 13th September 1882 in the Egyptian War

1st Gordon Highlanders: Battle of Tel-el-Kebir on 13th September 1882 in the Egyptian War

Gatling Gun team from HMS Monarch at the Battle of Tel-el-Kebir on 13th September 1882 in the Egyptian War

Gatling Gun team from HMS Monarch at the Battle of Tel-el-Kebir on 13th September 1882 in the Egyptian War

2nd King's Royal Rifle Corps: Battle of Tel-el-Kebir on 13th September 1882 in the Egyptian War

2nd King’s Royal Rifle Corps: Battle of Tel-el-Kebir on 13th September 1882 in the Egyptian War

Soldiers from 20th Bengal (Punjabi) Infantry: Battle of Tel-el-Kebir on 13th September 1882 in the Egyptian War

Soldiers from 20th Bengal (Punjabi) Infantry: Battle of Tel-el-Kebir on 13th September 1882 in the Egyptian War

2nd Highland Light Infantry: Battle of Tel-el-Kebir on 13th September 1882 in the Egyptian War

2nd Highland Light Infantry: Battle of Tel-el-Kebir on 13th September 1882 in the Egyptian War

N/2 'Broken Wheel' Battery Royal Artillery: Battle of Tel-el-Kebir on 13th September 1882 in the Egyptian War

N/2 ‘Broken Wheel’ Battery Royal Artillery: Battle of Tel-el-Kebir on 13th September 1882 in the Egyptian War

References for the Battle of Tel-el-Kebir:

War on the Nile by Michael Barthorp

British Battles by Grant

History of British Cavalry Volume 3: 1872-1898 by the Marquess of Anglesey

British 'Moonlight' Cavalry Charge at Kassassin: Battle of Tel-el-Kebir on 13th September 1882 in the Egyptian War: picture by Henry Ganz

British ‘Moonlight’ Cavalry Charge at Kassassin: Battle of Tel-el-Kebir on 13th September 1882 in the Egyptian War: picture by Henry Ganz

The previous battle in the British Battles sequence is the Battle of Ulundi

The next battle of the Egypt and Sudan War of 1882 is the Battle of El Teb

To the Egypt and Sudan War 1882 index


Battle of Charasiab

The knife-edged battle, fought on 6th October 1879 and won by the courage and resource of the British and Indian troops, that opened the way for Roberts to Kabul

View of the Battle of Charasiab on 9th October 1879 in the Second Afghan War: the River Logar is beyond the mountains on the right

View of the Battle of Charasiab on 9th October 1879 in the Second Afghan War: the River Logar is beyond the mountains on the right

The previous battle of the Second Afghan War is the Battle of Futtehabad

The next battle of the Second Afghan War is the Battle of Kabul

To the Second Afghan War index


Battle: Charasiab

War: Second Afghan War.

Lieutenant General Sir Frederick Roberts VC, British commander at the Battle of Charasiab on 9th October 1879 in the Second Afghan War

Lieutenant General Sir Frederick Roberts VC, British commander at the Battle of Charasiab on 9th October 1879 in the Second Afghan War

Date of the Battle of Charasiab: 6th October 1879

Place of the Battle of Charasiab: South of Kabul in Afghanistan.

Combatants at the Battle of Charasiab: British and Indians against Afghan troops and tribesmen.

Generals at the Battle of Charasiab: Major General Frederick Roberts VC against Nek Mohammed Khan, uncle of the Ameer and Governor of Kabul.

Size of the armies at the Battle of Charasiab: 3,800 British and Indian troops against 12,000 regular Afghan troops and tribesmen.

Uniforms, arms and equipment at the Battle of Charasiab:
The British and Indian forces were made up, predominantly, of native Indian regiments from the armies of the three British presidencies, Bengal, Bombay and Madras, with smaller regional forces, such as the Hyderabad contingent, and the newest, the powerful Punjab Frontier Force.

The Mutiny of 1857 had brought great change to the Indian Army. Prior to the Mutiny, the old regiments of the presidencies were recruited from the higher caste Brahmins, Hindus and Muslims of the provinces of central and eastern India, principally Oudh. Sixty of the ninety infantry regiments of the Bengal Army mutinied in 1857 and many more were disbanded, leaving few to survive in their pre-1857 form. A similar proportion of Bengal Cavalry regiments disappeared.

The British Army overcame the mutineers with the assistance of the few loyal regiments of the Bengal Army and the regiments of the Bombay and Madras Presidencies, which on the whole did not mutiny. But principally, the British turned to the Gurkhas, Sikhs, Muslims of the Punjab and Baluchistan and the Pathans of the North-West Frontier for the new regiments with which Delhi was recaptured and the Mutiny suppressed.

Lieutenant Hart Royal Engineers winning the VC: Battle of Charasiab on 9th October 1879 in the Second Afghan War: picture by Harry Payne

Lieutenant Hart Royal Engineers winning the VC: Battle of Charasiab on 9th October 1879 in the Second Afghan War: picture by Harry Payne

After the Mutiny, the British developed the concept of ‘the Martial Races of India’. Certain Indian races were more suitable to serve as soldiers, went the argument, and those were, coincidentally, the races that had saved India for Britain. The Indian regiments that invaded Afghanistan in 1878, although mostly from the Bengal Army, were predominantly recruited from the martial races; Jats, Sikhs, Muslim and Hindu Punjabis, Pathans, Baluchis and Gurkhas.

Map of Afghanistan by John Fawkes

Map of Afghanistan by John Fawkes

Prior to the Mutiny, each Presidency army had a full quota of field and horse artillery batteries. The only Indian artillery units allowed to exist after the Mutiny were the mountain batteries. All the horse, field and siege batteries were, from 1859, found by the British Royal Artillery.

In 1878, the regiments were beginning to adopt khaki for field operations. The technique for dying uniforms varied widely, producing a range of shades of khaki, from bottle green to a light brown drab.

As regulation uniforms were unsatisfactory for field conditions in Afghanistan, the officers in most regiments improvised more serviceable forms of clothing.

Indian Mountain Battery: Battle of Charasiab on 9th October 1879 in the Second Afghan War: map by John Fawkes

Indian Mountain Battery: Battle of Charasiab on 9th October 1879 in the Second Afghan War: map by John Fawkes

Every Indian regiment was commanded by British officers, in a proportion of some 7 officers to 650 soldiers, in the infantry. This was an insufficient number for units in which all tactical decisions of significance were taken by the British and was particularly inadequate for less experienced units.

The British infantry carried the single shot, breech loading, .45 Martini-Henry rifle. The Indian regiments still used the Snider; also a breech loading single shot rifle, but of older pattern and a conversion of the obsolete muzzle loading Enfield weapon.

The cavalry were armed with sword, lance and carbine, Martini-Henry for the British troopers, Snider for the Indian sowars.

Rissaldar Major 14th Bengal Cavalry, Murray's Jats: Battle of Charasiab on 9th October 1879 in the Second Afghan War: picture by A.C. Lovett

Rissaldar Major 14th Bengal Cavalry, Murray’s Jats: Battle of Charasiab on 9th October 1879 in the Second Afghan War: picture by A.C. Lovett

The British artillery, using a variety of guns, many smooth bored muzzle loaders, was not as effective as it could have been, if the authorities had equipped it with the breech loading steel guns being produced for European armies. Artillery support was frequently ineffective and on occasions the Afghan artillery proved to be better equipped than the British.

The army in India possessed no higher formations above the regiment in times of peace, other than the staffs of static garrisons. There was no operational training for staff officers. On the outbreak of war, brigade and divisional staffs had to be formed and learn by experience.

The British Army had, in 1870, replaced long service with short service for its soldiers. The system was not yet universally applied, so that some regiments in Afghanistan were short service and others still manned by long service soldiers. The Indian regiments were all manned by long service soldiers. The universal view seems to have been that the short service regiments were weaker both in fighting effectiveness and disease resistance than the long service.

Winner of the Battle of Charasiab: The British and Indians.

Bengal 12th Cavalry: Battle of Charasiab on 9th October 1879 in the Second Afghan War: picture by A.C. Lovett

Bengal 12th Cavalry: Battle of Charasiab on 9th October 1879 in the Second Afghan War: picture by A.C. Lovett

British and Indian Regiments at the Battle of Charasiab: 
British Regiments:
9th Lancers, now 9th/12th the Royal Lancers *
2 batteries Royal Horse Artillery
2 mountain batteries
67th Foot, later the Hampshire Regiment and now the Princess of Wales’s Royal Regiment. *
72nd Highlanders, later the Seaforth Highlanders and now the Royal Regiment of Scotland. *
92nd Highlanders, later the Gordon Highlanders and now the Royal Regiment of Scotland. *

Indian Regiments:
12th Bengal Cavalry *
14th Bengal Cavalry (Murray’s Jat Lancers) *
5th Punjab Cavalry (25th Cavalry (FF) *
23rd Bengal Native Infantry (Pioneers) *
28th Bengal Native Infantry (Punjabis) *
5th Gurkhas *
5th Punjab Infantry, Punjab Frontier Force (Vaughan’s Rifles) *
*these regiments have Charasiah as a battle honour.

Punjab 5th Cavalry: Battle of Charasiab on 9th October 1879 in the Second Afghan War: picture by A.C. Lovett

Punjab 5th Cavalry: Battle of Charasiab on 9th October 1879 in the Second Afghan War: picture by A.C. Lovett

Order of battle of the Kabul Field Force:
Cavalry Brigade: commanded by Brigadier-General Massey.
9th Lancers

12th Bengal Cavalry
14th Bengal Cavalry
5th Punjab Cavalry

Royal Artillery: commanded by Brigadier-General Gordon.
2 batteries Royal Horse Artillery
2 mountain batteries

First Infantry Brigade: commanded by Brigadier-General Macpherson VC.
67th Foot
92nd Highlanders
28th Bengal Native Infantry (Punjabis)

Second Infantry Brigade: commanded by Brigadier-General Baker.
72nd Highlanders
3rd Sikh Infantry
23rd Bengal Native Infantry (Pioneers)
29th Bengal Native Infantry (wing).
5th Gurkhas
5th Punjab Infantry, Punjab Frontier Force.

Punjabi infantry: Battle of Charasiab on 9th October 1879 in the Second Afghan War: picture by A.C. Lovett

Punjabi infantry: Battle of Charasiab on 9th October 1879 in the Second Afghan War: picture by A.C. Lovett

Third Infantry Brigade: commanded by Brigadier-General Tytler VC.
85th Foot
11th Bengal Native Infantry (Rajputs)
13th Bengal Native Infantry (Rajputs)
20th Bengal Native Infantry (Punjabis)

Fourth Infantry Brigade: commanded by Brigadier-General Gordon.
2nd/8th Foot, King’s Own Regiment
7th Bengal Native Infantry (Rajputs)
21st Bengal Native Infantry (Punjabis)
29th Bengal Native Infantry (Punjabis) (wing)

The Third and Fourth Brigades garrisoned the lines of communication. This was no easy task due to the frequent raids by the mountain tribes, with many of the troops so employed seeing as much action, if not more than the troops with the main force.

Account of the Battle of Charasiab:
On 3rd September 1879, Afghan troops from the Herati regiments rioted in Kabul, demanding their arrears of pay. The rioters went to the Bala Hissar fortress, where they stormed the residency occupied by the British Military Mission under Sir Louis Cavagnari and a small escort of Guides Cavalry.

British encampment: Battle of Charasiab on 9th October 1879 in the Second Afghan War

British encampment: Battle of Charasiab on 9th October 1879 in the Second Afghan War

After a bitter fight, the Herati troops killed Cavagnari and his British and Indian party, thereby rekindling the Second Afghan War.

The first phase of the war ended four months earlier with the signing of the Treaty of Gandamak in May 1879, the principle provision of which required the Afghan Ameer, Yakoub Khan, to accept Cavagnari’s mission in Kabul.

As the news of the deaths of Cavagnari’s party reached India, British and Indian regiments gathered in the border stations for the resumption of hostilities.

72nd Highlanders at the Battle of Charasiab on 9th October 1879 in the Second Afghan War: picture by Richard Simkin

72nd Highlanders at the Battle of Charasiab on 9th October 1879 in the Second Afghan War: picture by Richard Simkin

While in the first phase, the British contented themselves with a limited incursion into Afghanistan to bring the Ameer to negotiations, the death of Cavagnari caused the government in Calcutta to initiate a full invasion of the country, the occupation of Kabul and punitive action against the killers of Cavagnari’s party.

This time, the advance was to be by the Kurrum Valley alone, the Khyber route being considered too difficult, with a strong invasion in the South of Afghanistan to take Kandahar, the Southern Afghan capital. Once Kabul was taken, the Khyber Pass route would be opened to establish supply lines with India.


Map of the Battle of Charasiab on 9th October 1879 in the Second Afghan War: map by John Fawkes

Map of the Battle of Charasiab on 9th October 1879 in the Second Afghan War: map by John Fawkes

Command of the northern attack on Kabul was given to Major General Sir Frederick Roberts, the commander of the Kurrum Valley Field Force in the first phase and the general considered to have performed best.

Afghan troops: Battle of Charasiab on 9th October 1879 in the Second Afghan War

Afghan troops: Battle of Charasiab on 9th October 1879 in the Second Afghan War

Roberts reached Ali Khel near the head of the Kurrum Pass on 6th September 1879, to find the three brigades of the Kabul Field Force largely assembled and ready to cross the Shutagardan Pass into Central Afghanistan. Many of the mountain tribes were persuaded to desist from attacking the British supply columns, a move made easier by the Ramadan festival inhibiting tribal hostilities.

Yakoub Khan, finding that the murder of Cavagnari made his position as Ameer untenable, left Kabul and joined Roberts, enabling the British to claim that the invasion was to support the Ameer’s rule.

Second Afghan War Medal with clasps for Kabul and Charasia: Battle of Charasiab on 9th October 1879 in the Second Afghan War

Second Afghan War Medal with clasps for Kabul and Charasia: Battle of Charasiab on 9th October 1879 in the Second Afghan War

On 3rd October 1879, the Kabul Field Force began the final thirty-six mile march to Kabul.
As in the first phase of the war, the British and Indian force was severely hampered by a shortage of transport animals, camels and oxen. Brigade Macpherson remained at the town of Safed Sang, with a reserve of ammunition and stores, while Roberts and the main body continued to Kabul.

On the evening of 5th October 1879, Roberts reached Charasiab village near the River Logar and encamped. To the north of the camp, by the river, the route to Kabul lay through the Sang i Nawishta defile. Brigadier MacGregor urged that a hill overlooking the defile be immediately occupied, but this was not done. It was Roberts’ intention to remain in Charasiab while the transport animals returned to Safed Sang and brought up the supplies left there with the remaining troops.

As evening drew in, Afghans could be seen gathering in the hills flanking the Sang i Nawishta.

On the morning of 6th October 1879, a force comprising 23rd Bengal Native Infantry and 92nd Highlanders with cavalry and 2 guns advanced to the Sang i Nawishta, with the task of making sure the route along the Logar River was passable. But the Afghan force was now moving forward and it could be seen that this was not a mass of tribesmen, but regular Afghan troops equipped with artillery, around 8,000 in number. The Afghans took position occupying three miles of the crescent of hills.

To further complicate Roberts’ position, Afghan tribesmen were gathering in his rear and cutting his links with Macpherson’s force. Roberts resolved on immediate attack on the Afghan army blocking his road to Kabul.

92nd Highlanders storming the heights at the Battle of Charasiab on 9th October 1879 in the Second Afghan War

92nd Highlanders storming the heights at the Battle of Charasiab on 9th October 1879 in the Second Afghan War

Brigadier Baker advanced with the force already deployed; 72nd Highlanders, troops of 5th Gurkhas and 5th Punjab Infantry, cavalry and 5 guns.

Baker’s force divided in two; Major White leading a contingent from the 92nd and 23rd Pioneers into the defile, while Baker took the remaining companies to attack the Afghan right.

White stormed the hill overlooking the defile, only to find himself threatened by overwhelming numbers of Afghans. In spite of this, White detached two companies of highlanders to assist Baker’s attack.

Royal Artillery Elephant Battery: Battle of Charasiab on 9th October 1879 in the Second Afghan War

Royal Artillery Elephant Battery: Battle of Charasiab on 9th October 1879 in the Second Afghan War

Baker’s troops stormed the hills forming the first line on the Afghan right, driving the Afghans back to the second line of hills. The 72nd, 5th Gurkhas and the remaining companies of the 23rd Pioneers assailed the second line. This attack was suddenly supported by the two companies of 92nd Highlanders, sent with great perspicacity by White to launch an assault in support of Baker on the left flank of the Afghans.

Looking out for Afghans: Battle of Charasiab on 9th October 1879 in the Second Afghan War

Looking out for Afghans: Battle of Charasiab on 9th October 1879 in the Second Afghan War

The Afghan centre and right, under attack by Baker and in flank by the 92nd, crumbled and fled, taking the troops facing White with them, pressed as they were by White’s advance up the defile. White’s cavalry captured 6 guns.

Casualties at the Battle of Charasiab: British and Indian casualties were 78. Afghan casualties were around 500.

Follow-up to the Battle of Charasiab: 
The Battle of Charasiab opened the last section of road to Kabul for the British and Indian army. Moving forward, Roberts concentrated his army before taking over the city on 9th October 1879.

The battle at Charasiab was a critical one. As on several occasions in the Second Afghan War, the margin between success and disastrous failure was thin. The courage and resource of the troops and their officers won the battle against great odds. Roberts showed his remarkable tactical skill and ability to delegate, a confidence that was entirely justified in the case of vigorous and resourceful subordinate officers like White and Baker.

Anecdotes and traditions from the Battle of Charasiab:

Lieutenant General Sir George White VC in 1890: Battle of Charasiab on 9th October 1879 in the Second Afghan War

Lieutenant General Sir George White VC in 1890: Battle of Charasiab on 9th October 1879 in the Second Afghan War

  • George White, a major in the 92nd Highlanders, showed his tactical skill in the battle, earning the Victoria Cross for his conduct at Charasiab and the next year at Kandahar. This was the same White who, after twenty further years’ service, in 1899 permitted his army so disastrously to be shut up in Ladysmith at the start of the Second Boer War.
  • Charasiab is given as Charasiah in the battle honours list. This is clearly a misspelling.

References for the Battle of Charasiab:

The Afghan Wars by Archibald Forbes

The Road to Kabul; the Second Afghan War 1878 to 1881 by Brian Robson.

Recent British Battles by Grant.

The previous battle of the Second Afghan War is the Battle of Futtehabad

The next battle of the Second Afghan War is the Battle of Kabul

To the Second Afghan War index


« Previous Page
Next Page »

Search BritishBattles.com

Follow / Like Us

Follow us on Facebook Follow us on Pinterest  Follow us on RSS Follow us on Twitter

Other Pages

  • Home
  • Contact Us
  • Privacy
  • News Blog
  • Museums

The BritishBattles Podcast

If you are too busy to read the site, why not download a podcast of an individual battle and listen on the move! Visit our dedicated Podcast page or visit Podbean below.

Britishbattles on Podbean

Follow @Britishbattles


Wars Prior to 1700

  • Wars of Roman Britain
  • Battle of Medway
  • Danish Wars
  • Battle of Ashdown
  • Norman Conquest
  • Battle of Stamford Bridge
  • Battle of Hastings
  • Barons’ War
  • Battle of the Standard
  • Battle of Lewes
  • Battle of Evesham
  • Scottish Wars of Independence
  • Battle of Stirling Bridge
  • Battle of Falkirk
  • Battle of Bannockburn
  • Battle of Dupplin Moor
  • Battle of Halidon Hill
  • 100 Years War
  • Battle of Sluys
  • Battle of Morlaix
  • Battle of Auberoche
  • Battle of Caen
  • Battle of Creçy
  • Siege of Calais
  • Battle of Neville’s Cross
  • Battle of La Roche-Derrien
  • Battle of Winchelsea
  • Battle of Mauron
  • Battle of Poitiers
  • Battle of Cocherel
  • Battle of Auray
  • Battle of Najera
  • Battle of La Rochelle
  • Battle of Otterburn
  • Battle of Homildon Hill
  • Battle of Shrewsbury
  • Siege of Harfleur
  • Battle of Agincourt
  • Battle of Baugé
  • Battle of Cravant
  • Battle of Verneuil
  • Siege of Orléans
  • Battle of the Herrings
  • Battle of Patay
  • Battle of Formigny
  • Battle of Castillon
  • Wars of the Roses
  • First Battle of St Albans
  • Battle of Blore Heath
  • Battle of Northampton
  • Battle of Wakefield 1460
  • Battle of Mortimer’s Cross
  • Second Battle of St Albans
  • Battle of Towton
  • Battle of Barnet
  • Battle of Tewkesbury
  • Battle of Bosworth Field
  • Anglo Scottish War
  • Battle of Flodden
  • Battle of Pinkie
  • The Spanish War
  • The Spanish Armada
  • English Civil War
  • Battle of Edgehill
  • Battle of Seacroft Moor
  • Battle of Stratton
  • Battle of Wakefield 1643
  • Battle of Chalgrove
  • Battle of Adwalton Moor
  • Battle of Lansdown Hill
  • Battle of Roundway Down
  • Storming of Bristol
  • First Battle of Newbury
  • Battle of Cheriton
  • Battle of Cropredy Bridge
  • Battle of Marston Moor
  • Battle of Lostwithiel
  • Second Battle of Newbury
  • Battle of Naseby
  • Siege of Basing House
  • Battle of Dunbar
  • Battle of Worcester

Wars of 1700

  • War of the Spanish Succession
  • Battle of Blenheim
  • Battle of Ramillies
  • Battle of Oudenarde
  • Battle of Malplaquet
  • King George’s War (Austrian Succession)
  • Battle of Dettingen
  • Battle of Fontenoy
  • Battle of Rocoux
  • Battle of Lauffeldt
  • Jacobite Rebellion
  • Battle of Prestonpans
  • Battle of Falkirk
  • Battle of Culloden
  • Frederick the Great Wars
  • First Silesian War
  • Battle of Mollwitz
  • Battle of Chotusitz
  • Second Silesian War
  • Battle of Hohenfriedberg
  • Battle of Soor
  • Battle of Kesselsdorf
  • Seven Years War
  • Battle of Lobositz
  • Battle of Prague
  • Battle of Kolin
  • Battle of Rossbach
  • Battle of Leuthen
  • Battle of Zorndorf
  • Battle of Hochkirch
  • Battle of Kunersdorf
  • Battle of Liegnitz
  • Battle of Torgau
  • Battle of Burkersdorf
  • Battle of Minden
  • Battle of Emsdorf
  • Battle of Warburg
  • Battle of Kloster Kamp
  • Battle of Vellinghausen
  • Battle of Wilhelmstahl
  • Capture of Manila
  • Capture of Havana
  • Anglo-French Wars in India
  • Siege of Arcot
  • Battle of Arni
  • Battle of Kaveripauk
  • Battle of Plassey
  • French and Indian War
  • Battle of Monongahela 1755 – Braddock’s Defeat
  • Braddock’s Defeat: Part 1
  • Braddock’s Defeat: Part 2
  • Braddock’s Defeat: Part 3
  • Braddock’s Defeat: Part 4
  • Braddock’s Defeat: Part 5
  • Braddock’s Defeat: Part 6
  • Braddock’s Defeat: Part 7
  • Braddock’s Defeat: Part 8
  • Braddock’s Defeat: Part 9
  • Braddock’s Defeat: Part 10
  • Braddock’s Defeat: Part 11
  • Battle of Ticonderoga 1758
  • Capture of Louisburg 1758
  • Battle of Quebec 1759
  • American Revolutionary War
  • Battle of Lexington and Concord
  • Battle of Bunker Hill
  • Battle of Quebec 1775
  • Battle of Sullivan’s Island
  • Battle of Long Island
  • Battle of Harlem Heights
  • Battle of White Plains
  • Battle of Fort Washington
  • Battle of Trenton
  • Battle of Princeton
  • Battle of Ticonderoga 1777
  • Battle of Hubbardton
  • Battle of Bennington
  • Battle of Brandywine Creek
  • Battle of Freeman’s Farm
  • Battle of Paoli
  • Battle of Germantown
  • Battle of Saratoga
  • Battle of Monmouth
  • Siege of Savannah
  • Siege of Charleston
  • Battle of Camden
  • Battle of King’s Mountain
  • Battle of Cowpens
  • Battle of Guilford Courthouse
  • Battle of Yorktown
  • Siege of Gibraltar
  • Battle of Cape St Vincent 1780
  • Anglo-Mysore Wars
  • Storming of Seringapatam

Wars of 1800

  • Second Mahratta War
  • Battle of Assaye
  • Battle of Laswaree
  • Peninsular War
  • Battle of Roliça
  • Battle of Vimeiro
  • Battle of Sahagun
  • Battle of Benavente
  • Battle of Cacabelos
  • Battle of Corunna
  • Battle of the Douro
  • Battle of Talavera
  • Battle of the River Coa
  • Battle of Busaco
  • Battle of Barrosa
  • Battle of Campo Maior
  • Battle of Redinha or Pombal
  • Battle of Sabugal
  • Battle of Fuentes de Oñoro
  • Battle of Albuera
  • Battle of Usagre
  • Battle of El Bodon
  • Battle of Arroyo Molinos
  • Storming of Ciudad Rodrigo
  • Storming of Badajoz
  • Battle of Villagarcia
  • Battle of Almaraz
  • Battle of Salamanca
  • Battle of Garcia Hernandez
  • Battle of Majadahonda
  • Attack on Burgos
  • Retreat from Burgos
  • Battle of Morales de Toro
  • Battle of San Millan and Osma
  • Battle of Vitoria
  • Storming of San Sebastian
  • Battle of the Pyrenees
  • Battle of San Marcial
  • Battle of the Bidassoa
  • Battle of the Nivelle
  • Battle of the Nive
  • Battle of St Pierre
  • Battle of Orthez
  • Battle of Tarbes
  • Battle of Toulouse
  • Sortie from Bayonne
  • Napoleonic Wars
  • Battle of Cape St Vincent 1797
  • Battle of the Nile
  • Battle of Alexandria
  • Battle of Copenhagen
  • Battle of Trafalgar
  • Battle of Maida
  • Battle of Quatre Bras
  • Battle of Waterloo
  • First Afghan War
  • Battle of Ghuznee
  • Battle of Kabul and the retreat to Gandamak
  • Siege of Jellalabad
  • Battle of Kabul 1842
  • First Sikh War
  • Battle of Moodkee
  • Battle of Ferozeshah
  • Battle of Aliwal
  • Battle of Sobraon
  • Second Sikh War
  • Battle of Ramnagar
  • Battle of Chillianwallah
  • Battle of Goojerat
  • Crimean War
  • Battle of The Alma
  • Battle of Balaclava
  • Battle of Inkerman
  • Siege of Sevastopol
  • Indian Mutiny
  • Siege of Delhi
  • American Civil War
  • First Battle of Bull Run
  • Battle of Shiloh
  • Battle of Antietam
  • Battle of Fredericksburg
  • Battle of Chancellorsville
  • Abyssinian War
  • Battle of Magdala
  • Second Afghan War
  • Battle of Ali Masjid
  • Battle of Peiwar Kotal
  • Battle of Futtehabad
  • Battle of Charasiab
  • Battle of Kabul 1879
  • Battle of Ahmed Khel
  • Battle of Maiwand
  • Battle of Kandahar
  • Zulu War
  • Battle of Isandlwana
  • Battle of Rorke’s Drift
  • Battle of Khambula
  • Battle of Gingindlovu
  • Battle of Ulundi
  • War in Egypt and Sudan
  • Battle of Tel-el-Kebir
  • Battle of El Teb
  • Battle of Tamai
  • Battle of Abu Klea
  • Battle of Atbara
  • Battle of Omdurman
  • First Boer War
  • Battle of Laing’s Nek
  • Battle of Majuba Hill
  • Great Boer War
  • Battle of Talana Hill
  • Battle of Elandslaagte
  • Battle of Ladysmith
  • Battle of Belmont
  • Battle of Graspan
  • Battle of Modder River
  • Battle of Stormberg
  • Battle of Magersfontein
  • Battle of Colenso
  • Battle of Spion Kop
  • Battle of Val Krantz
  • Battle of Pieters
  • Battle of Paardeberg
  • Siege of Mafeking
  • Siege of Kimberley
  • Siege of Ladysmith
  • North-West Frontier of India
  • Black Mountain Expedition 1888
  • Black Mountain Expedition 1891
  • Waziristan 1894
  • Siege and Relief of Chitral
  • Malakand Rising 1897
  • Malakand Field Force 1897
  • Mohmand Field Force 1897
  • Tirah 1897

Wars of 1900

  • First World War
  • British Expeditionary Force (BEF)
  • Battle of Mons
  • Battle of Mons (2nd Day): Elouges
  • Battle of Landrecies
  • Battle of Le Cateau
  • Battle of Le Grand Fayt
  • Battle of Étreux
  • Battle of Heligoland Bight
  • Battle of Néry
  • Battle of Villers Cottérêts
  • Battle of the Marne
  • Battle of the Aisne
  • Texel Action
  • Battle of Coronel
  • Battle of the Falkland Islands
  • Battle of the Dogger Bank
  • Gallipoli Part I : Naval Attack on the Dardanelles
  • Gallipoli Part II: Land attack on Gallipoli Peninsular
  • Gallipoli Part III: ANZAC landing on 25th April 1915
  • Gallipoli Part IV: First landings at Cape Helles and Y Beach on 25th April 1915
  • Battle of Jutland Part I: Opposing fleets
  • Battle of Jutland Part II: Opening Battle Cruiser action on 31st May 1916
  • Battle of Jutland Part III: Clash between British and German Battle Fleets during the evening 31st May 1916
  • Battle of Jutland Part IV: Night Action 31st May to 1st June 1916
  • Battle of Jutland Part V: Casualties and Aftermath
  • Home


Copyright © 2025 · Chalfont Web Design

MENU
  • Wars Prior to 1700
    • Wars of Roman Britain
      • Battle of Medway
    • Danish Wars
      • Battle of Ashdown
    • Norman Conquest
      • Battle of Stamford Bridge
      • Battle of Hastings
    • Barons’ War
      • Battle of the Standard
      • Battle of Lewes
      • Battle of Evesham
    • Scottish Wars of Independence
      • Battle of Stirling Bridge
      • Battle of Falkirk
      • Battle of Bannockburn
      • Battle of Dupplin Moor
      • Battle of Halidon Hill
    • 100 Years War
      • Battle of Sluys
      • Battle of Morlaix
      • Battle of Auberoche
      • Battle of Caen
      • Battle of Creçy
      • Siege of Calais
      • Battle of Neville’s Cross
      • Battle of La Roche-Derrien
      • Battle of Winchelsea
      • Battle of Mauron
      • Battle of Poitiers
      • Battle of Cocherel
      • Battle of Auray
      • Battle of Najera
      • Battle of La Rochelle
      • Battle of Otterburn
      • Battle of Homildon Hill
      • Battle of Shrewsbury
      • Siege of Harfleur
      • Battle of Agincourt
      • Battle of Baugé
      • Battle of Cravant
      • Battle of Verneuil
      • Siege of Orléans
      • Battle of the Herrings
      • Battle of Patay
      • Battle of Formigny
      • Battle of Castillon
    • Wars of the Roses
      • First Battle of St Albans
      • Battle of Blore Heath
      • Battle of Northampton
      • Battle of Wakefield 1460
      • Battle of Mortimer’s Cross
      • Second Battle of St Albans
      • Battle of Towton
      • Battle of Barnet
      • Battle of Tewkesbury
      • Battle of Bosworth Field
    • Anglo Scottish War
      • Battle of Flodden
      • Battle of Pinkie
    • The Spanish War
      • The Spanish Armada
    • English Civil War
      • Battle of Edgehill
      • Battle of Seacroft Moor
      • Battle of Stratton
      • Battle of Wakefield 1643
      • Battle of Chalgrove
      • Battle of Adwalton Moor
      • Battle of Lansdown Hill
      • Battle of Roundway Down
      • Storming of Bristol
      • First Battle of Newbury
      • Battle of Cheriton
      • Battle of Cropredy Bridge
      • Battle of Marston Moor
      • Battle of Lostwithiel
      • Second Battle of Newbury
      • Battle of Naseby
      • Siege of Basing House
      • Battle of Dunbar
      • Battle of Worcester
  • Wars of 1700
    • War of the Spanish Succession
      • Battle of Blenheim
      • Battle of Ramillies
      • Battle of Oudenarde
      • Battle of Malplaquet
    • King George’s War (Austrian Succession)
      • Battle of Dettingen
      • Battle of Fontenoy
      • Battle of Rocoux
      • Battle of Lauffeldt
    • Jacobite Rebellion
      • Battle of Prestonpans
      • Battle of Falkirk
      • Battle of Culloden
    • Frederick the Great Wars
    • First Silesian War
      • Battle of Mollwitz
      • Battle of Chotusitz
    • Second Silesian War
      • Battle of Hohenfriedberg
      • Battle of Soor
      • Battle of Kesselsdorf
    • Seven Years War
      • Battle of Lobositz
      • Battle of Prague
      • Battle of Kolin
      • Battle of Rossbach
      • Battle of Leuthen
      • Battle of Zorndorf
      • Battle of Hochkirch
      • Battle of Kunersdorf
      • Battle of Liegnitz
      • Battle of Torgau
      • Battle of Burkersdorf
      • Battle of Minden
      • Battle of Emsdorf
      • Battle of Warburg
      • Battle of Kloster Kamp
      • Battle of Vellinghausen
      • Battle of Wilhelmstahl
      • Capture of Manila
      • Capture of Havana
    • Anglo-French Wars in India
      • Siege of Arcot
      • Battle of Arni
      • Battle of Kaveripauk
      • Battle of Plassey
    • French and Indian War
      • Battle of Monongahela 1755 – Braddock’s Defeat
      • General Braddock’s Defeat on the Monongahela in 1755 I
      • Braddock’s Defeat: Part 2
      • Braddock’s Defeat: Part 3
      • Braddock’s Defeat: Part 4
      • Braddock’s Defeat: Part 5
      • Braddock’s Defeat: Part 6
      • Braddock’s Defeat: Part 7
      • Braddock’s Defeat: Part 8
      • Braddock’s Defeat: Part 9
      • Braddock’s Defeat: Part 10
      • Battle of Ticonderoga 1758
      • Capture of Louisburg 1758
      • Battle of Quebec 1759
    • American Revolutionary War
      • Battle of Lexington and Concord
      • Battle of Bunker Hill
      • Battle of Quebec 1775
      • Battle of Sullivan’s Island
      • Battle of Long Island
      • Battle of Harlem Heights
      • Battle of White Plains
      • Battle of Fort Washington
      • Battle of Trenton
      • Battle of Princeton
      • Battle of Ticonderoga 1777
      • Battle of Hubbardton
      • Battle of Bennington
      • Battle of Brandywine Creek
      • Battle of Freeman’s Farm
      • Battle of Paoli
      • Battle of Germantown
      • Battle of Saratoga
      • Battle of Monmouth
      • Siege of Savannah
      • Siege of Charleston
      • Battle of Camden
      • Battle of King’s Mountain
      • Battle of Cowpens
      • Battle of Guilford Courthouse
      • Battle of Yorktown
      • Siege of Gibraltar
      • Battle of Cape St Vincent 1780
    • Anglo-Mysore Wars
      • Storming of Seringapatam
  • Wars of 1800
    • Second Mahratta War
      • Battle of Assaye
      • Battle of Laswaree
    • Peninsular War
      • Battle of Roliça
      • Battle of Vimeiro
      • Battle of Sahagun
      • Battle of Benavente
      • Battle of Cacabelos
      • Battle of Corunna
      • Battle of the Douro
      • Battle of Talavera
      • Battle of the River Coa
      • Battle of Busaco
      • Battle of Barrosa
      • Battle of Campo Maior
      • Battle of Redinha or Pombal
      • Battle of Sabugal
      • Battle of Fuentes de Oñoro
      • Battle of Albuera
      • Battle of Usagre
      • Battle of El Bodon
      • Battle of Arroyo Molinos
      • Storming of Ciudad Rodrigo
      • Storming of Badajoz
      • Battle of Villagarcia
      • Battle of Almaraz
      • Battle of Salamanca
      • Battle of Garcia Hernandez
      • Battle of Majadahonda
      • Attack on Burgos
      • Retreat from Burgos
      • Battle of Morales de Toro
      • Battle of San Millan and Osma
      • Battle of Vitoria
      • Storming of San Sebastian
      • Battle of the Pyrenees
      • Battle of San Marcial
      • Battle of the Bidassoa
      • Battle of the Nivelle
      • Battle of the Nive
      • Battle of St Pierre
      • Battle of Orthez
      • Battle of Tarbes
      • Battle of Toulouse
      • Sortie from Bayonne
    • Napoleonic Wars
      • Battle of Cape St Vincent 1797
      • Battle of the Nile
      • Battle of Alexandria
      • Battle of Copenhagen
      • Battle of Trafalgar
      • Battle of Maida
      • Battle of Quatre Bras
      • Battle of Waterloo
    • First Afghan War
      • Battle of Ghuznee
      • Battle of Kabul and the retreat to Gandamak
      • Siege of Jellalabad
      • Battle of Kabul 1842
    • First Sikh War
      • Battle of Moodkee
      • Battle of Ferozeshah
      • Battle of Aliwal
      • Battle of Sobraon
    • Second Sikh War
      • Battle of Ramnagar
      • Battle of Chillianwallah
      • Battle of Goojerat
    • Crimean War
      • Battle of The Alma
      • Battle of Balaclava
      • Battle of Inkerman
      • Siege of Sevastopol
      • Indian Mutiny
      • Siege of Delhi
    • American Civil War
      • First Battle of Bull Run
      • Battle of Shiloh
      • Battle of Antietam
      • Battle of Fredericksburg
      • Battle of Chancellorsville
    • Abyssinian War
      • Battle of Magdala
    • Second Afghan War
      • Battle of Ali Masjid
      • Battle of Peiwar Kotal
      • Battle of Futtehabad
      • Battle of Charasiab
      • Battle of Kabul 1879
      • Battle of Ahmed Khel
      • Battle of Maiwand
      • Battle of Kandahar
    • Zulu War
      • Battle of Isandlwana
      • Battle of Rorke’s Drift
      • Battle of Khambula
      • Battle of Gingindlovu
      • Battle of Ulundi
    • War in Egypt and Sudan
      • Battle of Tel-el-Kebir
      • Battle of El Teb
      • Battle of Tamai
      • Battle of Abu Klea
      • Battle of Atbara
      • Battle of Omdurman
    • First Boer War
      • Battle of Laing’s Nek
      • Battle of Majuba Hill
    • Great Boer War
      • Battle of Talana Hill
      • Battle of Elandslaagte
      • Battle of Ladysmith
      • Battle of Belmont
      • Battle of Graspan
      • Battle of Modder River
      • Battle of Stormberg
      • Battle of Magersfontein
      • Battle of Colenso
      • Battle of Spion Kop
      • Battle of Val Krantz
      • Battle of Pieters
      • Battle of Paardeberg
      • Siege of Mafeking
      • Siege of Kimberley
      • Siege of Ladysmith
    • North-West Frontier of India
      • Black Mountain Expedition 1888
      • Black Mountain Expedition 1891
      • Waziristan 1894
      • Siege and Relief of Chitral
      • Malakand Rising 1897
      • Malakand Field Force 1897
      • Mohmand Field Force 1897
      • Tirah 1897
  • Wars of 1900
    • First World War
      • British Expeditionary Force (BEF)
      • Battle of Mons
      • Battle of Mons (2nd Day): Elouges
      • Battle of Landrecies
      • Battle of Le Cateau
      • Battle of Le Grand Fayt
      • Battle of Étreux
      • Battle of Heligoland Bight
      • Battle of Néry
      • Battle of Villers Cottérêts
      • Battle of the Marne
      • Battle of the Aisne
      • Texel Action
      • Battle of Coronel
      • Battle of the Falkland Islands
      • Battle of the Dogger Bank
      • Gallipoli Part I: Naval Attack on the Dardanelles
      • Gallipoli Part II: Genesis of the land attack on the Gallipoli Peninsula
      • Gallipoli Part III: ANZAC landing on 25th April 1915
      • Gallipoli Part IV: First landings at Cape Helles and Y Beach on 25th April 1915
      • Battle of Jutland Part I: Opposing fleets
      • Battle of Jutland Part II: Opening Battle Cruiser action on 31st May 1916
      • Battle of Jutland Part III: Clash between British and German Battle Fleets during the evening 31st May 1916
      • Battle of Jutland Part IV: Night Action 31st May to 1st June 1916
      • Battle of Jutland Part V: Casualties and Aftermath
  • British Battles