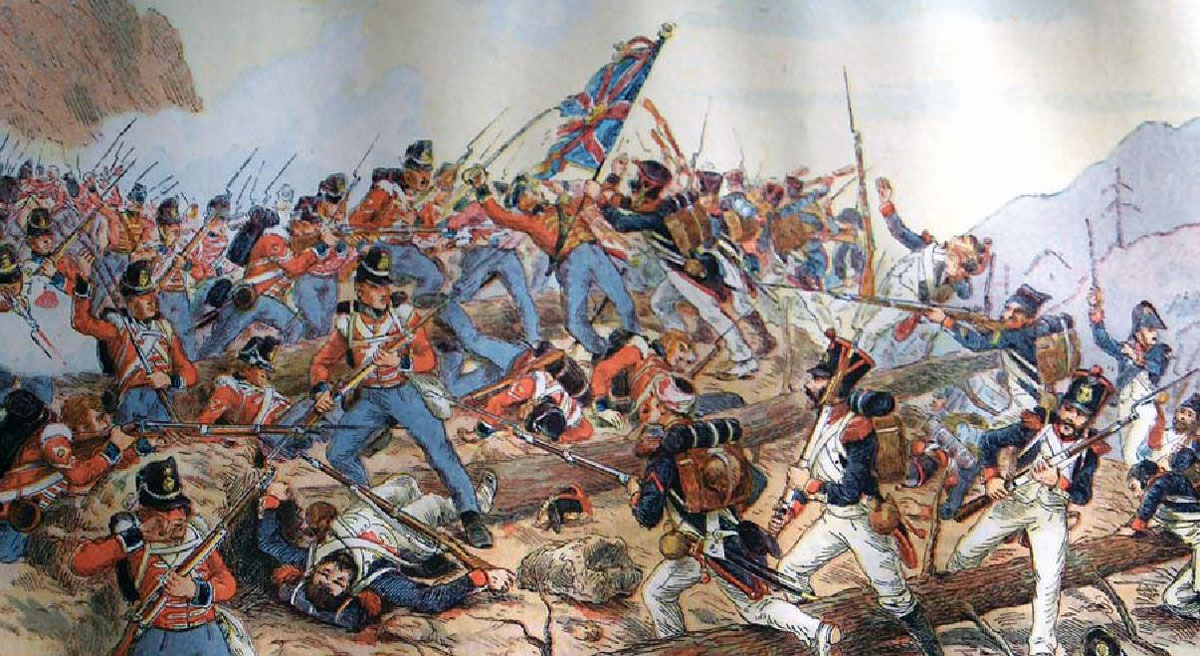
The British victory south of Madrid on 28th July 1809 over Joseph Bonaparte, the King imposed on Spain by Napoleon, and his French army in the Peninsular War
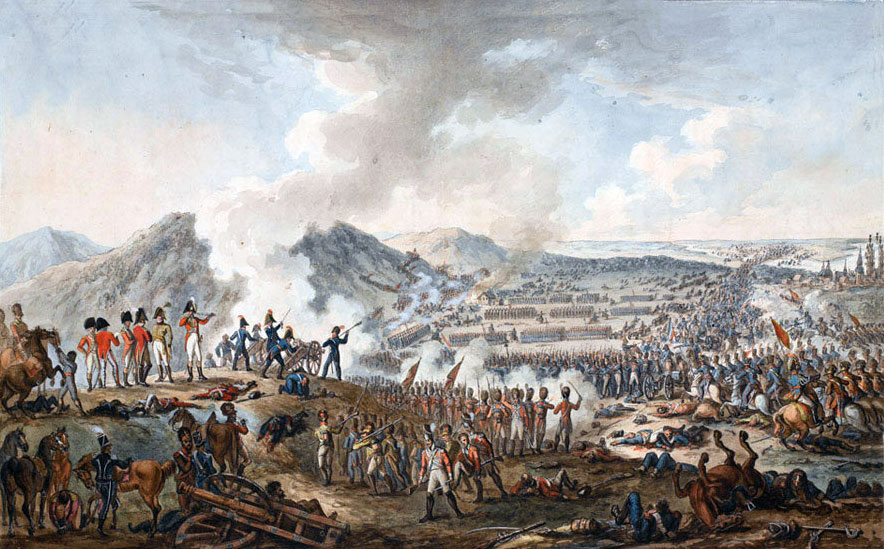
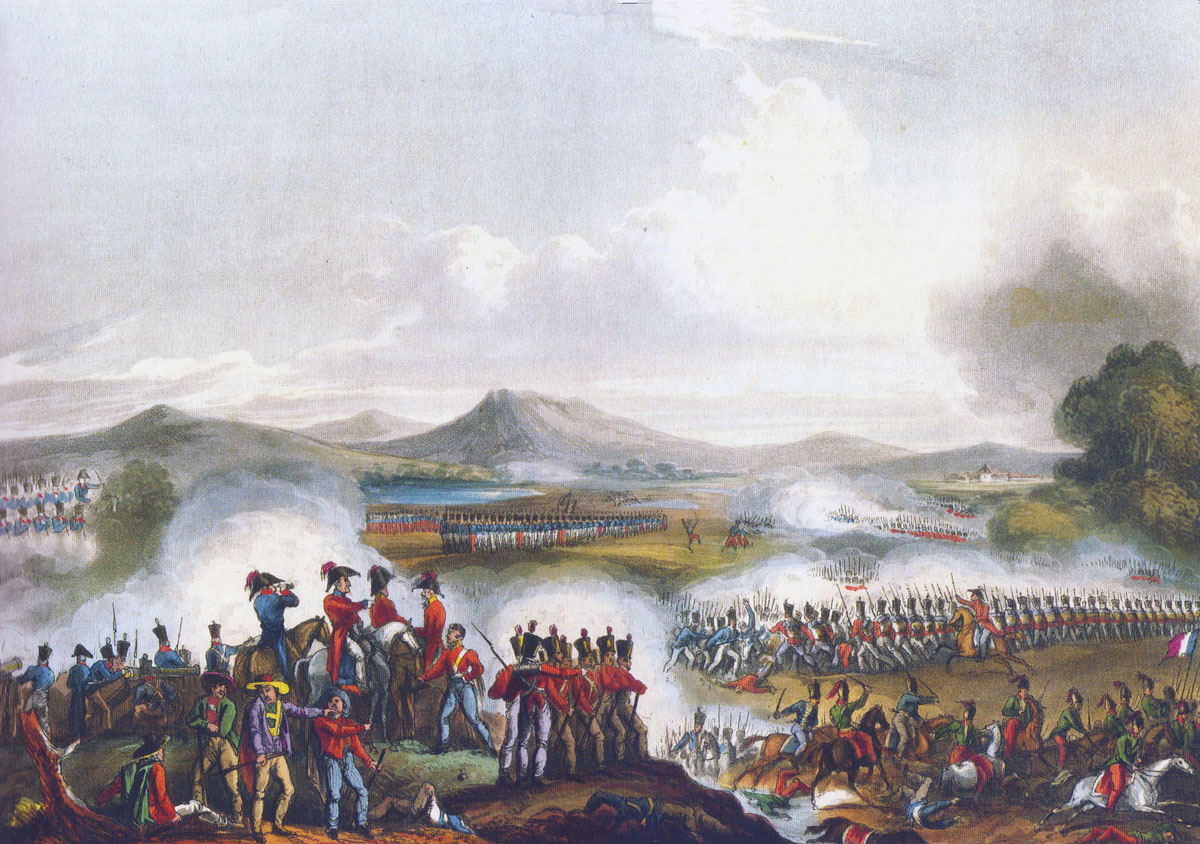
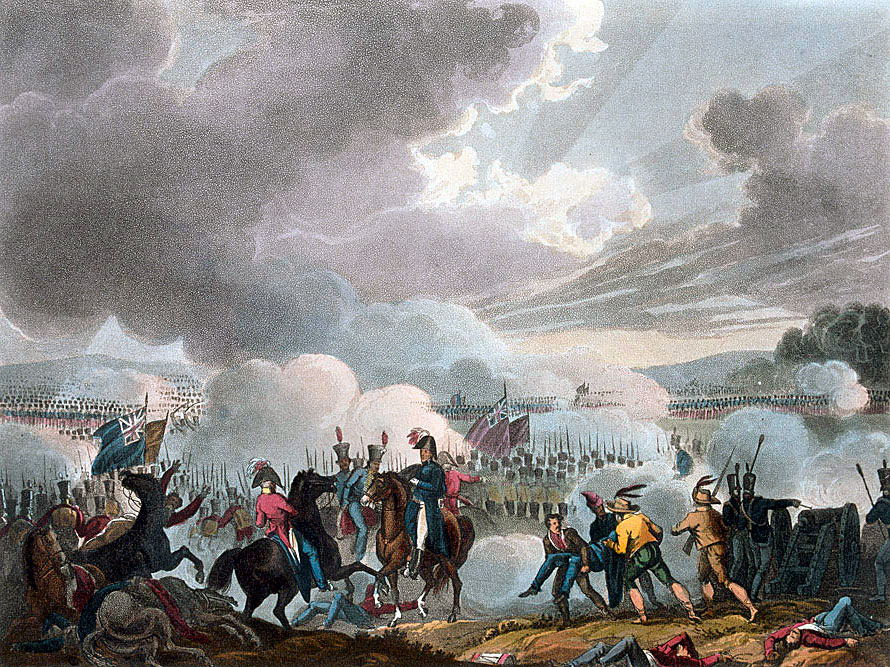
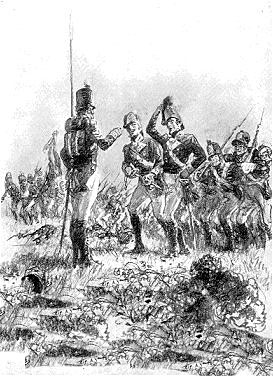
Battle of Talavera on 28th July 1809 in the Peninsular War: picture by E. Walker
 9. Podcast of the Battle of Talavera: The British victory south of Madrid on 28th July 1809 over Joseph Bonaparte, the King imposed on Spain by Napoleon, and his French army in the Peninsular War: John Mackenzie’s Britishbattles.com podcast.
The previous battle of the Peninsular War is the Battle of the Passage of the Douro
The next battle of the Peninsular War is the Battle of the River Coa
War: Peninsular War
Date of the Battle of Talavera: 28th July 1809
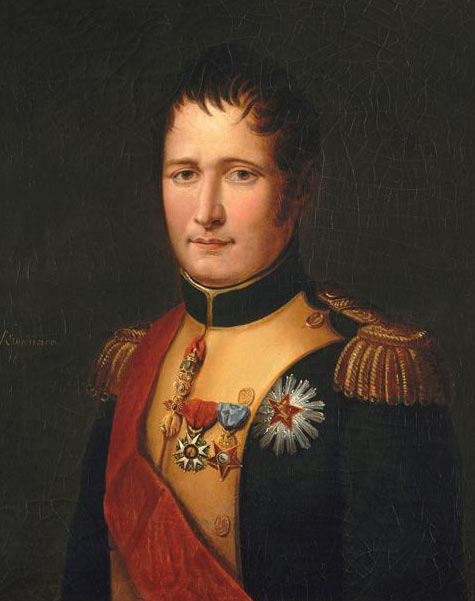
Joseph Bonaparte: Battle of Talavera on 28th July 1809 in the Peninsular War
Place of the Battle of Talavera: south-west of Madrid in New Castile, on the road from the Portuguese border to the Spanish Capital, on the bank of the River Tagus.
Combatants at the Battle of Talavera: British, Germans and Spanish against the French.
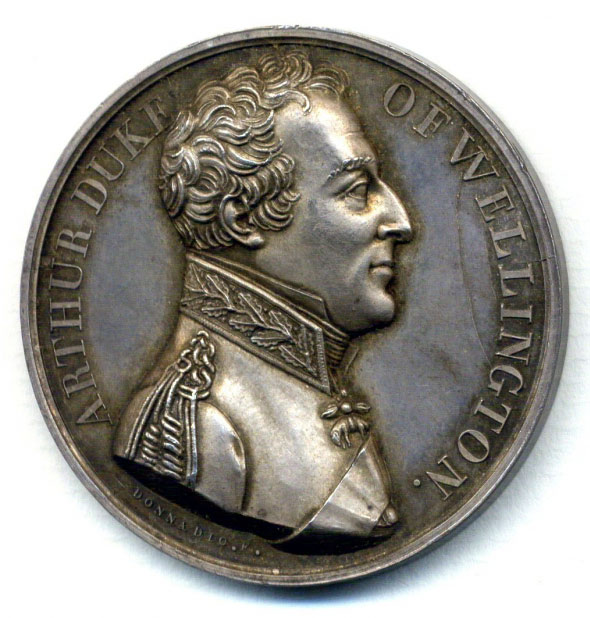
Generals at the Battle of Talavera: Lieutenant General Sir Arthur Wellesley against King Joseph Bonaparte.
Size of the armies at the Battle of Talavera: 16,500 British and Germans with 35,000 Spanish against 45,000 French.

Sir Arthur Wellesley: Battle of Talavera on 28th July 1809 in the Peninsular War
Uniforms, arms, equipment at the Battle of Talavera:
The British infantry wore red waist-length jackets, grey trousers, and stovepipe shakos. Fusilier regiments wore bearskin caps. The two rifle regiments wore dark green jackets and trousers.
The Royal Artillery wore blue tunics.
Highland regiments wore the kilt with red tunics and black ostrich feather caps.
British heavy cavalry (dragoon guards and dragoons) wore red jackets and ‘Roman’ style helmets with horse hair plumes.
The British light cavalry was increasingly adopting hussar uniforms, with some regiments changing their titles from ‘light dragoons’ to ‘hussars’.
The King’s German Legion (KGL) was the Hanoverian army in exile. The KGL owed its allegiance to King George III of Great Britain, as the Elector of Hanover, and fought with the British army. The KGL comprised both cavalry and infantry regiments. KGL uniforms mirrored the British.
The French army wore a variety of uniforms. The basic infantry coat colour was dark blue.
The French cavalry comprised Cuirassiers, wearing heavy burnished metal breastplates and crested helmets, Dragoons, largely in green, Hussars, in the conventional uniform worn by this arm across Europe, and Chasseurs à Cheval, dressed as hussars.
The French foot artillery wore uniforms similar to the infantry, the horse artillery wore hussar uniforms.
The standard infantry weapon across all the armies was the muzzle-loading musket. The musket could be fired at three or four times a minute, throwing a heavy ball inaccurately for a hundred metres or so. Each infantryman carried a bayonet for hand-to-hand fighting, which fitted the muzzle end of his musket.
48th at the Battle of Talavera on 28th July 1809 in the Peninsular War
The British rifle battalions (60th and 95th Rifles) carried the Baker rifle, a more accurate weapon but slower to fire, and a sword bayonet.
Field guns fired a ball projectile, of limited use against troops in the field unless those troops were closely formed. Guns also fired case shot or canister which fragmented and was highly effective against troops in the field over a short range. Exploding shells fired by howitzers, yet in their infancy. were of particular use against buildings. The British were developing shrapnel (named after the British officer who invented it) which increased the effectiveness of exploding shells against troops in the field, by showering them with metal fragments.
Throughout the Peninsular War and the Waterloo campaign, the British army was plagued by a shortage of artillery. The Army was sustained by volunteer recruitment and the Royal Artillery was never able to recruit sufficient gunners for its needs.
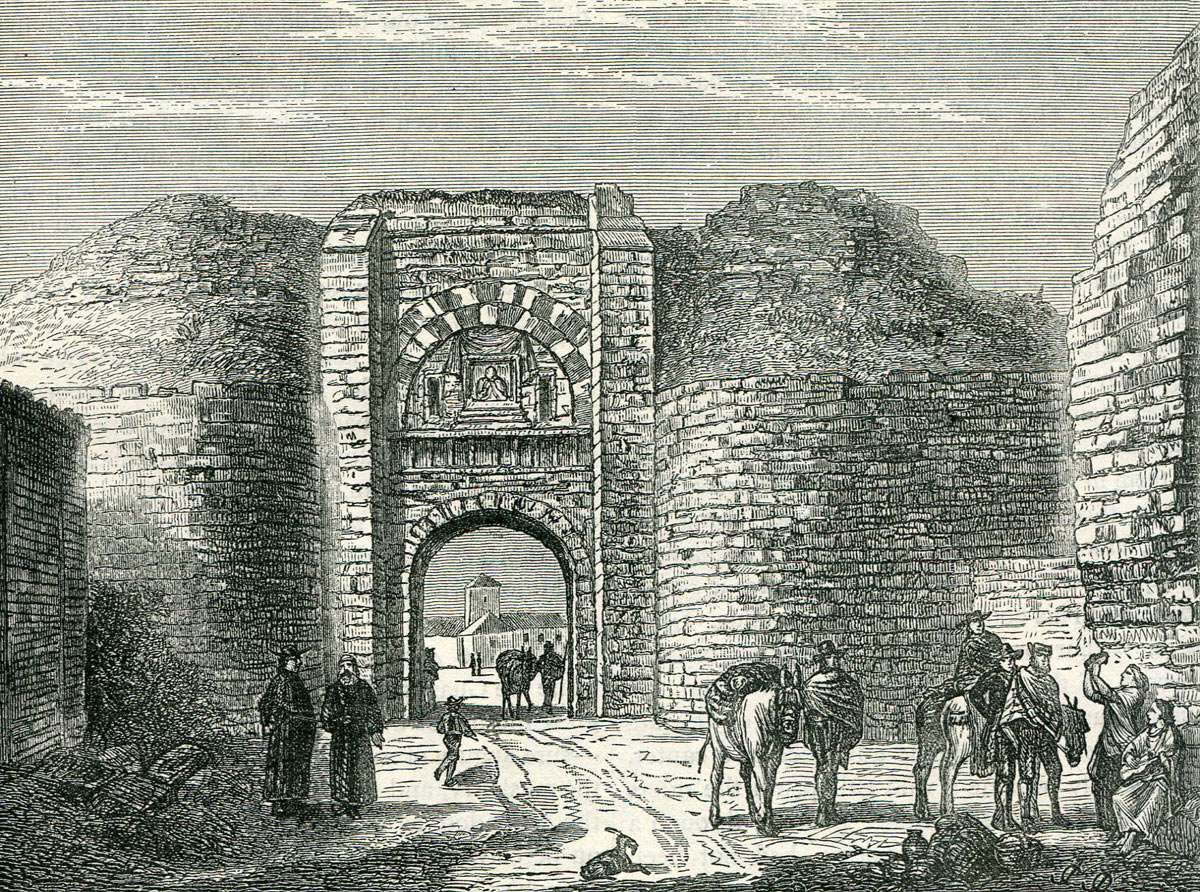
Gate of Talavera: Battle of Talavera on 28th July 1809 in the Peninsular War
Napoleon exploited the advances in gunnery techniques of the last years of the French Ancien Régime to create his powerful and highly mobile artillery. Many of his battles were won using a combination of the manoeuvrability and fire power of the French guns with the speed of the French columns of infantry, supported by the mass of French cavalry.
While the French conscript infantry moved about the battle field in fast moving columns, the British trained to fight in line. The Duke of Wellington reduced the number of ranks to two, to extend the line of the British infantry and to exploit fully the firepower of his regiments.
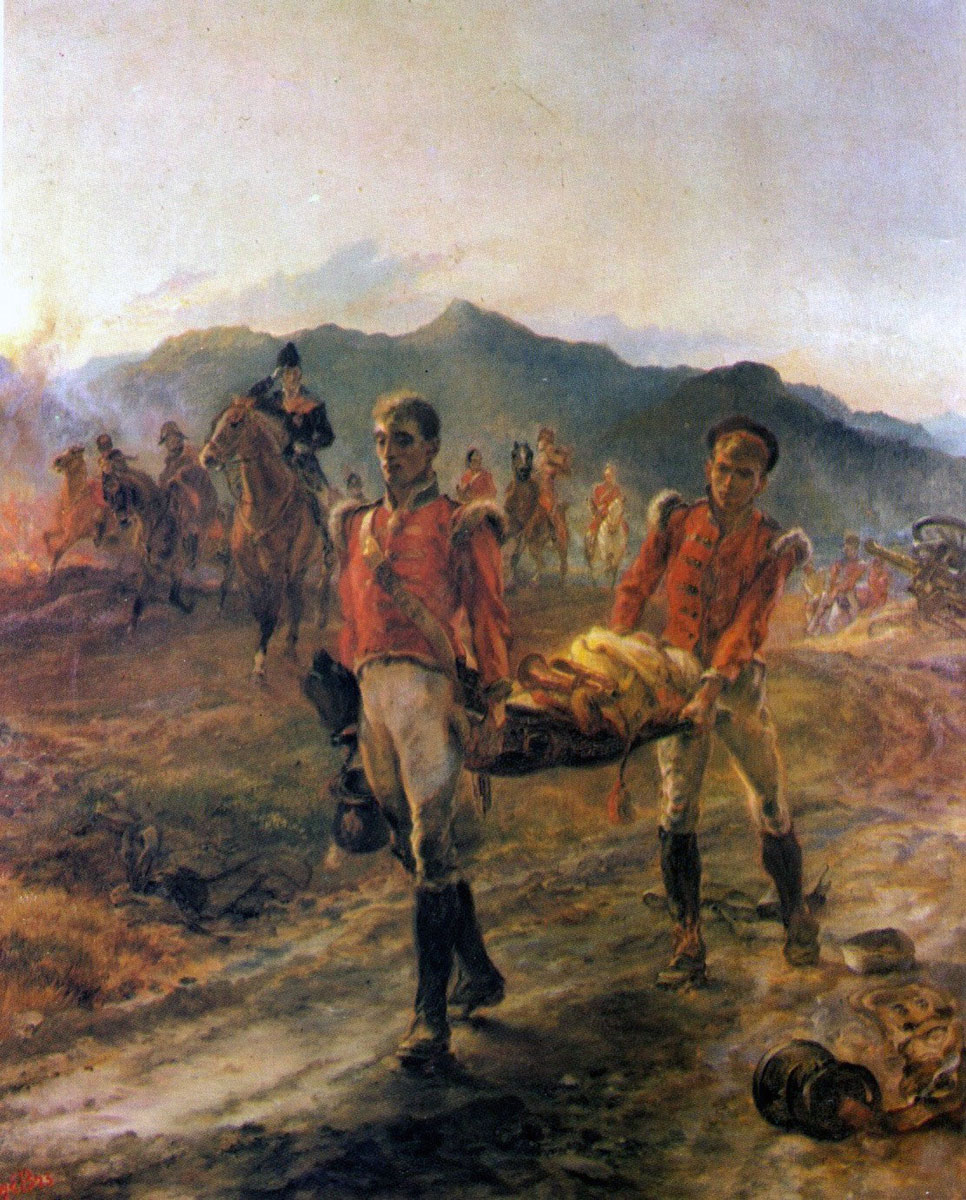
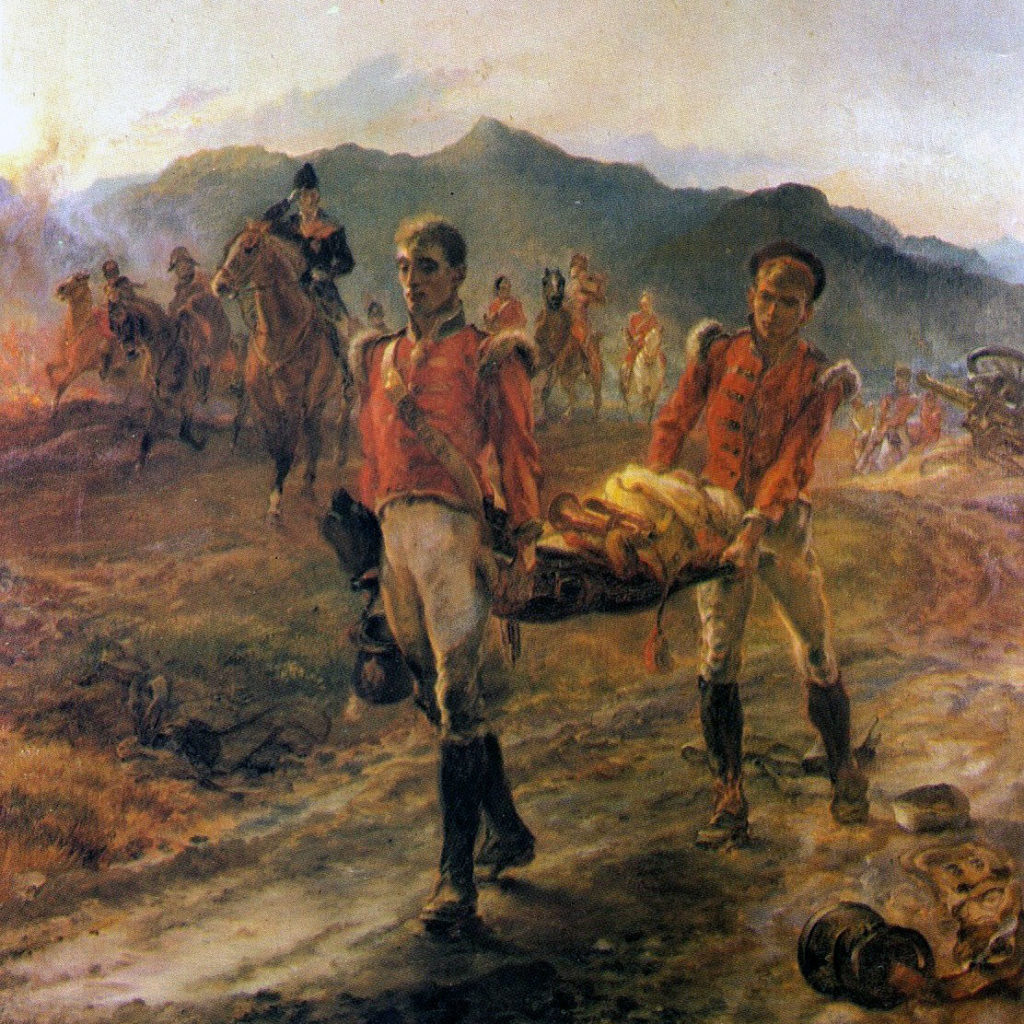
43rd Regiment collecting the dead after the Battle of Talavera on 28th July 1809 in the Peninsular War: picture by Lady Butler
British order of battle at the Battle of Talavera:
Commander-in-Chief: Lieutenant General Sir Arthur Wellesley
Cavalry:
commanded by Lieutenant General William Payne
1st Brigade: commanded by Brigadier General Henry Fane: 3rd Dragoon Guards and 4th Dragoons
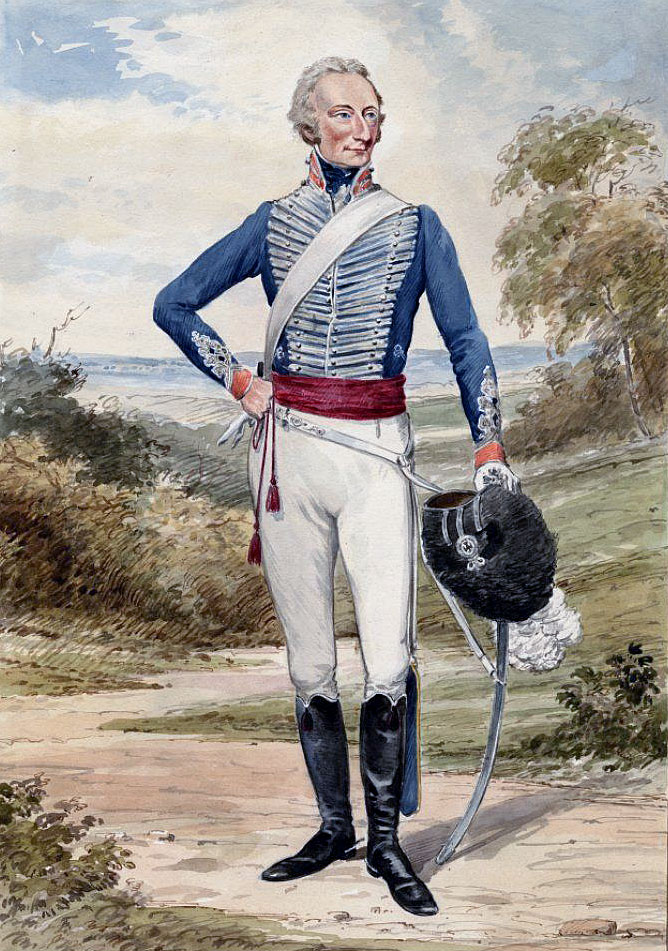
2nd Brigade: commanded by Brigadier General Stapleton Cotton: 14th and 16th Light Dragoons
3rd Brigade: commanded by Brigadier General George Anson: 23rd Light Dragoons and 1st Hussars, King’s German Legion
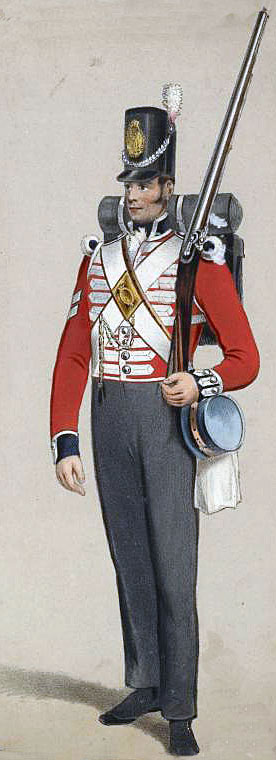
Corporal of First Foot Guards: Battle of Talavera on 28th July 1809 in the Peninsular War
Infantry:
1st Division: commanded by Lieutenant General John Sherbrooke
1st Brigade: commanded by Brigadier General Henry Campbell: 1st Battalion, Coldstream Guards, 1st/3rd Guards and 1 company 5th/60th Foot
2nd Brigade: commanded by Brigadier General Alan Cameron: 1st/61st and 2nd/83rd Foot and 1 company 5th/60th Foot
3rd Brigade: commanded by Brigadier General Ernst, Baron Langwerth: 1st and 2nd Line Battalions and 1st and 2nd Light Battalions, King’s German Legion
4th Brigade: commanded by Brigadier General Sigismund, Baron Löw: 5th and 7th Line Battalions, King’s German Legion
2nd Division: commanded by Major General Rowland Hill
1st Brigade: commanded by Brigadier General Christopher Tilson: 1st/3rd Buffs, 2nd/48th and 2nd/66th Foot and 1 company 5th/60th Foot
British 5th/60th Rifles: Battle of Talavera on 28th July 1809 in the Peninsular War: picture by Atkinson
2nd Brigade: commanded by Brigadier General Richard Stewart: 29th and 1st/48th Foot and 1st Battalion Detachments
3rd Division: commanded by Major General Randoll Mackenzie
1st Brigade: commanded by Major General Randoll Mackenzie: 2nd/24th, 2nd/31st and 1st/45th Foot
2nd Brigade: commanded by Colonel Donkin: 2nd/87th, 1st/88th and 5th/60th Foot
4th Division: commanded by Brigadier General Alexander Campbell
1st Brigade: commanded by Brigadier General Alexander Campbell: 2nd/7th Fusiliers and 2nd/53rd Foot and 1 company 5th/60th Foot
2nd Brigade: commanded by Colonel James Kemmis: 1st/40th and 97th Foot and 2nd Battalion Detachments and 1 company 5th/60th Foot
Artillery:
Lawson’s, Sillery’s and Elliot’s batteries
Rettberg’s and Heise’s batteries
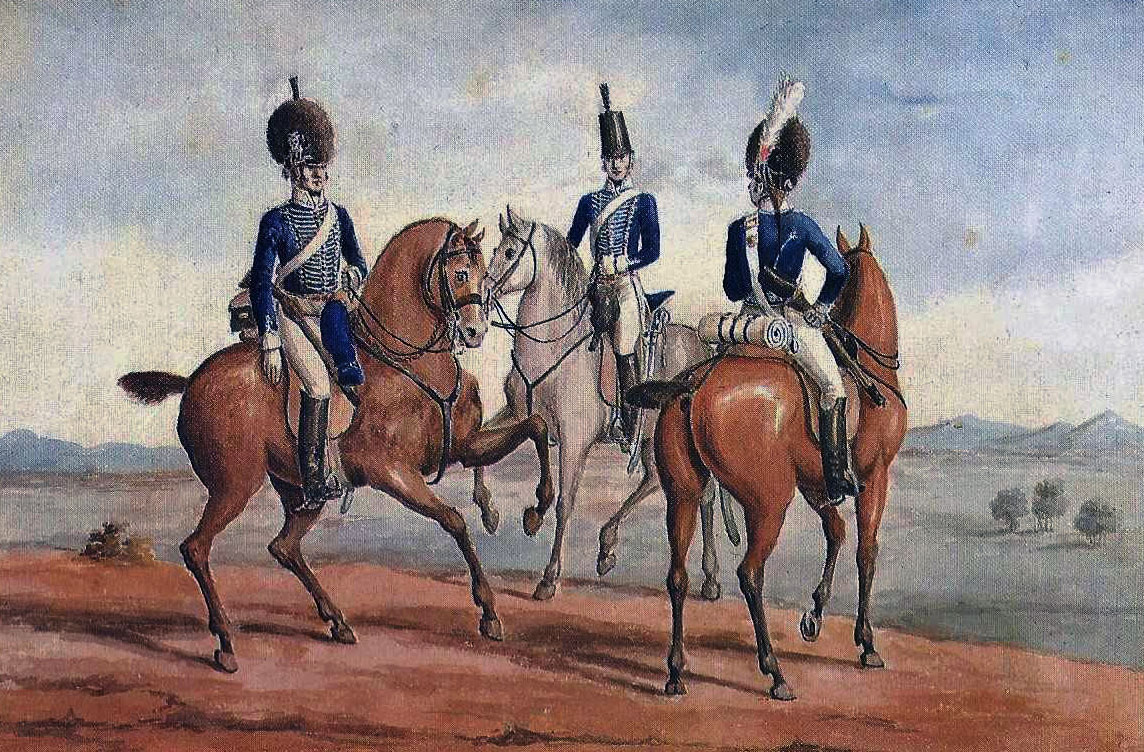
British Light Dragoons: Battle of Talavera on 28th July 1809 in the Peninsular War
French order of battle at the Battle of Talavera:
Commander in Chief: Joseph Bonaparte, King of Spain
Chief of Staff: Marshal Jourdan
I Corps: commanded by Marshal Victor
1st Division commanded by General Ruffin
2nd Division commanded by General Lapisse
3rd Division commanded by General Villatte
IV Corps: commanded by General Sebastiani
1st Division commanded by General Sebastiani
2nd Division commanded by General Valence
3rd Division commanded by General Leval
Cavalry Brigade commanded by General Merlin
Madrid Division commanded by General Dessolles
Reserve of cavalry:
1st Dragoon Division commanded by General Latour-Maubourg
2nd Dragoon Division commanded by General Milhaud
Artillery: commanded by General Sénarmont
82 guns.
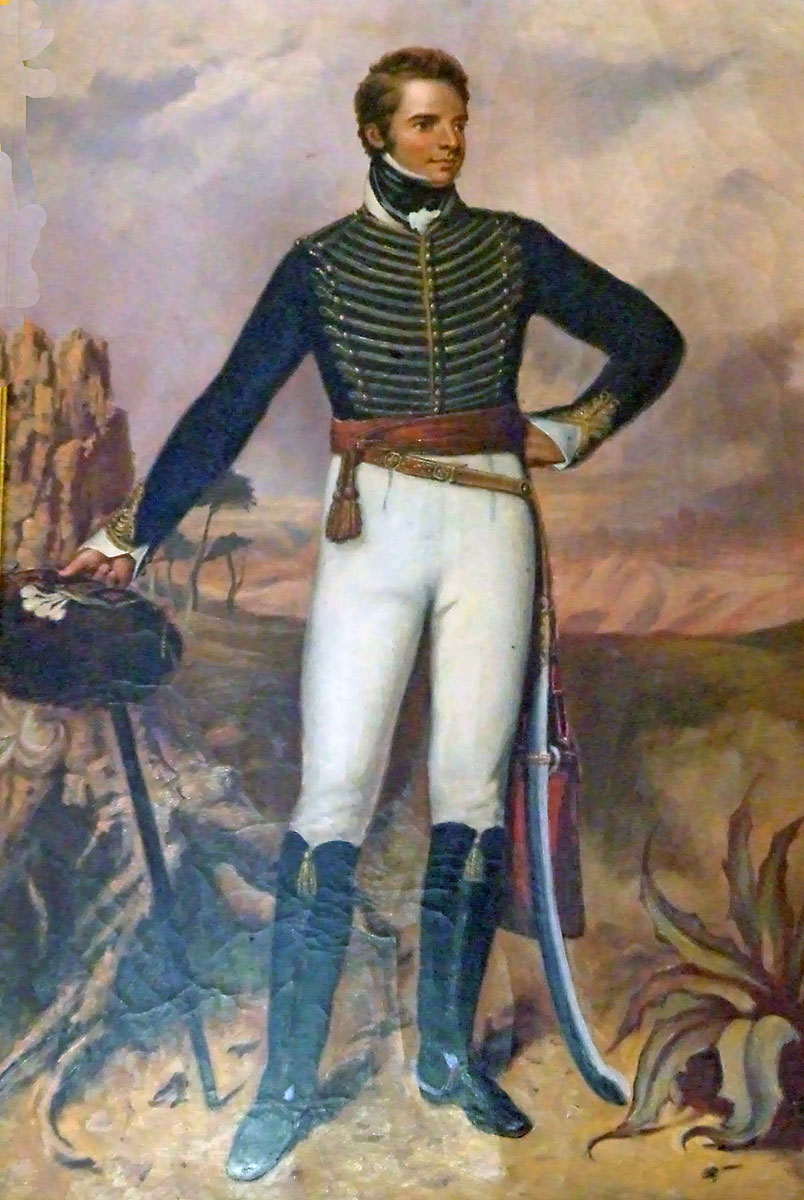
Lord Henry Seymour Conway, officer of the 16th Light Dragoons: Battle of Talavera on 28th July 1809 in the Peninsular War. The background shows the Talavera battlefield.
Background to the Battle of Talavera:
On 2nd July 1809, Sir Arthur Wellesley marched his British army across the border from Portugal into Spain, intending to act with the Spanish armies of General Cuesta and General Venegas, in an attack on the French in Madrid, led by Joseph Bonaparte, the king imposed on Spain by the Emperor Napoleon.
The French also had aggressive plans, with Marshal Soult’s corps re-invading Portugal, re-equipped and with its morale restored, after its disastrous retreat from Oporto, following Wellesley’s successful crossing of the River Douro.
The Emperor Napoleon’s directive to his brother, Joseph and the French marshals in Spain was to crush the British army in battle, thereby discouraging the London Government from interfering in Napoleon’s plans for the Iberian Peninsula again.
After crossing the Portuguese border in two columns, Wellesley’s army marched into Plasencia, 120 miles west of Madrid, on 9th and 10th July 1809.
Wellesley’s information on the French dispositions was that Victor’s Corps was retreating before him towards Talavera and Madrid, Ney was likely to remain in Galicia, the condition of Soult’s Corps was so bad as to preclude it from acting against him and Mortier’s Corps was in Valladolid.
With Soult and Mortier to his north, Wellesley was concerned with his left flank.
On 10th July 1809, Wellesley made the short journey to Casas del Puerto, on the far side of the River Tagus, to consult with General Cuesta and see at first hand the quality of his substantial Spanish army.
On arrival, Wellesley reviewed the Spanish regiments and formed the opinion, in Fortescue’s words, that, although physically fit, they were ‘untrained and undisciplined’.
On 11th July 1809, Wellesley and Cuesta had a difficult four-hour conference to work out a plan of campaign. Cuesta, elderly and ill, was deeply suspicious of Wellesley, who he suspected was trying to replace him.
Battle of Talavera on 28th July 1809 in the Peninsular War: picture by JJ Jenkins
Wellesley and Cuesta knew that Victor lay beyond Talavera with a corps of 22,000 French troops, while a further 13,000 were in reserve at Madrid under Joseph and his chief of staff, Jourdan. Sebastiani commanded a further 10,000 men at Madridejos, to the southeast of Toledo, observing the Spanish army of Venegas, comprising 20,000 men, which was moving towards Madrid.
Agreement between Wellesley and Cuesta was difficult. Wellesley was concerned about his left flank and wanted Cuesta to detach a substantial force to occupy the passes over the mountains on his left, not wishing to use British troops.
Cuesta refused to detach a large force, seeing this as a ploy to reduce his authority.
A small Spanish and Portuguese force was despatched to the left flank.
On the right, Venegas was to press Sebastiani back to the River Tagus.
British reinforcements were arriving in Lisbon for Wellesley’s army, but were being held up by the shortage of mule carts to carry equipment and supplies and cash for Wellesley’s treasury.
Some regiments did reach the army: 23rd Light Dragoons and the 48th and 61st Foot.
On 17th July 1809, Wellesley’s army left Plasencia, crossed the River Tierar and reached Oropesa on 20th July 1809.
Cuesta’s army arrived in Velada on 21st July 1809, some 12 miles east of Wellesley.
Skirmishing took place between cavalry patrols.
On 22nd July 1809, the Spanish and British armies again advanced, moving in parallel columns, the Spanish on the left.
As the Spanish approached Gamonal, they were confronted by Latour Maubourg’s Dragoon Division.
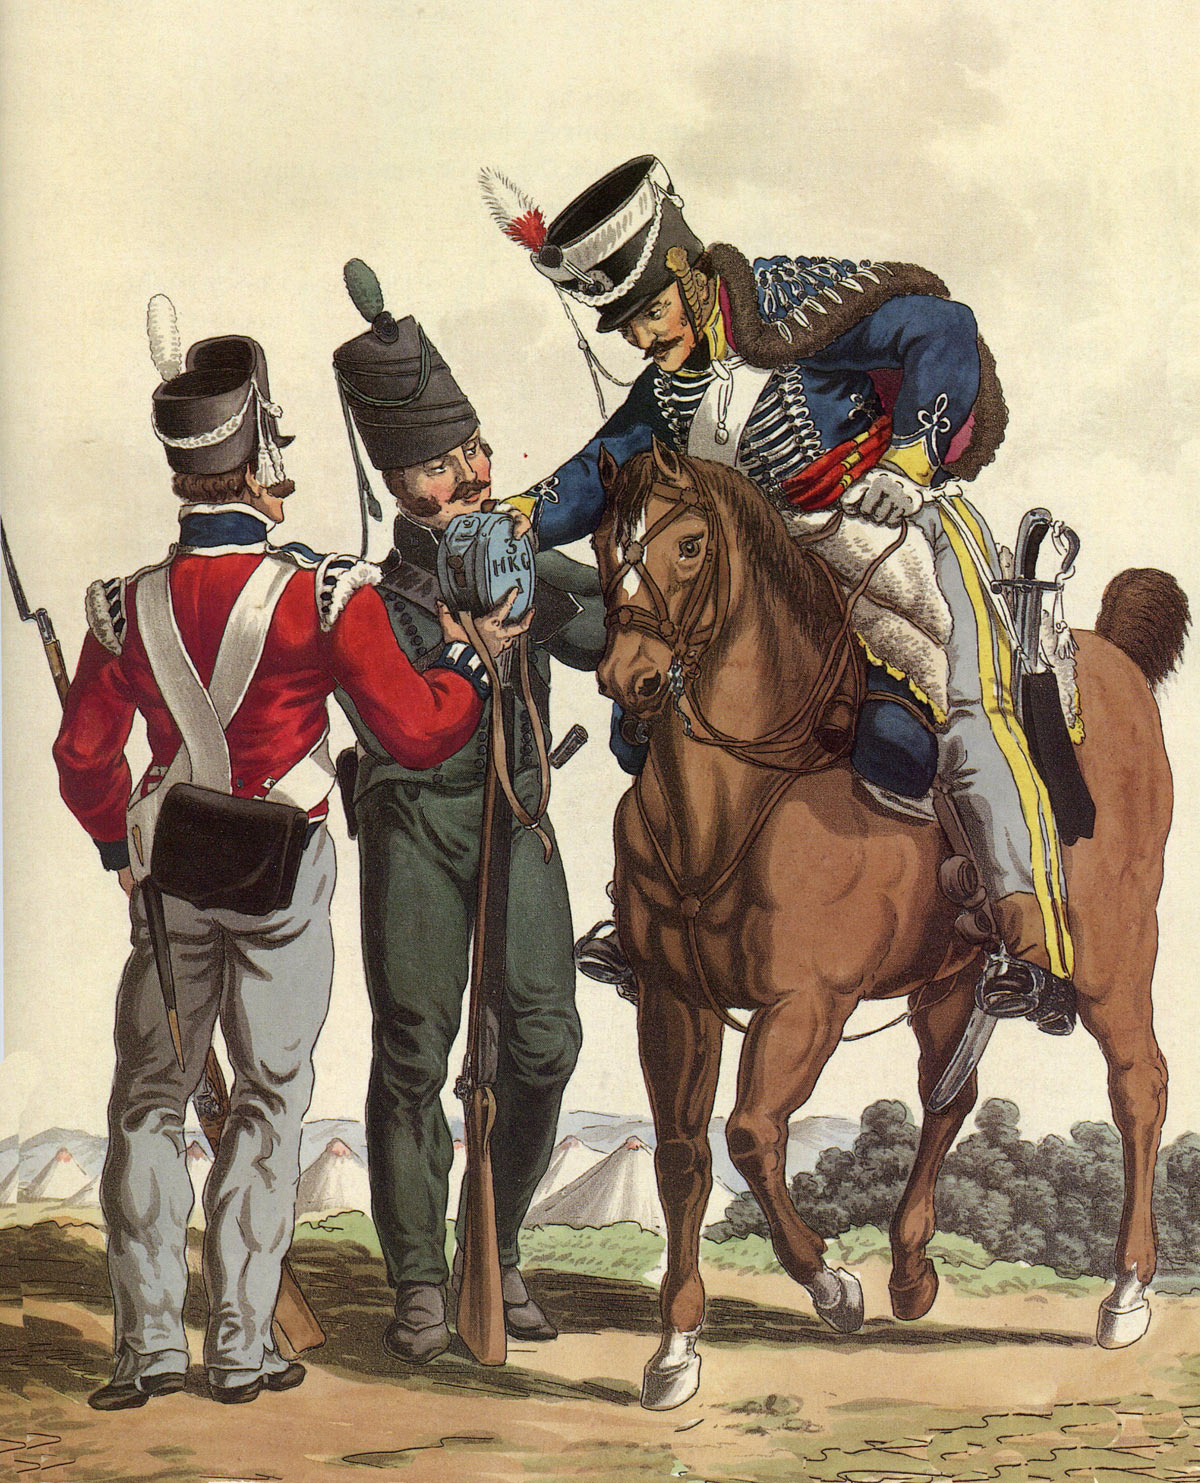
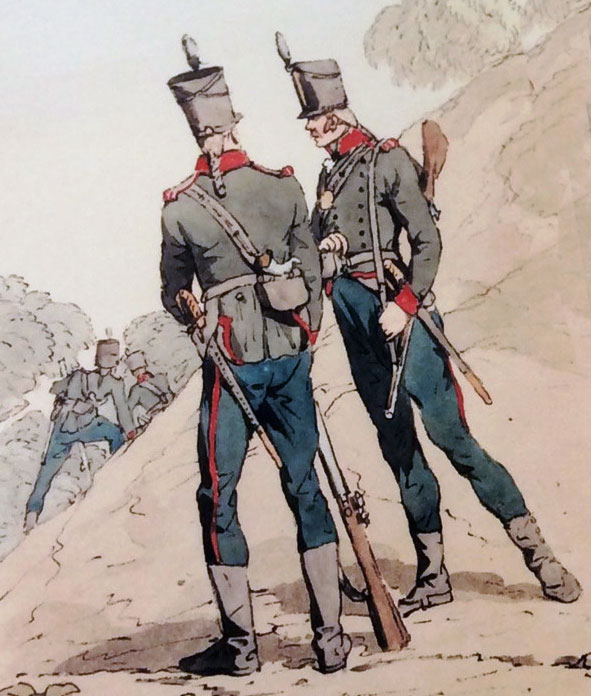
Infantry, Light Infantry and Hussar of the King’s German Legion: Battle of Talavera on 28th July 1809 in the Peninsular War: picture by Charles Hamilton Smith
The French troopers dismounted and awaited the Spanish were great calm.
The Spanish cavalry did not attack the French Dragoons and, even with the arrival of Spanish infantry, no aggressive move was made against Latour Maubourg’s men.
When Anson’s British brigade of light dragoons (23rd Light Dragoons and 1st KGL Light Dragoons) appeared, the French Dragoons mounted, retired around the northern side of Talavera and crossed the River Alberche.
During this stand-off, General Charles Stewart attempted three times to lead the Spanish cavalry in an attack on Latour Maubourg’s Dragoons as the French retreated, but the Spaniards would not charge.
Anson’s brigade did attempt an attack on the French dragoons, but came under fire from a French horse artillery battery and suffered some losses.
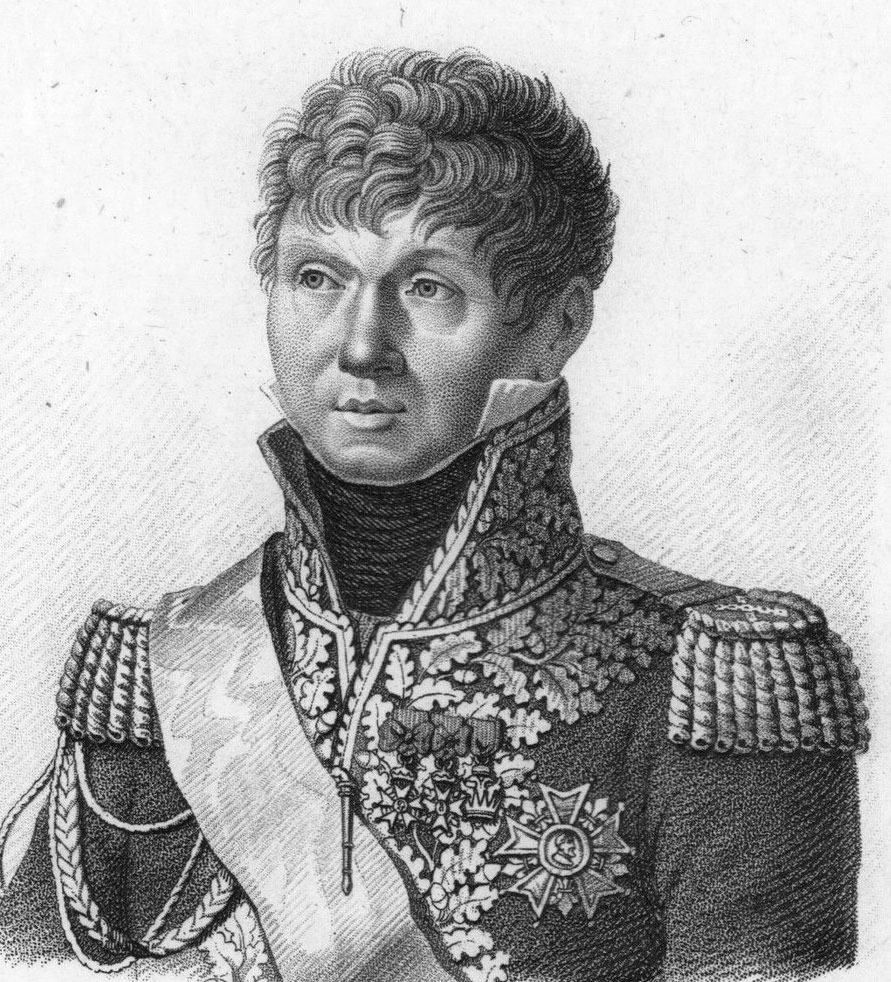
Marshal Victor: Battle of Talavera on 28th July 1809 in the Peninsular War
Fortescue reports that the most important feature of the day’s action was that for the first time Victor discovered there were British troops with Cuesta. This in turn triggered Napoleon’s order that a paramount aim for the French armies was to deal a decisive defeat to the British and thereby end their meddling in the Spanish Peninsula.
To achieve this end, Joseph had been corresponding with Soult on bringing together the French Second, Fifth and Sixth Corps for an advance towards Portugal.
Soult, however, required that his three corps be assembled at Salamanca and that the major priority for French resources was to restore the fighting capability of his own corps, left without artillery, weapons and equipment after his disastrous retreat from Portugal.
Now that Joseph was aware that the British were advancing up the River Tagus towards Madrid with Cuesta’s Spanish army, he directed Soult to move south against the left flank of the British and Spanish armies, the manoeuvre Wellesley feared, while Joseph advanced down the River Tagus from Madrid with his reserve, meeting Sebastiani at Toledo and marching on to combine his forces with Victor for battle with Wellesley and Cuesta.
On the night of 22nd July 1809, Mackenzie’s infantry division and Anson’s light cavalry brigade camped in front of Victor’s right wing, with the rest of Wellesley’s army to their rear and Cuesta’s army beyond Talavera.
Wellesley intended to attack Victor on 23rd July 1809, before he could be reinforced by Joseph’s reserve force from Madrid, but Cuesta failed to co-operate. The attack was deferred for a day, by which time Victor had retired and the opportunity of fighting him before he could be reinforced by Sebastiani and Joseph had been lost.
After his perverse failure to fight when circumstances were favourable, Cuesta pursued Victor’s army towards Toledo. Wellesley refused to accompany him, insisting that the Spanish authorities provide the baggage animals he needed to move supplies for his troops.
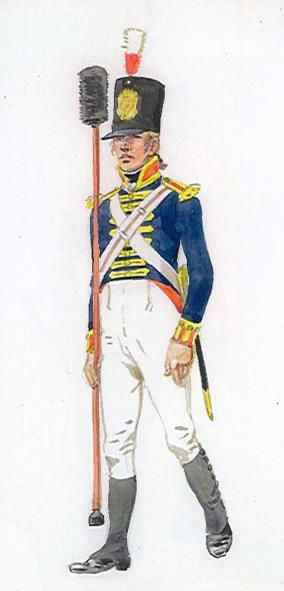
Royal Artillery gunner: Battle of Talavera on 28th July 1809 in the Peninsular War
In the meantime, the various French corps were on the move. Soult ordered Ney and his other subordinate commanders to march to Salamanca.
On receiving Victor’s report that he was retreating, Joseph changed the destination of his march from Talavera to Toledo.
On 25th July 1809, Joseph marched into Vargas, to the north of Toledo, Sebastiani’s Corps reached the city of Toledo, while Victor halted on the River Guararrama, 10 miles west of the city, thereby concentrating the French First Corps, Fourth Corps and Reserve in an army of 46,000 men.
Venegas’ Spanish army, following Sebastiani, received various conflicting orders from the Supreme Junta in Seville and from Cuesta and halted on the road to Madrid from the south-east, losing contact with Sebastiani.
On the same day, Mackenzie’s infantry division with two regiments of cavalry crossed the River Alberche, a tributary of the River Tagus.
Cuesta’s Spanish army was even further forward, at Torrijos, 15 miles from Toledo. On finding that the concentrated French army amounted to 40,000 men, Cuesta began to fall back.
The British divisions of Sherbrooke and Mackenzie advanced to cover the Spanish retreat.
Joseph and his marshals decided to attack and on the morning of 26th July 1809 advanced to Torrijos.
At Torrijos, the French cavalry came up with the Spanish rearguard of Zayas’ infantry division and two regiments of cavalry.
The French cavalry drove the Spanish rearguard 3 miles back to Alcabon, where Alburquerque’s cavalry division advanced to cover its retreat.
Victor halted the advance and his cavalrymen dispersed to find forage for their horses, enabling the Spanish formations to get away without further molestation.
After some hours, Victor finally moved a further 3 miles forward to Santa Olalla, where his corps camped for the night.
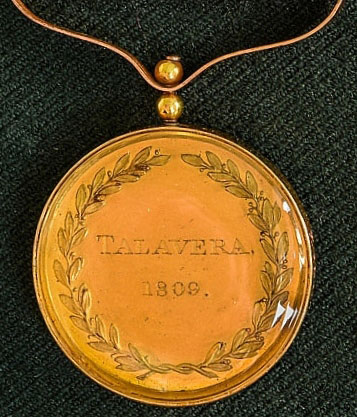
Army Gold Medal awarded to Lt Col Alexander Gordon of the 83rd Regiment for the Battle of Talavera on 28th July 1809 in the Peninsular War
Army Gold Medal awarded to Lt Col Alexander Gordon of the 83rd Regiment for the Battle of Talavera on 28th July 1809 in the Peninsular War
Cuesta’s army, disorganised by its headlong retreat, reached the River Alberche, the tributary that flows into the River Tagus from the north-east 3 miles to the east of Talavera, during the afternoon of 26th July 1809, where Wellesley, after bringing forward Sherbrooke’s infantry division to cover the Spanish troops, attempted to persuade Cuesta to cross the Alberche to the west bank. Cuesta refused.
After Wellesley finally repeated his request to Cuesta on bended knee, the Spanish began the river crossing in the hours before dawn on 27th July 1809, under the jaundiced eyes of Mackenzie’s and Sherbrooke’s British divisions.
At Wellesley’s suggestion, Cuesta’s army formed a defensive line stretching from the town of Talavera to the north, as far as a small plateau called the Paiar de Vergarar.
The Portina Brook followed the Spanish line and ran a further mile to the north, emerging from between two rugged hills, the Cerro de Medellin on the west side and the Cerro de Cascajal on the east side of the Portina Brook.
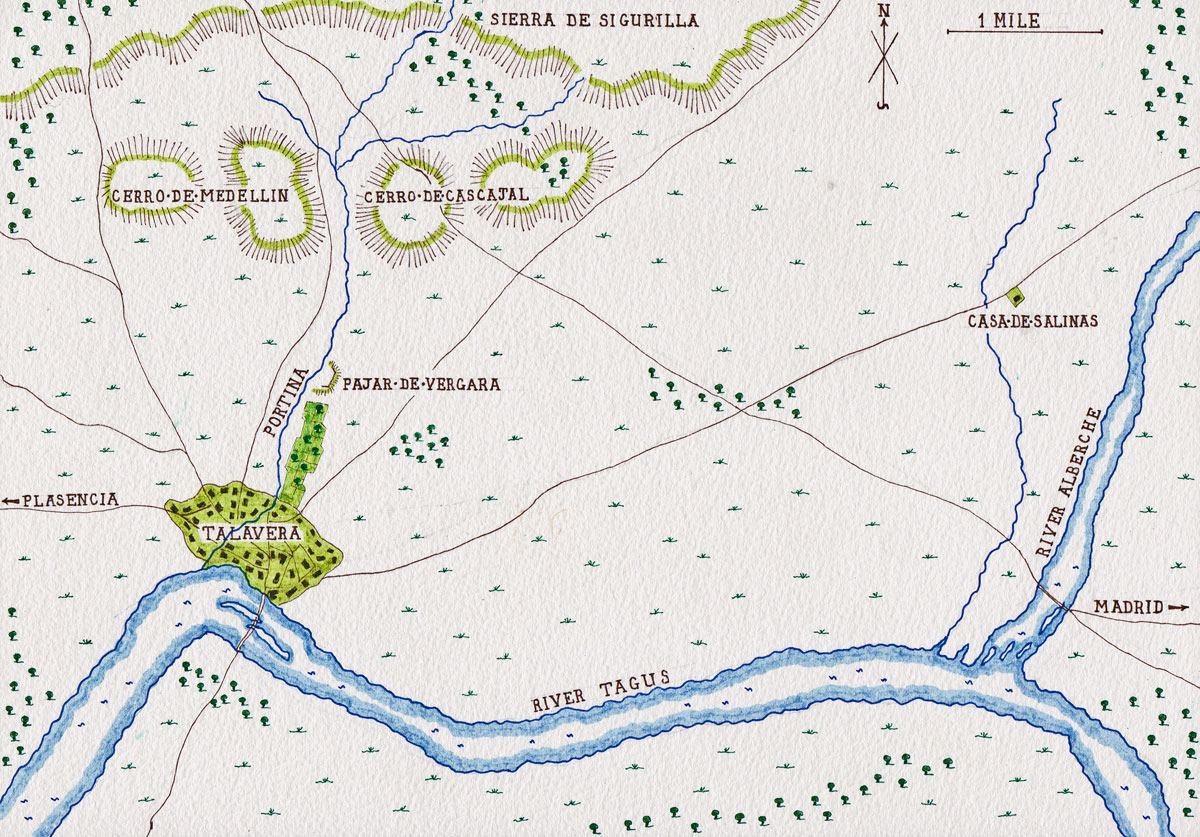
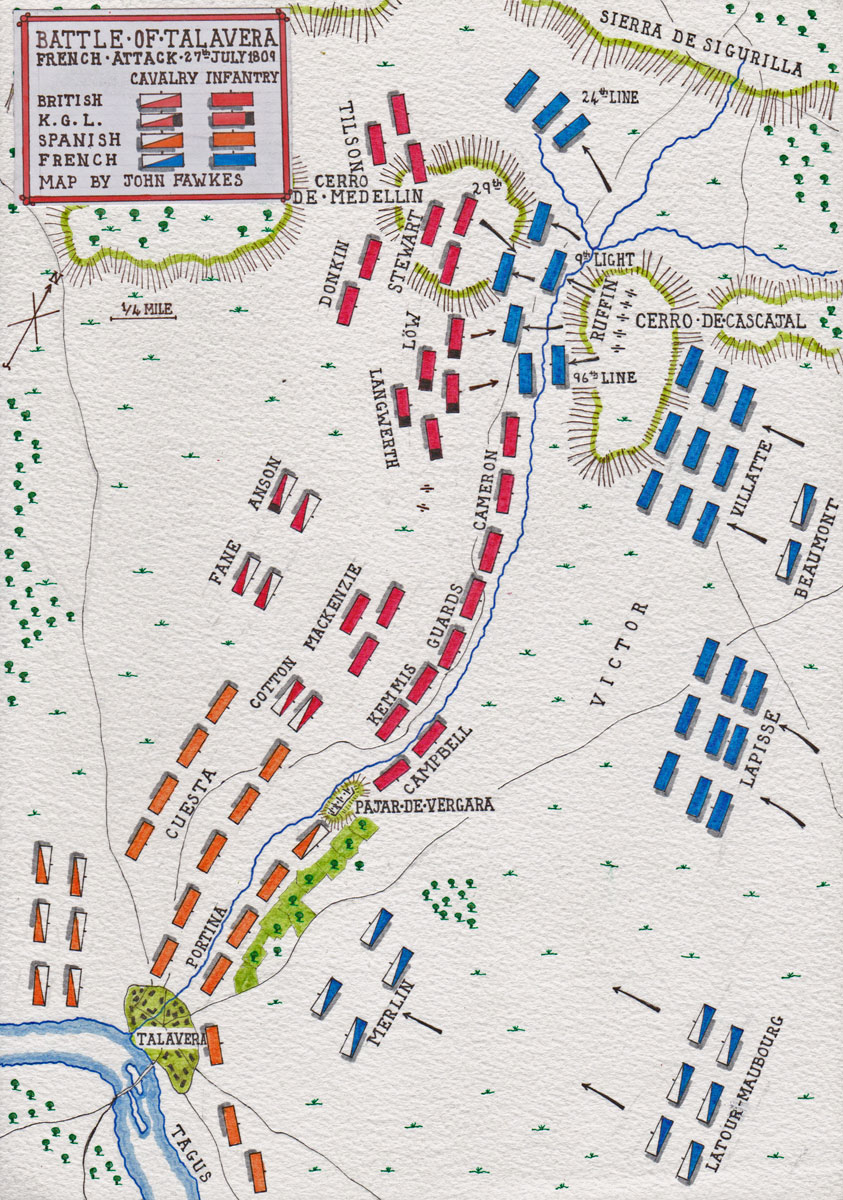
Map of the Talavera battlefield: Battle of Talavera on 27th/28th July 1809: map by John Fawkes
Beyond the two Cerros lay a plain, with rugged mountains beyond, called the Sierra de Seguilla.
Wellesley planned to face the French army along the line of the Portina Brook, the Spanish right based on the walled town of Talavera and the British left on the Cerro de Medellin.
Mackenzie’s Division, the British rearguard, crossed the River Alberche and marched to a group of buildings called the Casa de Salinas, some 3 miles short of the line along the Portina Stream.
Not expecting the French to have crossed the River Alberche, Mackenzie’s Division halted at the Casa de Salinas, without taking suitable precautions for defence.
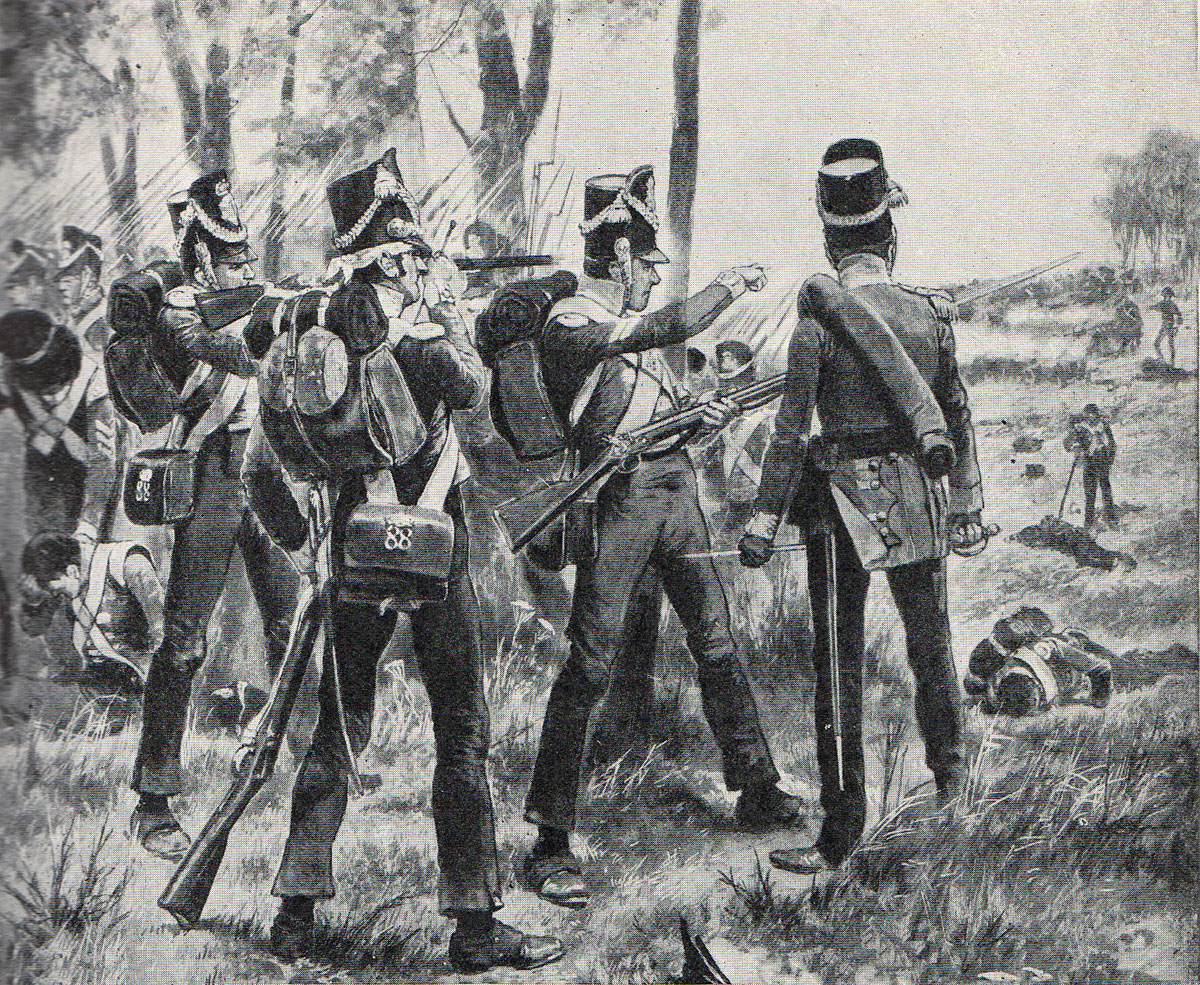
87th and 88th Regiments at the Casa de Salinas: Battle of Talavera on 27th July 1809 in the Peninsular War: picture by Richard Caton Woodville
Lapisse’s Division crossed the River Alberche, approached the British troops unobserved and fired a volley into Donkin’s Brigade, which principally fell on the 87th Regiment, inflicting around 150 casualties on the 87th, including 11 officers killed and wounded.
The British 87th and 88th Regiments ran back in wild confusion, although the third regiment of the brigade, the 60th, stood firm.
Wellesley was informed of the attack and rode forward to take over the situation. Narrowly escaping injury or capture by French light troops, Wellesley withdrew the regiments of Mackenzie’s Brigade, the 24th, 31st and 45th Regiments, through a wooded area to open ground, where they drove back the advancing French columns, while Donkin’s Brigade reformed in their rear.
With the French driven back, the British infantry were able to march to the main line, covered by the cavalry brigades of Anson, Cotton and Fane, but under a heavy fire from French horse artillery.
British casualties in the engagement were nearly 450 men killed, wounded or captured. The 87th suffered 200 casualties, with 34 of them taken prisoner.
Map of Victor’s night attack on 27th July 1809 at the Battle of Talavera on 27th/28th July 1809 in the Peninsular War: map by John Fawkes
Battle of Talavera; the French night attack on 27th July 1809:
While Wellesley selected the position from which to resist the French advance, he found himself involved in too many duties to supervise the proper disposal of the British troops along the position he had selected.
Due to the age and indisposition of General Cuesta, Wellesley became responsible for positioning the Spanish troops along the line from Talavera town to the Paiar de Vergarar. While doing this, Wellesley was called away to deal with the surprise attack on Mackenzie’s Division at the Casa de Salinas.
Wellesley was consequently unavailable to supervise the disposition of the British regiments along the Portina Brook line.

Sir Arthur Wellesley positioning Spanish regiments at the Battle of Talavera on 27th/28th July 1809 in the Peninsular War
There was consequently a significant degree of confusion. Due to faulty orders, the King’s German Legion Brigade marched away to the west, having to be recalled and directed to its designated position as darkness fell.
Some British brigade commanders failed to adopt the correct position and several were unaware whether they were in the first or second line.
With these failings, during the course of the afternoon and evening of 27th July 1809, Wellesley’s army formed along the Portina Brook line, north of the Paiar de Vergarar to the Cerro de Medellin, in this order: from the right, British guns on the Paiar de Vergarar, with Campbell’s Brigade next in line; behind the Portina Brook, Kemmis’ Brigade, the Foot Guards, with Mackenzie’s Brigade behind the Foot Guards, then more British guns, Cameron’s Brigade, Langwerth’s KGL Brigade with the rest of the British guns.
On the peak of the Cerro de Medellin stood Donkin’s Brigade and on the lower slopes of the Cerro de Medellin, Stewart’s Brigade on the southern slope and Tilson’s Brigade on the northern slope.
Cotton’s cavalry brigade took the rear of the British right wing, with Anson’s and Fane’s cavalry brigades further back on the right.
The King’s German Legion battalions arrived in the line late in the evening, after an exhausting day and many soldiers then fell asleep.
Victor, following his success over Mackenzie’s Division at the Casa de Salinas, brought the rest of his corps over the River Alberche and advanced towards Wellesley’s positions, with Ruffin’s Division to the front on the right, followed by Villatte’s Division, with Lapisse’s Division on the left, followed by Beaumont’s 2 cavalry regiments and with Latour-Maubourg’s cavalry division spread across the plain to the left, in front of the Spanish positions.
It was planned that Sebastiani’s Corps would take the left of the French advance, but his troops were still coming up on the east bank of the River Alberche, only Merlin’s dragoon division having crossed.
At around 7pm on 27th July 1809, Ruffin’s infantry and guns moved onto the Cerro de Cascajal and opened fire across the steep ravine of the Portina Brook at the British infantry on the Cerro de Medellin.
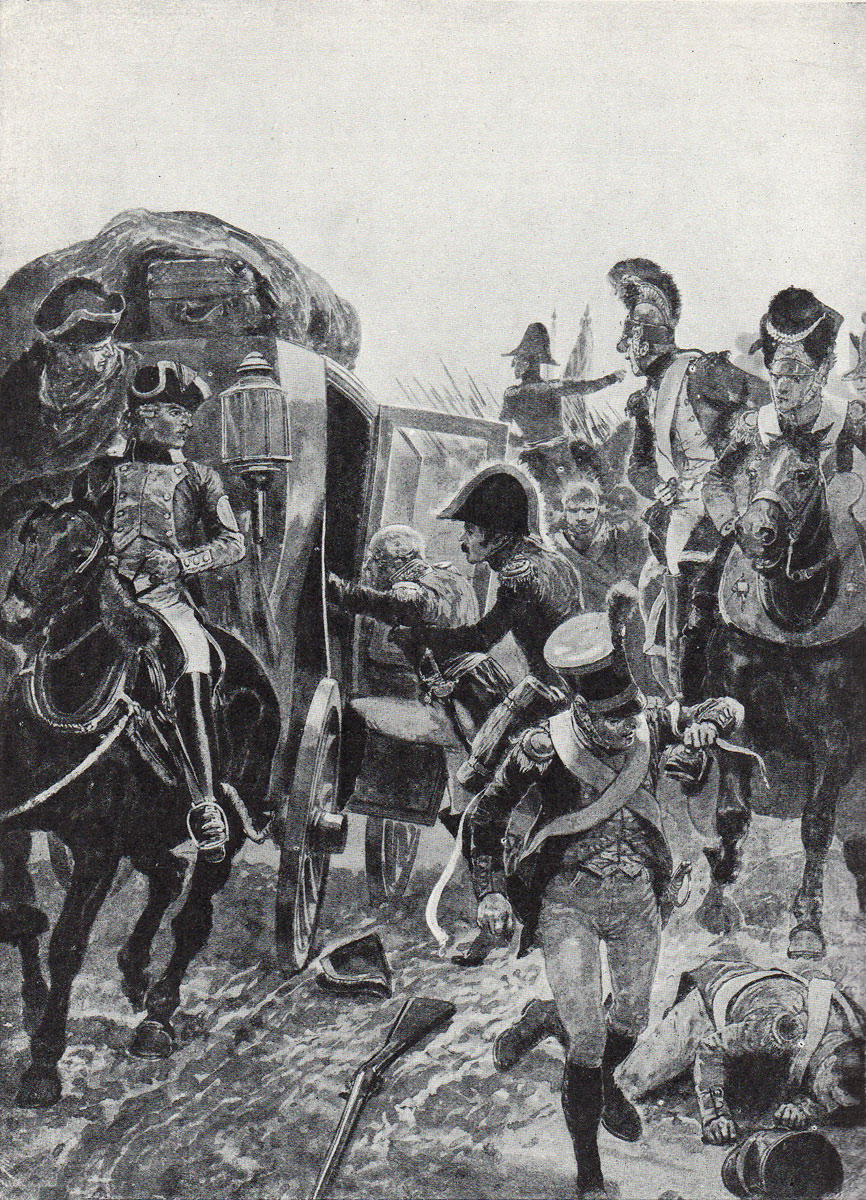
Spanish troops leaving the battlefield at the Battle of Talavera on 27th July 1809 in the Peninsular War: picture by Richard Caton Woodville
At the same time, Merlin’s dragoons approached the Spanish line and fired their pistols. The Spanish unleashed a terrific volley along their whole line, following which, four Spanish battalions turned and fled the battlefield.
It would seem that General Cuesta’s coach driver joined the flight, with the general an unwitting passenger.
At the northern end of the line, Victor resolved to mount an immediate attack on the thinly held Cerro de Medellin, without waiting for the rest of the French army to come up.
Victor withdrew his guns from the Cerro de Cascajal to make way for the infantry and ordered Ruffin to attack the Cerro de Medellin at 9pm.
Of Ruffin’s 3 regiments, each of 3 battalions, the 24th of the Line was to march around the north of the Cerro de Medellin and attack the British flank, while the 9th Light was to cross the ravine of the Portina Brook and make a frontal assault, with the 96th of the Line crossing the Portina Brook further south and attacking the right flank of the British troops on the Cerro de Medellin.
In the darkness, the 24th of the Line became lost and failed to deliver an attack.

Soldiers of the French 9th Light Regiment: Battle of Talavera on 28th July 1809 in the Peninsular War
The 9th Light crossed the Portina Brook and climbed the Cerro de Medellin, where it engaged Löw’s Brigade (5th and 7th Line Battalions, King’s German Legion) on the southern slopes of the Cerro.
The 7th KGL lost heavily while the 5th was seriously disordered.
The French 9th Light continued on up the Cerro and captured the crest, pushing off the piquet from Stewart’s Brigade.
The British line was now fully alert to the attack on the Cerro de Medellin.
General Hill was issuing orders to Stewart’s Brigade to support Löw’s KGL battalions, when he saw men firing down from the crest of the Cerro de Medellin.
Hill rode towards the men, taking them to be British, shouting to stop firing. Hill was surrounded by French infantrymen, one of whom grabbed his bridle and called on him to surrender.
Hill broke free and galloped down the mountainside, leaving his brigade-major shot dead.
Reaching Stewart’s Brigade, Hill ordered the regiments to form open column of companies and led them to attack the French 9th Light on the summit; the battalion of detachments in the lead, followed by the 29th and the 48th regiments.
The battalion of detachments was checked and fell back, the 29th pushing through them and charging on up the hill.
29th Regiment attacking the French at the Battle of Talavera on 27th/28th July 1809 in the Peninsular War
On reaching the summit of the Cerro de Medellin, the leading company of the 29th fired a volley into the French and charged them, driving them back into the ravine.
The whole regiment of the 29th then wheeled into line and advanced obliquely down the slope towards the Portina Brook, catching the reserve battalion of the 9th Light as it climbed the hill, driving it back in disorder.
The three defeated battalions of the 9th Light met at the Portina Brook and climbed back to the top of the Cerro de Cascajal, their attack abandoned.
At the beginning of the French attack on the Cerro de Medellin, the French 96th of the Line moved to the left, crossed the Portina Brook and engaged Langwerth’s Brigade of the King’s German Legion. After exchanging volleys with the KGL, the 96th also withdrew.
Victor’s first attack on the Cerro de Medellin was over.
Wellesley’s battalions suffered under 400 casualties from the infantry attack and the initial cannonade, half by Löw’s KGL Brigade.
French casualties are unknown, but it seems likely that the 9th Light suffered heavily.
Fortescue states: ‘No praise can be too high for the Twenty-ninth, which practically defeated all three battalions of the French 9th single-handed, and thus decisively established the superiority of the British troops over their enemy.’
Following this engagement, Wellesley ordered Rettberg’s battery of guns to the top of the Cerro de Medellin and re-positioned the infantry, permitting the 29th to remain on the summit, where it flaunted its colours, the regiment occupying the extreme left of the British line.
Attack of the British 29th Regiment at the Battle of Talavera on 27th/28th July 1809 in the Peninsular War
The regiments to the right of the 29th were the First Battalion of Detachments and the 48th Regiment of Stewart’s Brigade: then Tilson’s Brigade, flanked by the 2 brigades of King’s German Legion, then Sherbrooke’s Division, with Donkin’s Brigade in the rear.
British piquets crowded along the Portina Brook, edgily exchanging shots with the French sentries; sometimes firing on their own side.
At midnight, the Spanish troops unleashed a heavy fire, leading Sir Arthur Wellesley to believe the French were launching another attack. This was not the case.
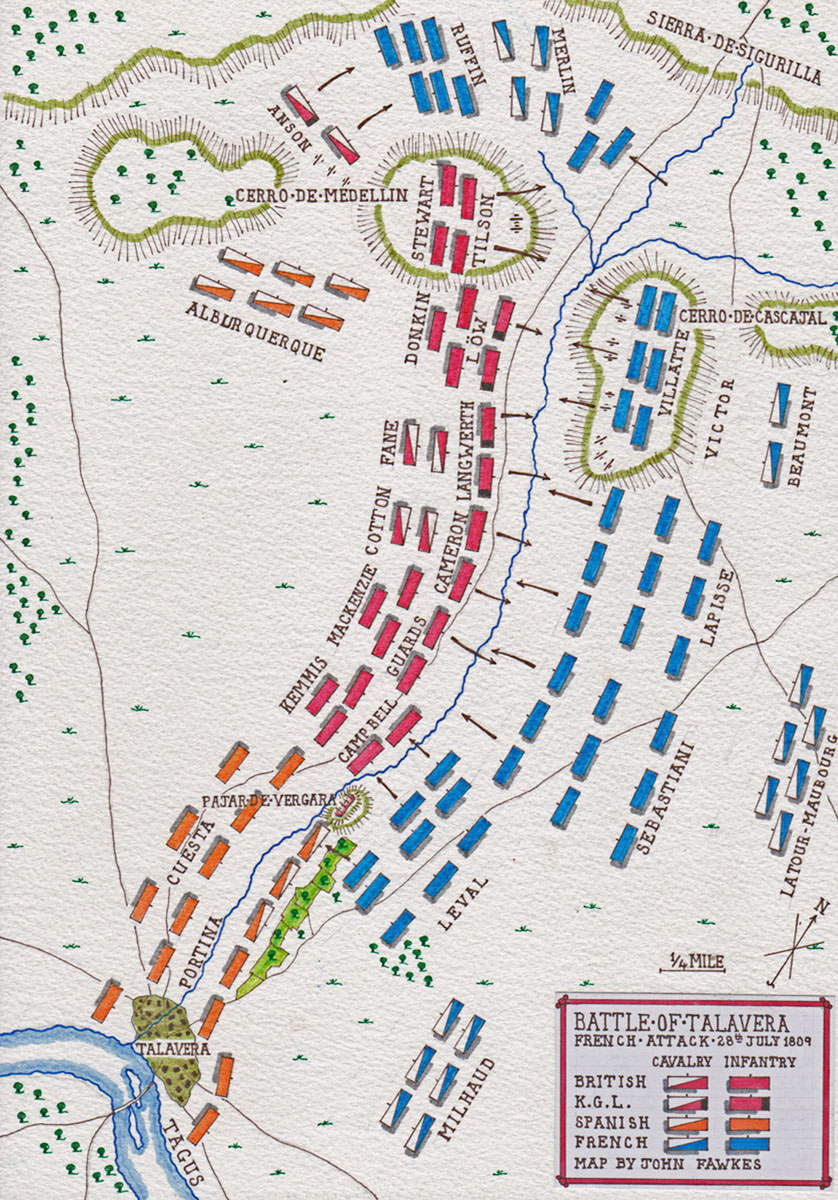
Map of the Main French Attack at the Battle of Talavera on 28th July 1809 in the Peninsular War: map by John Fawkes
Battle of Talavera; the main French attack, on 28th July 1809:
For the rest of the night of 27th July 1809, the French could be heard moving guns and infantry onto the top of the Cerro de Cascajal.
Victor was determined to renew his attack in daylight.
Jourdan, Joseph’s chief of staff, now on the battlefield, was for waiting until Soult’s army began its move through the mountain passes to emerge on Wellesley’s lines of communication.
However, Victor insisted on making the attack and Joseph and Jourdan gave way, fearing the consequences if Victor reported the dispute to Napoleon.
Victor assigned the second assault on the Cerro de Medellin again to Ruffin, despite the failure of his division in the first attack and the significant casualties and rough handling suffered by the 9th Light.
Only once the Cerro de Medellin was taken were Victor’s others divisions, Villatte’s and Lapisse’s, to advance on the next section of the British line.
In turn, Joseph directed Sebastiani’s Fourth Corps not to attack until Victor’s First Corps was seen to be successful.
These directions ensured that the French regiments would be committed piecemeal and without mutual support.
French deserters overnight revealed the plan of attack to Wellesley, who, at dawn, was on the Cerro de Medellin, watching Ruffin’s Divisional columns on the edge of the Portina Brook ravine, waiting to advance and Villatte’s Division on the summit of the Cerro de Cascajal, with 30 guns in battery to their front and Beaumont’s cavalry in support.
Lapisse’s Division was positioned on Villatte’s left, supported by Latour-Maubourg’s dragoon division.
On the French left, Sebastiani’s Fourth Corps was still coming up.
Joseph was in the rear with the reserve, comprising his Cavalry and Infantry Guard, Dessolle’s infantry brigade and 2 squadrons of Chasseurs a Cheval.
Of the French artillery, 30 guns were on the crest of the Cerro de Cascajal, with 30 more on the lower slopes and the rest with the Fourth Corps.
While the total Spanish and British army outnumbered the French by 55,000 to 45,000, the French troops facing the British section of the line numbered 30,000 against 16,500 British and German troops, with a substantially heavier and more numerous artillery.
Battle of Talavera on 28th July 1809 in the Peninsular War
At 5am on 28th July 1809, a single gun fired from the Cerro de Cascajal to signal the beginning of the French attack, followed by a barrage from all the guns on the Cerro at the British troops holding the Cerro de Medellin.
The brigades of Stewart and Tilson fell back behind the crest of the Cerro de Medellin, as Rettberg’s battery struggled to return the French cannonade.
With the opening of the bombardment, the French light troops rushed forward, followed by the infantry columns.
Most of the French cannon shots passed over the heads of the British 29th Regiment, lying down behind the crest of the slope.
General Hill saw the French advance beginning, in spite of the pall of smoke that shrouded the French positions and gave the order to recall the British light companies from the bank of the Portina Brook.
Once the French infantry were well up the slope, the French guns ceased firing to avoid hitting their own men.
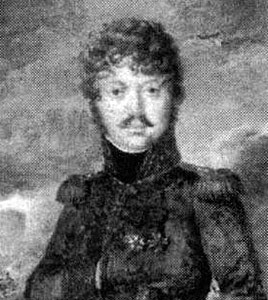
General de Division François Amable Ruffin: Battle of Talavera on 28th July 1809 in the Peninsular War
Ruffin’s regiments were formed in a different order from the previous night’s attack. The 9th Light was on the right, with its line of advance over the plain to the north of the Cerro de Medellin, the 24th of the Line was in the centre and the 96th of the Line on the left.
The French assault, comprising the 24th and the 96th, but not the 9th Light, which was directed along the level ground, fell on Stewart’s Brigade.
Ruffin’s infantry climbed the side of the Cerro de Medellin in ‘close column of divisions’, giving them a frontage of around 150 men and a depth of 9 men.
The British infantry were called to their feet and lined the edge of the summit.
Stewart’s men waited until the French infantry were within close range, before firing a volley which halted the French advance.
The French 96th of the Line was additionally subjected to a fire into its left flank from the KGL battalions, brought forward by Sherbrooke.
The French line wavered and was then charged by the British regiments, sweeping them back down the hill and up the far side of the Portina Brook ravine.
Seeing their fellow regiments driven back, the 9th Light abandoned its advance to the north of the Cero de Medellin and fell back to its starting position, joining the soldiers of the 24th and 96th of the Line back on the summit of the Cero de Cascajal. Victor’s second attack had failed.
The British infantry were again subjected to French cannon fire as they climbed back to their positions behind the summit of the Cero de Medellin.
Hill’s Division suffered casualties of around 750 killed, wounded or captured, Hill himself being wounded and forced to leave the battlefield, Tilson taking over command of his division.
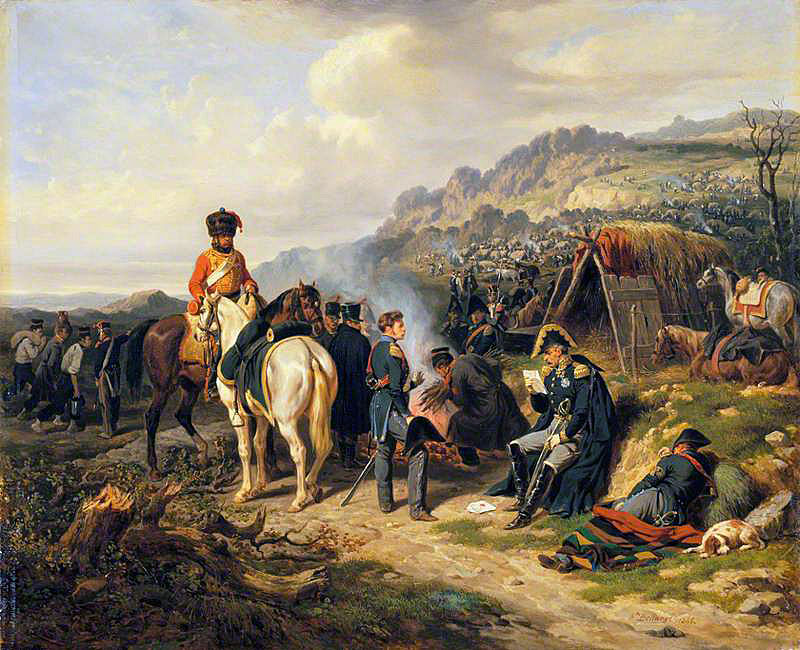
French staff officers: Battle of Talavera on 28th July 1809 in the Peninsular War: picture by Hippolyte Belangé
French casualties were heavier. The 24th and 96th lost 40 officers and around 1,100 men killed, wounded or captured, most of the wounded being left on the slope leading up to the British position.
The French guns continued to fire for a full hour, their shot falling among the parties of British troops collecting the wounded and dead, British and French, from the hillside.
At around 8.30am, the cannonade ceased and officers and soldiers of both sides wandered down to the Portina Brook to drink the muddy water, mingle and gossip.
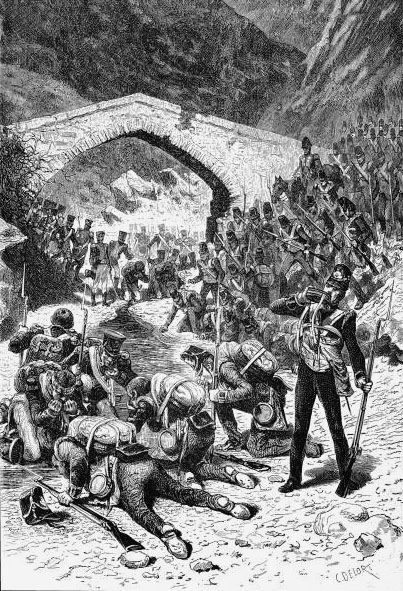
British and French troops drinking from the Portina Brook during the Battle of Talavera on 28th July 1809 in the Peninsular War: picture by C. Delort
During the pause, Wellesley ordered the cavalry brigades of Fane and Anson to form up to the west of the Cerro de Medellin, ready to counter any further move around the north side. 2 guns were also positioned on a northern spur of the Cerro de Medellin.
Donkin’s Brigade was moved onto the Cerro de Medellin, joining the brigades of Stewart and Tilson.
At around 10am, Joseph and his staff mounted to the top of the Cero de Cascajal to reconnoitre the situation. A discussion took place as to the next move for the French army.
Victor urged a further attack, saying that the one earlier in the day had failed because Sebastiani’s Fourth Corps had not taken part.
Joseph’s chief of staff, Jourdan, was against another attack, urging the danger that the Spanish might advance and force their way through the French army, driving it north into the mountains and leaving the road to Madrid open to the Spanish and British.
Victor declared that if Joseph could hold the Spanish troops, he would storm the Cerro de Medellin with the three divisions of his corps.
In the middle of the heated discussions, a despatch arrived from Soult saying that he could not reach Plasencia until between the 3rd and 5th August 1809.
This news made it essential to fight, as Joseph could not detach a sufficient force to hold Madrid against the advancing Spanish army of Venegas, coming up from the south-east and still confront Cuesta and Wellesley with sufficient strength.
It was decided that Victor would make a third attempt to take the Cerro de Medellin, while Joseph attacked the Spanish wing.
Victor again assigned the main assault to Ruffin’s battered division, presumably on the basis that it was in the correct position and it would take time and be risky to move it out of the way and replace it with one of his other two divisions.
Ruffin’s division was to advance with all 3 regiments around the north of the Cerro de Medellin, supported by a brigade of Villatte’s Division.
Lapisse’s Division was to attack on the left of Villatte’s Division.
30,000 French infantry would be attacking 16,500 British infantry.
Sebastiani’s Division and Leval’s German Division were to attack the British divisions in Wellesley’s centre and right.
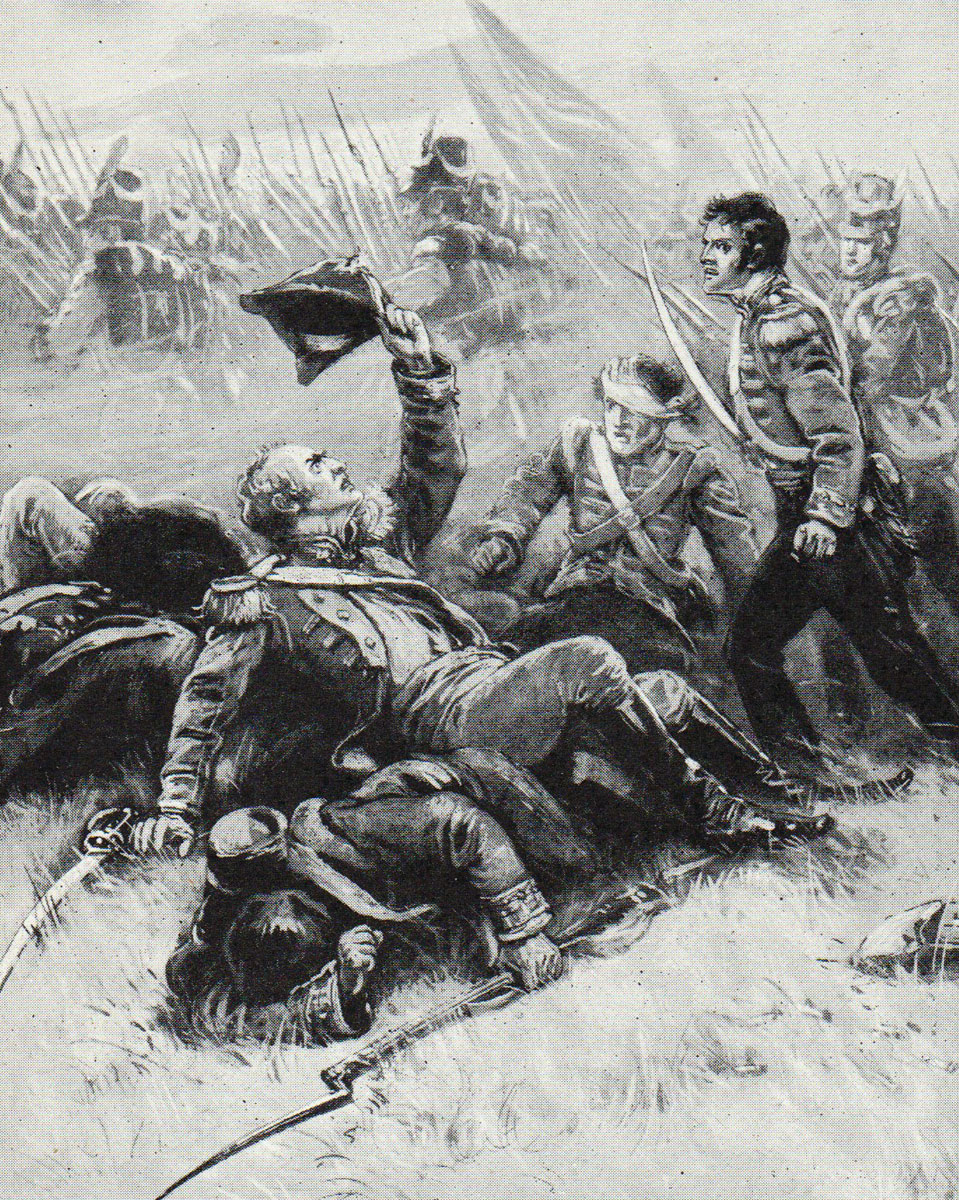
Death of General Mackenzie at the Battle of Talavera on 28th July 1809 in the Peninsular War: picture by R. Westall
The French cavalry was distributed along the rear in support of the attacking infantry: Latour-Maubourg’s dragoon division behind Sebastiani, Beaumont’s 2 regiments behind Villatte and Merlin’s 4 regiments supporting Ruffin’s attack, in the plain north of the Cerro de Medellin.
At around 11am, the British staff saw a cloud of dust indicating that Sebastiani’s Corps was advancing.
At the same time, French light infantry appeared on the Sierra de Segurilla, to the north of the Cerro de Medellin.
It was apparent to Wellesley that a further French attack was under way, causing him to seek reinforcements from Cuesta, who despatched Aberquerque’s cavalry division and a battery of horse artillery. These troops formed behind the British cavalry brigades of Fane and Anson to the west of the Cerro de Medellin.
The French attack initially fell on the British right, where the light companies of Campbell’s Brigade were surprised in the area of vineyards and walled gardens around the Pajar de Vergara, losing prisoners to the German troops of Leval’s Division.
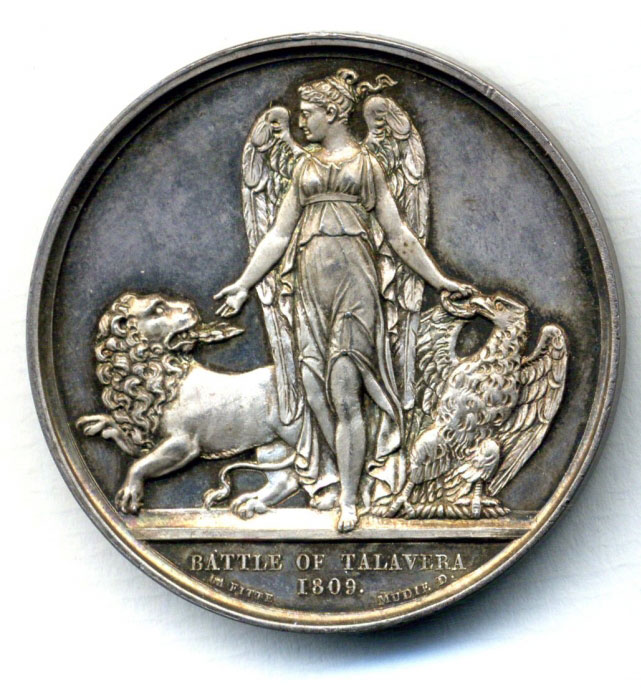
Silver Medal commemorating the Battle of Talavera on 28th July 1809 in the Peninsular War
Silver Medal commemorating the Battle of Talavera on 28th July 1809 in the Peninsular War
By the time Leval’s men reached the main line of Campbell’s Brigade (2nd/7th Fusiliers, 2nd/53rd Foot and 1 company 5th/60th Foot), they were thoroughly disordered by their advance through the broken ground.
Reinforced by the 40th Regiment, Campbell’s line, with its right flank against the Pajar de Vergara, discharged volleys into the advancing Germans, while the British guns in the redoubt on the Pajar de Vergara fired grapeshot into their left flank.
The German regiment receiving the discharges of grape gave way and ran back. The other German regiments wavered under the British volleys, at which Campbell ordered his brigade to advance, led by the 7th Fusiliers.
These remaining German regiments also ran off into the vineyards, leaving a battery of guns.
The battalions of Leval’s Division that were engaging the Spanish also retreated and the whole division fell back.
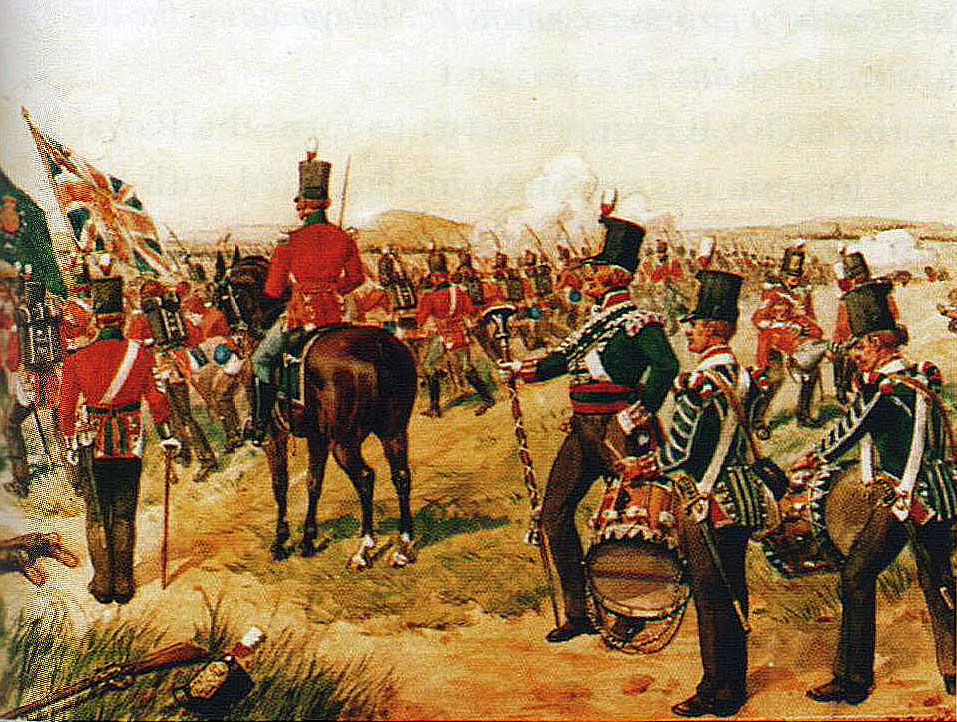
48th Regiment at the Battle of Talavera on 28th July 1809 in the Peninsular War
Campbell kept his battalions under strict control and halted the pursuit, bringing them back into the original line, spiking the abandoned guns on the way.
Towards the end of the action between Campbell’s brigade and Leval’s Division, the divisions of Lapisse and Sebastiani attacked the British First Division, commanded by Sherbrooke.
The two French divisions, preceded by a swarm of skirmishers, crossed the Portina Brook and advanced in solid masses against the line of the German brigades of Löw and Langwerth, Cameron and the British Foot Guards.
The British and German infantry waited until the first line of the French columns were within 50 yards, fired a devastating volley and charged.
The French gave way in confusion and were pushed back across the Portina Brook.
On the far side of the brook, Cameron halted his men and re-formed them.
3rd Foot Guards at the Battle of Talavera on 28th July 1809 in the Peninsular War
However, the Germans and the Foot Guards pushed on, in increasing disorder, until they were attacked in overwhelming numbers by the second lines of Lapisse’s and Sebastiani’s Divisions.
At the same time, the French guns on the Cero de Cascajal fired into the left flank of the German brigades, inflicting terrible casualties.
The German and Foot Guards brigades were bundled back across the Portina Brook by the triumphant French infantry.
The moment was critical for Wellesley’s army. The French appeared to have broken its centre.
Mackenzie’s Brigade hurried forward from the Second Line to meet the oncoming French, while the 48th Regiment came down from Cerro de Medellin to assist the retreating German battalions.
Death of Colonel Donnellan of the 48th Foot during the Battle of Talavera on 28th July 1809 in the Peninsular War: picture by BAV Hardy
The 48th, 24th, 31st and 45th Regiments formed a line, opening their ranks to allow the retreating regiments through and engaged the advancing French in a duel of volley firing, during which, Colonel Donnellan, commanding the 48th Foot, was mortally wounded.
Soon the Foot Guards and Cameron’s Brigade, followed by the German battalions, reformed themselves and joined the regiments of Mackenzie’s Brigade in engaging the French, who began to waver.
General Lapisse was killed, urging his men on, his death striking a severe blow to the morale of his division, which fell back, leaving Sebastiani’s flank exposed.
Cotton’s Brigade (14th and 16th Light Dragoons) launched a charge into the left flank of Sebastiani’s division and the whole of the French centre began to fall back.
British 24th Foot during the Battle of Talavera on 28th July 1809 in the Peninsular War: picture by Richard Simkin
In Fortescue’s words: ‘Thus the contest in the centre came to an end, both sides having suffered appalling losses in one of the stubbornest fights that occurred during the whole course of the war.’
Towards the end of the struggle in the centre, Leval’s Germans were again thrown into the attack, to cover Sebastiani’s left flank. They were easily repulsed by two Spanish infantry regiments and two of Campbell’s brigades.
As they fell back, the Germans were charged by the Spanish King’s Regiment of Horse, two German battalions being badly cut up and 4 guns taken. A further 7 of Leval’s guns were captured by Campbell’s troops.
During the French attack in the centre, the French guns on the Cerro de Cascajal fired a heavy bombardment on the British troops on the Cerro de Medellin, inflicting severe casualties, particularly on Donkin’s Brigade.
As the struggle in the centre reached its height, Victor began his advance around the northern side of the Cerro de Medellin, Ruffin’s Division on the right, the 9th Light moving over the Sierra de Segurilla, with Villatte’s Division on the left, led by the 27th Light.
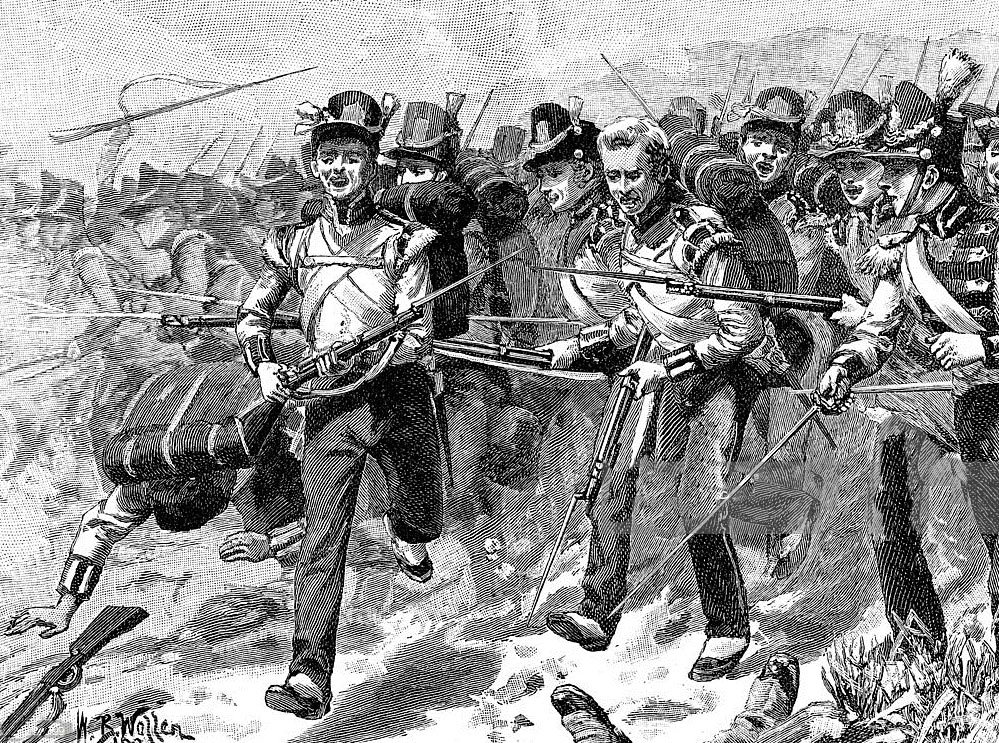
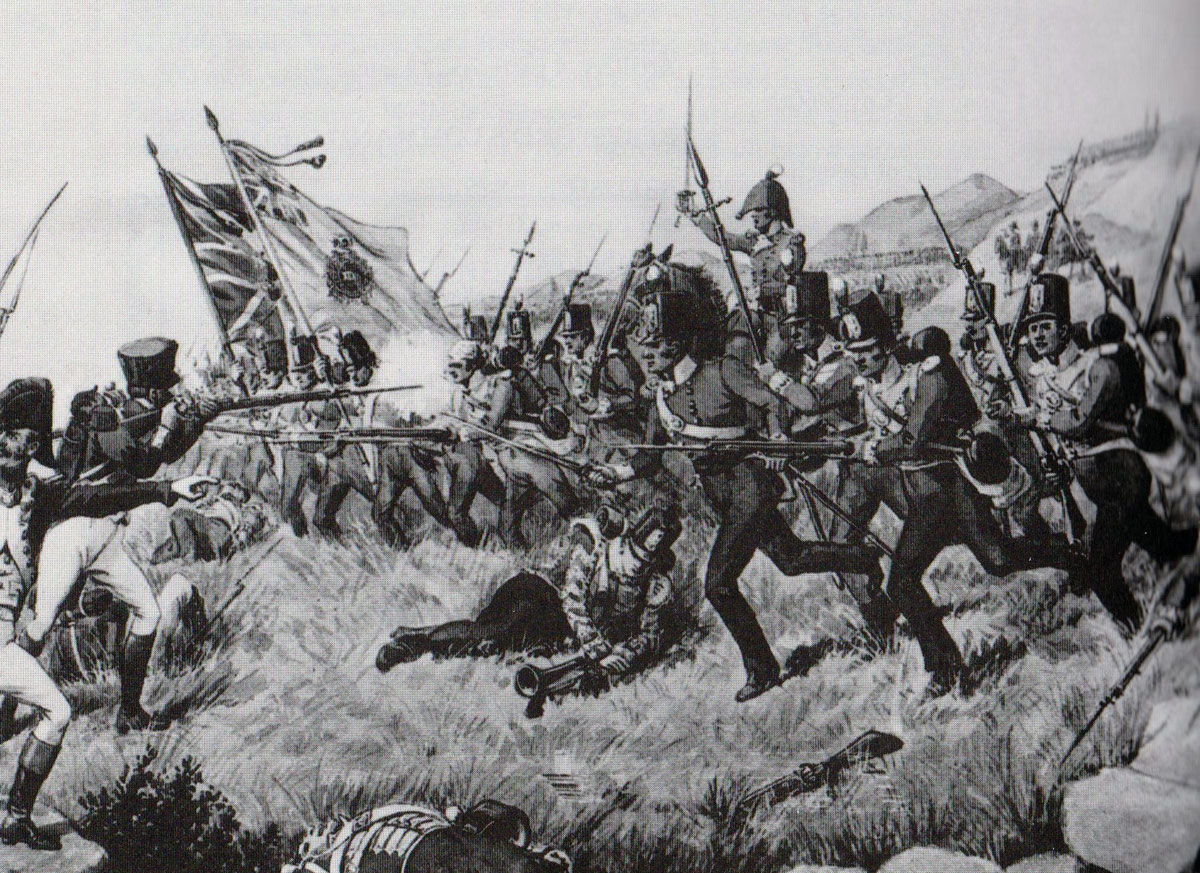
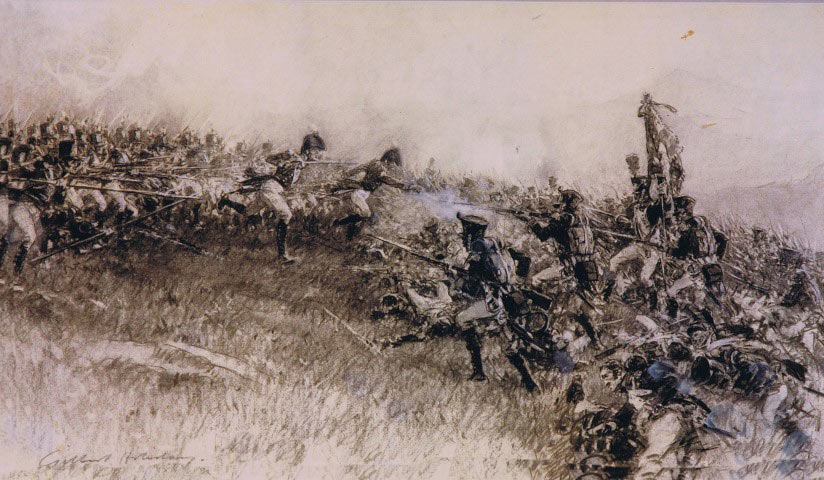
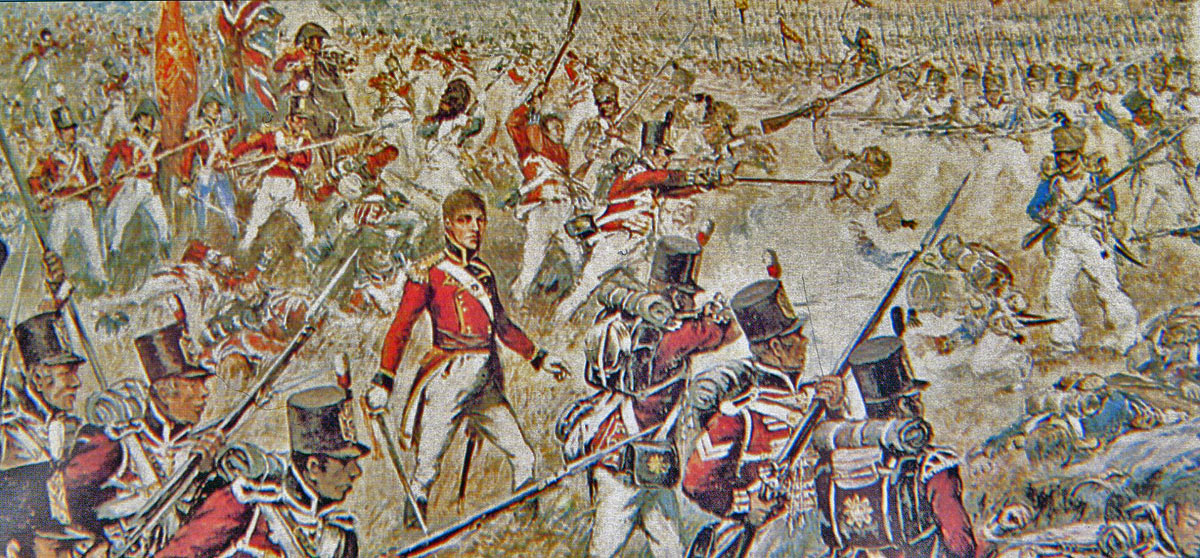
The bayonet attack by the 48th Regiment at the Battle of Talavera on 28th July 1809 in the Peninsular War: picture by William Barnes Wollen
The French advance was subject to the fire of the British guns on the Cerro de Medellin.
A loud cheer from the centre seems to have been sufficient to reassure Wellesley that matters there were turning out well and to have been the trigger for him to order Anson to attack the French moving around the Cerro de Medellin, with Fane’s heavy dragoons in support.
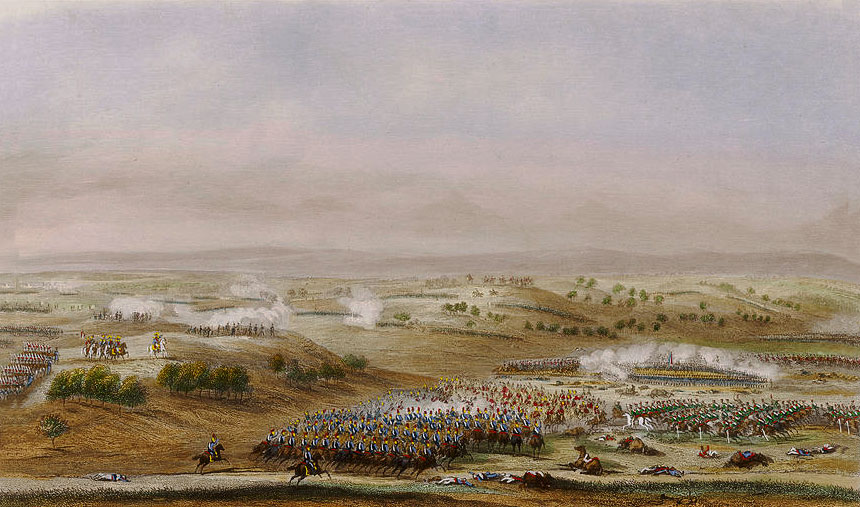
Attack by Anson’s Light Cavalry Brigade at the Battle of Talavera on 28th July 1809
As Anson’s regiments advanced, the 23rd Light Dragoons on the right and the 1st Hussars of the KGL on the left, the French infantry regiments formed squares.
The 23rd headed to attack the French 27th Light, while the 1st Hussars made for the 24th and 96th of the Line.
Coming under fire from the French guns on the Cerro de Cascabal and the light infantry on the Sierra de Segurilla, the light cavalrymen broke from a trot to a canter at an early stage in their advance.
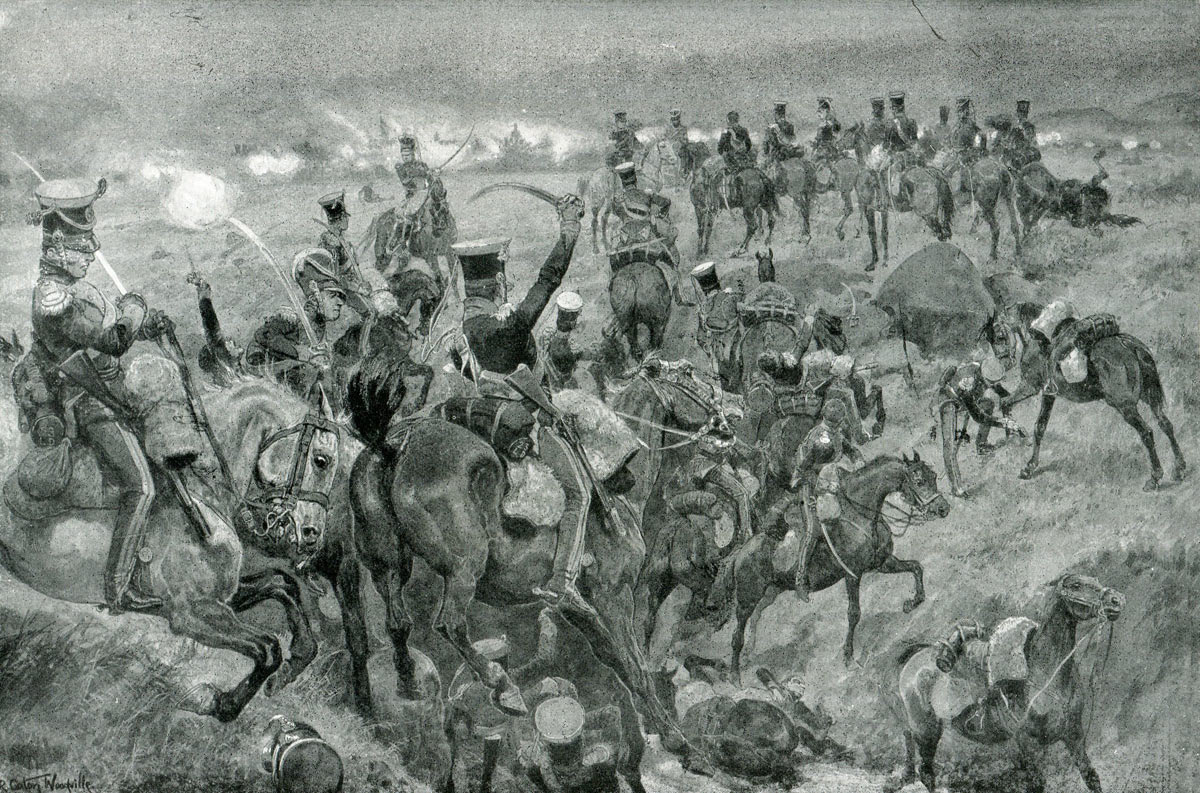
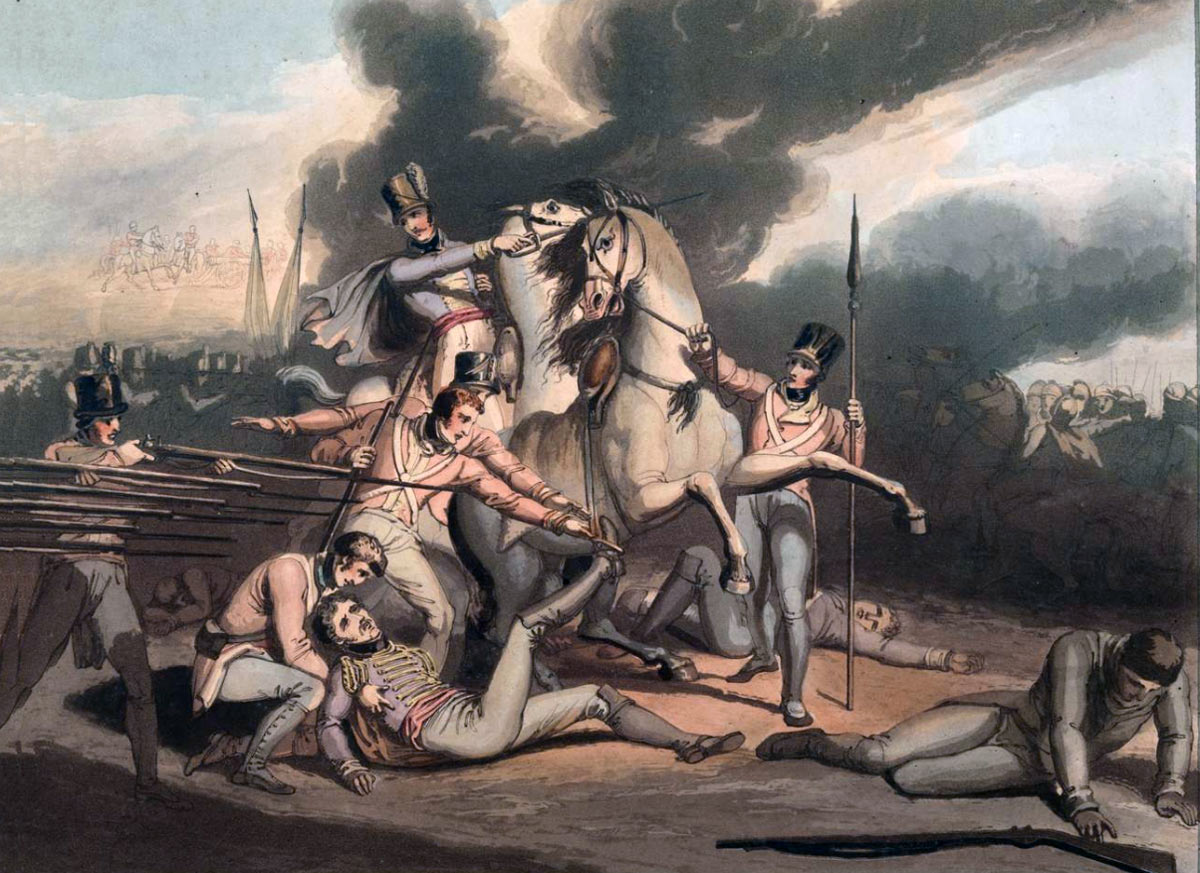
23rd Light Dragoons attacking the French infantry squares at the Battle of Talavera on 28th July 1809 in the Peninsular War: picture by Richard Caton Woodville (the regiment is, in error, given in post-1812 uniforms)
The 23rd, unexpectedly, came up to a stream running across their front. Moving too fast to halt, many of the troopers were brought down. The French infantry of the 27th opened a damaging fire on the helpless troopers.
The 1st Hussars were equally brought down by the water course, but were further from the French.
Both light cavalry regiments reformed and continued with their attack, the 1st Hussars being beaten off by the square of the 24th and the 23rd coming to grief in front of the square of the 27th Light or in a punishing fight with Merlin’s Cavalry Division.
The 23rd lost 207 killed, wounded or missing, with 224 horses lost, from a total strength of 480.
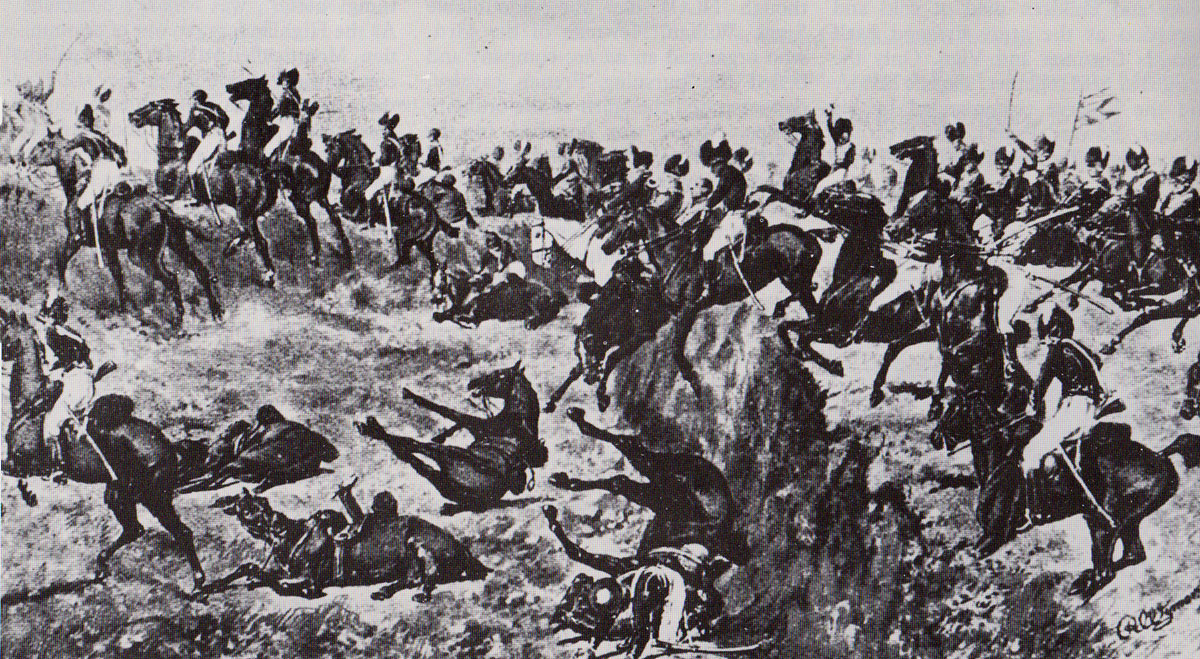
23rd Light Dragoons encounter the ditch at the Battle of Talavera on 28th July 1809 in the Peninsular War
While the French infantry were compelled to stand in square, they were subject to heavy cannon fire by British and Spanish guns and prevented from advancing.
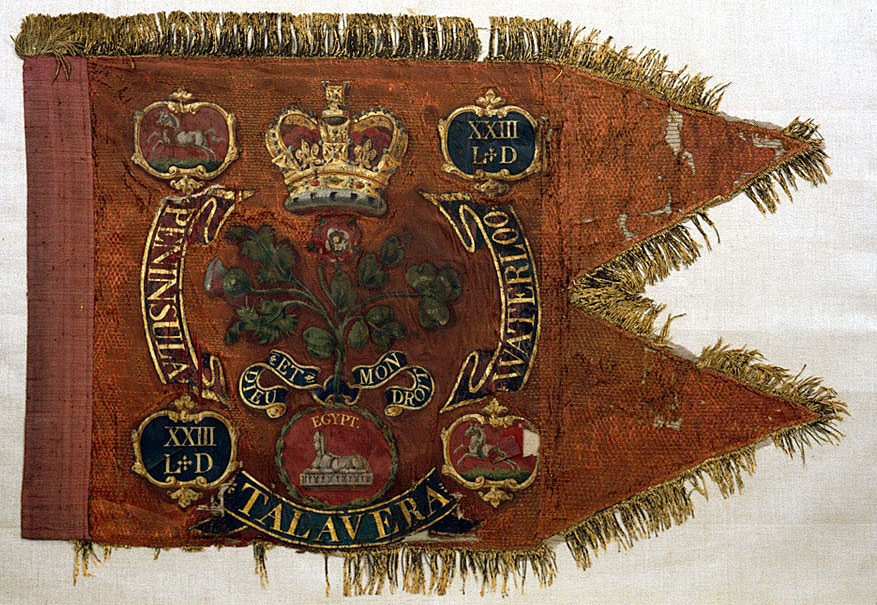
Guidon of the 23rd Light Dragoons: Battle of Talavera on 28th July 1809 in the Peninsular War
A consequence of the firing in the area was that the grass on the northern slope of the Cerro de Medellin caught fire, the blaze spreading across the plain to the Sierra de Segurilla. The divisions of Ruffin and Villatte fell back.
Finally, a report came from Milhaud that the Spanish were advancing on the French left.
This report turned out to be untrue, but it was now 6pm and it seemed clear that the attacks had all failed. In spite of Victor’s strenuous objections, Joseph ordered a general withdrawal to the positions held at the beginning of the day.
During the night, Victor received information that Wellesley was seeking to march around his right flank. The information was incorrect, but it caused Victor to put his corps into precipitate retreat.
Sebastiani, seeing the movement by Victor, felt bound to conform and also retreated.
Joseph, on being informed of the actions taken by his subordinates, ordered a general withdrawal and, overnight, the French army crossed the River Alberche, resumed its old position at Cazalegas and the Battle of Talavera came to its bloody end.
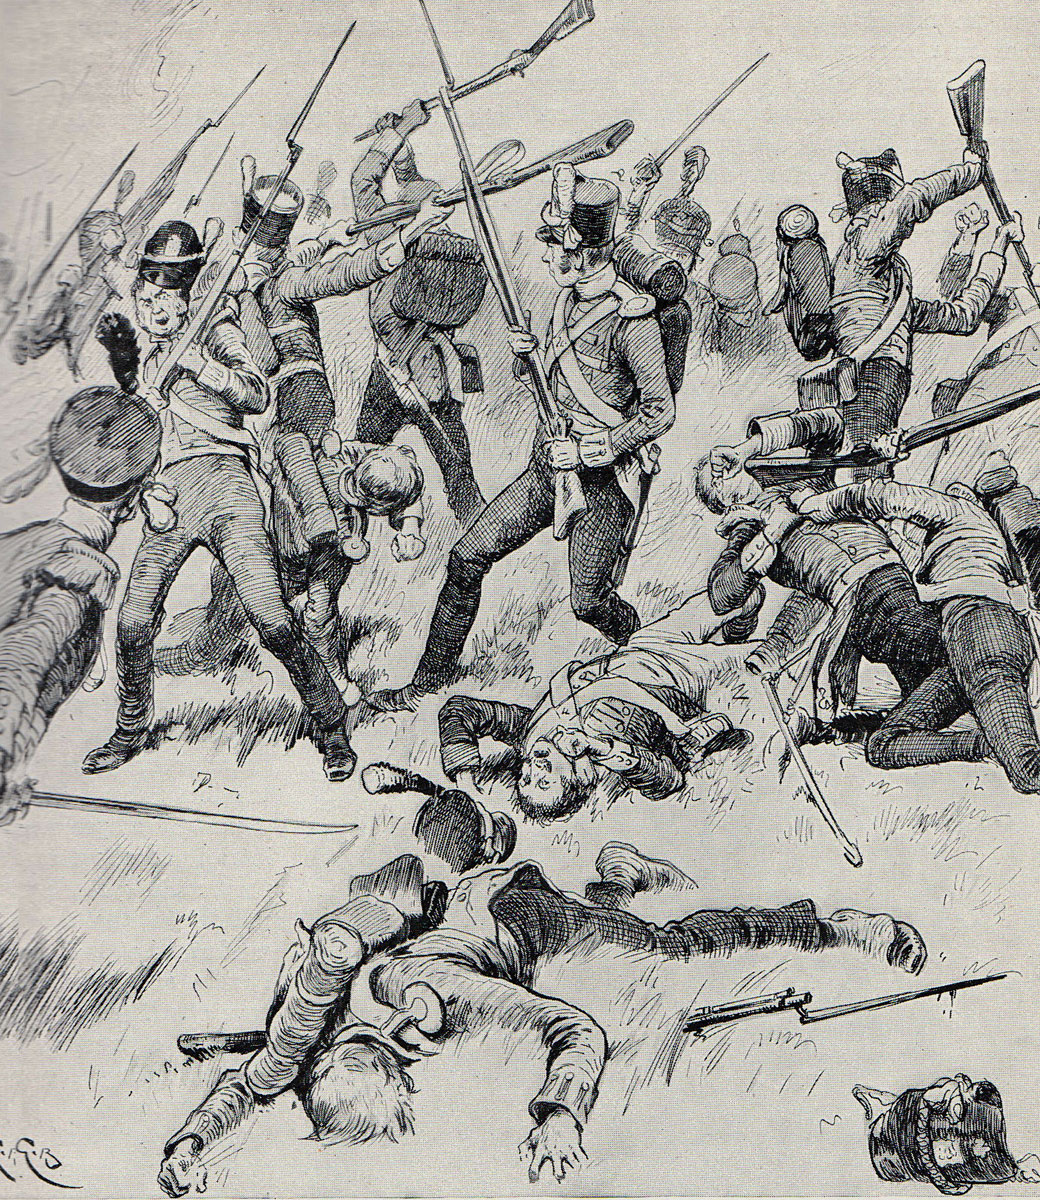
Hand to hand fighting during the Battle of Talavera on 28th July 1809 in the Peninsular War: picture by Gordon Browne
Casualties at the Battle of Talavera:
French casualties 7,268 men killed, wounded or captured, with 17 guns lost.
Two French generals were killed; Lapisse and van Porbeck.
These figures do not include the French wounded left on the battlefield and retrieved by the British. These men were liberated when Victor captured the British hospital on 6th August 1809.
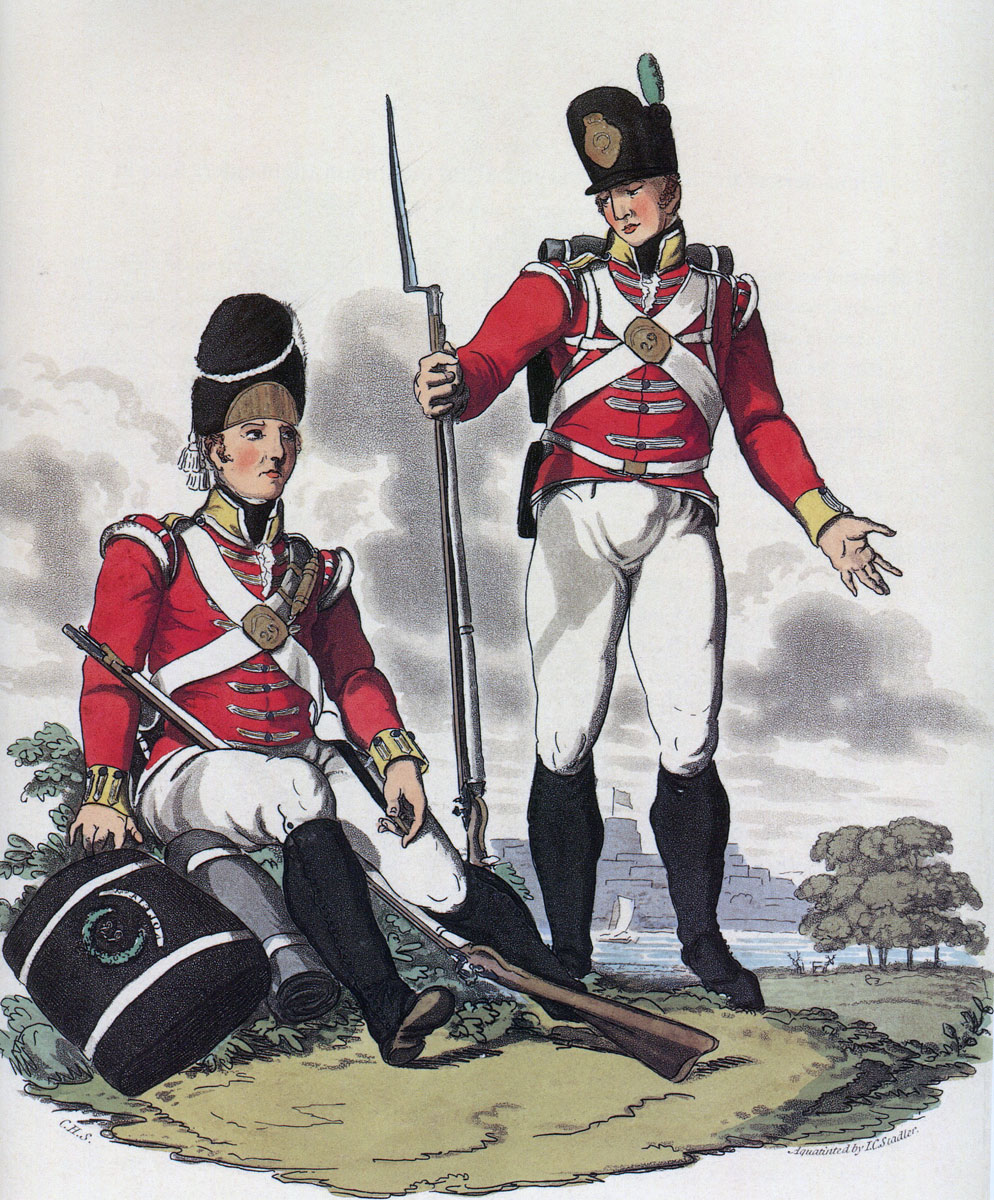
Grenadier and Light Company man of the 29th Foot: Battle of Talavera on 28th July 1809 in the Peninsular War: Hamilton Smith
The British and KGL lost 5,363 men killed, wounded or captured.
British casualties amounted to more than a quarter of their army, while French casualties were less than a sixth of their army.
Spanish losses were said by Cuesta to be 1,500. Most of the casualties were probably due to desertion, as few were engaged during the battle. Those Spanish regiments that were engaged performed well.
In the British Army, Generals Mackenzie and Langwerth were killed and Generals Hill, A. Campbell and H. Campbell wounded.
Several battalion commanders were killed or wounded.
The 25th Regiment suffered 320 casualties out of a compliment of 800.
The 31st Regiment suffered 260 casualties out of a compliment of 730.
The two battalions of Foot Guards suffered 600 casualties out of a compliment of 2,000.
The 83rd and the 1st and 2nd Battalions of the KGL suffered casualties of more than half their number.
Follow-up to the Battle of Talavera:
The next day Wellesley heard that Soult, with 30,000 French troops, was near to cutting his route to Portugal. Wellesley was forced to conduct a precipitous British retreat to the Portuguese border.
Medal and Battle Honour for the Battle of Talavera:
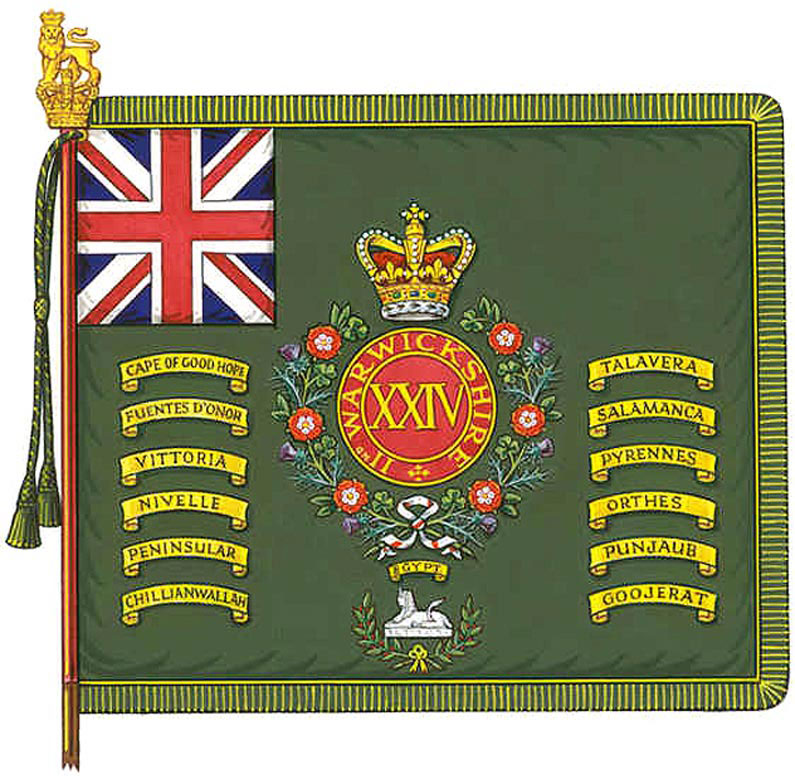
Regimental Colour of the 24th Foot with battle honour Battle of Talavera on 28th July 1809 in the Peninsular War
The Military General Service Medal 1848 was issued to all those serving in the British Army present at specified battles during the period 1793 to 1840, who were still alive in 1847 and applied for the medal. The medal was only issued to those entitled to one or more of the clasps. There were 21 clasps available for service in the Peninsular War.
The Battle of Talavera was one of the clasps.
The battle honour ‘Talavera’ was awarded to the following British regiments: 3rd Dragoon Guards, 4th Dragoons, 14th Light Dragoons, 16th Light Dragoons, Coldstream Guards, 3rd Guards, 3rd Buffs, 7th Royal Fusiliers, 24th, 29th, 31st, 40th, 45th, 48th, 53rd, 60th, 61st, 66th, 83rd, 87th and 88th Regiments.
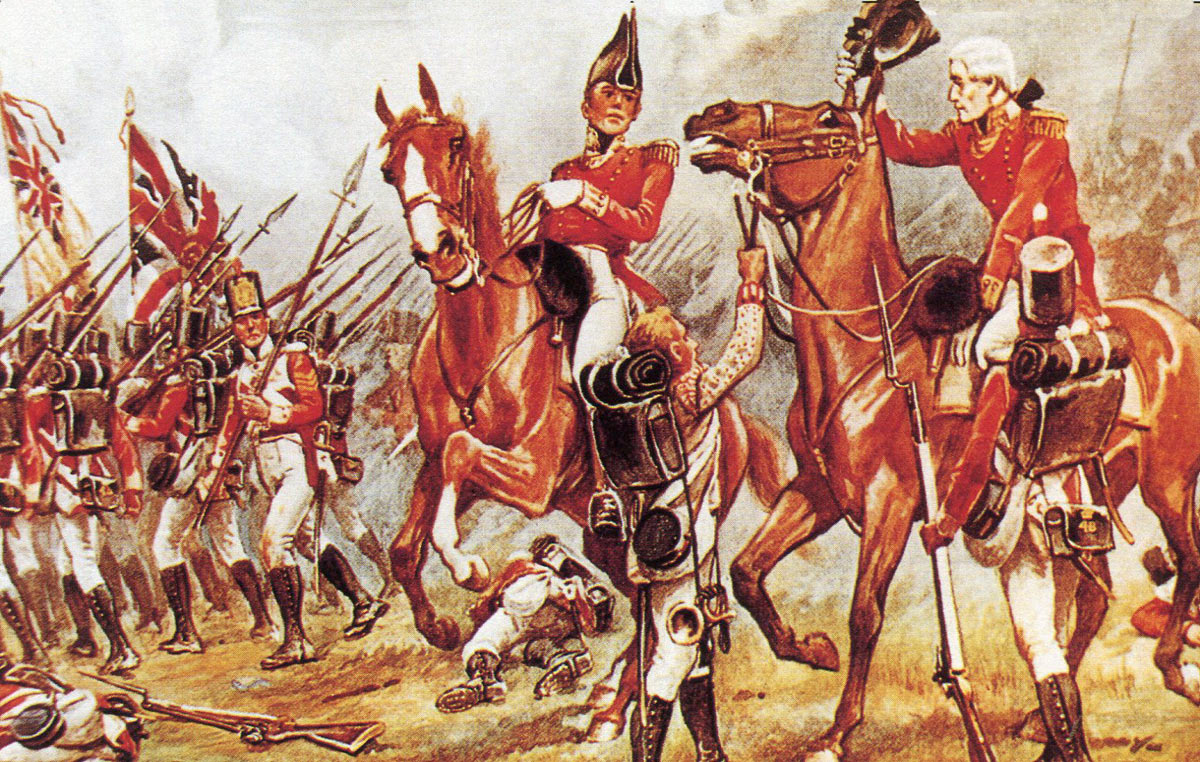
‘The General’s Hat’ at the Battle of Talavera on 28th July 1809
Anecdotes and traditions from the Battle of Talavera:
- Fortescue quotes from Munster’s Campaign of 1809 in relation to the Spanish General Cuesta’s appearance during the cavalry action on 22nd July 1809, before the main Battle of Talavera: ‘In truth it was not edifying for them (the British troops) to watch the Spanish Commander-in-Chief go out to the battle-field in a coach drawn by nine mules, and on his arrival to see the poor feeble old man lifted rather than supported from the coach to a carefully constructed seat on the carriage-cushions.’
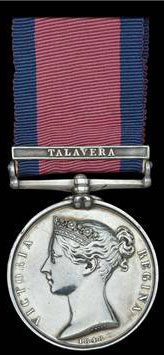
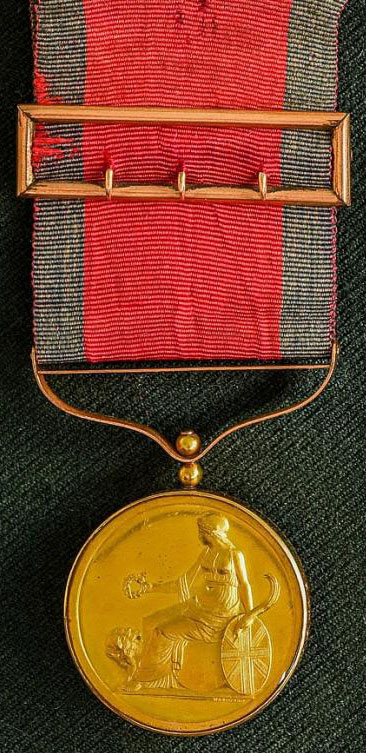
Military General Service Medal awarded to Captain Hawker with clasp for the Battle of Talavera on 28th July 1809 in the Peninsular War
- When the 29th Regiment was withdrawing up the side of the Portina Brook ravine, a French cannon ball passed so close that it blew off the cocked hats of General Stewart and Lieutenant Duguid of the 29th. Duguid recovered his hat and put it on. Later in the battle an orderly sergeant came up to Duguid and said the hat he was wearing was in fact General Stewart’s hat and he had been sent to recover it. Duguid was forced to give up the hat.
- The French attack up the Cerro de Medellin on the morning of 28th July 1809 is said to have been one of only two occasions on which General Sir Robert Hill is believed to have sworn. On seeing the British light companies filing neatly up the hillside in the face of the French attack, Hill is reputed to have shouted ‘Damn their filing, let them come in anyhow.’
- The 23rd Light Dragoons were commanded at the Battle of Talavera by Major Frederick Ponsonby, who continued to serve through the Peninsular War and was severely wounded at the Battle of Waterloo.
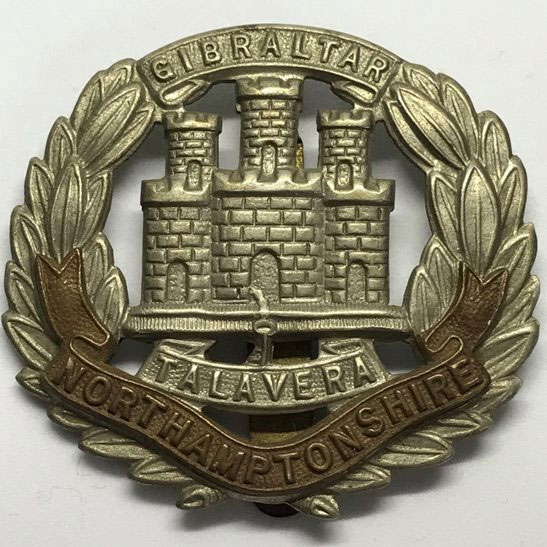
Badge of the Northamptonshire Regiment: Battle of Talavera on 28th July 1809 in the Peninsular War
- In the charge by the 14th Light Dragoons on Leval’s German troops, Captain Peter Hawker was severely wounded. Hawker commanded the squadron of the 14th that pursued the French rearguard at the Battle of the Passing of the Douro. Hawker was forced to leave the army, due to his wounds and became a popular writer on gun sports. Hawker received the Military General Service Medal 1848 with the Talavera clasp (shown on this page).
- The morning after the Battle of Talavera, Brigadier General Robert Craufurd’s Light Brigade, comprising 1st/43rd Light Infantry, 1st/52nd Light Infantry and 2nd/95th Rifles, marched into camp with bugle horns playing, having marched forty-two miles in twenty-six hours, in an attempt to reach the army in time for the battle. Having just arrived, the Light Brigade had to march for another fifteen hours to secure the Almaraz Bridge, before Soult could take it, thereby keeping open communications with Lisbon.
- The Northamptonshire Regiment, an amalgamation of the 48th and 58th Regiments, incorporated the Talavera battle honour in its badge. The successor regiment, the Royal Anglians, commemorates ‘Talavera Day’ on the anniversary of the battle.
- The British 1st/45th Regiment acquired the nickname ‘the Stubborns’ for its conduct at the Battle of Talavera, a nickname retained by its successor regiment, the Sherwood Forresters.
Earl of Bridgewater colonel of 14th Light Dragoons
References for the Battle of Talavera:
See the extensive list of references given at the end of the Peninsular War Index.
The previous battle of the Peninsular War is the Battle of the Passage of the Douro
The next battle of the Peninsular War is the Battle of the River Coa
Podcast of the Battle of Talavera: The British victory south of Madrid on 28th July 1809 over Joseph Bonaparte, the King imposed on Spain by Napoleon, and his French army in the Peninsular War: John Mackenzie’s Britishbattles.com podcast.