Wellington’s highly successful holding battle fought on 27th September 1810 in Western Portugal against Marshal Massena’s invading French army, as the British and Portuguese withdrew to Lisbon and the Lines of Torres Vedras, during the Peninsular War
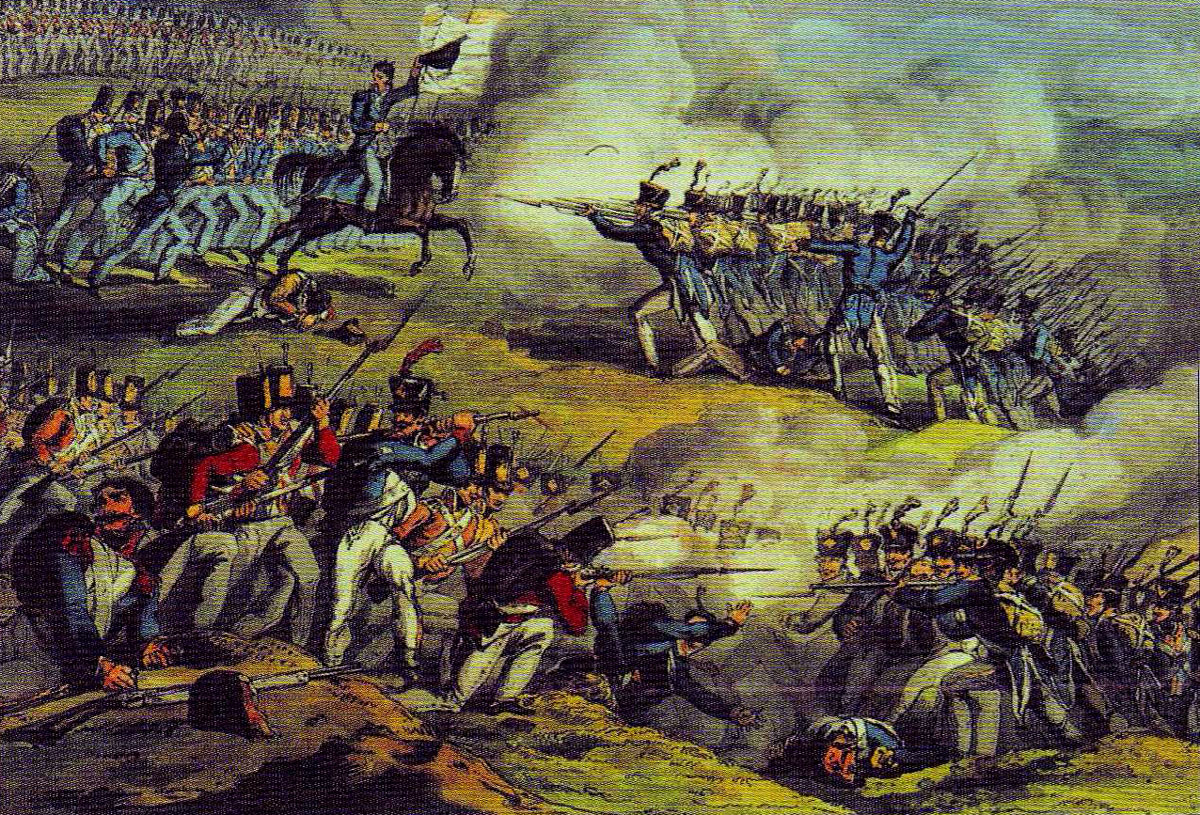
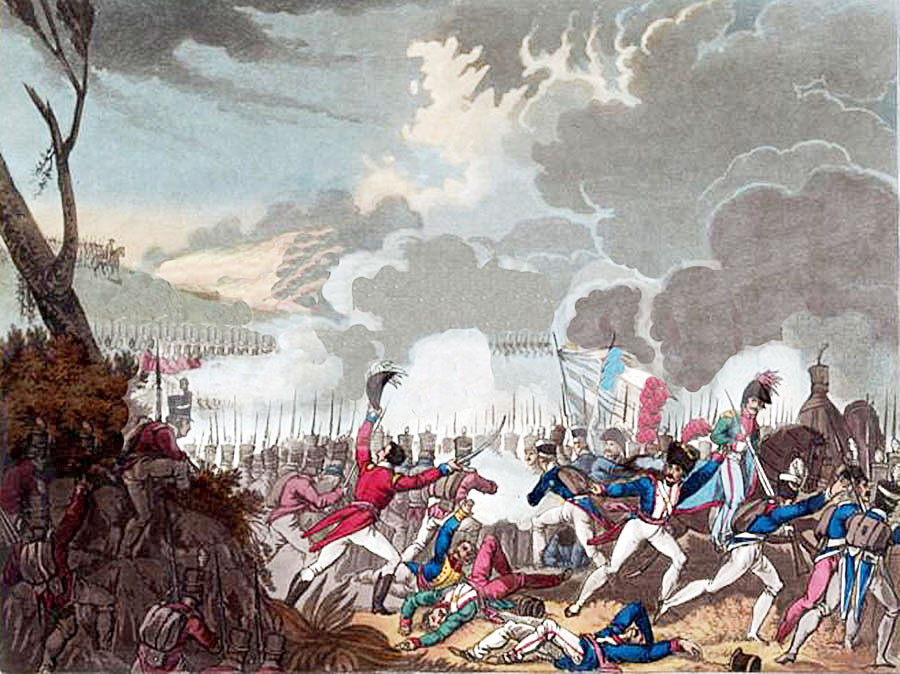
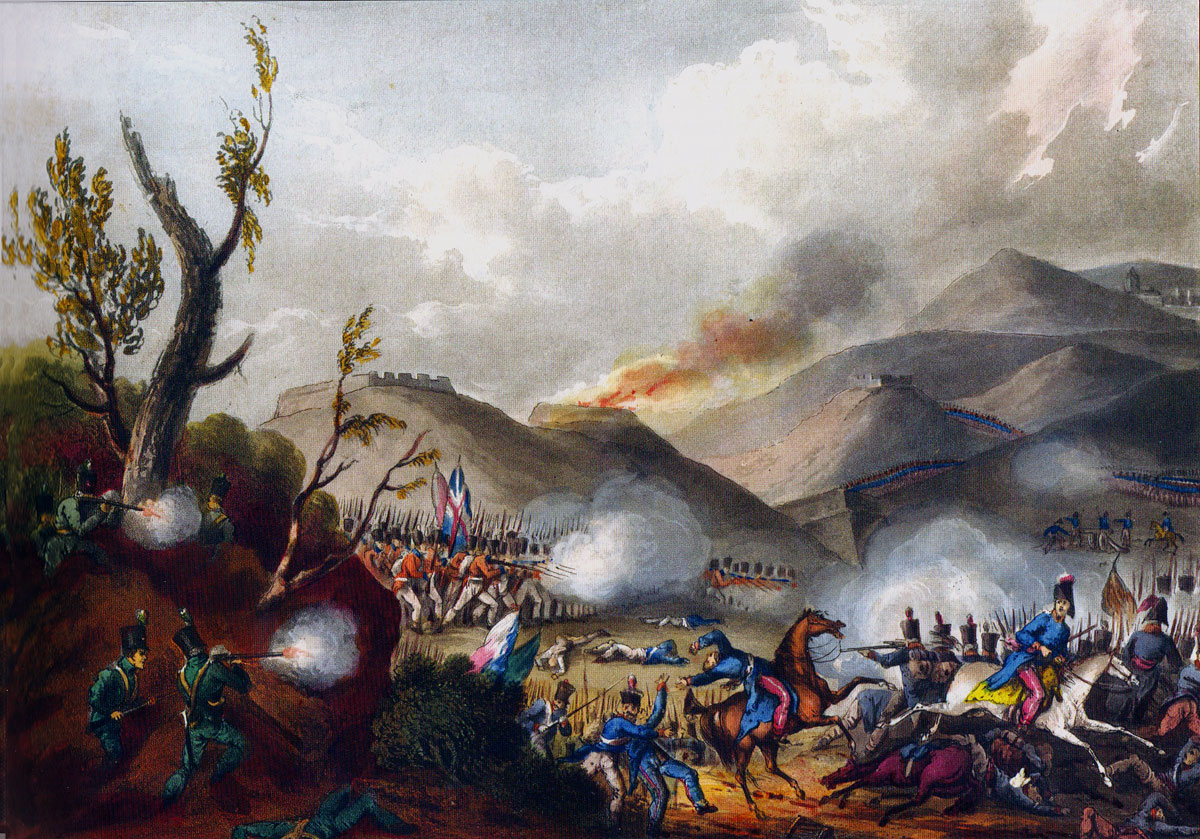
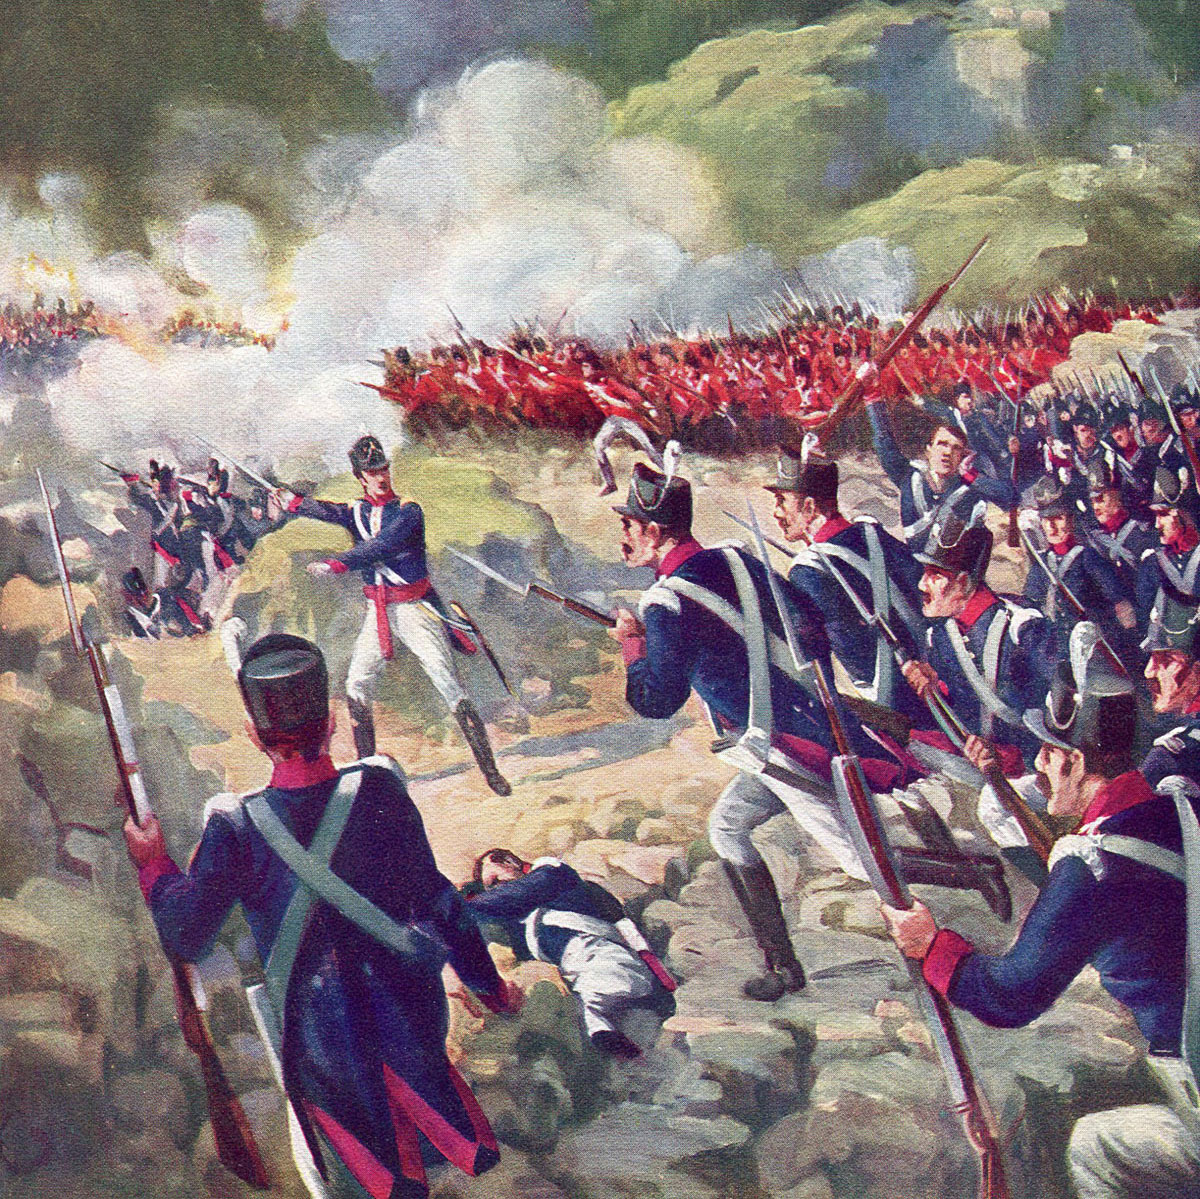
British and Portuguese infantry drive the French back down the hill at the Battle of Busaco on 27th September 1810 in the Peninsular War

14. Podcast of the Battle of Busaco: Wellington’s highly successful holding battle fought on 27th September 1810 in Western Portugal against Marshal Massena’s invading French army, as the British and Portuguese withdrew to Lisbon and the Lines of Torres Vedras, during the Peninsular War. John Mackenzie’s Britishbattles.com podcast.
The previous battle of the Peninsular War is the Battle of the River Coa
The next battle of the Peninsular War is the Battle of Barrosa
Battle: Busaco
War: Peninsular War
Date of the Battle of Busaco: 27th September 1810
Place of the Battle of Busaco: Western Central Portugal
Combatants at the Battle of Busaco: British and Portuguese against the French.
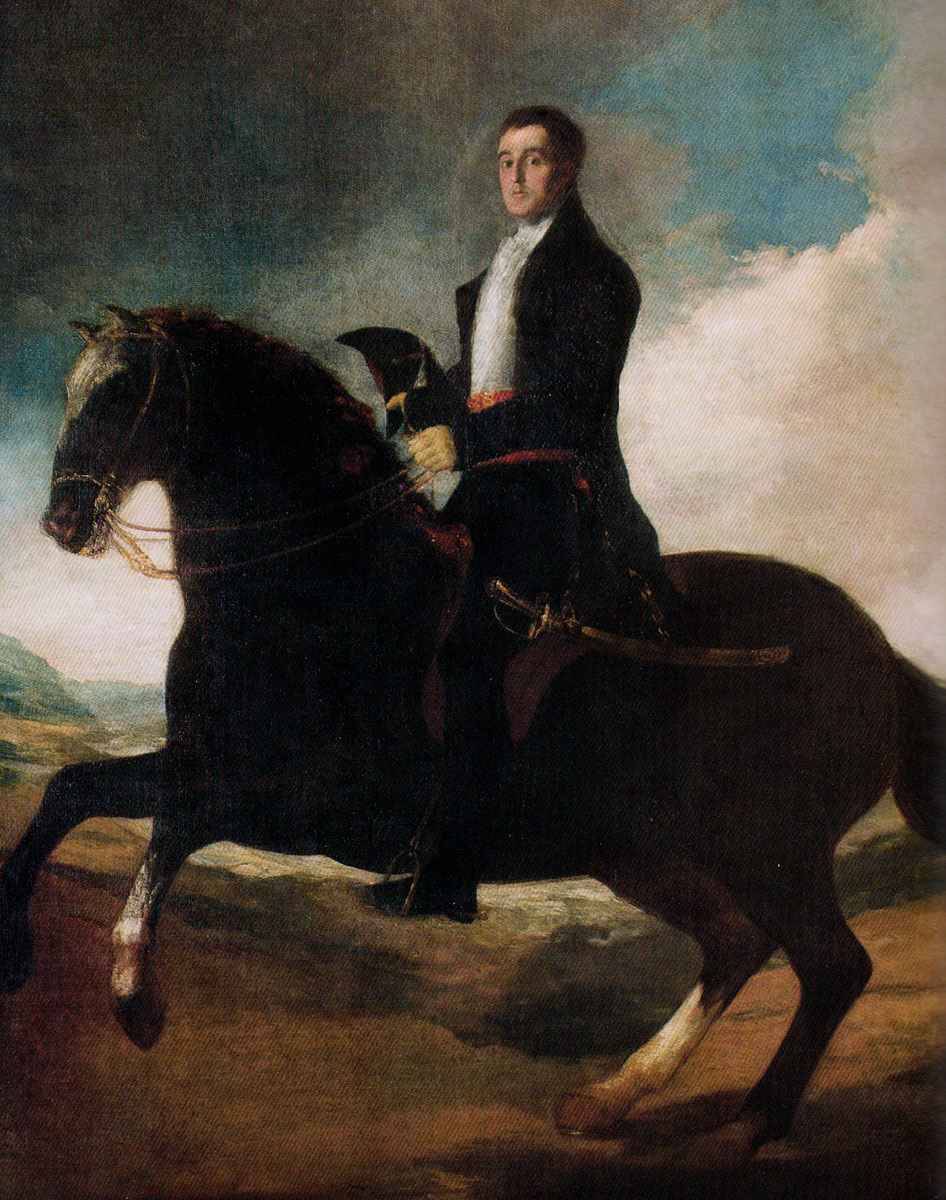
Duke of Wellington: Battle of Busaco on 27th September 1810 in the Peninsular War: picture by Goya
Commanders at the Battle of Busaco: Lieutenant General ViscountWellington (previously Sir Arthur Wellesley and later the Duke of Wellington) against Marshal André Massena, Prince of Essling and Duke of Rivoli.
Size of the armies at the Battle of Busaco: 50,000 British and Portuguese troops against 65,000 French troops.
Uniforms, arms and equipment at the Battle of Busaco:
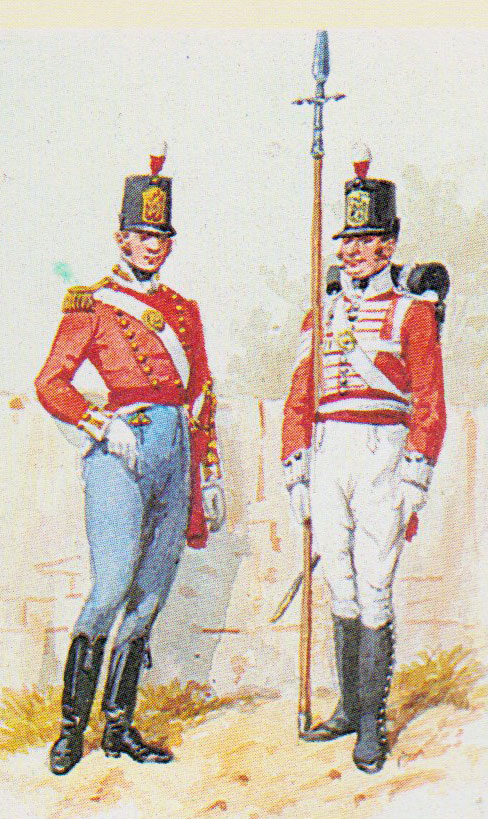
The British infantry wore red waist-length jackets, grey trousers, and stovepipe shakos. Fusilier regiments wore bearskin caps. The two rifle regiments wore dark green jackets and trousers.
The Royal Artillery wore blue tunics.
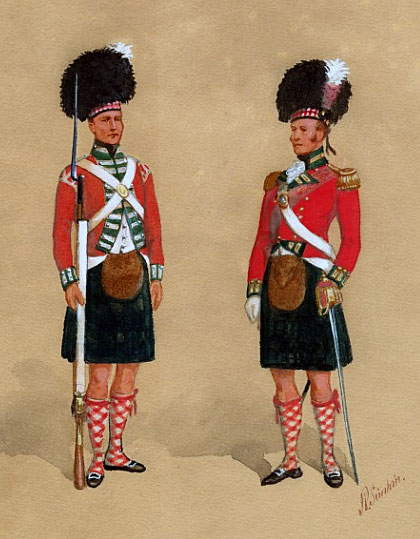
Highland regiments wore the kilt with red tunics and black ostrich feather caps.
British heavy cavalry (dragoon guards and dragoons) wore red jackets and ‘Roman’ style helmets with horse hair plumes.
The British light cavalry was increasingly adopting hussar uniforms, with some regiments changing their titles from ‘light dragoons’ to ‘hussars’.
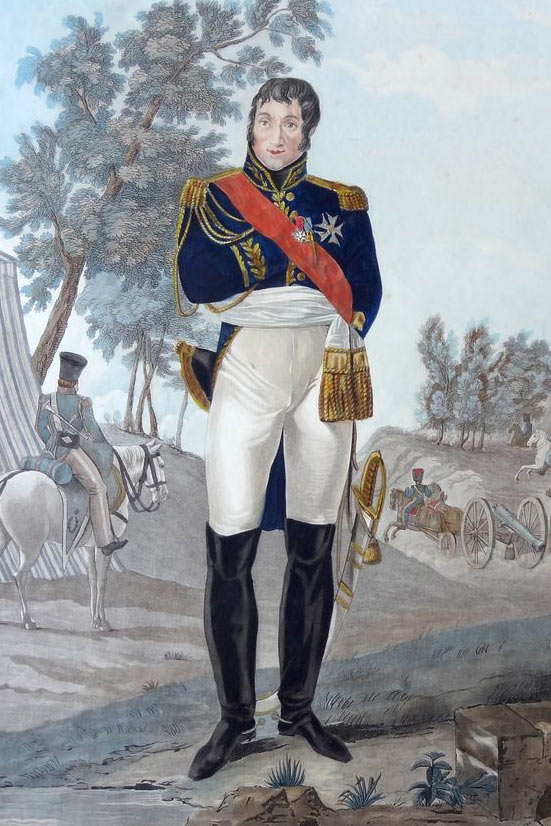
Marshal Massena: Battle of Busaco on 27th September 1810 in the Peninsular War
The King’s German Legion (KGL) was the Hanoverian army in exile. The KGL owed its allegiance to King George III of Great Britain, as the Elector of Hanover, and fought with the British army. The KGL comprised both cavalry and infantry regiments. KGL uniforms mirrored the British.
The Portuguese army uniforms increasingly during the Peninsular War reflected British styles. The Portuguese line infantry wore blue uniforms, while the Caçadores light infantry regiments wore green.
The French army wore a variety of uniforms. The basic infantry uniform was dark blue.
The French cavalry comprised Cuirassiers (although there were no French cuirassier regiments in the Peninsula), wearing heavy burnished metal breastplates and crested helmets, Dragoons, largely in green, Hussars, in the conventional uniform worn by this arm across Europe, and Chasseurs à Cheval, dressed as hussars.
The French foot artillery wore uniforms similar to the infantry, the horse artillery wore hussar uniforms.
The standard infantry weapon across all the armies was the muzzle-loading musket. The musket could be fired at three or four times a minute, throwing a heavy ball inaccurately for a hundred metres or so. Each infantryman carried a bayonet for hand-to-hand fighting, which fitted the muzzle end of his musket.
The British rifle battalions (60th and 95th Rifles) carried the Baker rifle, a more accurate weapon but slower to fire, and a sword bayonet.
Field guns fired a ball projectile, of limited use against troops in the field unless those troops were closely formed. Guns also fired case shot or canister which fragmented and was highly effective against troops in the field over a short range. Exploding shells fired by howitzers, yet in their infancy. were of particular use against buildings. The British were developing shrapnel (named after the British officer who invented it) which increased the effectiveness of exploding shells against troops in the field, by exploding in the air and showering them with metal fragments.
Throughout the Peninsular War and the Waterloo campaign, the British army was plagued by a shortage of artillery. The Army was sustained by volunteer recruitment and the Royal Artillery was not able to recruit sufficient gunners for its needs.
Napoleon exploited the advances in gunnery techniques of the last years of the French Ancien Régime to create his powerful and highly mobile artillery. Many of his battles were won using a combination of the manoeuvrability and fire power of the French guns with the speed of the French columns of infantry, supported by the mass of French cavalry.
While the French conscript infantry moved about the battle field in fast moving columns, the British trained to fight in line. The Duke of Wellington reduced the number of ranks to two, to extend the line of the British infantry and to exploit fully the firepower of his regiments.
Winner: Busaco was a victory for Wellington. While immediately after the battle Wellington’s army continued its retreat to Lisbon, the French casualties were significantly larger than Wellington’s and all their attacks on the Busaco ridge failed.
British order of battle at the Battle of
Busaco:
Commander: Lieutenant General Viscount Wellington
Commander of the Portuguese troops: Marshal Beresford
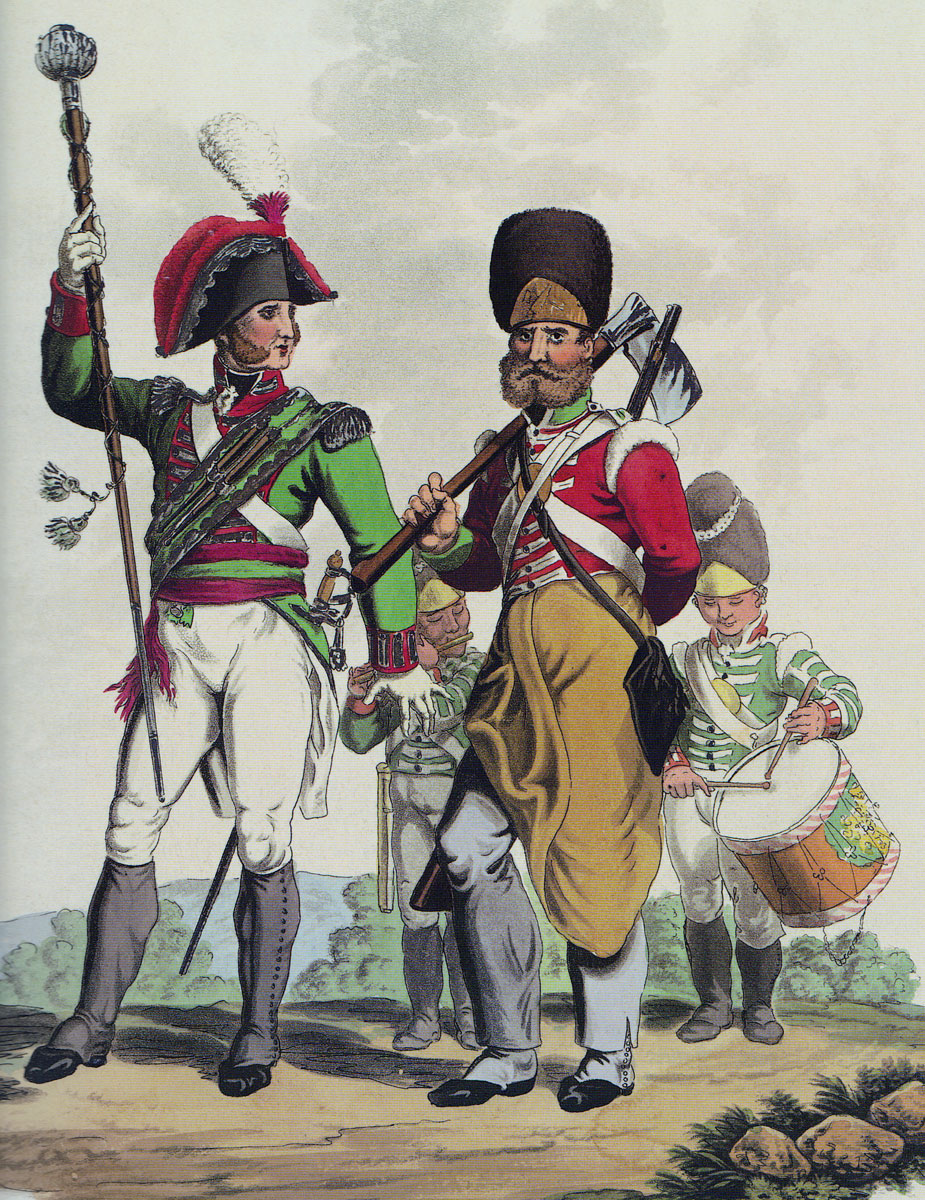
Drum-Major, Pioneer, Sergeant and Drummer of British Infantry: picture by Hamilton-Smith
Cavalry:
4th Dragoons, 14th Light Dragoons, 16th Light
Dragoons.
1st Division:
commanded by Lieutenant General Brent Spencer
1st Brigade: commanded by Colonel Stopford: 1st/Coldstream
Guards, 1st/3rd Guards, 1 company of the 5th/60th Foot
2nd Brigade: commanded by Lieutenant Colonel Blantyre: 2nd/24th Foot, 2nd/42nd Highlanders, 1st /61st Foot, 1 company of the 5th/60th Foot
3rd Brigade: commanded by Major General Baron Löw: 1st, 2nd, 5th and 7th Line Battalions, King’s German Legion with a detachment from the light battalions of the King’s German Legion
4th Brigade: commanded by Colonel Pakenham: 1st /7th Royal Fusiliers, 1st/79th Highlanders
2nd Division:
commanded by Major General Rowland Hill
1st Brigade: commanded by Major General Stewart: 1st/3rd Buffs,
2nd/31st Foot, 2nd/48th Foot,
2nd/66th Foot, 1 company of the 5th/60th Foot
2nd Brigade: commanded by Colonel William Inglis: 29th Foot, 1st/48th Foot, 1st/57th Foot
3rd Brigade: commanded by Brigadier General Catlin Craufurd: 2nd/28th Foot, 2nd/34th Foot, 2nd/39th Foot
3rd Division:
commanded by Major General Thomas Picton
1st Brigade: commanded by Colonel Mackinnon: 1st/45th Foot,
1st/74th Highlanders, 1st/88th Foot
2nd Brigade: commanded by Major General Lightburne: 2nd/5th Foot, 2nd/83rd Foot, 3 companies of the 5th/60th Foot
Portuguese Brigade: commanded by Colonel Champlemond: 1st and 2nd/9th Line Portuguese Regiment, 1st/21st Line Portuguese Regiment
4th Division:
commanded by Major General Lowry Cole
1st Brigade: commanded by Brigadier General Alexander Campbell:
2nd/7th Royal Fusiliers, 1st /11th Foot,
2nd/53rd Foot, 1 company of the 5th/60th Foot
2nd Brigade: commanded by Colonel Kemmis: 3rd/27th Foot, 1st/40th Foot, 97th Foot
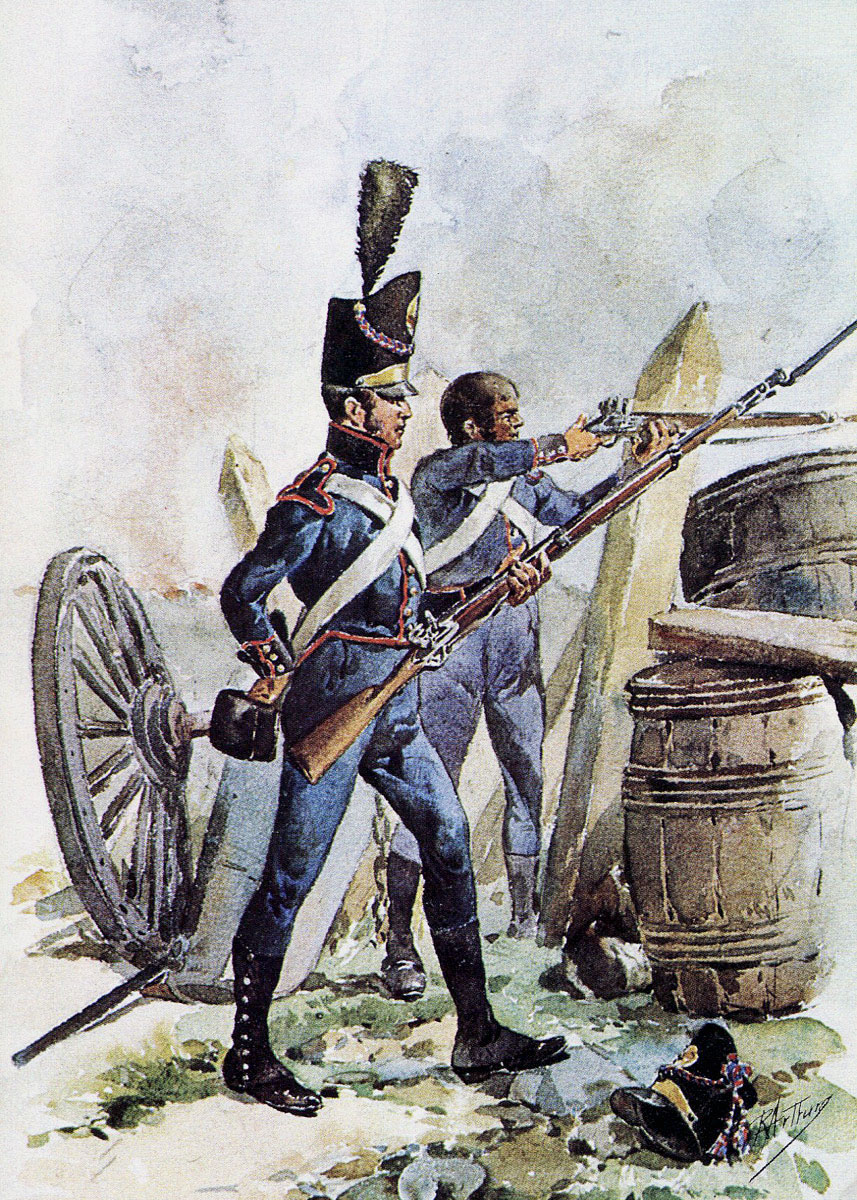
Portuguese artillerymen: Battle of Busaco on 27th September 1810 in the Peninsular War
Portuguese Brigade: commanded by Colonel Collins: 1st/11th Portuguese Line Regiment, 2nd/11th Portuguese Line Regiment, 1st/23rd Portuguese Line Regiment, 2nd/23rd Portuguese Line Regiment
5th
Division: commanded by Major General Leith
British Brigade: commanded by Lieutenant Colonel Leith: 1st/Buffs, 1st/9th Foot,
2nd/38th Foot
Portuguese Brigade: commanded by Lieutenant Colonel Spry: 1st/3rd Portuguese Line Regiment, 2nd/3rd Portuguese Line Regiment, 1st/15th Portuguese Line Regiment, 2nd/15th Portuguese Line Regiment, Thomar Militia, 2 Battalions of the Loyal Lusitanian Legion, 1st/8th Portuguese Line Regiment, 2nd/8th Portuguese Line Regiment
Light
Division: commanded by Brigadier General Robert Craufurd
1st Brigade: commanded by Lieutenant Colonel Beckwith: 1st/43rd Foot,
1st/95th Rifles (5 companies), 3rd Caçadores
2nd Brigade: commanded by Lieutenant Colonel Barclay: 1st/52nd Foot, 1st/95th Rifles (4 companies), 1st Caçadores
Portuguese
Division: commanded by Major General Hamilton
1st Brigade: commanded by Brigadier General Archibald Campbell:
1st/4th Portuguese Line Regiment, 2nd/4th
Portuguese Line Regiment, 1st/10th Portuguese Line
Regiment, 2nd/10th Portuguese Line Regiment
2nd Brigade: commanded by Brigadier General Luiz Fonseca: 1st/2nd Portuguese Line Regiment, 2nd/2nd Portuguese Line Regiment, 1st/14th Portuguese Line Regiment, 2nd/14th Portuguese Line Regiment
Independent
Portuguese Brigades:
1st Brigade: commanded by Brigadier General Denis Pack: 1st/1st Portuguese
Line Regiment, 2nd/1st Portuguese Line Regiment, 1st/16th Portuguese
Line Regiment, 2nd/16th Portuguese Line Regiment, 4th Caçadores
5th Brigade: commanded by Brigadier General Alexander Campbell: 1st/6th Portuguese Line Regiment, 2nd/6th Portuguese Line Regiment, 1st/18th Portuguese Line Regiment, 2nd/18th Portuguese Line Regiment, 6th Caçadores
6th Brigade: commanded by Brigadier General Coleman: 1st/7th Portuguese Line Regiment, 2nd/7th Portuguese Line Regiment, 1st/19th Portuguese Line Regiment, 2nd/19th Portuguese Line Regiment, 2nd Caçadores
Artillery:
commanded by Brigadier Howorth; 60 guns
Bull’s and Ross’s Troops Royal Horse Artillery
Thompson’s and Lawson’s Batteries Royal Artillery
Von Rettberg’s and Cleeves’ Batteries King’s German Artillery
Portuguese Artillery:
Batteries of de Rozierres, da Cunha Preto, da Silva and Freira.
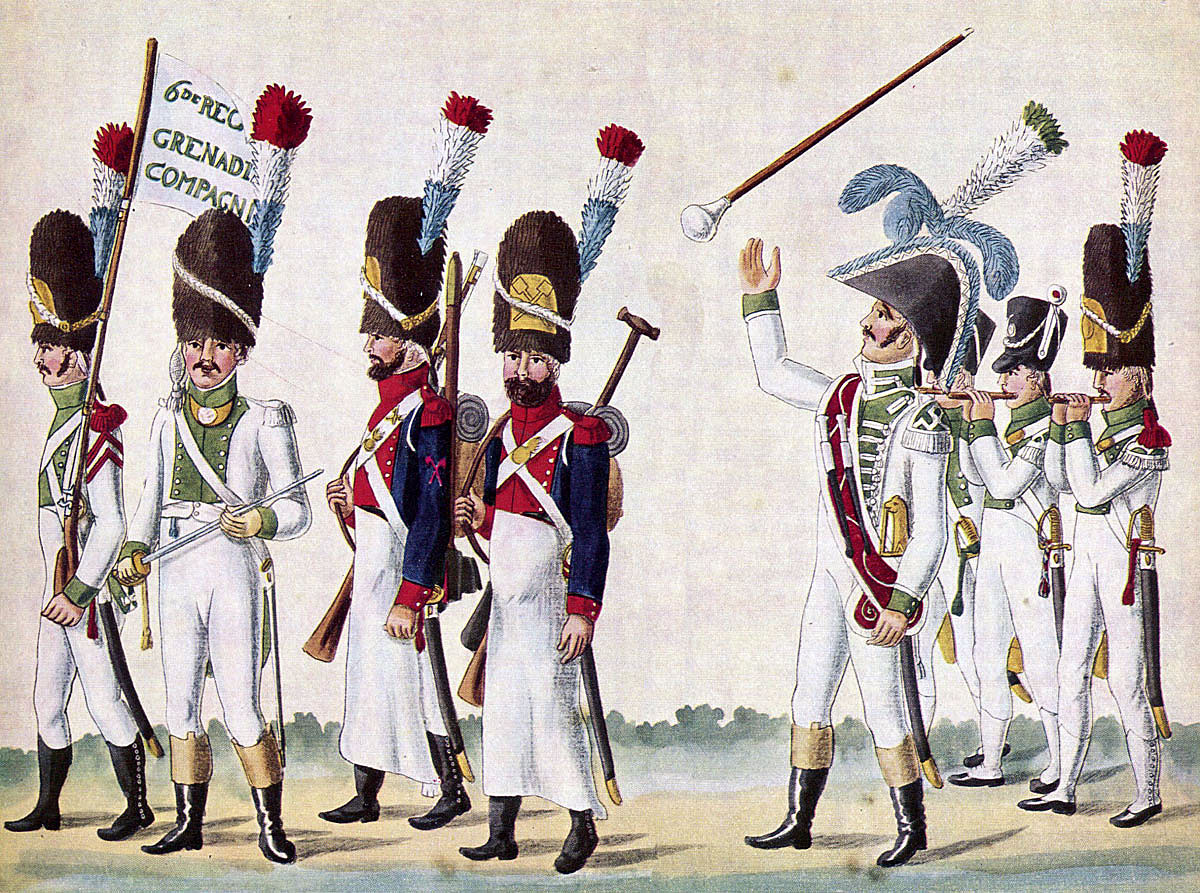
French Grenadiers, Pioneers, Drum Major and Fifers of 6th Regiment of Infantry: Battle of Busaco on 27th September 1810 in the Peninsular War
French order of battle at the Battle of Busaco:
Commander-in-chief: Marshal André Massena, Prince of Essling and Duke of Rivoli
II Corps: commanded by General Reynier
1st Division: commanded by General Merle
2nd Division: commanded by General Heudelet
Cavalry Brigade: commanded by General Soult
VI
Corps: commanded by Marshal Ney, Duke of Elchingen
1st Division: commanded by General Marchand
2nd Division: commanded by General Mermet
3rd Division: commanded by General Loison
VIII
Corps: commanded by General Junot
1st Division: commanded by General Clausel
2nd Division: commanded by General Solignac
Cavalry Brigade: commanded by General Sainte-Croix
Reserve
of Cavalry: commanded by General Montbrun
Reserve of artillery, engineers, staff and gendarmerie.
Background to the Battle of Busaco:
On 15th August 1810, Marshal Ney’s corps began the French invasion of Portugal by besieging the Portuguese fortress town of Almeida on the Spanish border.
The garrison comprised Portuguese regular and militia troops.
Wellington’s expectation was that Almeida would hold out for several months.
The French bombardment of the town began on 20th August 1810.
That evening, an exploding French shell lit a stray powder trail that caused the town’s magazine to explode, destroying most of Almeida and killing many of the defending artillerymen.
Almeida was forced to surrender within days, leaving the French free to begin the invasion of Portugal.
In spite of this key advantage, Massena did not begin his main advance until 15th September 1810.
After some delay, during which Wellington was uncertain as to Massena’s intended route, the French army marched for the Portuguese town of Vizeu on the northern road to Coimbra, the key Portuguese city in the west.
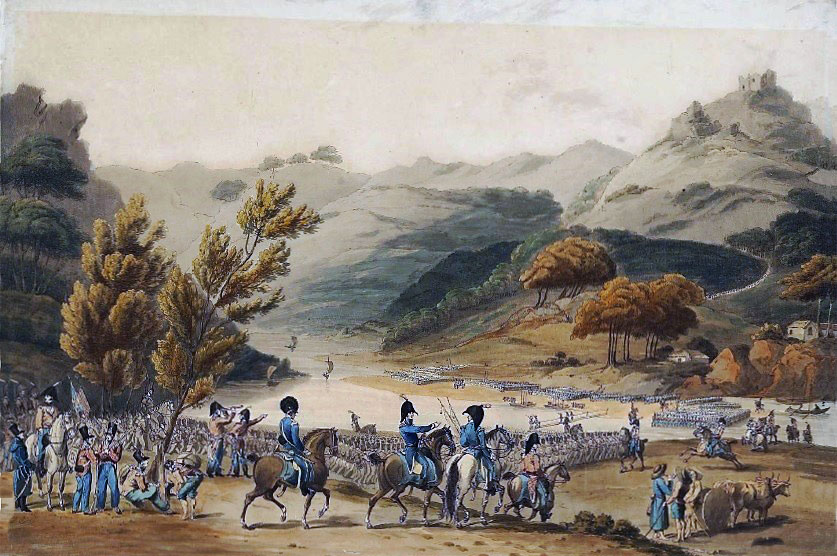
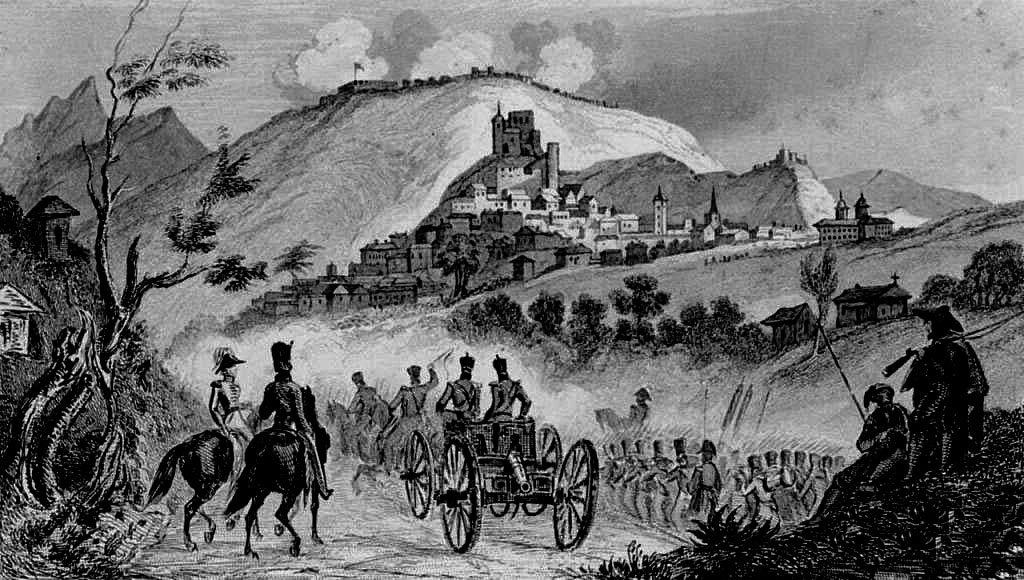
Wellington’s army crossing the River Mondego with Busaco convent in the background before the Battle of Busaco on 27th September 1810 in the Peninsular War: picture by Thomas Staunton St Clair
Massena thereby chose the worst of the roads available to him.
The maps Massena relied upon were highly misleading and the advice he received from his Portuguese advisers was ill-informed.
The southern route to Coimbra along the River Alva was more direct and paved and would have saved the French considerable time and difficulty in their advance.
Wellington resolved to give battle to the French in the area of Coimbra.
Wellington’s choice of battlefield was the ridge of the Serra do Busaco, 5 miles north of Coimbra.
On 19th September 1810, Junot’s infantry joined Ney’s infantry at Vizeu, his artillery coming up the next day after considerable difficulty with the ill-made road, which had to be re-constructed.
On 21st September 1810, Ney continued his advance south, reaching a point 10 miles short of the Serra do Busaco ridge.
On 22nd September 1810, the French Second Corps took the lead, crossing the River Criz and driving in the British outposts.
Ney halted while Reynier remained at Vizeu.
In the meantime, Wellington moved his headquarters to the Busaco convent, while his divisions assembled in the area of the intended battlefield.
The one formation lacking was Hill’s Division.
Wellington needed Ney to remain halted on the River Criz to give time for Hill to come up.
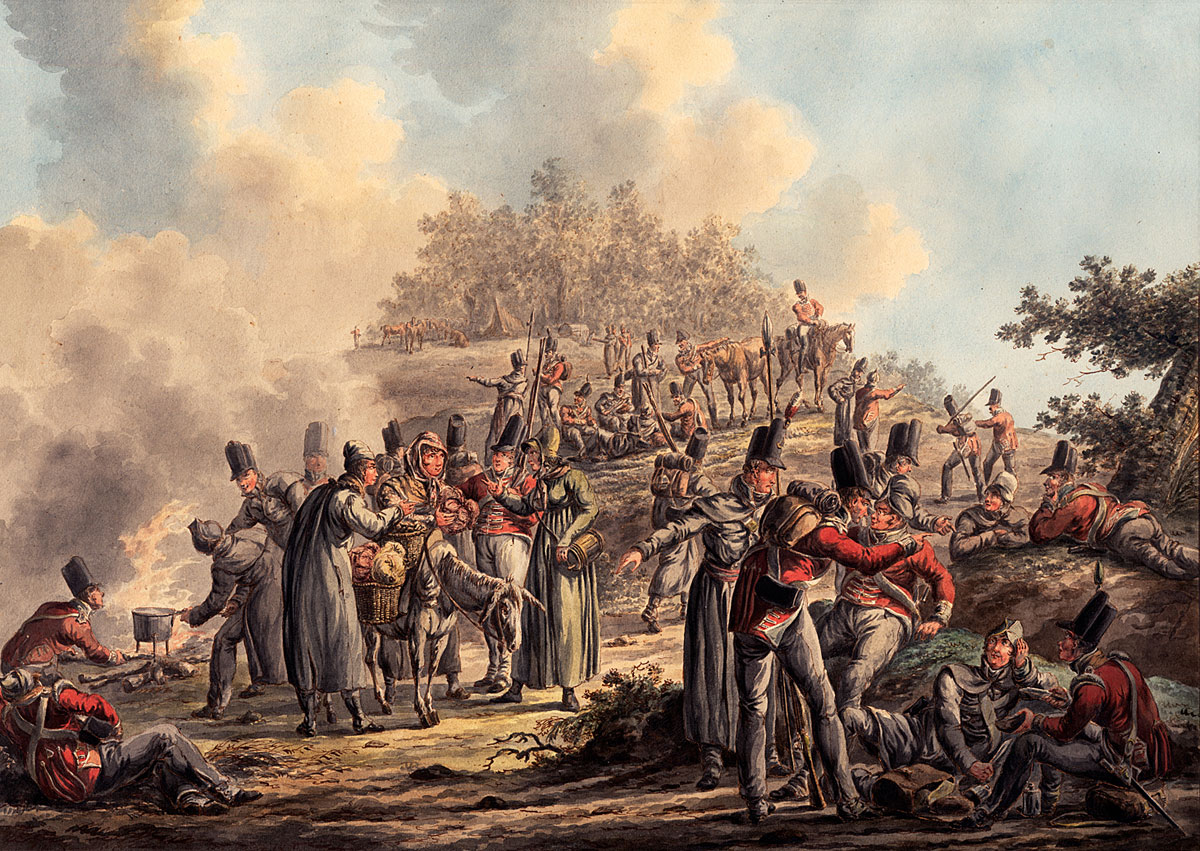
British troops bivouacking on the Serra de Busaco before the Battle of Busaco on 27th September 1810 in the Peninsular War: picture by Langenkjik
Ney duly obliged and Wellington’s line of battle was completed.
On 23rd September 1810, the British advanced guard lay at Mortago on the main road west of the River Criz.
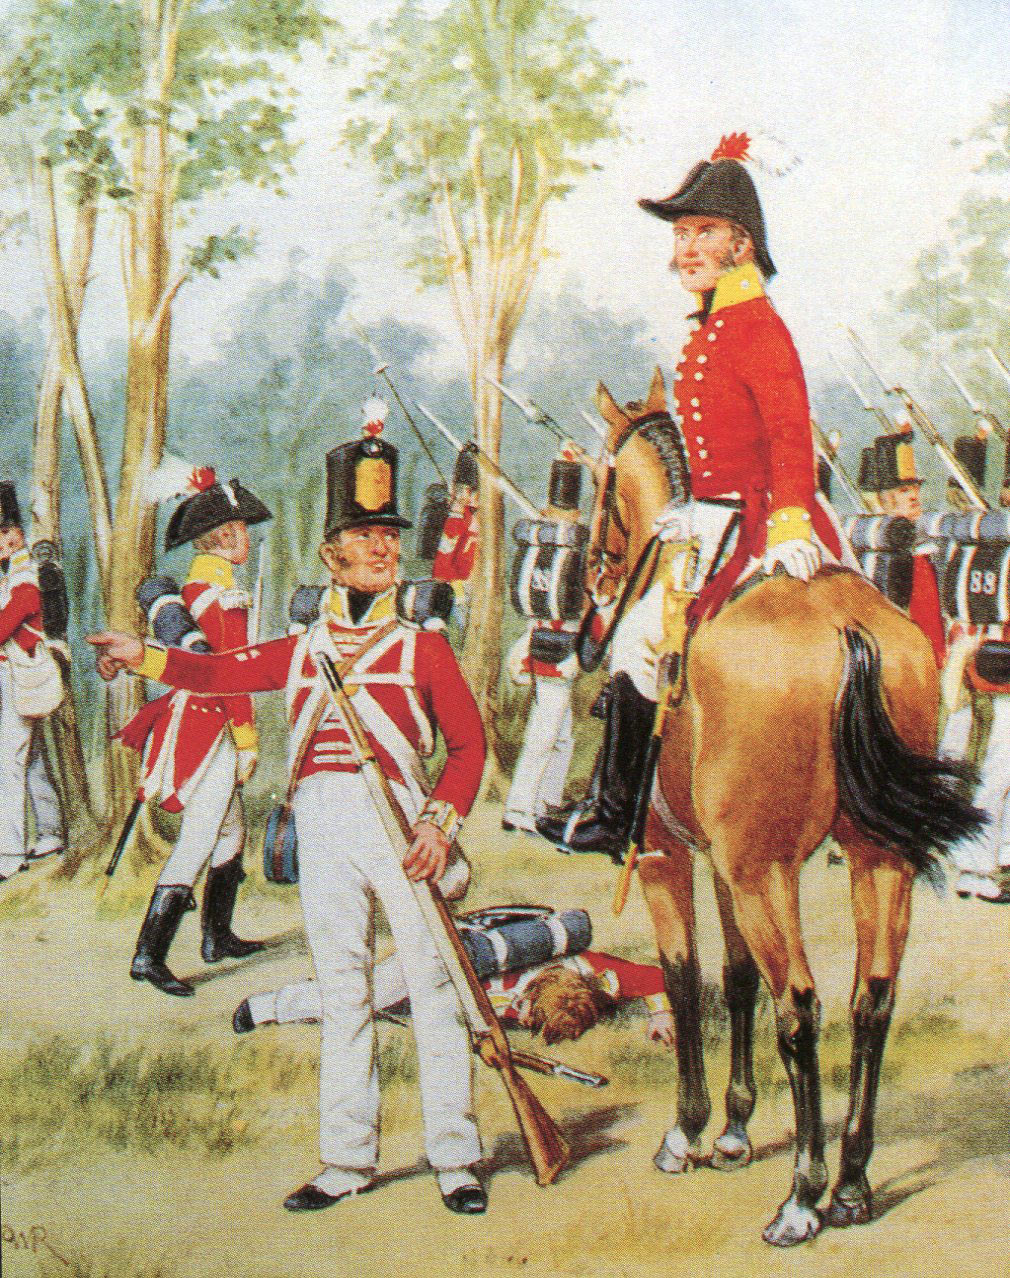
British 74th Regiment, Third Division, Battle of Busaco on 27th September 1810 in the Peninsular War: picture by Richard Simkin
Hill lay opposite Penacova, 5 miles south of Busaco.
Spencer’s Division lay at Mealhada, on the main road to the west of Busaco.
Leith’s, Picton’s and Cole’s Divisions were in position on the Serra do Busaco.
In the afternoon of 23rd September 1810, Wellington withdrew his cavalry from its position on the lower ground.
On 25th September 1810, Craufurd’s Light Division marched down into the plain as the forward outpost confronting the advancing French.
Craufurd remained on the lower ground longer than was prudent, Wellington having to intervene to extract the Light Division and ensure its safe withdrawal onto the Serra do Busaco.
The Serra do Busaco is a 9-mile-long ridge running south to north from the River Mondego, with the walled enclosure of the old ruined Busaco convent on the northern end.
The sides of the Serra, covered in heather and strewn with rocks that make movement difficult, particularly for military units attempting to retain formation, are lined with ravines, most carrying mountain streams.
Wellington’s army occupied a series of positions along the top of the Serra, facing north-east, the direction from which the French army was advancing to the attack.
A military track was quickly constructed the length of the Serra behind the summit, to enable Wellington to move his regiments along the Serra, out of sight of the French.
Wellington established his headquarters in the ruined convent.
Three roads cut across the Serra do Busaco, broadly at the southern, central and northern points, presenting the obvious routes for a French attack.
Battle of Busaco on 27th September 1810 in the Peninsular War: picture by William Heath
Wellington positioned his troops in groups around the points where these three roads crossed the top of the Serra.
Hill’s division, with the Lusitanian Legion of Portuguese troops and two Portuguese brigades held the right flank or southern end of the ridge.
Leith’s Division held the gap on Hill’s left.
Picton’s Division held the ground covering the central road.
The remainder of the army held the key ground around the Busaco convent and the northern paved road leading through the village of Sula.
Inevitably with such a long position, lengths of the ridge were unoccupied by Wellington’s troops, but it was a reasonable assumption that the French would attack along one of the roads, to retain their orientation during the difficult climb and Wellington could move reinforcements unseen along the track behind the summit of the Serra.
Late on 25th September 1810, Ney’s Corps moved forward and took over the area approaching Sula, while Reynier’s Corps moved south, to a position opposite the central road.
On 26th September 1810, Ney formed the view from movements along the crest of the ridge towards the northern end, that the British were about to leave the Serra do Busaco.
Ney urged Reynier to attack and overwhelm Wellington’s right flank, which Ney took to be marching away to Reynier’s right, while Ney attacked at Sula, enabling the French to inflict a heavy defeat on Wellington’s army.
The difficulty for Ney and Reynier was that from their positions in the valley they could not see what Wellington’s army was doing on the peak of the Serra, particularly as movements were made by way of the track built behind the summit.
Massena came forward during the afternoon and issued his orders.
These were based on the assumptions of Ney, Reynier and Massena that there were now no opposing troops on the Serra do Busaco further south than the central road.
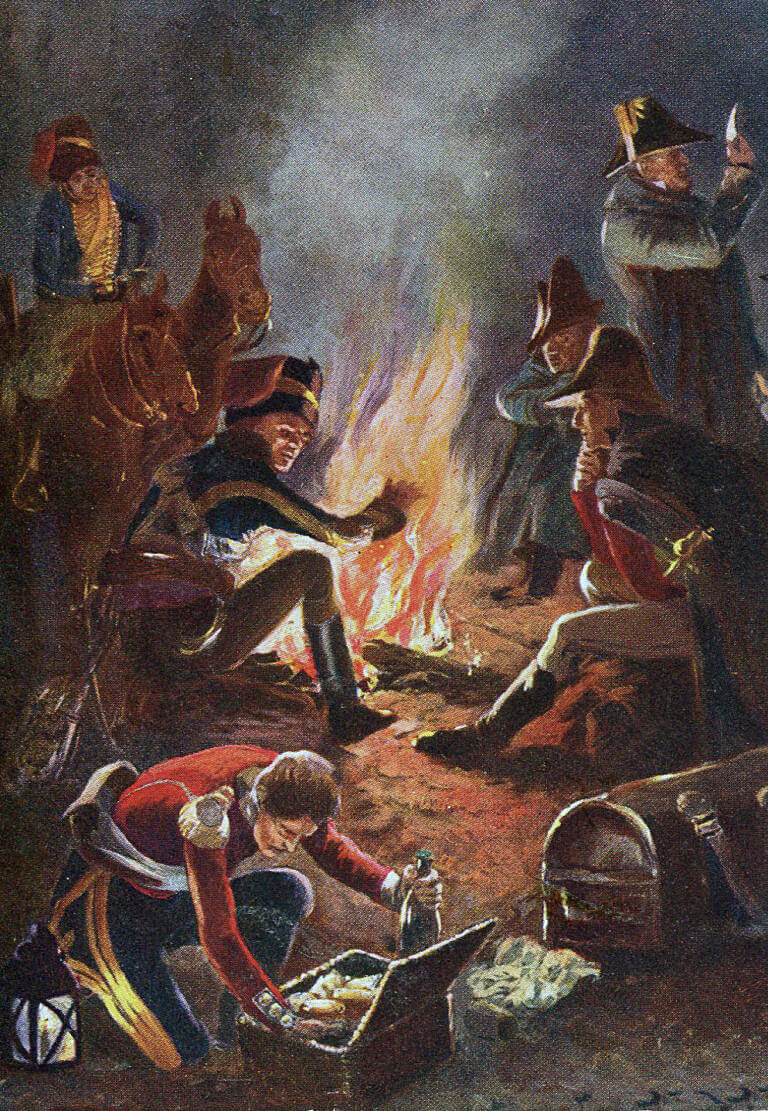
British officers bivouac the night before the Battle of Busaco on 27th September 1810 in the Peninsular War
Reynier was to attack what was taken to be the British right by advancing up the central road and once his corps was established on the crest of the Serra to wheel to the north and roll up Wellington’s line.
Once Reynier’s advance was well established on the Serra, Ney’s Sixth Corps was to attack the area of the Busaco convent at Sula by the two roads that passed the village.
The Eighth Corps was to remain at Moura on the River Mondego in reserve.
After making these deployments, Massena returned to Mortagoa, some 7 miles from the next day’s battlefield, where he spent the night.
Massena’s orders failed to take into account that Wellington’s position extended the whole length of the Serra do Busaco and that Hill’s Division was in position on the southern road.
The French plan committed Reynier, after taking the crest of the ridge, to marching his corps north along the crest of the Serra do Busaco, with the whole of Hill’s Division still in his immediate rear.
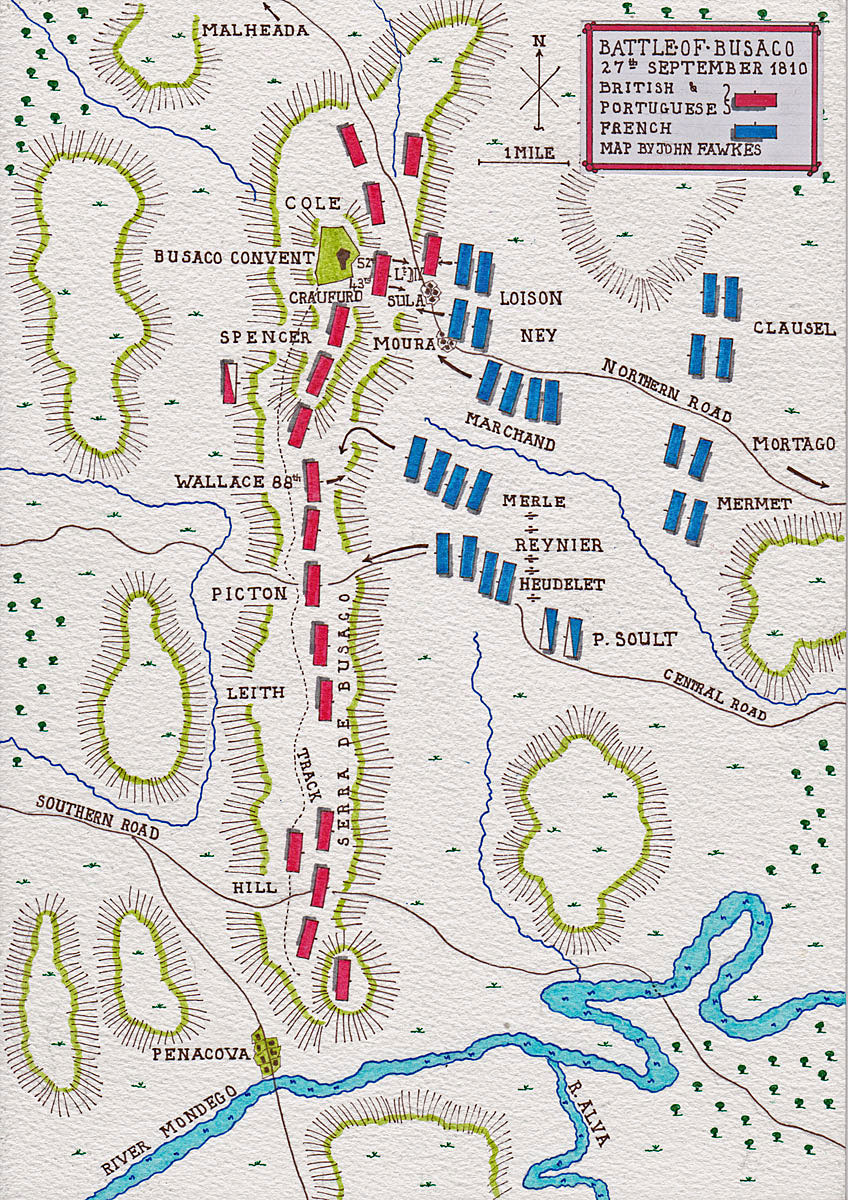
Map of the Battle of Busaco on 27th September 1810 in the Peninsular War: map by John Fawkes
Account of the Battle of Busaco:
A misty dawn on 27th September 1810 saw Reynier’s Corps begin the assault on the Serra do Busaco.
Merle’s Division of 11 battalions began the advance up the right side of the central road, while Heudelet’s Division of 15 battalions marched up the central road itself, to the rear of Merle.
There were no French troops to the south of Heudelet’s Division.
On the previous evening, Wellington watched the movement of Reynier’s Corps and was ready for the attack up the central road, moving troops into the gap between Spencer’s and Picton’s divisions, to meet the French column that would be advancing on the north side of the road.
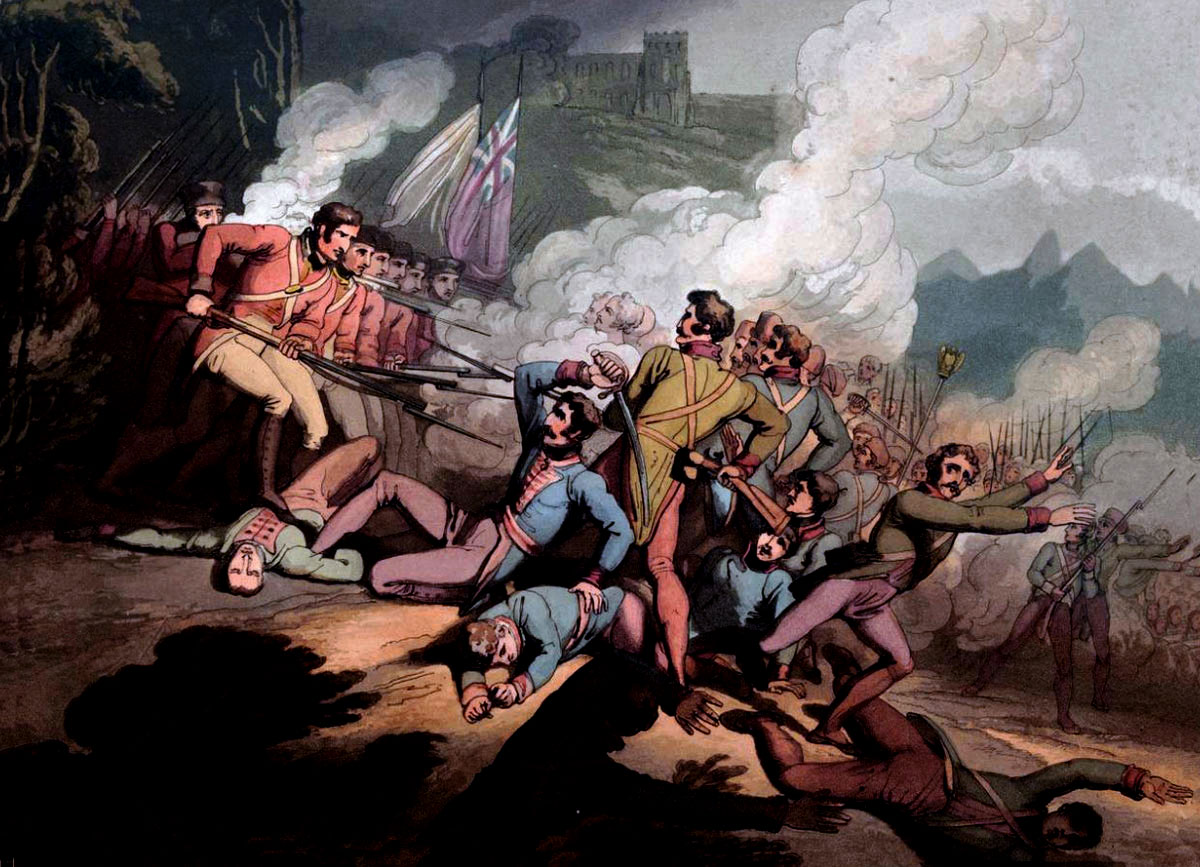
Reynier’s attack during the Battle of Busaco on 27th September 1810 in the Peninsular War: picture by Thomas Staunton St Clair
To increase his security, Picton despatched the 88th Regiment to occupy the gap between his flank and Spencer’s, followed by a further four companies of the 45th Regiment.
As Merle’s Division advanced up the slope of the Serra, the initial fighting took place between Merle’s battalions and Lightburne’s Brigade of Spencer’s Division and Wallace’s 88th Regiment.
Wellington rode up during the struggle and brought up 2 guns with orders to fire on Merle’s advancing column with grapeshot.
Merle’s men were forced to swerve to their left and make their way along the slope, fired on by the sharp-shooters from Lightburne’s Brigade and the 88th.
On Merle’s left, Reynier’s artillery opened fire on Picton’s positions, as the French 31st of the Line led Heudelet’s Division up the central road.
Two Portuguese batteries fired on the French column, inflicting heavy casualties but failing to halt the French advance.
Finally, approaching the top of its climb, the French column came under volley fire from the British 74th and two Portuguese Regiments and its advance faltered.
Battle of Busaco on 27th September 1810 in the Peninsular War: picture by J.J. Jenkins
A strong force of British skirmishers from the light companies of Picton’s Division spread down the left flank of the French 31st.
Heudelet’s Division could make no further progress and fell back.
It was now clear to Picton that the French assault was no longer a threat to his part of the line and he concentrated on providing support for the troops holding the northern side of the central road.
Colonel Wallace, seeing his attached companies of the 45th Regiment facing the whole weight of Merle’s Division, moved the 88th along the ridge and, discharging a volley, charged the French regiments climbing the slope.
Colonel Wallace and the 88th Regiment at the Battle of Busaco on 27th September 1810 in the Peninsular War
Wallace’s 88th was heavily outnumbered, but its impetuous charge on the French infantry, exhausted after their arduous climb and with their regiments disordered, drove the French back.
Watching from the summit, Wellington brought up guns to fire into the French, while the Portuguese 8th Regiment joined the attack.
The French 36th gave way completely and the whole of Merle’s Division was driven in confusion to the bottom of the hill, where Reynier’s guns forced the pursuing British and Portuguese troops to halt and return to the top of the ridge.
Picton came up to the scene of the attack on Merle’s Division to find that a party of French skirmishers was established on the ridge.
Picton organised a counter-attack on these skirmishers, who were driven off and joined the rout of the rest of Merle’s Division down the hill side.
Foy’s Brigade of Reynier’s Corps was advancing up the lower part of the ridge to make his attack when Merle’s shattered division came pouring past.
Reynier spoke harsh words to Foy, accusing him of hanging back to avoid the burden of an attack.
Enraged at the accusation Foy lead his brigade up the ridge, inclining to the north, as all the French attacks had tended to do.
Foy’s leading battalions gained the summit of the ridge and stood cheering, believing they had fulfilled their instructions.
However, Leigh marched up Barnes’ Brigade by way of the track constructed behind the crest and launched the 9th Regiment in a charge.
The 9th seized the summit and Foy’s brigade was driven in confusion down the ridge by the 9th and 38th Regiments, Foy himself being shot in the arm.
With the failure of these various attacks, Reynier’s attempt to storm the ridge was decisively defeated, with three of his four brigades in a state of collapse.
Hill’s Division of 11,000 men hurried along the crest of the ridge from the southern road and was ranged opposite Reynier, making any further French assault up the central road impossible.
Around the Busaco convent and the northern paved road Ney’s Corps waited to attack, once it was clear that Reynier was established on the ridge around the central road.
It seems clear that, at his distance, Ney was unable to distinguish the various levels of the Serra do Busaco ridge and that he took the arrival of Reynier’s troops on one of the lower ridges as the successful capture of the crest.
Ney consequently began his advance past the village of Sula towards the Busaco convent prematurely.
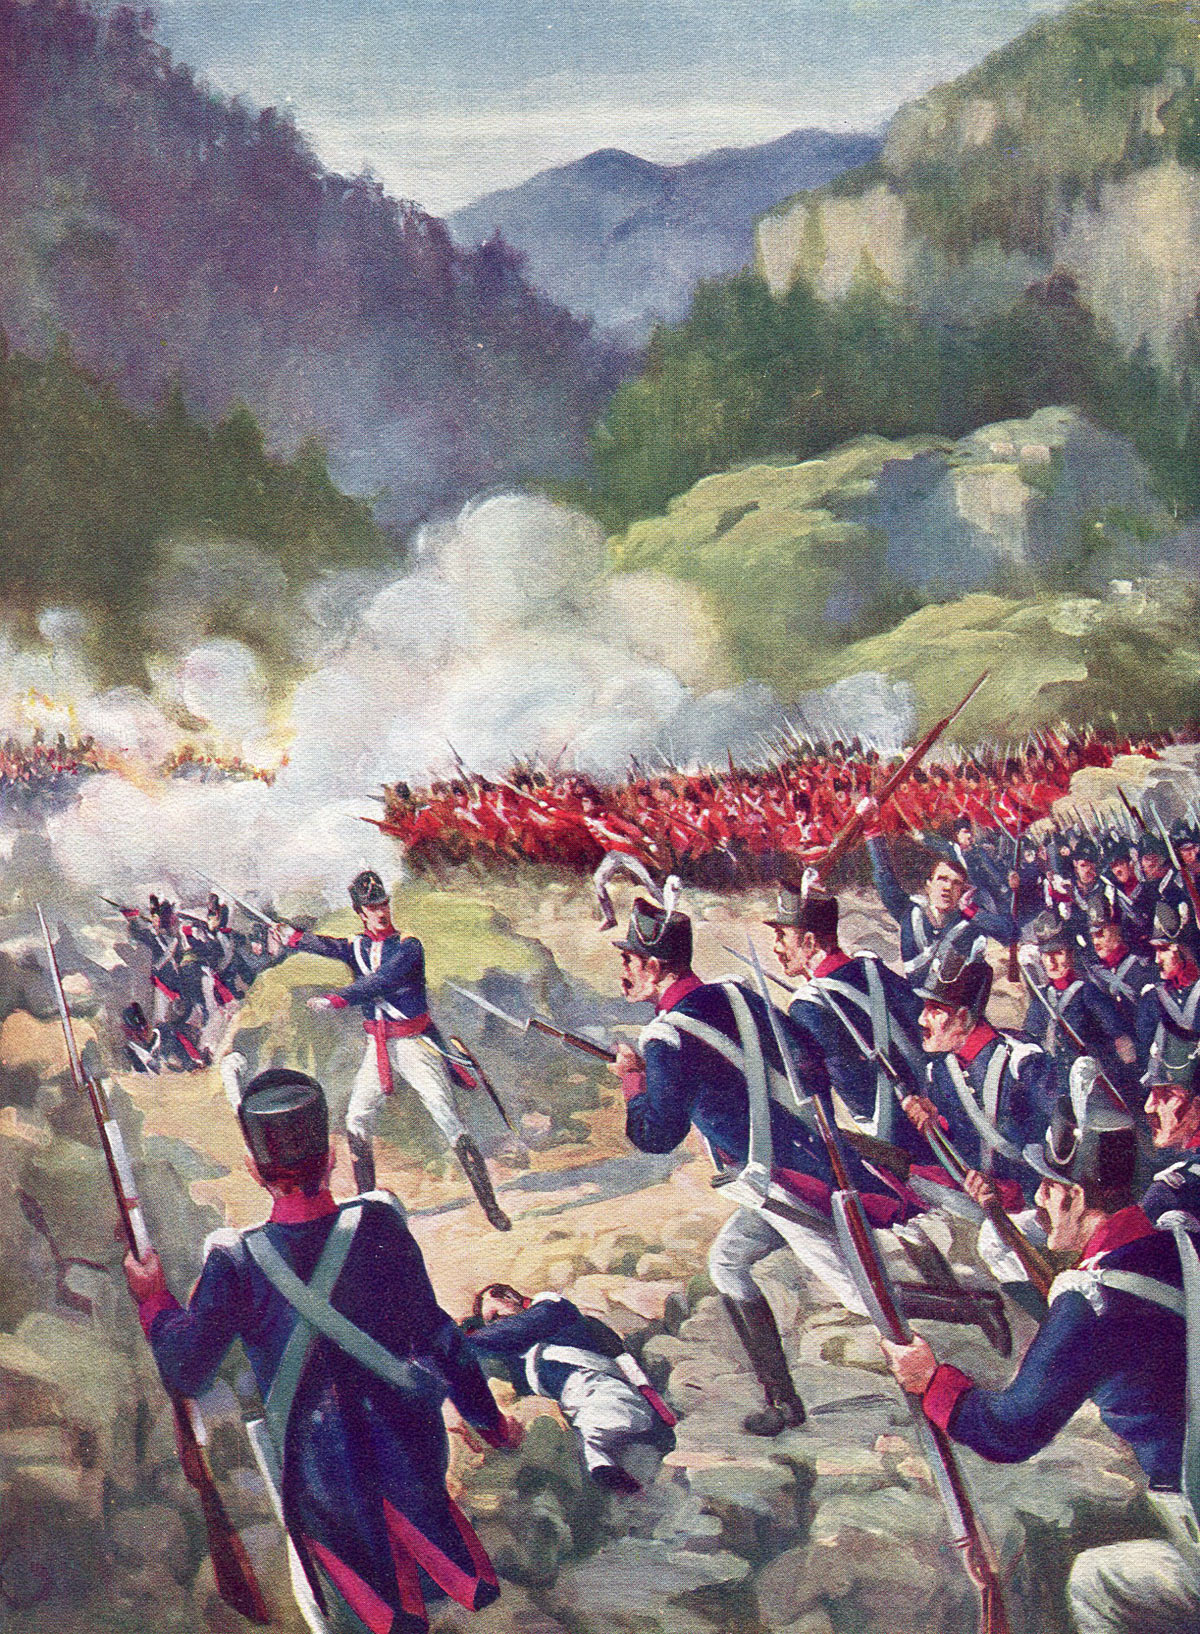
Charge of British and Portuguese infantry at the Battle of Busaco on 27th September 1810 in the Peninsular War
Beneath the convent, Craufurd’s Light Division was positioned on a plateau, completely concealed from the French troops laboriously climbing the ridge from below.
The British 43rd Light Infantry was posted on the right with the 52nd Light Infantry on the left and the 1st Caçadores in reserve.
The light companies of the Light Division together with the whole of the 95th Rifles and the 3rd Caçadores provided a powerful contingent of skirmishers, ready to fire on the French column as it toiled up the slope.
A ravine divided the route up to Craufurd’s position from the southern side of the paved road, dividing Ney’s two assaults and preventing mutual support.
British and Portuguese guns stood at the head of the ravine, ready to fire on the attacking French columns.
Loison’s Division of 2 brigades, Ferey’s and Simon’s, carried out the attack on the left side of the paved road leading to the Light Division plateau.
Loison’s brigades pushed back the skirmishers of the British Light Division with great difficulty and took the village of Sula.
The French were now bombarded by Ross’s battery and the renewed attack of the Light Division skirmishers, now reinforced by the whole of the 1st Caçadores.
With considerable difficulty, Loison’s columns pushed the skirmishers back and approached the lip of the plateau on which the 43rd and 52nd were concealed.
Ross’s battery ceased firing and pulled back.
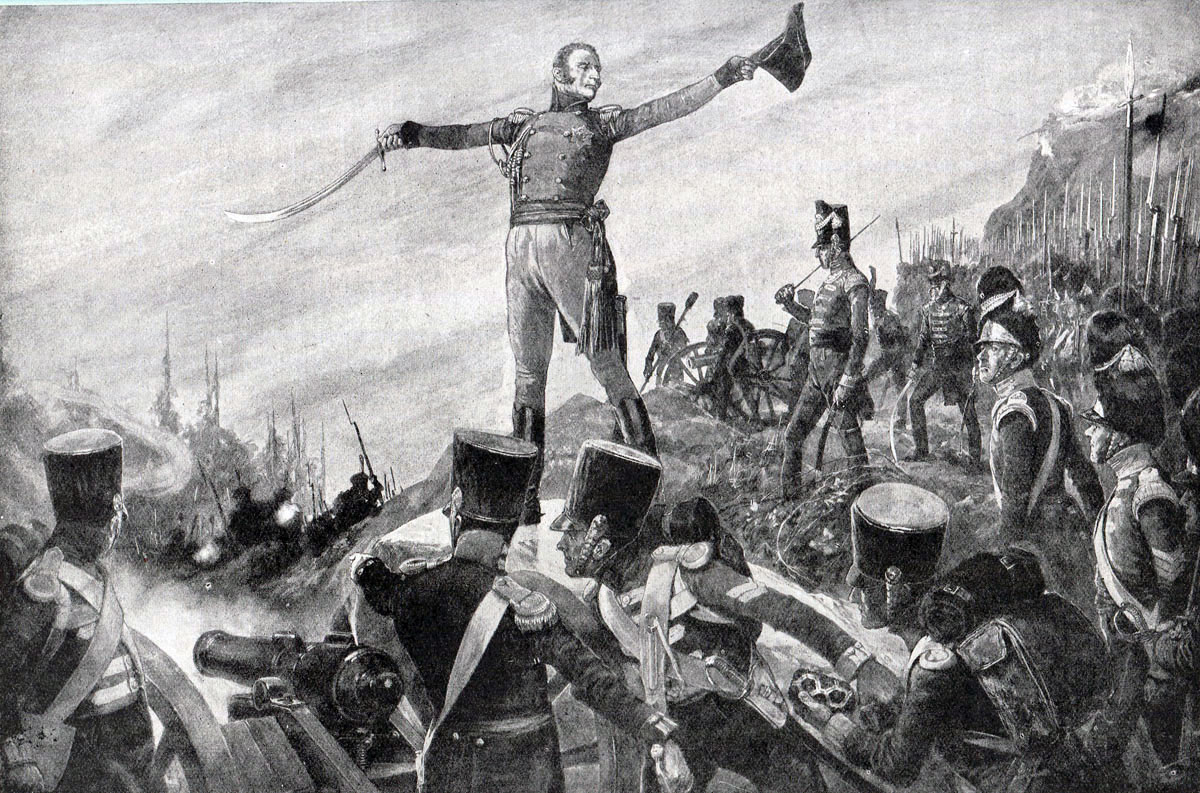
Craufurd ordering the 43rd and 52nd Light Infantry to charge at the Battle of Busaco on 27th September 1810 in the Peninsular War: picture by Richard Caton Woodville
Craufurd was watching the progress of the French column from the top of a boulder at the edge of the plateau.
As the French column climbed up to the edge of the plateau, Craufurd stood up and shouted for his two regiments to charge.
The 43rd and 52nd rushed over the edge of the plateau and poured down on the French column toiling up the slope.
The leading French ranks managed to discharge a volley before four companies, two from each British regiment, plunged into the front of the French column with the bayonet.
The remaining 43rd and 52nd companies, having no part of the French column in front of them, curled around the flanks of the French column and discharged three volleys at close range.
The whole of Loison’s Division broke in confusion and was driven back down the hill, suffering considerable casualties.
Halting at the bottom of the slope the 43rd and 52nd turned and climbed back to the plateau, the return journey taking half an hour against the 5 minutes of the frenzied charge.
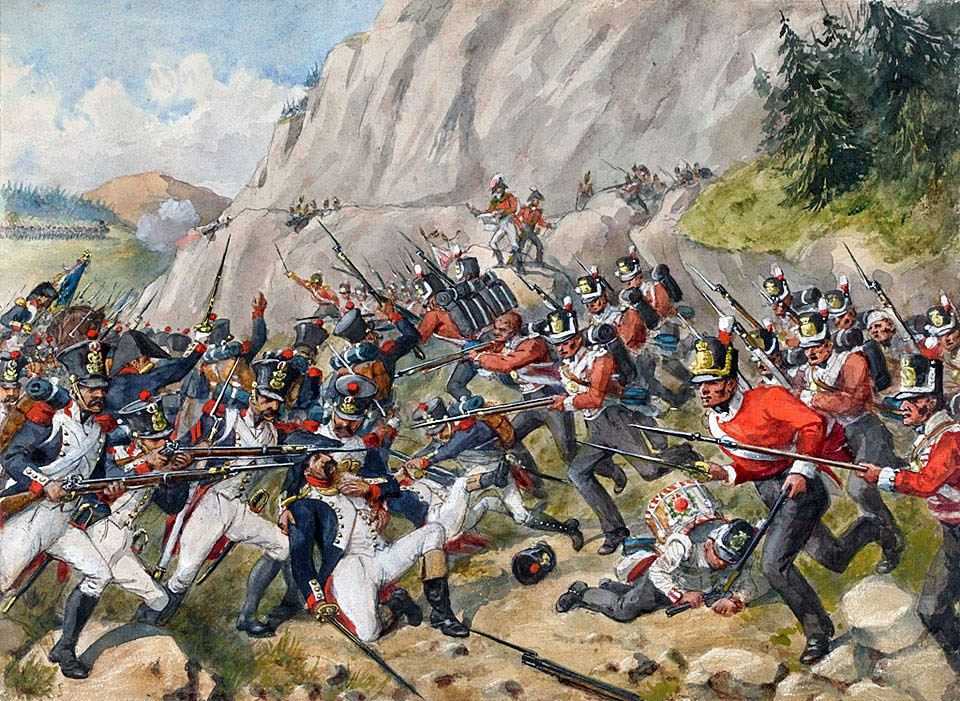
Charge of the 43rd and 52nd Light Infantry at the Battle of Busaco on 27th September 1810 in the Peninsular War: picture by Richard Simkin
The casualties of the Light Division in routing Loison’s Division were 24 men killed, wounded or missing, against Loison’s losses of more than 1,200 killed, wounded or missing.
Marchand’s Division, advancing up the ridge on the south side of the paved northern road, emerged from the village of Moura.
The leading brigade of Maucune came under heavy fire from the guns posted at the head of the ravine, together with volleys from a battalion of Caçadores in the woods on their left.
Maucune’s brigade pushed on up the ridge until they encountered Pack’s Portuguese Brigade, against whom they were unable to make any progress.
Marchand’s second brigade encountered heavy artillery fire on the road and halted.
At this point, recognising that the French attack was failing, Ney called a halt and recalled his divisions.
Massena still had Junot’s and Mermet’s Divisions of the Sixth Corps uncommitted to the battle, but it was now clear that there were several British divisions on the crest of the ridge that had taken little or no part in the fighting and that there was no realistic prospect of capturing the Serra do Busaco.
Battle of Busaco on 27th September 1810 in the Peninsular War: picture by R. Westall
At around 2pm, Massena called off the French attack and the Battle of Busaco came to an end.
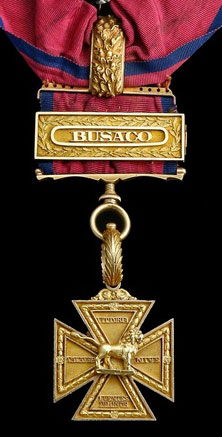
Gold Medal Cross awarded to Lieutenant Colonel Aylmer for the Battle of Busaco on 27th September 1810 in the Peninsular War
British Casualties at the Battle of
Busaco:
Total British and Portuguese casualties in the Battle of Busaco were 1,251
killed, wounded or missing, equally divided between the two nationalities.
The British regiments with the greatest number of casualties were the 45th Regiment with 150 killed, wounded or missing and the 88th Regiment with 134 killed, wounded or missing.
The French suffered at least 4,600 men killed, wounded or missing in the battle of Busaco.
Four French generals were wounded, Merle, Foy, Simon and Maucune, with General Graindorge killed.
Follow-up to the Battle of Busaco and the Lines of Torres Vedras:
Massena was not prepared to have his advance on Lisbon thwarted by Wellington’s victory at Busaco.
On 28th June 1810, French cavalry were despatched to find a route around the Busaco position.
These patrols, with information from local Portuguese, discovered the road to the north-west via Sardao to Boilvo on the north-south coastal road to Coimbra.
Wellington directed Trant to block this road with his Portuguese militia, but Trant was unable to do so, possibly due to a lack of co-operation from his Portuguese superior.
Once it became clear that Massena would be able to march around his left flank, Wellington promptly continued his retreat, withdrawing his British and Portuguese Army into Lisbon, behind the Lines of Torres Vedras.
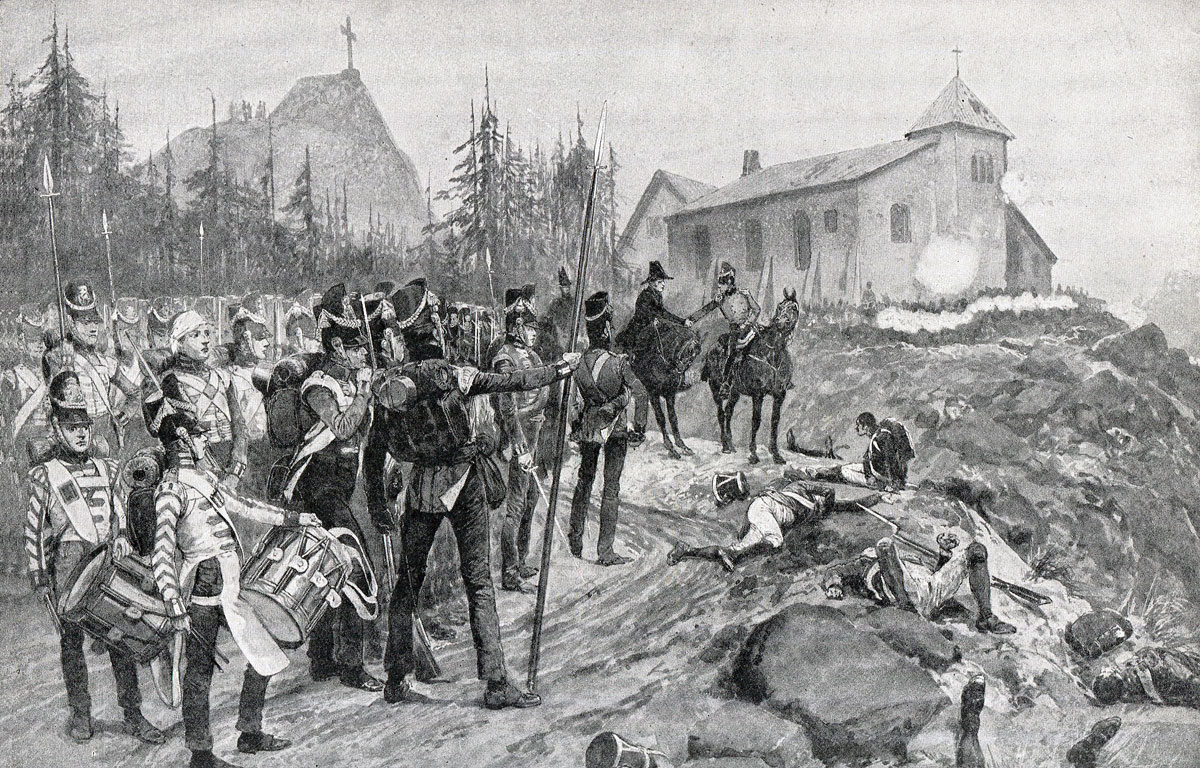
Wellington’s army withdrawing after the Battle of Busaco on 27th September 1810 in the Peninsular War
The French were taken by surprise by the Torres Vedras fortifications. With no prospect of a successful attack on the Lines of Torres Vedras and reluctant to withdraw, Massena allowed his troops to starve, until 6th March 1811, when the French “Army of Portugal” began its retreat. Massena reached Spain with his army in ruins. The French did not invade Portugal again.
Medal and Battle Honour for the Battle of Busaco:
The Military General Service Medal 1848 was issued to all those serving in the British Army present at specified battles during the period 1793 to 1840, who were still alive in 1847 and applied for the medal. The medal was only issued to those entitled to one or more of the clasps. There were 21 clasps available for service in the Peninsular War.
The Battle of Busaco was one of the clasps.
The battle honour ‘Busaco’ was awarded to the following British regiments: 1st Royal Scots, 5th, 7th Royal Fusiliers, 9th, 24th, 38th, 42nd Black Watch, 43rd Light Infantry, 45th, 52nd Light Infantry, 60th, 61st, 74th Highlanders, 79th Cameron Highlanders, 83rd, 88th and 95th Rifles.
Army Gold Medal:
In 1810 a Gold Medal was issued to be awarded to officers of rank of major and above for meritorious service at certain battles in the Peninsular War, with clasps for additional battles. The ‘Large Gold Medal’ was awarded to generals, the ‘Small Gold Medal’ to majors and colonels, with the medal replaced by a cross where four clasps were earned. The Battle of Busaco was one of the battles.
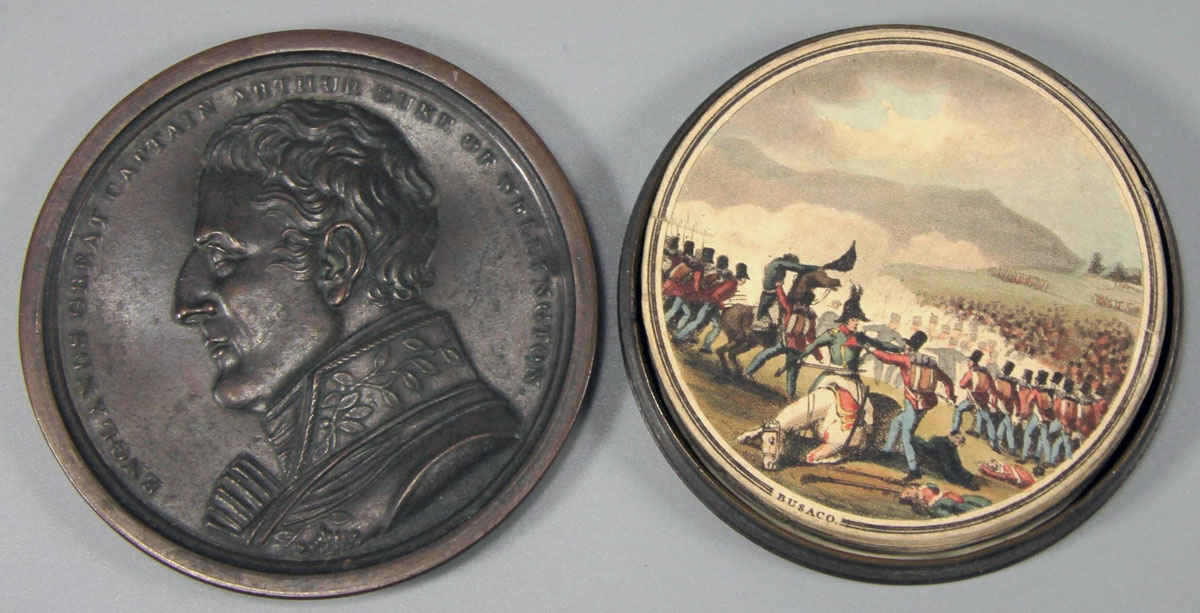
Medal commemorating the Battle of Busaco on 27th September 1810 in the Peninsular War: picture by E. Orme
Anecdotes and traditions from the Battle of Busaco:
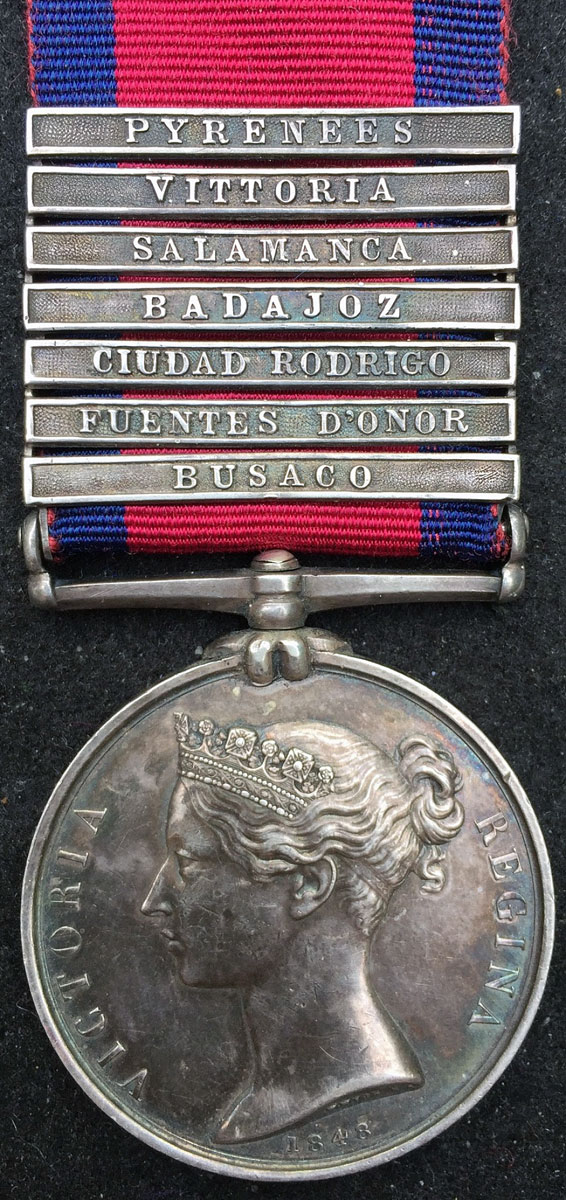
General Service Medal with clasp for Battle of Busaco on 27th September 1810 in the Peninsular War: awarded to Captain Costley of the 1st/45th Regiment, the ‘Old Stubborns’
- Fortescue states that the Battle of Busaco was a nasty jolt for Massena. He discovered that the Portuguese troops, making up half Wellington’s army, were, contrary to French expectations, highly effective troops.
- While campaigning in the Peninsular, The French relied upon the maps of Tomas Lopez. Lopez was Spanish and his information on his own country was reliable. When it came to mapping Portugal, Lopez used his imagination and set out roads where he thought they ought to be. The result was that Massena was unable to make a proper assessment of the suitable routes for his army. This error came near to destroying his army.
- It is said that Massena was delayed in acting on Ney’s first report on the evening of 25th September 1810, because he was locked in his bedroom with his mistress Mme Henriette Leberton. Ney’s Aide de Camp had to shout his message through the door. It was some two hours before Massena was available to reconnoitre the ridge.
- After the attack by the 88th Connaught Rangers, Lord Wellington said to their colonel, “Wallace, I have never witnessed a more gallant charge.”
- As the 52nd Foot rose from the plateau to attack Loison’s division, General Craufurd is said to have called out “Now, 52nd Revenge the death of Sir John Moore”. Moore, killed at the Battle of Corunna, had been colonel of the 52nd. The two light infantry regiments gave a terrible shout and charged, driving Loison’s division down the hill in confusion.
Wellington thanking Colonel Wallace of the 88th after the Battle of Busaco on 27th September 1810 in the Peninsular War: picture by Richard Caton Woodville
References for the Battle of Busaco:
See the extensive list of references given at the end of the Peninsular War Index.
14. Podcast of the Battle of Busaco:Wellington’s highly successful holding battle fought on 27th September 1810 in Western Portugal against Marshal Massena’s invading French army, as the British and Portuguese withdrew to Lisbon and the Lines of Torres Vedras, during the Peninsular War. John Mackenzie’s Britishbattles.com podcast.
The previous battle of the Peninsular War is the Battle of the River Coa
The next battle of the Peninsular War is the Battle of Barrosa