The siege in Natal during the Boer War that ensnared a British army from 2nd November 1899 to 27th February 1900, but blocked the Boer invasion of the colony
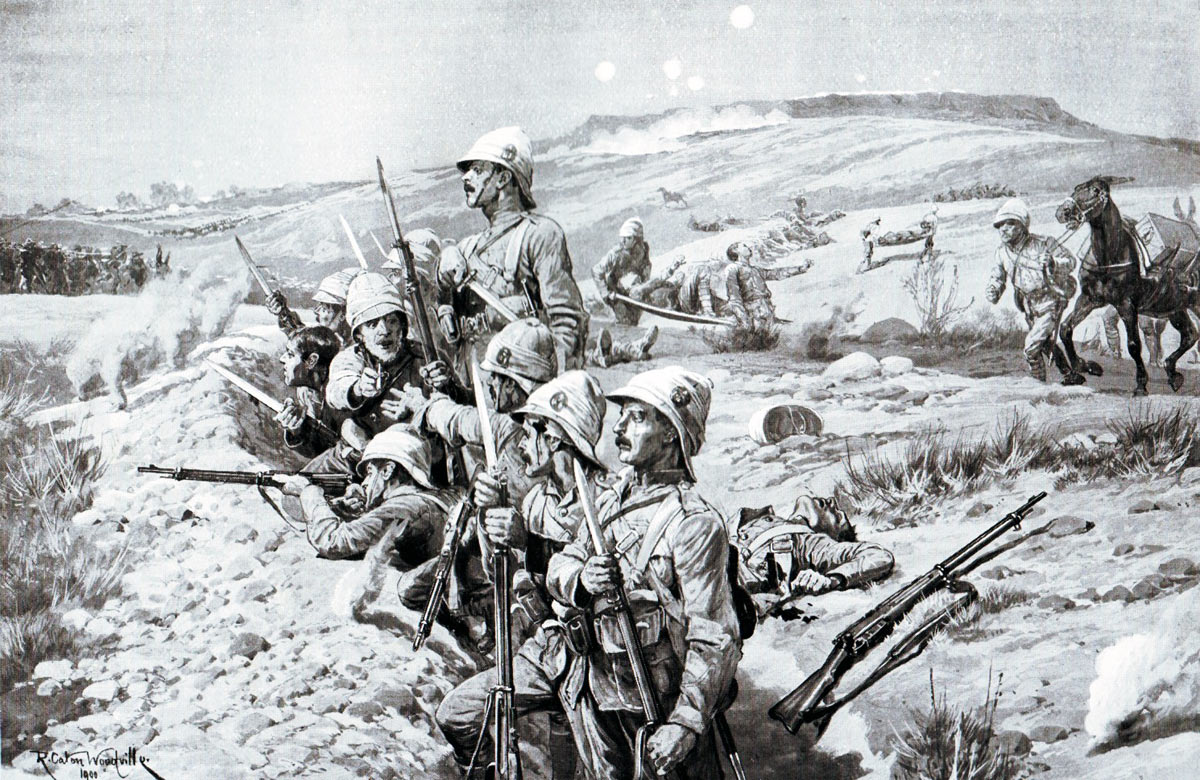
‘Fix Bayonets’: Siege of Ladysmith, 2nd November 1899 to 27th February 1900 in the Great Boer War: picture by Richard Caton Woodville
 71. Podcast on the Siege of Ladysmith: The siege in Natal during the Boer War that ensnared a British army from 2ndNovember 1899 to 27thFebruary1900, but blocked the Boer invasion of the colony: John Mackenzie’s britishbattles.com podcasts
The previous battle of the Great Boer War is the Siege of Kimberley
The next battle of the British Battles sequence is the Black Mountain Expedition 1888
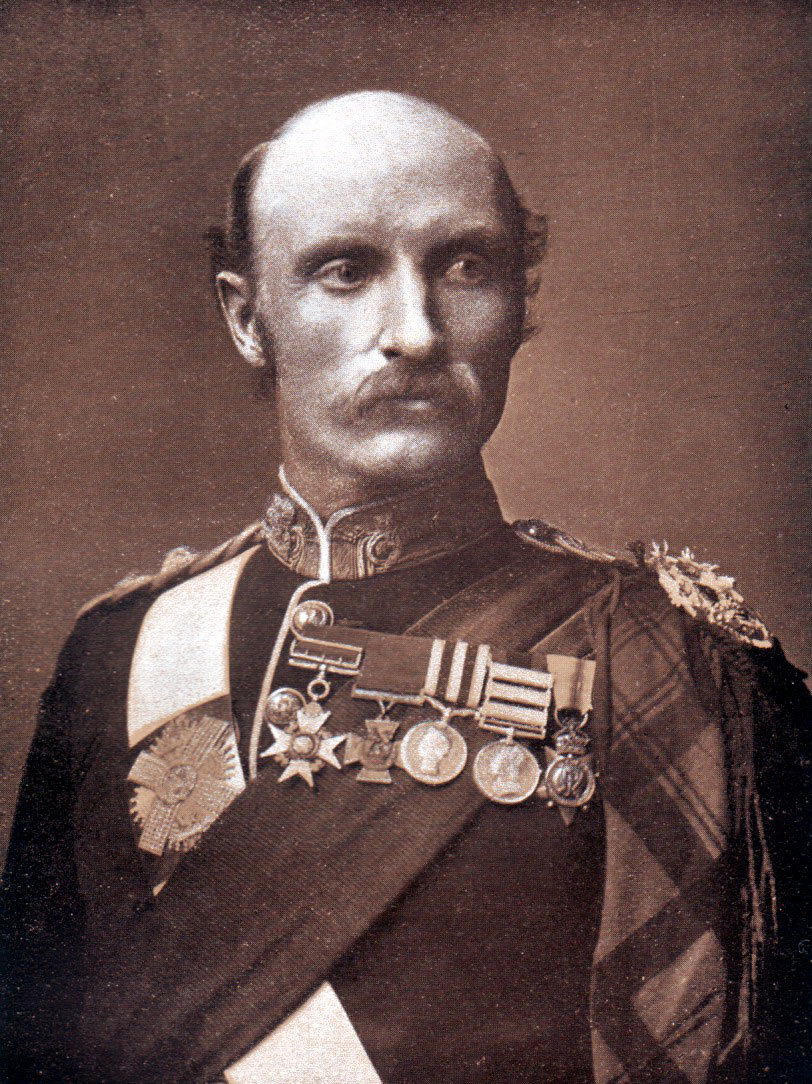
Lieutenant General Sir George White: Siege of Ladysmith, 2nd November 1899 to 27th February 1900 in the Great Boer War
War: The Boer War
Dates of the Siege of Ladysmith: 2nd November 1899 to 27th February 1900.
Place of the Siege of Ladysmith: Northern Natal in Southern Africa.
Combatants at the Siege of Ladysmith: British against the Boers.
Commanders at the Siege of Ladysmith: Lieutenant General Sir George White against Generals Joubert and Botha.
Size of the armies at the Siege of Ladysmith: 5,500 British troops against a varying number of Boers. From the end of the year 1899 the garrison outnumbered the besieging Boers.
Uniforms, arms and equipment at the Siege of Ladysmith: The Boer War was a serious jolt for the British Army. At the outbreak of the war British tactics were appropriate for the use of single shot firearms, fired in volleys controlled by company and battalion officers; the troops fighting in close order. The need for tight formations had been emphasised time and again in colonial fighting. In the Zulu and Sudan Wars overwhelming enemy numbers armed principally with stabbing weapons were easily kept at a distance by such tactics; but, as at Isandlwana, would overrun a loosely formed force. These tactics had to be entirely rethought in battle against the Boers armed with modern weapons.
Boers bringing up a ‘Long Tom’ to bombard Ladysmith: Siege of Ladysmith, 2nd November 1899 to 27th February 1900 in the Great Boer War
In the months before hostilities the Boer commandant general, General Joubert, bought 30,000 Mauser magazine rifles and a number of modern field guns and automatic weapons from the German armaments manufacturer Krupp and the French firm Creusot. The commandoes, without formal discipline, welded into a fighting force through a strong sense of community and dislike for the British. Field Cornets led burghers by personal influence not through any military code.
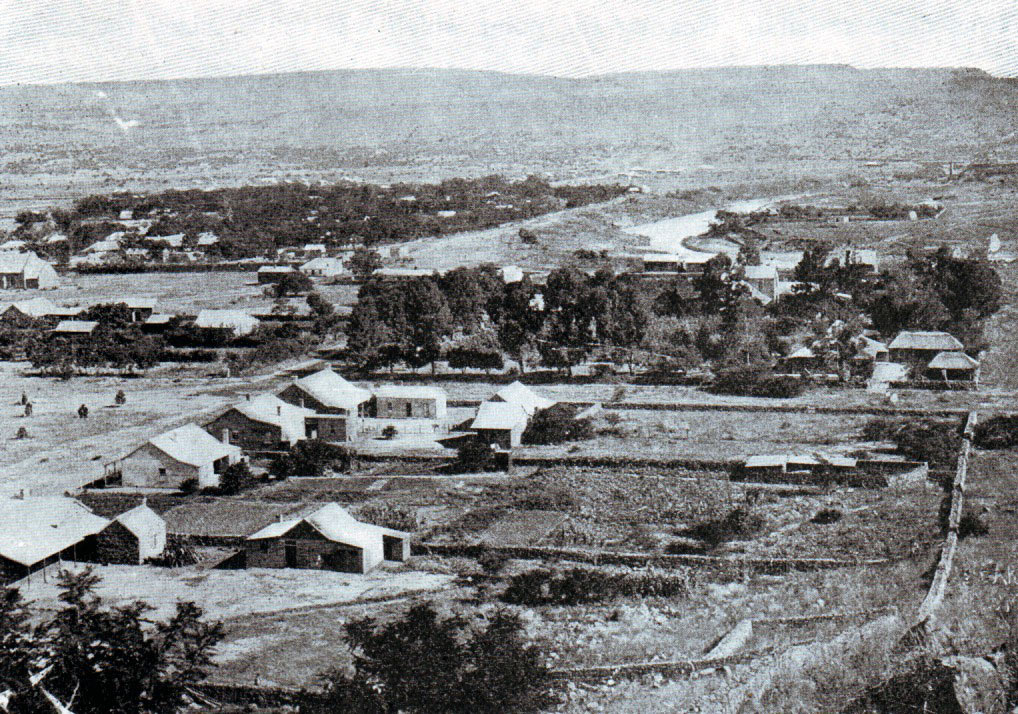
Ladysmith and the Klip River: Siege of Ladysmith, 2nd November 1899 to 27th February 1900 in the Great Boer War
The Boers did not adopt military formation in battle, instinctively fighting from whatever cover there might be. The preponderance were countrymen, running their farms from the back of a pony with a rifle in one hand. These rural Boers brought a life time of marksmanship to the war, an important edge, further exploited by Joubert’s consignment of magazine rifles. Viljoen is said to have coined the aphorism ‘Through God and the Mauser’. With strong fieldcraft skills and high mobility the Boers were natural mounted infantry. The urban burghers and foreign volunteers readily adopted the fighting methods of the rest of the army.
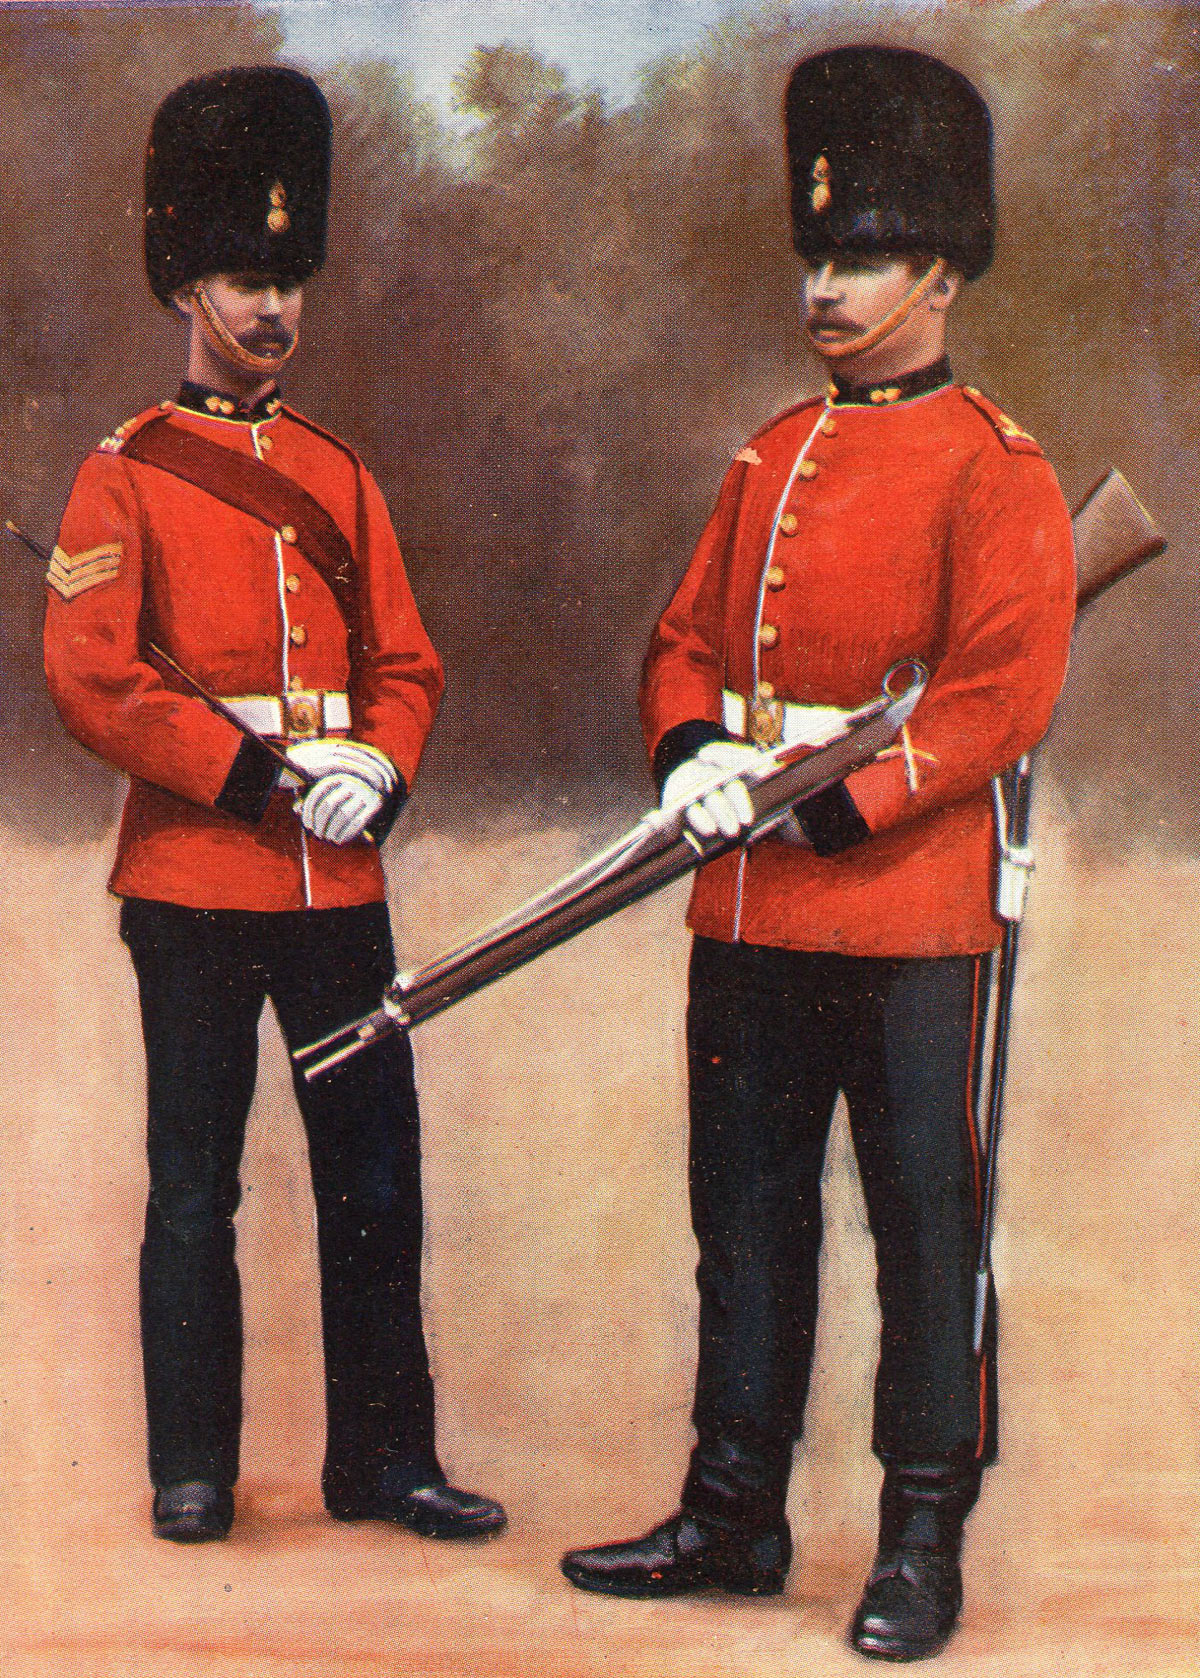
Sergeant and Private Royal Dublin Fusiliers: Siege of Ladysmith, 2nd November 1899 to 27th February 1900 in the Great Boer War
Other than in the regular uniformed Staats Artillery and police units, the Boers wore their everyday civilian clothes on campaign.
After the first month, the Boers lost their numerical superiority, spending the rest of the formal war on the defensive against British forces that regularly outnumbered them.
British tactics, little changed from the Crimea, used at Modder River, Magersfontein, Colenso and Spion Kop were incapable of winning battles against entrenched troops armed with modern magazine rifles. Every British commander made the same mistake; Buller; Methuen, Roberts and Kitchener. When General Kelly-Kenny attempted to winkle Cronje’s commandoes out of their riverside entrenchments at Paardeburg using his artillery, Kitchener intervened and insisted on a battle of infantry assaults; with the same disastrous consequences as Colenso, Modder River, Magersfontein and Spion Kop.
Some of the most successful British troops were the non-regular regiments; the City Imperial Volunteers, the South Africans, Canadians, Australians and New Zealanders, who more easily broke from the habit of traditional European warfare, using their horses for transport rather than the charge, advancing by fire and manoeuvre in loose formations and making use of cover, rather than the formal advance into a storm of Mauser bullets.
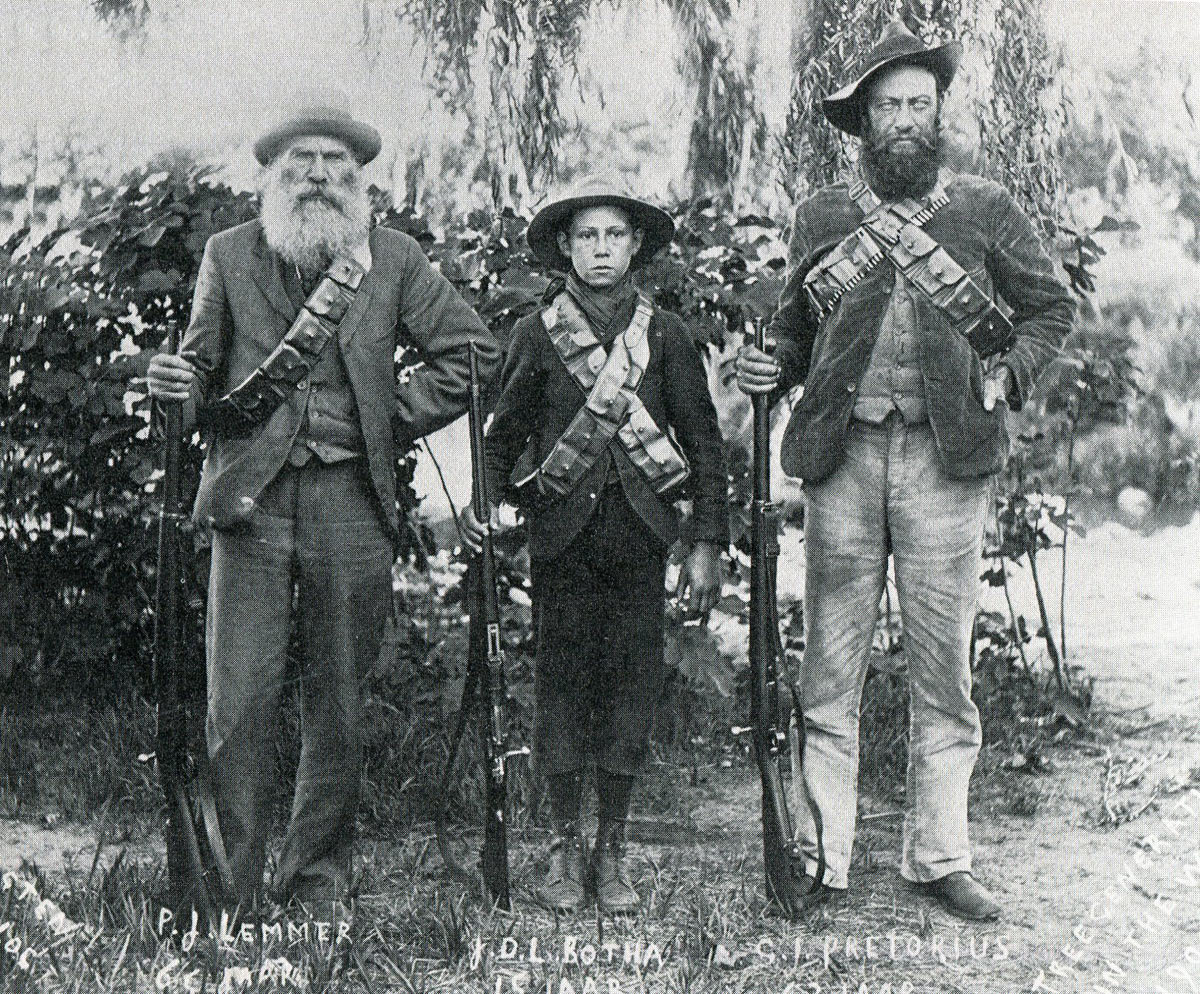
Three generations of Boer soldiers: Siege of Ladysmith, 2nd November 1899 to 27th February 1900 in the Great Boer War
Uniform at the Siege of Ladysmith: The British regiments made an uncertain change into khaki uniforms in the years preceding the Boer War, with the topee helmet as tropical headgear. Highland regiments in Natal devised aprons to conceal coloured kilts and sporrans. By the end of the war the uniform of choice was a slouch hat, drab tunic and trousers; the danger of shiny buttons and too ostentatious emblems of rank emphasised in several engagements with disproportionately high officer casualties.
The British infantry were armed with the Lee Metford magazine rifle firing 10 rounds. But no training regime had been established to take advantage of the accuracy and speed of fire of the weapon. Personal skills such as scouting and field craft were little taught. The idea of fire and movement was unknown, many regiments still going into action in close order. Notoriously General Hart insisted that his Irish Brigade fight shoulder to shoulder as if on parade in Aldershot. Short of regular troops, Britain engaged volunteer forces from Britain, Canada, Australia and New Zealand who brought new ideas and more imaginative formations to the battlefield.
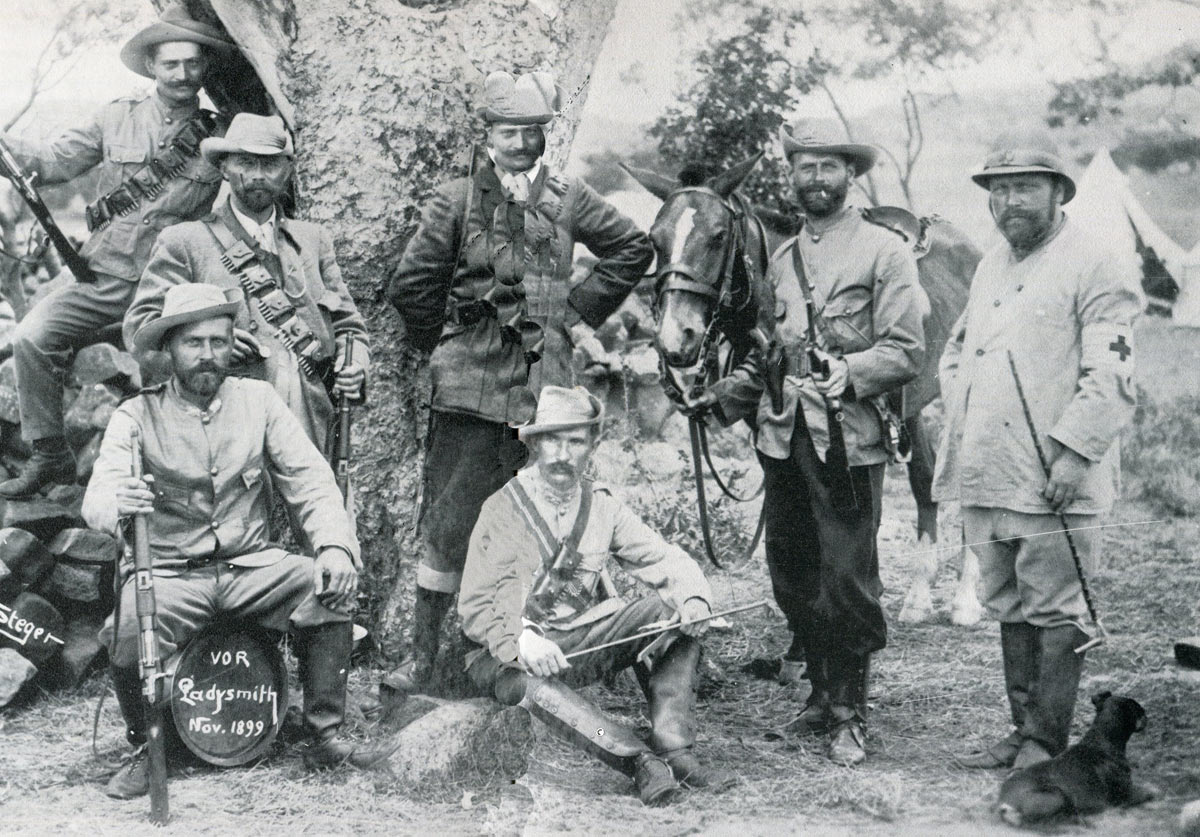
German volunteers in the Boer army: Siege of Ladysmith, 2nd November 1899 to 27th February 1900 in the Great Boer War
The British regular troops lacked imagination and resource. Routine procedures such as effective scouting and camp protection were often neglected. The war was littered with incidents in which British contingents became lost or were ambushed often unnecessarily and forced to surrender. The war was followed by a complete re-organisation of the British Army.
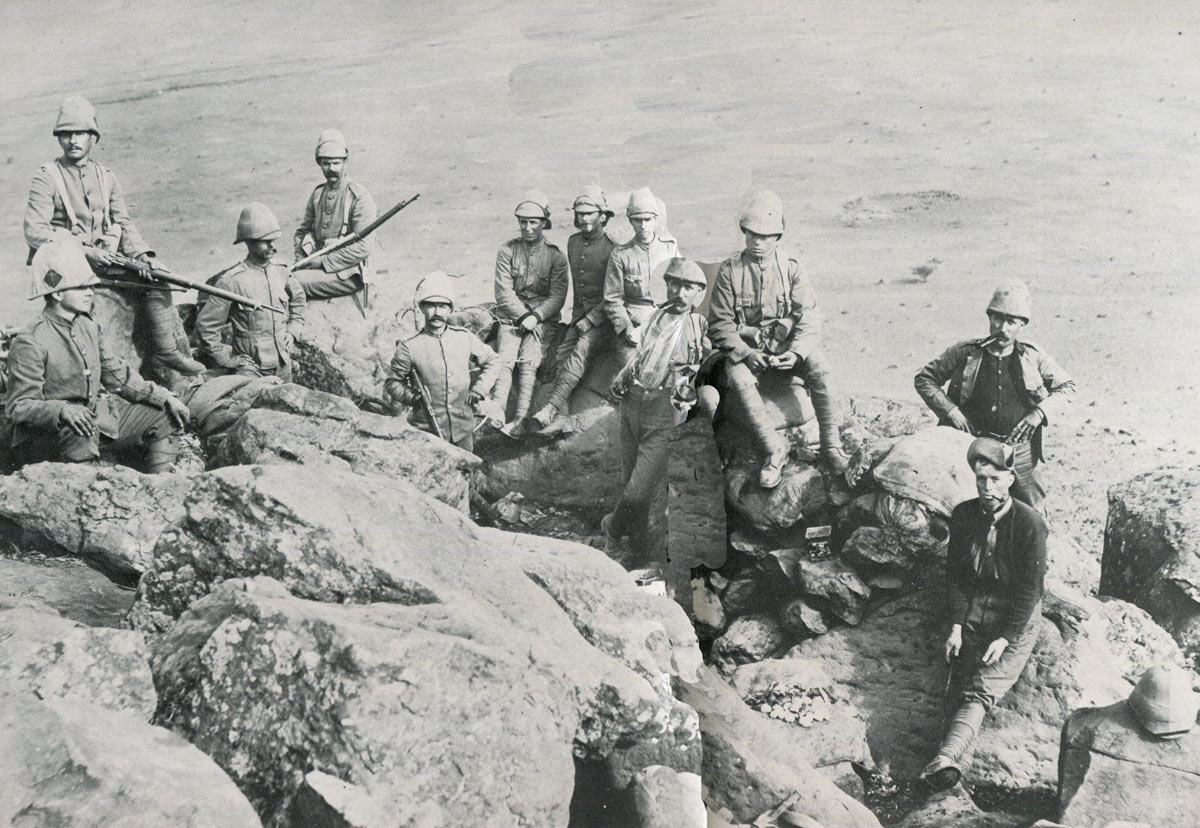
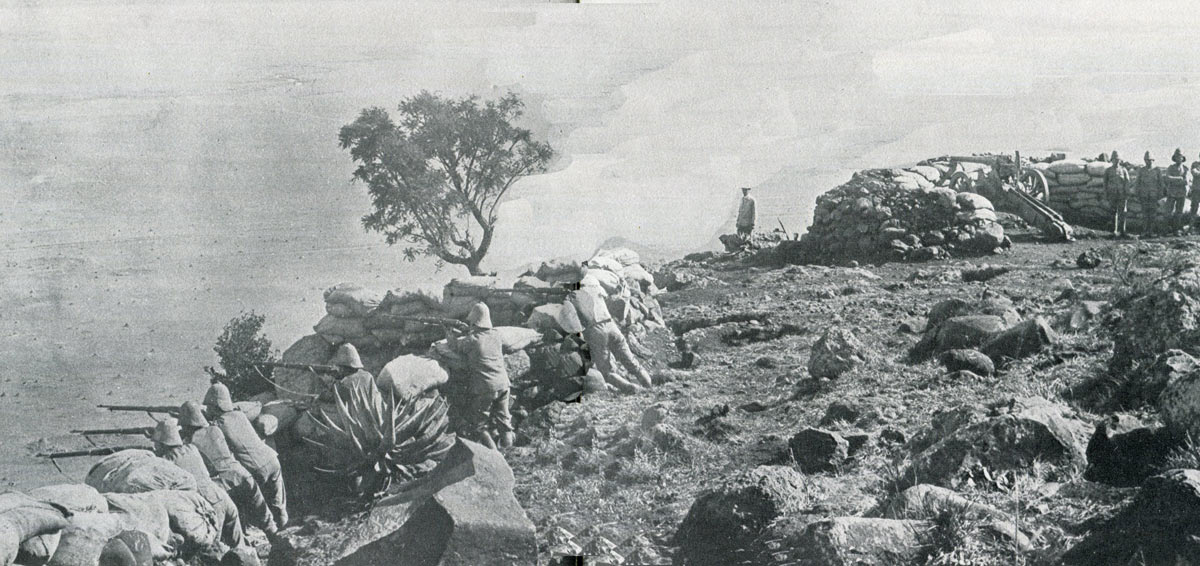
British hilltop picket: Siege of Ladysmith, 2nd November 1899 to 27th February 1900 in the Great Boer War
The British artillery was a powerful force in the field, underused by commanders with little training in the use of modern guns in battle. Pakenham cites Pieters as being the battle at which a British commander, surprisingly Buller, developed a modern form of battlefield tactics: heavy artillery bombardments co-ordinated to permit the infantry to advance under their protection. It was the only occasion that Buller showed any real generalship and the short inspiration quickly died.
The Royal Field Artillery fought with 15 pounder guns; the Royal Horse Artillery with 12 pounders and the Royal Garrison Artillery batteries with 5-inch howitzers. The Royal Navy provided heavy field artillery with a number of 4.7-inch naval guns mounted on field carriages devised by Captain Percy Scott of HMS Terrible.
Automatic weapons were used by the British usually mounted on special carriages accompanying the cavalry.
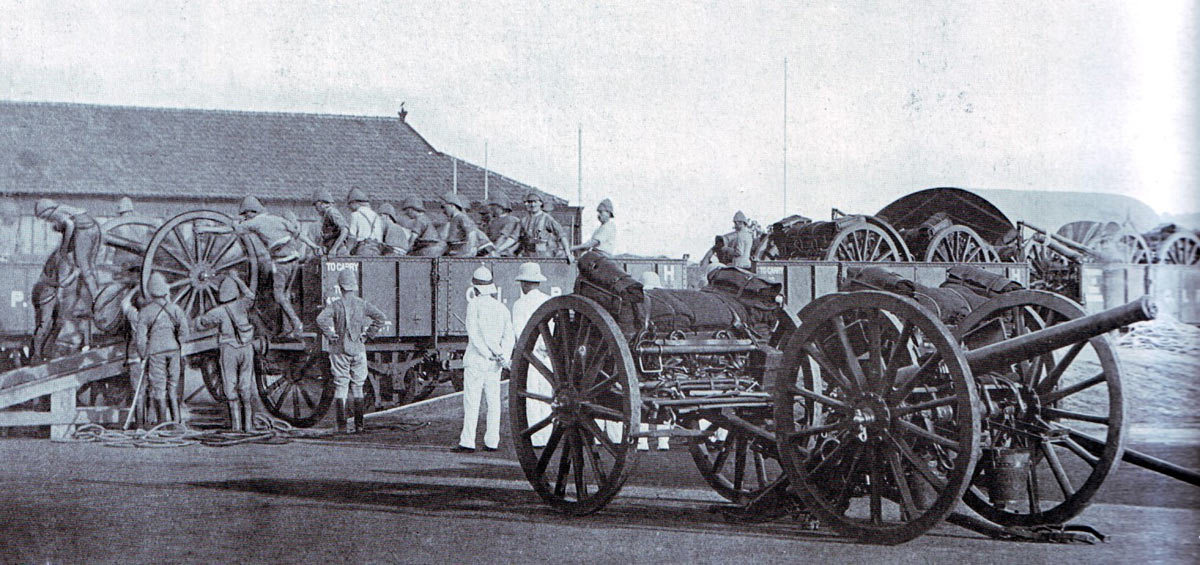
Royal Artillery 42nd Battery arriving at Durban: Siege of Ladysmith, 2nd November 1899 to 27th February 1900 in the Great Boer War
Winner of the Siege of Ladysmith: The British under White held out until relieved by General Buller, but without great distinction.
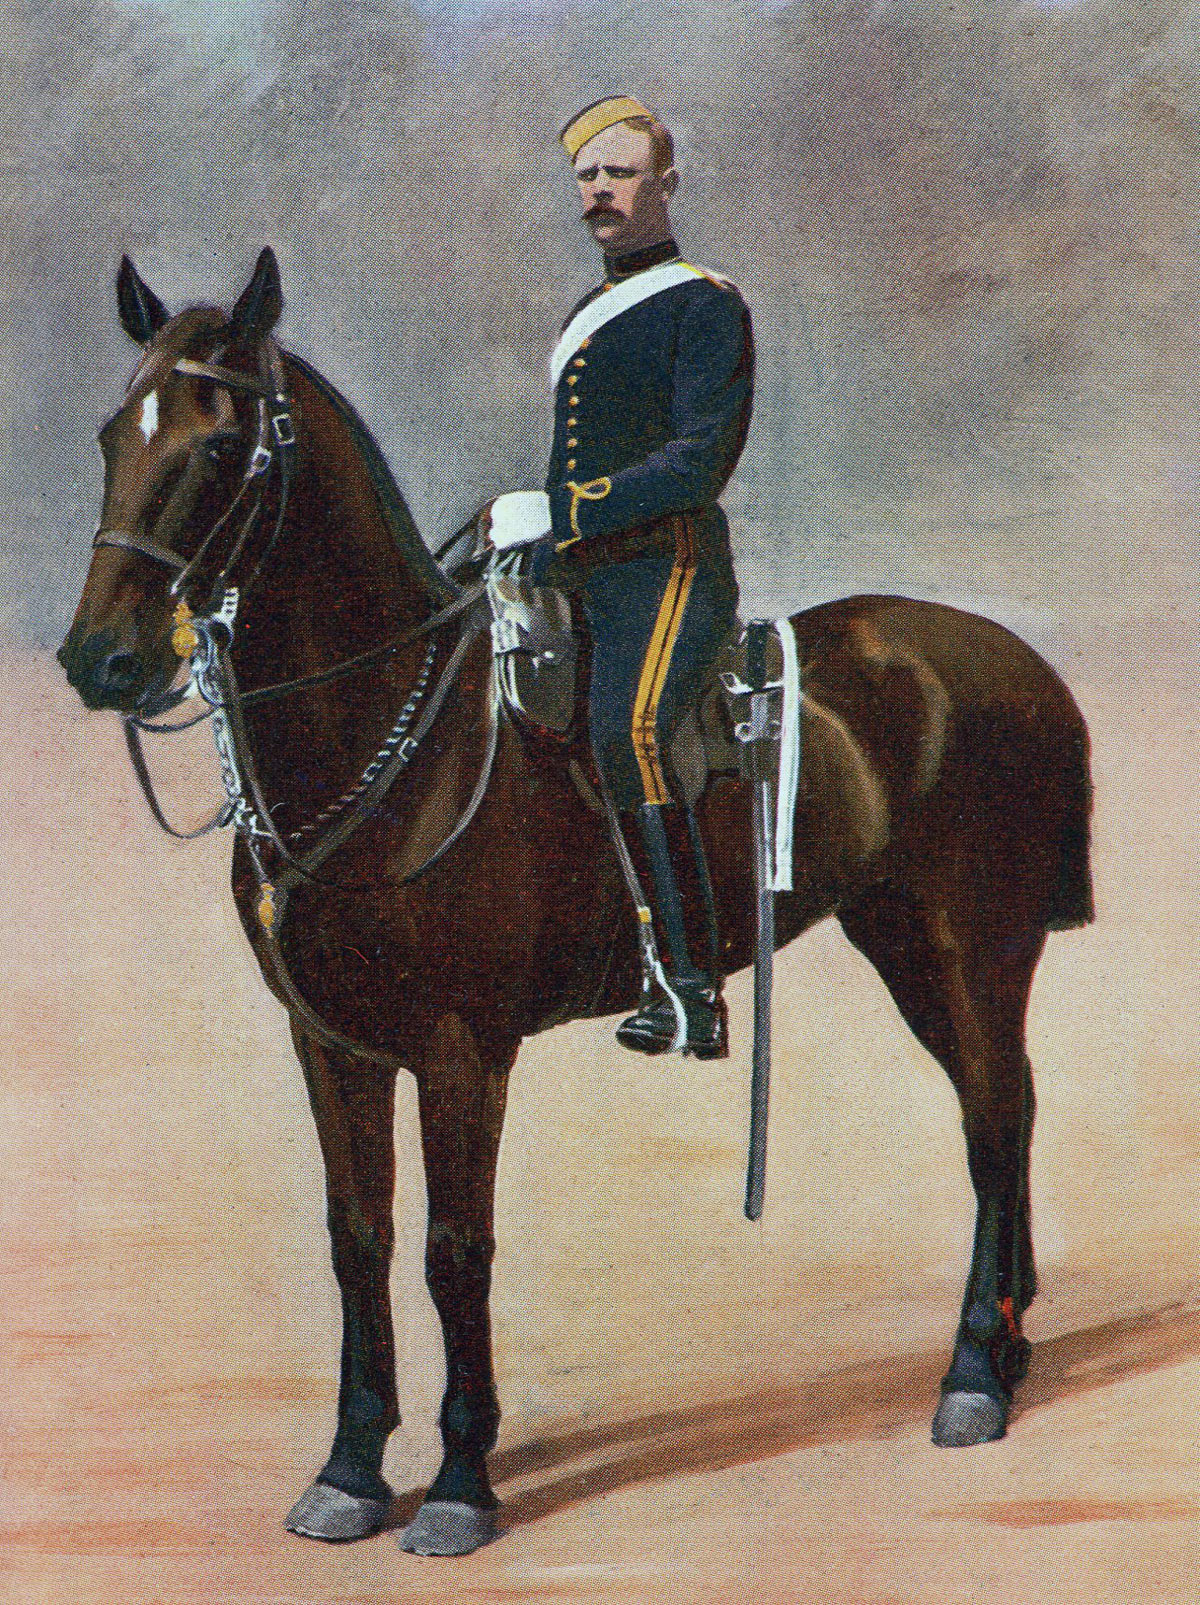
Sergeant of 18th Hussars: Siege of Ladysmith, 2nd November 1899 to 27th February 1900 in the Great Boer War
British Regiments at the Siege of Ladysmith:
18th Hussars: from 1922, the 13th/18th Royal Hussars and now the Light Dragoons.
19th Hussars: from 1922, the 15th/19th King’s Royal Hussars and now the Light Dragoons.
5th Lancers: from 1922, the 16th/5th Lancers and now the Royal Lancers.
Royal Field Artillery: 13th, 18th, 21st, 42nd, 53rd and 69th Batteries. No 10 Mountain Battery
1st King’s Liverpool Regiment: now the Duke of Lancaster’s Regiment.
1st Devonshire Regiment: now the Rifles.
1st Leicestershire Regiment: now the Royal Anglian Regiment.
1st Gloucestershire Regiment: now the Rifles.
1st King’s Royal Rifle Corps: now the Rifles.
1st Manchester Regiment: now the Duke of Lancaster’s Regiment.
2nd Gordon Highlanders: now the Royal Regiment of Scotland.
2nd Rifle Brigade: now the Rifles
1st Royal Irish Fusiliers: disbanded in 1922.
2nd Royal Dublin Fusiliers: disbanded in 1922.
Natal Volunteer Artillery
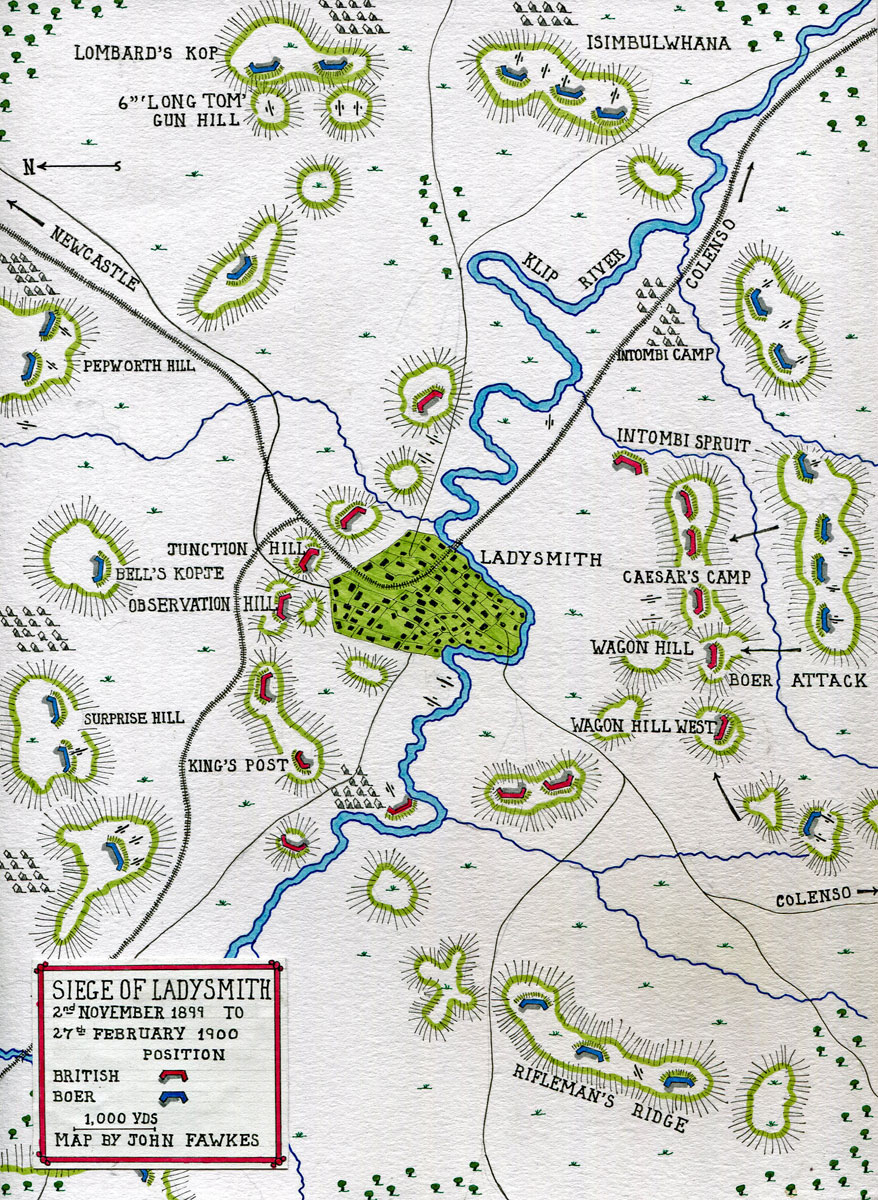
Map of the Siege of Ladysmith, 2nd November 1899 to 27th February 1900 in the Great Boer War: map by John Fawkes
Account of the Siege of Ladysmith:
The Boer War began on 11th October 1899 with the invasion of Natal by General Joubert’s Boer army of 35,000 Transvaalers and Orange Free Staters.
On his appointment as commander-in-chief, General Sir Redvers Buller urged that no British troops should be positioned further north than the Tugela River, until he arrived from England with the British Army Corps. Buller knew South Africa and the Boers and that the force commanded by White was insufficient to venture across the Tugela.
After the initial British successes of the Battles of Talana Hill and Elandslaagte, Buller was proved correct. White lost the Battle of Ladysmith and quickly found himself trapped by the advancing Boers.
On 2nd November 1899, the railway line was cut south of Ladysmith and White’s army was under siege in the town.
On the last train out were Major General French and his chief of staff, Major Douglas Haig, lying on the carriage floor amidst a hail of bullets, escaping to command the cavalry division with regiments arriving from Britain.
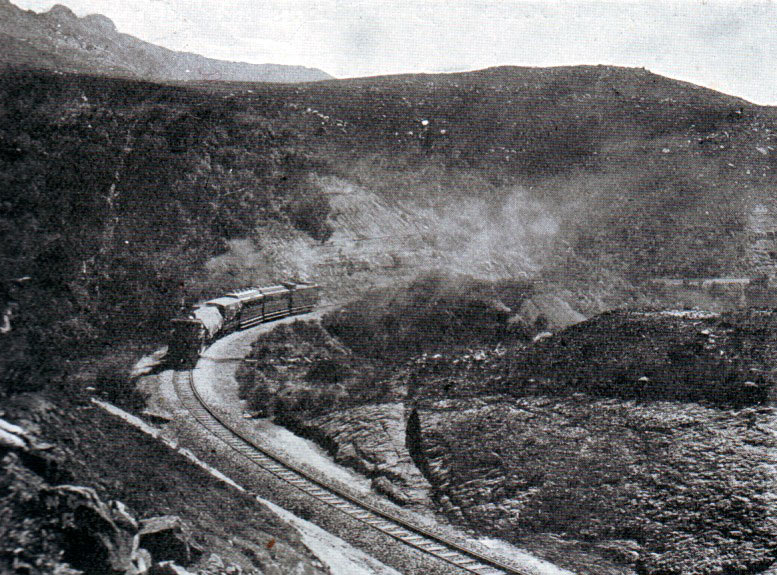
Last train out before the Siege of Ladysmith, 2nd November 1899 to 27th February 1900 in the Great Boer War
White was an elderly general, whose career had been forged in an earlier epoch. White had fought in the Indian Mutiny and won the Victoria Cross in the Second Afghan War. Semi-retirement beckoned with the Governorship of Gibraltar, when the South African crisis diverted him to Durban and pushed him back into the front line.
The warfare in Natal was beyond White’s experience and capability, requiring knowledge of the country, which White did not have. Fighting the well-armed Boers required active and accurate reconnaissance and intelligence. It required energy, hard work and resource and above all insight, initiative and determination, qualities White no longer possessed.
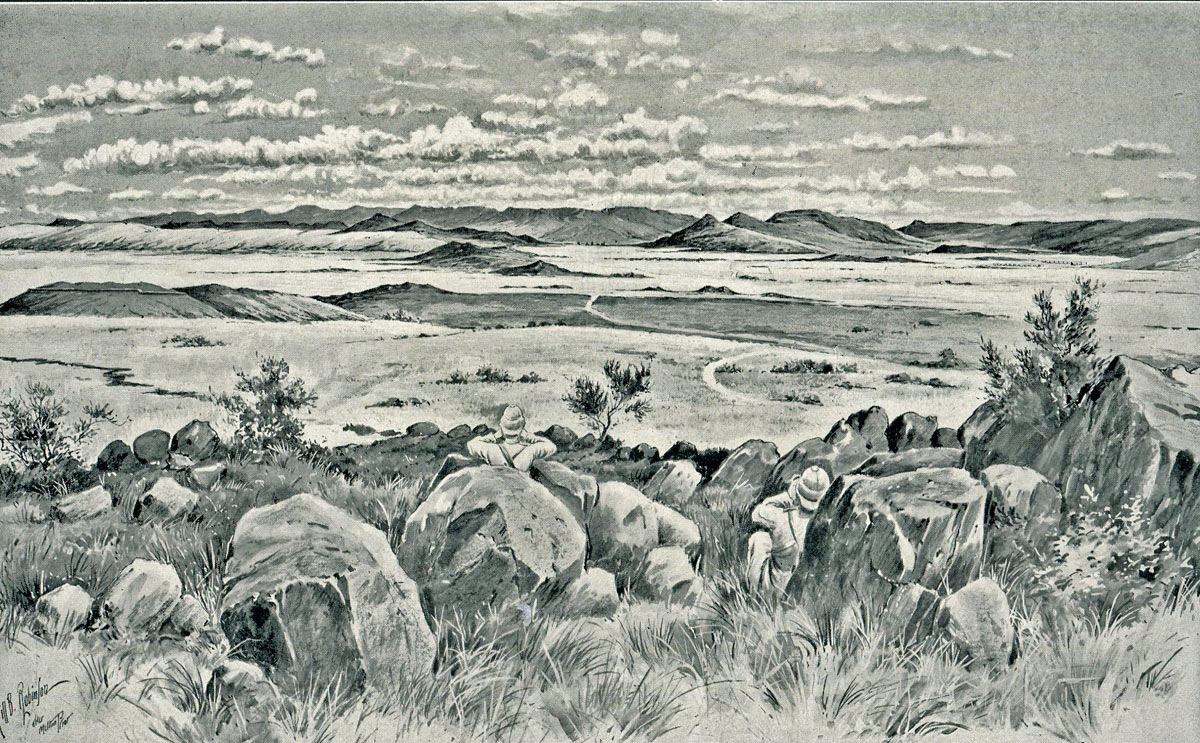
Observation Hill in Ladysmith: Siege of Ladysmith, 2nd November 1899 to 27th February 1900 in the Great Boer War: picture by Melton Prior
White knew that he should not permit his force to be pinned down in a useless minor township. He should have retreated precipitously to avoid being caught in Ladysmith. But he could not bring himself to abandon the stockpile of army supplies built up in the town.
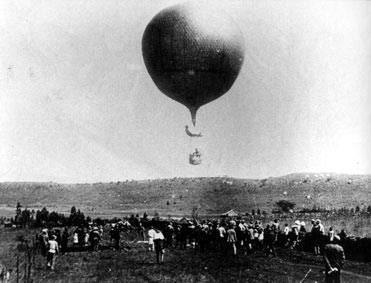
The Ladysmith Balloon: Siege of Ladysmith, 2nd November 1899 to 27th February 1900 in the Great Boer War
When Buller arrived in Cape Town with the British Army Corps, the expectation of him was that he would invade the Orange Free State at a point of his choosing. The strategic pendulum would then have swung firmly in Britain’s favour. White’s investment in Ladysmith, with Cecil Rhodes self-immurement in Kimberley, changed all that. Buller could not permit such a large force as White’s to fall into the hands of the Boers. He was forced to abandon any notion of invading the Free State for a slogging match across the Tugela to relieve Ladysmith.
The British in Ladysmith and in Kimberley and Mafeking were fortunate that the nature of the Boer commando made it an inappropriate instrument to conduct a siege. Discipline was voluntary and self-imposed. The Boer burgers had to be persuaded to adopt a course of action. They could not be ordered. The Boer was an ideal soldier for a defensive battle, which most of the main battles were for the Boer side. He was not appropriately armed for an assault, having no bayonet, which in the end was the only way to capture Ladysmith and the other towns.

King’s Post, 2nd Rifle Brigade: Siege of Ladysmith, 2nd November 1899 to 27th February 1900 in the Great Boer War: picture by Melton Prior
On 9th November 1899, the Boers stormed King’s Post on the northern perimeter of Ladysmith and Caesar’s Camp on the southern perimeter. After heavy fighting, the Boers were driven back.
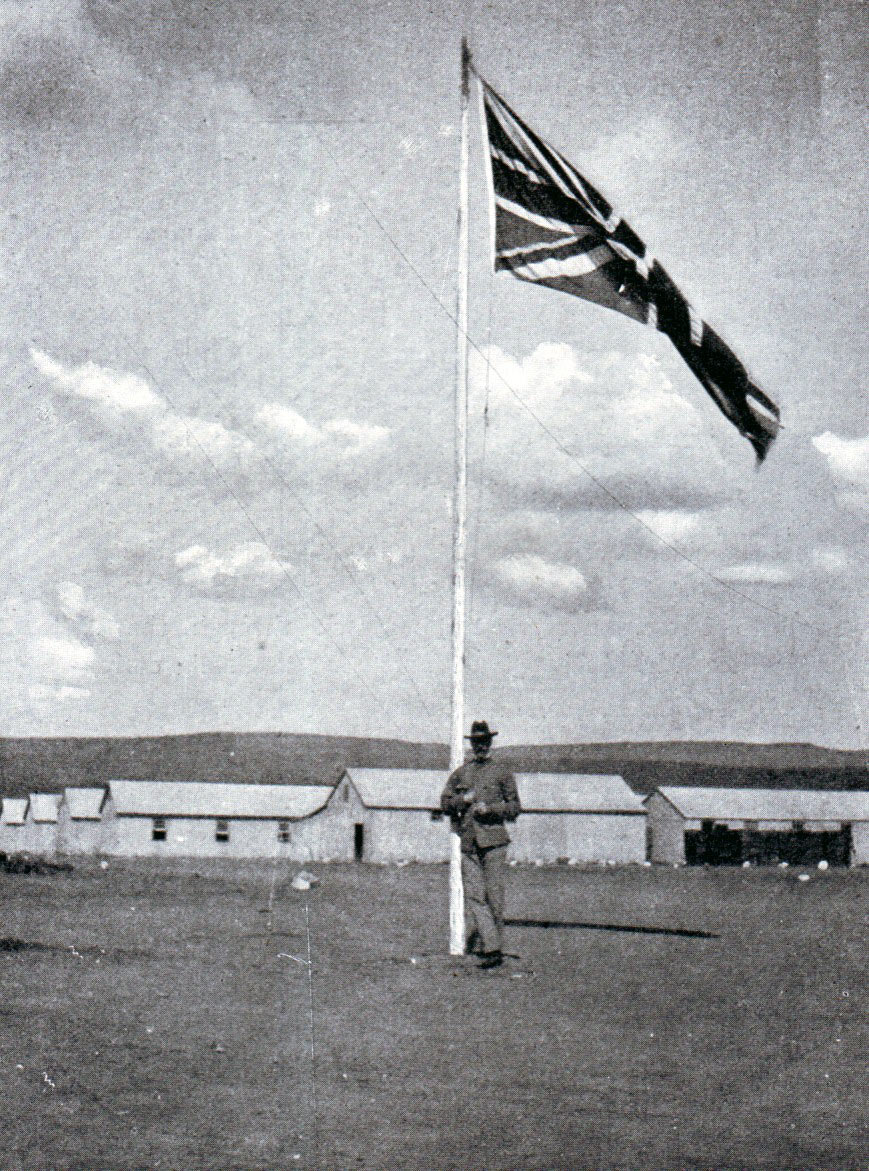
Union Jack flying over the town: Siege of Ladysmith, 2nd November 1899 to 27th February 1900 in the Great Boer War
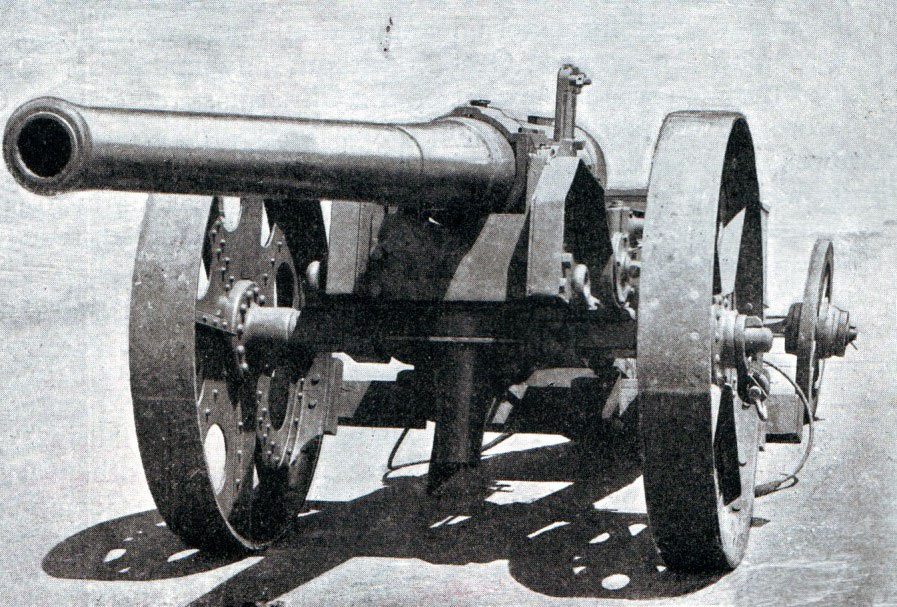
The siege quickly developed a monotonous routine, with artillery bombardments conducted by either side each day. Long Tom, the heavy Creusot gun, was the main Boer armament, while the Royal Navy gunners replied with a 4.7-inch gun.
By agreement with General Cronje, a camp was established at Intombi, on the outer south-eastern edge of the perimeter, for the civilian inhabitants of the town. The camp lay on the railway and throughout the siege trains took sickening civilians to its hospital. A condition laid down by Cronje was that once there, no one could return to the main town.
On 15th December 1899, General Buller attempted to force the Boer positions on the Tugela at the Battle of Colenso, losing convincingly. The Ladysmith garrison listened to the distant bombardment. At first it was thought that Buller had forced the Boer positions. The next day, the correct news came through to the town by way of a dispatch from Buller to White, explaining that the Natal Field Force had been repelled.
Further Buller stated to White that he did not consider his army was strong enough to force the line of the Tugela River to rescue the British garrison in Ladysmith and that White should consider firing away his ammunition and making terms with the Boers.
White and his officers took Buller to be recommending that they surrender to the Boers and indignantly rejected the suggestion.

Boer gun positioned to the south-west of Ladysmith: Siege of Ladysmith, 2nd November 1899 to 27th February 1900 in the Great Boer War
Buller sent a telegram making the same point to the government in London, receiving a sharp rebuke in reply, stating that there was no question of permitting the Ladysmith garrison to surrender.
Buller, after the relief, denied that he had meant that the garrison should surrender.
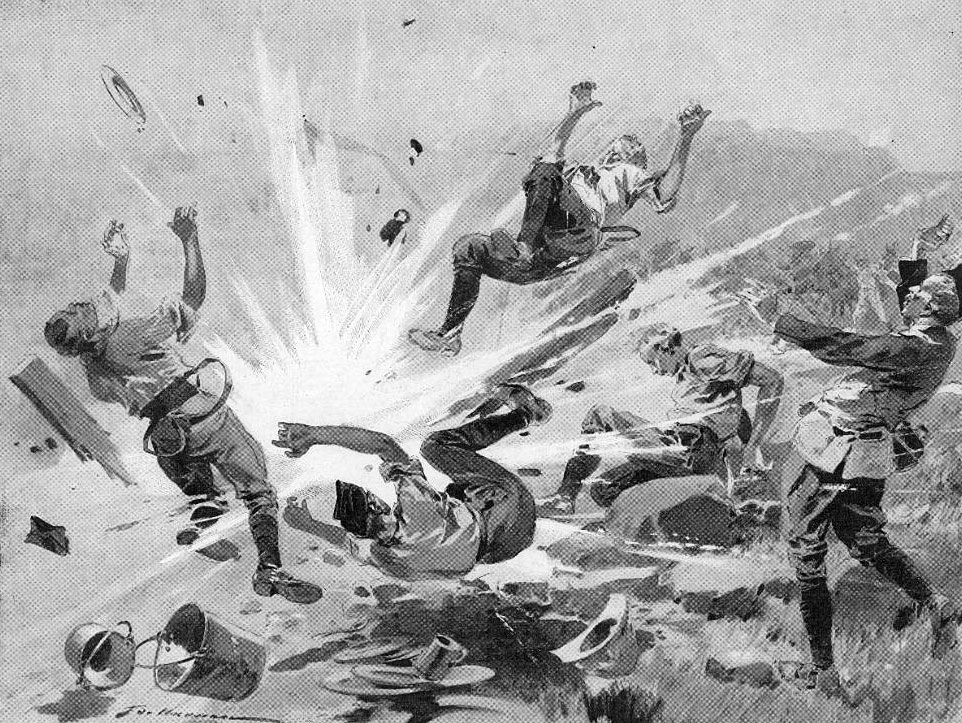
Boer shell exploding in the kitchen of the 18th Hussars: Siege of Ladysmith 2nd November 1899 to 27th February 1900 in the Great Boer War
As the extent of the defeat at Colenso sank in, the spirits of the Ladysmith garrison fell. Several of the senior officers were aware that, with the withdrawal of many of the Boers to reinforce Joubert’s lines on the Tugela, the British garrison heavily outnumbered the besiegers and yet almost nothing was done to incommode the Boers.
The Boer bombardments, particularly by their two 6-inch guns, were conducted at unpredictable times.
Royal Navy 4.7-inch Gun: Siege of Ladysmith, 2nd November 1899 to 27th February 1900 in the Great Boer War
On 24th November 1899, Long Tom caught a company of the King’s Liverpools massed in the open, inflicting 9 casualties, 5 of them killed.
On 22nd December 1899, Long Tom surprised the Gloucesters inflicting 17 casualties. A repeated target for the long-range Boer guns was the main Ladysmith Hospital.
On the night of 27th December 1899, Long Tom dropped a shell into the officers’ mess of the Devons on Junction Hill, killing and wounding a number of officers from various infantry regiments.
On New Year’s Day 1900, a British officer was killed by a shell landing in the middle of a cricket match, the dead officer being in the act of bowling.
The counter battery fire was conducted by the two naval 4.7-inch guns known as Lady Anne and Princess Victoria. For the garrison, the sound of British guns firing back maintained morale.
General White spent most of the siege in his headquarters building in the middle of the town, surrounded by his largely inactive staff. No proper continuous system of fortification or strong points was built. Nothing was done to harass the Boer besiegers. White attempted to maintain the myth that his command was a field force, but did nothing to justify that claim.

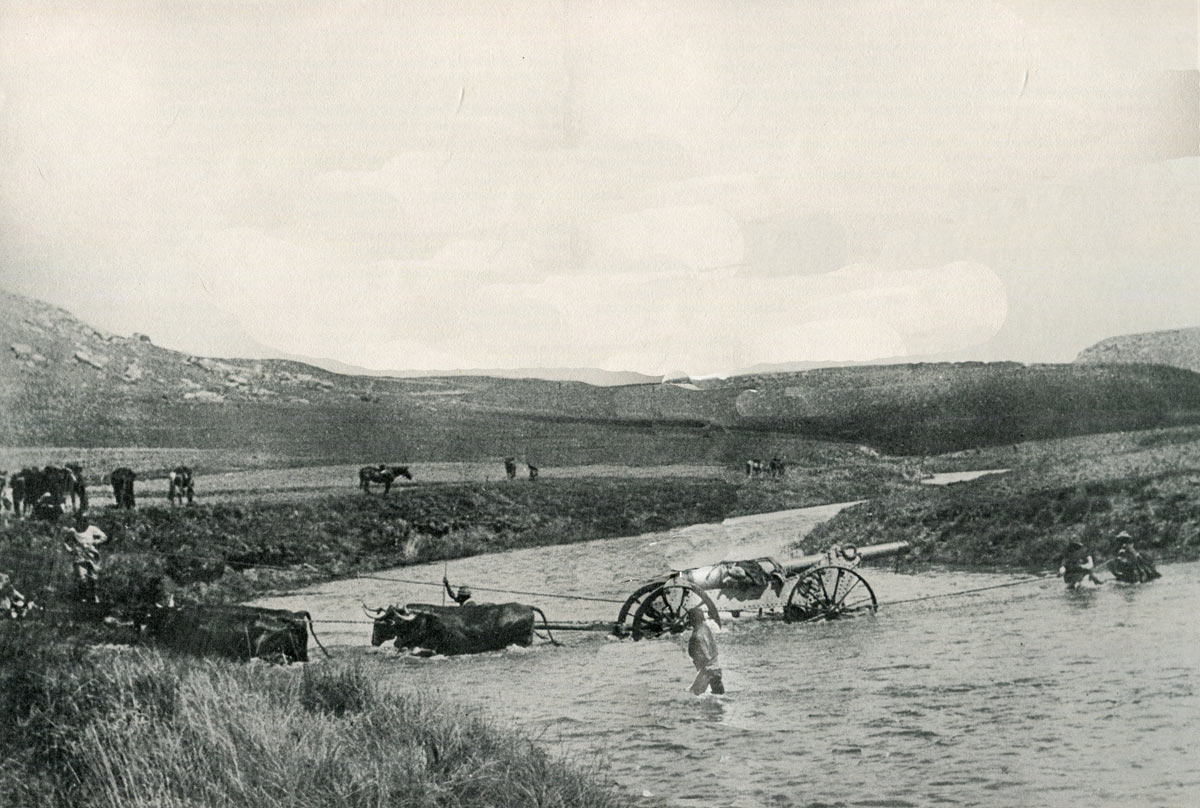
Royal Navy 4.7-inch guns crossing the Tugela River: Siege of Ladysmith, 2nd November 1899 to 27th February 1900 in the Great Boer War: picture by Joseph Finnemore
Colonel Knox, commanding the northern sector of the Ladysmith perimeter worked hard to fortify his lines. The other sectors were less well served.
On 8th December 1899, Colonel Rawlinson persuaded White to permit a raid on the Boer lines. A party of Imperial Light Horse and Natal Carabineers stormed Lombard’s Kop and destroyed two large Boer guns.
On 11th December 1899, the Rifles captured Surprise Hill, blowing up a Boer howitzer. This party had to fight its way out but the successes exhilarated the garrison. Denys Reitz was a member of the Boer corporalship that ambushed the retreating Rifles.
The top of Wagon Hill: Siege of Ladysmith, 2nd November 1899 to 27th February 1900 in the Great Boer War
Colonel Ian Hamilton, the commander in chief in the Dardanelles in 1915, performed less well with his southern sector, containing the vital Wagon Hill and Caesar’s Camp. Hamilton seems to have had little time for his responsibilities, preferring to stay with his depressive and inactive commander in the headquarters in the centre of Ladysmith.
President Kruger constantly urged the Boer leaders around Ladysmith to take the town by storm, a course of action they finally agreed to attempt.
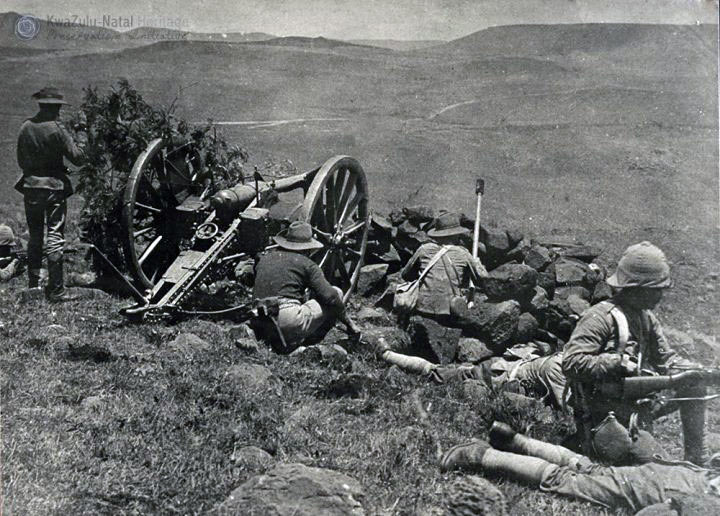
British gun and infantry picket at the Siege of Ladysmith, 2nd November 1899 to 27th February 1900 in the Great Boer War
On 6th January 1900, the Boers launched an attack on Ladysmith designed to overwhelm the garrison before the Boers transferred a substantial part of the investing force to the Tugela to help resist Buller’s advance.
Attacks were launched around the Ladysmith perimeter. Knox beat off the assault on his fortifications with little difficulty.

Boer attack on Caesar’s Camp on 6th January 1900: Siege of Ladysmith, 2nd November 1899 to 27th February 1900 in the Great Boer War: picture by W. Burton
The main Boer attack fell on the crescent shaped hill in the southern perimeter known as Caesar’s Camp, the western pinnacle of which was called Wagon Hill.
Due to the indolence of White and Hamilton, whose sector this was, the area was largely bereft of entrenchments. The Boers approached the brow of the hill in two columns. Finally challenged, the Boers rushed the British posts.
Boer attack on Wagon Hill: Siege of Ladysmith, 2nd November 1899 to 27th February 1900 in the Great Boer War
The troops on Wagon Hill were the King’s Royal Rifles, Gordon Highlanders and Imperial Light Horse, supported by a Hotchkiss gun. A confused fight took place in the dark.
Ian Hamilton brought up reinforcements of Gordon Highlanders, Rifle Brigade and the 21st and 53rd Field Batteries. Fierce fighting took place along Wagon Hill and in support of the beleaguered companies of Manchesters and Imperial Light Horse on Wagon Hill West and Caesar’s Camp. The Boers were eventually driven back by a renewed attack, reinforced by a dismounted squadron of 18th Hussars.
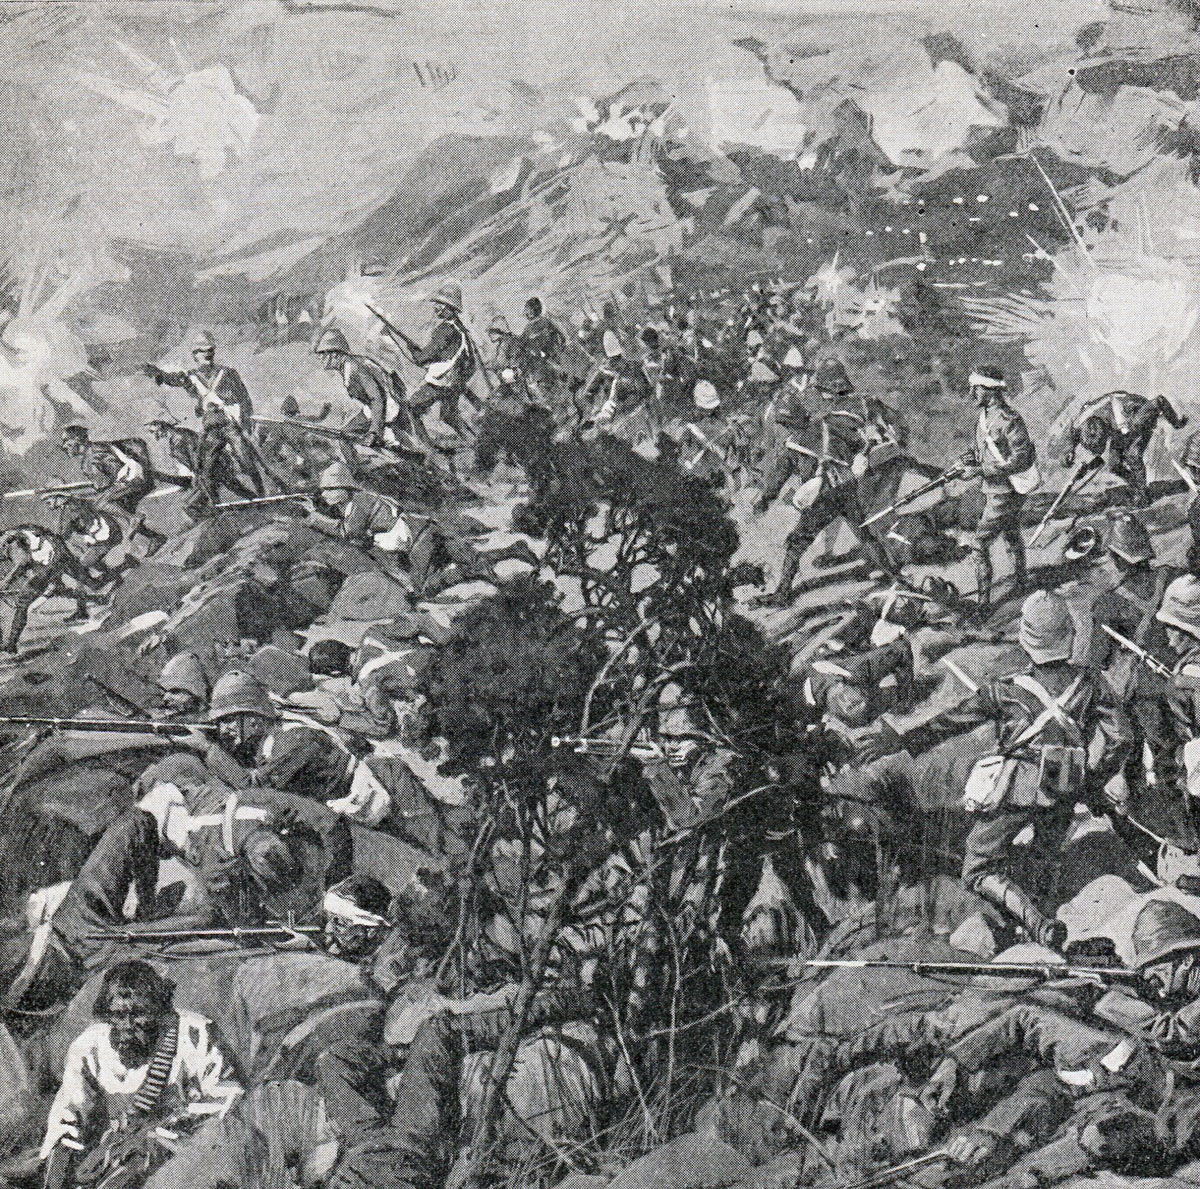
The final movement was conducted by companies of the Devons, who charged the crest of the hill and drove the Boers back, albeit with some loss.

Devons attacking at Wagon Hill: Siege of Ladysmith, 2nd November 1899 to 27th February 1900 in the Great Boer War: picture by Richard Caton Woodville
An old Boer was found lying on the hillside with a Martini Henry rifle marked ‘58th Regiment’ taken from the British during the First Boer War at Laing’s Nek or Majuba Hill.
The garrison did nothing further to assist Buller’s advance to relieve Ladysmith, other than listen anxiously to the sounds of the fighting on Spion Kop.
During January 1900, supplies in Ladysmith became seriously short. The remaining cavalry horses were shot for food.
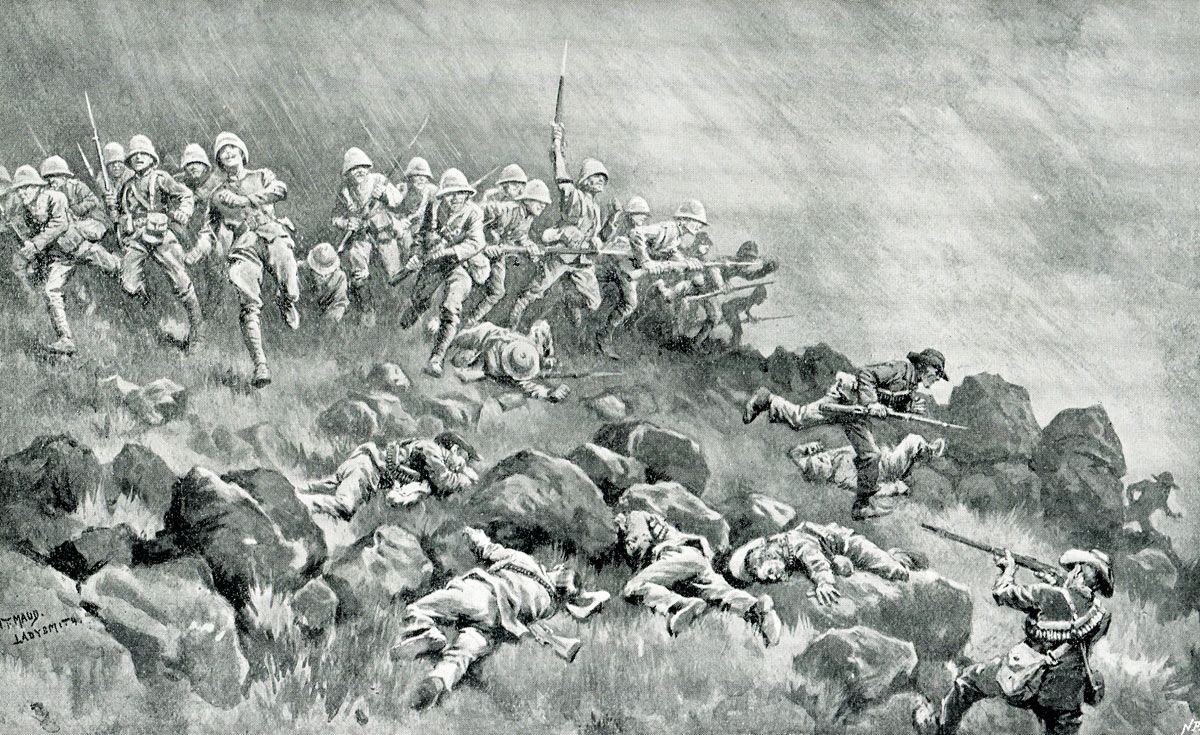
Devons clearing the top of Wagon Hill: Siege of Ladysmith, 2nd November 1899 to 27th February 1900 in the Great Boer War: picture by W.T. Maud
Between 20th and 27th February 1900, Buller fought his final and successful battle at Pieters, forcing the Boer positions covering the Tugela River crossings.
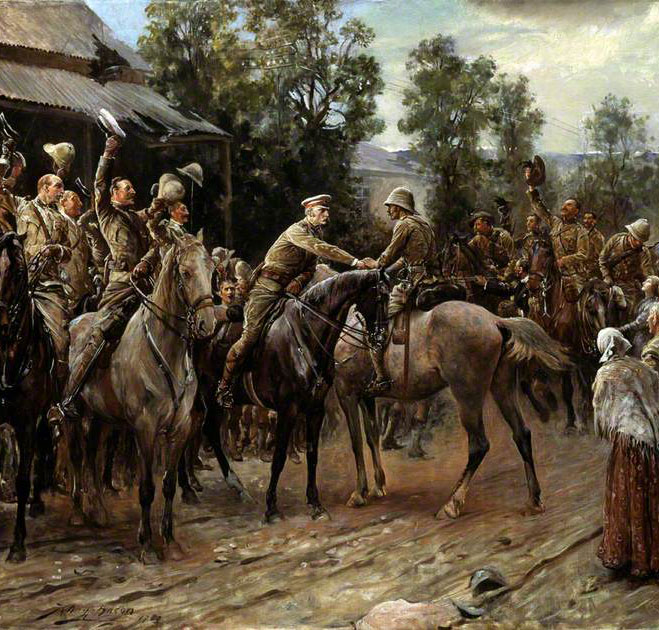
On 27th February 1900, the British pickets on Wagon Hill saw the Boer besiegers trek away across the veldt. Soon afterwards, Buller’s troops marched into Ladysmith. The siege was over.
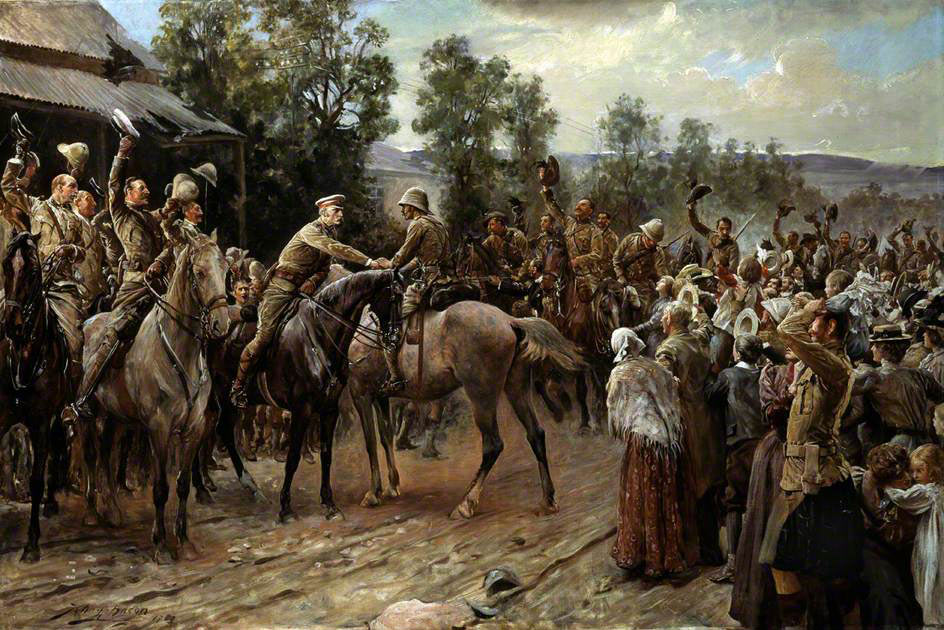
General Sir George White greets General Buller on the relief of Ladysmith: Siege of Ladysmith, 2nd November 1899 to 27th February 1900 in the Great Boer War: picture by John Henry Frederick Bacon
Casualties in the Siege of Ladysmith:
The British suffered around 900 men killed and wounded in the Siege of Ladysmith with another 800 men captured by the Boers.
Boer casualties are not known.
Follow-up to the Siege of Ladysmith:
Follow-up to the Siege of Ladysmith:
Once in Ladysmith Buller made no effort to pursue the Boers who withdrew from Natal. The war in the colony was over.
Battle Honours and Medal Clasps:
‘Defence of Ladysmith’ is a battle honour for the regular British regiments in the garrison.
‘Relief of Ladysmith’ is a battle honour for the regular British regiments in Buller’s relieving army.
The Ladysmith garrison did not know whether they were ‘rogues’ or ‘heroes’ for spending the war in the town. A clasp was issued for the Queen’s South Africa medal ‘Defence of Ladysmith’. Another clasp recorded the ‘Relief of Ladysmith’.
Anecdotes and traditions from the Siege of Ladysmith:
-

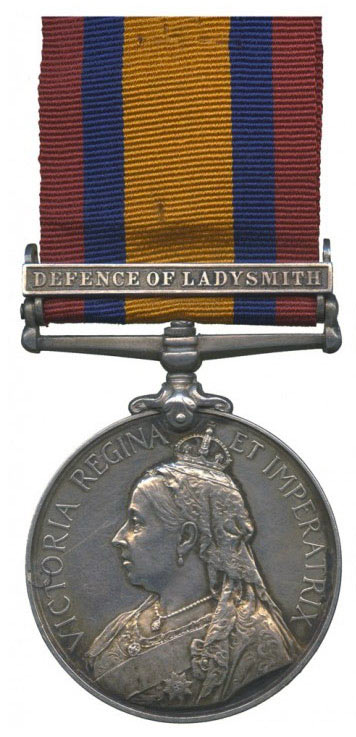
Queen’s South Africa Medal with clasp ‘Defence of Ladysmith’
The Ladysmith garrison did not know whether they were ‘rogues’ or ‘heroes’ for spending the war in the town. A clasp was issued for the Queen’s South Africa medal ‘Defence of Ladysmith’. Another clasp recorded the ‘Relief of Ladysmith’.
- Colonel Knox based his fortifications on the northern sector of the Ladysmith perimeter on an extensive knowledge of the Siege of Plevna. The defence of Plevna, a town in Bulgaria, by the Turkish army under Osman Pasha during the Russo-Turkish War of 1877 attracted the admiration of Western Europe, through the determination of the Turks to withstand Russian attack. The fortifications built in Plevna engaged the interest of western armies. An account of the siege and capture of Plevna written by a young half English officer, Frederick Von Herbert, who held a junior command in the Turkish Army during the siege, was widely read in Britain and elsewhere. The Plevna fortifications were held out as a fine example of what could be achieved by a resourceful and determined force. Von Herbert served in the British Army in the Great Boer War in Cape Colony.

Capture of the Grivitsa Redoubt in the Siege of Plevna in 1877: picture by Nikolai Dmitriev-Orenburgsky
References for the Siege of Ladysmith:
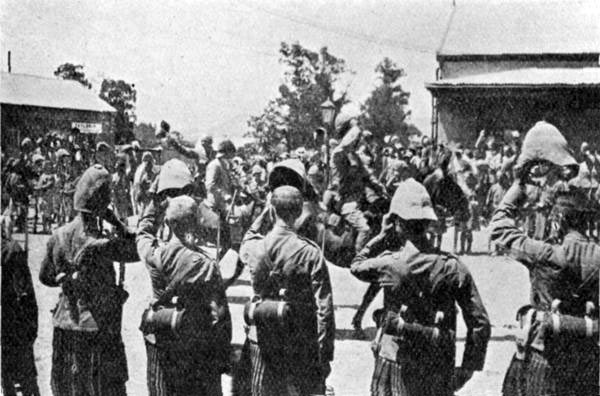
Gordon Highlanders cheering the Dublin Fusiliers of Buller’s relieving army: Siege of Ladysmith, 2nd November 1899 to 27th February 1900 in the Great Boer War
The Boer War is widely covered. A cross section of interesting volumes would be:
The Great Boer War by Sir Arthur Conan Doyle
Goodbye Dolly Gray by Rayne Kruger
The Boer War by Thomas Pakenham
South Africa and the Transvaal War by Louis Creswicke (6 highly partisan volumes)
Books solely on the fighting in Natal:
Buller’s Campaign by Julian Symons
Ladysmith by Ruari Chisholm
For a view of the fighting in Natal from the Boer perspective:
Commando by Denys Reitz.
71. Podcast on the Siege of Ladysmith: The siege in Natal during the Boer War that ensnared a British army from 2ndNovember 1899 to 27thFebruary1900, but blocked the Boer invasion of the colony: John Mackenzie’s britishbattles.com podcasts
The previous battle of the Great Boer War is the Siege of Kimberley
The next battle of the British Battles sequence is the Black Mountain Expedition 1888