Methuen’s disastrous defeat at the hands of Cronje’s Boers on 11th December 1899; the Highland Brigade suffering severe loss: the second battle of ‘Black Week’
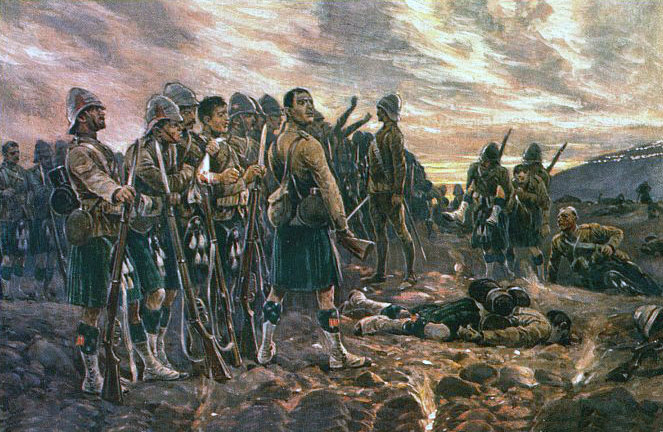
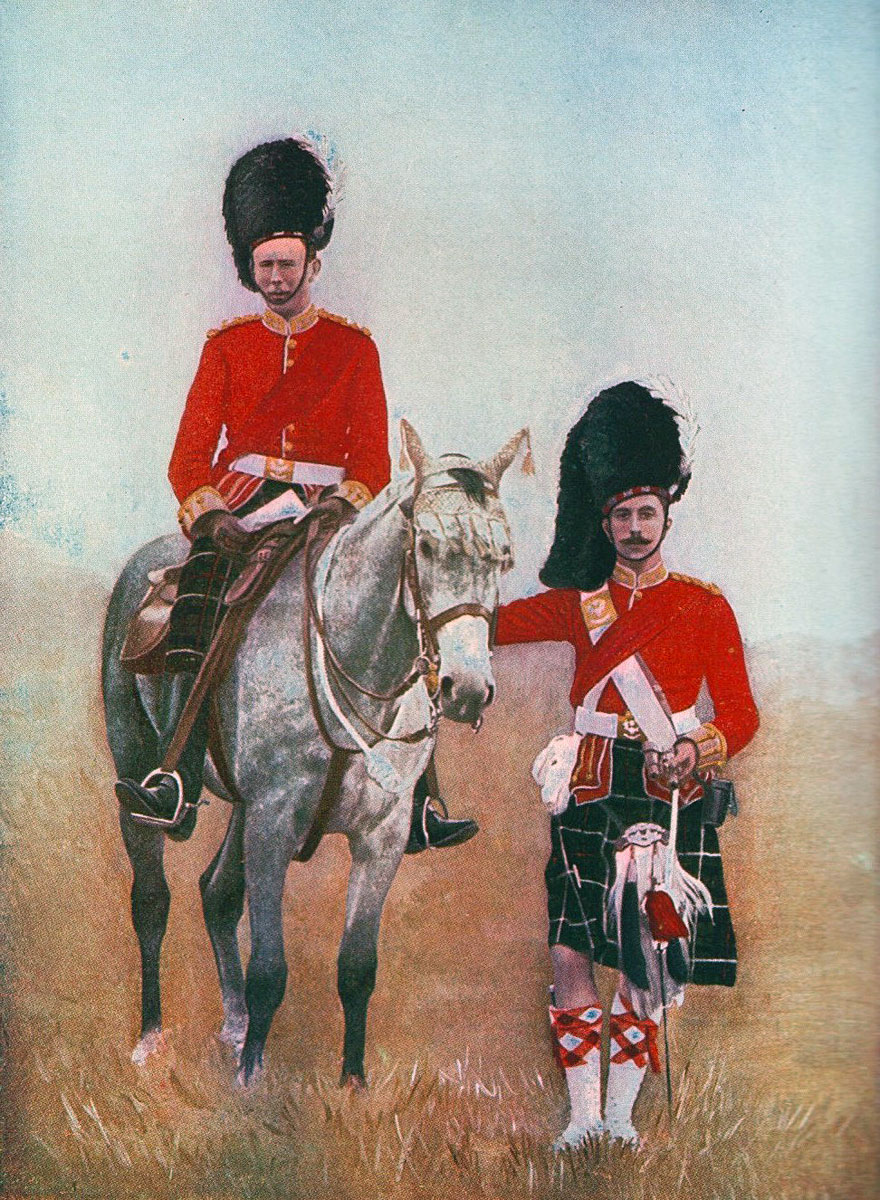
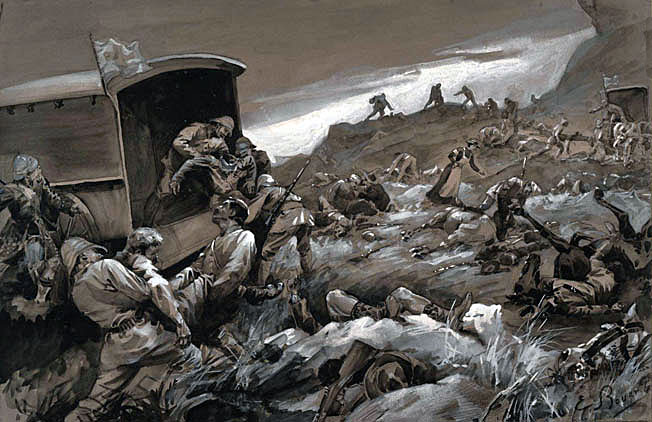
Argyll and Sutherland Highlanders after their heavy casualties as part of the Highland Brigade at the Battle of Magersfontein on 11th December 1899 in the Boer War: picture by Richard Caton Woodville
64 . Podcast on the Battle of Magersfontein: Lord Methuen’s disastrous defeat at the hands of Cronje’s Boers on 11th December 1899 in the Boer War; the Highland Brigade suffering severe loss: the second battle of ‘Black Week’: John Mackenzie’s britishbattles.com podcasts
The previous battle in the Boer War is the Battle of Stormberg
The next battle in the Boer War is the Battle of Colenso
Battle: Magersfontein.
War: The Boer War.
Date: 11th December 1899.
Argyll and Sutherland Highlanders: the regiment’s 1st Battalion fought at the Battle of Magersfontein on 11th December 1899 in General Wauchope’s Highland Brigade in the Boer War
Place: 6 miles north east of the Modder River in the North
West of Cape Colony near the Transvaal border in South Africa.
Combatants: British against the Boers.
Generals: Lieutenant General Lord Methuen against General Cronje and General De la Rey.
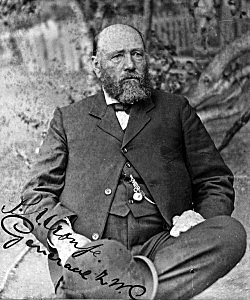
General Piet Cronje the Boer commander at the Battle of Magersfontein on 11th December 1899 in the Boer War
Lieutenant General Lord Methuen British commander at the Battle of Magersfontein on 11th December 1899 in the Boer War
Size of the armies: 14,000 British against 10,000 Boers.
Uniforms, arms and equipment: The Boer War was a serious jolt for the British Army. At the outbreak of the war British tactics were appropriate for the use of single shot firearms, fired in volleys controlled by company and battalion officers; the troops fighting in close order. The need for tight formations had been emphasised time and again in colonial fighting. In the Zulu and Sudan Wars overwhelming enemy numbers armed principally with stabbing weapons were kept at a distance by such tactics, but, as at Isandlwana, would overrun a loosely formed force. These tactics had to be entirely rethought in battle against the Boers armed with modern weapons.
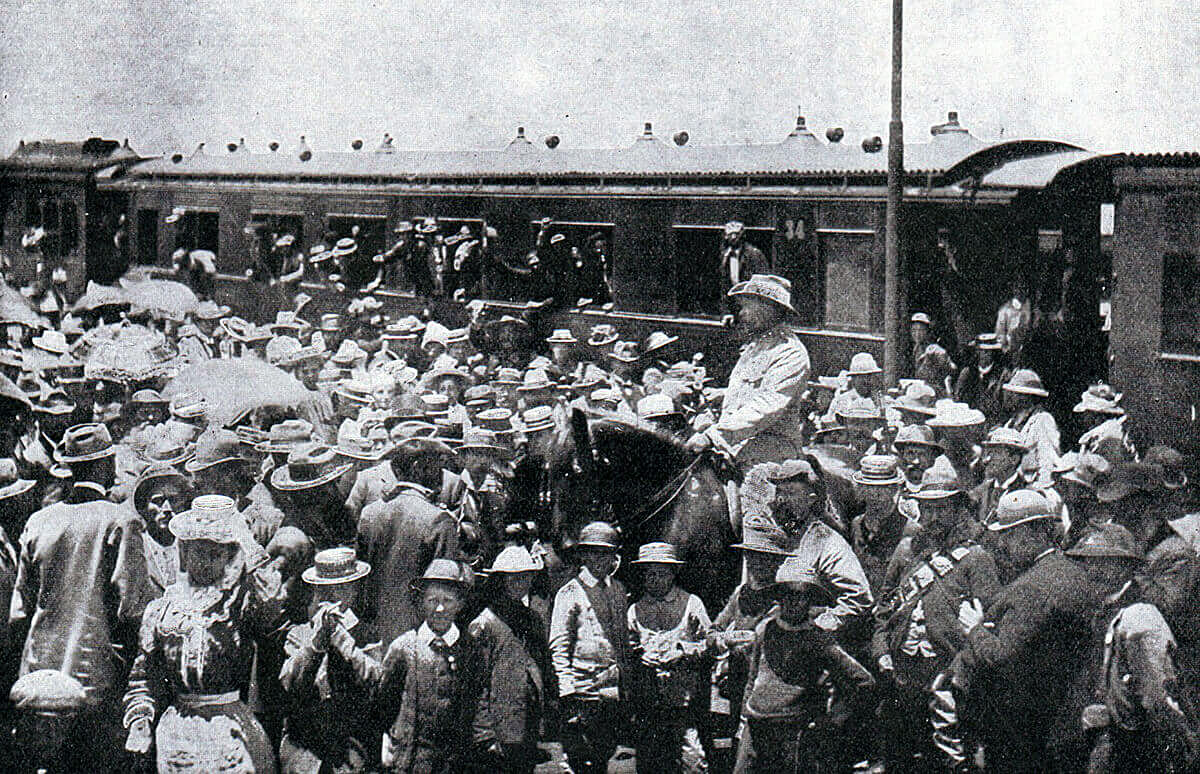
Boers leaving Pretoria for the front during the Boer War: Battle of Magersfontein on 11th December 1899 in the Boer War
The Boer War was fought between the two independent Boer republics in Southern Africa, the Transvaal and the Orange Free State and Great Britain.
The Boer republics began the war in October 1899 in an attempt to assert their independence from the encircling and increasingly dictatorial British colonial authorities.
In the months before hostilities the Boer commandant general, General Joubert, bought 30,000 Mauser magazine rifles, firing smokeless ammunition, and a number of modern field guns and automatic weapons from the German armaments manufacturer Krupp, the French firm Creusot and the British company Maxim. Unfortunately for the Boers they elected to buy high explosive ammunition for their new field guns. The war was to show that high explosive was largely ineffective in the field, unless rounds landed on rocky terrain and splintered the rock. The British artillery relied upon air-bursting shrapnel which was highly effective against infantry in open country.
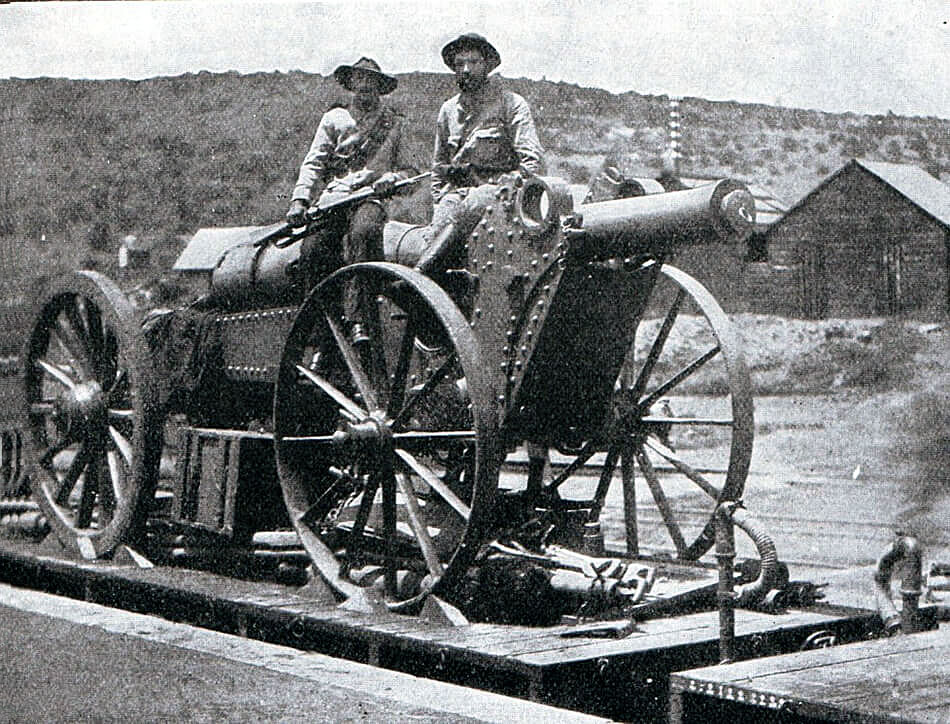
Boer Creusot 15 cm (6 inch) field gun, one of the guns used at the Battle of Magersfontein on 11th December 1899 in the Boer War
Once the war was under way the arms markets of Europe were no longer open to the Boers, due to the British naval blockade, and the error in ammunition selection could not be remedied.
The commandoes, without formal discipline, welded into a fighting force through a strong sense of community and dislike for the British. Field Cornets led burghers by personal influence not through any military code. The Boers did not adopt military formation in battle, instinctively fighting from whatever cover there might be. Most Boers were countrymen, running their farms from the back of a pony with a rifle in one hand. These rural Boers brought a life time of marksmanship to the war, an important advantage further exploited by Joubert’s consignment of smokeless magazine rifles. Viljoen is said to have coined the aphorism “Through God and the Mauser”. With strong field craft skills and high mobility the Boers were natural mounted infantry. The urban burghers and foreign volunteers readily adopted the fighting methods of the rest of the army.
Boers lining a trench of the type used at the Battle of Magersfontein on 11th December 1899 in the Boer War
Other than in the regular uniformed Staats Artillery and police units, the Boers wore their every day civilian clothes on campaign.
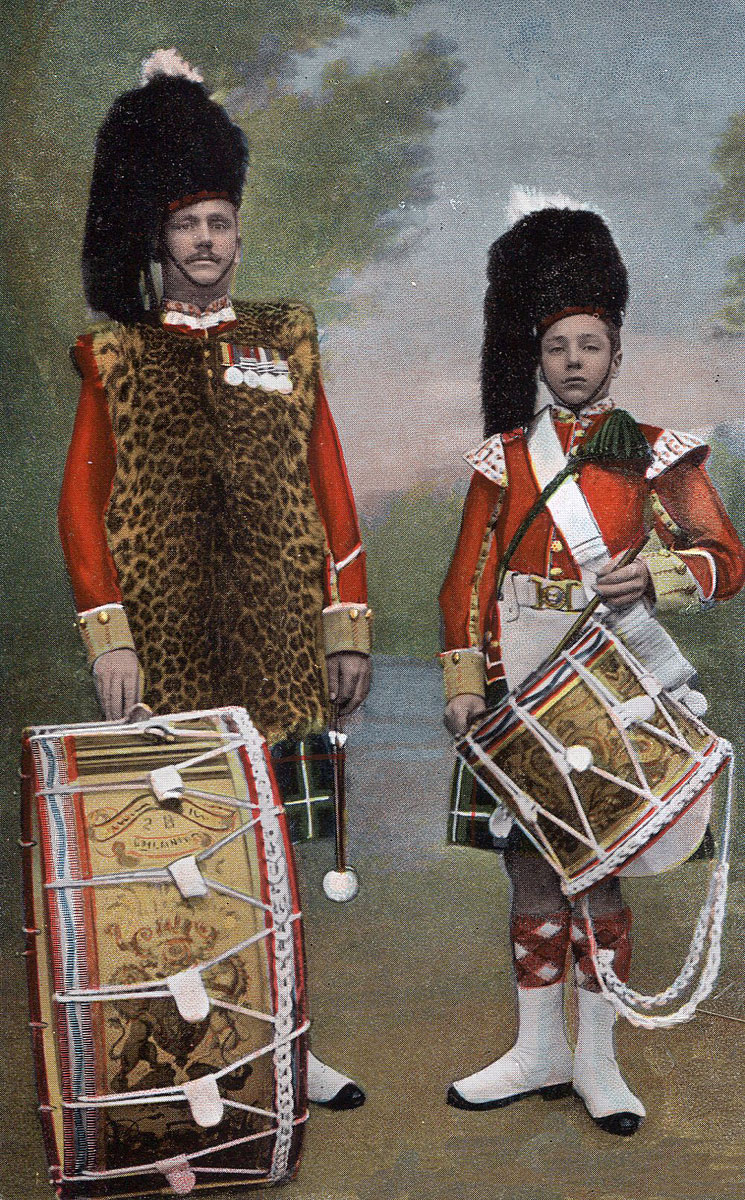
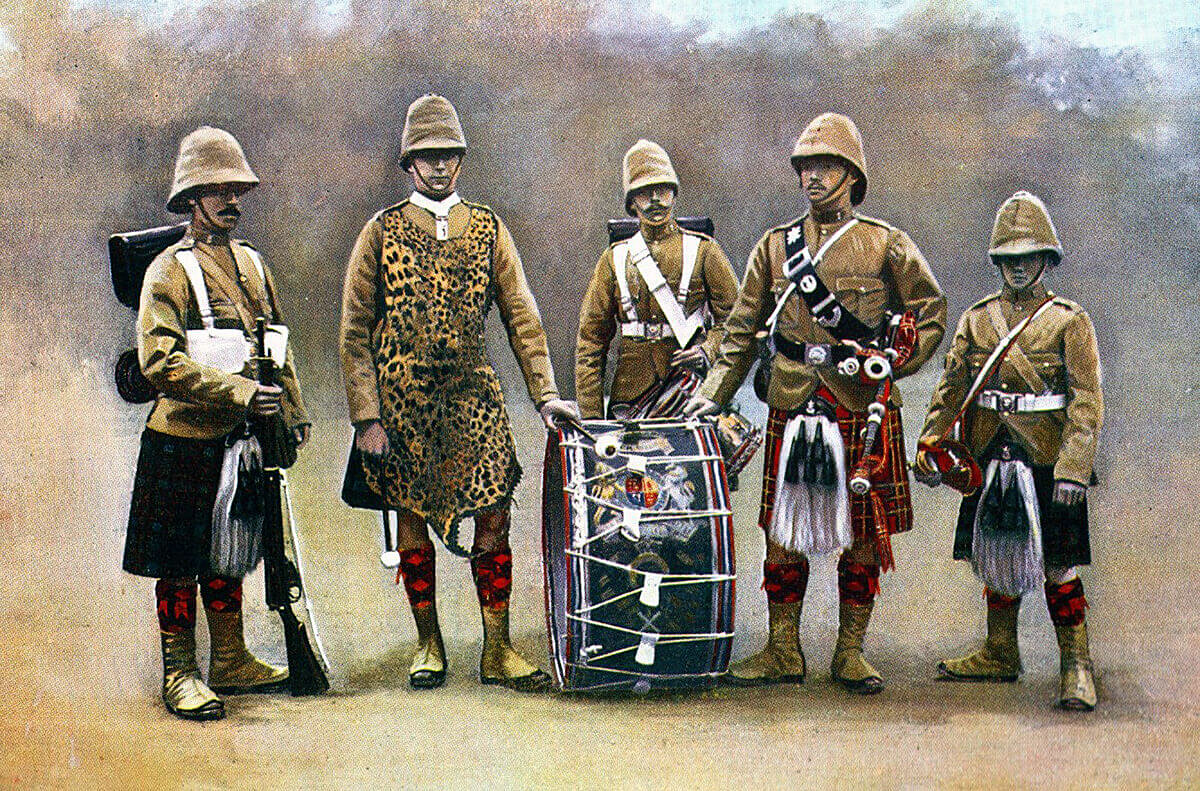
Drummers of the Seaforth Highlanders: the regiment’s 2nd Battalion fought at the Battle of Magersfontein on 11th December 1899 in General Wauchope’s Highland Brigade in the Boer War
After the first month the Boers lost their numerical superiority, spending the rest of the formal war on the defensive against British forces that regularly outnumbered them.
British tactics, developed on the North-West Frontier of India, Zululand, the Sudan and in other colonial wars against badly armed tribesmen, when used at Modder River, Magersfontein, Colenso and Spion Kop were inappropriate for winning battles against entrenched troops armed with modern magazine rifles. Every British commander made the same mistake; Buller; Methuen, Roberts and Kitchener (Elandslaagte was a notable exception where Hamilton specifically directed his infantry to keep an open formation). When General Kelly-Kenny attempted to winkle Cronje’s commandoes out of their riverside entrenchments at Paardeburg using his artillery, Kitchener intervened and insisted on a battle of infantry assaults, with the same disastrous consequences as earlier in the war.
Some of the most successful British troops were the non-regular regiments; the Imperial Light Horse, City Imperial Volunteers, the South Africans, Canadians, Australians and New Zealanders, who more easily broke from the habit of earlier British colonial warfare, using their horses for transport rather than the charge, advancing by fire and manoeuvre in loose formations and making use of cover, rather than the formal advance into a storm of Mauser bullets.
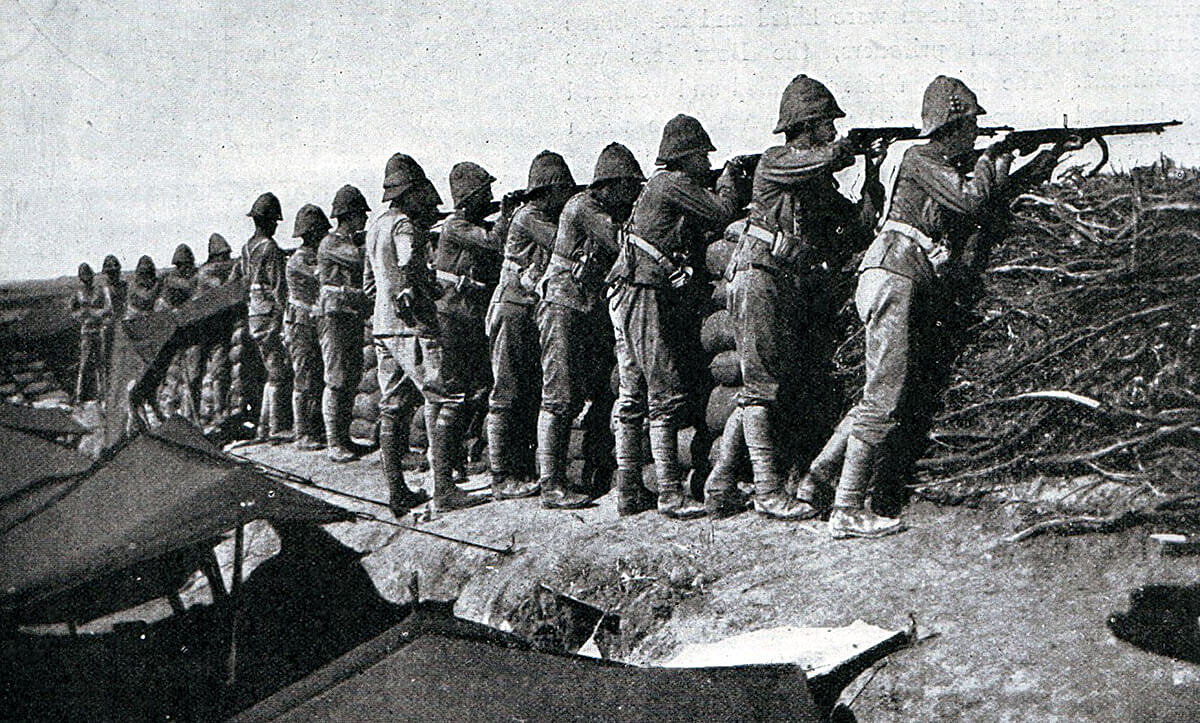
Grenadier Guards manning an emplacement at Modder River after the Battle of Magersfontein on 11th December 1899 in the Boer War
War Aims:
Having started the hostilities the Boers found themselves without an achievable war aim. The only strategy that might have had a chance of success would have been to invade and occupy the whole of Cape Colony, Natal and the other neighbouring British colonies. The two Boer republics did not have the resources to carry out such an extensive operation. In any case they could not have prevented a British sea landing to retake these areas.
Once war was declared the Boers invaded and occupied Natal as far as the Tugela River, but with Ladysmith holding out in their rear. The Orange Free State government was not prepared to allow its forces to advance further south in Natal. In Cape Colony some of the citizens of Boer origins joined their brothers from the two Republics but most did not.
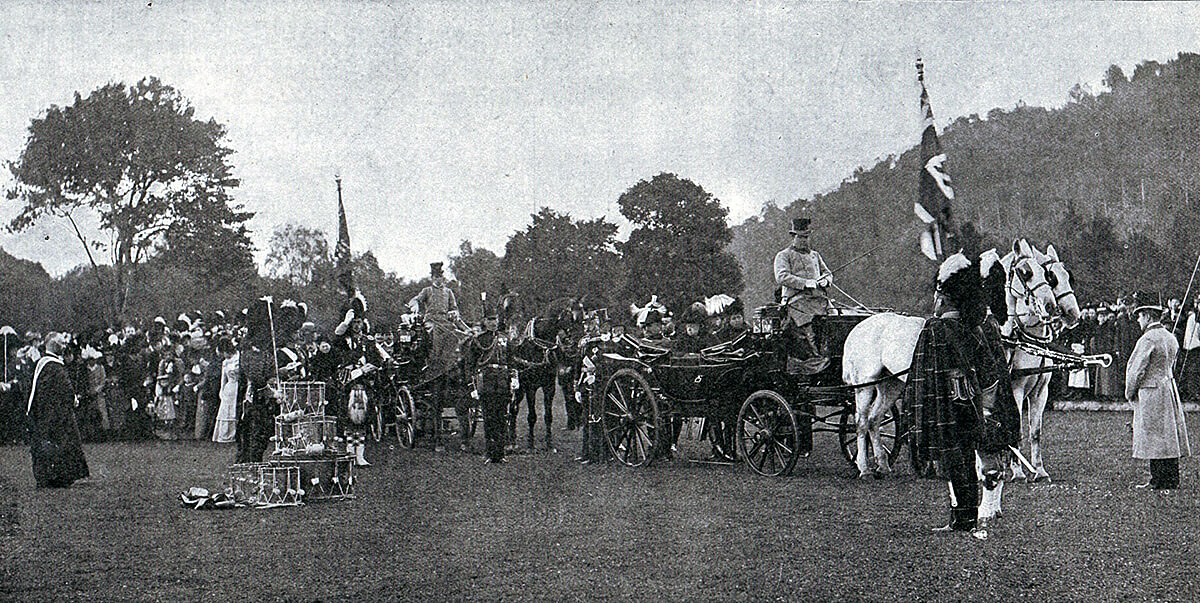
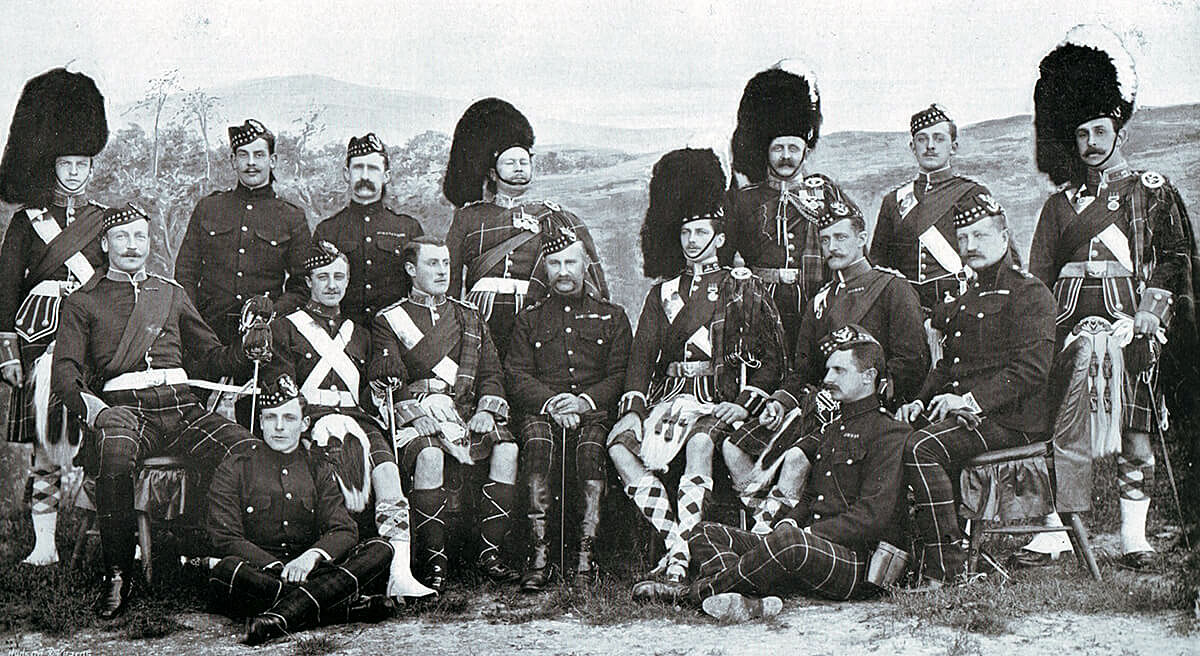
Queen Victoria presenting new colours to 2nd Seaforths at Balmoral in September 1899. The Battalion fought in the Highland Brigade at the Battle of Magersfontein on 11th December 1899 in the Boer War, suffering significant casualties
The only other offensive operations the Boers carried out were to besiege Mafeking in the north and Kimberley further south on the Cape Colony border. Both sieges were unsuccessful. Some limited incursion was carried out into the central area of Cape Colony up to the area around Stormberg.
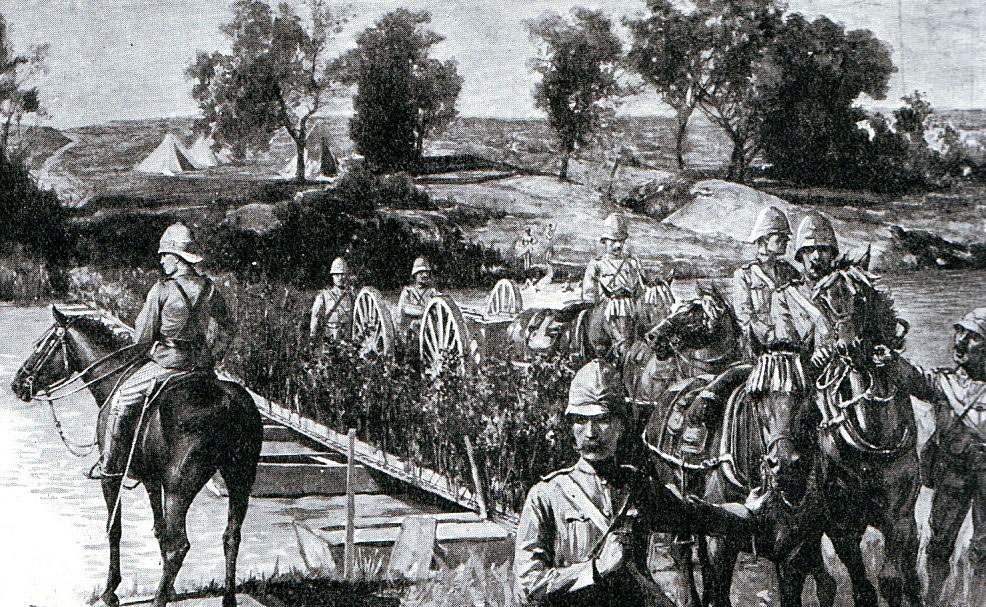
British howitzer battery crossing the pontoon bridge over the Modder River before the Battle of Magersfontein on 11th December 1899 in the Boer War
The major difficulty for the Boer armies was that although competent in defence, digging field fortifications and using their magazine rifles to great effect to defend them, the Boers lacked an effective offensive capability.
The absence of formal military discipline made it difficult for the Boer commanders to devise strategies they could rely on their troops to carry through. As the British built up their armies and began to advance defeat for the Boers became inevitable.
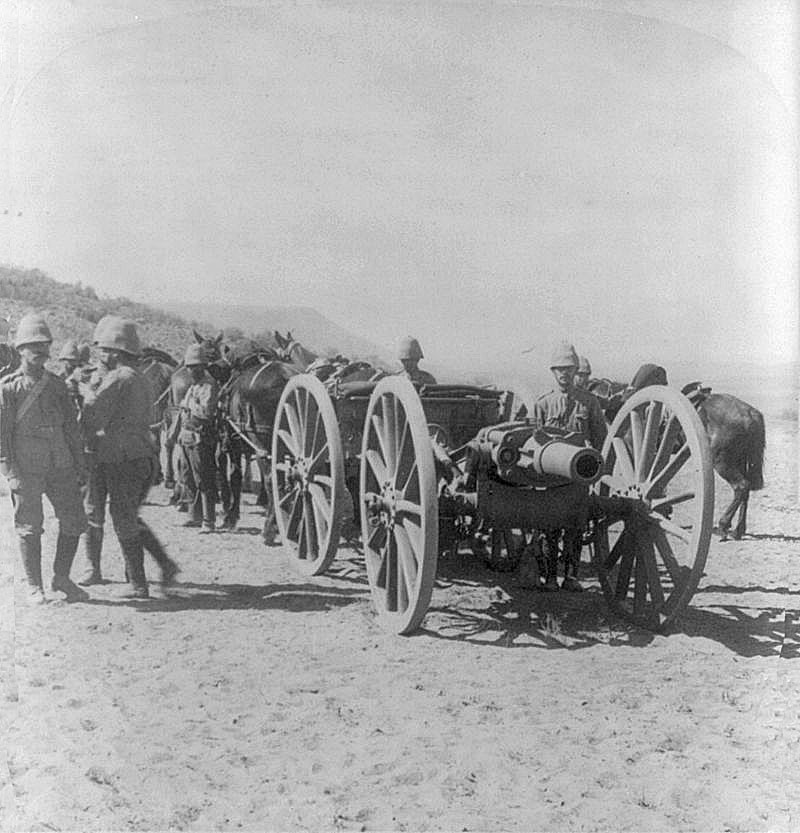
British 5 inch BL howitzer of the type used at the Battle of Magersfontein on 11th December 1899 in the Boer War
The Boer armies suffered from a wide variation in competence and commitment. The general belief was that the Transvaalers were more resilient and determined fighters than the Free Staters. The younger commanders tended to be more resourceful and aggressive and felt handicapped by the older more senior commanders.
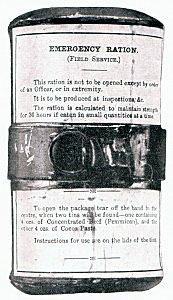
British emergency ration pack used in the Boer War
Uniform: The British regiments made an uncertain change into khaki uniforms in the years preceding the Boer War, with the topee helmet as tropical headgear. Highland regiments in Natal devised aprons to conceal coloured kilts and sporrans. By the end of the war the uniform of choice was a slouch hat, drab tunic and trousers; the danger of shiny buttons and too ostentatious emblems of rank was emphasised in several engagements with disproportionately high officer casualties.
The British infantry were armed with the Lee Metford magazine rifle firing 10 rounds, but no training regime had been established to take advantage of the accuracy and speed of fire of the weapon. Personal skills such as scouting and field craft were little taught. The idea of fire and movement was largely unknown, many regiments still going into action in close order. Notoriously General Hart insisted that his Irish Brigade fight shoulder to shoulder as if on parade in Aldershot. Short of regular troops, Britain engaged volunteer forces from Britain, Canada, Australia and New Zealand who brought new ideas and more imaginative formations to the battlefield.
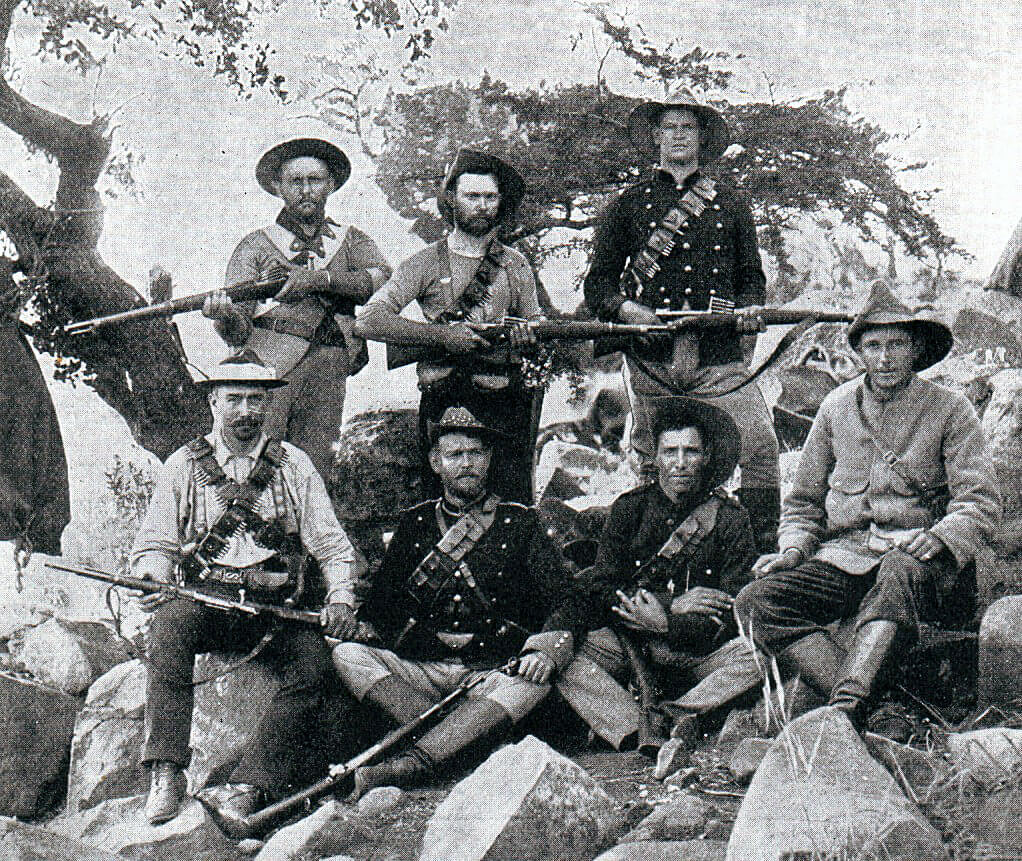
Boers with Mauser rifles bought from Germany: Battle of Magersfontein on 11th December 1899 in the Boer War
The British regular troops lacked imagination and resource. Routine procedures such as effective scouting and camp protection were often neglected. The war was littered with incidents in which British contingents became lost or were ambushed often unnecessarily and forced to surrender. The war was followed by a complete re-organisation of the British Army, with emphasis placed on personal weapon skills and fire and movement using cover.
The British artillery was a powerful force in the field, underused by commanders with little training in the use of modern guns in battle. Pakenham cites Pieters as being the battle at which a British commander, surprisingly Buller, developed a modern form of battlefield tactics: heavy artillery bombardments co-ordinated to permit the infantry to advance under their protection. It was the only occasion that Buller showed any real generalship and the short inspiration quickly died.
The Royal Field Artillery fought with 15 pounder guns; the Royal Horse Artillery with 12 pounders and the Royal Garrison Artillery batteries with 5 inch howitzers. The Royal Navy provided heavy field artillery with a number of 4.7 inch naval guns mounted on field carriages devised by Captain Percy Scott of HMS Terrible and the iconic long 12 pounders, seen in the Royal Navy gun competitions at the Royal Tournament.
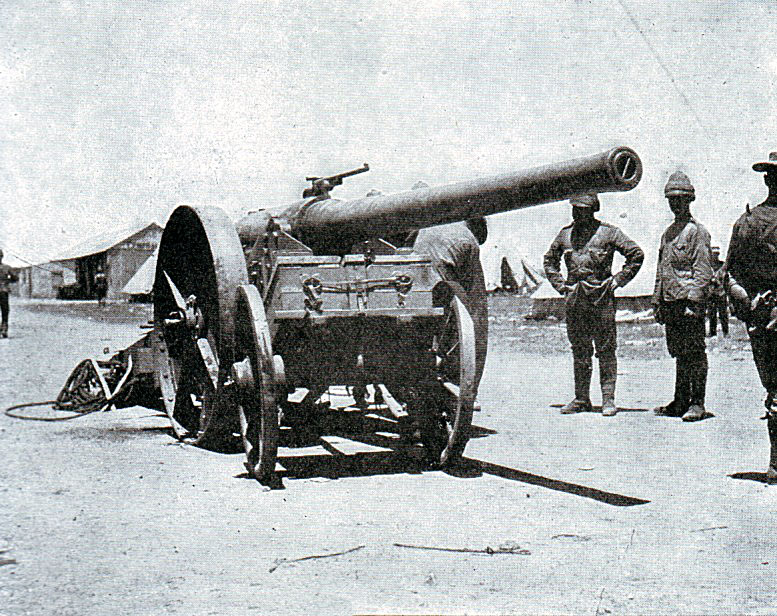
Naval 4.7 inch gun known as ‘Joe Chamberlain’ used at the Battle of Magersfontein on 10th and 11th December 1899 in the Boer War
Automatic weapons were used by the British often mounted on special carriages accompanying the mounted infantry or cavalry, although several of the infantry battalions possessed a maxim machine gun.
Winner: The Boers.
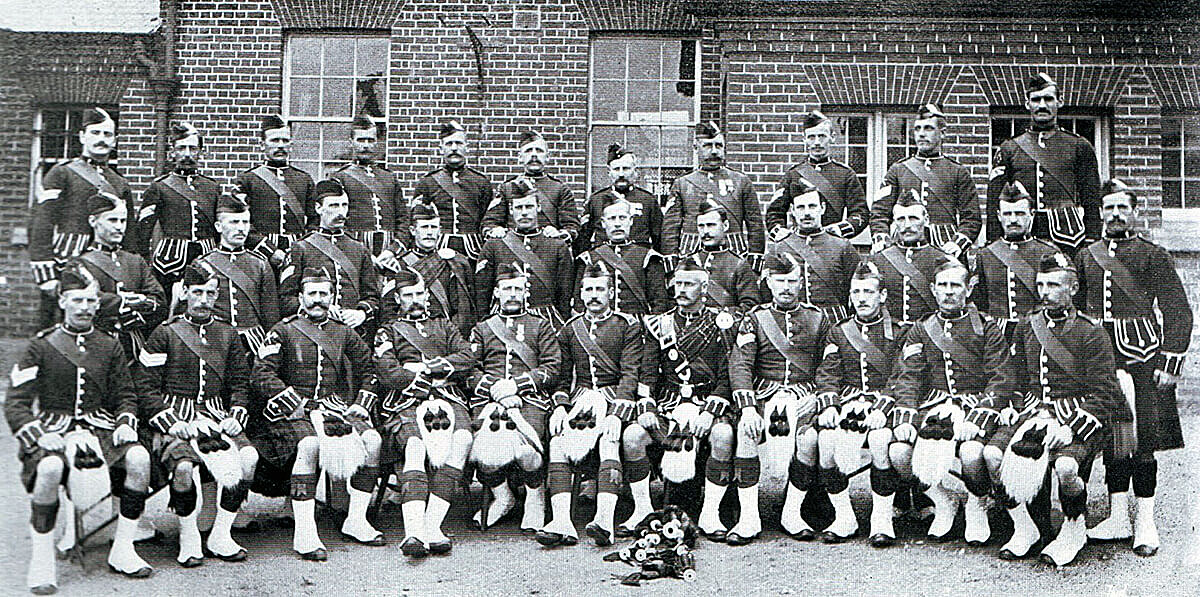
Non-commissioned officers of the 2nd Seaforth Highlanders: many of these soldiers became casualties at the Battle of Magersfontein on 11th December 1899 in the Boer War
British Regiments
Royal Horse Artillery: G Battery
Royal Artillery. 18th, 62nd and 65th Field Batteries.
9th Lancers: now 9th/12th Royal Lancers
12th Lancers: now 9th/12th Royal Lancers
Royal Engineers:
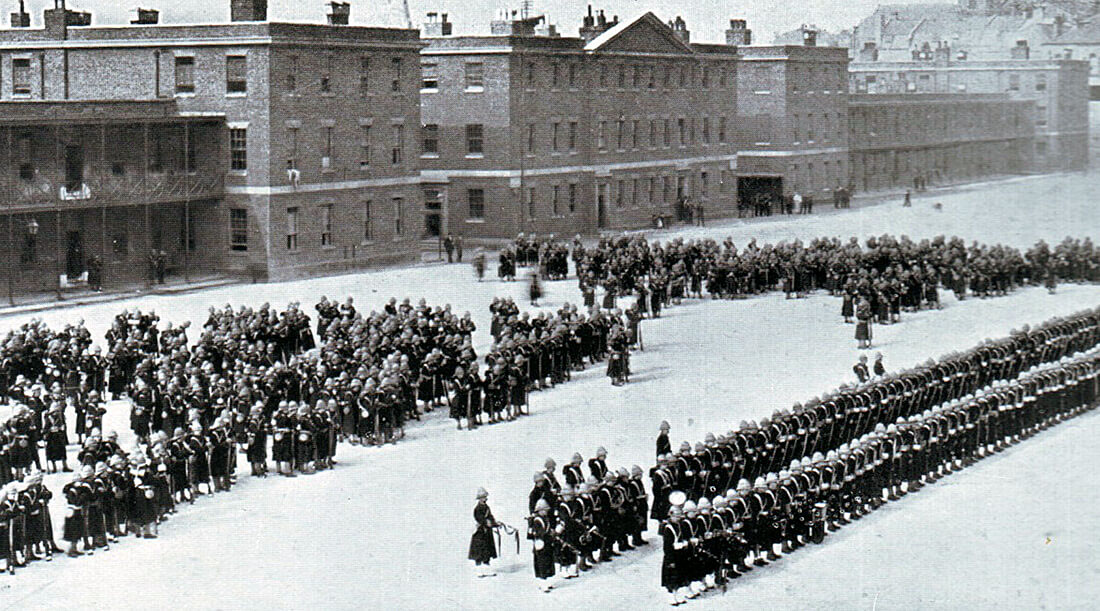
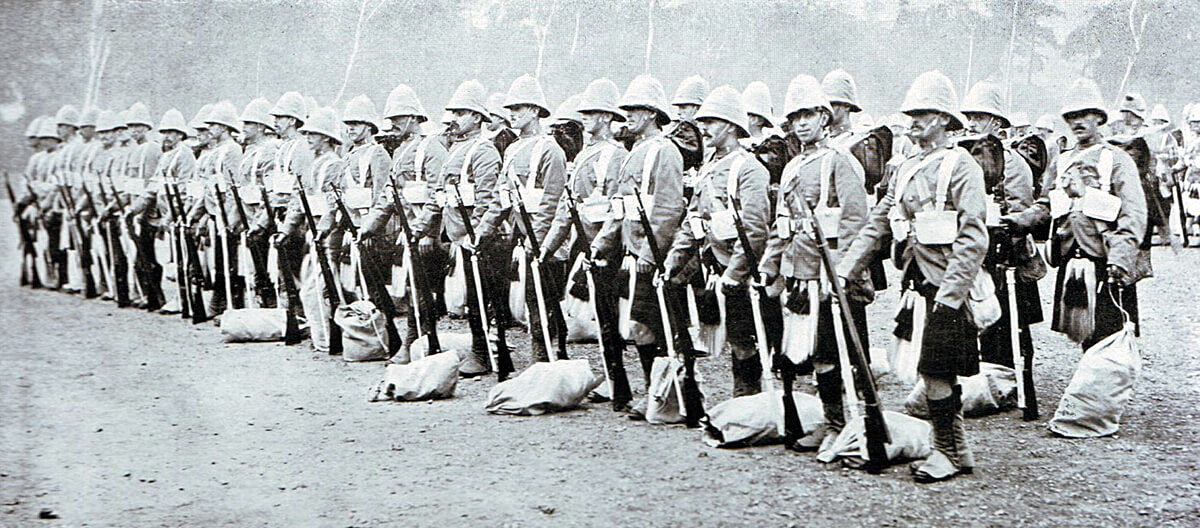
1st Highland Light Infantry on parade in Britain before leaving for South Africa in 1899. The Battalion fought in the Highland Brigade at the Battle of Magersfontein on 11th December 1899 in the Boer War suffering significant casualties
1st Guards Brigade:
3rd Grenadier Guards.
1st and 2nd Coldstream Guards.
1st Scots Guards.
Non-commissioned officers of 2nd Black Watch: many of these soldiers became casualties at the Battle of Magersfontein on 11th December 1899 in the Boer War
9th Brigade:
1st Northumberland Fusiliers: now Royal Regiment of Fusiliers
2nd Northamptonshire Regiment: now Royal Anglian Regiment
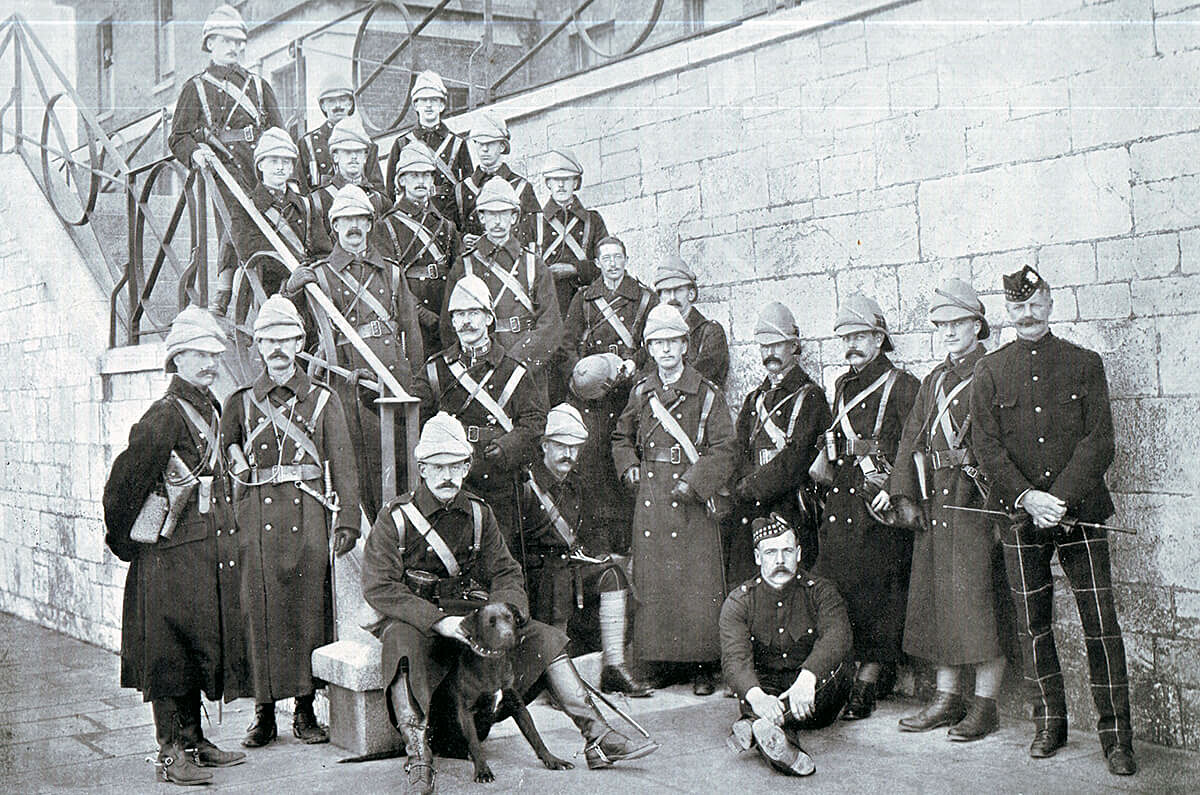
Officers of the Seaforth Highlanders: Battle of Magersfontein on 11th December 1899 in the Boer War
1st Loyal North Lancashire Regiment: later Queen’s Lancashire Regiment and now the Duke of Lancaster’s Regiment
2nd King’s Own Yorkshire Light Infantry: later the Light Infantry and now the Rifles
1st Manchester Regiment: late the King’s Regiment and now the Duke of Lancaster’s Regiment
3rd Highland Brigade:
2nd Black Watch: now 3rd Battalion the Royal Regiment of Scotland
1st Highland Light Infantry: later the Royal Highland Fusiliers and now 2nd Battalion the Royal Regiment of Scotland
2nd Seaforth Highlanders: later the Queen’s Own Highlanders, then the Highlanders and now 4th Battalion the Royal Regiment of Scotland
1st Argyll and Sutherland Highlanders: now 5th Battalion the Royal Regiment of Scotland
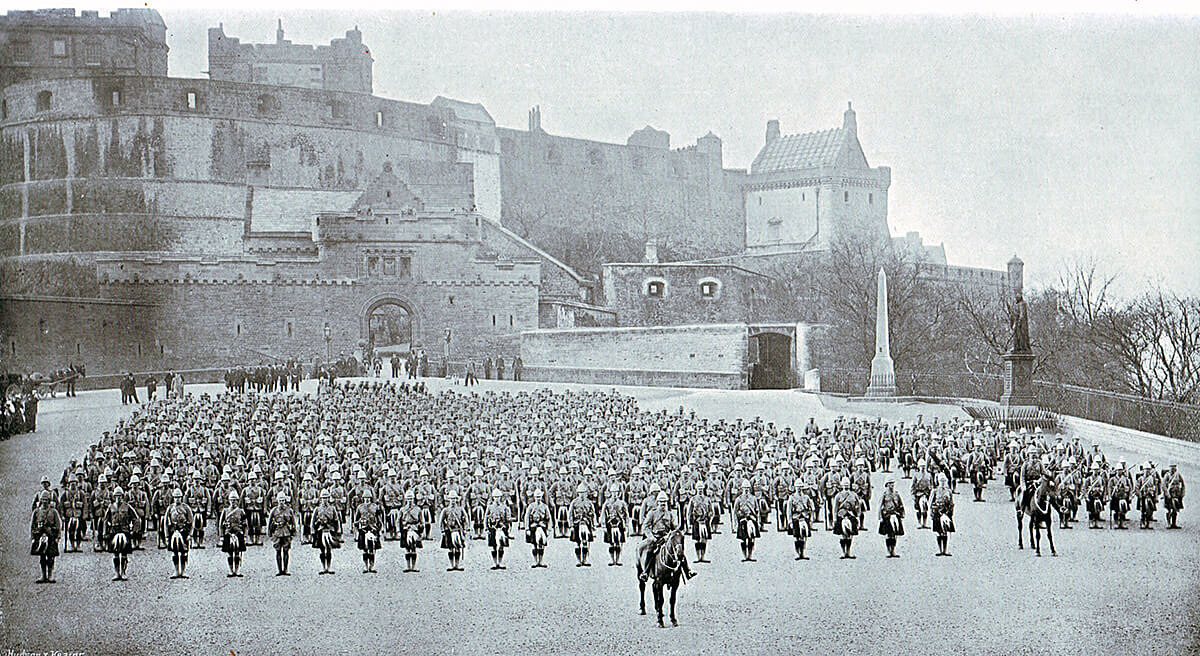
1st Gordon Highlanders parading outside Edinburgh Castle before leaving for South Africa in 1899. The Battalion fought at the Battle of Magersfontein on 11th December 1899 in the Boer War
Account:
In late 1899 the two main areas of fighting between the British and the Boers were Natal, where Boer forces invaded the British colony and forced their way south to the Tugela River, and the north-west corner of Cape Colony, where Lord Methuen led a British army up the railway to relieve the diamond mining town of Kimberley, under siege by the Boers.
Lord Methuen crossed the Orange River and moved north, fighting the Battle of Belmont on 23rd November, the Battle of Graspan on 25th November and finally the Battle of Modder River on 28th November 1899.
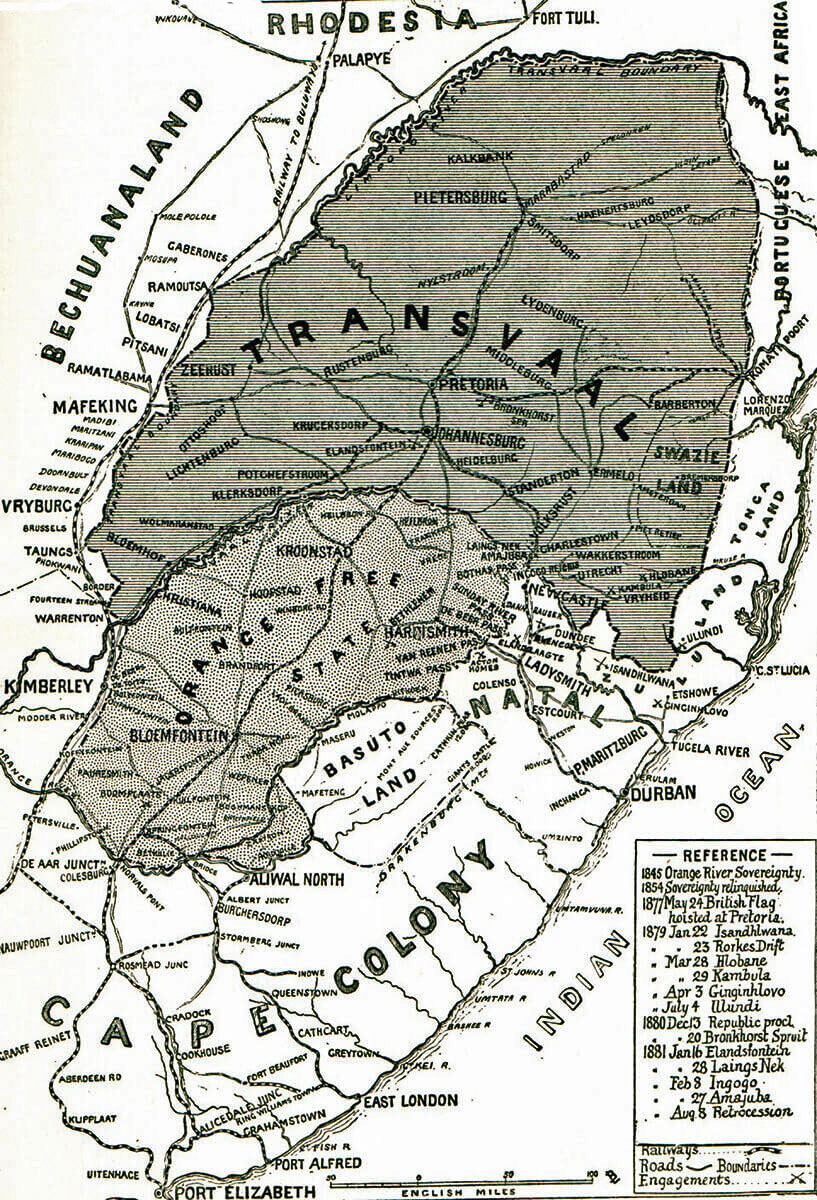
Map of South Africa: Methuen’s march took place up the left side of the map: Battle of Magersfontein on 11th December 1899 in the Boer War
Following the British forcing of the Modder River on 28th November Methuen established his camp north of the river, although this led to the inconvenience that it was beyond the reach of the railway line, as the bridge had been destroyed by the Boers before the battle. Crossing the river was by way of a pontoon bridge established by the Royal Engineers.
Although the British had won the battle Methuen felt bound to stay at Modder River until his army was built up by re-inforcements, he himself recovered from the bullet wound he had received in the thigh and the railway bridge was re-instated to enable supplies and troops to be brought up from Orange River by train.
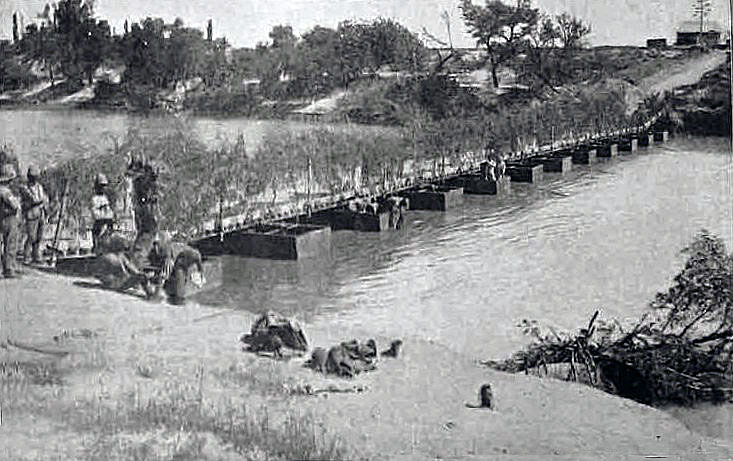
Pontoon bridge built over the Modder River by the Royal Engineers to replace the railway bridge demolished by the Boers: Battle of Magersfontein on 10th and 11th December 1899 in the Boer War
Methuen’s task on reaching Kimberley was to extract the civilian population and leave a well provisioned military force to hold the town against the Boers. This could not be done without an operating railway line both to take out the civilians and to bring in supplies.
The Modder River battle caused the Boers significant difficulties. Many of the Free State Boers who had given way around Rosdean were inclined to abandon the war. President Kruger of the Transvaal remonstrated with President Steyn of the Orange Free State asking him to personally call on the Free State Boers to continue fighting.
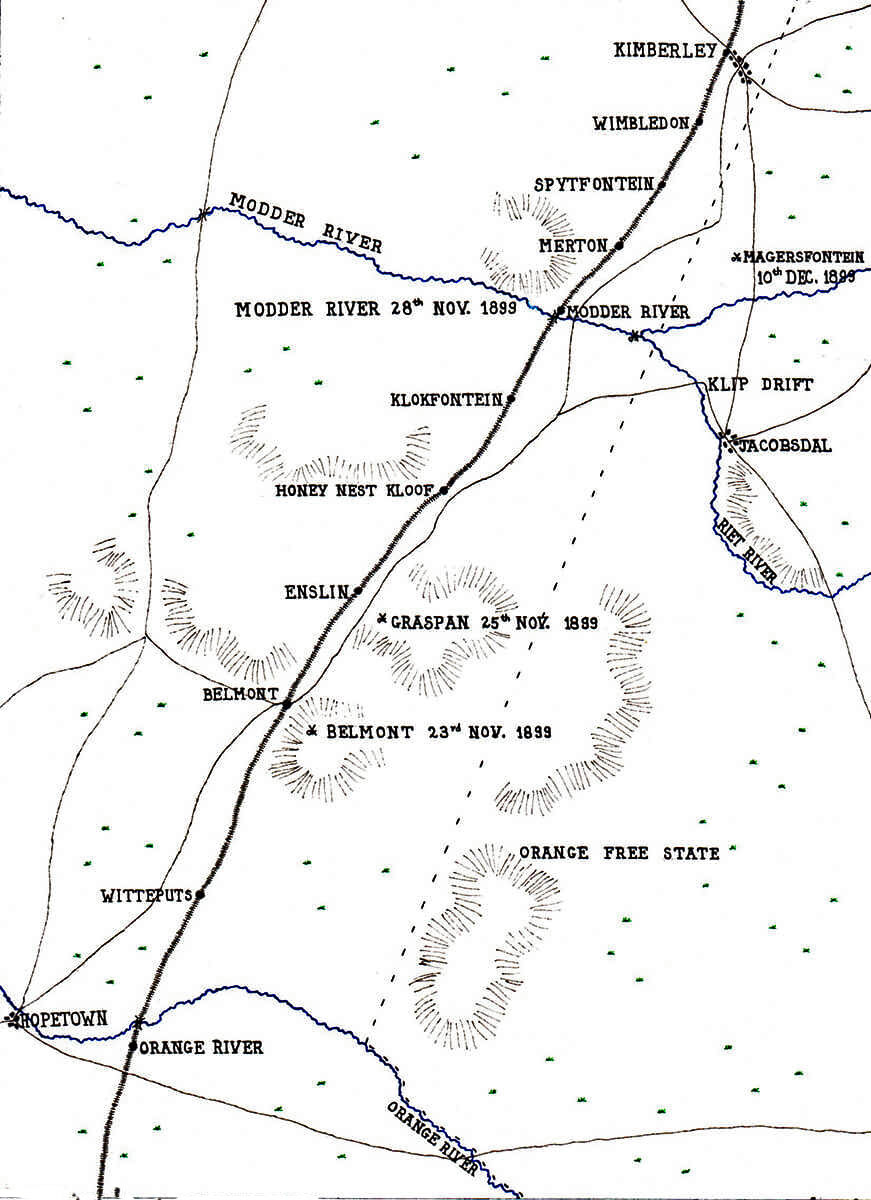
Map showing the area of Lord Methuen’s operations from the Orange River to the Battle of Magersfontein on 10th December 1899 in the Boer War: map by John Fawkes
General Cronje, the Boer commander at Modder River, was inclined to take his army back to Spytfontein and defend the line of kopjes there. This was the decision taken at the meeting of senior Boer commanders.
Black Watch: the Regiment’s 2nd Battalion fought at the Battle of Magersfontein on 10th and 11th December 1899 in the Boer War
De la Rey, General Cronje’s energetic subordinate at the Battle of Modder River was in Jacobsdal arranging and conducting the funeral of his older son Aadrian, fatally wounded during the fighting around Rosmead at Modder River on 28th November 1899. He consequently missed the meeting of senior Boer commandants at which the decision was made to withdraw to Spytfontein.
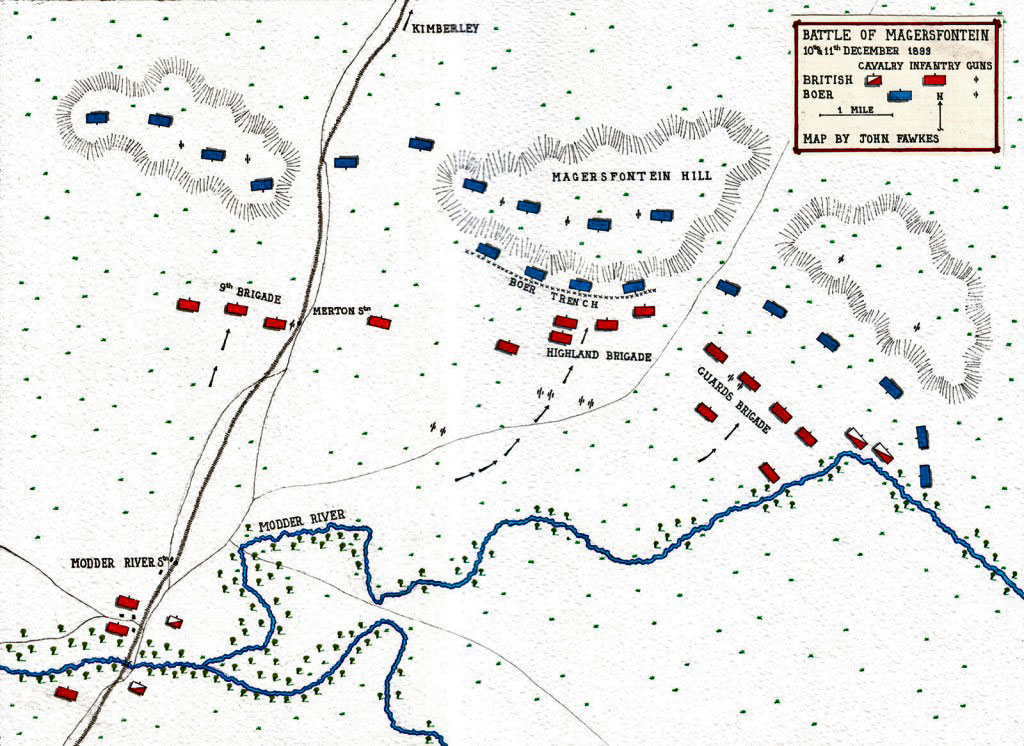
Map of the Battle of Magersfontein 10th – 11th December 1899 in the Boer War by John Fawkes
De la Rey persuaded Cronje that the right place to make the next stand was the line of kopjes at Magersfontein and that the position must be fortified with much greater subtlety than had been deployed at Modder River.
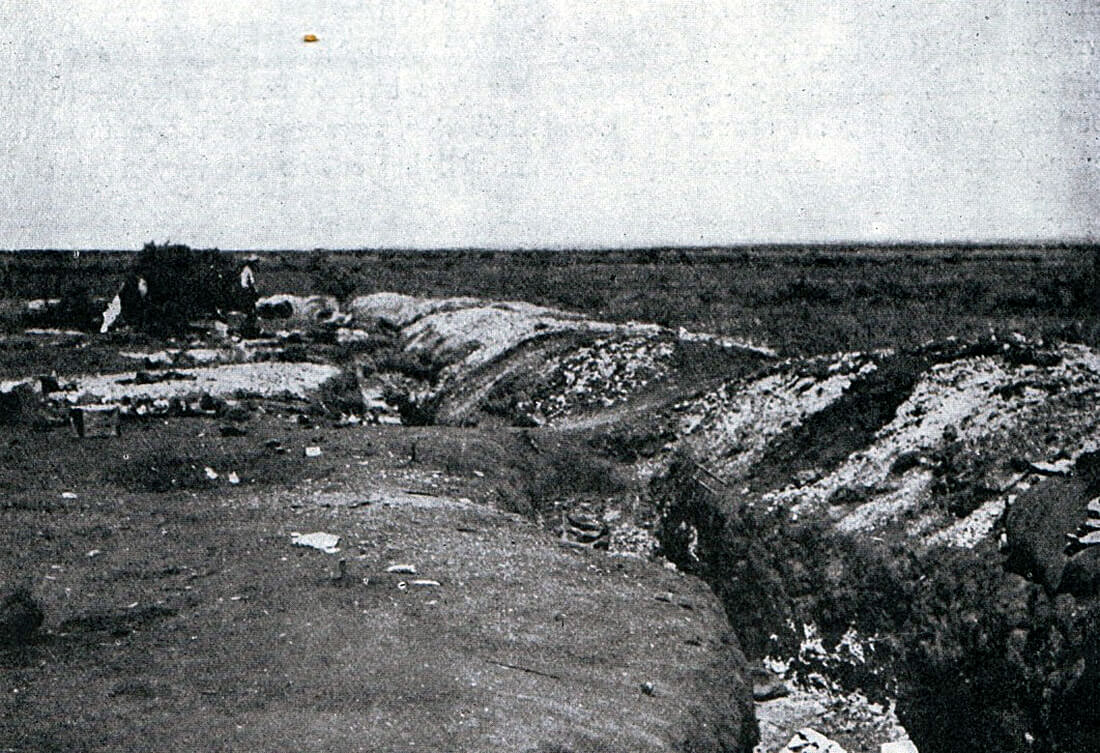
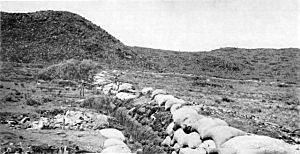
Boer trench in front of the hill line at the Battle of Magersfontein on 11th December 1899 in the Boer War
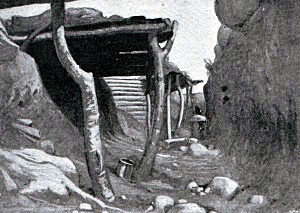
Boer covered trench in front of the hill line at the Battle of Magersfontein 11th December 1899 in the Boer War
The Boers’ extensive intelligence system across the whole of Cape Colony, built up during the years before the war and relying upon the substantial section of the Boer population in the colony prepared to assist the Boers of the two republics, enabled Cronje to form an accurate assessment of the length of time before Methuen would feel able to advance north up the railway line towards his target of Kimberley. This was around two weeks, giving the Boers sufficient time to build the required field fortifications at Magersfontein.
While he waited at Modder River Methuen ensured that there were regular cavalry patrols up the line to the Magersfontein kopjes so that he was well aware that the next battle would be fought there.
What Methuen failed to do was to establish the nature and positions of the Boer entrenchments and then to ensure that his subordinate commanders were fully aware of the position and extent of these entrenchments.
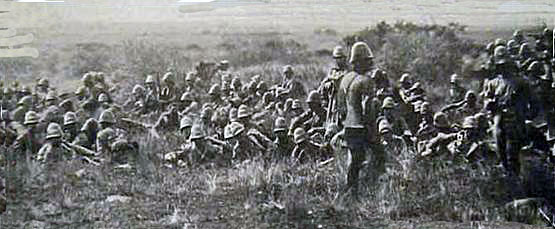
1st Gordon Highlanders awaiting orders on the morning of 11th December 1899 at the Battle of Magersfontein in the Boer War
A major difficulty was the lack of organisational sophistication of British field forces. Methuen had a staff of eleven officers. Of these, six were technical officers, provost, medical, chaplaincy and signals. His second senior staff officer, Lieutenant Colonel Northcott, had been killed in the Modder River battle. Methuen himself was recovering from a painful leg injury which limited his movement, forcing him to hand over command to Major General Colville for a number of days. Methuen had four other staff officers who will have had their time taken up with administering the needs of the troops, arranging the re-instatement of the railway line and telegraph and bringing up re-inforcements. A major task was arranging for supplies and troops to travel up and the wounded to be taken down on the single railway line. This left little divisional staff resource for supervising reconnaissance, acquiring intelligence, assessing it and issuing information to the brigades
Each brigade possessed two staff officers, an ADC for the brigade commander and a brigade major. The regiments and battalions did not have intelligence officers and did not consider they had responsibility for reconnaissance work unless ordered to do so. It is striking that there was no intelligence officer appointed below the Army Corps Headquarters, which Buller had taken with him to Natal.
2nd Black Watch in Britain before leaving for South Africa, many of these soldiers became casualties at the Battle of Magersfontein on 11th December 1899 in the Boer War
Scouting the Boer positions was carried out by cavalry and mounted infantry patrols with little local knowledge, if any, and what are described in the contemporary literature as ‘friendly natives’, who were likely to have been infiltrated by the Boer intelligence service.
A further substantial difficulty for the British in acquiring intelligence was the pervasive presence of parties of mounted Boers, who would, on sighting a British patrol open a heavy and accurate rifle fire, forcing it hurriedly to withdraw. Reconnaissance by the limited number of British mounted troops was so restricted as to prevent the acquisition of anything like adequate intelligence on Boer deployments and activities.
The railway line lay close to the border of the Orange Free State for its full length from Orange River Station to Modder River Station, some fifty miles. Rumours of attack on the line were rife and daily skirmishes took place along the line between Boers and Rimington’s Scouts, one of the units responsible for the security of the line.
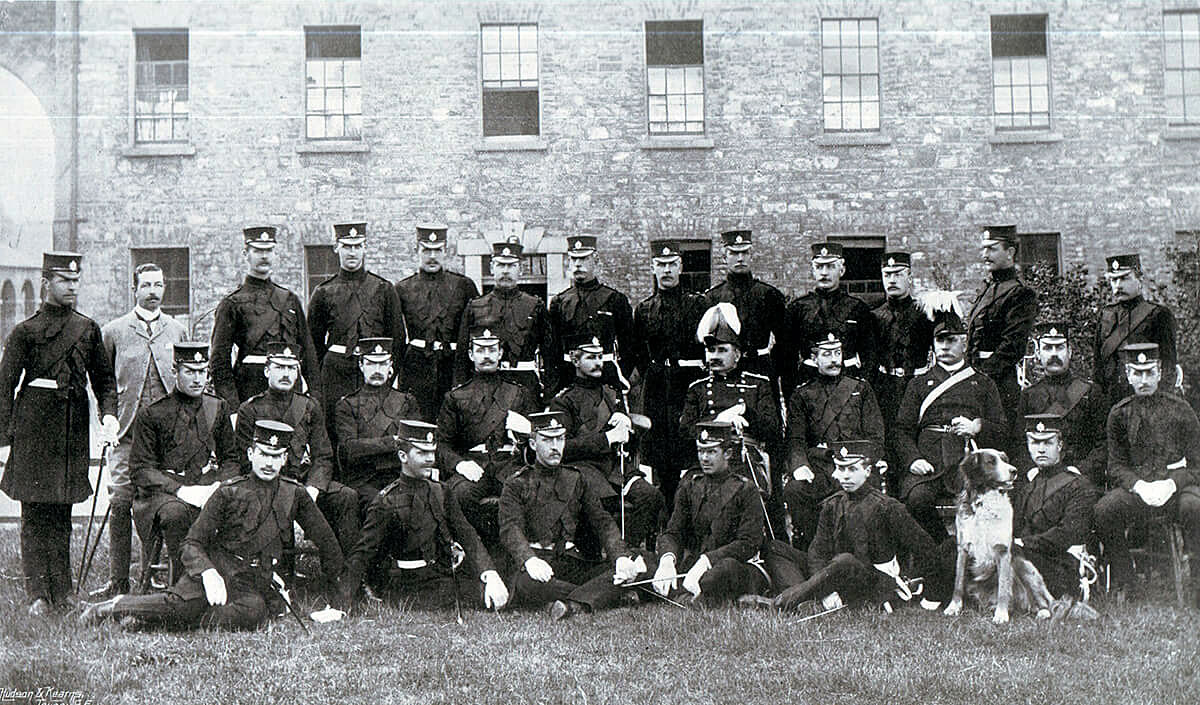
Officers of the 2nd Coldstream Guards. The Battalion fought at the Battle of Magersfontein on 11th December 1899 in the Boer War
On the night of 6th/7th December 1899 the Boers attacked Enslin station and cut the telegraph wire. A force of all arms was sent from Modder River to drive the Boers off and re-establish the railway link.
Methuen recovered from his leg wound sufficient to resume command of the army on 6th December 1899.
The railway bridge was completed by 7th December 1899, a remarkable feat, so that trains could move north of the river.
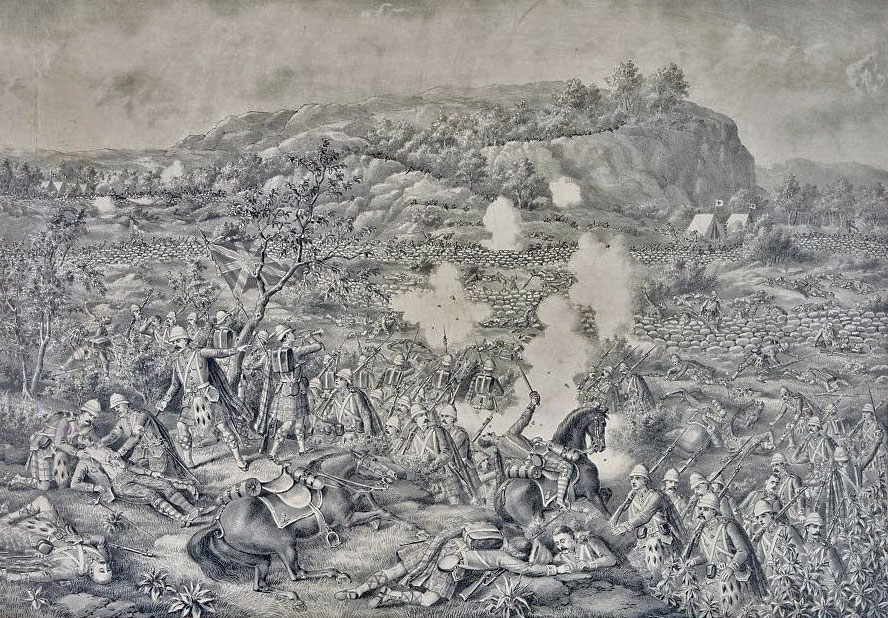
Contemporary print of the Battle of Magersfontein on 11th December 1899 in the Boer War
The final re-inforcements arrived on 10th December 1899, giving Methuen, in addition to his original force, the 12th Lancers, G Battery Royal Horse Artillery, a long naval 4.7 inch gun, a battery of 5 inch howitzers of the Royal Garrison Artillery, the Highland Brigade comprising part of 2nd Black Watch, 2nd Seaforth Highlanders and 1st Highland Light Infantry. (1st Argyll and Sutherland Highlanders was already with Methuen and had played a leading part in the Modder River battle). 1st Gordon Highlanders arrived on the 10th December and did not take part in the night march at Magersfontein with the rest of the Highland Brigade.
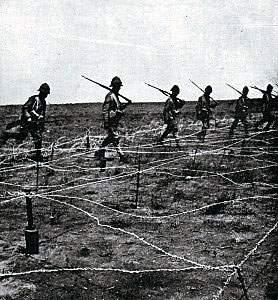
Barbed wire entanglement in front of the Boer trench at the Battle of Magersfontein on 11th December 1899 in the Boer War which added to the difficulties of the Highland Brigade in their attempted attack
The re-inforcements from the coast included a ‘captive balloon’ complete with telephone equipment to communicate with the ground.
Methuen now commanded 11,000 infantry, 850 cavalry and mounted troops, 750 gunners with thirty guns and the naval personnel with four long 12 pounders and the 4.7 inch gun.
Canadian and Australian troops arrived at Belmont and were given responsibility for the security of the railway line.
The next station on the railway line north of Modder River was Merton. At this point the line ran between two groups of kopjes. The Boers entrenched and held each of these groups. The prominent feature was Magersfontein Hill on the east side of the line. The Boers placed their guns and burghers equipped with the older Martini-Henry rifles firing smoke generating cartridges in prepared positions on the hills.
Along the southern foot of Magersfontein Hill the Boers dug a trench on the flat ground about a thousand yards long. It followed the course of a dry stream and a barbed wire fence. A further barbed wire entanglement was added, simple by later standards, but still an impediment to advancing troops. Boers armed with the new Mauser rifles firing smokeless ammunition occupied this trench.
Officers of 3rd Grenadier Guards at Modder River before the Battle of Magersfontein on 11th December 1899 in the Boer War
Further entrenched positions with gun emplacements were built on the higher reaches of the kopjes. The aim was to mislead the British into believing the Boer positions were all on the hillsides.
Boer re-inforcments arrived from the besieging force at Kimberley and from Natal increasing the size of Cronje’s army to around 10,000. The exact number is unknown. He may have had half as many men again. Day by day the Boers improved their positions and brought up more men from Kimberley and the two republics. After the battle the British expressed considerable surprise at the sophistication of the entrenchment at the bottom of the hill.
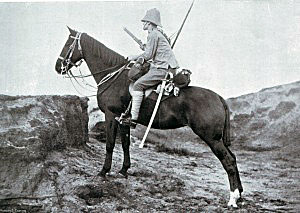
12th Lancer scout on patrol in South Africa: Battle of Magersfontein on 11th December 1899 in the Boer War
Methuen made several reconnaissances to establish the Boer positions. On 6th December Rimington’s Scouts were involved in a skirmish with the Boers, having two men captured. On 7th December an officer of the 12th Lancers was wounded and captured while on patrol. On 9th December the British artillery bombarded the line of hills in an attempt to draw the Boer fire and thereby establish the positions of their guns and rifle pits. The Boers did not respond.
Methuen formed the view that he could not march round the Boer positions on either flank and would have to make another frontal attack up the line of the railway.
Methuen made his arrangements for the attack on Sunday 10th December 1899, following divine service. There would be an artillery bombardment of the hills for two hours before sunset on the Sunday. The Highland Brigade would make a night approach march to the base of Magersfontein and attack up the hill at dawn, supported by the Guards Brigade and the fire of the British artillery.

Divine service in the British camp before the Battle of Magersfontein on 11th December 1899 in the Boer War
Security was poor in the British lines with the presence of many native drivers and railway workmen and the uncertainty as to the loyalty of Cape Colony inhabitants. For this reason the plan of advance was kept confidential to Lord Methuen and his immediate staff, some half dozen officers. This had the disastrous effect of preventing the brigade and unit officers from ensuring that they and their men knew what they were expected to do and being given information on the Boer dispositions.
In spite of this security, messages were flashed by heliograph to Kimberley informing the garrison that they could expect to be relieved at any time.
The attacking column moved out of the British camp at 2pm on Sunday 10th December 1899. It is hard to see how the Boers can have been unaware of this move. The column was headed by a force of cavalry followed by the Highland Brigade, then the artillery and Guards Brigade in the rear. The 9th Brigade remained to guard the British camp.
Towards the end of the afternoon the British column halted and the artillery conducted a two-hour bombardment of the slopes and tops of the kopjes. Initial shells fell among groups of worshipping Boers killing forty, it is reported.
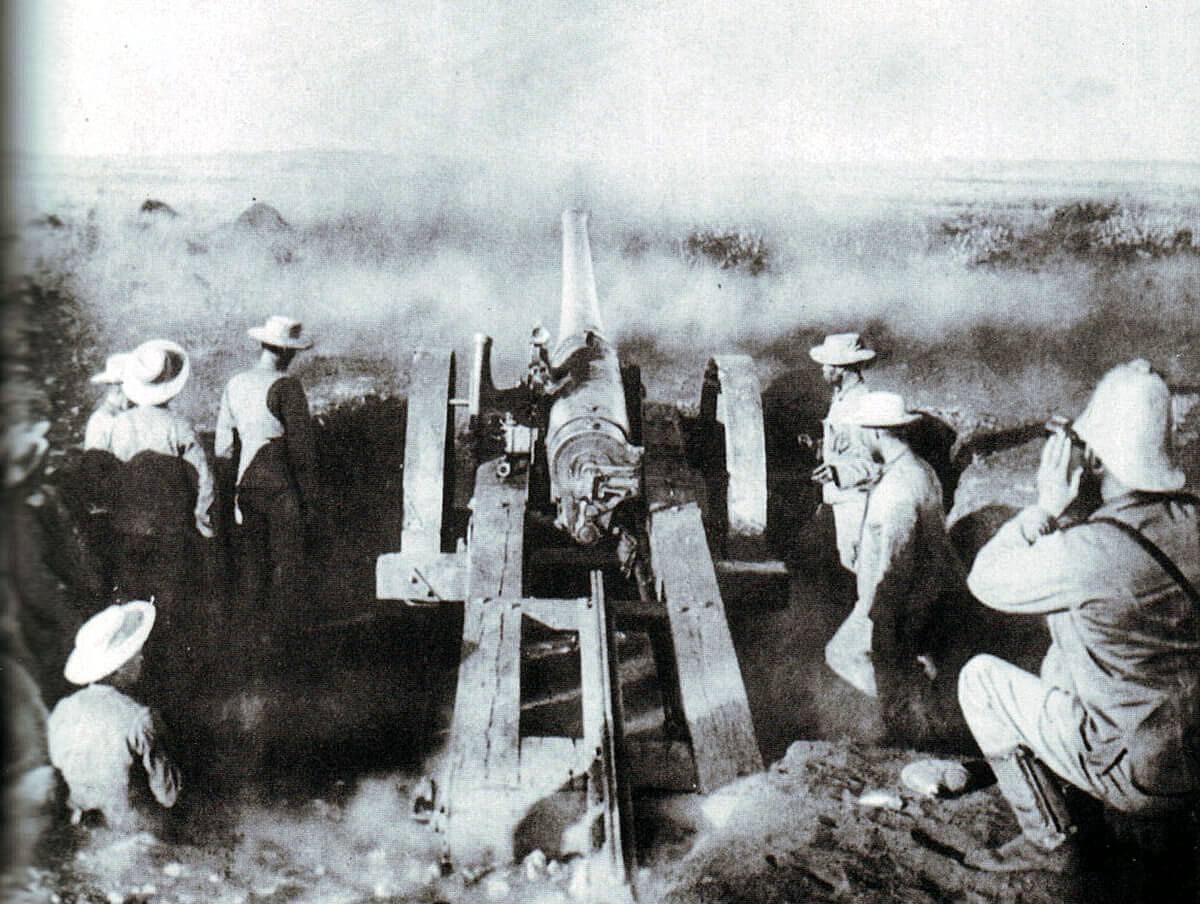
Naval 4.7 inch gun ‘Joe Chamberlain’ firing at the Boers at the Battle of Magersfontein on 11th December 1899 in the Boer War
At around 6.45pm darkness fell and the bombardment ceased. The various formations bivouacked, the Highlanders opposite Magersfontein Hill, the Guards Brigade on their right and the artillery nearer the railway line, ready to resume the bombardment at dawn.
Methuen gave Major General Wauchope his final orders. The Highland Brigade was to be guided by Major Benson of the Royal Field Artillery. It is said that Wauchope was unhappy at the prospect of a night approach march and was uncertain as to the position of the Boers. He also objected to Methuen’s requirement that the Highlanders march in ‘quarter column’ or in lines of whole companies, one six paces behind the other, with the battalions in sequence, so that the brigade presented a narrow deep mass of men.
Officers of 1st Highland Light Infantry embarking for South Africa in 1899. The Battalion fought in the Highland Brigade at the Battle of Magersfontein on 11th December 1899 in the Boer War, suffering significant casualties
On reaching Magersfontein Hill the brigade was to deploy so that the 2nd Black Watch, the leading battalion, attacked the eastern end of the hill on the right, with 2nd Seaforths on their left, 1st Argylls on their left and the 1st Highland Light Infantry in reserve.
The Highland Brigade began the march at around 1am, leaving half an hour late. The formation was ‘quarter column’, so that the thirty-two companies of the four battalions were in lines one after the other, the lines six paces apart. The hundred soldiers in each line, marching shoulder to shoulder, held ropes to ensure the lines kept together. The officers and men had been told nothing of what was expected of them. They assumed they were to attack the Boer positions on the hills, but knew nothing further.
Officers of 2nd Seaforth Highlanders, one of the battalions of the Highland Brigade at the Battle of Magersfontein on 11th December 1899 in the Boer War
The night started oppressively hot, but during the march a storm broke with lightning, thunder and heavy rain, bringing intense cold.
Major Benson’s compasses failed to work either due to the lightning or to magnetic compounds in the ground. The moon set leaving pitch darkness, other than the flashes of lightning. The soldiers stumbled over stones, plants, anthills and the uneven ground.
A strong light shone away to the right and another on the left. It did not seem to the Highlanders that these were British lights. In fact the Boers were alert and manned their trenches at 2am.
It was beginning to get light when the leading line of the 2nd Black Watch encountered a long wire fence in their path and a patch of dense brushwood, obstacles that broke up their formation and took time and a great deal of noise to negotiate.
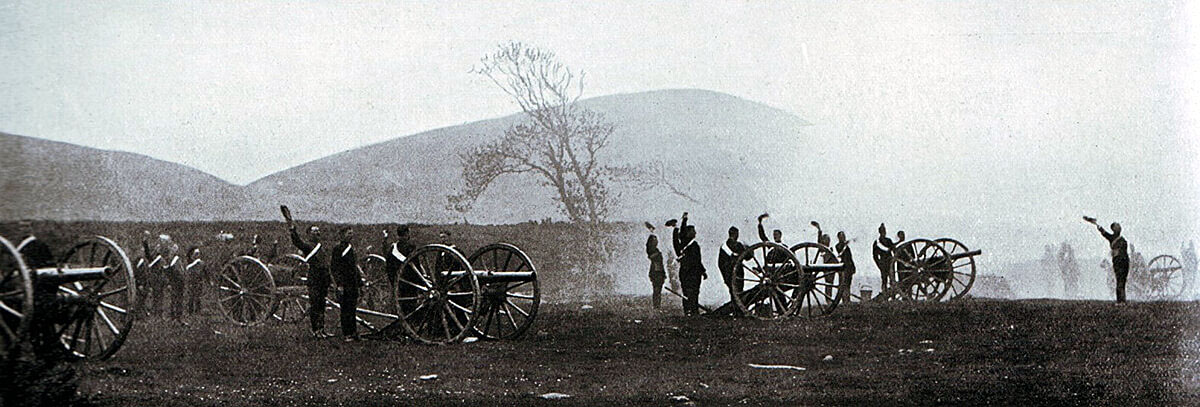
Royal Horse Artillery 12 pounders in action on exercise: Battle of Magersfontein on 11th December 1899 in the Boer War
At 4am Major Benson advised General Wauchope that the brigade should extend into open order. Wauchope understood his orders to be that he should keep the close formation until well up to the Boer positions. He himself described this as ‘madness’. As the battalions cleared the brushwood the order was given to go into extended order.
At this point the bright light on the left went out and a single rifle shot rang out. This appears to have been a signal and the Boers opened fire from their trench at the base of Magersfontein Hill, some four hundred yards from the advancing Highlanders, catching them still in close order, the rifle rounds ripping through their ranks.
Boer trench at the base of the hill at the Battle of Magersfontein 11th December 1899 in the Boer War
The Boers also seem to have had a system of tin cans attached to trip wires and were alerted by the noise of the cans banging together as the Highlanders made their way forward.
A Black Watch colour sergeant described the Boer rifle fire: ‘They seemed to be formed up in tiers all up the hillside, and were pouring magazine fire into us at a terrible rate’.
Conan Doyle records that the Highland Brigade suffered seven hundred casualties in the first seven minutes of firing.
The Highland Brigade broke up in confusion, some attempting to assault the Boer positions, others falling back with the main body, going to ground and attempting to return the fire. Some were caught on the barbed wire and shot down. Many simply fled. The officers attempted to establish control of their men but largely without success.
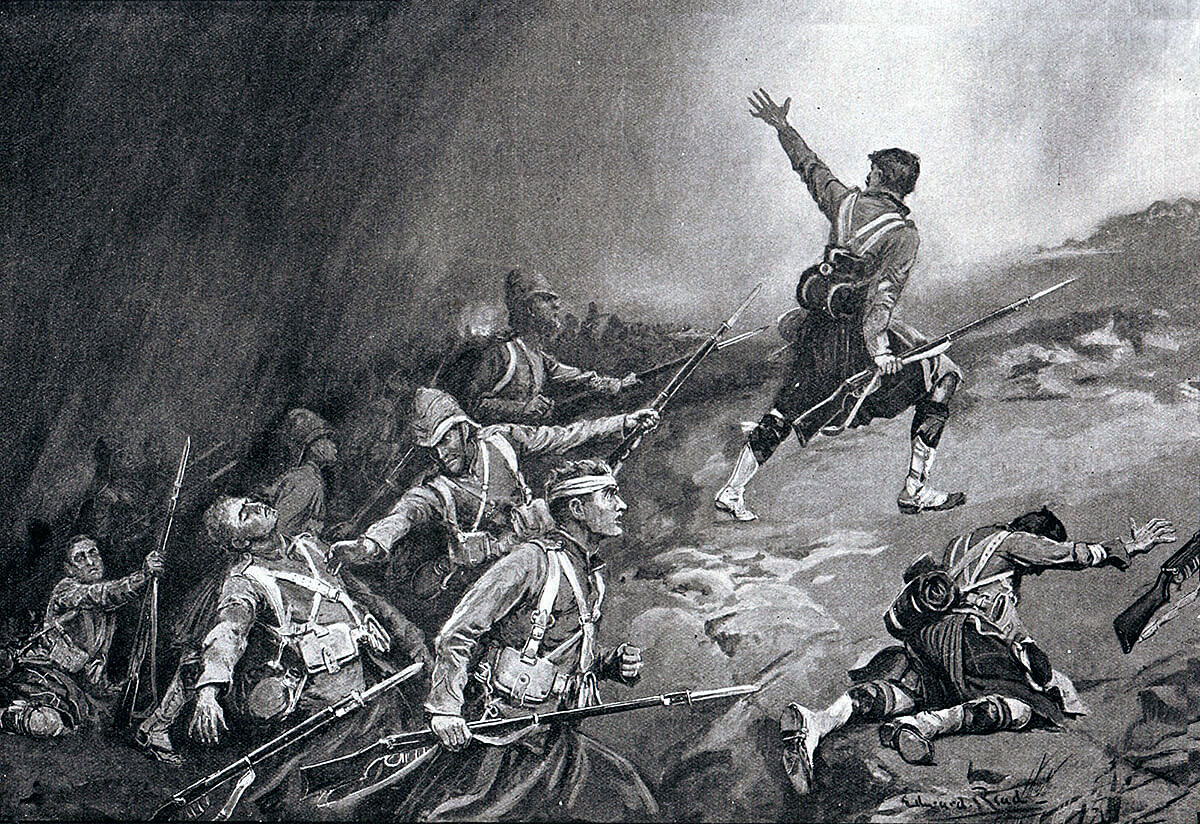
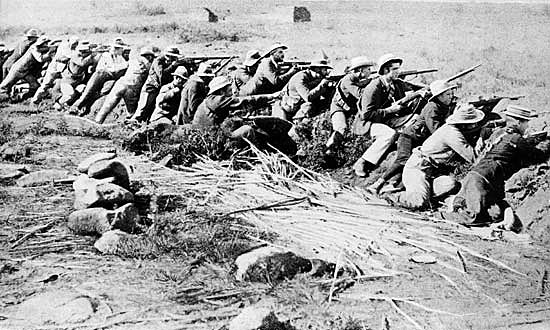
2nd Black Watch attempting an attack on the Boer trench at the Battle of Magersfontein on 11th December 1899 in the Boer War: picture by Edward Read
The sun came up, revealing the Highland Brigade pinned to the ground in front of the Boer positions, where it stayed for the rest of the day. Whenever a soldier moved he attracted fire. Some rushes were made but no general advance was achieved.
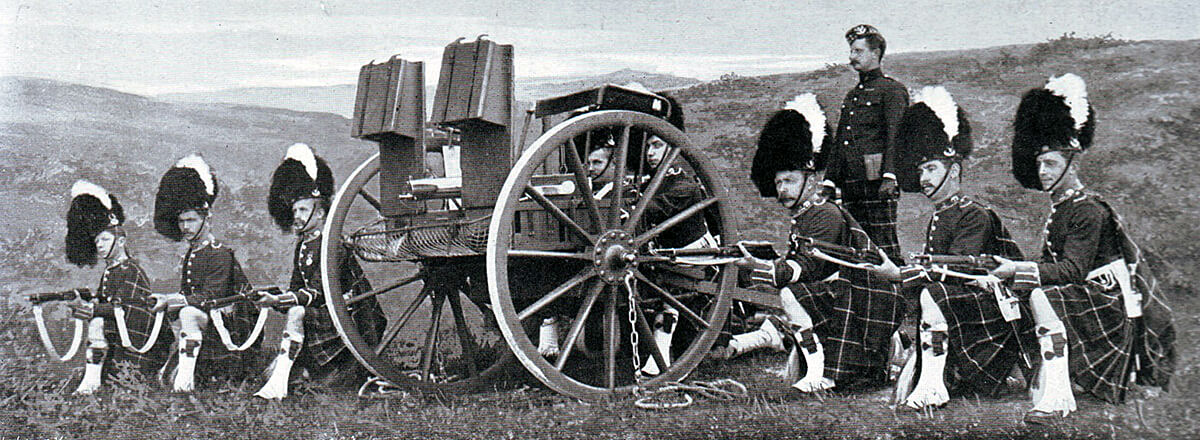
Maxim Gun detachment of 2nd Seaforth Highlanders in Britain. The detachment was almost wiped out providing supporting fire to the Highland Brigade at the Battle of Magersfontein on 11th December 1899 in the Boer War
Lieutenant Lindsay brought up the Seaforth’s Maxim gun and provided what support he could, while his gun crew was shot down. The 12th Lancers Maxim also provided support losing most of its gun crew.
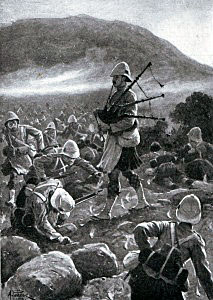
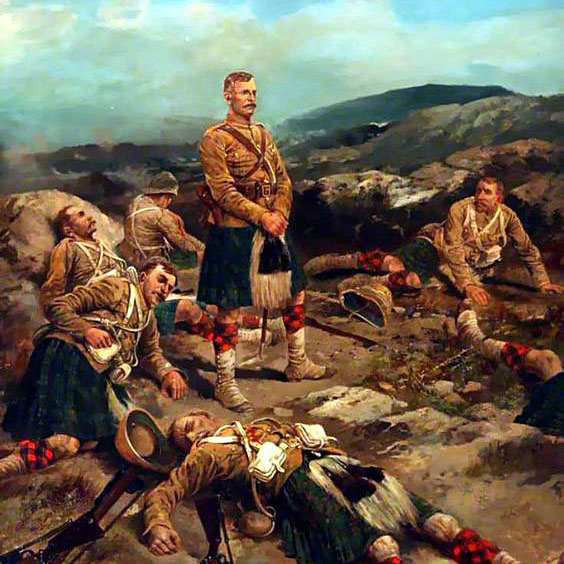
Corporal McKay of 1st Argylls rallying his comrades at the Battle of Magersfontein on 11th December 1899 in the Boer War
As in many battles of the war it was the gunners who came to the relief of the infantry. The Howitzer battery came into action at around 4,000 yards, the field guns of 18th, 62nd and 75th Batteries RFA at 2,000 yards and the RHA G Battery from right up behind the infantry.
Such casualties as the Boers suffered in the battle were caused by the gunfire, but even so it was of limited effect against the well dug in Boers, particularly as it was not fully realized that the most damaging Boer fire was coming from the trench situated on the flat ground and not the hill positions.
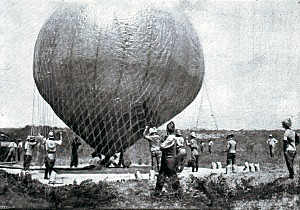
Launching the balloon during the Battle of Magersfontein on 11th December 1899 in the Boer War
With full daylight the balloon was launched and provided Methuen with information on the progress of the battle.
1st Gordon Highlanders with the two Coldstream Guards battalions moved up to support the Highland Brigade, the Gordons attempting an assault on the Boer positions, halting around four hundred yards short.
Mounted infantry and the 12th Lancers fighting dismounted held the line of the Modder River to the right of the Highland Brigade against Boer infiltration, until the Grenadiers and the 2nd KOYLI came up in support.
The Scots Guards and some companies of the Gordons provided escorts for the guns in their forward positions.
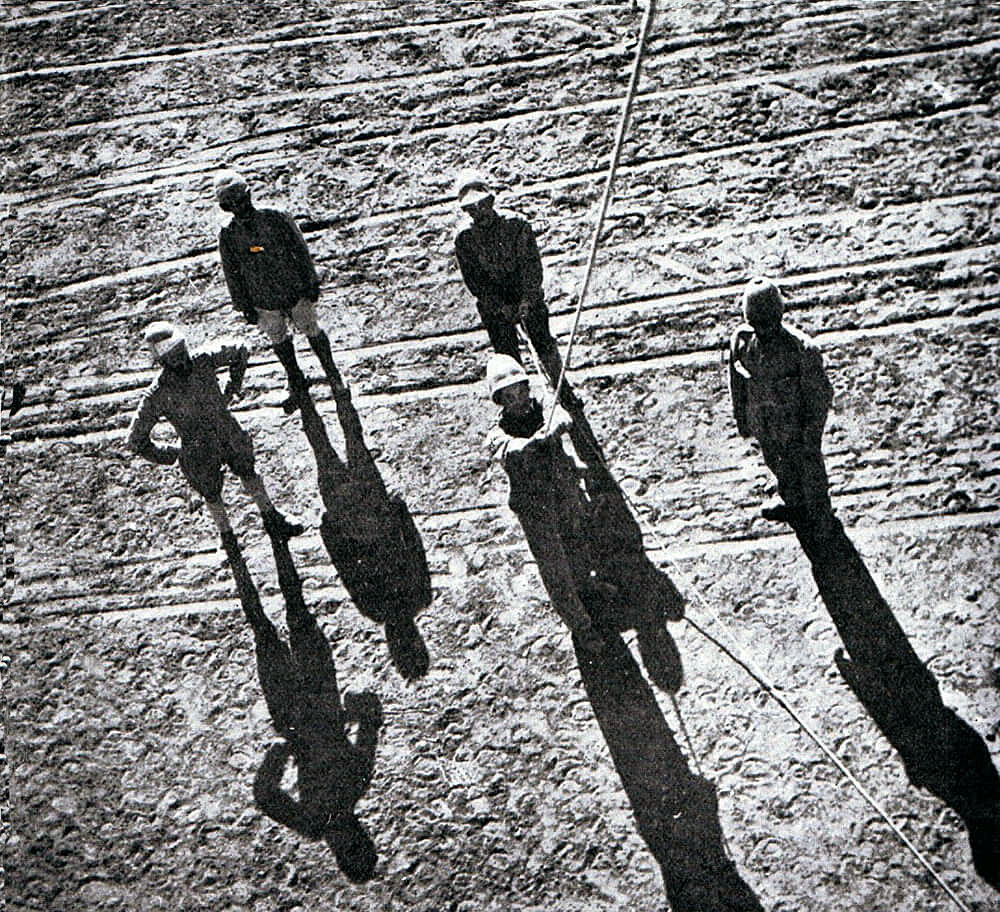
View of the ground crew from the balloon at the Battle of Magersfontein on 11th December 1899 in the Boer War
After nine hours exposed to constant fire from the Boer trenches the highland regiments finally broke up and withdrew, suffering substantial losses as they rose from whatever cover they had found and made for the rear. The soldiers were halted, rallied by their officers and NCOs and brought back into support of the rest of the line. The Boers made no attempt to exploit this collapse, lacking the bayonets and swords necessary for an attack.
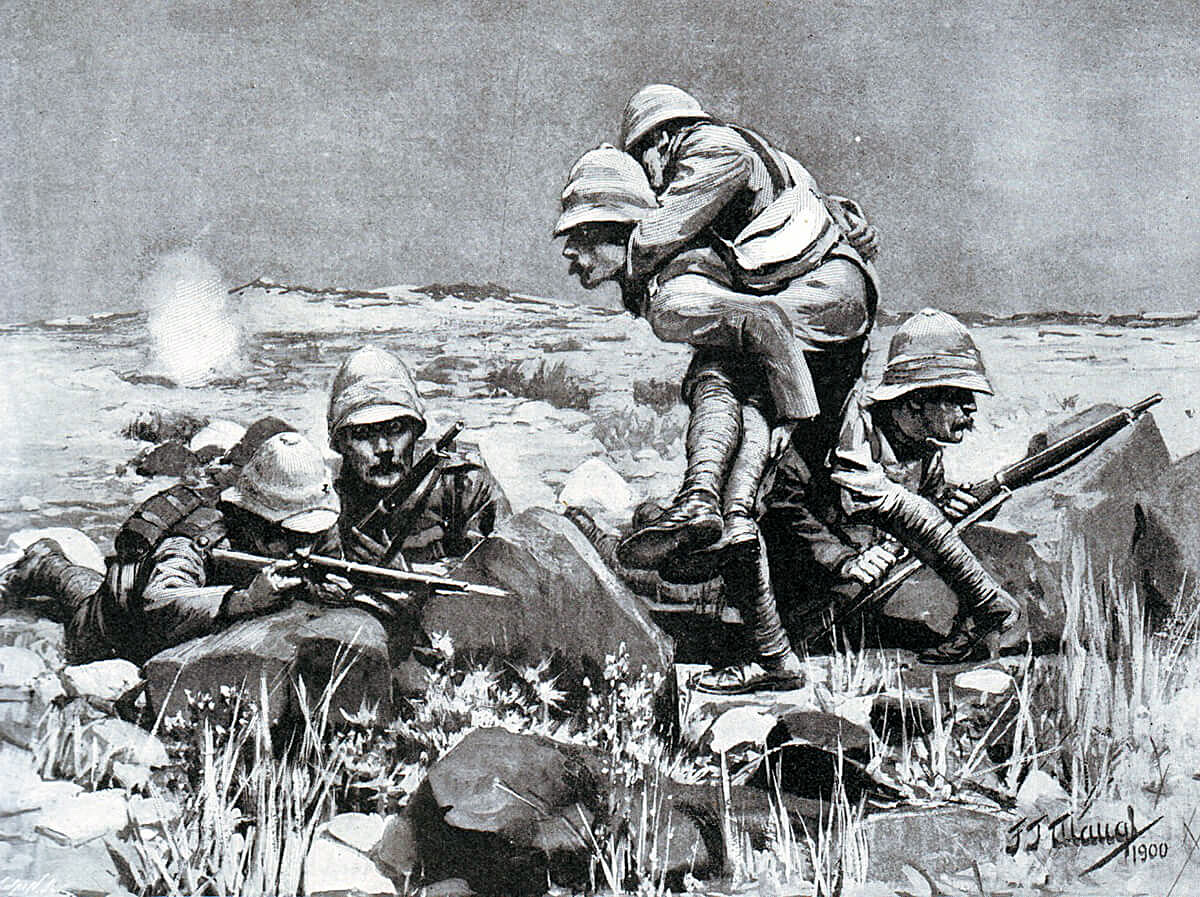
Men of the King’s Own Yorkshire Light Infantry on the extreme right of the British line during the Battle of Magersfontein on 11th December 1899 in the Boer War: picture by F.J. Waugh
The 9th Brigade was brought up on the left of the railway line to cover the flank of the advanced British positions.
At around 5.30pm the Boer guns, which had not fired during the day, opened up on the British cavalry. This triggered a general withdrawal of the exhausted British troops who had been fighting all day in the blazing heat, with inadequate cover, under fire from opponents they could not see firing from hilltop and entrenched positions. Methuen accepted the inevitable and ordered his force back to the camp at Modder River.
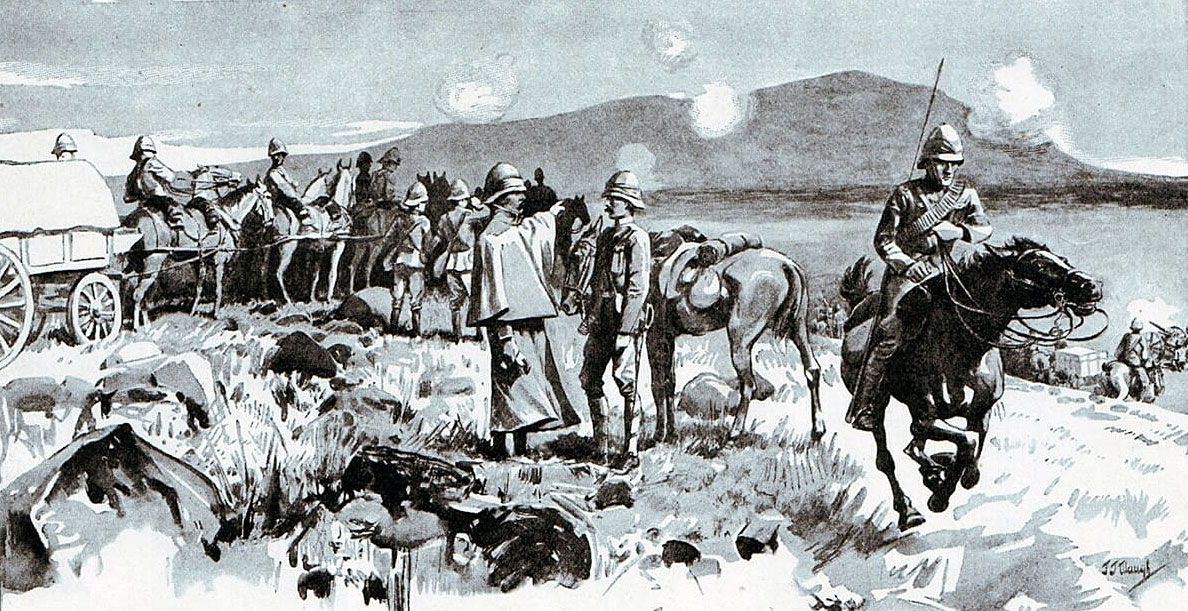
Lord Methuen and his staff during the Battle of Magersfontein on 11th December 1899 in the Boer War: picture by F.J. Waugh
It was the British hope that the Boers would fall back from their positions during the night, as they had after the previous three battles. The next morning the balloon went up and reported that the Boers were clearly still in their positions on the line of kopjes of which Magersfontein Hill was now the best known. The difference this time was that the Boers had won and decisively.
Scots Guards after the Battle of Magersfontein on on 11th December 1899 in the Great Boer War
This was the end of Methuen’s attempt to relieve Kimberley. It would fall to Lord Roberts to complete this task during 1900.
Removing the British casualties after the Battle of Magersfontein on 11th December 1899 in the Boer War
Following the battle both sides observed a truce while the dead and wounded were removed from the field. The British wounded were quickly evacuated to the south by train.
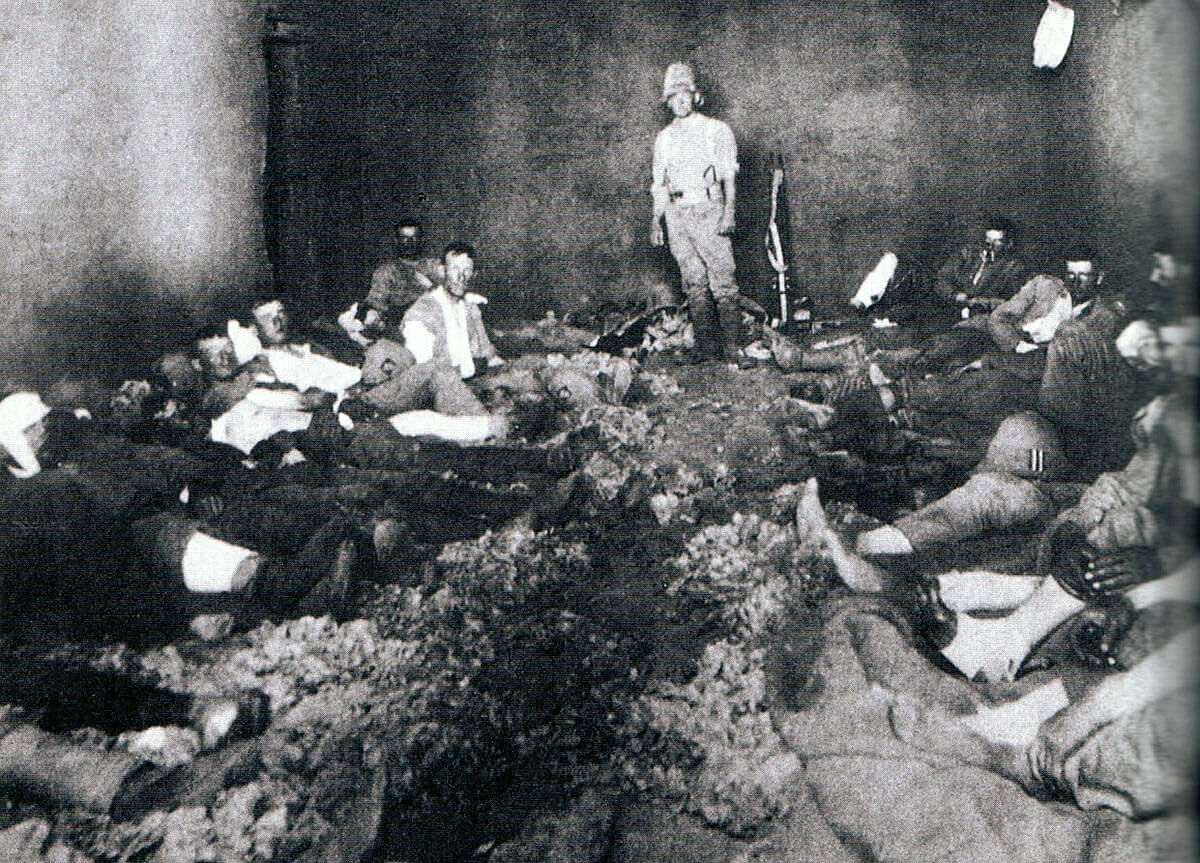
British dressing station at Modder River after the Battle of Magersfontein on 11th December 1899 in the Boer War

Highland attack on the Boer Scandinavian Corps at the Battle of Magersfontein on 11th December 1899 in the Boer War
Casualties: British casualties were 902. The Highland Brigade lost 53 officers and 650 soldiers, among them the brigade commander, Major General Wauchope, and 2 commanding officers killed. The commanding officer of the Gordons was also killed. Boer casualties were 236.
2nd Black Watch lost 19 officers and over 300 men killed and wounded in the battle.
Follow-up:
Methuen claimed that the defeat at Magersfontein was due to the failure of the Highland Brigade to attack the Boer trench. This assertion aroused the indignation of the Highland regiments.
The defeat caused Methuen to be side-lined. Lord Roberts and Lord Kitchener, on their arrival in South Africa with further reinforcements, took over the advance in the west, leading to the inexorable invasion and conquest of first the Orange Free State and then the Transvaal and the relief of Kimberley and Mafeking.
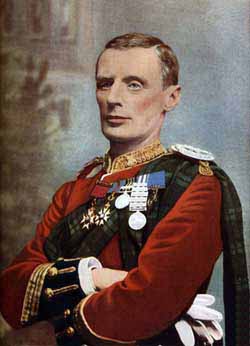
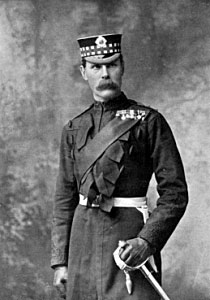
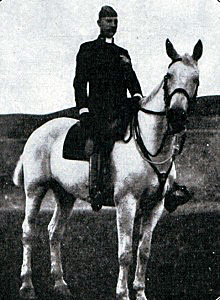
Major General Andrew Wauchope killed commanding the Highland Brigade at the Battle of Magersfontein on 11th December 1899 in the Boer War
It is difficult not to categorise Methuen as one of the unfortunate British generals experienced only in unsophisticated colonial warfare propelled into a modern war against well armed and canny opposition with insufficient, ill-trained and inexperienced troops and officers and inadequate resources, while armies were assembled to do the job properly.
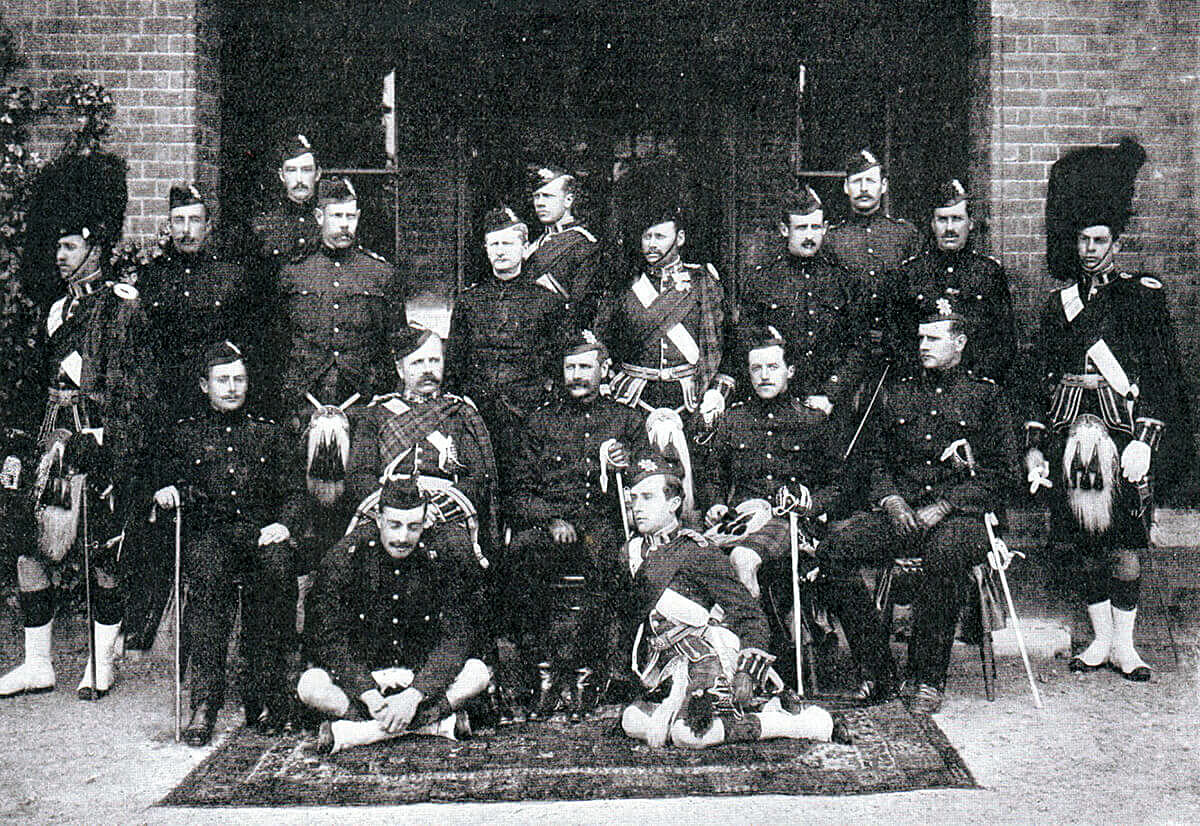
Officers of 2nd Black Watch in 1899: of these officers six were killed and one was wounded in the Battle of Magersfontein on 11th December 1899 in the Boer War
Decorations:
Lieutenant Henry Douglas of the Medical Corps received the Victoria Cross and the DSO for his work in treating wounded officers and soldiers of the Highland Brigade under fire.
Corporal John Shaul of 1st Highland Light Infantry was awarded the Victoria Cross for his conduct in charge of the battalion’s stretcher bearers in tending wounded men under fire.
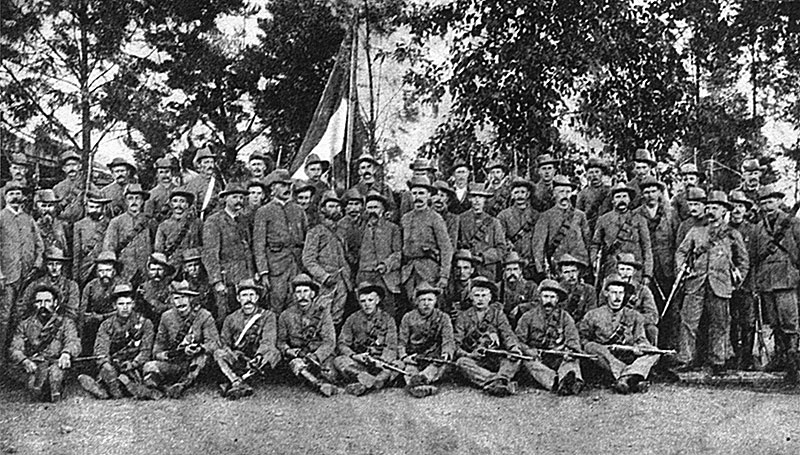
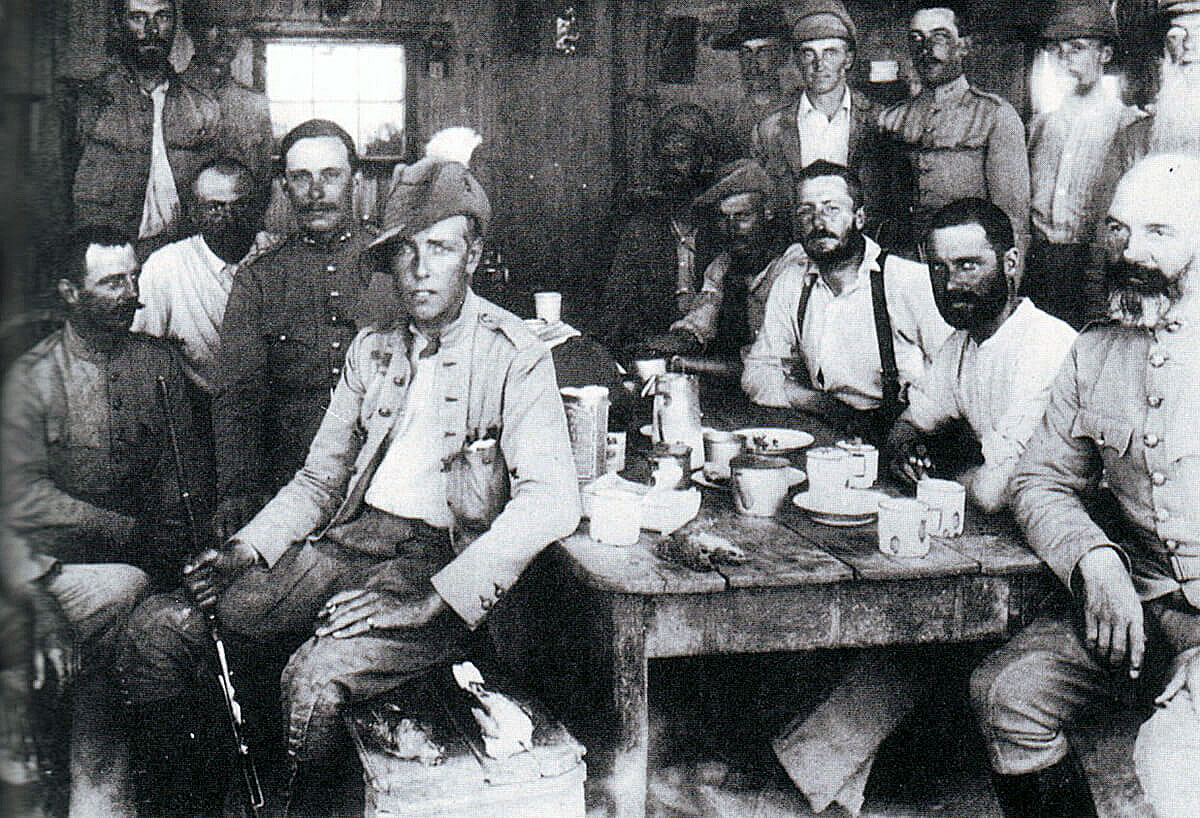
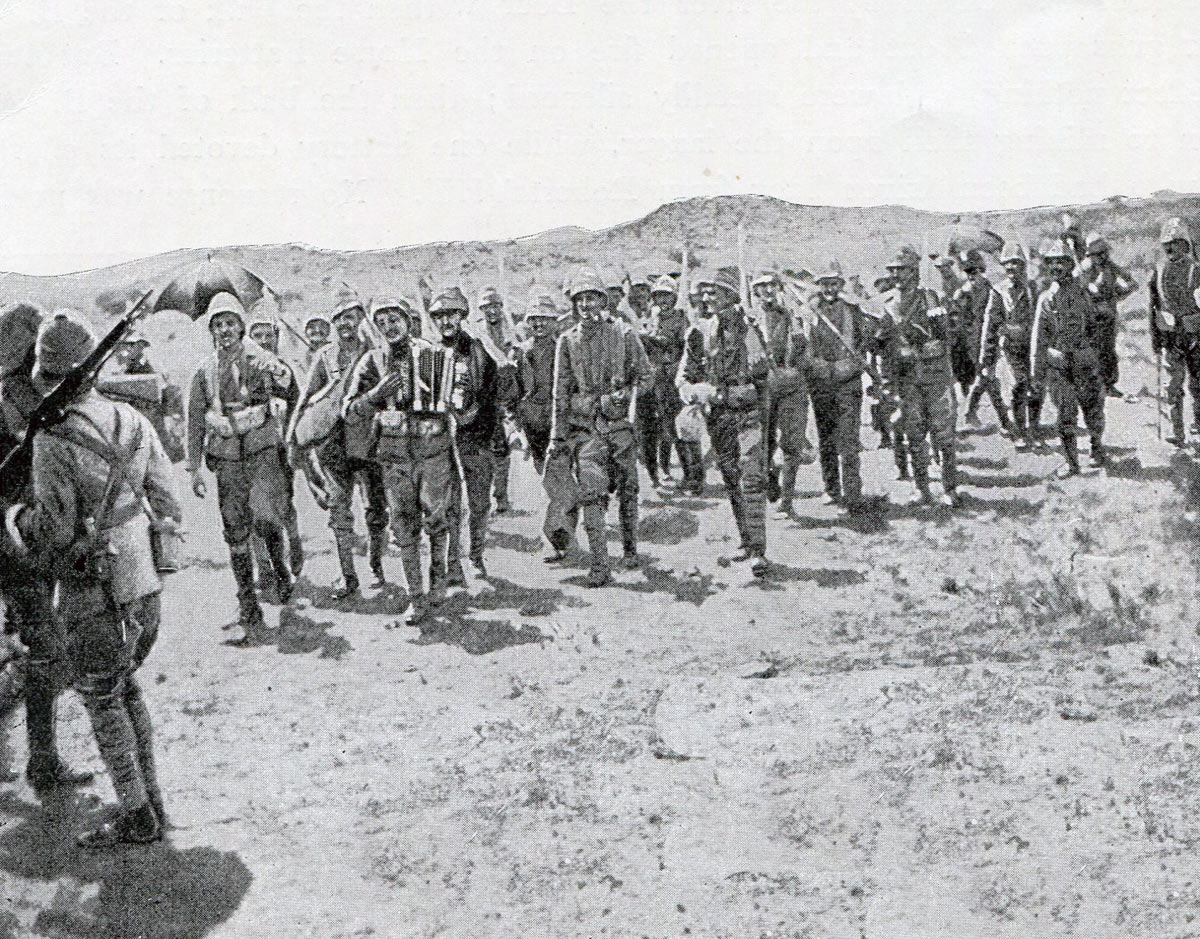
Boer Scandinavian Corps at the Battle of Magersfontein on 11th December 1899 in the Boer War
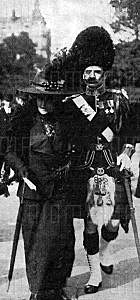
Captain Ernest Beachcroft Towse 1st Gordon Highlanders accompanied by his morther on the occasion of his award of the Victoria Cross for his conduct at the Battle of Magersfontein on 11th December 1899 in the Boer War
Captain Ernest Beachcroft Towse 1st Gordon Highlanders was awarded the Victoria Cross for his conduct at Magersfontein in assisting his wounded commanding officer Lieutenant Colonel Downham from the battlefield and for his conduct on 30th April 1900 when he received wounds that destroyed his sight. Towse received his VC from Queen Victoria. It is reported that the Queen had tears in her eyes during the investiture. Towse did significant work with soldiers in the Boer War and the Great War who lost their sight due to wounds.
The Gordons’ pipe tune ‘Captain Towse VC’ commemorates that officer.
Battle Honours:
Magersfontein is not a battle honour. All the regiments that fought in South Africa received the battle honour ‘South Africa’ with the dates of presence in the country.
Regimental anecdotes and traditions:
- During the course of the Highland Brigade’s night march to the Boer trench they encountered a Boer outpost. The forty seven defenders were members of the Boer Scandinavian Corps and had not been warned to withdraw to the main Boer position. They were all killed or captured by the Highlanders.
- The Royal Navy 4.7 inch gun was known as ‘Joe Chamberlain’. It fired in support of the army attack at the Battle of Magersfontein.
- Soldiers of the Highland Brigade reported that while they were pinned down in front of the Boer trench they saw a Boer, who seemed to them to be dressed like a German in a suit and shiny black shoes and smoking a cigar, walking around on the hill in a leisurely manner. The German paused every now and then to examine the British troops through a field glass and then fired at them with his rifle. He is reported as hitting several British officers. All attempts to shoot him failed. The soldiers reported that he appeared to have a ‘charmed life’.
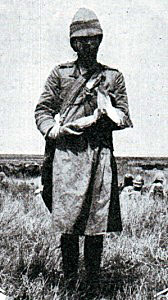
Wounded Highlander after the Battle of Magersfontein on 11th December 1899 in the Boer War
- There was controversy over the beginning of the battle with a bombardment on the Sabbath. Boers were reported to have been killed at divine worship. Evangelicals in South Africa and Britain believed the battle was lost because it was fought on a Sunday, the Almighty being offended at the desecration of the Sabbath. Similarly in the American Civil War the Federal army was believed to have lost the First Battle of Bull Run in 1861 because its attack was launched on the Sabbath.
- Magersfontein, Stormberg and Colenso were the defeats that made up “Black Week”. Although there were more failures for the British, Lord Roberts in the west and General Buller in Natal pushed the Boers back, relieving Kimberley, Mafeking and Ladysmith, capturing the capitals of the Free State, Bloemfontein and the Transvaal, Pretoria and finally after a protracted guerilla campaign bringing the war to a successful conclusion.
Reverend J. Robertson Chaplain to the Highland Brigade: Battle of Magersfontein on 11th December 1899 in the Boer War
- Contemporary accounts state that a night march should only be undertaken once the ground has been carefully reconnoitered and by soldiers who know the area. This seems a tall order for an army advancing over unknown territory. Nevertheless the Highland Brigade’s advance was unduly risky, particularly as it would be difficult to approach the Boer position without being observed with officers and soldiers who had no knowledge of the country and no real idea of what they were meant to be achieving.
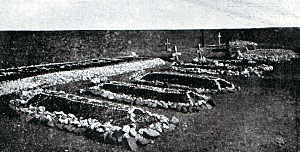
Graves of Highlanders killed at the Battle of Magersfontein on 11th December 1899 in the Boer War
- The losses in the Highland Brigade caused great distress in Scotland. The battle is commemorated in the pipe retreat march “The Highland Brigade at Magersfontein”. Major General Andy Wauchope was something of a Scottish celebrity, having stood against Gladstone in the contest for the seat of Midlothian during the 1892 General Election, reducing the Prime Minister’s majority to 690. Wauchope is said to have been greatly mourned.
- It is said that Wauchope was ‘fay’ and foresaw his own death. He had been wounded at every battle he had taken part in and expected this action to be his last.
- Wauchope was a Black Watch officer and the Highland battalion with the greatest loss was 2nd Black Watch. Inevitably comparisons were made with the Battle of Ticonderoga in 1758.
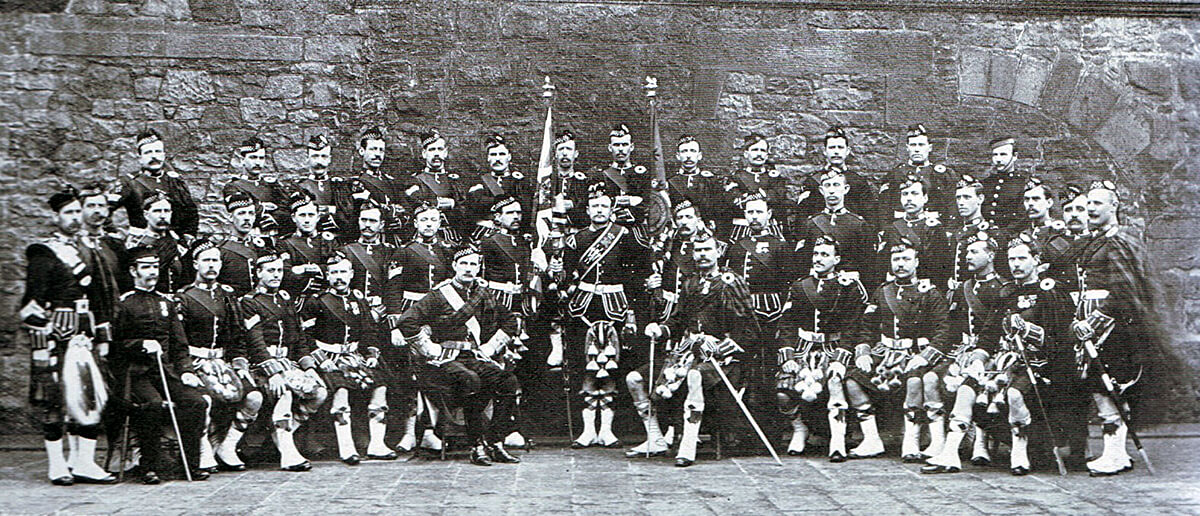
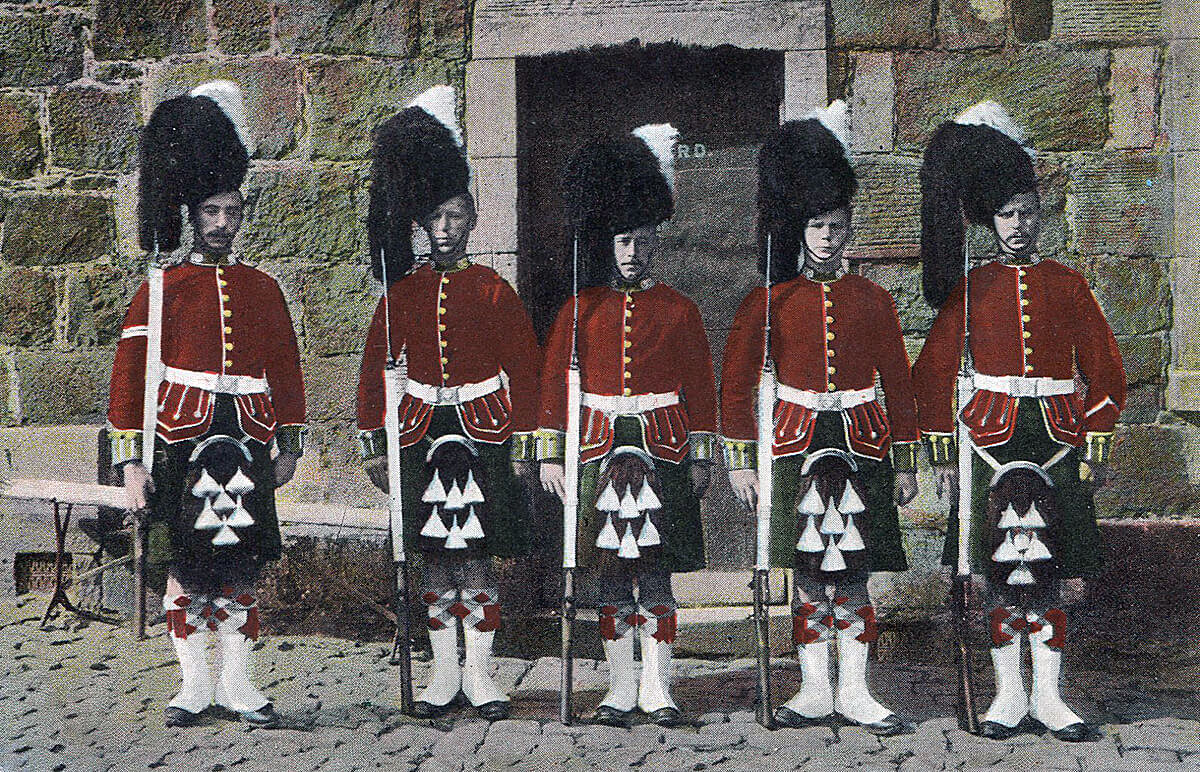
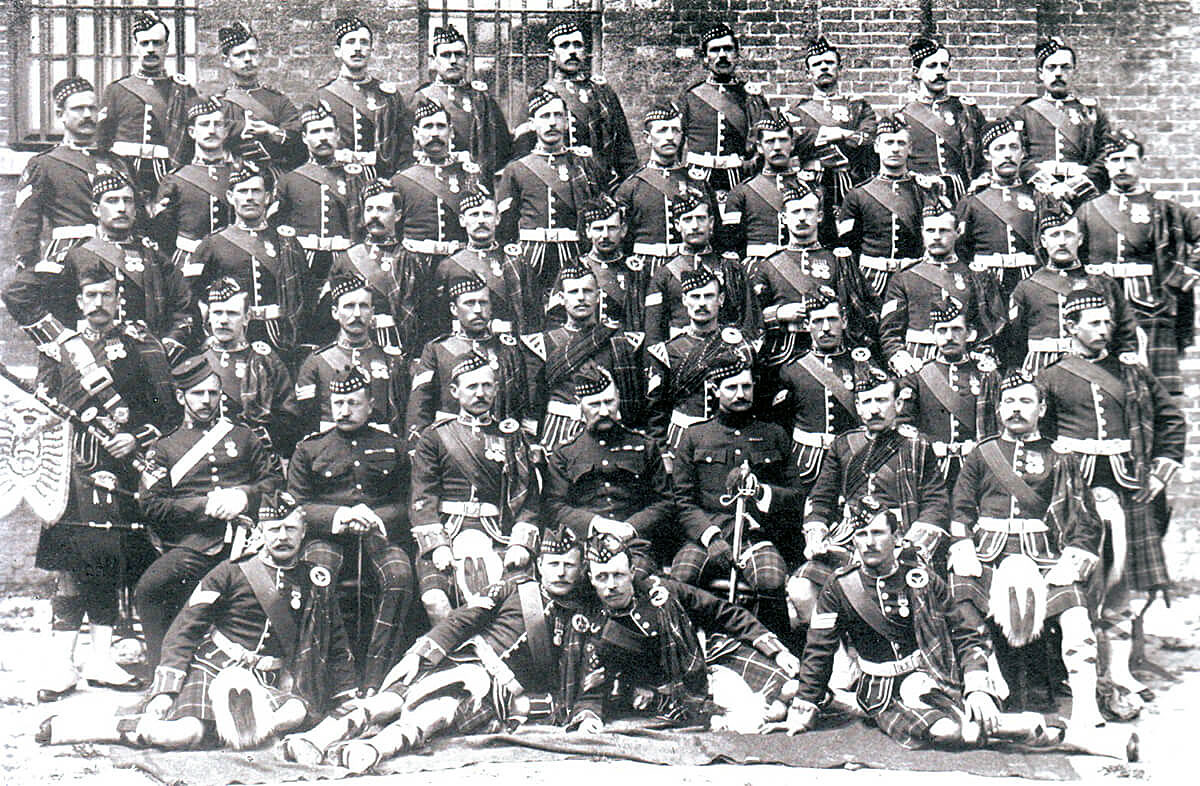
Non-commissioned officers of the 1st Argyll and Sutherland Highlanders, one of the battalions of the Highland Brigade at the Battle of Magersfontein on 11th December 1899 in the Boer War
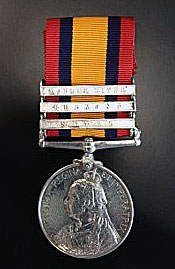
Queen’s South Africa Medal with clasps for ‘Natal’ ‘Belmont’ and ‘Modder River’: Battle of Magersfontein on 11th December 1899 in the Boer War
References:
The Boer War is widely covered. A cross section of interesting volumes would be:
The Times History of the War in South Africa
The Great Boer War by Sir Arthur Conan Doyle
Goodbye Dolly Gray by Rayne Kruger
With the Flag to Pretoria by HW Wilson
The Boer War by Thomas Pakenham
South Africa and the Transvaal War by Louis Creswicke (6 highly partisan volumes)
The previous battle in the Boer War is the Battle of Stormberg
The next battle in the Boer War is the Battle of Colenso
![]()
64 . Podcast on the Battle of Magersfontein: Lord Methuen’s disastrous defeat at the hands of Cronje’s Boers on 11th December 1899 in the Boer War; the Highland Brigade suffering severe loss: the second battle of ‘Black Week’: John Mackenzie’s britishbattles.com podcasts
© britishbattles.com.