Occasion, on 21st October 1899, of the devastating charge by the 5th Dragoon Guards and the 5th Lancers
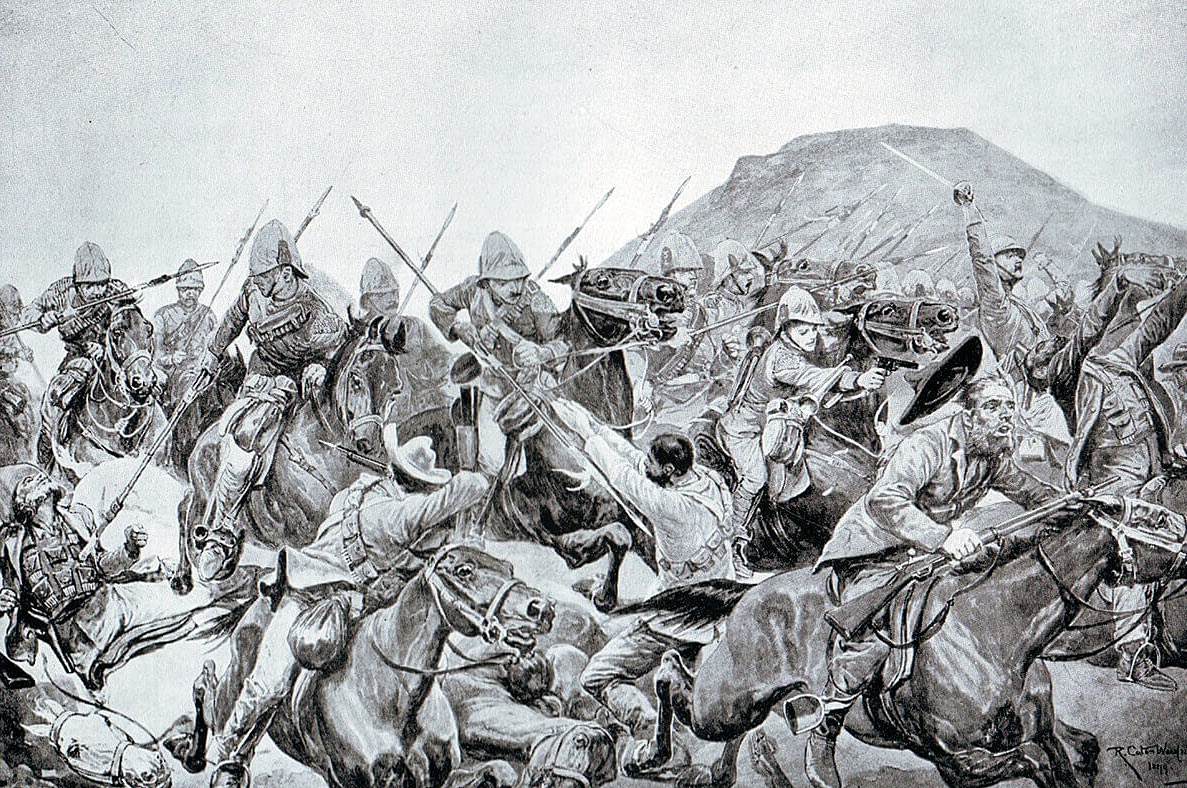
charge of the 5th Lancers at Elandslaagte on 21st October 1899 by Richard Caton Woodville, showing Trumpeter Shurlock firing his revolver: picture by Richard Caton Woodville
 58. Podcast on the Battle of Elandslaagte fought on 21st October 1899 in the Great Boer War with the devastating charge by the British 5th Dragoon Guards and 5th Lancers: John Mackenzie’s britishbattles.com podcasts
The previous battle in the Boer War is the Battle of Talana Hill
The next battle in the Boer War is the Battle of Ladysmith
Battle: Elandslaagte
War: The Boer War
Date of the Battle of Elandslaagte: 21st October 1899
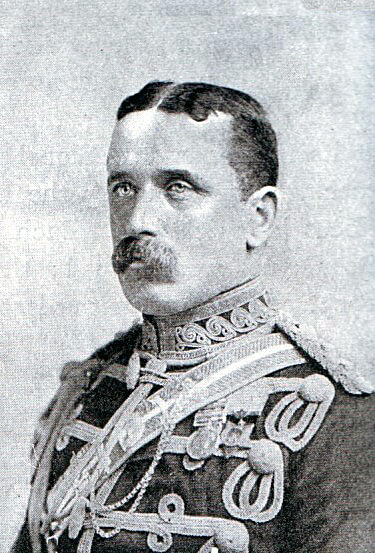
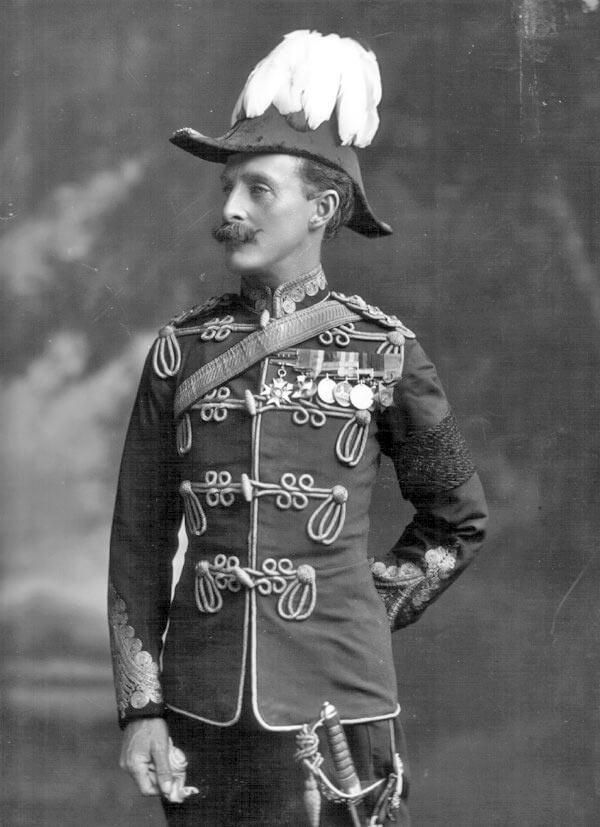
General French commander of the British force at the Battle of Elandslaagte on 21st October 1899
Place of the Battle of Elandslaagte: Northern Natal in South Africa
Combatants at the Battle of Elandslaagte: British against the Boers
Commanders at the Battle of Elandslaagte: Major General French and Colonel Ian Hamilton against Commandant Kock.
Size of the armies at the Battle of Elandslaagte: 2,500 British with 18 guns against 1,000 Boers of the Johannesburg Commando with 3 guns.
Uniforms, arms and equipment at the Battle of Elandslaagte: The Boer War was a serious jolt for the British Army. At the outbreak of the war British tactics were appropriate for the use of single shot firearms, fired in volleys controlled by company and battalion officers; the troops fighting in close order. The need for tight formations had been emphasised time and again in colonial fighting. In the Zulu and Sudan Wars overwhelming enemy numbers armed principally with stabbing weapons were kept at a distance by such tactics, but, as at Isandlwana, would overrun a loosely formed force. These tactics had to be entirely rethought in battle against the Boers armed with modern weapons.
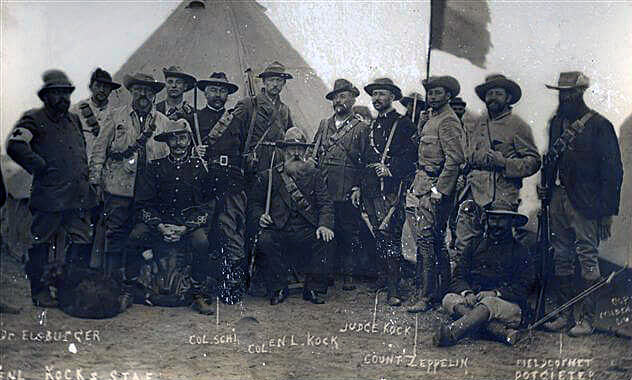
Commandant Kock and his staff. Kock commanded the Boer force at the Battle of Elandslaagte on 21st October 1899: one of his staff is a German officer, Count Zeppelin
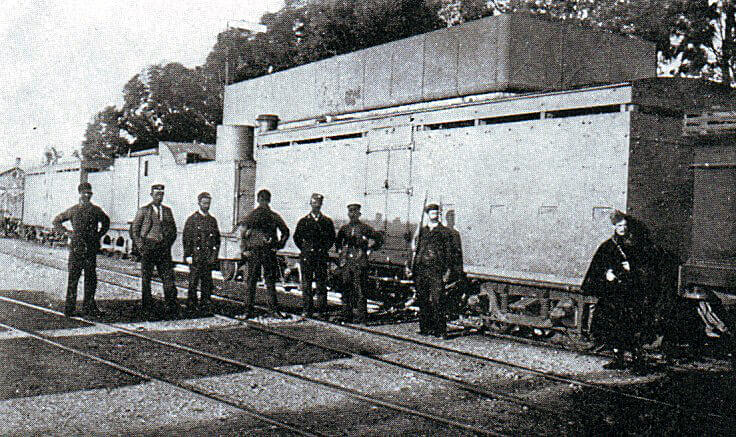
British armoured train in Natal: Battle of Elandslaagte fought on 21st October 1899 in the Great Boer War
In the months before hostilities the Boer commandant general, General Joubert, bought 30,000 Mauser magazine rifles, firing smokeless ammunition, and a number of modern field guns and automatic weapons from the German armaments manufacturer Krupp, the French firm Creusot and the British company Maxim.
Joubert bought high explosive ammunition for the field guns. The correct ammunition for use against infantry in the field was air burst shrapnel, exploding over the heads of advancing troops and showering them with metal fragments. High explosive shells were primarily for use against structures. The mistake came to light once the war was under way. It was then too late to order shrapnell due to the British naval blockade.
The Boer commandoes, without formal discipline, welded into a fighting force through a strong sense of community and dislike for the British. Field Cornets led burghers by personal influence not through any military code.

German Corps in the Boer Army before the Battle of Elandslaagte on 21st October 1899 in the Great Boer War
The Boers did not adopt military formation in battle, instinctively fighting from whatever cover there might be. Most Boers were countrymen, running their farms from the back of a pony with a rifle in one hand. These rural Boers brought a life time of marksmanship to the war, an important advantage further exploited by Joubert’s consignment of smokeless magazine rifles.
Viljoen is said to have coined the aphorism “Through God and the Mauser”. With strong field craft skills and high mobility the Boers were natural mounted infantry. The urban burghers and foreign volunteers readily adopted the fighting methods of the rest of the army.
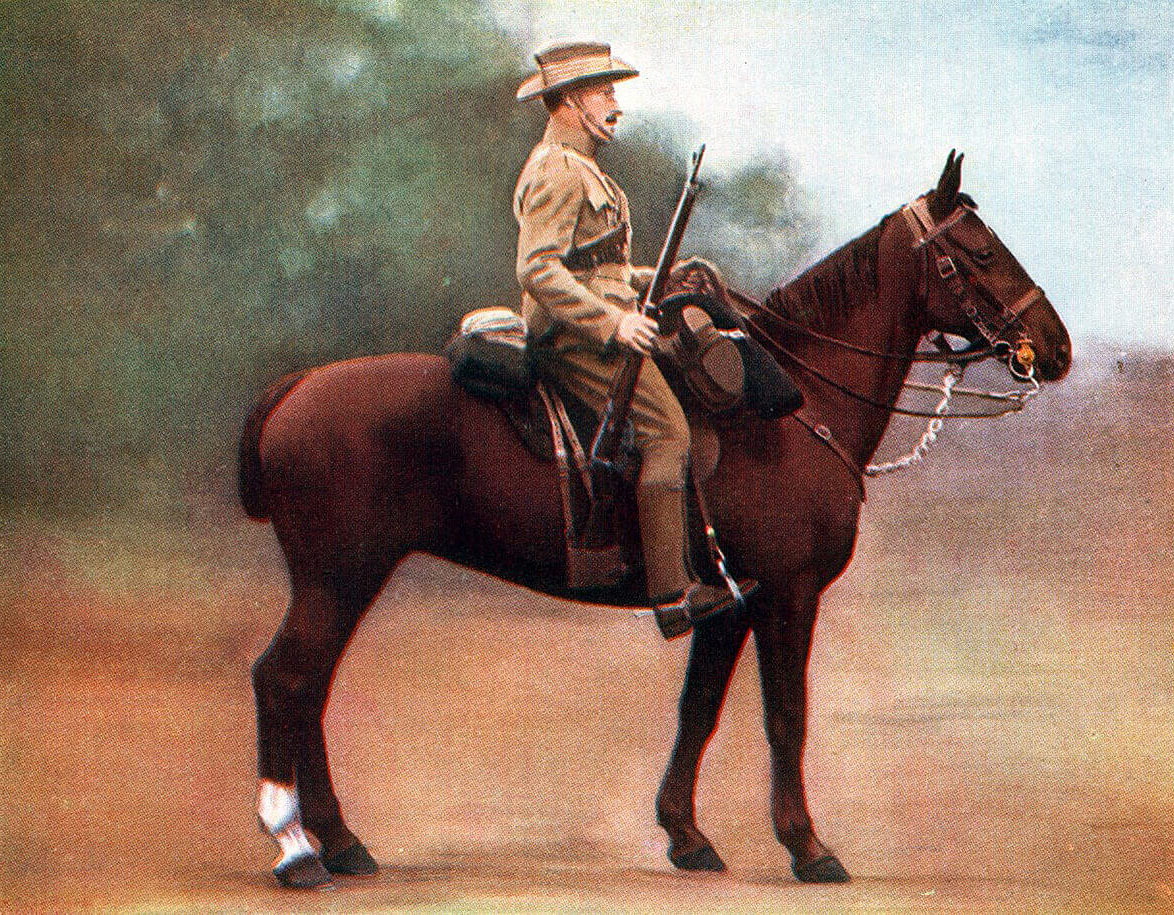
Imperial Light Horse sergeant. The Imperial Light Horse played a key infantry role at the Battle of Elandslaagte on 21st October 1899, two of its captains winning the Victoria Cross and its commanding officer Lieutenant Colonel Chisholme killed leading the attack
Other than in the regular uniformed Staats Artillery and police units, the Boers wore their every day civilian clothes on campaign.
After the first month the Boers lost their numerical superiority, spending the rest of the formal war on the defensive against British forces that regularly outnumbered them.
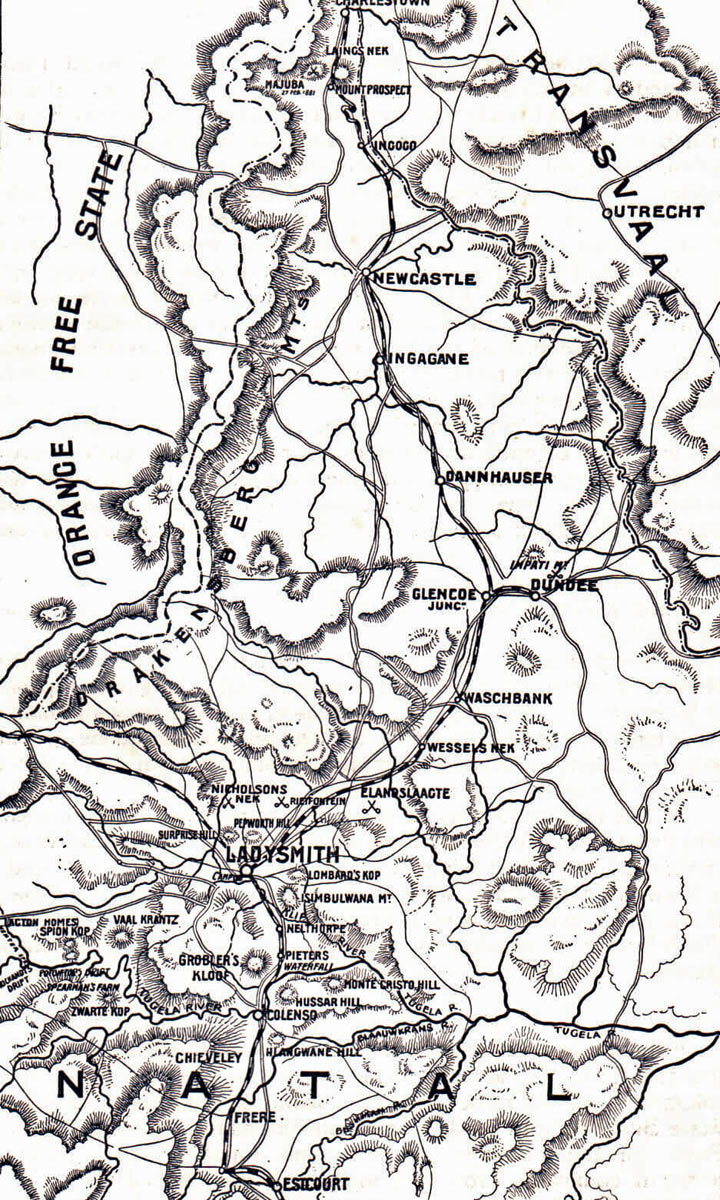
Map of Northern Natal in 1899
British tactics, developed on the North-West Frontier of India, Zululand, the Sudan and in other colonial wars against badly armed tribesmen, when used at Modder River, Magersfontein, Colenso and Spion Kop were incapable of winning battles against entrenched troops armed with modern magazine rifles. Every British commander made the same mistake; Buller; Methuen, Roberts and Kitchener (Elandslaagte was a notable exception where Hamilton specifically directed his infantry to keep an open formation). When General Kelly-Kenny attempted to winkle Cronje’s commandoes out of their riverside entrenchments at Paardeberg using his artillery, Kitchener intervened and insisted on a battle of infantry assaults, with the same disastrous consequences as earlier in the war.
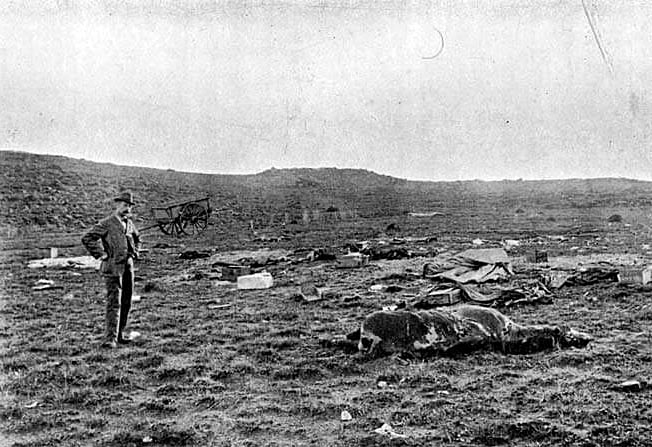
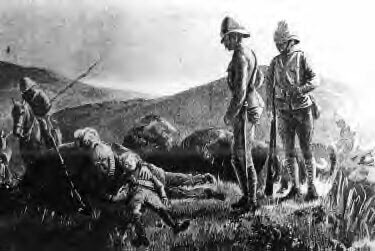
Elandslaagte battlefield after the battle fought on 21st October l899 in the Great Boer War
Some of the most successful British troops were the non-regular regiments; the Imperial Light Horse, City Imperial Volunteers, the South Africans, Canadians, Australians and New Zealanders, who more easily broke from the habit of earlier British colonial warfare, using their horses for transport rather than the charge, advancing by fire and manouevre in loose formations and making use of cover, rather than the formal advance into a storm of Mauser bullets.
Although the British quickly realised the importance of using the non-regular troops for scouting, the presence in the field of so many Boers, mounted and armed with accurate, long range magazine rifles, that they used to great effect, made scouting extremely hazardous and restricted the flow of information.
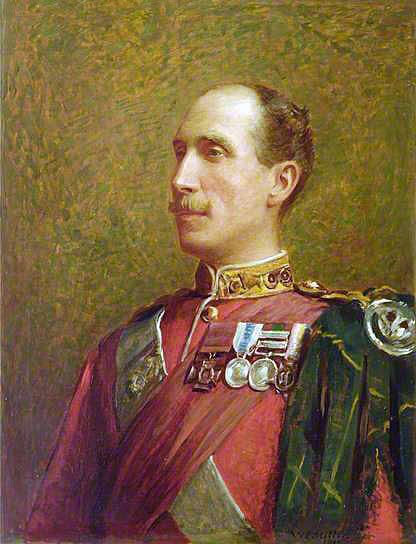
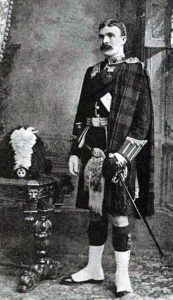
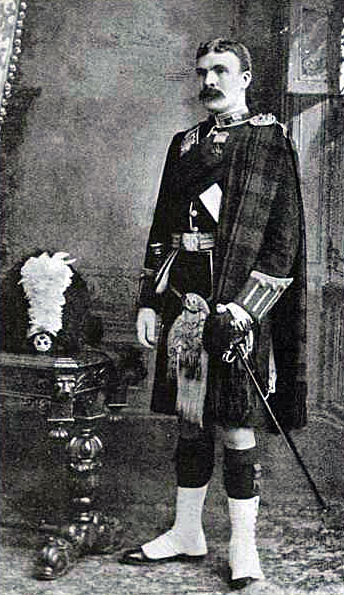
Lieutenant Colonel Dick-Cunyngham VC commanding officer of 2nd Gordon Highlanders at the Battle of Elandslaagte on 21st October 1899 in the Great Boer War
Uniforms at the Battle of Elandslaagte: The British regiments made an uncertain change into khaki uniforms in the years preceding the Boer War, with the topee helmet as tropical headgear. Highland regiments in Natal devised aprons to conceal coloured kilts and sporrans. By the end of the war the uniform of choice was a slouch hat, drab tunic and trousers; the danger of shiny buttons and too ostentatious emblems of rank emphasised in several engagements with disproportionately high officer casualties.
The British infantry were armed with the Lee Metford magazine rifle firing 10 rounds. But no training regime had been established to take advantage of the accuracy and speed of fire of the weapon. Personal skills such as scouting and field craft were little taught. The idea of fire and movement was largely unknown, many regiments still going into action in close order. Notoriously General Hart insisted that his Irish Brigade fight shoulder to shoulder as if on parade in Aldershot. Short of regular troops, Britain engaged volunteer forces from Britain, Canada, Australia and New Zealand who brought new ideas and more imaginative formations to the battlefield.
The British regular troops lacked imagination and resource. Routine procedures such as effective scouting and camp protection were often neglected. The war was littered with incidents in which British contingents became lost or were ambushed often unnecessarily and forced to surrender. The war was followed by a complete re-organisation of the British Army, with emphasis placed on personal weapon skills and fire and movement using cover.
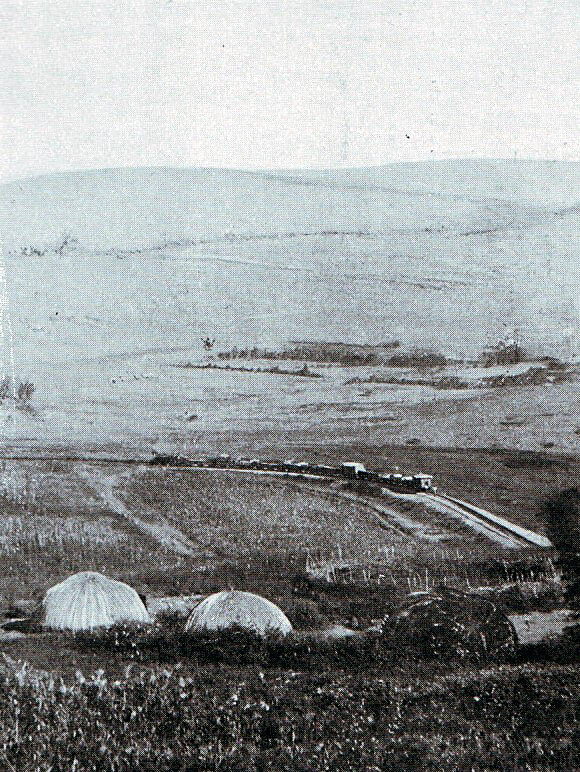
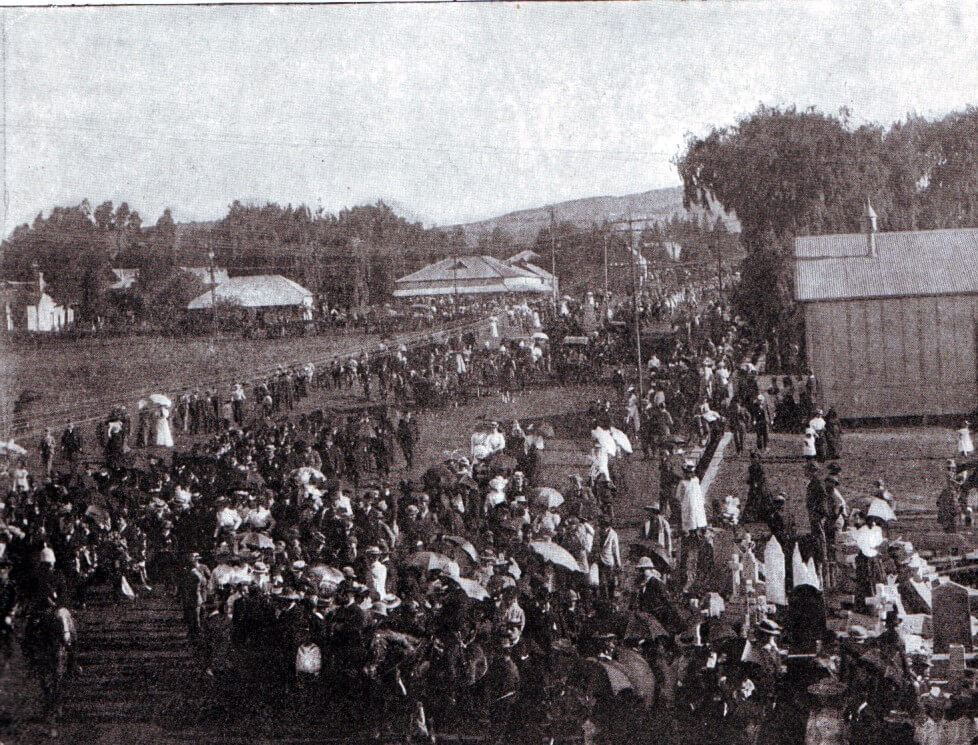
Photograph showing the railway to Elandslaagte and the hills where the battle took place on 21st October 1899 in the Great Boer War
The British artillery was a powerful force in the field, underused by commanders with little training in the use of modern guns in battle. Pakenham cites Pieters as being the battle at which a British commander, surprisingly Buller, developed a modern form of battlefield tactics: heavy artillery bombardments co-ordinated to permit the infantry to advance under their protection. It was the only occasion that Buller showed any real generalship and the short inspiration quickly died.
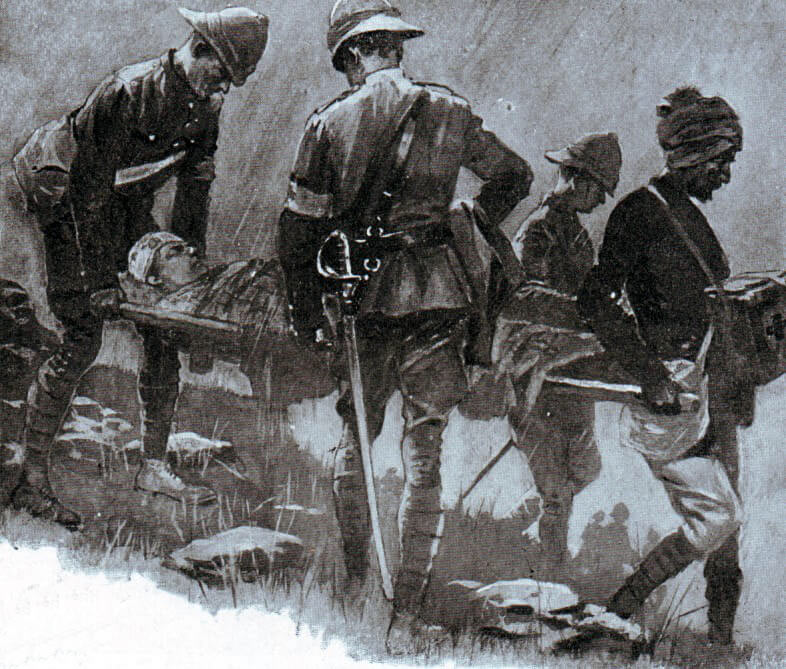
British doctors and medical staff collecting the wounded after the Battle of Elandslaagte on 21st October 1899 in the Great Boer War
The Royal Field Artillery fought with 15 pounder guns; the Royal Horse Artillery with 12 pounders and the Royal Garrison Artillery batteries with 5 inch howitzers. The Royal Navy provided heavy field artillery with a number of 4.7 inch naval guns mounted on field carriages devised by Captain Percy Scott of HMS Terrible.
Automatic weapons were used by the British usually mounted on special carriages accompanying the mounted infantry or cavalry.
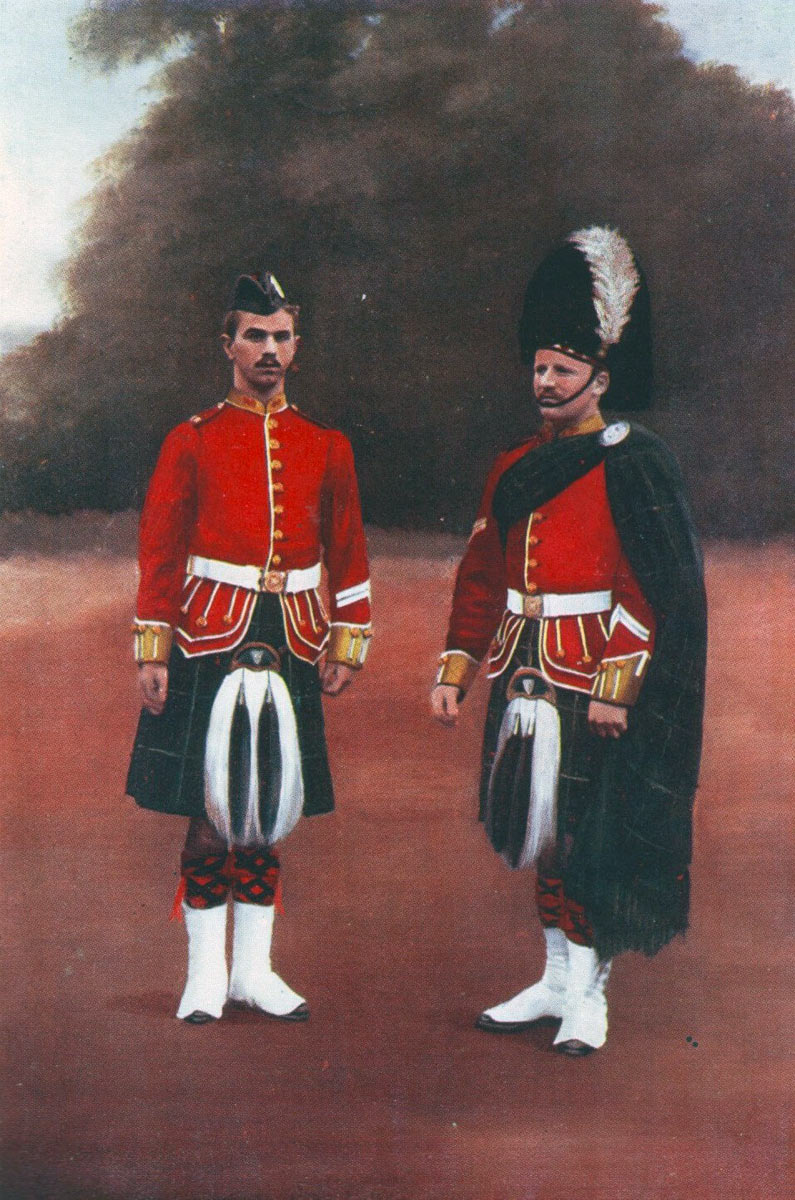
Gordon Highlanders: Battle of Elandslaagte on 21st October 1899 in the Great Boer War
Winner of the Battle of Elandslaagte: The British
British Regiments at the Battle of Elandslaagte:
5th Dragoon Guards: from 1922 the 5th Inniskilling Dragoon Guards and now the Royal Dragoon Guards.
5th Lancers: from 1922 the 16th/5th Lancers and now the Queen’s Royal Lancers.
Royal Field Artillery: 21st and 42nd Field Batteries,
1st Devonshire Regiment: later the Devon and Dorset Regiment and now merged into the Rifles
1st Manchester Regiment: later the King’s Regiment and now merged into the Duke of Lancaster’s Regiment
2nd Gordon Highlanders: later the Highlanders and now 4th Battalion the Royal Regiment of Scotland
Imperial Light Horse
Natal Volunteer Artillery.
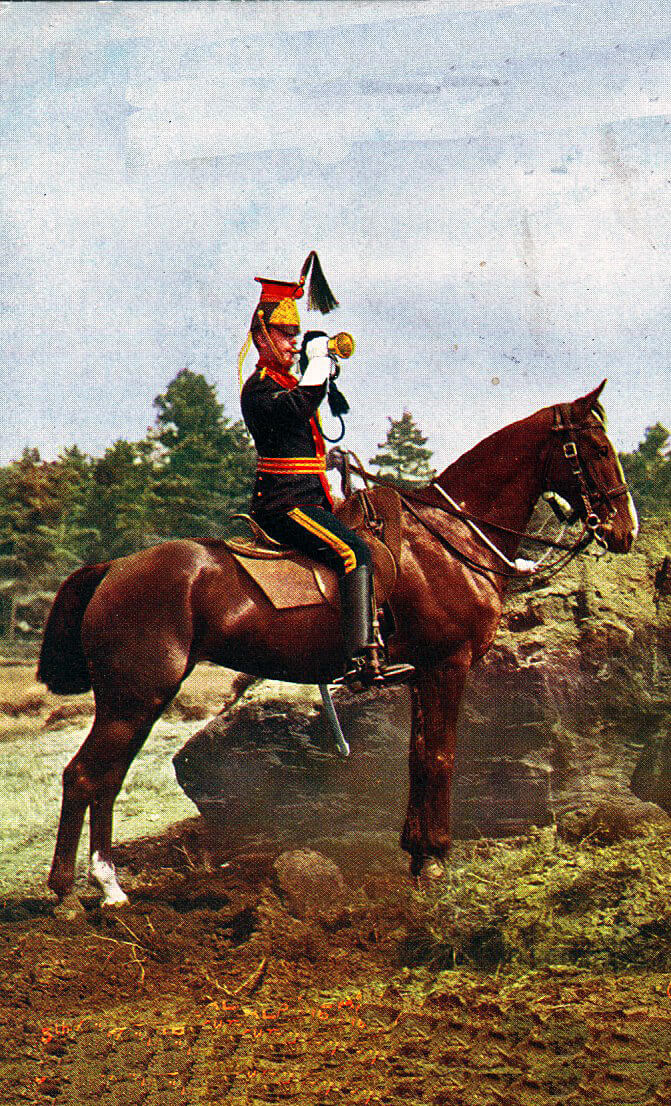
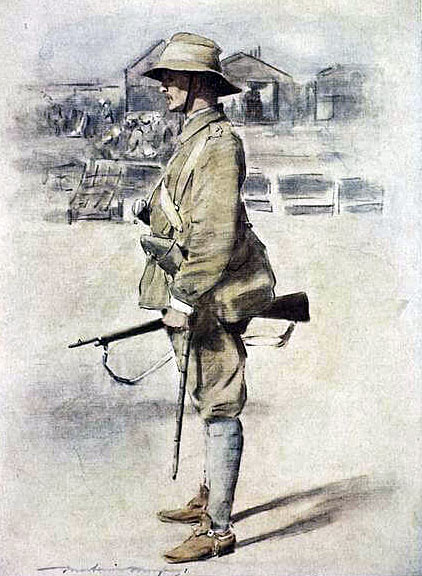
Trumpeter of 5th Royal Irish Lancers: Battle of Elandslaagte on 21st October 1899 in the Great Boer War
Account of the Battle of Elandslaagte:
On 18th October 1899, with the expiry of President Kruger’s ultimatum to the British, the Boer forces from the Transvaal and the Orange Free State invaded the British colony of Natal along its northern border. In breach of General Buller’s advice from England, the outnumbered British garrison in Natal was deployed to the North of the Tugela River, based on Ladysmith.
The aim of the British commander-in-chief in Natal General Sir George White in advancing north of the Tugela seems to have been to keep the Boer forces from the Transvaal and the Orange Free State apart.
The temporary British commander in chief, Major General Penn Symons, won the Pyrrhic victory of Talana Hill at Dundee on 20th October 1899 against an exposed Boer commando, Penn Symons being mortally wounded.
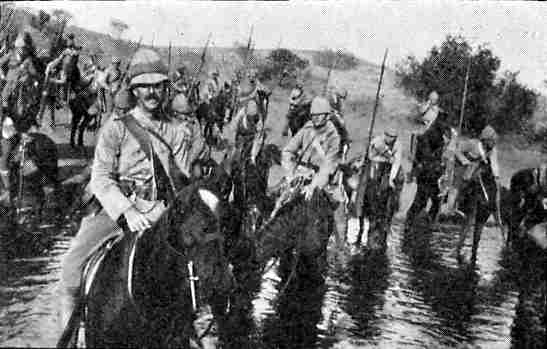
5th Lancers in South Africa during the Boer War
On the following day General White, newly arrived in Natal to take over from Penn Symons, sent Major General French to conduct a reconnaissance to Elandslaagte to investigate reports that the Boers had cut the railway and telegraph to Dundee.
Captain Mullins of the Imperial Light Horse winner of the Victoria Cross at the Battle of Elandslaagte on 21st October 1899 in the Great Boer War
Captain Robert Johnston of the Imperial Light Horse winner of the Victoria Cross at the Battle of Elandslaagte on 21st October 1899 in the Great Boer War
French arrived in the neighbourhood of Elandslaagte with the 5th Dragoon Guards, the 5th Lancers, five squadrons of the Imperial Light Horse, the Natal Field Battery and a half battalion of the 2nd Manchester Regiment, the infantry travelling by train.
French observed that the Boers were indeed in possession of Elandslaagte Station and had pitched camp in the hills to the south-east of the station. French’s guns bombarded the Boers in the station area and French then fell back to the Modder Spruit, calling for re-enforcements from Ladysmith through the railway telegraph.
Imperial Light Horse attacking at the Battle of Elandslaagte on 21st October 1899 in the Great Boer War by William Barnes Wolllen
The Boer force in Elandslaagte was the Johannesburg Commando headed by the aged Commandant Kock. This small force was far in advance of the main Boer army, in breach of General Joubert’s carefully laid plans.
Colonel Ian Hamilton commander of the British infantry brigade at the Battle of Elandslaagte on 21st October 1899 in the Great Boer War
General Sir George White immediately dispatched an infantry brigade from Ladysmith, commanded by Colonel Ian Hamilton, comprising 1st Devons, the second half of the 1st Manchesters and 2nd Gordon Highlanders, a further squadron of the 5th Dragoon Guards and two batteries of Royal Field Artillery with twelve 15 pounder field guns. The infantry travelled in two trains, led by an armoured train, while the cavalry and guns took the road.
Hamilton’s infantry detrained just to the north of the Modder Spruit, where French and his troops were waiting for them. French was now in command of the whole force of 1,630 infantry, 1,314 cavalry and 552 gunners with 18 guns. He faced a Boer force of some 1,000 men and 3 guns, the Johannesburg Commando being reinforced by a further five hundred foreign volunteers.
Kock’s Boers were in position on a curved ridge with a central hill to the east of the railway line. French deployed his infantry so that the Devons would advance on the Boer front, attracting their fire, while the remaining infantry, 1st Manchesters and 2nd Gordons with the dismounted Imperial Light Horse, circled around to the right and attacked onto the Boer left flank. The cavalry were divided. Four squadrons of 5th Dragoon Guards and 5th Lancers took the left flank, ready to encircle the Boer right, by riding around the ridge once the infantry attack succeeded in pushing the Boers off the ridge. Two squadrons of the two cavalry regiments, one from each, were positioned on the right flank to protect the flank and rear of the attacking British infantry. The gun batteries remained in the centre.
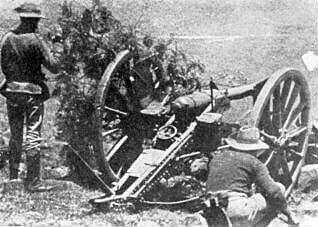
Natal Field Artillery in the Boer War: Battle of Elandslaagte on 21st October 1899 in the Great Boer War
As the British force approached Elandslaagte the cavalry drove the Boers back to their hill-top position on the ridge, so that the infantry were enabled to remain in the trains until they reached close to the start point for the attack.
The British guns came into action at around 1.15pm, bombarding the Boer positions on the ridge, while the infantry detrained and formed up for the advance.
Colonel Ian Hamilton, the brigade commander, relying on his experience on the North-West Frontier of India, took the view that close order was inappropriate for an advance against modern magazine rifles and directed the Devons to form with three yards between each two men and with the companies widely spread out. Unfortunately this was not a practice adopted in many of the subsequent major battles of the war.
In this formation the Devons advanced under a heavy Boer fire to the base of the ridge where they took cover and waited, returning fire. Major Park, commanding the Devons, instructed his company officers that Hamilton’s orders were that the Devons were not to push in with their final attack on the Boer positions on the ridge until the flank attack by the Manchesters, Gordons and Imperial Light Horse was well established.
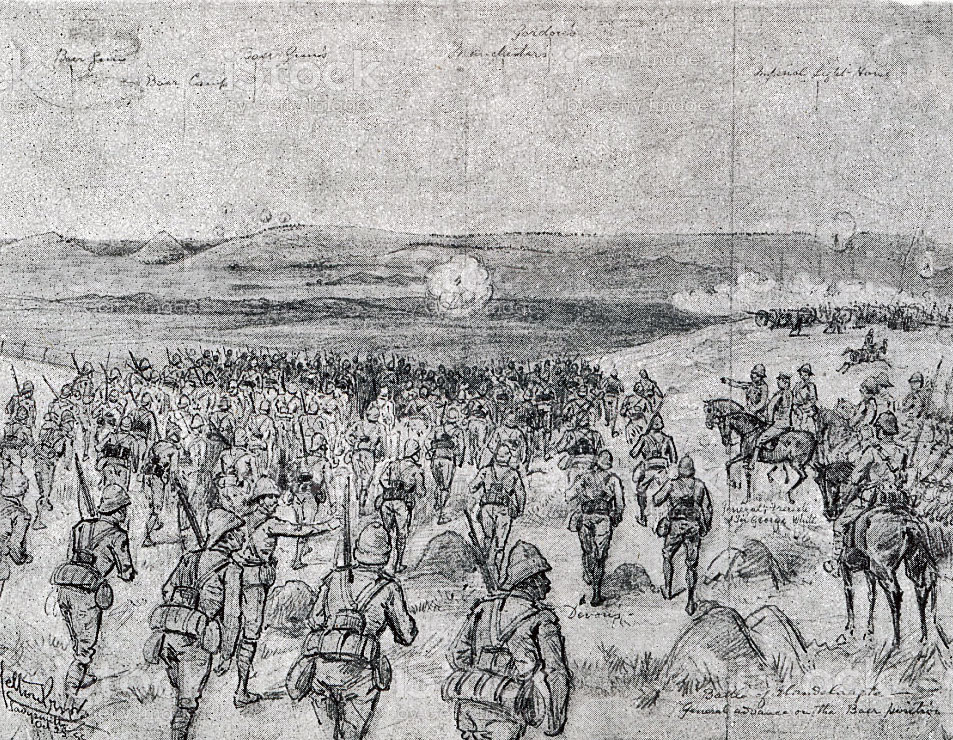
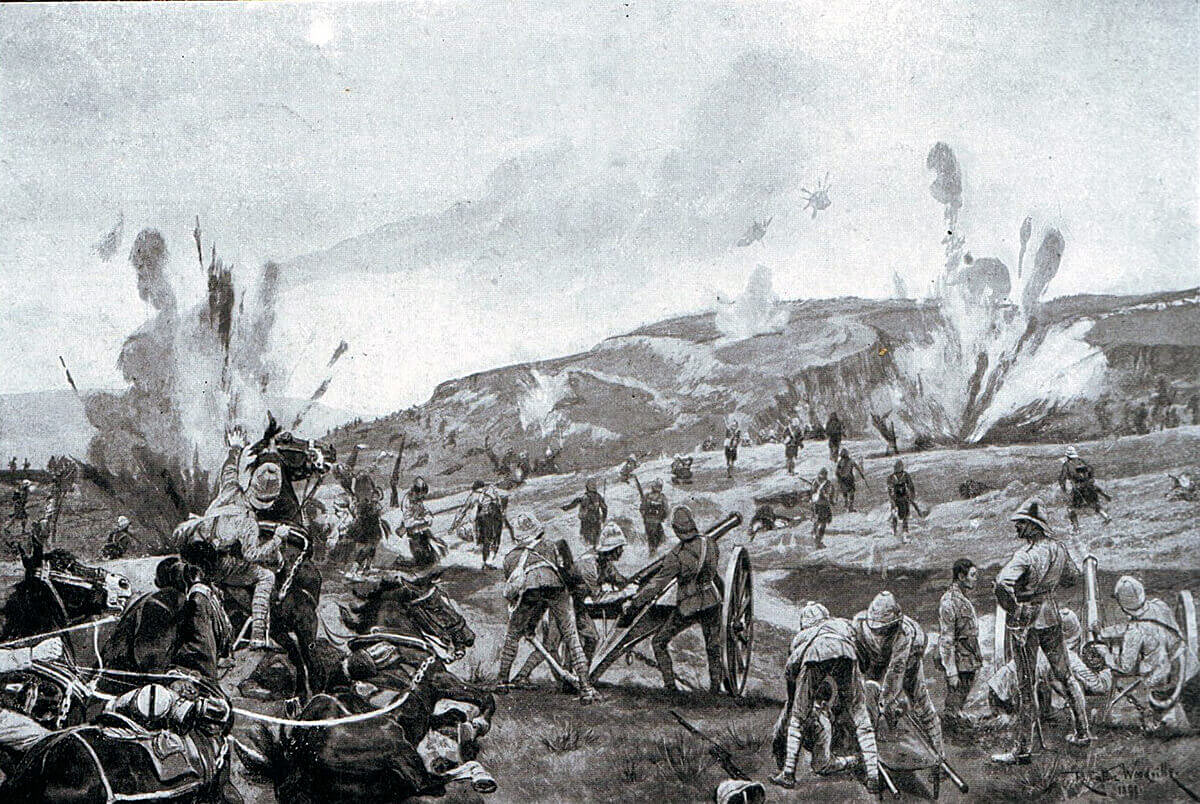
British Infantry Attack at the Battle of Elandslaagte on 21st October 1899 in the Great Boer War: sketch by Melton Prior
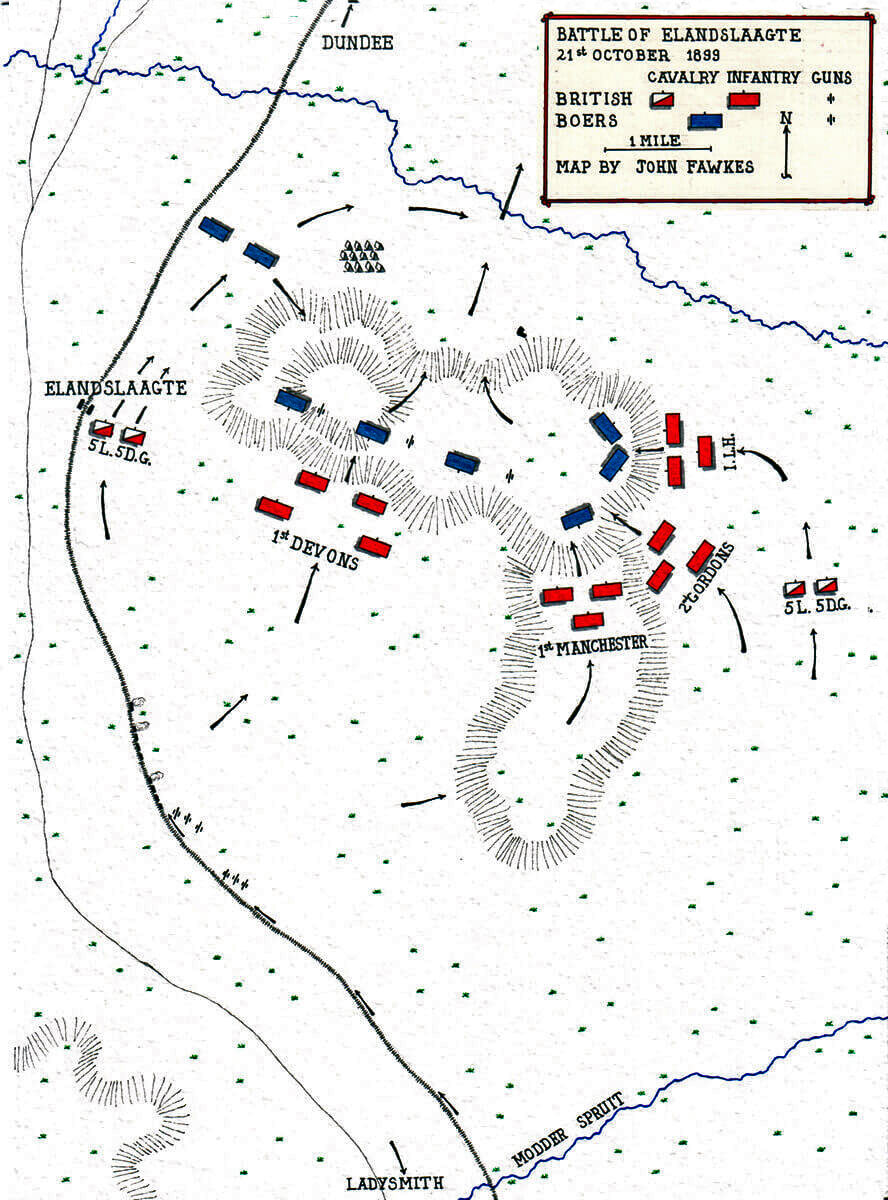
Map of the Battle of Elandslaagte on 21st October 1899 in the Great Boer War by John Fawkes
On the right flank the Manchesters encountered Boer positions forward of the ridge. Here the Boer fire held up the advance for some time until their riflemen withdrew onto the ridge. The Manchesters were then able to resume their advance up the hillside, moving around the end of the Boer flank with the Gordons and the Imperial Light Horse on their right.
The Gordon’s encountered a heavy fire which struck down several of their officers including the commanding officer, Lieutenant Colonel Dick-Cunyngham. Their advance was impeded by wire fences on the hillside.
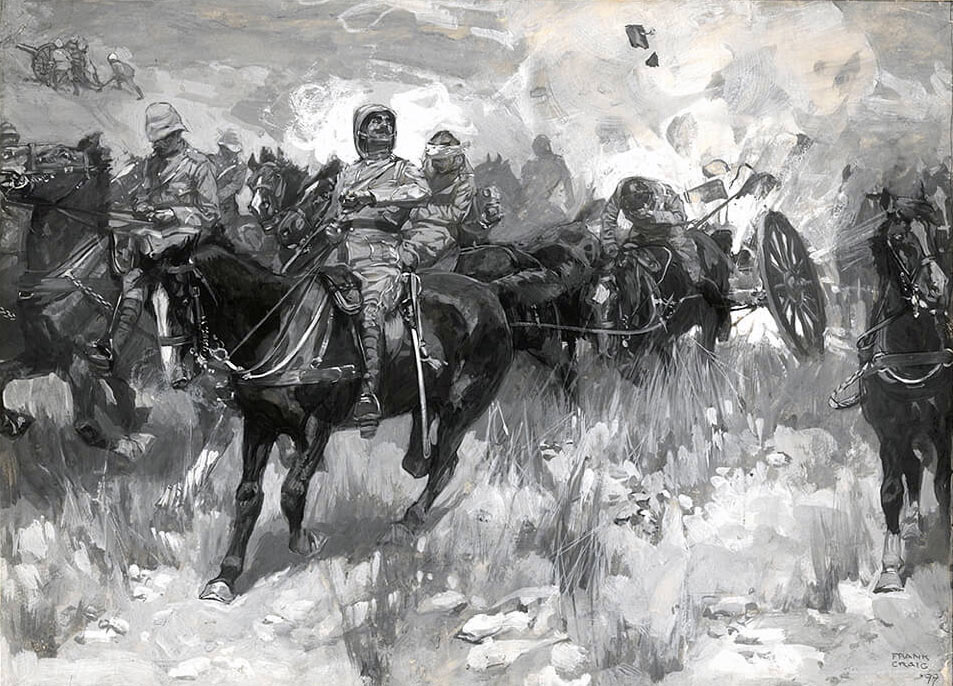
Royal Field Artillery at the Battle of Elandslaagte on 21st October 1899 in the Great Boer War: picture by Frank Craig
In spite of the adoption of khaki uniforms for all ranks the British officers were still highly visible due to their use of swords and other emblems of rank. Senior officers were frequently mounted during an action. The Boer riflemen used their marksmanship to pick off the officers in the knowledge that British units were unable to operate without officer leadership.

1st Devonshire Regiment advancing in open order at the Battle of Elandslaagte on 21st October 1899 in the Great Boer War
At 4.30pm a torrential African rainstorm blacked out the battlefield. The British infantry seized the opportunity to resume the attack, spurred on by Colonel Hamilton who rode up and shouted ‘Fix bayonets. Charge’. The drum major of the Gordons seized a bugle and blew the ‘Charge’ and the order was taken up by British buglers along the line.
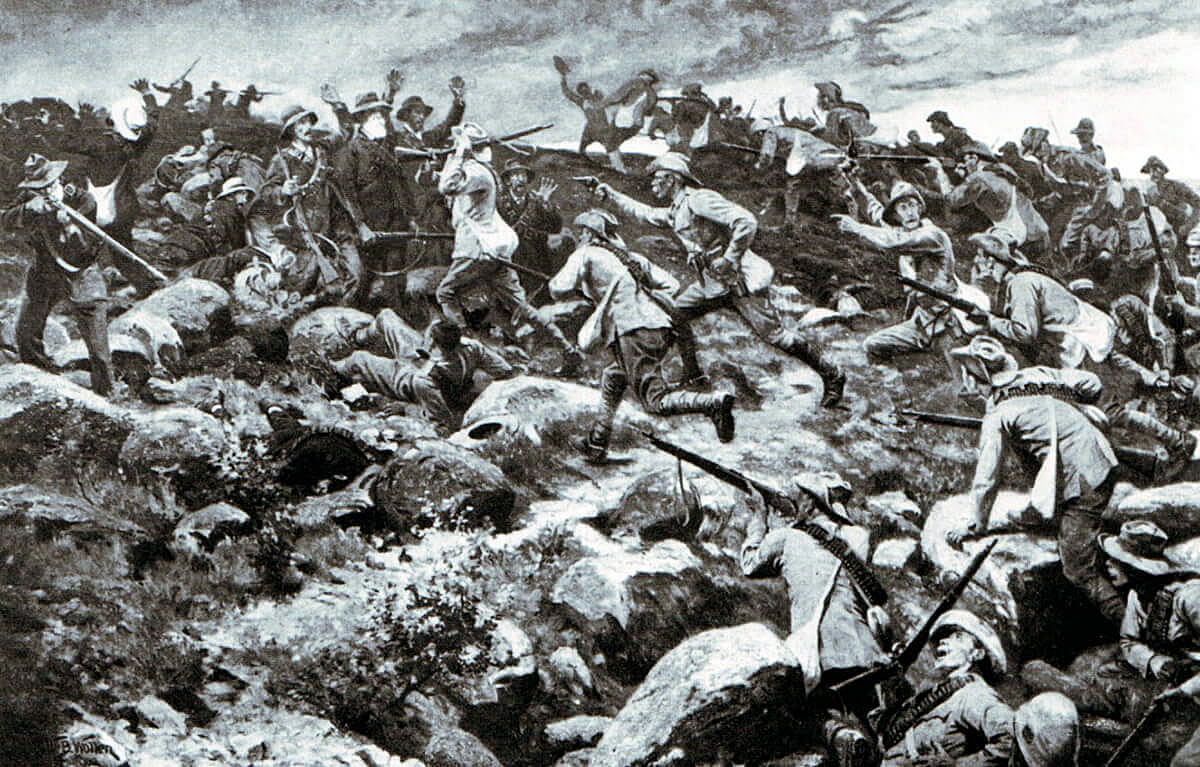
2nd Gordons attacking the hill at the Battle of Elandslaagte on 21st October 1899 in the Great Boer War: picture by Richard Caton Woodville
One of the first British soldiers onto the top of the ridge was the adjutant of the Manchesters, Captain Newbigging. Newbigging found the Boers had pulled back from the edge of the ridge to a position from where they resumed their fire.
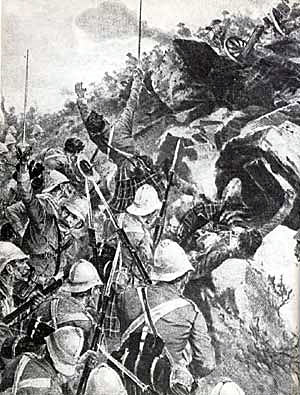
2nd Gordons storming the hill at the Battle of Elandslaagte on 21st October 1899 in the Great Boer War
The time was nearly 6pm and Boers could be seen saddling their ponies at the base of the ridge and making off. It seemed that the battle for the infantry was nearly over. A white flag appeared above the Boer line. British troops stopped firing and emerged from cover to take prisoners. At this point Commandant Kock led a counter attack from further down the hillside. Caught in the open the British suffered casualties including Newbigging, wounded in the back.
Hamilton and his staff officers rallied the recoiling soldiers and with buglers and the Gordons’ pipers sounding the charge the British surged back. Kock was severely wounded.
The Devons, having resumed their attack, surged over the front of the ridge and the position was taken, the remaining Boers hurrying down the hillside to their ponies.
As the Boers rode away across the flat ground to the north-east the four squadrons of 5th Dragoon Guards and 5th Lancers rounded the northern end of the ridge at a full gallop.
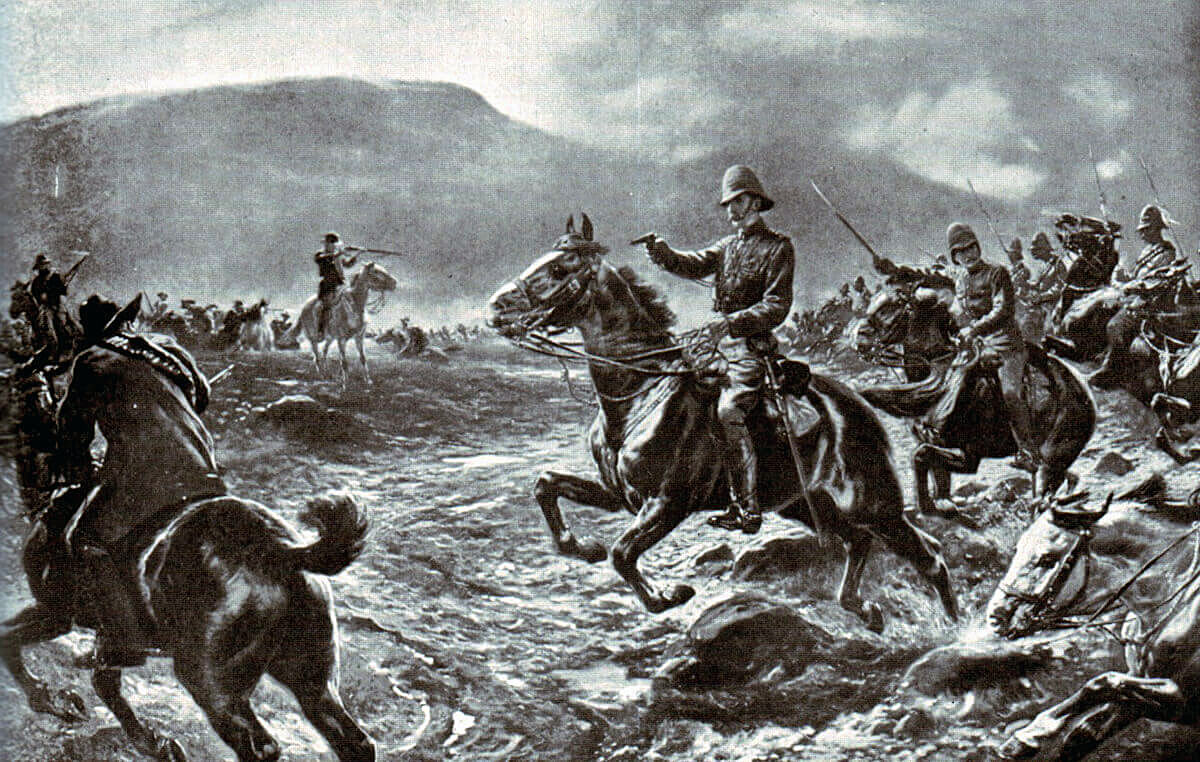
5th Dragoon Guards at the Battle of Elandslaagte on 21st October 1899 in the Great Boer War
The British cavalry rode into the Boer force using lances, swords and pistols. The Boer horsemen equipped only with rifles had nothing to counter these weapons. They were speared and cut down as the British rode through them and turning rode through them again and then back for a third time.
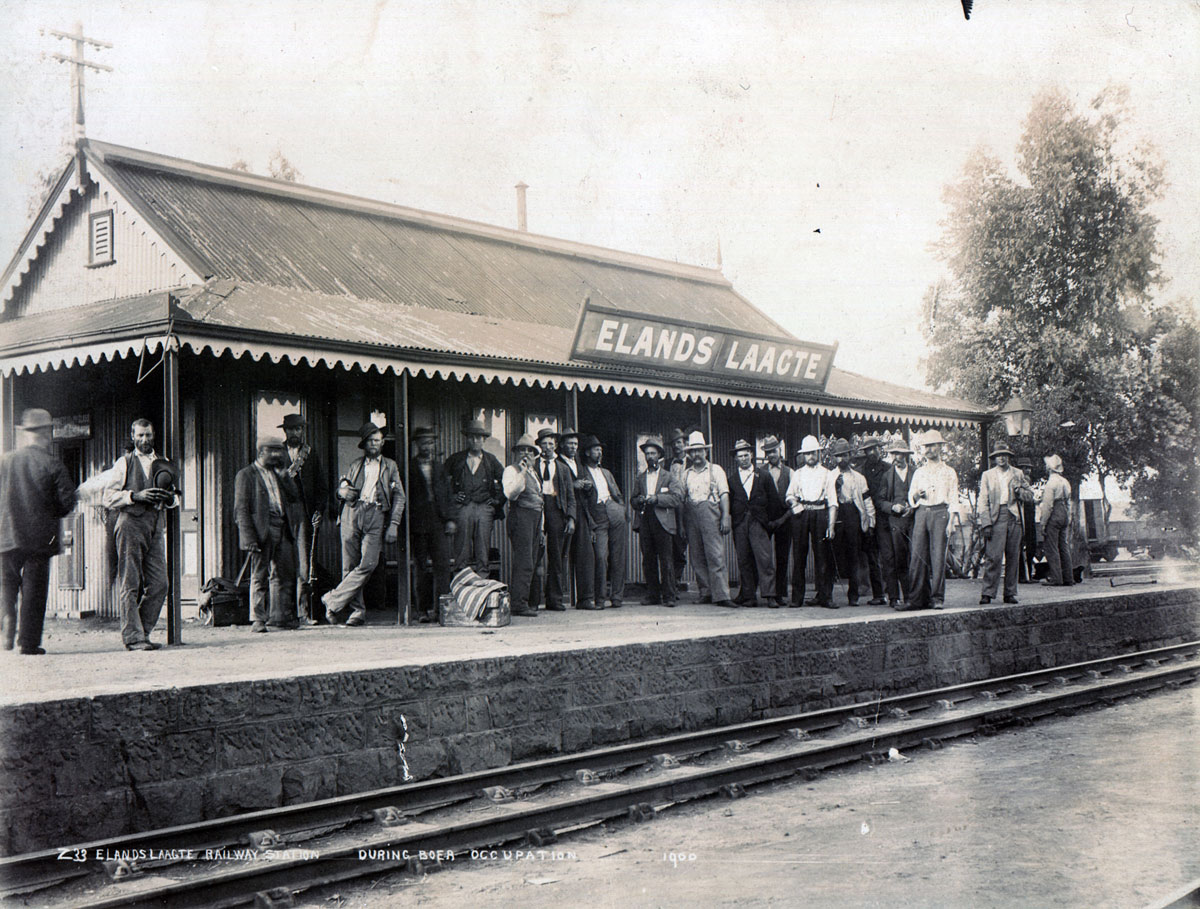
Elandslaagte Railway Station: Battle of Elandslaagte on 21st October 1899 in the Great Boer War
It was now 6.30pm and night was falling. The ridge and the valley to the rear was spread with the dead and wounded. Indian stretcher bearers moved around the hillside collecting the surviving casualties.
Decorations and Battle Honours from the Battle of Elandslaagte:
Two Gordon Highlanders won the Victoria Cross at Elandslaagte, Sergeant Major William Robertson and Captain Meiklejohn, as did two officers of the Imperial Light Horse, Captains Robertson and Mullins. All four recipients stood out in leading their soldiers and all were severely wounded. Meiklejohn lost his right arm.
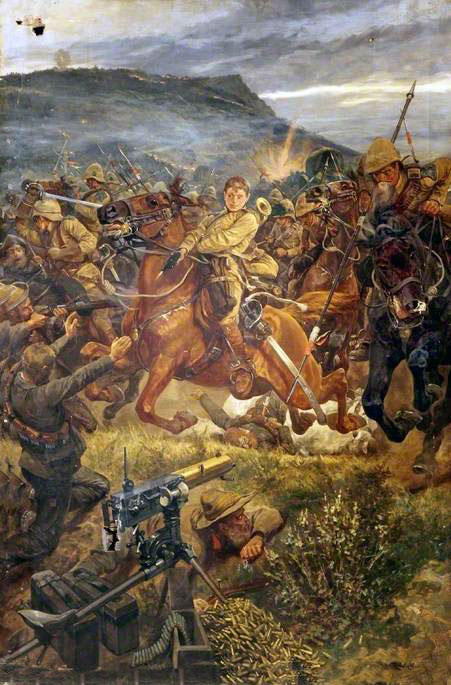
Trumpeter Shurlock at the Battle of Elandslaagte on 21st October 1899 in the Great Boer War: picture by Richard Caton Woodville
General French recommended Colonel Ian Hamilton for the Victoria Cross for his conduct in rallying the infantry in the face of Kock’s counter-attack. The view taken by the authorities in London was that extreme valour was the duty of a senior officer and did not warrant an award of the VC.
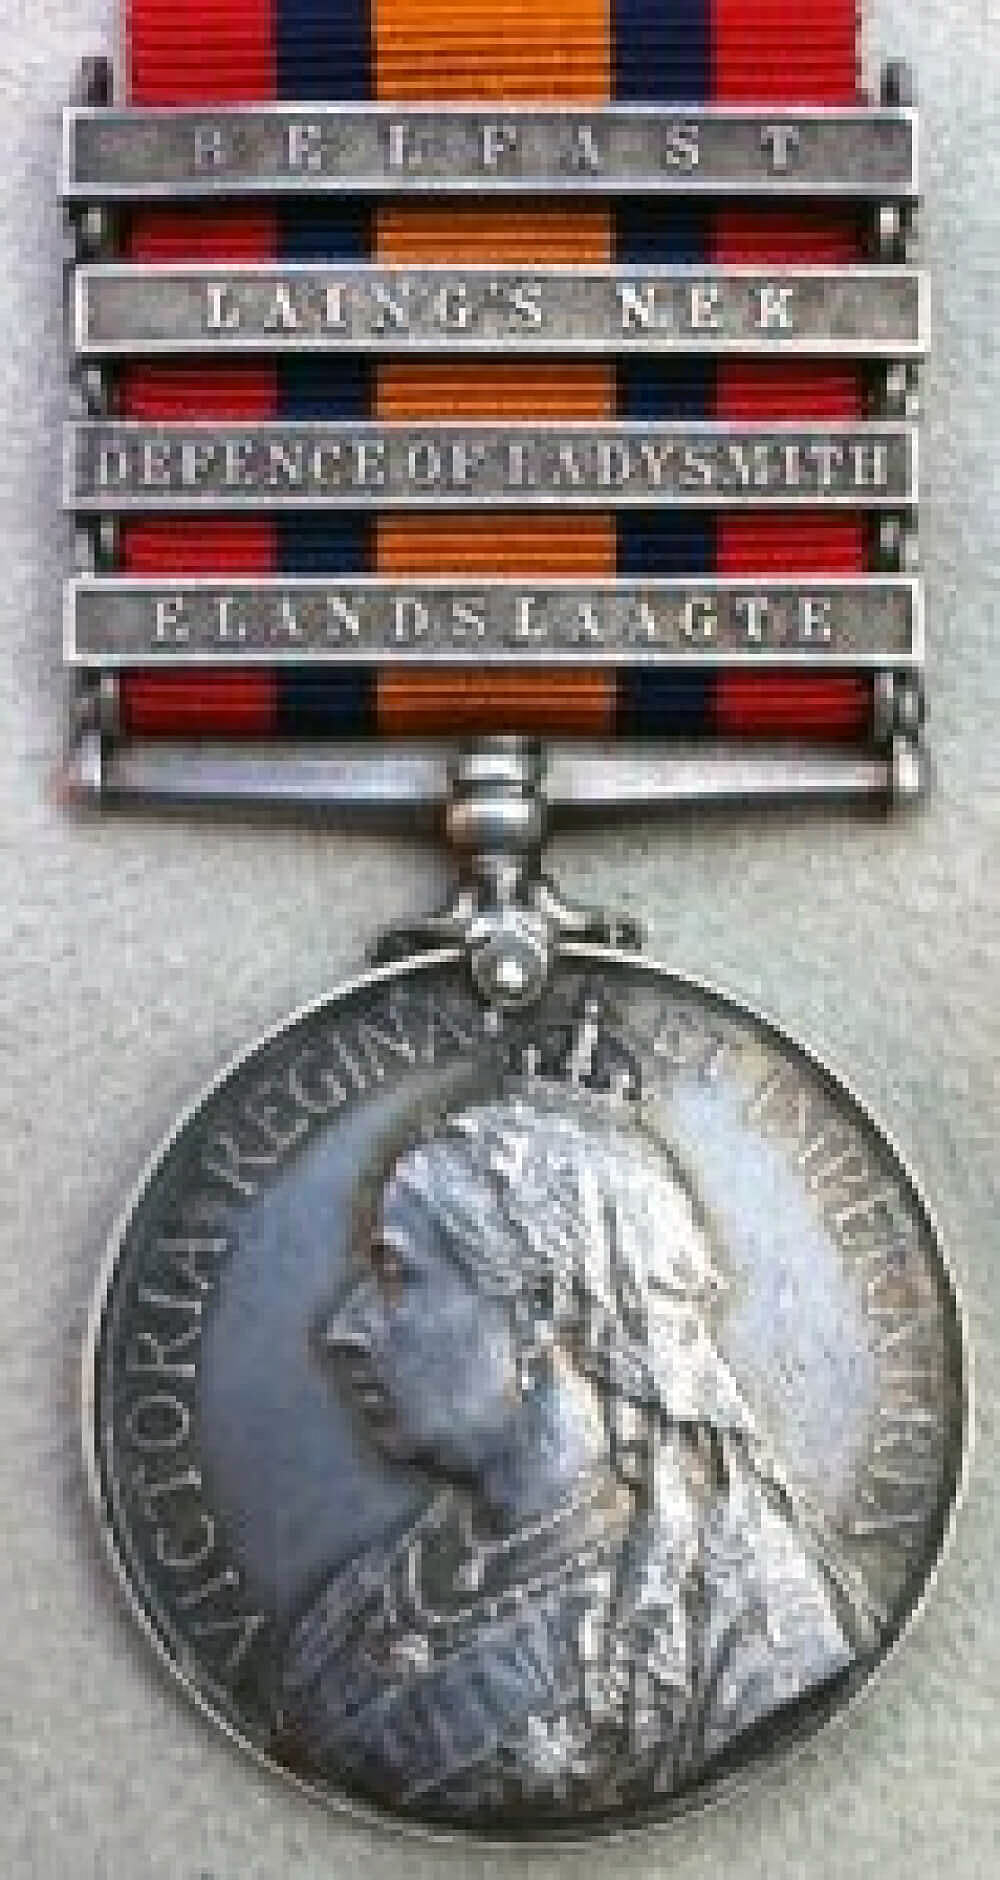
Queen’s South Africa medal with clasp for the Battle of Elandslaagte on 21st October 1899 in the Great Boer War
Elandslaagte was awarded as a clasp on the Queen’s South Africa Medal but is not a regimental battle honour. All regiments that fought in the South African War were awarded the Battle Honour ‘South Africa’ with the dates of involvement.
Casualties: The British suffered casualties of 35 officers and 202 men, the high officer casualties reflecting the nature of the fighting and their vulnerability. Boer casualties are thought to have been around 350. Commandant Kock was captured and died a few days later in a British hospital in Ladysmith.
There were many losses among the officers of both sides. Colonel Scott Chisholme, 5th Lancers, commanding the Imperial Light Horse, was killed and Lieutenant Colonel Dick-Cunyngham of the Gordons severely wounded.
Captain Meiklejohn of 2nd Gordon Highlanders winner of the Victoria Cross at the Battle of Elandslaagte on 21st October 1899 where he was seriously wounded, losing his right arm
Follow-up: Following the battle Sir George White received intelligence that General Joubert was advancing on him with overwhelming numbers. White ordered a withdrawal to the British base of Ladysmith that quickly degenerated into a panic-stricken retreat in which prisoners and equipment were abandoned.
Regimental anecdotes and traditions from the Battle of Elandslaagte:
- The newspaper correspondents left the battlefield to telegraph news of the British victory after the infantry capture of the ridge and before the cavalry charge, which was only later reported.
-
Roll call for the 1st Devons after the Battle of Elandslaagte on 21st October 1899 in the Great Boer War
Trumpeter Shurlock, a boy soldier in the 5th Lancers, shot three Boers with his revolver during the charge and was later cheered around the British camp, before becoming a hero in Britain. This may be a reason why the charge is associated with the 5th Lancers and the part played by the 5th Dragoon Guards, at least as significant, is less well-known.
- Caton Woodville’s picture of Trumpeter Shurlock shows a Boer machine gun. This probably reflects the uneasiness in Britain at what was little more than a slaughter of retreating Boers who were riding to get away and had no weapons to defend themselves from lances and swords. It is clear that the British cavalry speared and cut down the Boers indiscriminately and regardless of whether they were trying to surrender. Some Boers subsequently vowed vengeance against any lancer they captured. There is no evidence that this vow was carried out.
Body of a Boer cradling his 13 year old son after the Battle of Elandslaagte on 21st October 1899 in the Great Boer War
- The battle entered British military folklore with the title of “’Ell and Slaughter”, a reference to the devastating cavalry attack.
- Lieutenant Colonel Chisholme the commanding officer of the Imperial Light Horse led his men into battle waving a walking stick with a red scarf tied on the end. Chisholme’s last words before being shot dead are reputed to have been ‘my fellows are doing well’.
- The Boer commander, Commandant Kock, fought the battle in a black frock coat and top hat. He personally led the counter-attack from his camp at the base of the ridge, was wounded and captured.
Sergeant Major William Robertson of the 2nd Gordon Highlanders winner of the Victoria Cross at the Battle of Elandslaagte on 21st October 1899 in the Great Boer War
- The Indian stretcher bearers of the British Field Hospital collected the casualties of both sides from the battlefield. They found an elderly badly wounded Boer who asked them to find his 13 year old son. The stretcher bearers found the boy’s body and brought it to his distraught father who died with his son in his arms.
- Elandslaagte showed that the British were capable of dealing with Boer riflemen when led by officers of the capability and intelligence of Hamilton and French, particularly if the troops were experienced India hands, as the Gordons in particular were.
- The Imperial Light Horse was raised on the outbreak of war in secret by the Transvaal ‘Uitlanders’ who took part in the Jameson Raid, Aubrey Woolls-Sampson and Walter Davies. The regiment was taken over by the British officer Lieutenant-Colonel John Chisholme with Sergeant Major Dryden, both of the 5th Lancers, and comprised initially six squadrons of eighty-six men in each squadron raised from the ‘Uitlanders’ or foreigners ejected from the Boer Transvaal Republic. Dryden expressed amazement at the standard of marksmanship shown by the recruits to the regiment.
- It is interesting to note that the British battle plan was similar to that intended by General Penn Symons at Talana Hill; an artillery bombardment of the Boers in their hill top position, followed by an infantry assault, with the cavalry circling the hill to attack the Boers as they withdrew from their positions. If the commanding officer of the 18th Hussars had carried out his orders Talana Hill might well have been as successful as Elandslaagte.
- On Commandant Kock’s staff was a German officer, Count Zeppelin, son of the inventor of the German Zeppelin airship (see the photograph above).
Funeral in Pretoria of Commandant Kock wounded and captured at the Battle of Elandslaagte on 21st October 1899 and who died a few days later in a British hospital in Ladysmith
References for the Battle of Elandslaagte:
The Great Boer War by Sir Arthur Conan Doyle
Goodbye Dolly Gray by Rayne Kruger
The Boer War by Thomas Pakenham
South Africa and the Transvaal War by Louis Creswicke (6 highly partisan volumes)
Books solely on the fighting in Natal:
Buller’s Campaign by Julian Symons
Ladysmith by Ruari Chisholm
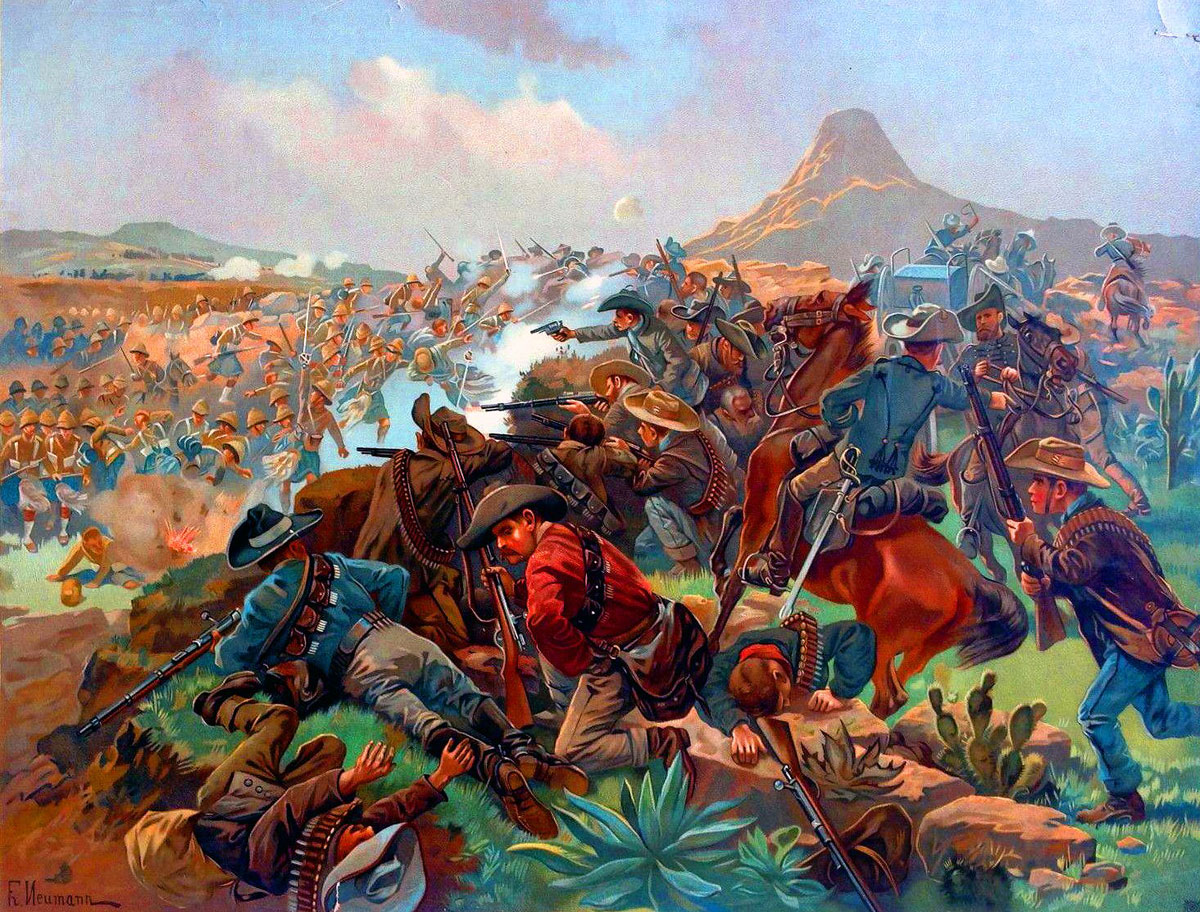
German volunteers in the Boer army at the Battle of Elandslaagte on 21st October 1899 in the Great Boer War: picture by Fritz Neumann
58. Podcast on the Battle of Elandslaagte fought on 21st October 1899 in the Great Boer War with the devastating charge by the British 5th Dragoon Guards and 5th Lancers: John Mackenzie’s britishbattles.com podcasts
The previous battle in the Boer War is the Battle of Talana Hill
The next battle in the Boer War is the Battle of Ladysmith
© britishbattles.com.