The quintessential Victorian battle, fought in the Sudan on 17th January 1885 by the lauded ‘Camel Corps’ against the Mahdi’s Dervishes , during the desperate attempt to rescue General Gordon in Khartoum: Celebrated in Sir Henry Newbolt’s poem ‘Vitai Lampada’; …. ‘the sand of the desert is sodden red, red with the wreck of the square that broke; the Gatling’s jammed and the colonel dead and the regiment blind with dust and smoke…….’Play up! Play up! And play the game!’
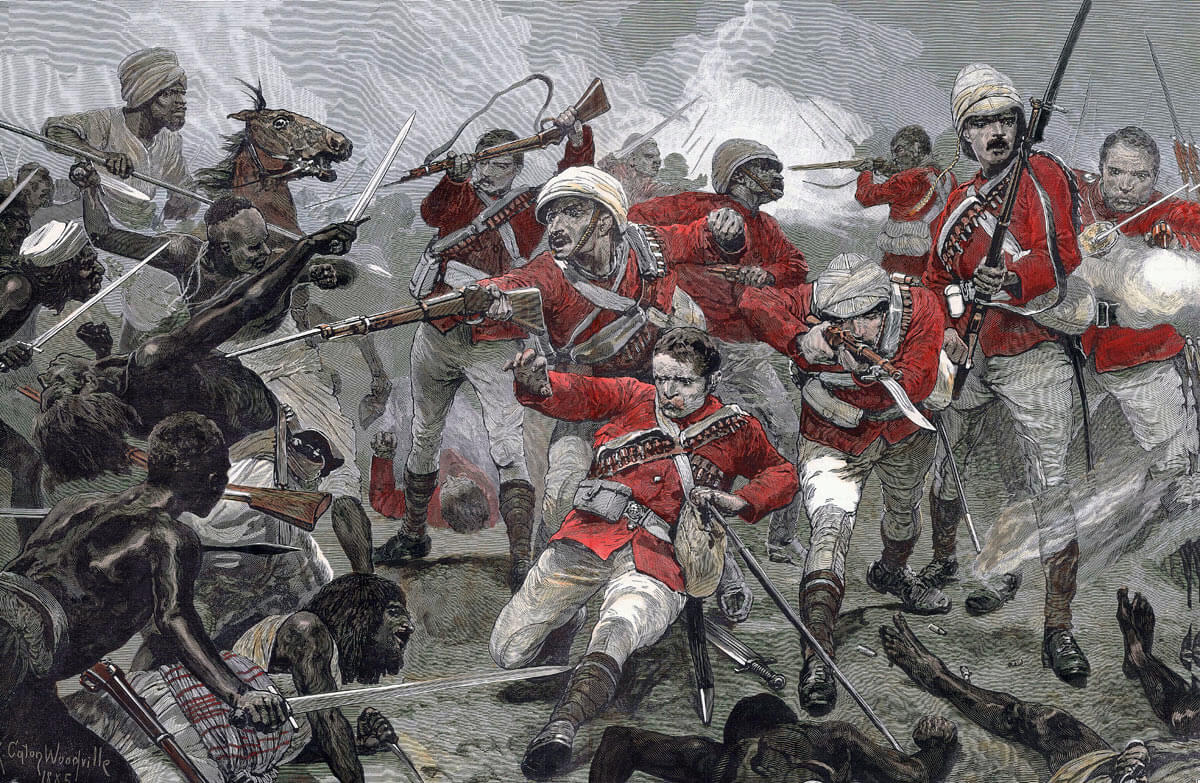
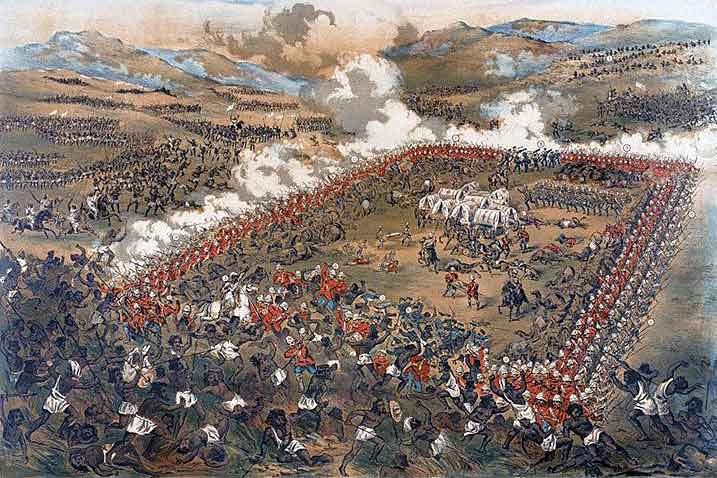
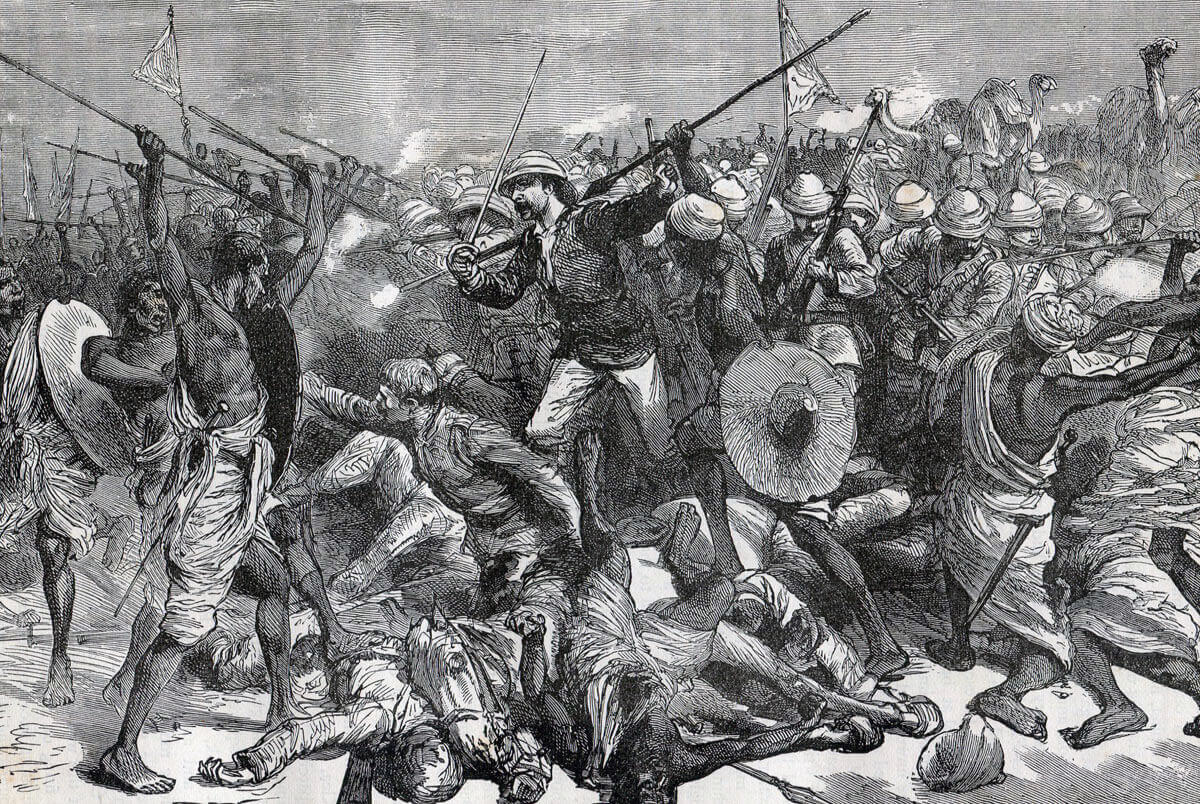
Mahdists breaking into the British square at the Battle of Abu Klea on 17th January 1885 in the Sudanese War: picture by Richard Caton Woodville
The previous battle of the War in Egypt and the Sudan is the Battle of Tamai
The next battle of the War in Egypt and the Sudan is the Battle of Atbara
To the War in Egypt and the Sudan index
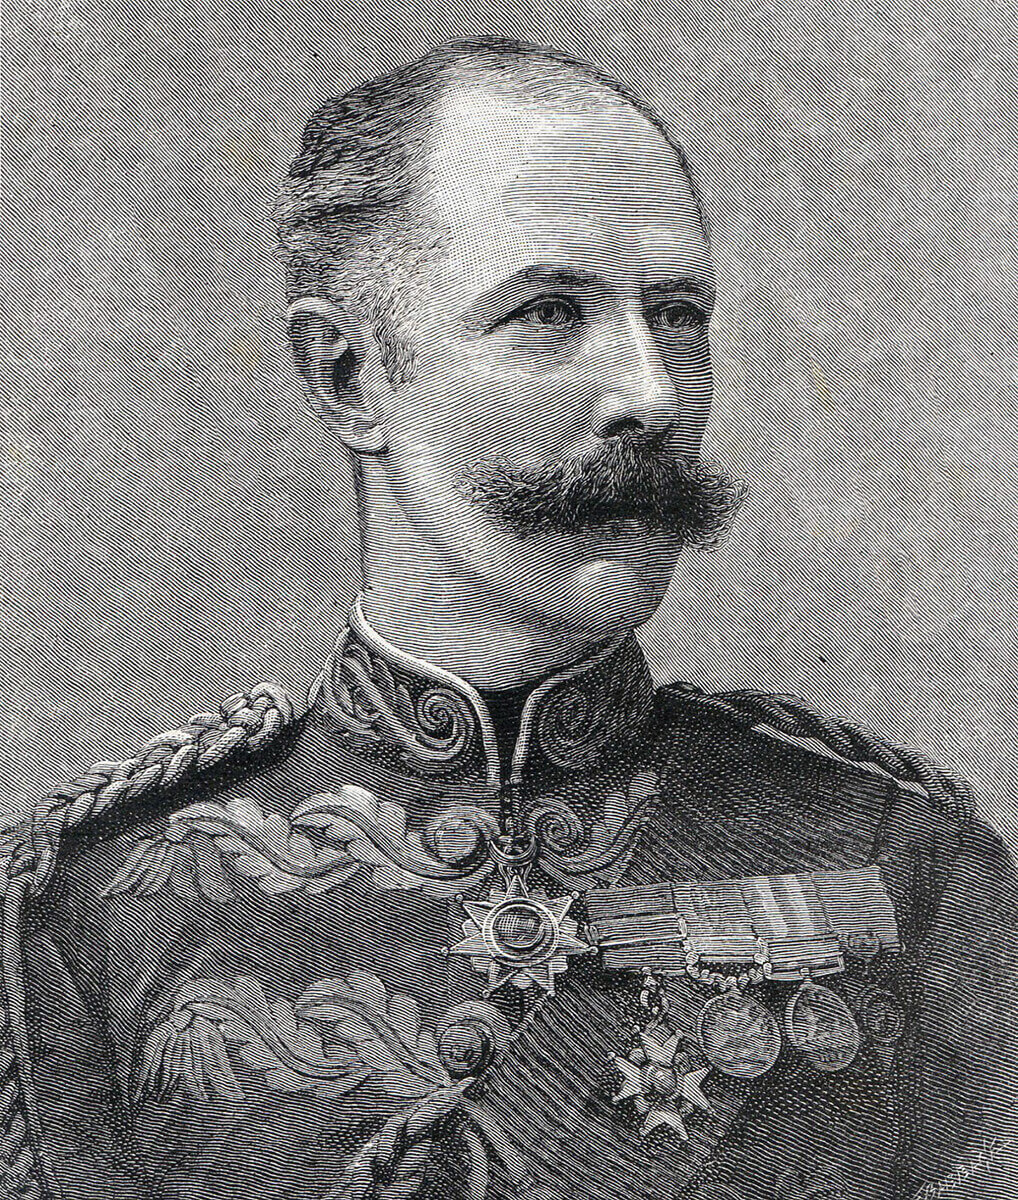
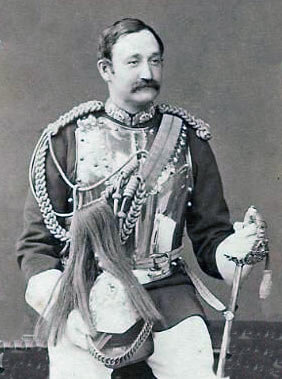
Major General Sir Herbert Stewart, British commander at the Battle of Abu Klea fought on 17th January 1884 in the Sudanese War: General Stewart was mortally wounded at Abu Kru on 19th January 1884
War: The Sudan Campaign to rescue General Charles Gordon besieged in Khartoum.
Date of the Battle of Abu Klea: 17th January 1885.
Place of the Battle of Abu Klea: In the bend of the River Nile, North of Khartoum.
Combatants at the Battle of Abu Klea: A British force against the Mahdi’s Sudanese army.
Commanders at the Battle of Abu Klea: Major General Sir Herbert Stewart against the Mahdi’s lieutenants.
Size of the armies at the Battle of Abu Klea: The British force numbered 1,400 against a Sudanese army of around 14,000, of which some 3,000 attacked the British square.
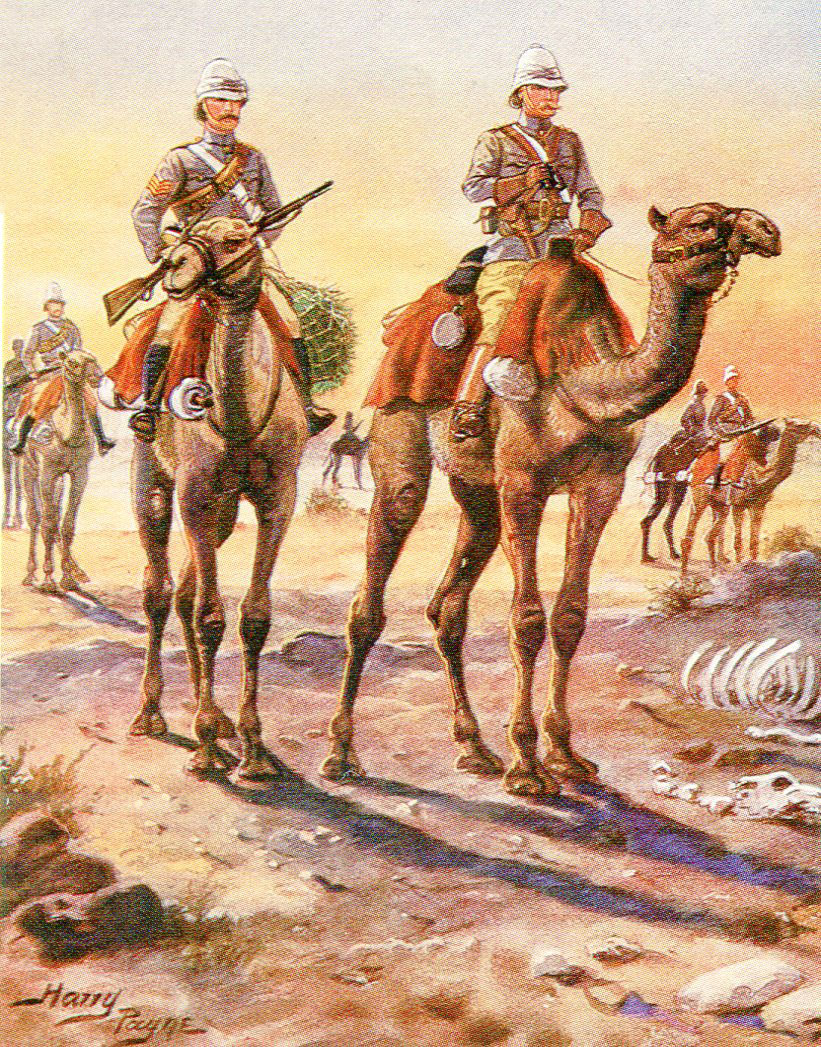
Light Camel Corps: Battle of Abu Klea fought on 17th January 1884 in the Sudanese War:picture by Harry Payne
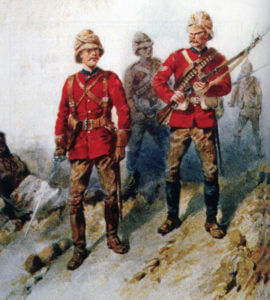
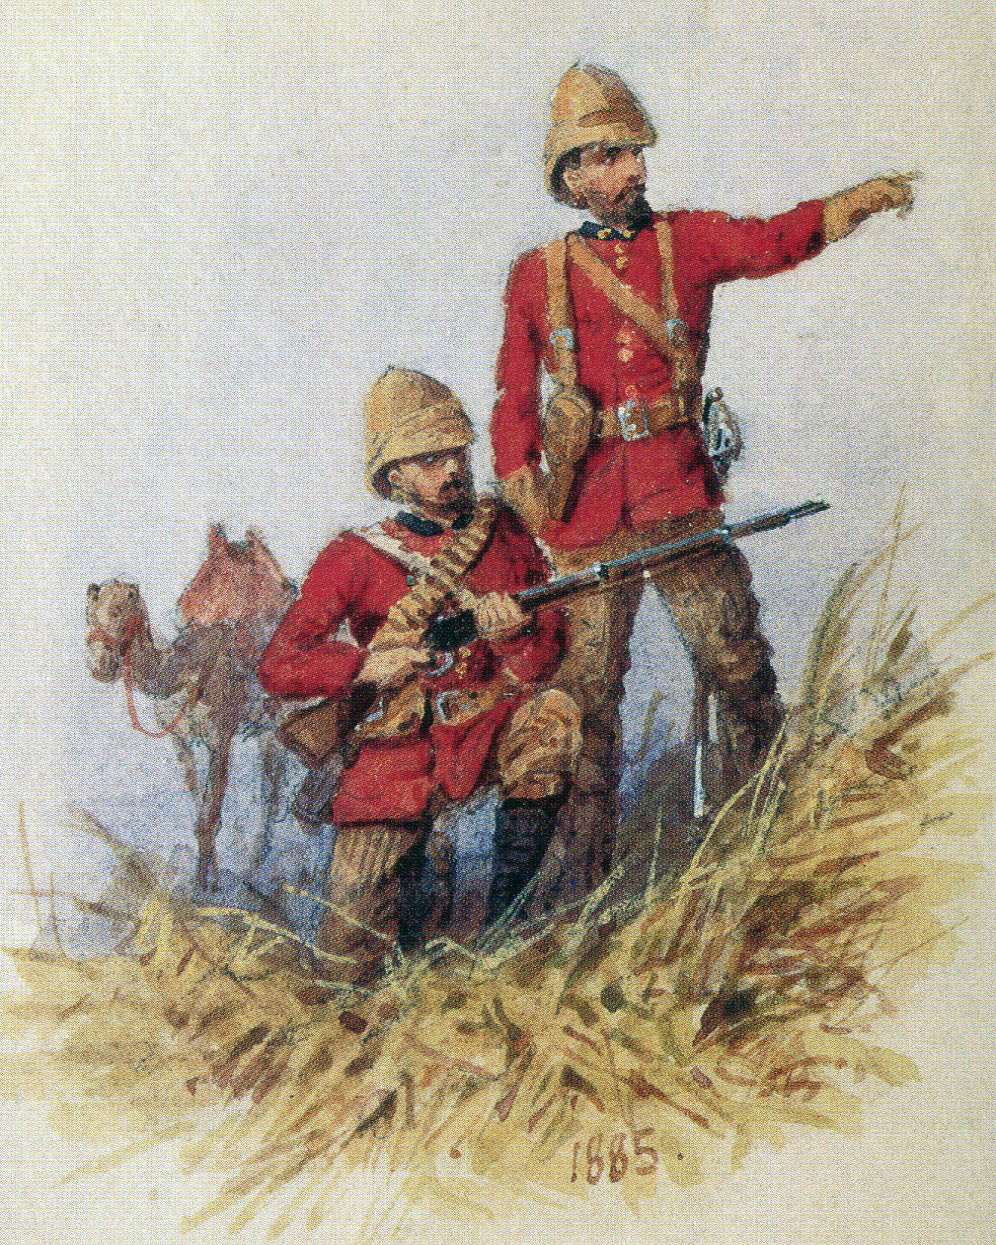
Uniforms, arms and equipment at the Battle of Abu Klea: The British Camel Corps wore grey tunics, cord breeches and helmets stained brown. The infantry of the Royal Sussex Regiment wore khaki tunics. The British troops were all armed with Martini-Henry single shot rifles and twenty-two inch bayonets. Both infantry and cavalry were mounted on camels, except the 19th Hussars armed with carbines and swords and mounted on horses.
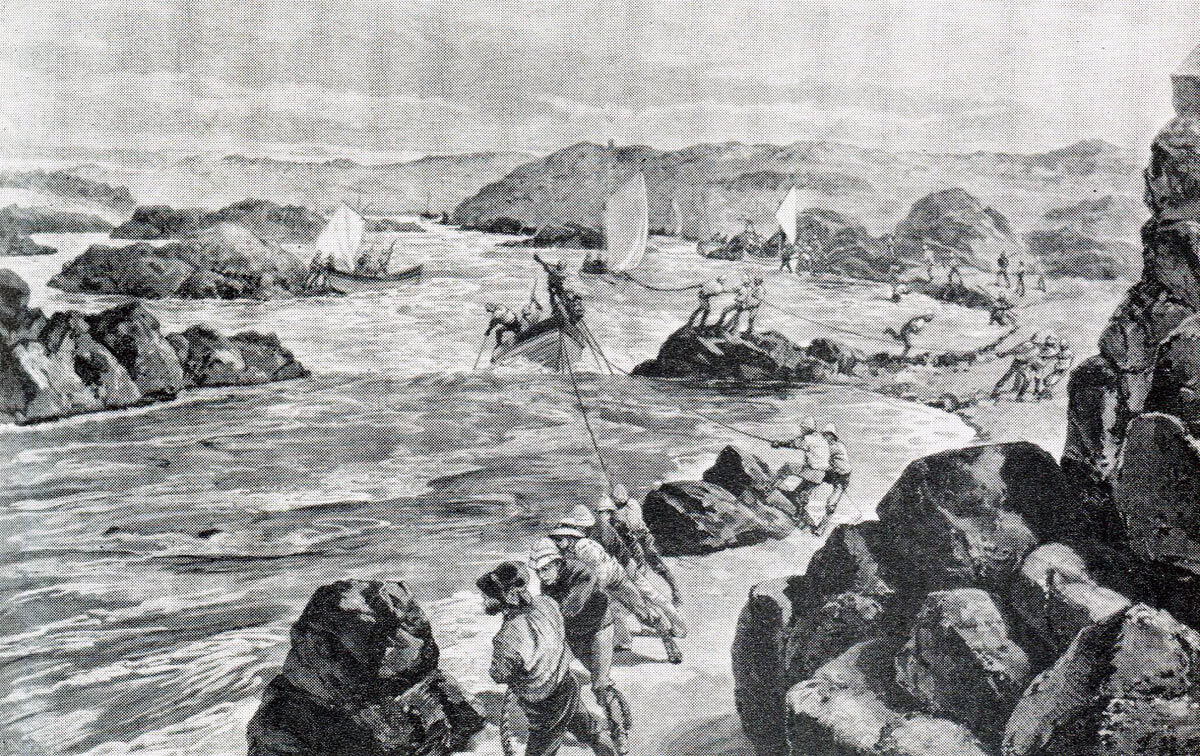
Hauling a whaler up the Second Cataract on the River Nile: Battle of Abu Klea on 17th January 1885 in the Sudanese War
The Mahdists fought with their traditional weapons, the sword, spear and dagger. They wore white robes patched with black cloth and fought under their characteristic black flags. There were no Mahdist cavalry.
Some of the Mahdists carried Remington single shot rifles captured from the soldiers of the Egyptian garrisons.
Battle of Abu Klea on 17th January 1885 in the Sudanese War
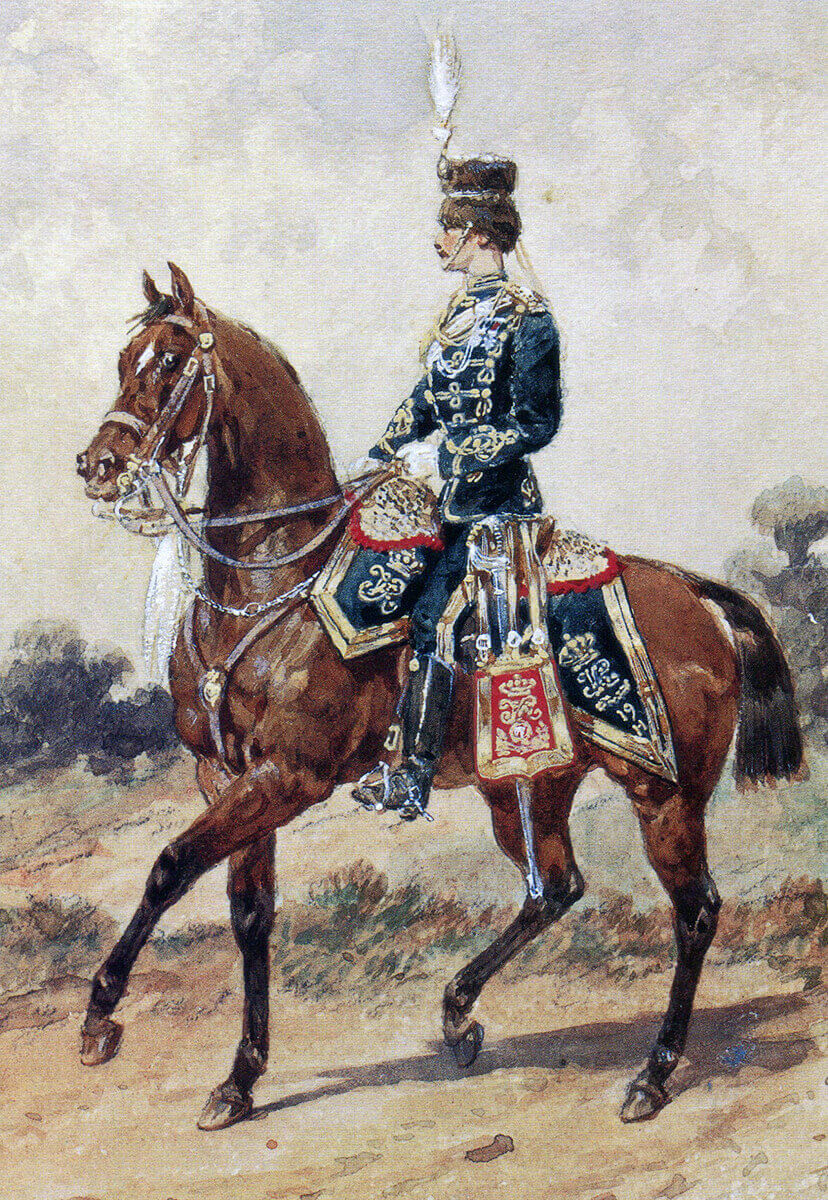
19th Hussars in England: Battle of Abu Klea on 17th January 1885 in the Sudanese War: picture by Orlando Norie
Winner of the Battle of Abu Klea: The British force.
British Regiments at the Battle of Abu Klea:
The Camel Corps, comprising; the Heavy Regiment, formed from the Household Cavalry, Dragoon Guards, Dragoons and Lancers; the Guards Regiment, formed from Grenadier, Coldstream and Scots Guards and the Royal Marine Light Infantry; and the Mounted Infantry Regiment, drawn from the infantry regiments stationed in Egypt.
19th Hussars
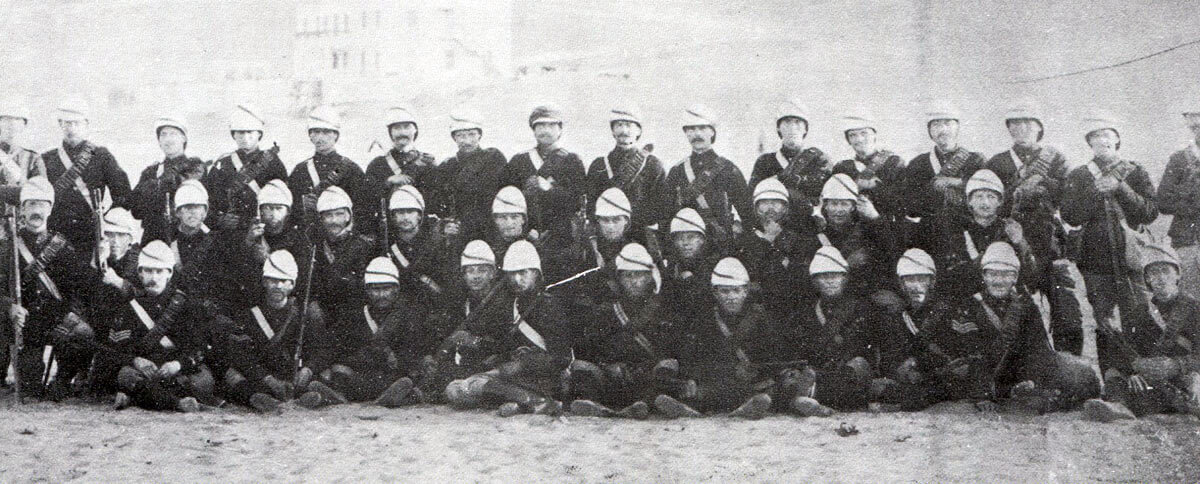
1st Battalion the Royal Sussex Regiment
3 guns of the Royal Artillery
A Royal Navy contingent with a Gardner Gun (a cranked machine gun similar to the Gatling).
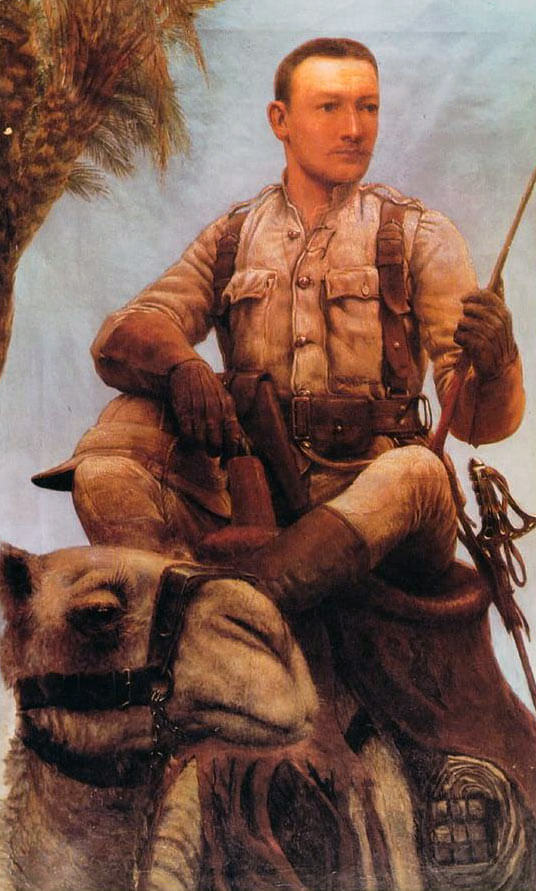
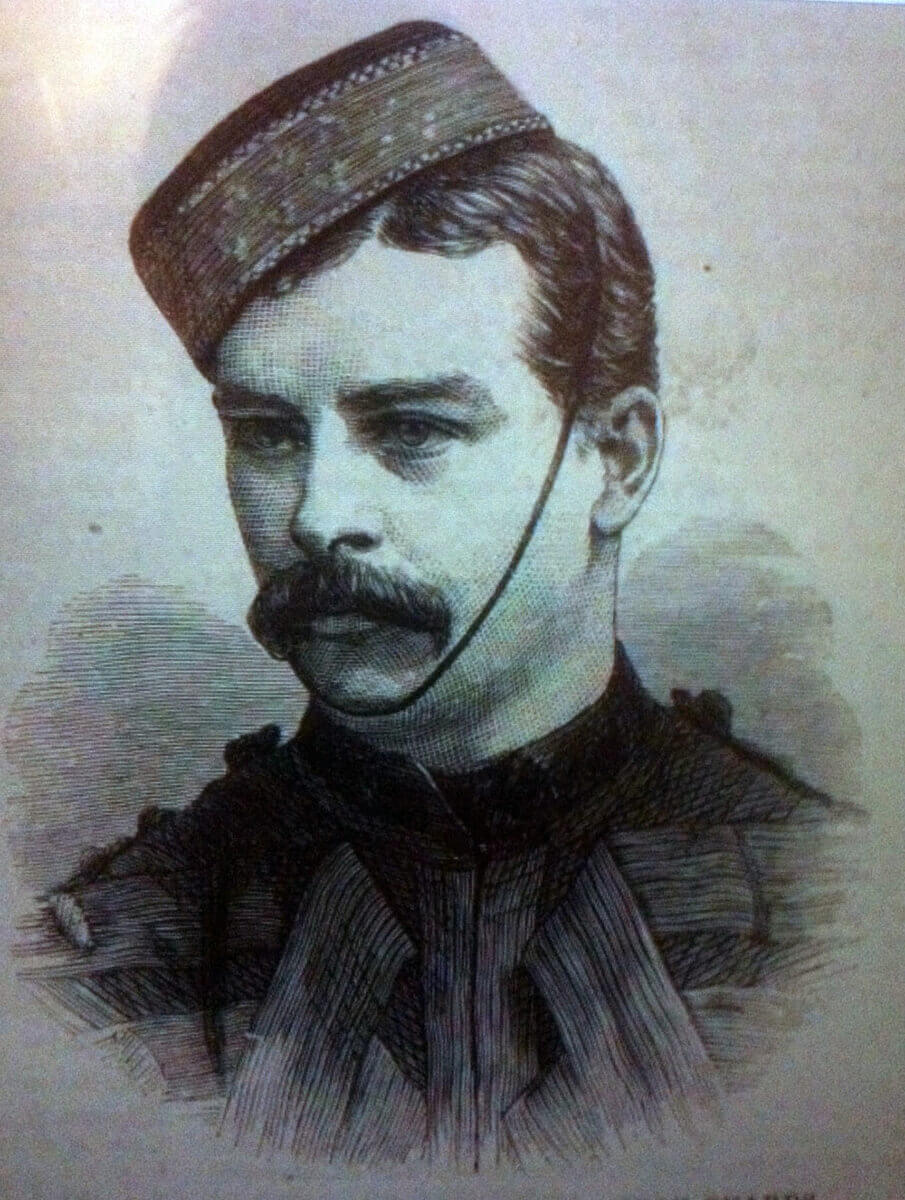
Lieutenant Frank Smyth Baden-Powell, Scots Guards, of the Guards Camel Corps: Battle of Abu Klea on 17th January 1885 in the Sudanese War: a self-portrait
Background to the Battle of Abu Klea:
In 1884, Mohammed Ahmed, an apprentice boat builder, declared himself to be the Mahdi or Saviour of the people of Sudan and began a revolt against the Khedive of Egypt, the ruler of Sudan under the Ottoman Turkish Empire and his Egyptian garrisons across the country. The revolt was a Jihad, or Muslim Holy War.
The Khedive resolved to evacuate his garrisons from Sudan and leave the country to the Mahdi. The problem was in finding someone who could carry out this difficult operation.
In January 1884, on the urging of the British Government of William Gladstone, the Khedive appointed General Charles Gordon to conduct the withdrawal operations from the Sudan. Gordon’s remit was not properly articulated, enabling Gordon to interpret his instructions as he saw fit.
Gordon had successfully acted as governor of the Sudan in the 1880s and had left with a high reputation. It was the expectation of the British Government that Gordon would arrange the evacuation of the Egyptian forces and then leave the Sudan without endangering himself.
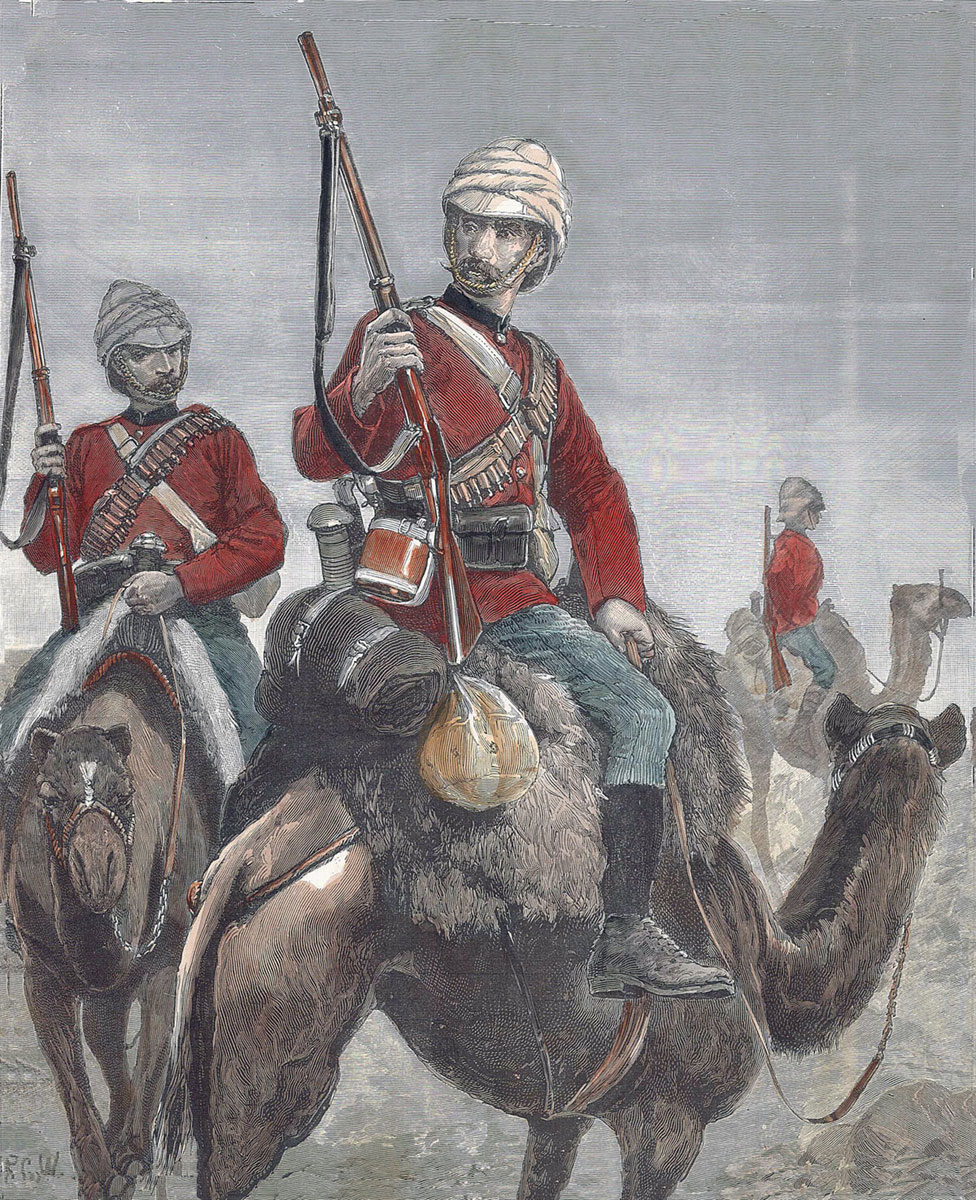
British Camel Corps: Battle of Abu Klea on 17th January 1885 in the Sudanese War: picture by Richard Caton Woodville
Gordon reached Khartoum, the capital of the Sudan, on the Nile on 18th February 1884 and immediately put the city into a state of readiness for siege, while at the same time beginning the evacuation of the foreign civilians.
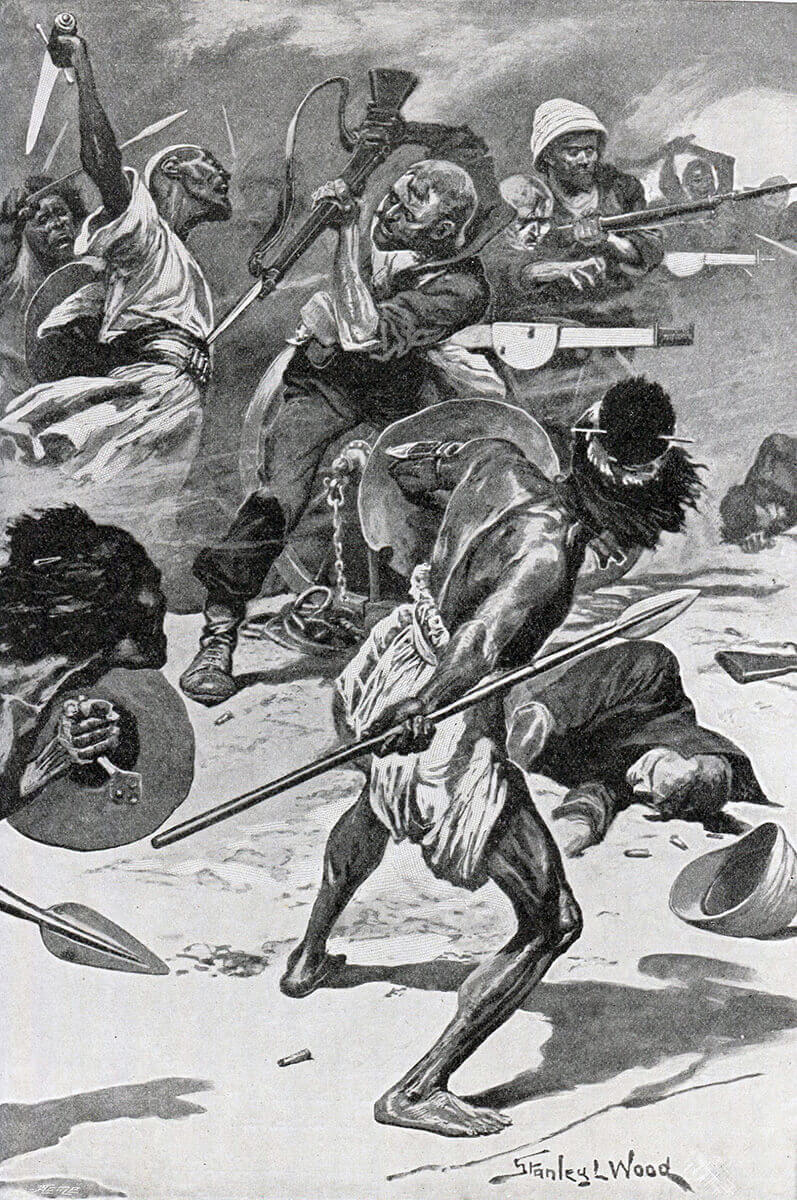
Battle of Abu Klea fought on 17th January 1885 in the Sudanese War: print by Stanley L. Wood
General Graham conducted his successful campaign from Suakin, from February to April 1884, winning the battles of El Teb and Tamai and was then ordered to withdraw to Egypt. Gordon was left to depend upon his own resources.
The evacuation of the Sudan proved to be infinitely more difficult than envisaged in Cairo and London. The Nile was the sole route of escape. It was far from easily navigable, having a series of rapids, the main ones known as the Six Cataracts. In April 1884, the Mahdi captured Berber, a town on the Nile, cutting Gordon’s sole route to Egypt.
Desultory communications came out of Khartoum, taking some time to reach Egypt, making it clear that Khartoum only had the capacity to hold out for forty days, once under siege. It was apparent that Gordon had no intention of leaving the Sudanese capital.
Gordon sent his second in command, Colonel Stewart, with a message for Sir Evelyn Baring, the British Commissioner in Cairo. In one of Gordon’s five steamers, Stewart sailed past Berber, but then went aground was captured and executed by one of the Mahdi’s lieutenants.

19th Hussars and an alarm in the desert: Battle of Abu Klea fought on 17th January 1884 in the Sudanese War: picture by Richard Caton Woodville
The British Liberal Prime Minister, William Gladstone, was determined that Britain would not intervene further in the Sudan, but British public opinion was outraged. It was the view in the country that Gordon must be rescued. Queen Victoria expressed the same view. Finally, the threatened resignation of Lord Hartington, the Secretary of State for War, forced Gladstone to agree to the sending of an expeditionary force to relieve Gordon.
Lord Wolseley, Britain’s most eminent general, was given command of the Sudan expeditionary force.
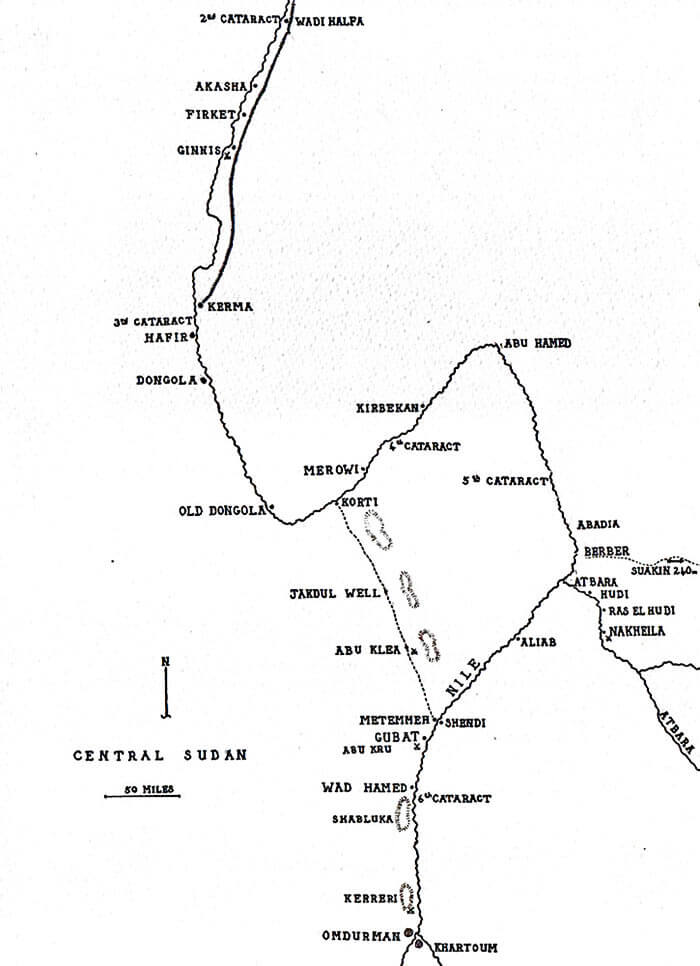
Map of the River Nile in the Sudan: Battle of Abu Klea on 17th January 1885 in the Sudanese War: map by John Fawkes
Wolseley had the choice of two routes to reach Gordon in Khartoum: the shorter, from Suakin on the Red Sea and the longer up the Nile. Wolseley chose the Nile route. Landing at Suakin would have presented the problem of movement across a wide expanse of country held by the Mahdist Hadendoa tribe, which General Graham had fought at El Teb and Tamai, the previous year, to reach Khartoum. The River Nile was a waterway up which the British army could travel.
19th Hussars advancing across the desert: Battle of Abu Klea fought on 17th January 1884 in the Sudanese War: picture by Richard Caton Woodville

Camel Corps: Battle of Abu Klea on 17th January 1885 in the Sudanese War: picture by Orlando Norie
Troops were sent to Suakin on the Red Sea, commanded, as in the previous year, by General Sir Gilbert Graham V.C. An Indian Army cavalry regiment, Hodson’s Horse and an Indian Army infantry brigade formed part of the Suakin force.
The River Nile presented significant difficulties for the British Army. There was no established department that could provide the transport for such a journey. Boats had to be built and crews recruited and transported from Canada and South Africa. Sir Thomas Cook’s travel company provided the steamers.
The force allocated to Lord Wolseley for the advance up the Nile comprised 6 battalions of infantry, 1 regiment of cavalry, with guns and engineers taken from the British forces already in Egypt. Sir Redvers Buller, promoted major general following the Suakin campaign, was appointed Lord Wolseley’s chief of staff.
19th Hussars crossing the desert: Battle of Abu Klea fought on 17th January 1884 in the Sudanese War: picture by Richard Caton Woodville
It was apparent to Wolseley, that to reach Khartoum in time, he needed a flying column. For this purpose, the Camel Corps was formed. The British public imagination was fired by the need to rescue the extraordinary Charles Gordon. Instead of forming the Camel Corps from the line infantry regiments, in the expectation that the corps would simply be mounted infantry, the Camel Corps took many of its officers and men from the socially elite regiments of the British Army.
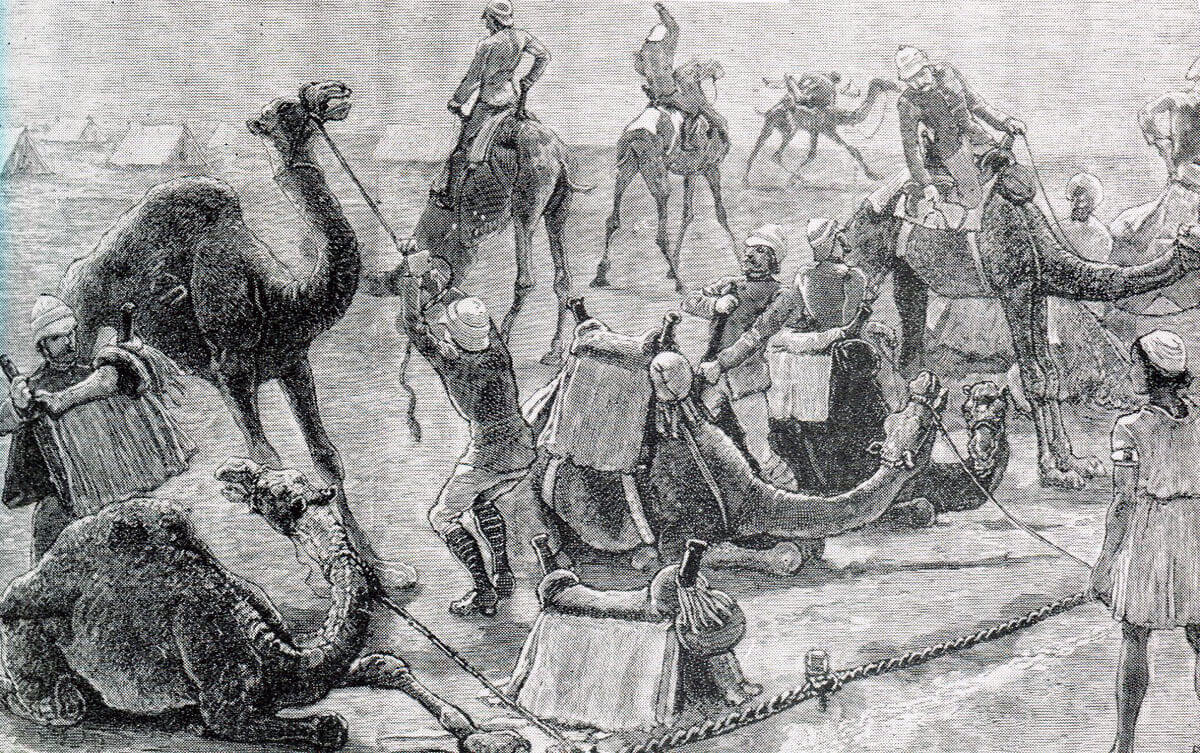
British Camel Corps mastering their new mounts: Battle of Abu Klea on 17th January 1885 in the Sudanese War
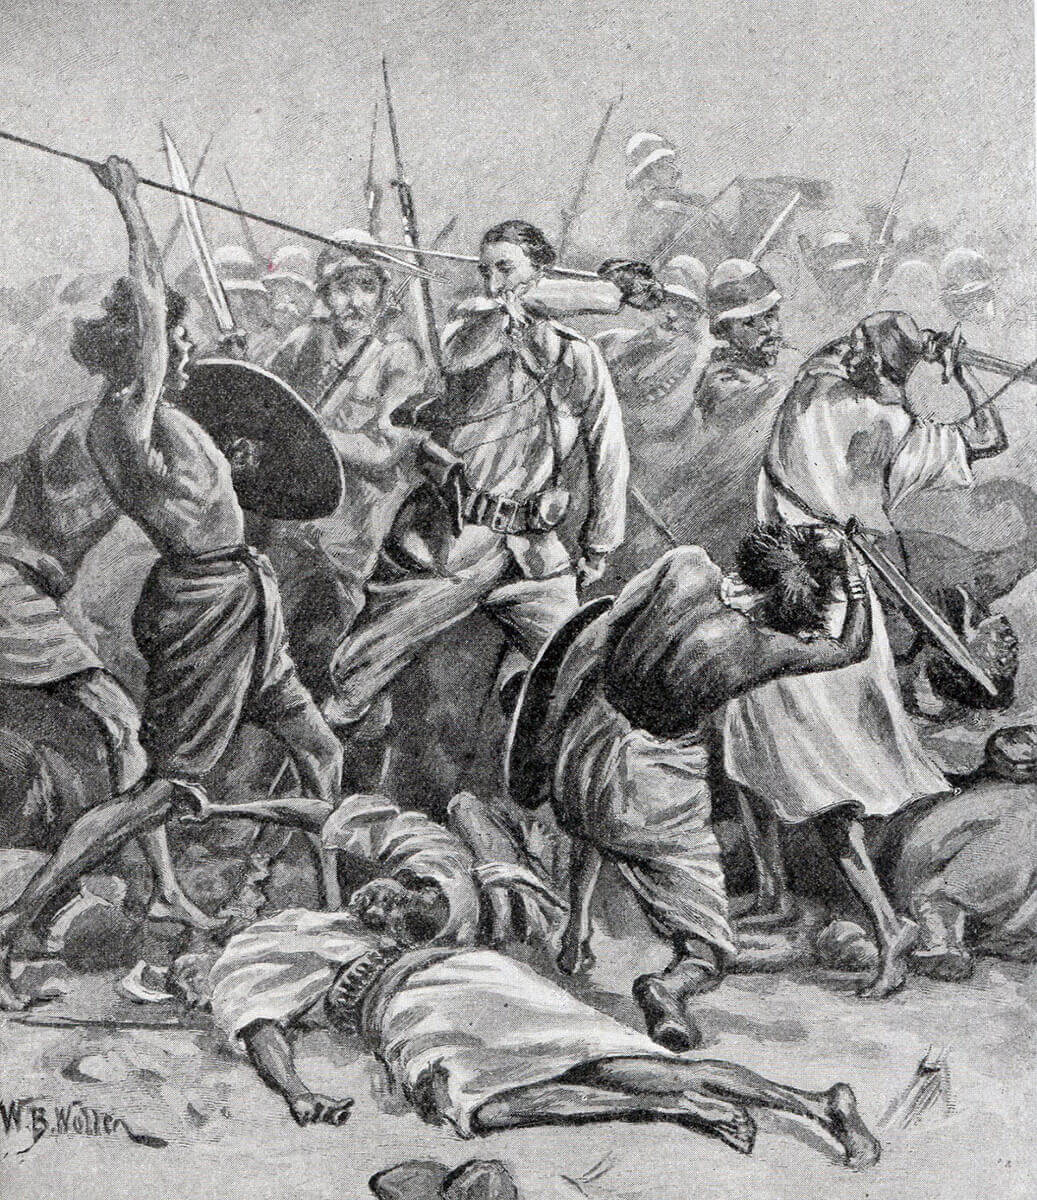
British Square at the Battle of Abu Klea on 17th January 1885 in the Sudanese War: print by William Barnes Wollen
Two of the Camel Corps’ regiments were formed from the cavalry: The Heavy Regiment from the Household Cavalry, the Dragoon Guards, the Dragoons and Lancers: The Light Regiment from the Hussars. The Guards Regiment of the Camel Corps was formed from the Grenadier, Coldstream and Scots Guards, with Royal Marine Light Infantry and the Mounted Infantry Regiment from line infantry regiments already in Egypt.
While the main contingent of Wolseley’s army struggled up the Nile from Wadi Halfa in boats, Major General Sir Herbert Stewart, who had commanded the cavalry in the Suakin campaign the previous year, was to march across the desert from Korti to capture Metemmeh on the River Nile, fifty miles north of Khartoum.
Stewart’s command was labelled the ‘Desert Column’ and comprised the Camel Corps, additional troops of the Royal Sussex Regiment, the 19th Hussars on horses, three Royal Artillery guns and a Royal Navy detachment with a Gardner gun (a similar weapon to the Gatling).
Desert Column marches out from Korti: Battle of Abu Klea on 17th January 1885 in the Sudanese War: drawing by Lady Butler
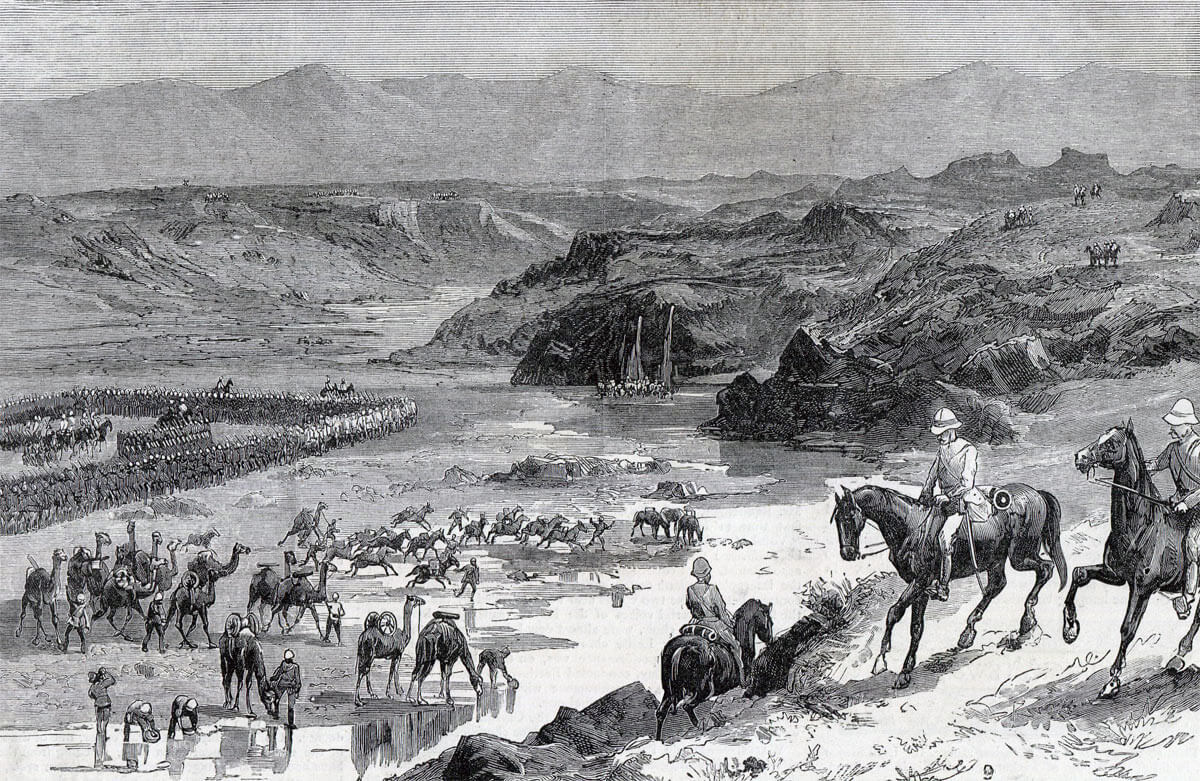
Difficulty was immediately encountered. There were insufficient camels to carry the supplies necessary for the Desert Column. Stewart was forced to take part of his force across the desert to the wells at Jakdul, a point halfway between Korti and Metemmeh, leave the troops there while returning with the camels to bring up the rest of his force.
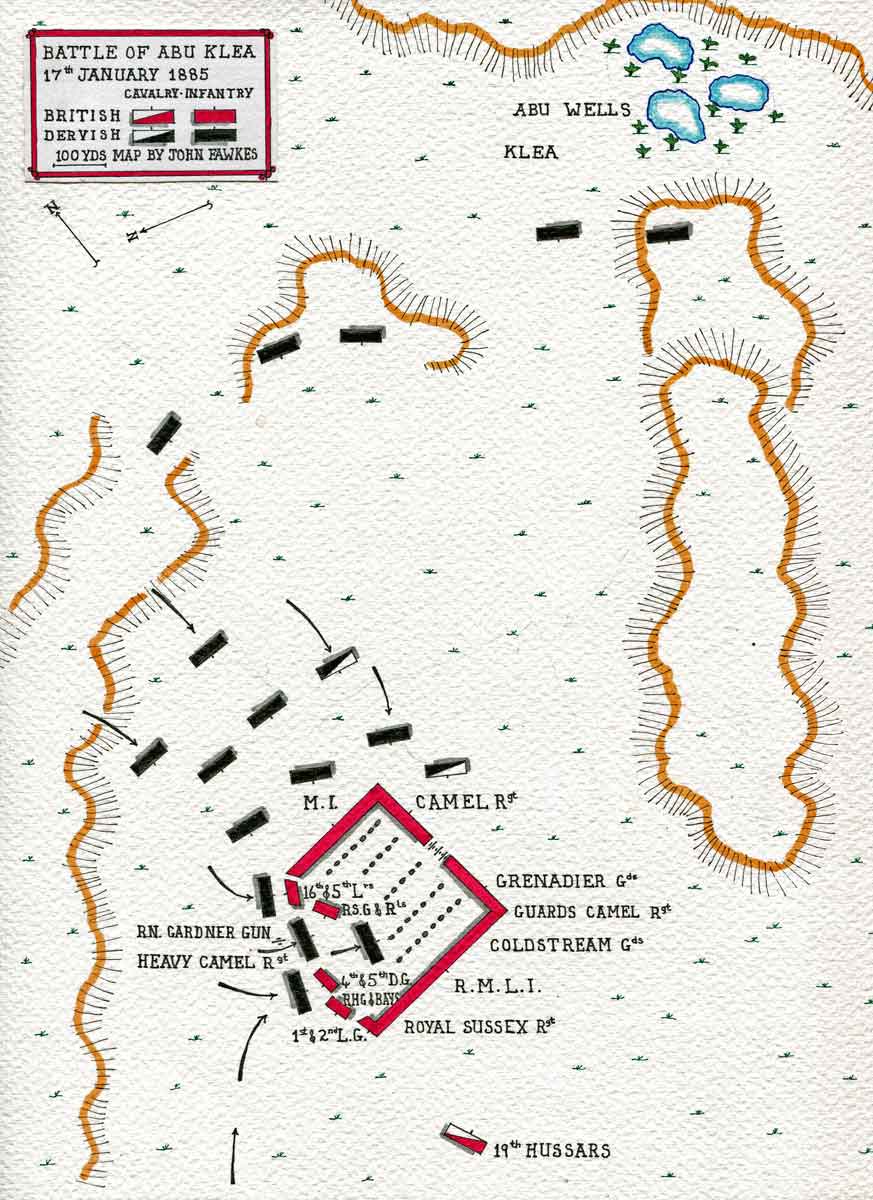
Map of the Battle of Abu Klea on 17th January 1885 in the Sudanese War: map by John Fawkes
Account of the Battle of Abu Klea:
On 14th January 1884, General Stewart moved out from Jakdul with the Heavy Camel Regiment, the Guards Camel Regiment, the Mounted Infantry Camel Regiment, the 19th Hussars and part of the 1st Battalion Royal Sussex Regiment and the guns. A garrison was left to hold the wells.
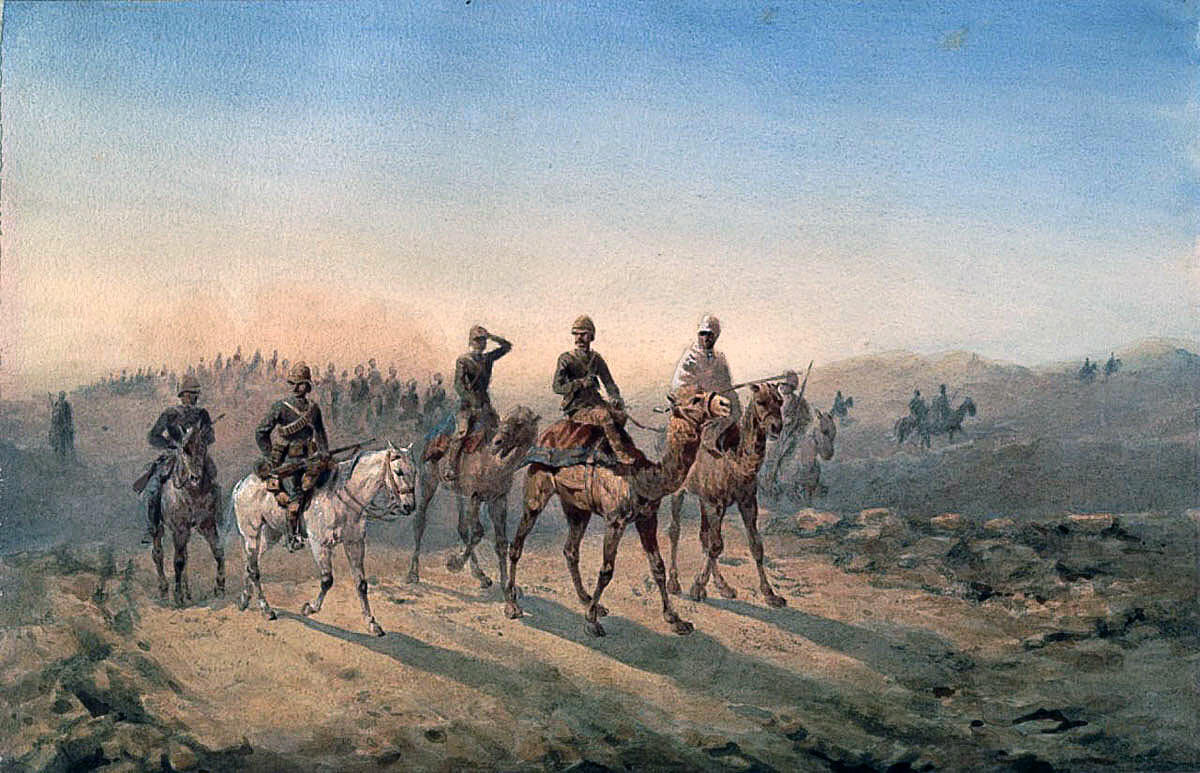
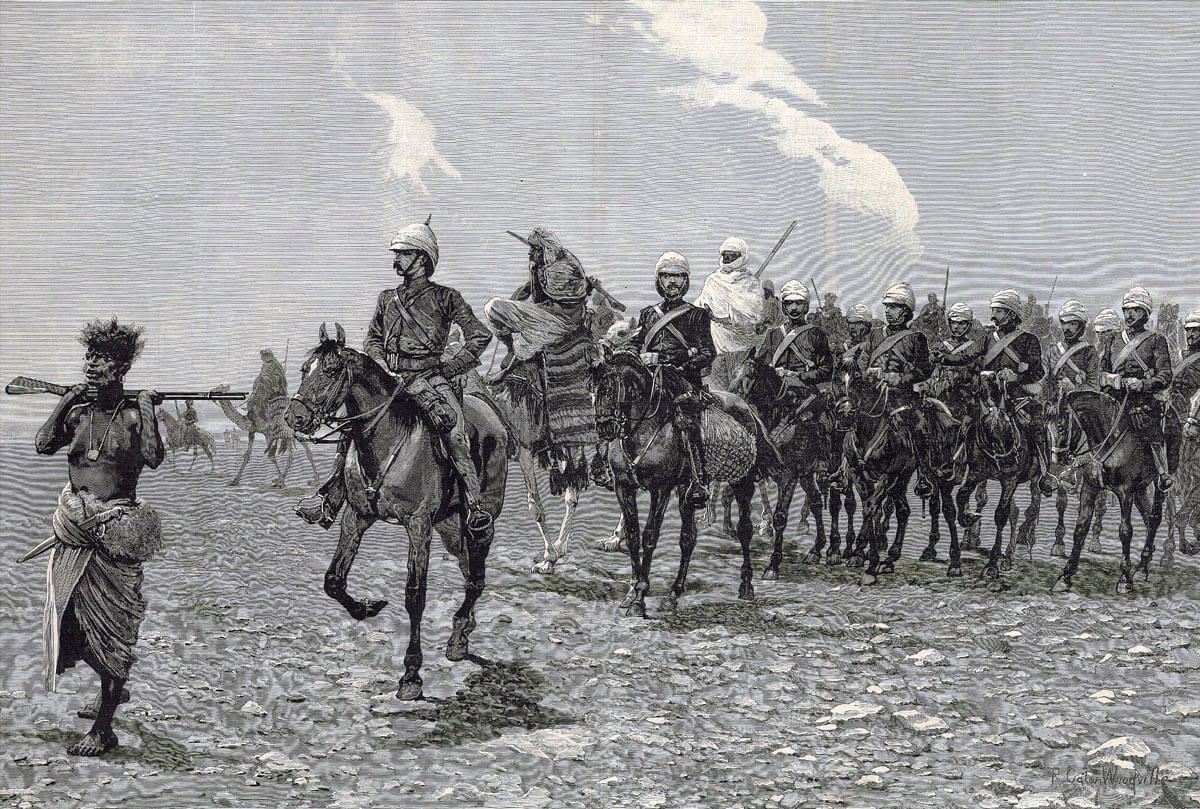
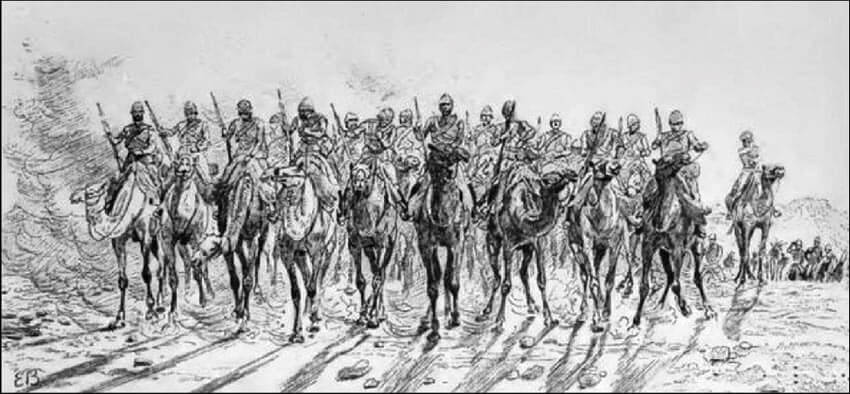
Camel Corps and 19th Hussars crossing the desert: Battle of Abu Klea on 17th January 1885 in the Sudanese War: picture by Orlando Norie
It was hoped that Stewart’s advance across the desert would take the Mahdi by surprise and ensure that Metemmeh could be stormed with the minimum of difficulty.
As General Stewart’s force approached the wells at Abu Klea on 16th January 1884, piquets of the 19th Hussars, scouting ahead of the main column, encountered parties of Mahdists. It could be seen that a large force was established at the wells and ready to give battle. The British had left the last water some forty-three miles before and needed replenishment.
British Square at the Battle of Abu Klea on 17th January 1885 in the Sudanese War: print by Stanley L. Wood
It was apparent that Abu Klea could only be taken by assault. Stewart halted two miles short of Abu Klea and camped.
The night was a busy one. A thorn bush zereba or compound was built. The British camp was under constant sniper fire and preparations had to be made for the formation of the attack.
With daylight on 17th January 1884, a strong force of Mahdists could be seen formed up to the left of the zereba. Several unsuccessful attempts were made to lure this force into attacking, by sending a strong party of British troops forward, which then retreated into the zereba. As this ploy had no effect, General Stewart resolved to advance to the wells at Abu Klea in a square formation.
The Mounted Infantry were positioned in the left front corner of the square. The Guards Camel Regiment (Foot Guards and Royal Marine Light Infantry) took the right front corner. The Heavy Camel Regiment took the left rear corner and the rear face, while the Royal Sussex Regiment took the rear of the right face.
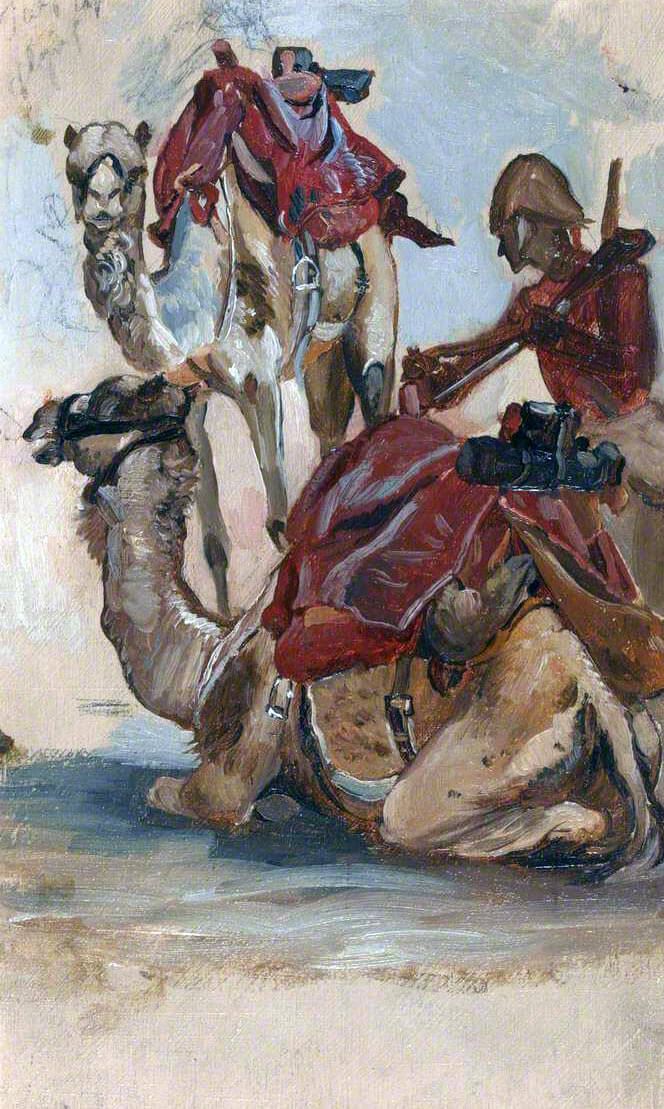
Camel Corps: Battle of Abu Klea on 17th January 1885 in the Sudanese War: picture by Lady Butler
The troops marched on foot with the camels bunched in the centre of the square. The guns were placed in the centre of the front face. The Gardner gun with its Royal Navy gun team, under Captain Lord Beresford RN, took the rear of the centre, ready to be rushed to any point of crisis. The main body of the 19th Hussars was posted to the left of the square, with a small detachment on the right.
At 7.30am on 17th January 1884, the British square began its difficult and cumbersome advance, the aim being to pass the flank of the Mahdist position and force an attack. As the square moved forward, skirmishers from the Guards and Mounted Infantry went out to engage the Mahdist riflemen. The ground was broken and the square formation became severely distorted, with the rear lagging back, forced out of place by the vagaries of the movement of the camels. As casualties were inflicted by the Mahdist sniping, camels were stopped and loaded with the wounded, after the administration of first aid, thereby causing the camels to lag and further distort the formation. The officers in front, who controlled the movement of the square, gave insufficient consideration to the difficulties being experienced at the rear. As a result, gaps opened up at crucial points in the corners and rear of the square.
Much of the Mahdist fire was coming from a gully that ran parallel to the route the British were taking on its left. General Stewart ordered that skirmishers be sent out from the Heavy Regiment to neutralize this fire.
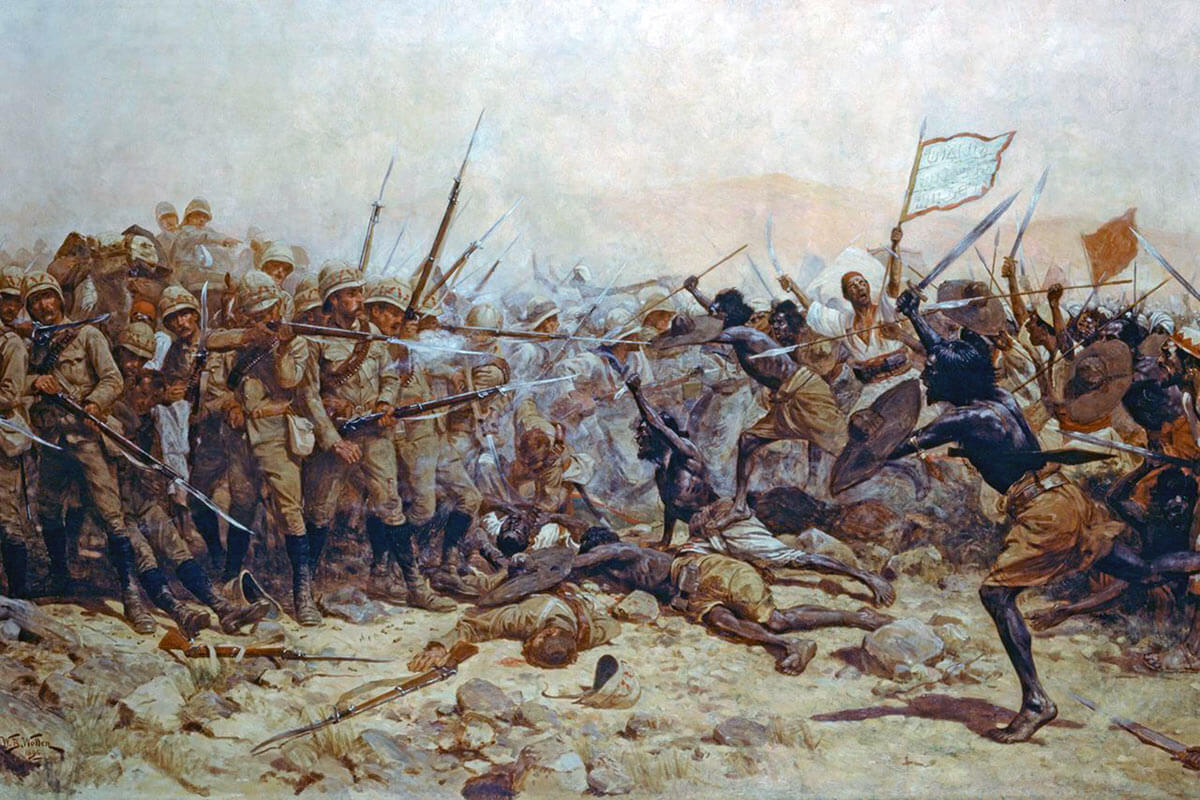
Mahdist attack on the British square at the Battle of Abu Klea on 17th January 1885 in the Sudanese War: picture by William Barnes Wollen
At around 9.30am, it became clear that the Mahdist army was about to attack the front left corner of the square. The square was wheeled to the right, to move onto higher ground. A large force of probably around 3,000 Mahdists, armed with spears and swords, appeared from the nearby gully and charged the square.
At this point the British were hampered by the presence of their skirmishers, who had to be permitted to regain the square before fire could be opened. The Mahdist assault was consequently within 200 yards or less of the square before the British troops fired their first volley.
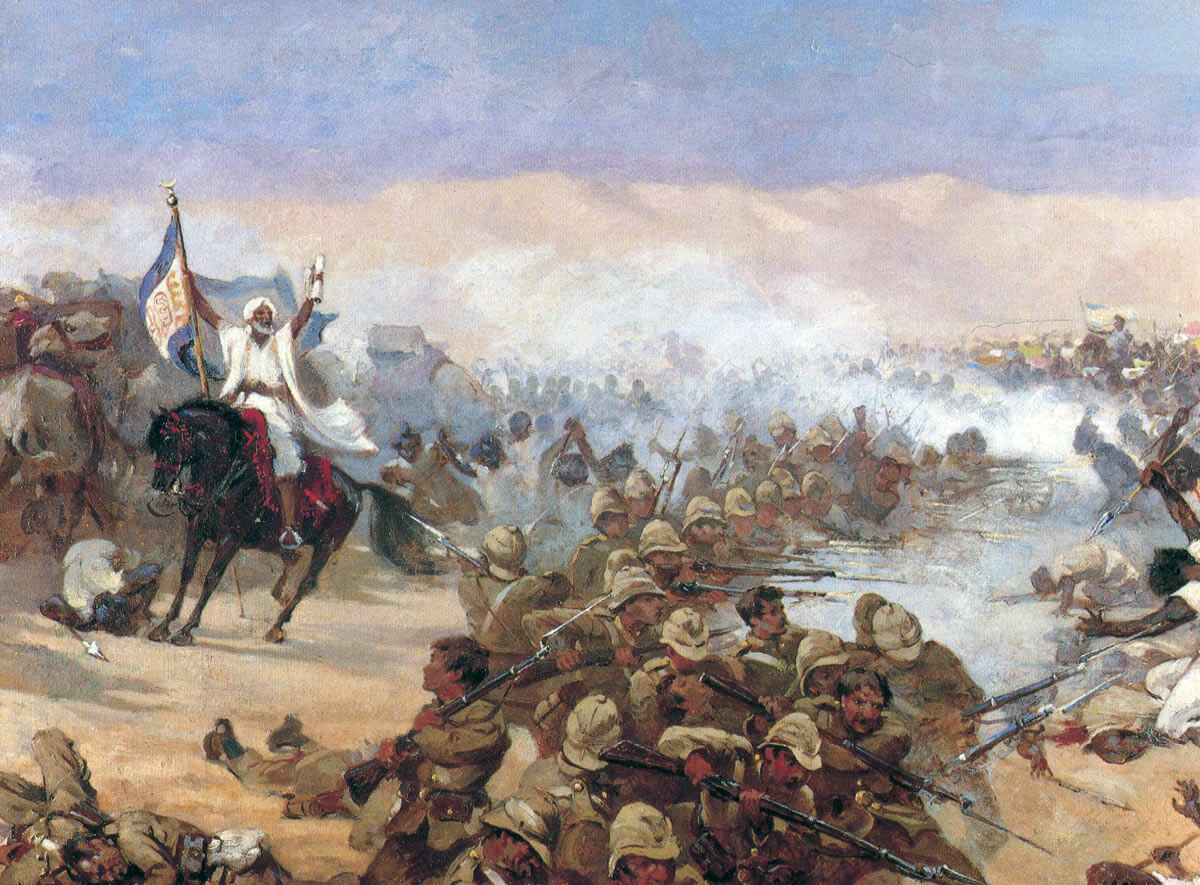
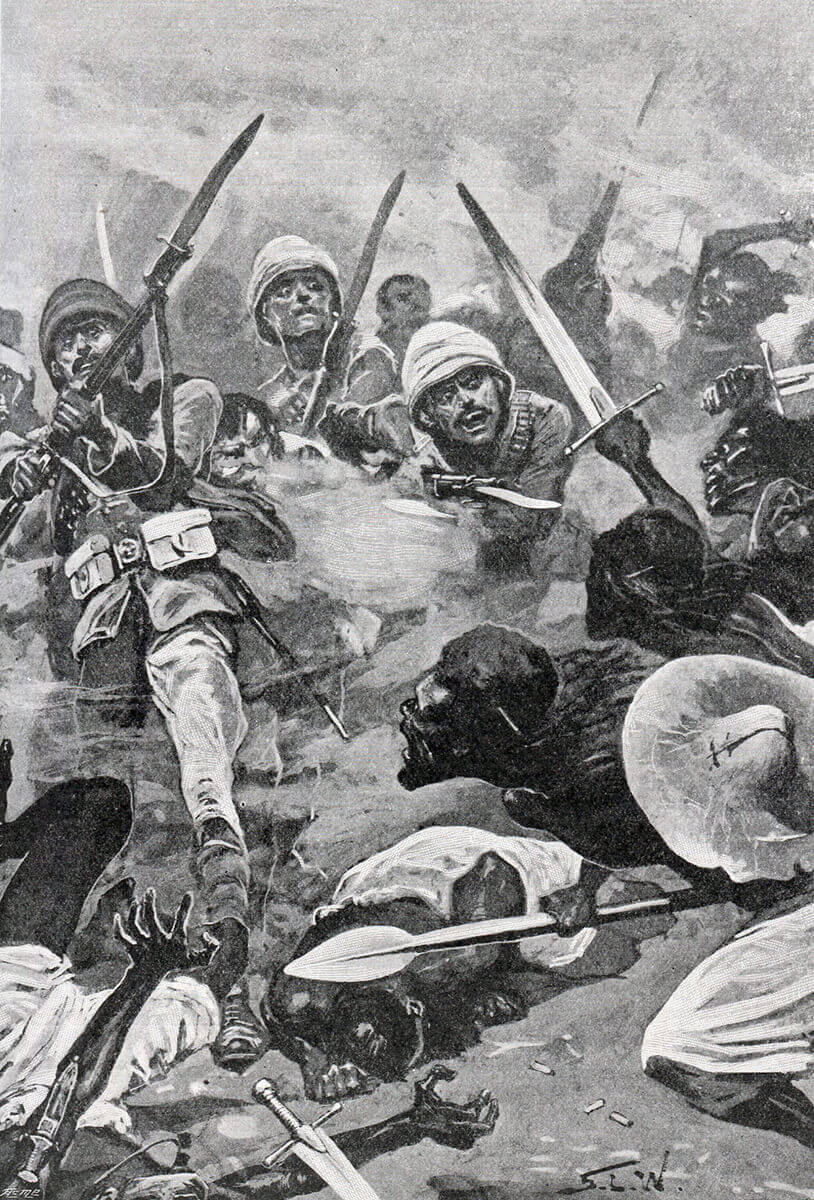
Dervishes break into the British square at the Battle of Abu Klea on 17th January 1885 in the Sudanese War: picture by Stanley Berkeley
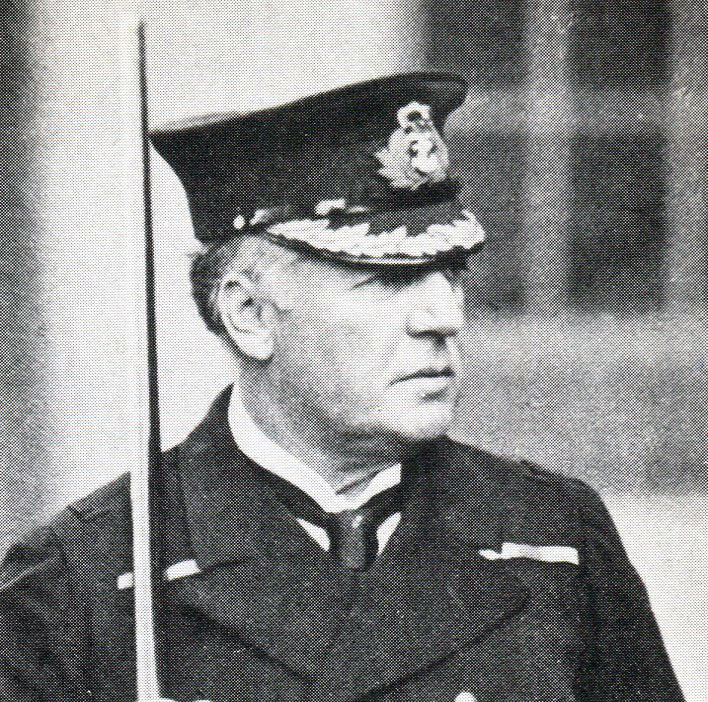
Captain Lord Beresford, Royal Navy: Battle of Abu Klea fought on 17th January 1885 in the Sudanese War
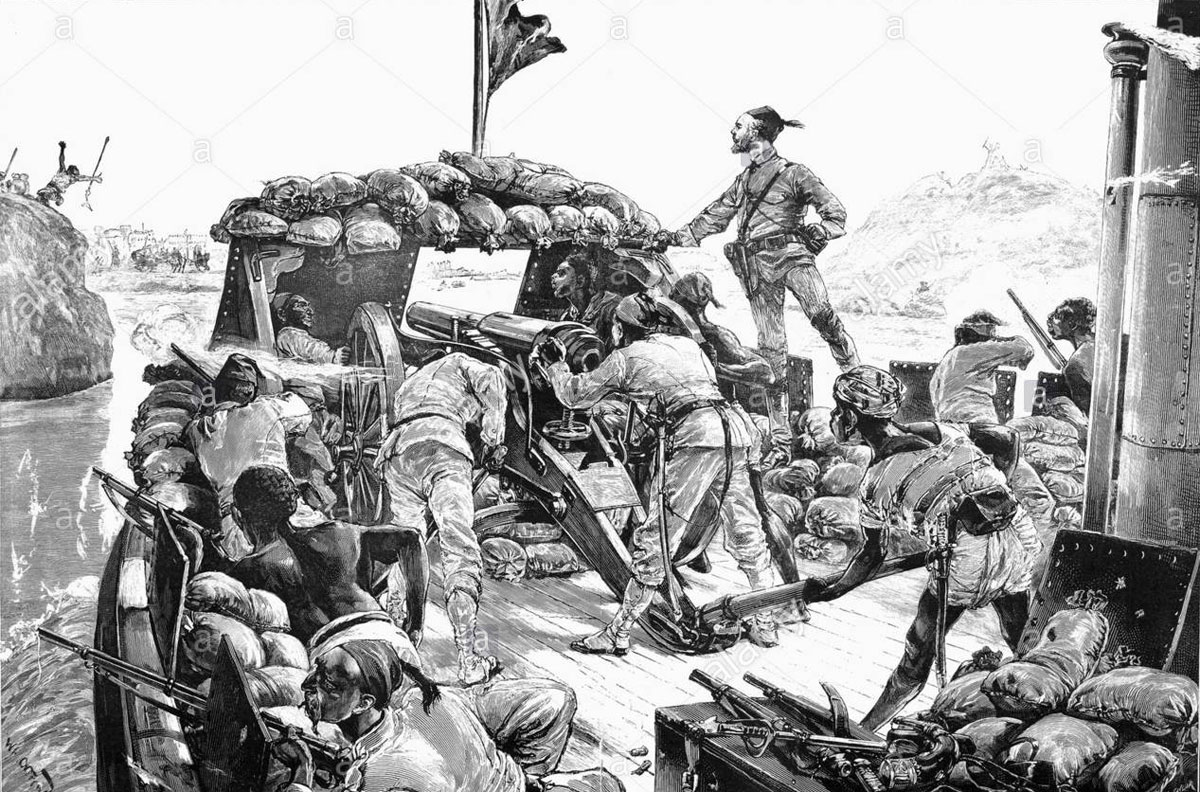
The Mahdist charge was delivered at the section of the front left face held by the Mounted Infantry Regiment of the Camel Corps. Captain Lord Beresford brought his Gardner gun from its position at the rear of the square, took it out through the Mounted Infantry position and opened fire on the charging Mahdists. After firing some seventy rounds, the Gardner gun jammed. Before it could be cleared, the Mahdist spearmen overwhelmed the Royal Navy detachment manning the Gardner and killed all but Lord Beresford, who fell under the gun, and one of the sailors.
Probably due to the heavy volley firing from the Mounted Infantry and shrapnel from the three guns in the front face, the Mahdist charge veered away, down the left face and fell on the fragmented corner held by the Heavy Cavalry regiment, where the Mahdists broke into the square.

Dervish attack at the Battle of Abu Klea fought on 17th January 1885 in the Sudanese War
The troopers of the Heavy Cavalry Camel Regiment were fighting with the long infantry rifle, a weapon they were unfamiliar with. The cavalry officers had no experience of fighting an infantry square. It seems to be the universal view of informed senior officers that the cavalry officers took insufficient care to ensure the integrity of the square formation. As happened at the Battle of Tamai, with the break of the square many of the officers and non-commissioned officers standing to the rear of the line became casualties.
Death of Colonel Burnaby at the Battle of Abu Klea fought on 17th January 1884 in the Sudanese War
Colonel Fred Burnaby was fatally injured and brought from his horse. A soldier of Burnaby’s regiment, the Royal Horse Guards, Corporal McIntosh, rushed forward to assist him, but together the two were overwhelmed. General Stewart’s horse was killed and he had to be rescued by men from the Mounted Infantry regiment.
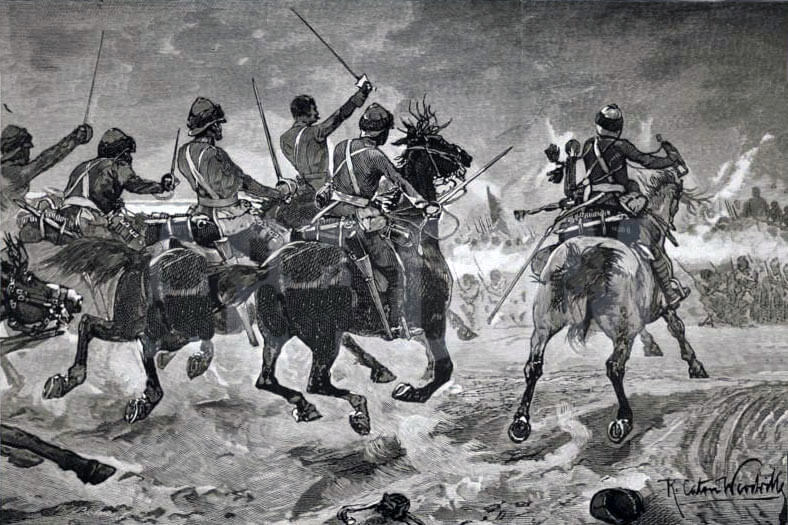
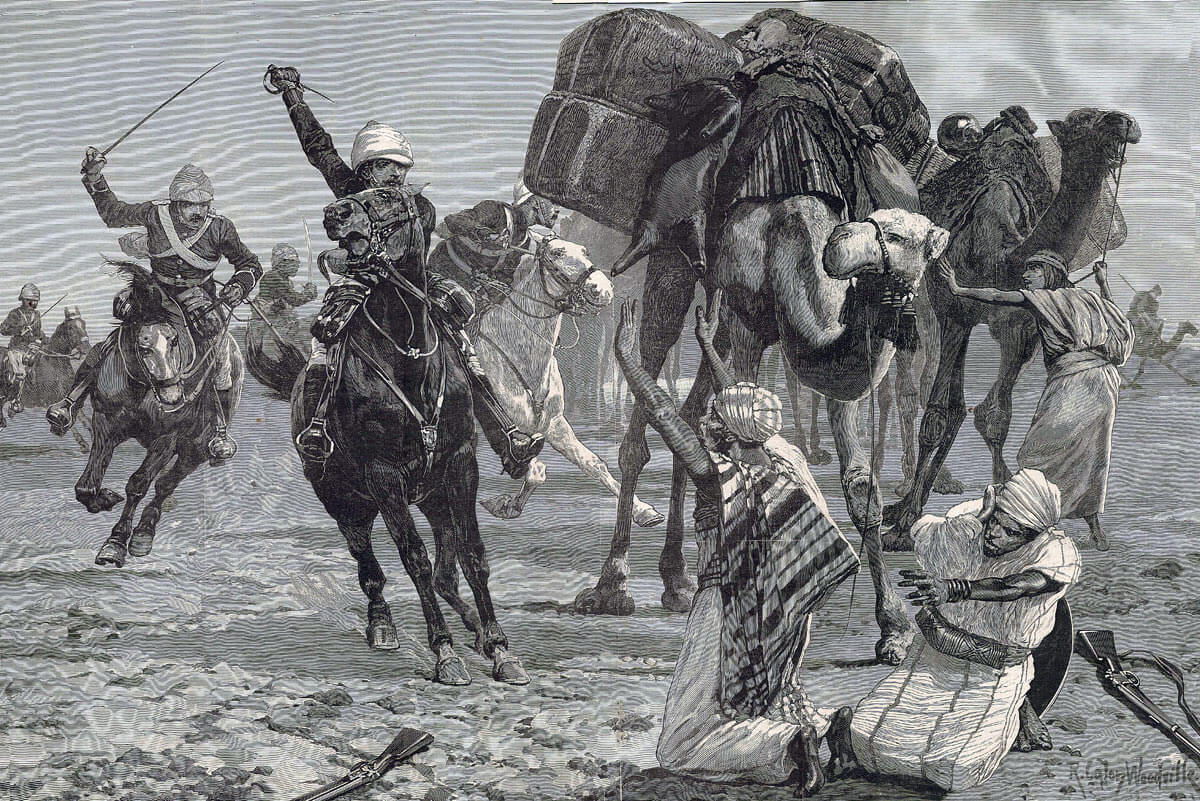
19th Hussars capturing the Abu Klea Wells at the Battle of Abu Klea on 17th January 1885 in the Sudanese War: picture by Richard Caton Woodville
The charge of the Mahdists into the centre of the British square was impeded by the mass of camels, which prevented the Mahdists from reaching the ranks of the opposing faces. The rear rank of the Mounted Infantry in the front face and the Foot Guards and Royal Marine Light Infantry of the Guards regiment in the right face turned about and opened a devastating fire on the Mahdists. After a hectic time, the Mahdists who had broken into the square were shot down and the charge died away. The battle was over in ten minutes.
British troops drinking from the wells after the Battle of Abu Klea fought on 17th January 1884 in the Sudanese War
The 19th Hussars moved forward and took possession of the wells at Abu Klea.
By 1pm, the square had reformed and the wounded taken care of, so the force could move forward to the wells, which were reached by 4pm. In the evening, a party of Mounted Infantry returned to the overnight zereba and brought up the garrison and wounded left there.
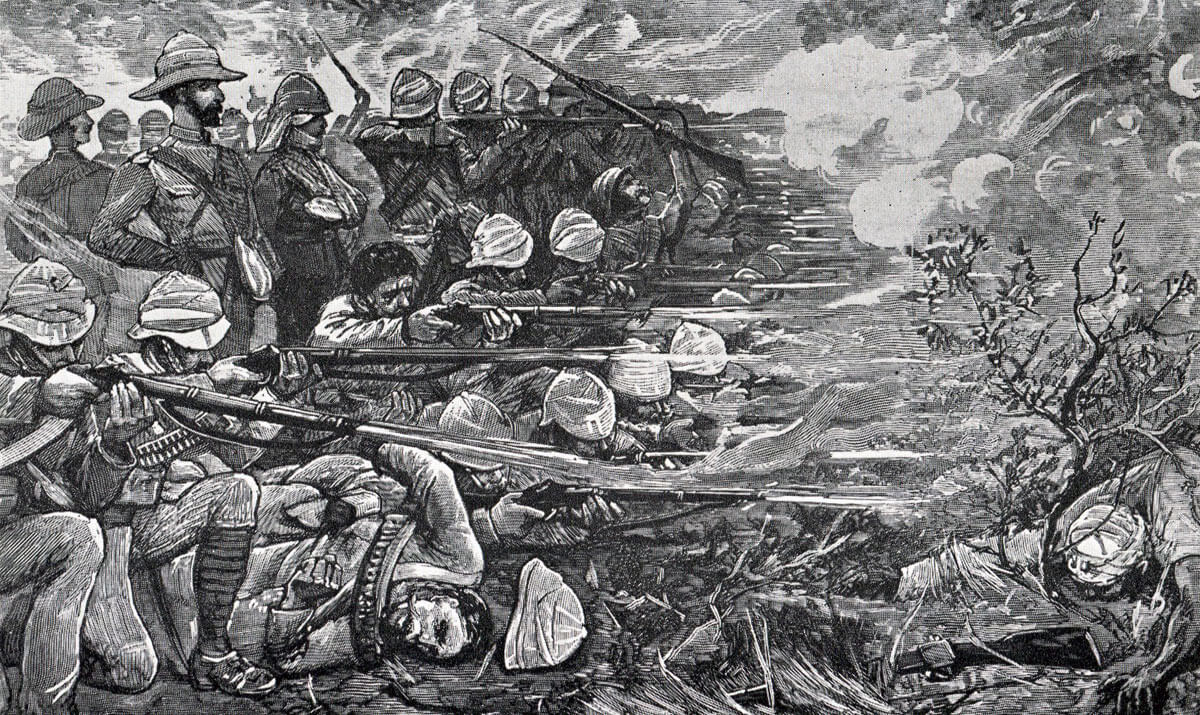
British volley firing at Gubat or Abu Kru, two days after the Battle of Abu Klea on 17th January 1885 in the Sudanese War
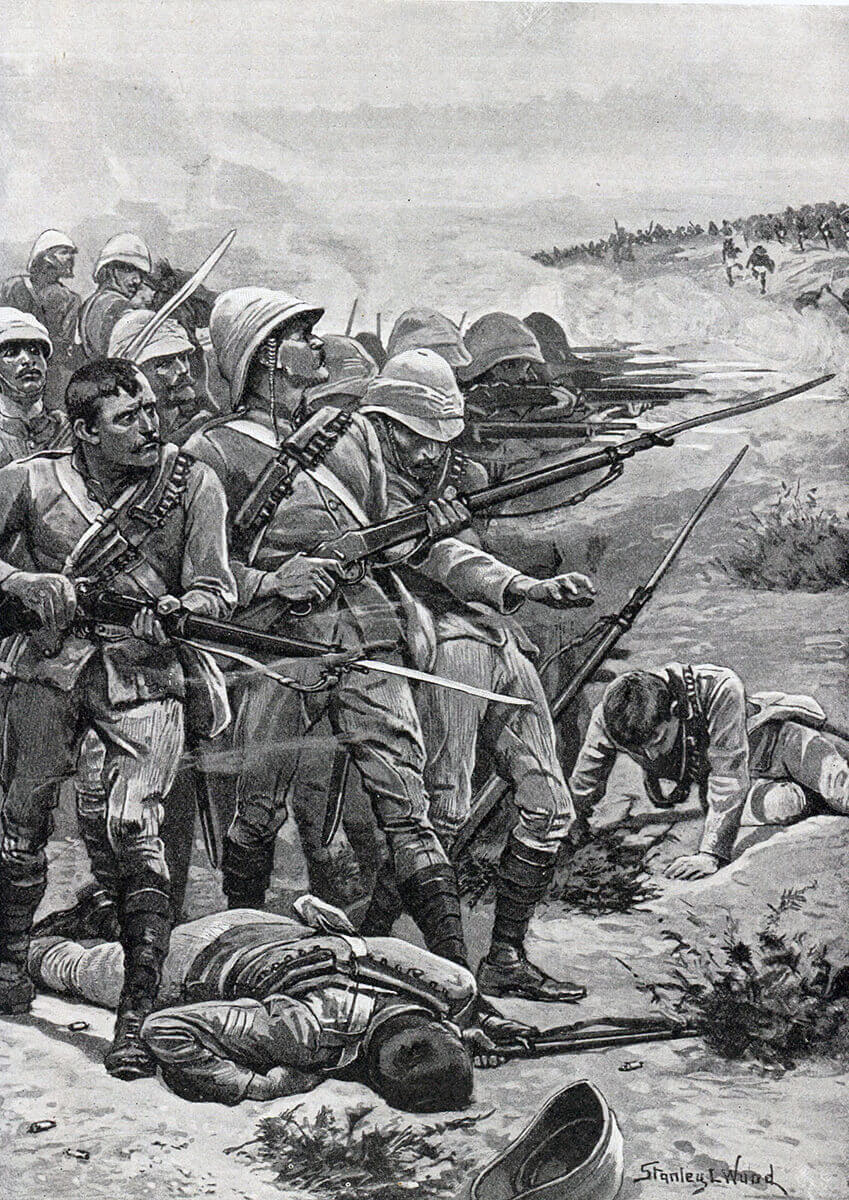
British Square at Abu Kru, two days after the Battle of Abu Klea on 17th January 1885 in the Sudanese War: print by Stanley L. Wood
Casualties at the Battle of Abu Klea: British casualties were 71 killed and 64 wounded. Of the 11 officers killed, 7 were cavalry officers.
Among the officers killed were Colonel Fred Burnaby, who had been wounded as a volunteer in General Graham’s force at Tamai, Major Carmichael, 5th Lancers, of the Heavy Regiment, Camel Corps and Lord St Vincent of the 16th Lancers, the adjutant of the Heavy Regiment.
It is likely that the Mahdists suffered around 1,500 casualties. The Mahdists refused to surrender, even when wounded. Only one man was taken prisoner, an Egyptian soldier captured at Berber and forced to fight for the Mahdi. The Mahdists lost a number of important leaders in the battle: Sheikh Suleiman, Sheikh Abu Seyd, the Mahdi’s Emir from Shendy, and Sheikh Nouringeh, the Emir of Berber.
Follow-up to the Battle of Abu Klea: On the afternoon of the day after the battle at Abu Klea, 18th January 1885, the column resumed its advance to Metemmeh. A prisoner revealed that there were some 8,000 Mahdists in the town. The march was continued through the night, dawn finding the British force within four miles of Metemmeh, having covered around 20 miles. A position was adopted, on which the Mahdists opened a heavy fire. Finally, the British troops formed square and advanced to the River Nile at Gubat, also known as Abu Kru, under heavy fire. One of the casualties to this fire was General Stewart who was fatally wounded. Command of the desert column devolved on Brigadier Wilson.
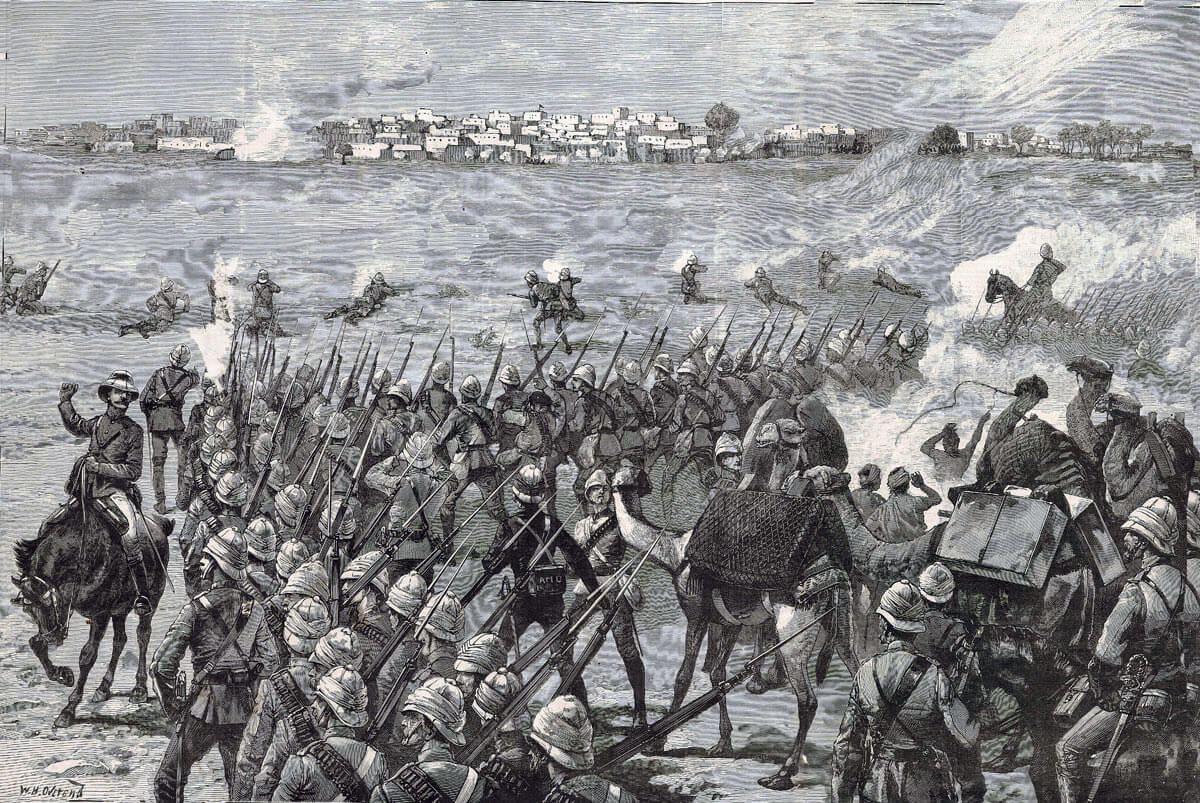
Battle at Gubat or Abu Kru, two days after the Battle of Abu Klea on 17th January 1885 in the Sudanese War: picture by W.H. Overend
On 21st January 1885, four Nile steamers arrived at Gubat from Khartoum. Brigadier Wilson on 23rd January 1885, embarked with soldiers of the Royal Sussex Regiment on the steamers and headed for Khartoum.
Nile Steamer at Khartoum after the Battle of Abu Klea on 17th January 1885 in the Sudanese War: picture by Richard Caton Woodville
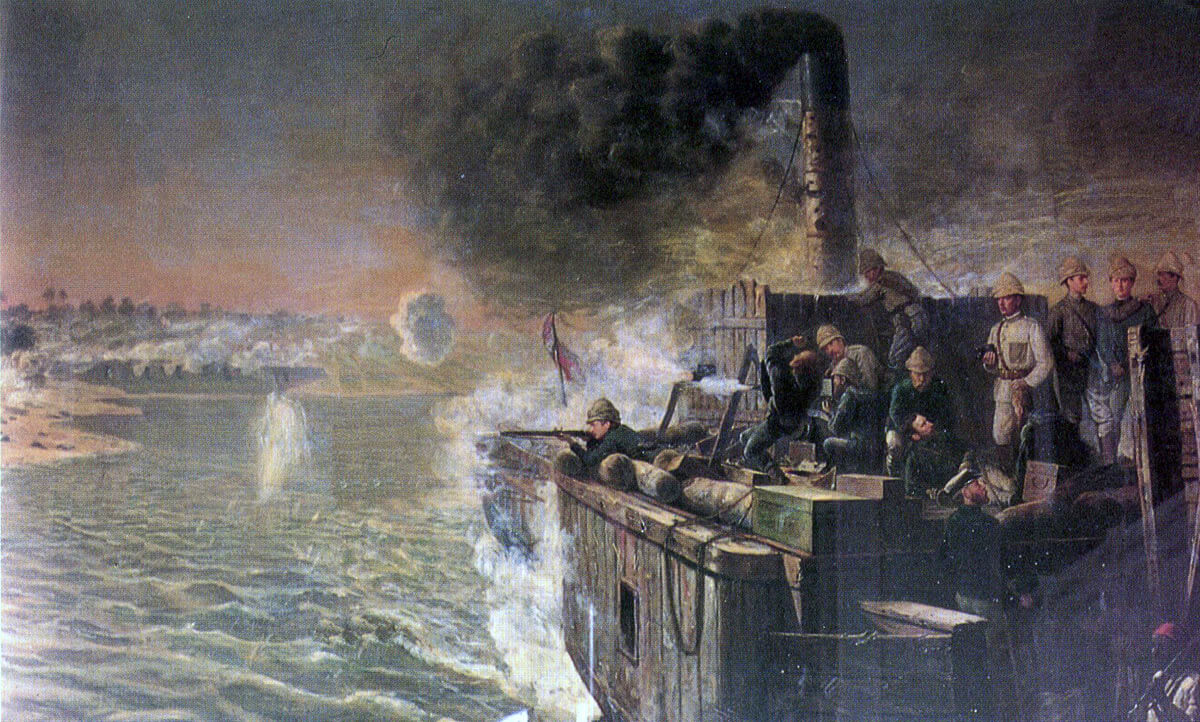
Lord Charles Beresford on the Nile Steamer ‘Safia’ after the Battle of Abu Klea on 17th January 1885 in the Sudanese War: picture by the Dickinson Brothers
Wilson’s men reached Khartoum on 28th January 1885, Wilson’s steamer having twice grounded. They sailed past the city under heavy fire, but could see only Mahdist troops on the banks. The Mahdi’s forces had taken Khartoum on 26th January 1885, massacring the defenders. General Charles Gordon was killed on the steps of his palace. The British relief was two days too late.

Death of General Charles Gordon on 26th January 1885 in Khartoum: Battle of Abu Klea on 17th September 1885 in the Sudanese War: picture by George William Joy
Anecdotes and traditions from the Battle of Abu Klea:
- In his book ‘The River War’, Winston Churchill described Abu Klea as ‘The most savage and bloody action ever fought in the Sudan by British troops….’
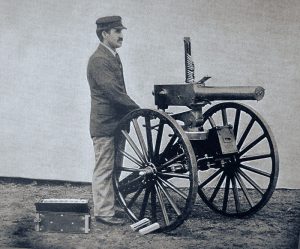
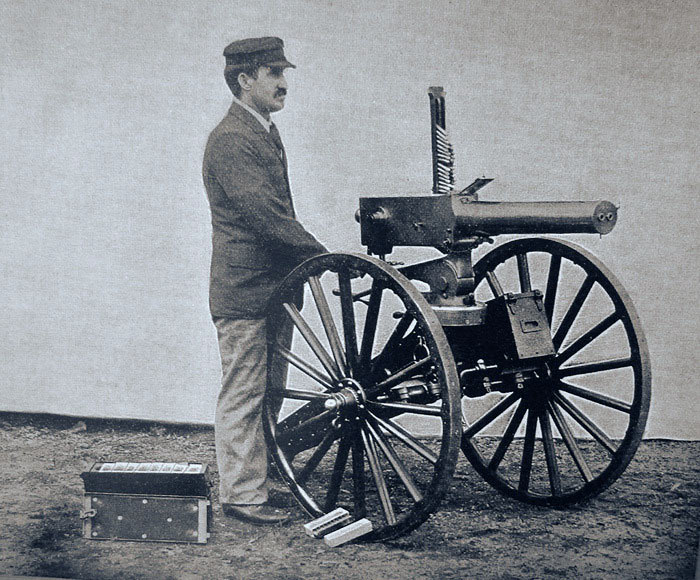
William Gardner with his Gardner machine gun: Battle of Abu Klea on 17th January 1885 in the Sudanese War
- Although members of many British regiments fought at Abu Klea in the Camel Corps, the only regiments to have the battle honour are the 19th Hussars and the Royal Sussex Regiment.
- The Desert Column suffered from inadequate equipment. The Gardner gun that jammed in the battle was the same Gardner that had jammed at the Battle of Tamai the year before. The small arms ammunition used by the column was of poor quality and caused frequent jams in the Martini-Henry rifles. The bayonets were of sub-standard material and bent during the battle. They were insufficiently sharp.
- The Gardner machine gun was invented by the American officer, Captain William Gardner. It is likely that the gun’s performance was adversely affected by the sand and dust in the Sudan, which caused it to jam.
- Major Kitchener, who went on to win the Battle of Omdurman in 1897 and then to become Field Marshal Lord Kitchener, was an intelligence officer with the Desert Column.
- The officer commanding the piquet of the 19th Hussars that first made contact with the Mahdi’s forces at Abu Klea was Major John French, later commanding the Cavalry Division in the relief of Kimberley and the GOC of the British Expeditionary Force to France in 1914.
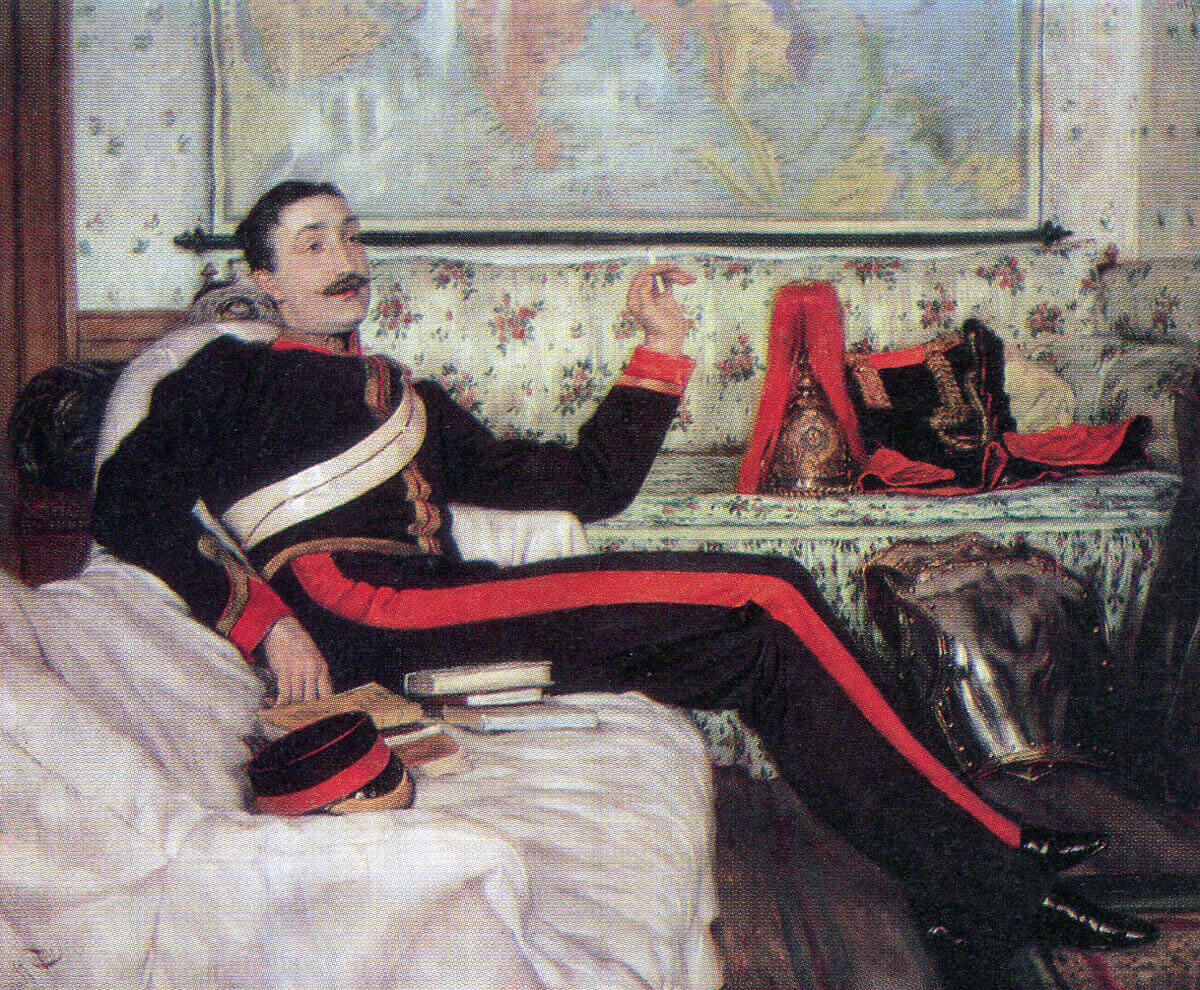
Colonel Frederick Burnaby, Royal Horse Guards, killed at the Battle of Abu Klea fought on 17th January 1885 in the Sudanese War: picture by J.G. Tissot
-
Colonel Frederick Burnaby as colonel of the Royal Horse Guards, killed at the Battle of Abu Klea fought on 17th January 1885 in the Sudanese War
Colonel Fred Burnaby’s colourful career ended with his death at the Battle of Abu Klea. A man of great height and strength, Burnaby was highly popular in his regiment, the Royal Horse Guards, although actively disliked by the Royal Family and the Commander-in-Chief, the Duke of Cambridge, for making unseemly jokes about them. Burnaby once came into the officers’ mess carrying a pony under his arm. Burnaby became a Member of Parliament and colonel of the Royal Horse Guards. Vetoed for an appointment in the Sudan by the Duke of Cambridge, Burnaby arrived as a volunteer. He acted as Brigade Major with the Suakin force, fighting at the Battle of El Teb and wounded at the Battle of Tamai. Again, he appeared as a volunteer when Wolseley’s force was dispatched to the Sudan and accompanied the Camel Corps across the desert, apparently holding a command at Abu Klea. Punch published a poem in commemoration of Burnaby’s death. Burnaby was a keen balloonist, crossing the Channel. He reported the Carlist Wars in Spain as a journalist and wrote a book about his cross-country ride to Khiva.
- Captain Piggott of the 21st Hussars and the Heavy Camel Regiment, known as ‘Bloody minded Piggott’, fought with a shot gun at Abu Klea.
-

Coldstream Guards of the Guards Camel Corps: Battle of Abu Klea on 17th January 1885 in the Sudanese War: picture by Orlando Norie
In Major General Sir Herbert Stewart, fatally wounded at Abu Kru, the day after Abu Klea, the British Army lost one of its rising stars. Stewart fought at the Battle of Tel-el-Kebir and commanded the cavalry brigade at the Battle of El Teb and the Battle of Tamai. Lord Wolseley described him as the best staff officer he had encountered.
- Twenty-two British regiments provided the personnel (1,789 officers and men) for the four regiments of the Camel Corps. An officer described the corps as ‘London society on camels’. The corps fired the imagination of late Victorian England and officers, many of them peers, unable to serve in the campaign with their regiments, volunteered for the Camel Corps. While the troops were meant to be the best available, some regiments sent their throw-outs. The commanding officer of the 2nd Life Guards assigned the regiment’s drunks to the Camel Corps, on the basis that they would be unlikely to find alcohol in the desert.
- The Camel Corps caused enormous interest and comment in Britain. It was referred to as the ‘Nile Circus’. Lord Wolseley fuelled the mirth by ordering a thousand white umbrellas to keep the desert sun off the corps. The regimental march selected for the corps was the Scottish air ‘The Campbells are coming’. This was transposed to ‘The Camels are coming’.
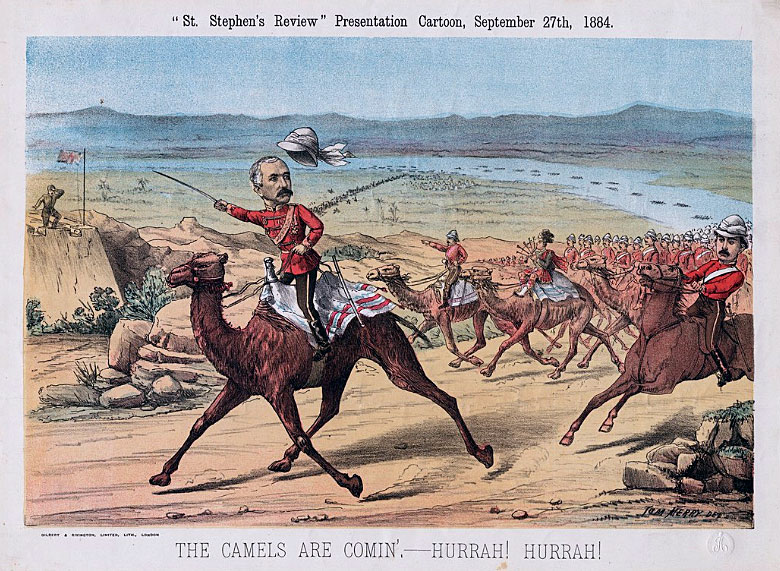
‘The Camels are coming Hurrah Hurrah’: Battle of Abu Klea on 17th January 1885 in the Sudanese War
16th Lancers of the Heavy Regiment of the Camel Corps: Battle of Abu Klea on 17th January 1885 in the Sudanese War
- The Heavy Regiment of the Camel Corps was drawn from ten regiments of cavalry: 1st Life Guards, 2nd Life Guards, the Royal Horse Guards, the 2nd Dragoon Guards (Queen’s Bays), 4th Dragoon Guards, 5th Dragoon Guards, 1st Royal Dragoons, the 2nd Dragoons (Royal Scots Greys), the 16th Lancers and the 5th Lancers.
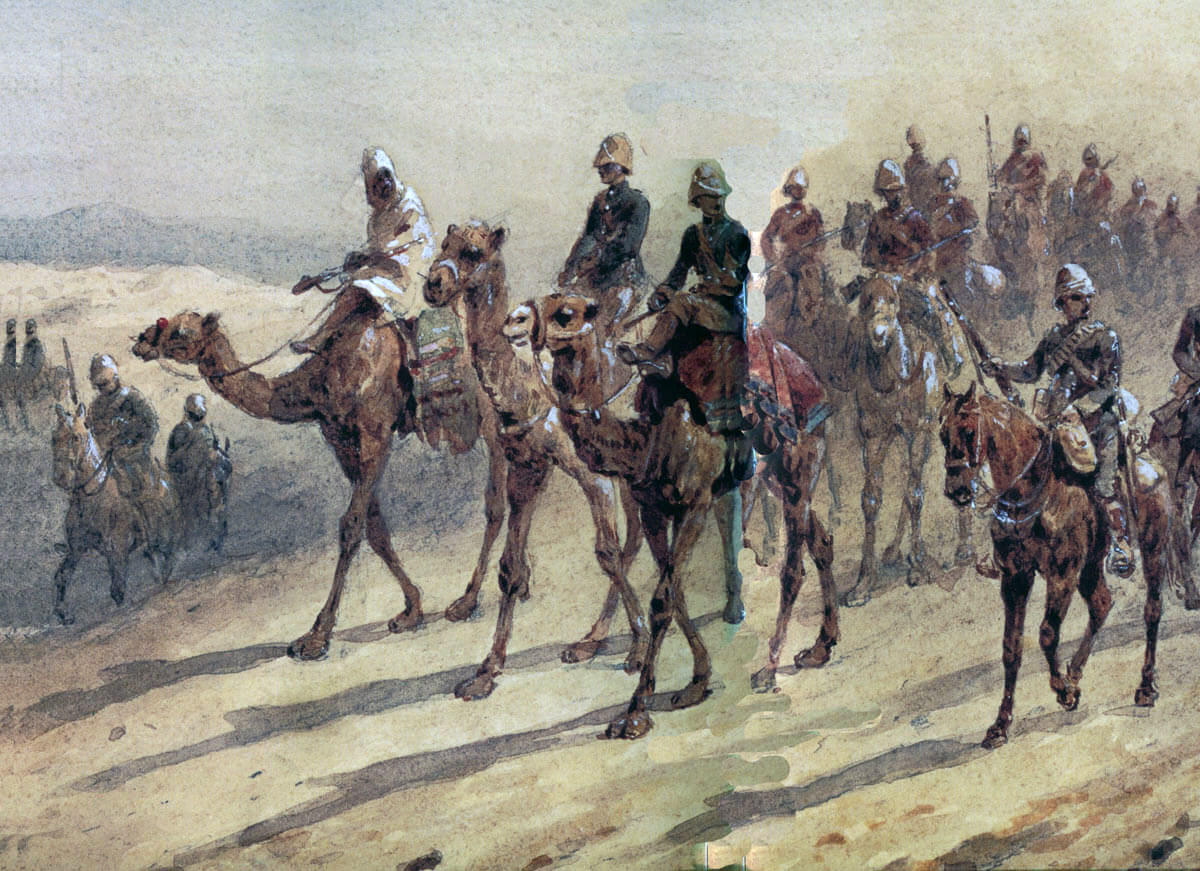
Camel Corps and 19th Hussars crossing the desert: Battle of Abu Klea fought on 17th January 1885 in the Sudanese War: picture by Orlando Norie
Grenadier Guards of the Guards Camel Corps: Battle of Abu Klea on 17th January 1885 in the Sudanese War: picture by Orlando Norie
- The 19th Hussars, commanded by Lieutenant Colonel Barrow, was an experienced regiment. The change from long service to short service engagements had not bitten on the regiment, due to its service overseas, so that the average length of service of the soldiers was seven years. The regiment fought at the Battle of Tel El Kebir and with the Suakin force commanded by General Graham at the Battle of El Teb and the Battle of Tamai. The regiment was mounted on small wiry Syrian ponies of enormous stamina. At the end of Abu Klea, General Stewart enquired as to why the 19th Hussars had not charged the enemy. The reason was that the horses were hungry, dehydrated and exhausted after the long march and the battle.
- Confusion over the uniforms worn by British troops in the Sudan is perpetuated by the practice of taking black and white illustrations from journals such as the ‘Illustrated London News’ and colouring them for sale as prints. Invariably artists showed tunics as red, instead of the actual dun colour, as this created a more interesting image. Probably the most accurate illustration of the uniform and equipment of the Camel Corps is the self-portrait by Frank Baden-Powell (see above), who subsequently left the army and made his living as an artist.
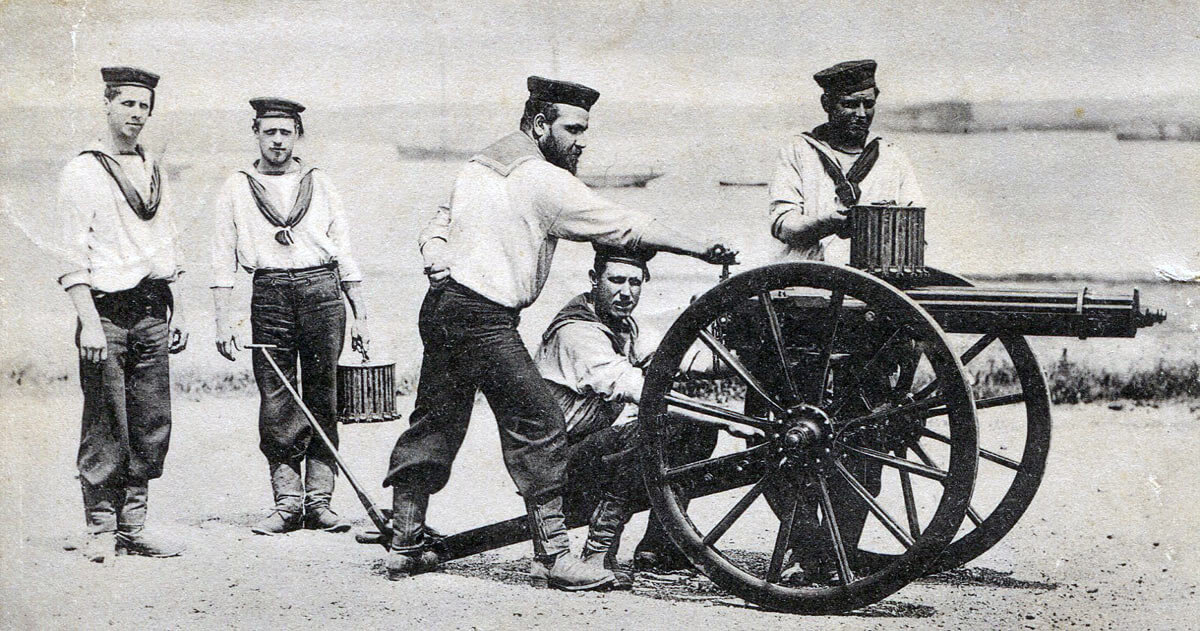
Royal Navy Gatling Gun team: Battle of Abu Klea fought on 17th January 1885 in the Sudanese War
- Sir Henry Newbolt’s poem ‘Vitai Lampada’ is a clear reflection of the Battle of Abu Klea, although ‘the colonel’ was Colonel Fred Burnaby, who was fighting as a volunteer not as ‘the colonel’ and the gun was a Gardner, not a Gatling.

Captain Darley, 4th Dragoon Guards, Heavy Regiment of the Camel Corps, killed at the Battle of Abu Klea fought on 17th January 1885 in the Sudanese War
Vitai Lampada by Sir Henry Newbolt
There’s a breathless hush in the Close to-night —
Ten to make and the match to win —
A bumping pitch and a blinding light,
An hour to play and the last man in.
And it’s not for the sake of a ribboned coat,
Or the selfish hope of a season’s fame,
But his Captain’s hand on his shoulder smote
“Play up! play up! and play the game!”
The sand of the desert is sodden red, —
Red with the wreck of a square that broke; —
The Gatling’s jammed and the colonel dead,
And the regiment blind with dust and smoke.
The river of death has brimmed his banks,
And England’s far, and Honour a name,
But the voice of schoolboy rallies the ranks,
“Play up! play up! and play the game!”
This is the word that year by year
While in her place the School is set
Every one of her sons must hear,
And none that hears it dare forget.
This they all with a joyful mind
Bear through life like a torch in flame,
And falling fling to the host behind —
“Play up! play up! and play the game!”
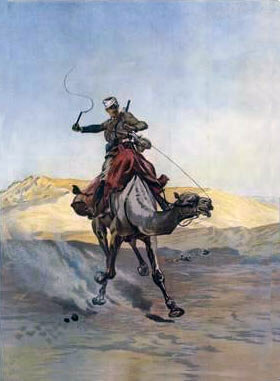
Despatch bearer from the Camel Corps: Battle of Abu Klea fought on 17th January 1885 in the Sudanese War: picture by Lady Butler
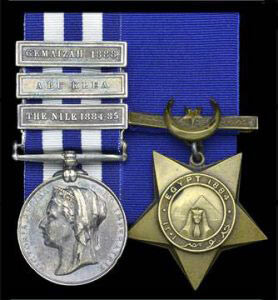
Campaign medals for the Battle of Abu Klea:
For the Sudan campaign, the British troops received the Egypt medal issued for the Tel-El-Kebir campaign in 1882, but without the date. Where troops already had the Egypt 1882 medal, they received an additional clasp ‘Abu Klea’ for that medal. In the same way, the Khedive Star was issued to those ranks that did not already have it.
References for the Battle of Abu Klea:
England’s Pride by Julian Symons.
War on the Nile by Michael Barthorp.
A History of the British Cavalry by the Marquess of Anglesey, Volume 3.
The River War by Winston Churchill.
British Battles by Grant.
The previous battle of the War in Egypt and the Sudan is the Battle of Tamai
The next battle of the War in Egypt and the Sudan is the Battle of Atbara
To the War in Egypt and the Sudan index