The Duke of Cumberland’s decisive defeat of Prince Charles Edward Stuart’s Jacobite Army on 16th April 1746: the beginning of the end for the clan system in the Highlands of Scotland
Duke of Cumberland at the Battle of Culloden 16th April 1746 in the Jacobite Rebellion
The previous battle in the 1745 Jacobite Rebellion is the Battle of Falkirk
The next battle in the British Battles series is the Battle of Mollwitz
To the 1745 Jacobite Rebellion index
Battle: Culloden
War: The Jacobite Rebellion of 1745
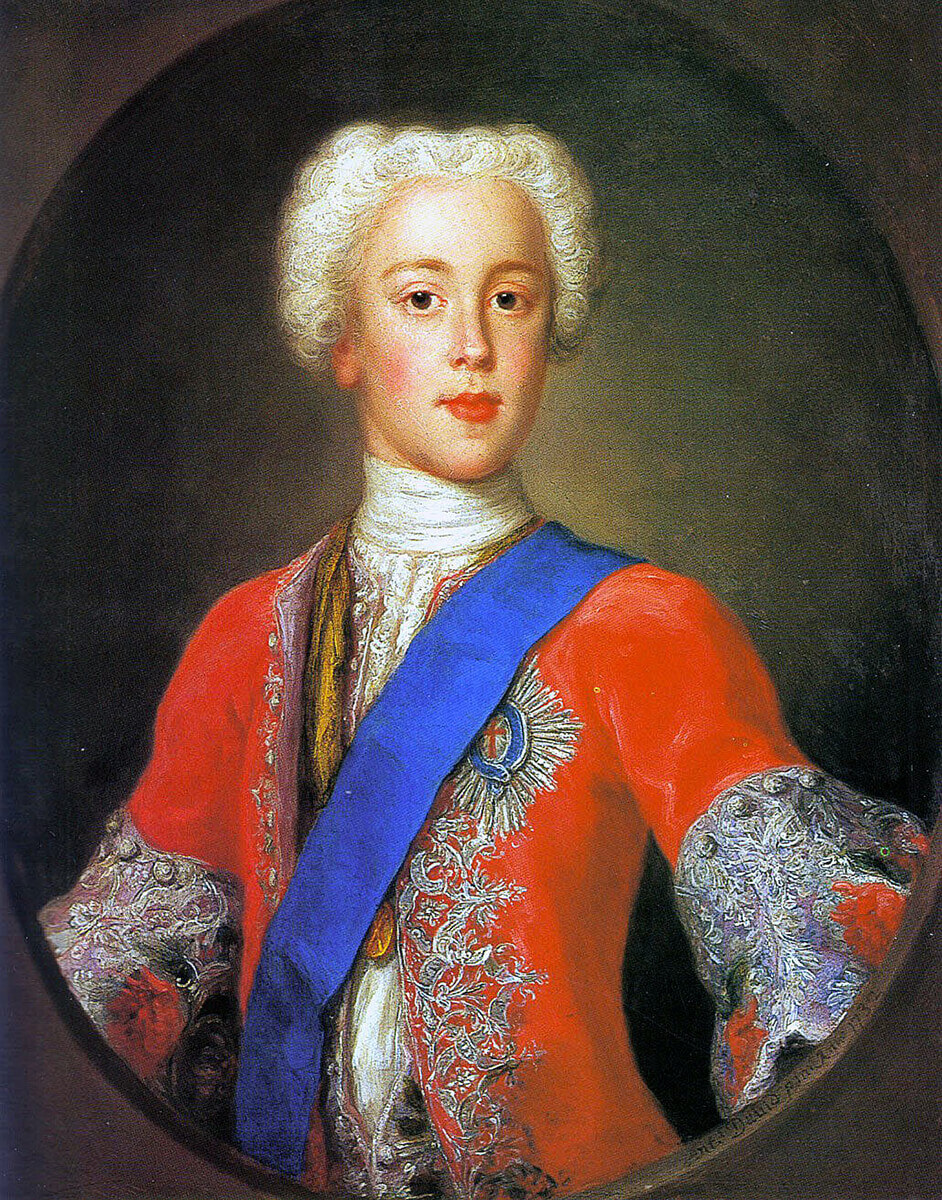
Prince Charles Edward Stuart: Battle of Culloden 16th April 1746 in the Jacobite Rebellion
Date of the Battle of Culloden: 16th April 1746 (Old Style) (27th April 1746 New Style). The dates in this page are given in the Old Style.
Place of the Battle of Culloden: South east of Inverness and a few miles south west of Nairn in Scotland
Combatants at the Battle of Culloden: The Jacobite Army of Prince Charles and the Royal Troops of King George II
Generals at the Battle of Culloden: Prince Charles and Lord George Murray against the Duke of Cumberland.
Size of the Armies at the Battle of Culloden: 7,000 in the Jacobite Army and 8,000 in the Royal Army.
Winner of the Battle of Culloden: The Royal Army under the Duke of Cumberland.
British Regiments at the Battle of Culloden: Culloden is not a battle honour for British Regiments despite being a victory.
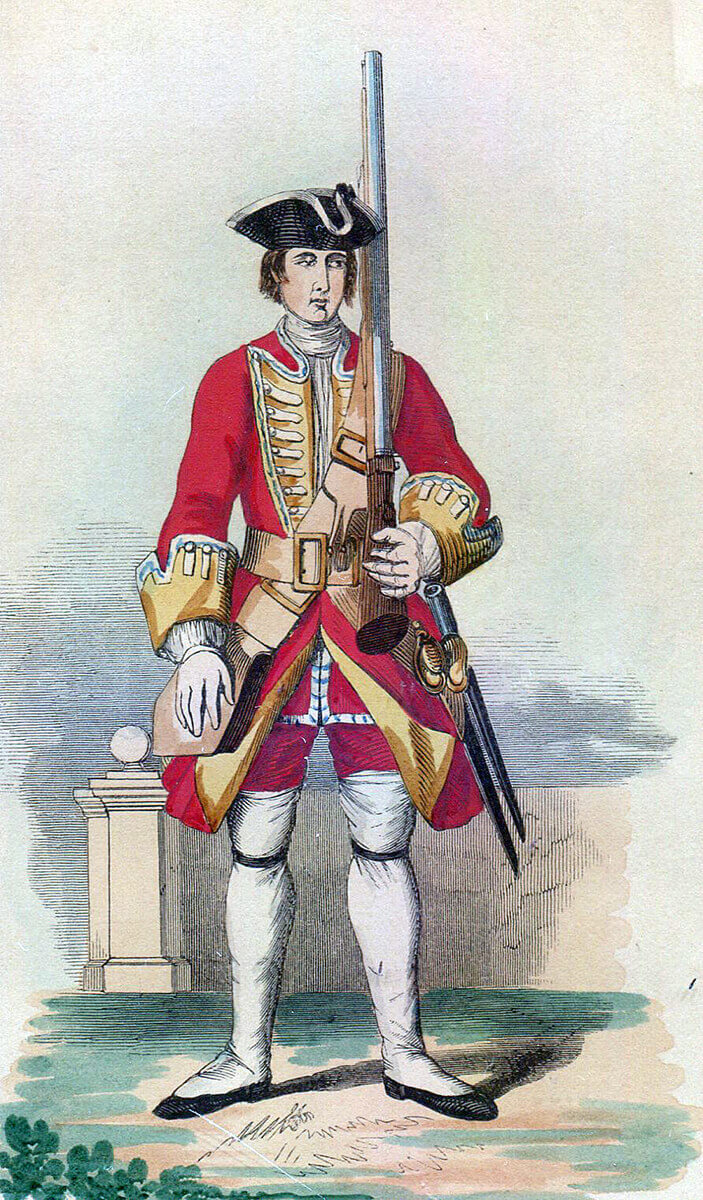
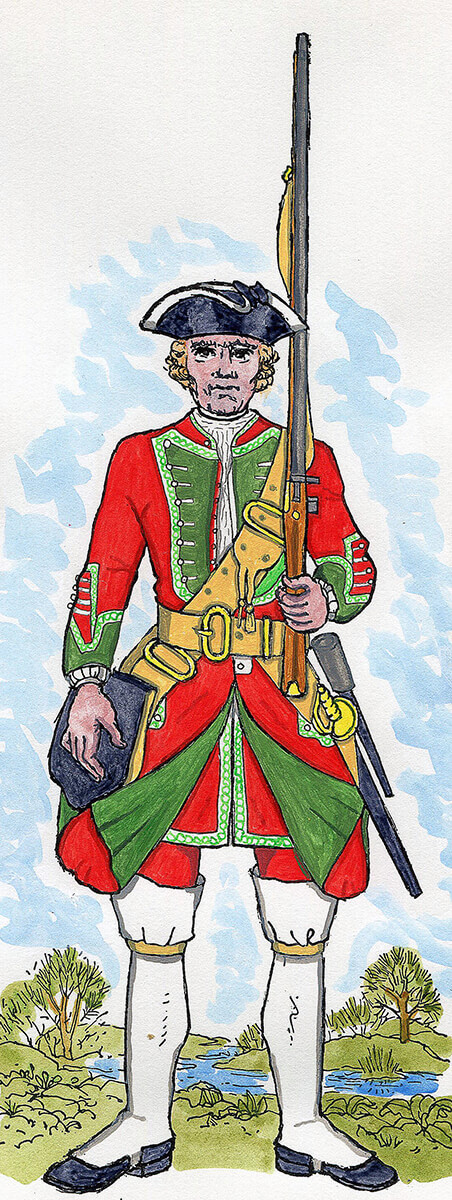
Cholmondeley’s 34th Regiment: Battle of Culloden 16th April 1746 in the Jacobite Rebellion
The regiments present at the battle were: Cobham’s (10th) and Kerr’s (11th) dragoons, Kingston’s Light Dragoons, the Royals (1st), Howard’s Old Buffs (3rd), Barrel’s King’s Own (4th) Wolfe’s (8th), Pulteney’s (13th), Price’s (14th), Bligh’s (20th), Campbell’s Royal Scots Fusiliers (21st), Sempill’s (25th), Blakeney’s (27th), Cholmondeley’s (34th), Fleming’s (36th), Munro’s (37th), Ligonier’s (48th) and Battereau’s (62nd) Foot.
Colonel Francis Ligonier (brother of Lieutenant General Sir John Ligonier) died soon after the Battle of Falkirk and Sir Robert Munro was killed at that battle. Their regiments of foot became Conway’s and Dejean’s. Colonel Conway was one of the Duke’s aides de camp at Culloden. Bligh’s became Bury’s, Lord Bury being another aide de camp. James Wolfe became the lieutenant colonel of Bury’s.
The Royal Artillery was commanded by Colonel Belfort.
Background to the Battle of Culloden:
The Duke of Cumberland arrived in Edinburgh on 30th January 1746 to take over command of the Royal Army from General Hawley, following the unsuccessful Battle of Falkirk. The next day Cumberland marched north taking the circuitous route along the coast so the army could be supplied by the fleet. The army halted for some weeks at Aberdeen.
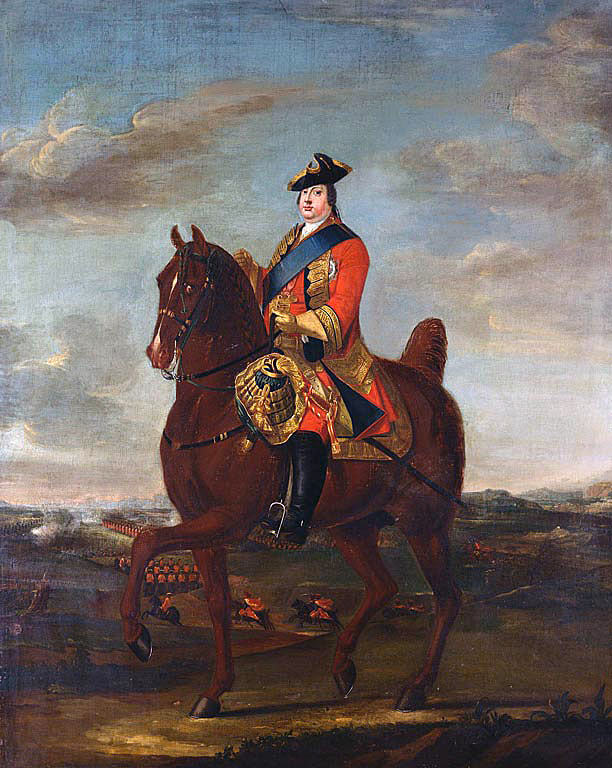
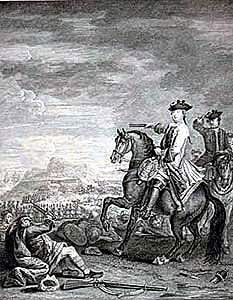
Duke of Cumberland: Battle of Culloden 16th April 1746 in the Jacobite Rebellion: picture by David Morier
Unable to capture Stirling Castle from the redoubtable General Blakeney, Prince Charles with his army retreated north to Inverness. From there he undertook operations across the Highlands, capturing Fort George and Fort Augustus and harrying the remaining government forces.
While at Aberdeen Cumberland prepared his troops for the forthcoming battle against the highlanders. Cumberland and his soldiers were determined there should not be another defeat like the Battles of Prestonpans and Falkirk. In addition to practising volley firing the troops were taught a form of bayonet fighting; the first time in the British army that the use of the bayonet was the subject of tuition.
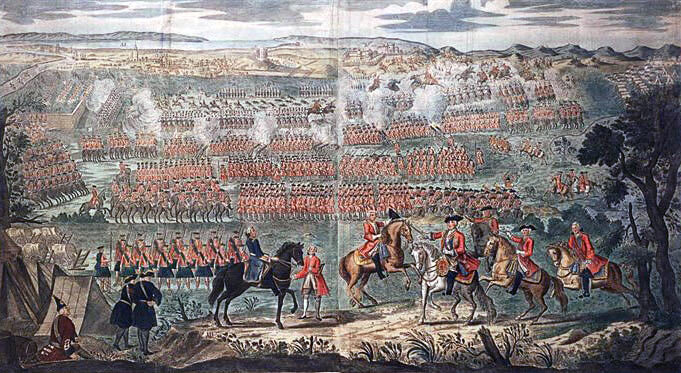
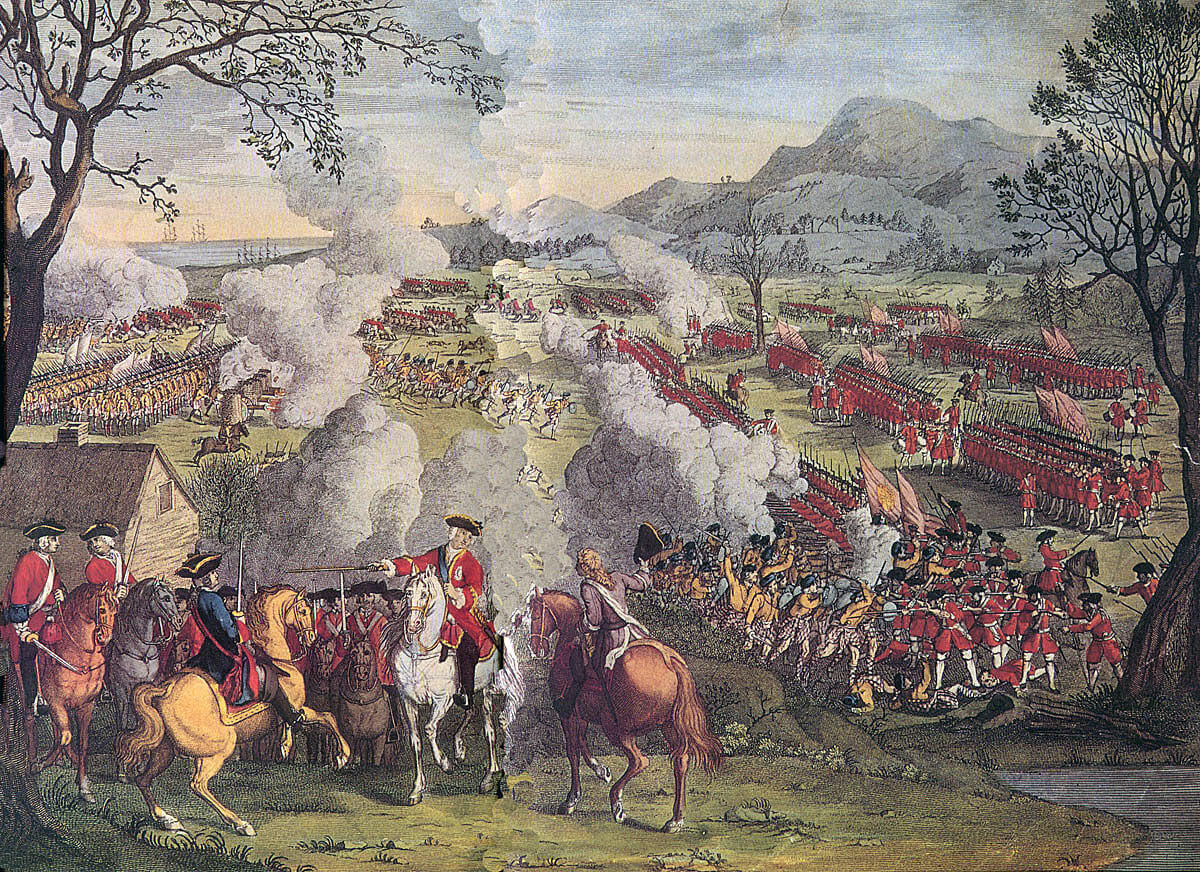
Battle of Culloden, 16th April 1746 in the Jacobite Rebellion, a contemporary woodcut painting
The Duke of Cumberland was admired and liked by “Tommy Lobster” (the nickname coming into use for soldiers). He had been with them at Dettingen in 1743, where he had been wounded in the leg and he had led the renowned infantry attack on the French at the Battle of Fontenoy in 1745, an episode that attracted admiration and derision in equal measure.
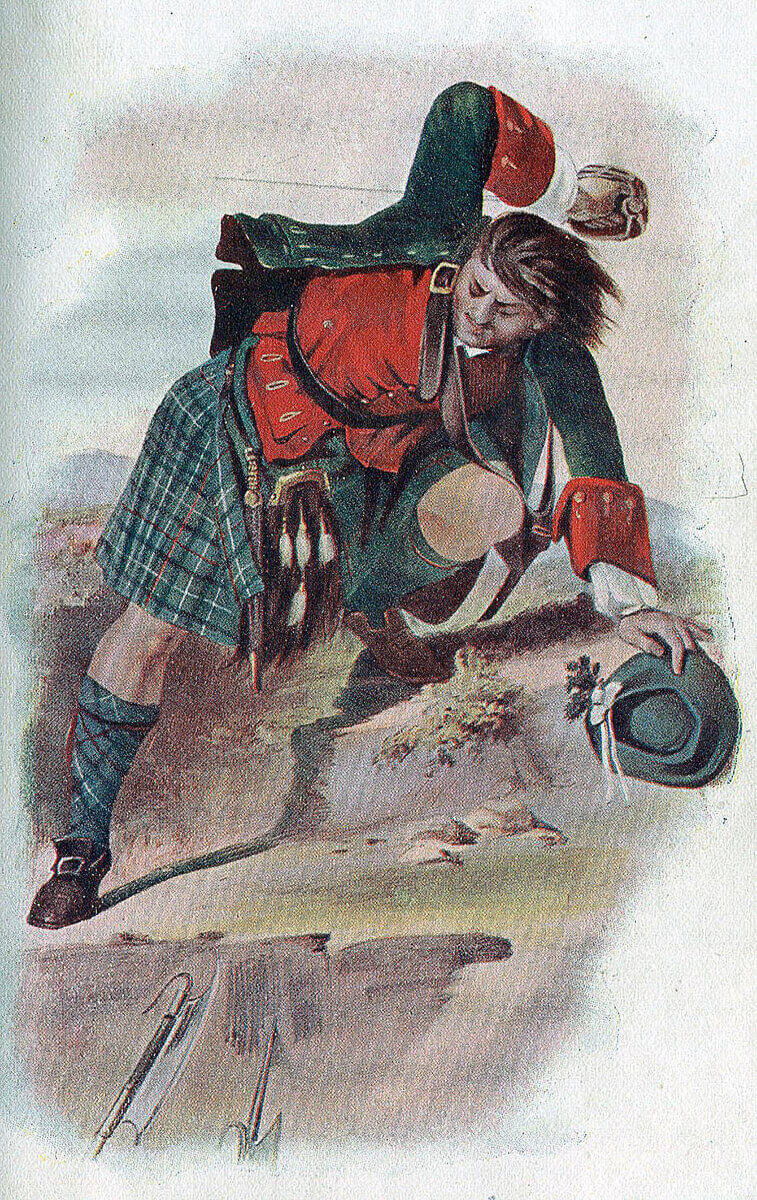
Highlander: Battle of Culloden 16th April 1746 in the Jacobite Rebellion
In the 18th Century, military authority was uncertain, particularly above regimental level. Cope and Hawley, the Royal commanders at the Battles of Prestonpans and Falkirk respectively, although generals, did not have the authority to ensure their armies were properly equipped. The Duke of Cumberland was the second son of the monarch, a decisive source of authority and could ensure his army had the equipment and support it needed from all departments of government. The fleet provided his supply and the Ordnance, an agency independent of the Army, provided his powerful and well led train of artillery. In Colonel Belford, Cumberland was supported by Britain’s leading gunner. By the time the Royal Army marched north it was ready for the decisive encounter with the Jacobites.
The Jacobite Army was not so well placed. It was in serious decline after Falkirk, many of the highlanders leaving for home after the battle. Supply was badly organised and the regiments that assembled on the moorland outside Inverness to meet the Royal Army were on short rations. There was dissent among the senior officers and Prince Charles refused to concern himself with his deteriorating military situation.
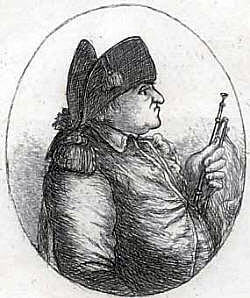
Harry Rowe, trumpeter in the Duke of Kingston’s Light Dragoons at the Battle of Culloden 16th April 1746 in the Jacobite Rebellion in later life
A position was selected by Secretary O’Sullivan, Prince Charles’s adjutant general, on which the Jacobite Army would give battle to Cumberland’s troops. O’Sullivan chose a stretch of open moorland shut in by the walled Culloden enclosures to the North and the walls of Culloden Park to the South. Lord George Murray and other senior officers pointed out the unsuitability of such open land in view of Cumberland’s powerful artillery. The Prince refused to change O’Sullivan’s choice.
On 15th April 1746, the Royal Army camped at Nairn, where it celebrated the Duke of Cumberland’s birthday. On that night, the Jacobites attempted a night attack on Cumberland’s camp. The approach march was a failure with men falling far behind and losing themselves in the boggy country. With dawn breaking the Jacobites were not near enough to launch their attack and were forced to return to Culloden, exhausted, discouraged and hungry.
This failure exacerbated the split between Prince Charles and some of his most important commanders. Many of the highlanders went off to search for food or to sleep.
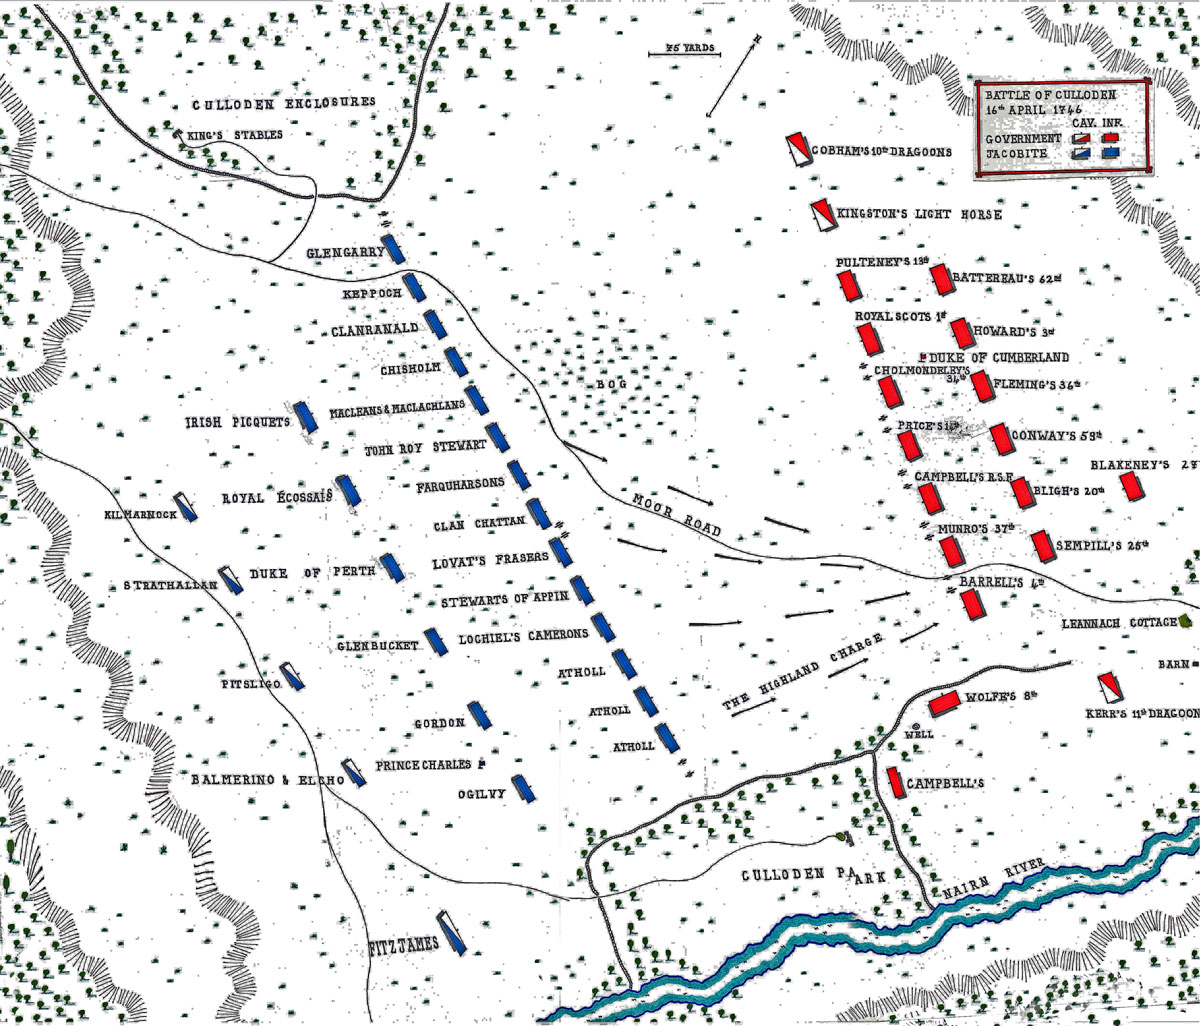
Map of the Battle of Culloden 16th April 1746 in the Jacobite Rebellion: map by John Fawkes
Account of the Battle of Culloden:
The Royal Army rose early on 16th April 1746 and began its approach march to Culloden, moving onto the moor in four columns. The troops were well fed and rested, confident and determined. The Argyll Militia, comprising Campbell highlanders and Kingston’s Light Horse reconnoitred in advance of the army.
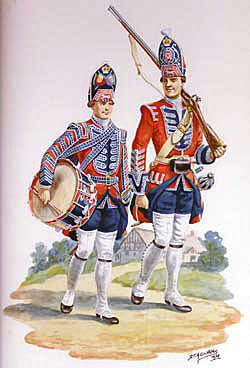
Drummer and Grenadier, Barrell’s King’s Own Royal Regiment: Battle of Culloden 16th April 1746 in the Jacobite Rebellion
The alarm was given in the Highland camp and guns were fired to summon the clans to their battle positions.
In addition to the shortage of supplies and the exhaustion of the men, the Jacobite Army was beset with difficulties. Important sections of the army were in the north pursuing Loudon’s government forces. Many of the men who had left their regiments to forage and sleep failed to hear the summons.
The waning fortunes of the rebellion had brought out stresses within the army. A dispute between the Clanranald and Glengarry sections of the Clan McDonald had caused many to return home. The remaining MacDonalds were upset that they were allotted the left flank of the army rather than the right, which they considered their entitlement. When the battle began, they could not be persuaded to charge.
The first line of the Jacobite Army formed with the Atholl regiments on the right flank, then the Camerons of Locheil, Stewarts of Appin, Frasers, Mackintoshes, Macleans and Maclachlans, Farquarharsons, Stuarts and on the left wing the Macdonalds.
3rd Buffs: Battle of Culloden 16th April 1746 in the Jacobite Rebellion: picture by Richard Simkin
The second line comprised the various mounted regiments, much depleted by the wear on the horses of the long campaign, the regular regiments of Scots and Irish foot from the French army and a few further clan regiments.
Placed in the centre and on each flank was the motley assemblage of cannon possessed by the army, largely manned by scratch teams of untrained gunners.
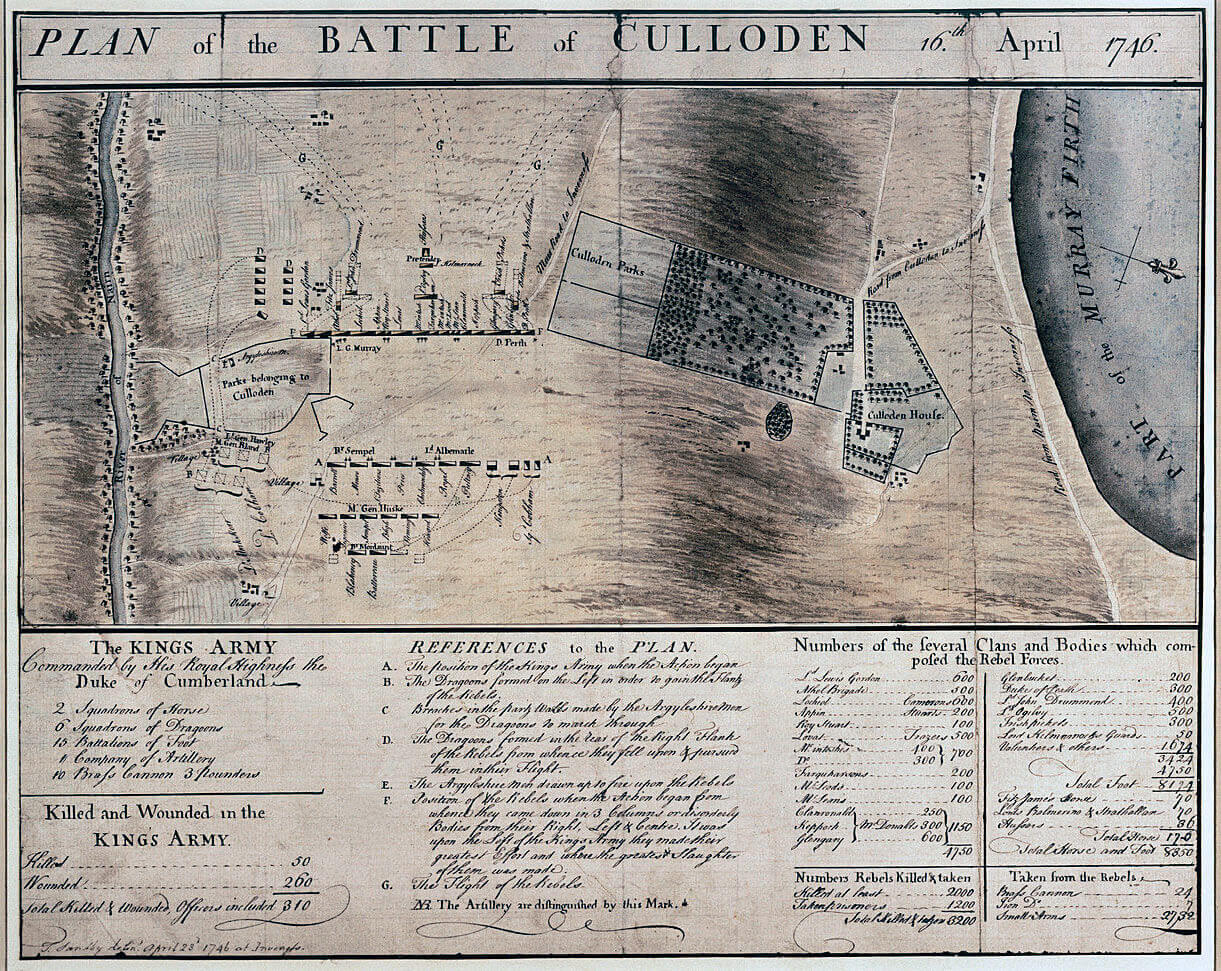
Plan of the Battle of Culloden, 16th April 1746 in the Jacobite Rebellion, made by Paul Sandby, who was present at the battle, on 21st April 1746
Once assembled the Jacobite Army numbered some 5,000 men.
At around midday the Royal Army arrived on the field of battle after marching some ten miles across the moorland from the camp at Nairn. the regiments in three lines. The army then advanced in line to bring itself closer to the rebels and halted. Two regiments were brought from the third into the first and second lines to extend the flank on the right and the dragoon regiments were positioned on the outer flanks.
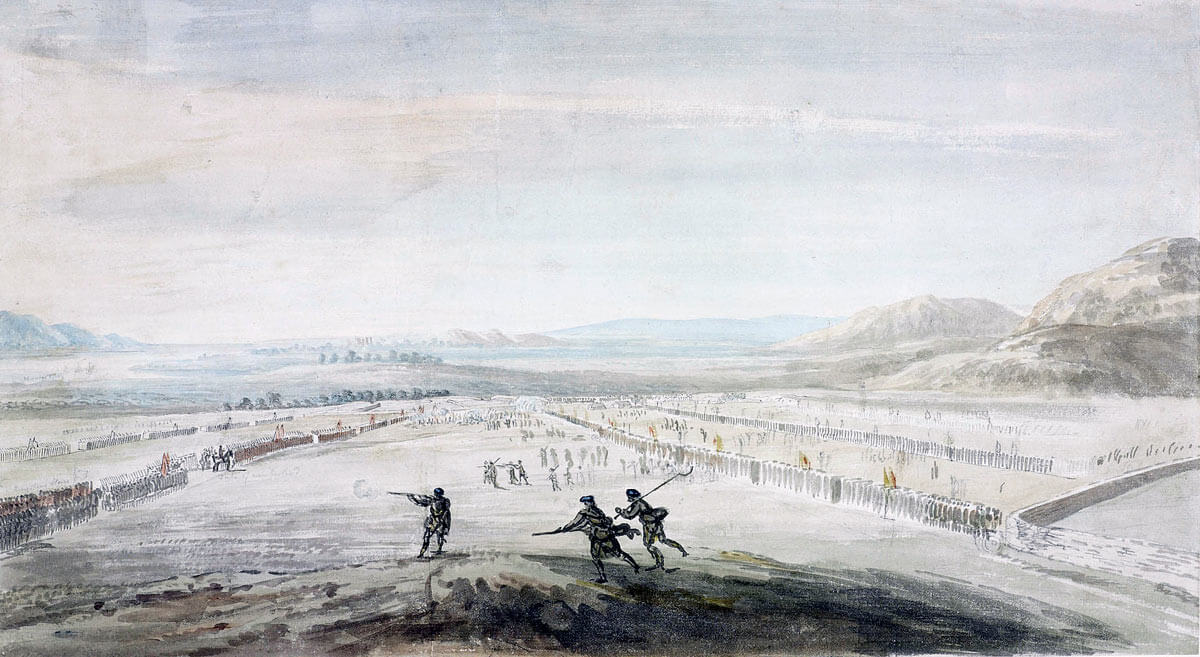
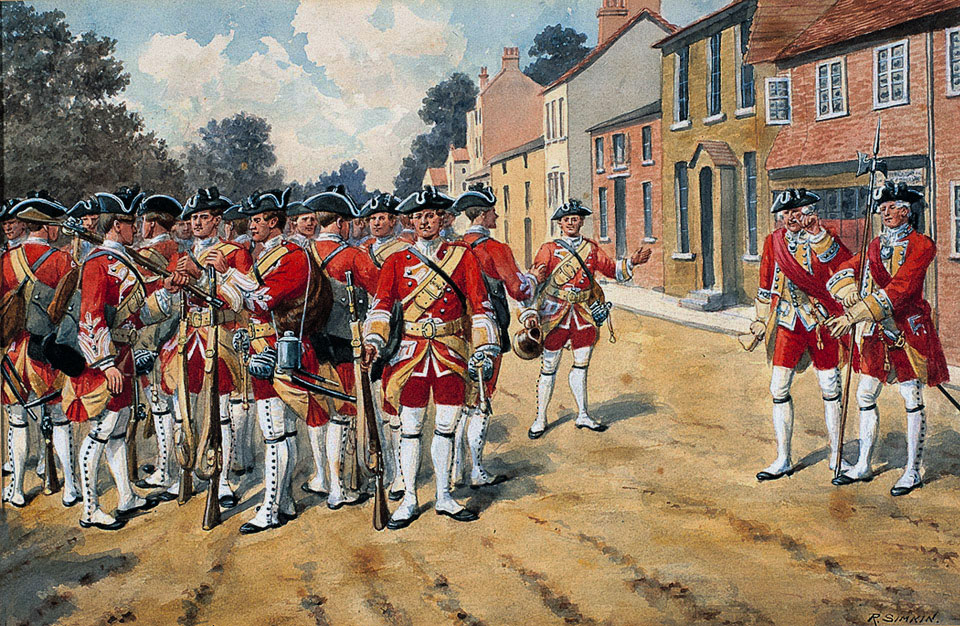
Battle of Culloden 16th April 1746 in the Jacobite Rebellion: picture by Thomas Sandby
Cumberland’s regiments stood from right to left: in the front line Pulteney’s, the Royal Regiment, Cholmondeley’s, Price’s, the Royal Scots Fusiliers, Munro’s and Barrel’s: in the second line Campbell’s, Battereau’s, Howard’s, Fleming’s, Bligh’s, Sempill’s and Ligonier’s. Blakeney’s regiment formed the third line alone.
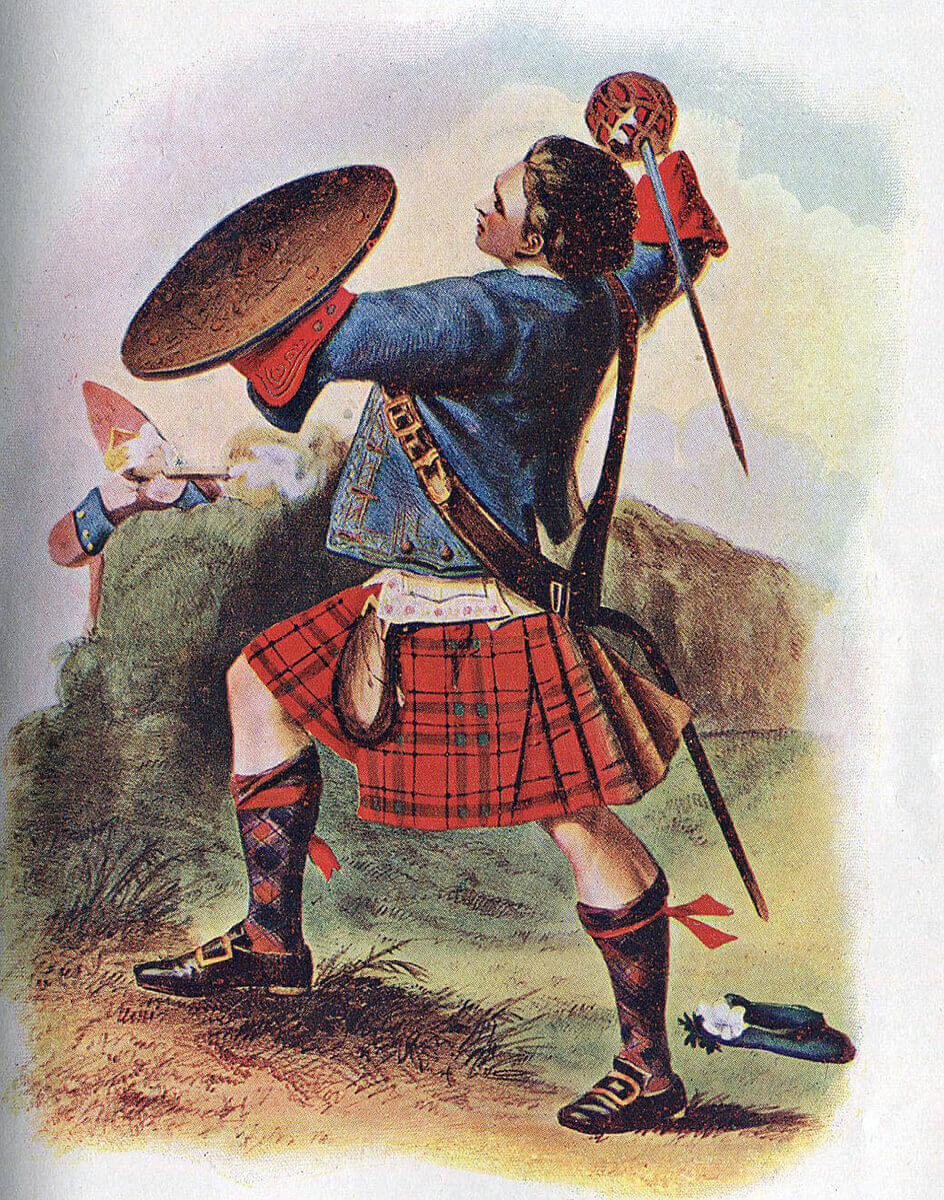
Highlander: Battle of Culloden 16th April 1746 in the Jacobite Rebellion
Wolfe’s Regiment took post behind the wall that led forward from Barrel’s left flank, to provide enfilading fire across the army’s front. The 6 pounder guns were placed in pairs between the front-line regiments and the mortars in a battery behind the first line. The two armies stood some 300 yards apart.
The Royal guns opened fire on the Jacobite lines, a fire that the inadequate Jacobite artillery could not effectively answer.
It was Prince Charles’s expectation that Cumberland would attack. He waited for the word that Cumberland was advancing but the Royal Army did not move. The bombardment continued, inflicting casualties on the highlanders and wreaking havoc with the morale of many of the less steadfast Jacobite regiments.
Prince Charles was finally persuaded that he must order the highlanders to charge before the army began to melt away. He dispatched aides de camp to give the word to the various parts of the first line to attack.
On the left wing the Duke of Perth attempted to persuade the McDonalds to charge, but they refused.
Elsewhere in the Jacobite front line the order to attack was instantly obeyed, the highlanders keen to escape from the galling gunfire and get to grips with the enemy. The first regiment away was the MacIntosh, known as Clan Chattan, led by its yellow haired colonel, McGillivray of Dunmaglass.
36th Regiment of Foot: Battle of Culloden 16th April 1746 in the Jacobite Rebellion: Mackenzie from Representation of Cloathing
The highlanders’ charge was a fearsome episode; bunches of clansmen running at top speed with broadswords, target shields and dirks, yelling their clan war cries. In the two previous battles, Prestonpans and Falkirk, the highlanders’ charge had been sufficient to cause the Royal regiments to collapse in flight without waiting for contact.
One of the drawbacks to the position selected by O’Sullivan was the presence of an area of boggy ground unnoticed to its front. The Clan Chattan veered to its right to avoid the bog and followed the road that passed diagonally on firm ground across the moor. The Clan Chattan crowded across in front of the clan regiments to their right, obstructing the path of the attack and pushing their neighbours towards the park wall.
The Frasers, Appin Stewarts, Locheil’s Camerons and the three regiments of Athollmen charged home on Cumberland’s left wing striking Barrel’s King’s Own Regiment on the extreme flank.
All the regiments of foot in the Royal first line fired on the attacking highlanders, the guns discharging canisters of musket ball. The wind was behind them pushing the choking clouds of powder smoke, a feature of every 18th Century battle, down on the highlanders.
Wolfe’s regiment fired into the flank of the highland charge from its position behind the wall, inflicting many casualties.
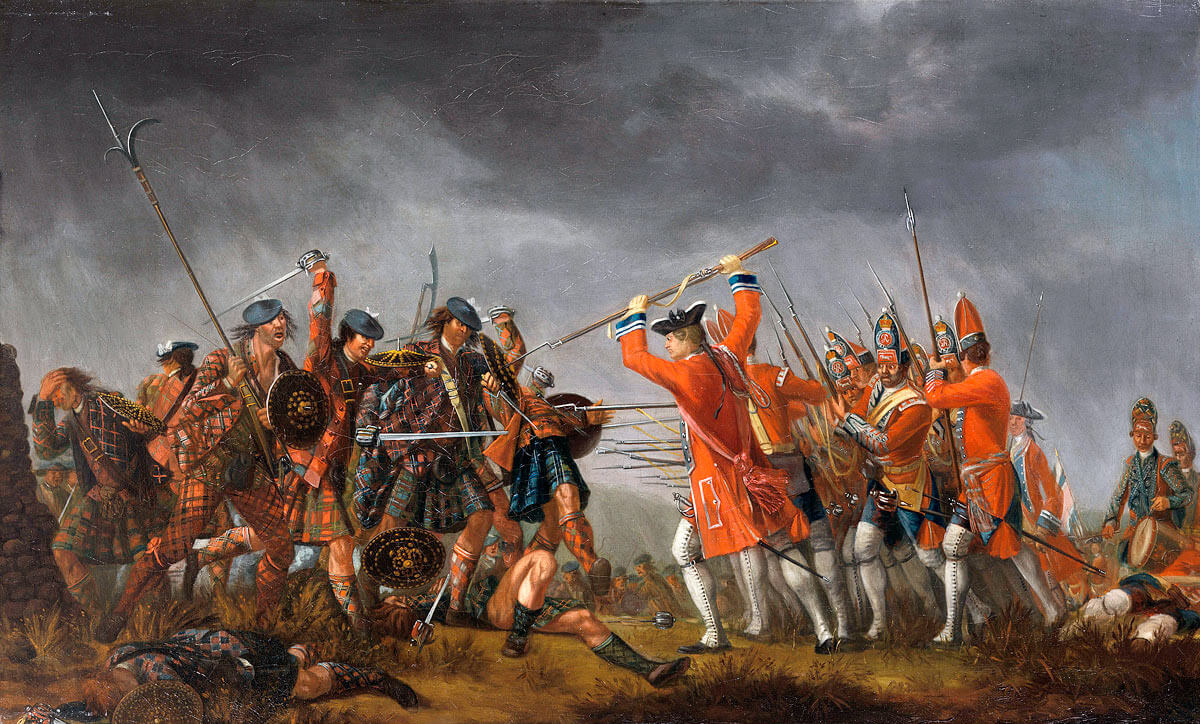
Highland charge on Barrell’s Regiment: Battle of Culloden 16th April 1746 in the Jacobite Rebellion: painted by David Morier using Highland prisoners as models
The surviving highlanders smashed into Barrel’s and Munro’s regiments. Hand to hand fighting of great ferocity took place. This time, unlike the two earlier battles, the royal troops fought it out.
Lord Robert Kerr, a captain in Barrel’s, was killed by a blow from a broadsword. Robert Rich, the lieutenant colonel of the regiment, lost his left hand to a sword cut and nearly lost the right forearm to another, in addition to six cuts to his head.

Highland Attack: Battle of Culloden 16th April 1746 in the Jacobite Rebellion: picture by John Fawkes
Duke of Cumberland at the Battle of Culloden 16th April 1746 in the Jacobite Rebellion
Cumberland ordered up Bligh’s and Sempill’s regiments in support of the first line and the highlanders who managed to pass through the front line were shot down by these regiments. Those highlanders that survived the charge made their way back to rebel lines, receiving further fire from Wolfe’s as they passed.
The Royal dragoons moved forward, ranging across the battlefield. The Campbells crossed Culloden Park, coming out behind the rebels’ right flank.
Prince Charles rode away and the clan regiments left the field, their retreat covered by the Irish Pickets and the other regular regiments of foot. The battle was over.
Casualties at the Battle of Culloden:
| Royal Army: | Killed | Wounded |
| The Royals (1st) | 0 | 4 |
| Howard’s Old Buffs (3rd) | 1 | 2 |
| Barrel’s King’s Own (4th) | 17 | 108 |
| Wolfe’s (8th) | 0 | 1 |
| Cholmondeley’s (34th) | 1 | 2 |
| Price’s (14th) | 1 | 9 |
| Ligonier’s (48th), (Conway’s) | 1 | 5 |
| Pulteney’s (13th) | 0 | 0 |
| Sempill’s (25th), | 1 | 13 |
| Campbell’s RSF (21st) | 0 | 7 |
| Blakeney’s (27th) | 0 | 0 |
| Munro’s (37th), (Dejean’s) | 14 | 69 |
| Fleming’s (36th) | 0 | 6 |
| Bligh’s (20th) | 4 | 17 |
| Battereau’s (62nd) Foot. | 0 | 3 |
| Highland Militia | 6 | 4 |
| Cobham’s Dragoons | 1 | 0 |
| Kerr’s Dragoons | 3 | 3 |
| Kingston’s Dragoons | 0 | 1 |
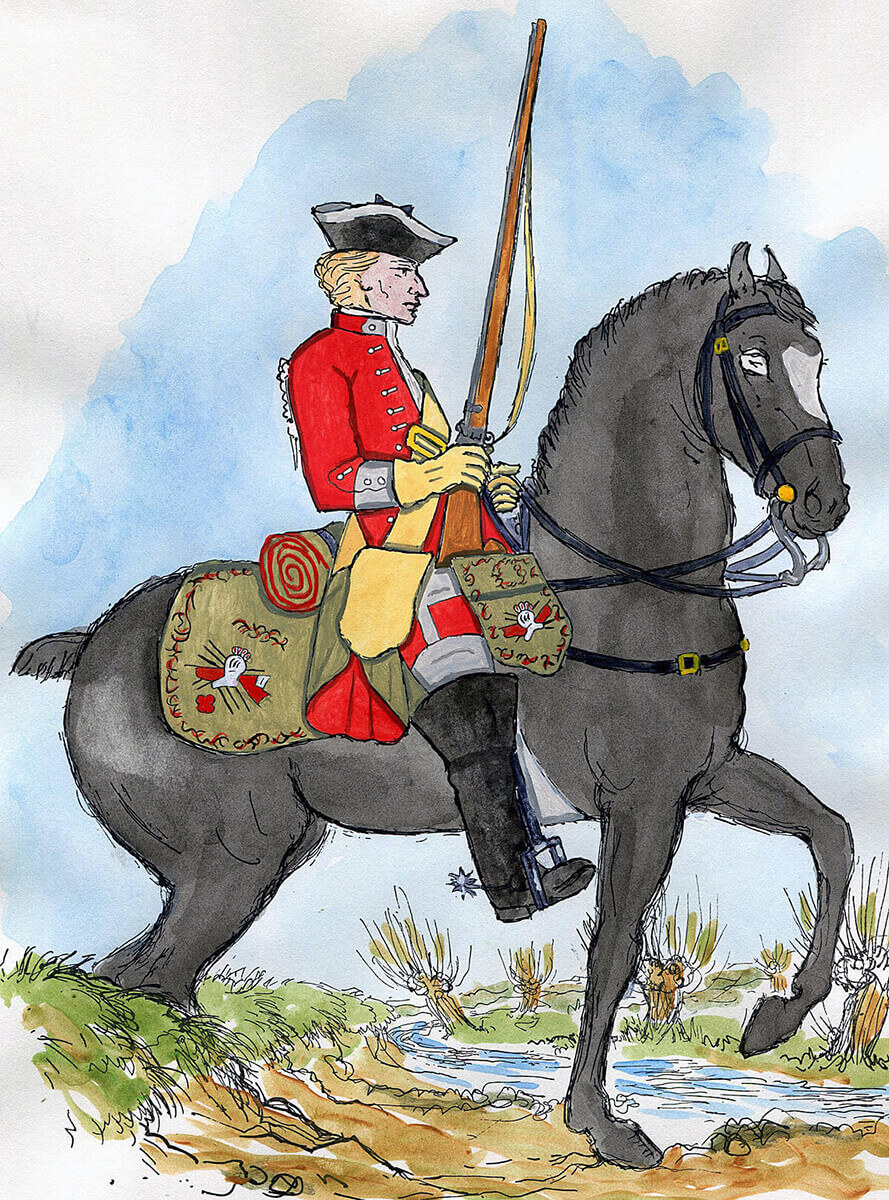
Kerr’s 11th Regiment of Dragoons: Battle of Culloden 16th April 1746 in the Jacobite Rebellion: Mackenzie from Representation of Cloathing
The casualties of the Highland army are unknown but are believed to have been around 1,000.
Follow-up to the Battle of Culloden:
Culloden marked the end of the military phase of the Jacobite Rebellion of 1745/6. The battle was followed by a lengthy period of suppression in the Highlands marked by massacre and despoiling. Of the officers and chiefs who escaped the battle, many fled to Europe and served in foreign armies. Some were in due course permitted to return. Many of the Jacobite rank and file fled to the American colonies.
The prisoners were tried at Berwick, York and London and around 80 were executed, the last in 1754.
Regimental anecdotes and traditions from the Battle of Culloden:
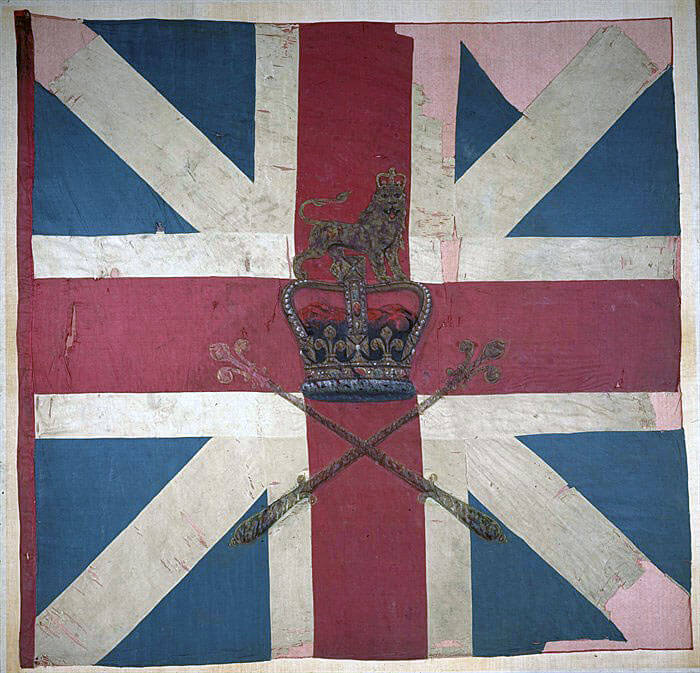
King’s Colour of Barrell’s King’s Own Royal Regiment: Battle of Culloden 16th April 1746 in the Jacobite Rebellion
- The Duke of Cumberland is reputed to have said to his army before the battle “If there is any man who does not wish to fight the highlanders, I beg him in God’s name to go. I would rather fight with one thousand resolute men than ten thousand half-hearted.”
- Following the battle Handel wrote his oratorio Judas Maccabaeus to honour the Duke of Cumberland, with the aria “See how the conquering hero comes”.
- It is said that after the battle the Duke pointed at a wounded highlander and directed Major James Wolfe to shoot him. Wolfe is reputed to have said that his commission was at the disposal of the Duke but not his honour. A soldier shot the highlander who is said to have been Charles Fraser of Inverallochy, lieutenant colonel of Lovat’s regiment.
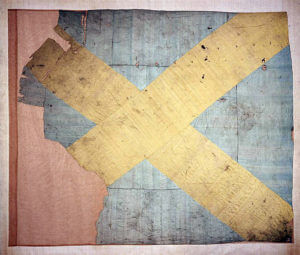
Standard of the Appin Stewarts: Battle of Culloden 16th April 1746 in the Jacobite Rebellion
- It is a regimental tradition of the Somerset Light Infantry (13th Foot) that their sergeants wear their sashes over the left shoulder to mark the fact that after Culloden the sergeants took the regiment out of action, all the officers being casualties. In fact the 13th had no casualties at Culloden.
- The colours of Barrel’s are displayed in the Scottish Museum in Edinburgh next to the standard of the Appin Stewarts who attacked them.

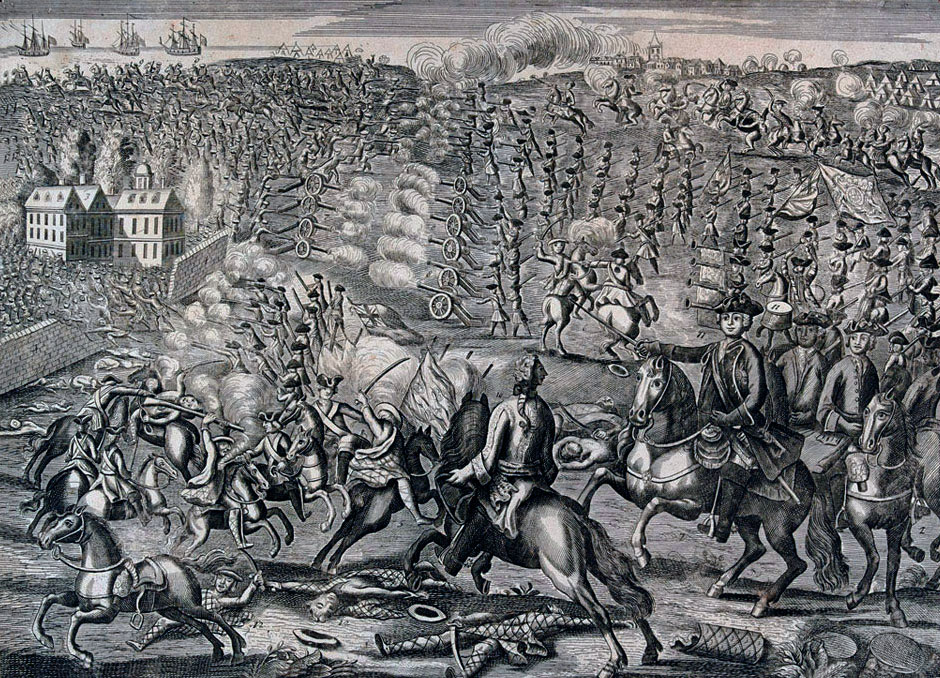
Contemporary Image of the Battle of Culloden 16th April 1746 in the Jacobite Rebellion
References for the Battle of Culloden:
Fortescue’s History of the British Army Volume 1 Part II
Battles of the ’45 by Tomasson and Buist

Battle of Culloden 16th April 1746 in the Jacobite Rebellion, a contemporary picture
The previous battle in the 1745 Jacobite Rebellion is the Battle of Falkirk
The next battle in the British Battles series is the Battle of Mollwitz
To the 1745 Jacobite Rebellion index